
Articles
How To Properly Seal HVAC Ducts
Modified: October 20, 2024
Learn how to seal HVAC ducts properly with our informative articles. Find step-by-step guides and expert tips for a more efficient and comfortable home.
(Many of the links in this article redirect to a specific reviewed product. Your purchase of these products through affiliate links helps to generate commission for Storables.com, at no extra cost. Learn more)
Introduction
Properly sealed HVAC ducts play a crucial role in maintaining the efficiency and functionality of your heating, ventilation, and air conditioning (HVAC) system. In fact, a significant amount of energy can be lost due to leaky ductwork, leading to higher utility bills and decreased comfort in your home or office. Sealing your ducts can help prevent conditioned air from escaping and improve the overall performance of your HVAC system.
Sealing your HVAC ducts is a relatively simple and cost-effective solution that can have long-lasting benefits. By following the proper steps and using the right materials, you can significantly reduce energy waste and ensure that your HVAC system operates at its optimal level. In this article, we will explore the importance of sealing ductwork, signs of unsealed ducts, and provide a step-by-step guide on how to properly seal your HVAC ducts.
Before we delve into the details, it’s important to note that sealing ductwork is a task that may require some basic DIY skills. If you’re not comfortable working with tools or crawling into tight spaces, it’s best to hire a professional HVAC technician to handle the job. However, if you’re up for the challenge, sealing your ducts can be a rewarding and cost-saving endeavor.
Now, let’s take a closer look at why sealing your HVAC ducts is so important and what signs to look out for that indicate your ductwork may be in need of sealing.
Key Takeaways:
- Properly sealing HVAC ducts is crucial for energy efficiency, indoor air quality, and temperature control. Following a step-by-step guide and using the right materials can significantly improve the performance of your HVAC system.
- Regular maintenance and inspections are essential for ensuring the longevity and effectiveness of sealed ductwork. By proactively maintaining your ducts, you can enjoy the benefits of a well-sealed and efficiently operating HVAC system for years to come.
Read more: How To Clean HVAC Ducts
Why is Sealing HVAC Ducts Important
Sealing HVAC ducts is essential for several reasons. Firstly, it helps to improve energy efficiency and reduce utility costs. When air leaks occur in your ductwork, it means that the conditioned air produced by your HVAC system is escaping into areas such as your attic, basement, or crawl spaces. This results in wasted energy and increased energy consumption as your system works harder to compensate for the lost air. By sealing your ductwork, you can ensure that the air you’re paying to heat or cool stays within the intended areas of your home or office.
In addition to energy efficiency, sealing your ducts can greatly enhance indoor air quality. Leaky ductwork can draw in dust, allergens, and pollutants from the surrounding areas, which then circulate throughout your living or working spaces. This can lead to respiratory issues, allergies, and other health problems. By sealing the ducts, you create a barrier that prevents outside contaminants from infiltrating the airflow, resulting in cleaner and healthier indoor air.
Sealing ductwork also helps to maintain consistent temperature control throughout your premises. When air leaks occur, rooms farther from the HVAC unit may not receive the same amount of conditioned air as those closer to the system. This creates temperature imbalances and hot or cold spots within your home or office. By sealing your ducts, you can ensure that airflow is distributed evenly, eliminating these temperature discrepancies and providing consistent comfort in every room.
Another benefit of sealing ducts is the reduction of noise transfer. Leaky ductwork can allow the transmission of sounds from one area of your property to another. This can be disruptive and affect the overall comfort and tranquility of your living or working spaces. By sealing your ductwork, you create a sound barrier that helps to minimize noise transfer, providing a more peaceful environment.
Lastly, sealing ductwork can contribute to the longevity and durability of your HVAC system. When ducts are properly sealed, it reduces the strain on the system as it doesn’t need to work as hard to compensate for air loss. This can help extend the lifespan of your equipment and reduce the frequency of repairs and maintenance.
Now that we understand the importance of sealing HVAC ducts, let’s explore some common signs that may indicate your ductwork is in need of sealing.
Signs of Unsealed Ductwork
Unsealed ductwork can lead to various issues that affect the performance of your HVAC system and the comfort of your living or working spaces. Here are some common signs that may indicate your ductwork is in need of sealing:
- High Energy Bills: If you notice a significant increase in your energy bills without any changes in your usage patterns, it could be a sign that your ductwork is leaking and causing energy loss. Leaky ducts can result in up to 30% of the conditioned air escaping, requiring your HVAC system to work harder and consume more energy to maintain the desired temperature.
- Uneven Temperature Distribution: Are certain rooms consistently warmer or colder than others? Uneven temperature distribution is a common indication of leaky ductwork. When air escapes through leaks in the ducts, it may not reach all areas of your home or office, resulting in inconsistent comfort levels throughout the space.
- Excessive Dust or Allergies: Leaky ducts can act as pathways for dust, allergens, and pollutants to enter your living or working spaces. If you frequently notice excessive dust accumulation or experience allergy symptoms, it may be a sign that your ductwork needs sealing to prevent outside contaminants from infiltrating the airflow.
- Noisy Ducts: If you hear whistling, rattling, or banging noises coming from your ducts when the HVAC system is running, it could indicate leaks or loose connections. Leaky ductwork can cause air turbulence, leading to audible vibrations and noises as the air passes through the openings.
- Visible Leaks or Gaps: Perform a visual inspection of your ductwork and look for any visible leaks, gaps, or disconnected sections. Pay close attention to joints, connections, and areas where ducts pass through walls, ceilings, or floors. Any visible signs of leaks should be addressed promptly to prevent further energy loss.
If you notice any of these signs, it’s important to address the issue by sealing your ductwork. Doing so will not only improve energy efficiency but also enhance comfort, indoor air quality, and the overall performance of your HVAC system. Now, let’s move on to the materials and tools you will need to properly seal your ducts.
Materials and Tools Needed for Sealing Ducts
Before you start sealing your HVAC ducts, it’s important to gather the necessary materials and tools. Here is a list of what you will need:
- Duct Sealant: Choose a high-quality duct sealant that is specifically designed for sealing HVAC ductwork. Look for a sealant that is approved for use on both metal and flexible ducts. Make sure to read the manufacturer’s instructions for proper application.
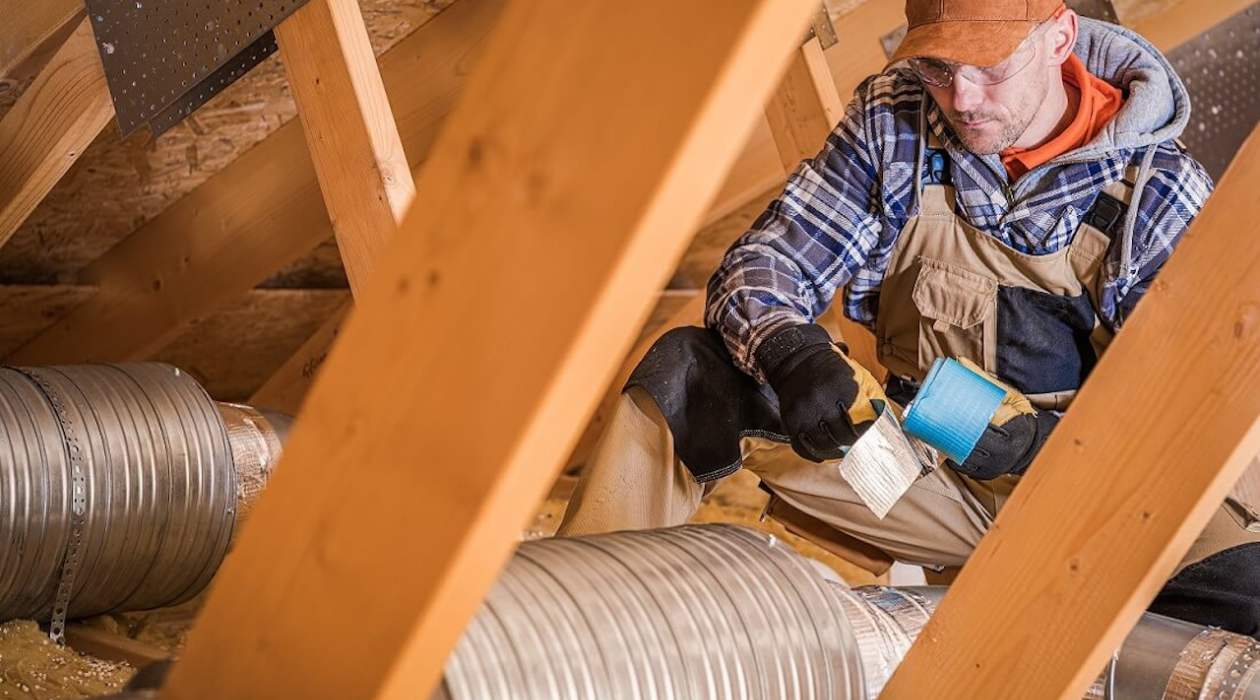
- HVAC Foil Tape: HVAC foil tape is an important component for sealing duct joints, seams, and small holes. It provides a strong, long-lasting bond and helps prevent air leaks. Look for foil tape that is labeled as suitable for use with HVAC systems.
- Duct Insulation: Insulating your ducts can further improve energy efficiency and reduce heat loss or gain. Choose insulation with an appropriate R-value to match your climate and ductwork location.
- Cloth or Disposable Gloves: It’s important to protect your hands while working with duct sealant and insulation. Wear cloth or disposable gloves to keep your skin safe from any potential irritation or chemical exposure.
- Dust Mask: When cleaning your ducts or applying sealant, it’s advisable to wear a dust mask. This will help protect your respiratory system from dust, debris, or any potential allergens present in the ductwork.
- Utility Knife: A utility knife will come in handy for cutting the foil tape and insulation. Make sure the blade is sharp to ensure clean and precise cuts.
- Paintbrush or Roller: You will need a paintbrush or roller to apply the duct sealant. A brush is typically used for smaller areas, while a roller can cover larger sections quickly and evenly.
- Flashlight: A flashlight will enable you to inspect hard-to-reach areas of your ductwork and identify any leaks or gaps that need sealing.
- Ladder: If your ductwork is located in an attic or high ceiling, you may need a ladder to access and work on the ducts safely and comfortably.
- Protective Clothing: While not strictly a tool, wearing protective clothing, such as long sleeves and pants, can help prevent any accidental scratches or cuts while working in tight spaces.
Make sure to gather all the necessary materials and tools before you begin sealing your ductwork. Having everything prepared in advance will make the process smoother and more efficient. Now you’re ready to move on to the step-by-step guide for properly sealing your HVAC ducts.
Step 1: Inspect the Ductwork
Before you start sealing your HVAC ducts, it’s important to thoroughly inspect the ductwork to identify any leaks, gaps, or other issues that need to be addressed. Here’s how you can conduct a comprehensive inspection:
- Turn off the HVAC System: Begin by turning off the HVAC system to ensure safety during the inspection process. This will prevent any airflow while you’re working on the ducts.
- Access the Ductwork: Locate the access points to your ductwork. These may include vents, registers, or removable panels. Use a screwdriver or other appropriate tool to remove the covers and gain access to the ducts.
- Examine the Ducts: Carefully examine the ductwork, paying close attention to the joints, seams, and connections. Look for any visible signs of leaks, gaps, or disconnected sections. Use a flashlight to inspect hard-to-reach areas and ensure a thorough examination.
- Feel for Air Leaks: In addition to visual inspection, run your hand along the ducts while the HVAC system is running to feel for any air leaks. Be cautious as the duct surface may be hot or cold, depending on whether your system is in heating or cooling mode.
- Listen for Unusual Noises: While the HVAC system is running, listen for any whistling, rattling, or banging noises coming from the ducts. These noises can be signs of leaks, loose connections, or airflow obstruction that need to be addressed.
- Take Notes: Make a note of any leaks, gaps, or issues you discover during the inspection. This will help you prioritize and address them during the sealing process.
By carefully inspecting your ductwork, you can identify areas that require sealing and develop a plan of action. Once you have completed the inspection, it’s time to move on to the next step: cleaning the ducts.
Read more: How To Close Off A HVAC Duct
Step 2: Clean the Ducts
Cleaning the ducts is an important step before sealing them as it helps to remove dust, debris, and other contaminants that may be present inside. Here’s how you can effectively clean your HVAC ductwork:
- Gather the Necessary Cleaning Tools: Before you begin, gather the necessary cleaning tools. This may include a vacuum cleaner with a long hose attachment, a soft-bristle brush, and a damp cloth.
- Use the Vacuum Cleaner: Start by attaching the long hose to your vacuum cleaner. Carefully insert the hose into each vent or register, cleaning one at a time. Move the hose back and forth to thoroughly suck up any dust or debris accumulated in the ducts. Repeat this process for all vents or registers throughout your property.
- Brush Off Loose Debris: After vacuuming, use a soft-bristle brush to gently brush off any loose debris or remaining dust from the walls of the ducts. Be cautious not to damage the ducts or dislodge any connections while brushing.
- Wipe Down the Vents or Registers: Take a damp cloth and wipe down the vents or registers to remove any remaining dust or dirt. Pay attention to the slats or openings to ensure they are clean and free from blockages.
- Clean the Return Air Registers: Don’t forget to clean the return air registers, as they can accumulate dust and debris as well. Remove the cover, vacuum the inside, brush off any loose debris, and wipe it down with a damp cloth.
- Replace Filters: While cleaning the ducts, it’s a good idea to check and replace the air filters if necessary. A clean filter promotes better airflow and helps to prevent dirt and dust from entering the ductwork.
By cleaning the ducts, you ensure that the sealing process is done on a clean surface and reduce the chance of any contaminants being trapped in the ductwork after sealing. Once you have completed the cleaning process, it’s time to move on to applying duct sealant in the next step.
When sealing HVAC ducts, use mastic sealant or metal tape to cover any gaps or leaks. Make sure to clean the surface before applying the sealant for better adhesion.
Step 3: Apply Duct Sealant
Applying duct sealant is a crucial step in properly sealing your HVAC ductwork. The sealant helps to close any gaps or leaks in the ducts, ensuring that conditioned air does not escape. Here is a step-by-step guide on how to apply duct sealant:
- Prepare the Ducts: Ensure that the ducts are clean and dry before applying the sealant. This will ensure better adhesion and effectiveness.
- Wear Protective Gear: Put on gloves and a dust mask to protect yourself from any potential skin irritation or inhalation of sealant fumes.
- Stir the Sealant: If your duct sealant comes in a container, give it a good stir to ensure it is well-mixed and ready to use.
- Apply the Sealant to Leaks and Gaps: Using a paintbrush or a roller, apply the sealant generously to any visible leaks, gaps, or holes in the ductwork. Ensure that you cover the areas completely, creating a smooth and even seal. Pay close attention to joints, seams, and connections, as these are common areas for air leakage.
- Smooth and Even Out the Sealant: After applying the sealant, use a brush or a gloved finger to smooth and even out the sealant. This will create a seamless seal and ensure better adhesion.
- Allow the Sealant to Dry: Follow the manufacturer’s instructions regarding the drying time of the sealant. It typically takes a couple of hours for the sealant to fully dry and cure. Avoid turning on the HVAC system during this time to prevent any disruption to the sealant.
- Reinspect for Any Missed Leaks: Once the sealant has dried, carefully inspect the ductwork once again to ensure that no leaks were missed. If you find any additional leaks, apply more sealant and repeat the smoothing process.
Properly applying duct sealant will help eliminate air leaks and ensure that your HVAC system operates efficiently. Once the sealant has dried and any additional leaks are addressed, you can move on to the next step of using HVAC foil tape to reinforce the sealing process.
Step 4: Use HVAC Foil Tape
After applying duct sealant to the leaks and gaps in your HVAC ductwork, the next step is to reinforce the sealing process using HVAC foil tape. Foil tape provides a strong and durable seal, preventing air leaks and ensuring the efficiency of your duct system. Here’s how to use HVAC foil tape effectively:
- Choose High-Quality HVAC Foil Tape: Select a high-quality HVAC foil tape that is specifically designed for use with ductwork. Look for tape that is resistant to temperature changes and provides excellent adhesion.
- Prepare the Tape: Cut the foil tape to the desired length, allowing enough tape to cover the entire joint or seam. It’s recommended to use scissors or a utility knife to ensure a clean and precise cut.
- Clean the Surface: Before applying the tape, make sure the surface is clean and free from any dust or debris. Wipe the area with a dry cloth to ensure optimal adhesion.
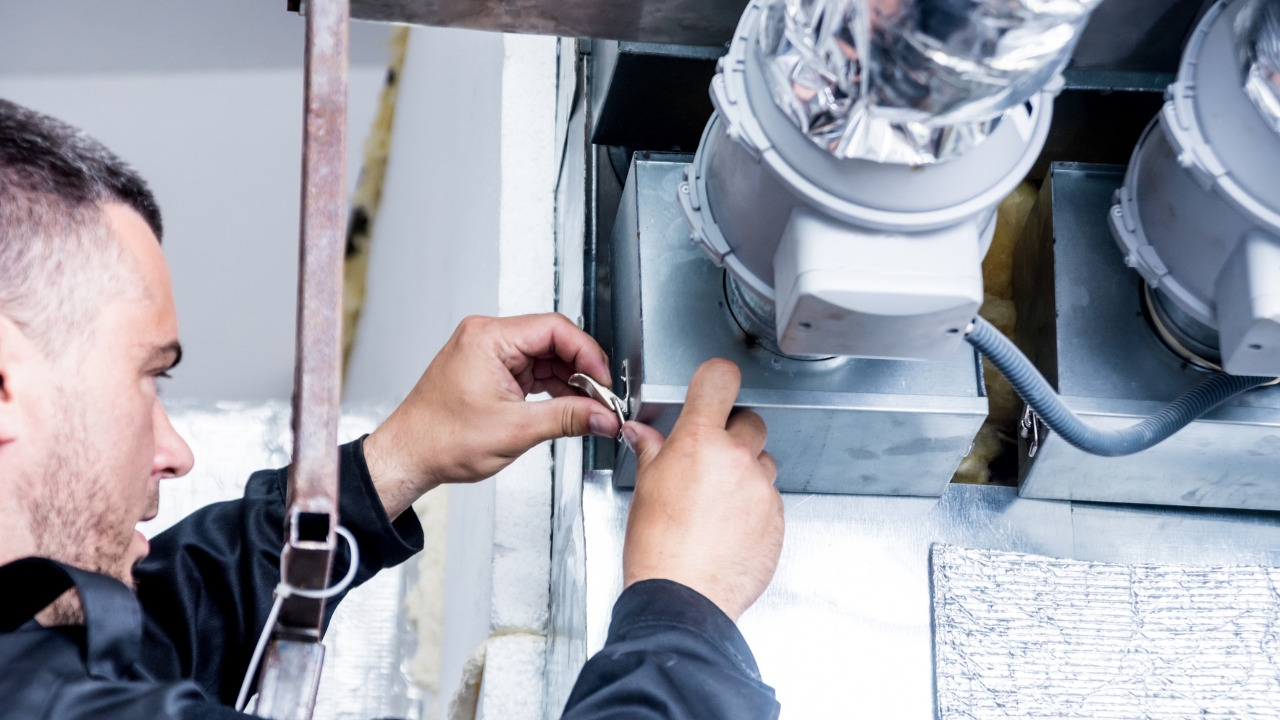
- Apply the Tape: Place the cut foil tape over the joint or seam, starting from one end and pressing it firmly onto the ductwork. Smooth the tape down with your fingers or a roller to ensure good contact and eliminate any air pockets.
- Seal All Joints and Seams: Continue applying foil tape to all joints, seams, and connections in the ductwork. Pay close attention to areas where air leaks are more likely to occur, such as corners and bends. Ensure that the tape is securely adhered and covers the entire length of the joint or seam.
- Overlap the Tape: When sealing larger gaps or seams, it’s advisable to overlap the tape by a few inches. This provides additional strength and creates a more robust seal.
- Press and Smooth the Tape: Once all the joints and seams are taped, go over the tape again with your fingers or a roller to ensure proper adhesion and create a smooth surface. This will help prevent any air leaks.
- Check for Any Missed Areas: After applying the foil tape, inspect the entire ductwork once again to ensure that no areas were missed. If you find any gaps or uncovered seams, apply additional foil tape to seal them.
Using HVAC foil tape provides an extra layer of reinforcement to your sealing efforts, ensuring that your HVAC system operates efficiently and effectively. With the foil tape in place, the next step is to insulate the ducts to further improve energy efficiency and performance.
Step 5: Insulate the Ducts
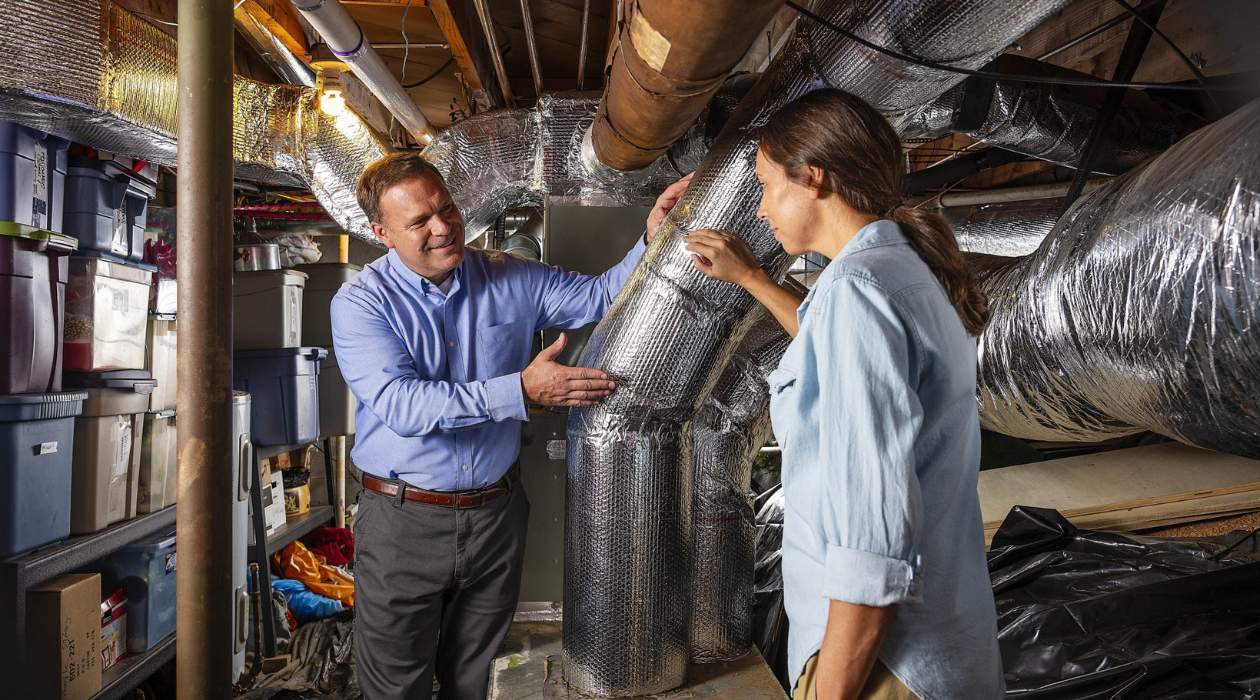
Insulating your HVAC ducts is an important step in optimizing energy efficiency and reducing heat loss or gain. Insulation helps to maintain the desired temperature of the conditioned air as it travels through the ductwork, minimizing energy waste and improving overall performance. Here’s how you can properly insulate your ducts:
- Select the Right Insulation: Choose insulation materials that are appropriate for the type of ductwork you have and the climate you live in. Common insulation options include fiberglass duct board, flexible duct insulation, or foam insulation sleeves. Determine the R-value requirements for your specific application.
- Measure and Cut the Insulation: Measure the length of your ducts and cut the insulation material accordingly. Make sure to leave enough material to fully cover the ducts, including the joints and seams.
- Wrap the Insulation Around the Ducts: Starting from one end, wrap the insulation material tightly around the ducts, ensuring a snug fit. Use adhesive or foil tape to secure the insulation in place, especially at the ends and joints.
- Seal Gaps and Seams: Inspect the insulation for any gaps or seams that may have formed during the wrapping process. Seal these gaps or seams with foil tape to maintain the integrity of the insulation.
- Insulate all Exposed Ductwork: Insulate not only the main trunk lines but also any exposed ductwork that runs through unconditioned spaces such as attics, basements, or crawl spaces. This will help prevent heat gain or loss as the air travels through these areas.
- Pay Attention to Fittings and Transitions: Ensure that any fittings or transitions in the ductwork are also properly insulated. These areas are prone to air leakage and heat transfer, so proper insulation is crucial to maintain energy efficiency.
- Insulate Supply and Return Plenums: Don’t forget to insulate the supply and return plenums, which are the large boxes or chambers at the beginning and end of your ductwork. Insulating these areas helps to minimize heat gain or loss and maintain the overall efficiency of the system.
- Recheck for Proper Insulation Coverage: Once you’ve insulated all the ducts, go back and recheck to ensure that all areas are properly covered. Insulation should be continuous, without any gaps or exposed sections.
By properly insulating your HVAC ducts, you can significantly reduce energy loss, maintain consistent temperature control, and improve the overall performance of your system. Take the time to ensure that all sections of the ductwork are adequately insulated before moving on to the final step of testing for air leaks.
Read more: How To Hide HVAC Ducts In Basement
Step 6: Test for Air Leaks
Once you have completed the process of sealing and insulating your HVAC ducts, it’s important to test for any remaining air leaks. Testing for air leaks allows you to identify areas that may still require additional sealing or insulation, ensuring optimal performance and energy efficiency. Here’s how you can test for air leaks in your ductwork:
- Turn on the HVAC System: Start by turning on your HVAC system and setting it to the appropriate temperature for testing.
- Close all Windows and Doors: Close all windows and doors in your home or office to minimize any outside air entering the space.
- Locate Air Leakage Points: Carefully inspect the ductwork, focusing on joints, connections, seams, and areas where the ducts pass through walls, ceilings, or floors. Look for any signs of air leakage, such as noticeable drafts or small dust particles being blown out.
- Use a Smoke Test: One effective method to detect air leaks is by using a smoke test. Light a stick of incense or a smoke pen and pass it along the ductwork. Observe if the smoke is being pulled into any openings or if it is being blown away, as this indicates air leakage.
- Feel for Air Leaks: Run your hand along the ducts, feeling for any air leaks. Pay close attention to joints, seams, and connections where air may escape. Be cautious as the duct surface may be hot or cold depending on whether your system is in heating or cooling mode.
- Mark Air Leakage Points: As you identify air leakage points, use a marker or tape to mark these areas for future reference and sealing.
- Address Air Leaks: Once you have identified the air leakage points, go back and apply additional sealant or insulation as needed. Use foil tape or duct sealant to seal any gaps, seams, or joints that are allowing air to escape.
- Re-test for Air Leaks: After addressing the identified air leaks, re-test the ductwork to ensure that all leaks have been properly sealed. Repeat the smoke test or hand-feeling method to confirm that no air is escaping.
- Document and Maintain: Document the areas where air leaks were found and sealed. Regularly monitor and maintain your ductwork to ensure that it remains properly sealed and insulated over time.
Testing for air leaks is a critical step in the duct sealing process, as it allows you to identify and address any remaining issues. By sealing these leaks, you can achieve optimal energy efficiency and performance from your HVAC system while maintaining a comfortable and well-regulated indoor environment.
Congratulations! By following these steps to properly seal and insulate your HVAC ducts, you have taken a proactive approach to improving energy efficiency, reducing utility costs, and enhancing the comfort of your living or working spaces. Regular maintenance and inspections will help you maintain the integrity of your ductwork and ensure its continued efficiency in the years to come.
Remember, if you’re uncomfortable performing these steps yourself, it’s always a good idea to consult with a professional HVAC technician who can provide expert guidance and assistance.
Conclusion
Properly sealing HVAC ducts is a vital step in optimizing energy efficiency, reducing utility costs, and improving indoor comfort. Leaky ductwork can lead to significant energy loss, uneven temperature distribution, poor indoor air quality, and increased strain on the HVAC system. By following the steps outlined in this guide, you can effectively seal and insulate your ducts, ensuring optimal performance and maintaining a comfortable living or working environment.
We began by understanding the importance of sealing HVAC ducts, including the benefits of energy efficiency, improved indoor air quality, consistent temperature control, and reduced noise transfer. We then explored the signs of unsealed ductwork, such as high energy bills, uneven temperature distribution, excess dust, noisy ducts, and visible leaks or gaps.
Next, we discussed the materials and tools needed for sealing ducts, including duct sealant, HVAC foil tape, duct insulation, gloves, dust masks, utility knives, paintbrushes or rollers, flashlights, ladders, and protective clothing. These tools and materials are essential for a successful sealing project.
We then provided a step-by-step guide for properly sealing HVAC ducts, covering the following steps:
- Inspect the ductwork to identify leaks, gaps, or other issues.
- Clean the ducts, removing dust, debris, and contaminants.
- Apply duct sealant to seal leaks and gaps.
- Use HVAC foil tape to reinforce the sealing of joints and seams.
- Insulate the ducts to minimize heat loss or gain.
- Test for air leaks to identify any remaining areas that need attention.
By completing these steps, you have improved energy efficiency, reduced energy waste, and enhanced the performance of your HVAC system. You have also created a more comfortable and healthier indoor environment by minimizing air leakage and improving temperature control.
Regular maintenance and inspections are essential to ensuring the longevity and effectiveness of your sealed ductwork. Make it a habit to monitor for any signs of new leaks, gaps, or damage, and address them promptly. By proactively maintaining your ducts, you can enjoy the benefits of a well-sealed and efficiently operating HVAC system for years to come.
If you’re unsure about performing these steps yourself, it’s always wise to consult with a professional HVAC technician. They can offer expert guidance, help identify problem areas, and provide professional sealing services.
Sealing your HVAC ducts is a worthwhile investment that pays off in terms of energy savings, improved comfort, and a healthier indoor environment. Take the necessary steps today to seal your ductwork and enjoy the benefits for years to come.
Frequently Asked Questions about How To Properly Seal HVAC Ducts
Was this page helpful?
At Storables.com, we guarantee accurate and reliable information. Our content, validated by Expert Board Contributors, is crafted following stringent Editorial Policies. We're committed to providing you with well-researched, expert-backed insights for all your informational needs.







0 thoughts on “How To Properly Seal HVAC Ducts”