Articles
How To Properly Install Insulation
Modified: October 20, 2024
Learn how to properly install insulation with our informative articles. Get expert advice and step-by-step instructions for a successful insulation installation.
(Many of the links in this article redirect to a specific reviewed product. Your purchase of these products through affiliate links helps to generate commission for Storables.com, at no extra cost. Learn more)
Introduction
Welcome to the world of insulation! When it comes to maintaining a comfortable and energy-efficient home, insulation plays a crucial role. Insulation helps regulate temperature, reduces energy consumption, and enhances the overall comfort of your living space. Whether you’re a seasoned DIY enthusiast or a novice homeowner, learning how to properly install insulation can save you money on energy bills and improve the quality of your home.
In this guide, we will walk you through the step-by-step process of installing insulation in various areas of your home, including walls, attics, and floors. We will also cover sealing and insulating around windows and doors for maximum efficiency. By the end of this article, you will have a comprehensive understanding of insulation installation and be well-equipped to tackle this project on your own.
Before we dive into the installation process, it’s important to understand the different types of insulation available. The most common types include fiberglass, cellulose, spray foam, and rigid foam. Each type has its own advantages and is suitable for different applications. Consider factors such as R-value (a measure of insulation’s effectiveness), budget, and any specific requirements for your home when choosing the right insulation material.
Additionally, it’s worth noting that insulation installation may vary depending on your geographical location and climate. It’s always a good idea to consult local building codes and regulations to ensure compliance and maximum efficiency.
Now let’s get started with step one: assessing your insulation needs.
Key Takeaways:
- Properly assessing insulation needs, gathering necessary materials, and ensuring proper ventilation are key to successful insulation installation.
- Insulating walls, attics, floors, and sealing around windows and doors are essential steps for energy-efficient and comfortable homes.
Step 1: Assessing Your Insulation Needs
Before diving into the installation process, it’s essential to assess your insulation needs. Properly assessing the current insulation status in your home will help you determine the areas that require insulation and the type of insulation that will work best for each specific area.
Start by conducting a thorough inspection of your home. Look out for any signs of inadequate insulation, such as drafts, temperature fluctuations, or high energy bills. Pay close attention to areas that tend to be more vulnerable to heat loss or gain, such as attics, walls facing the outside, and floors above unheated spaces like garages or crawl spaces.
Once you have identified the areas that need insulation, measure the existing insulation’s thickness to determine its R-value. The R-value indicates the insulation’s thermal resistance. Ideally, you should strive for higher R-values in areas with colder climates and lower R-values in areas with milder temperatures. This will ensure optimal energy efficiency for your home.
Next, consider the type of insulation that will be suitable for each specific area. Fiberglass batts or rolls are commonly used for walls, attics, and floors. Blown-in insulation, like cellulose or fiberglass, is ideal for filling gaps and irregular spaces. Spray foam insulation provides excellent air sealing properties and is useful for sealing cracks and crevices.
Take into account any specific challenges or conditions that may affect insulation installation. For example, if you have a sloped attic, you may need to use baffles to create proper airflow and prevent moisture buildup. If you have electrical wiring or plumbing running through the walls, you’ll need to work around them and ensure that they are not compromised during the installation process.
Lastly, consider your budget and the long-term benefits of investing in quality insulation. Although insulation installation may require an upfront investment, it can significantly reduce your energy consumption and lower your utility bills in the long run. Additionally, proper insulation can improve the comfort of your home and contribute to a healthier indoor environment.
By thoroughly assessing your insulation needs, you will be able to plan and execute the installation process more effectively. In the next step, we will discuss the materials and tools you’ll need for a successful insulation installation.
Step 2: Gathering the Necessary Materials and Tools
Now that you’ve assessed your insulation needs, it’s time to gather the materials and tools required for the installation process. Having everything on hand before you begin will ensure a smooth and efficient installation.
Here’s a list of the essential materials you’ll need:
- Insulation material (such as fiberglass batts or rolls, cellulose, spray foam, or rigid foam)
- Vapor barrier (if required for your specific insulation type and location)
- Insulation supports (like insulation hangers or wire mesh) for securing insulation in place
- Weatherstripping or caulk for sealing gaps and cracks
- Baffle vents for proper attic ventilation
- Fire-resistant insulation for areas near heating appliances or fireplaces
- Duct tape or foil tape for sealing insulation joints and seams
- Protective gear (such as gloves, goggles, and a mask) for personal safety
In addition to the materials, you’ll need a variety of tools to assist you during the installation:
- Tape measure for accurately measuring the required insulation dimensions
- Utility knife or insulation knife for cutting insulation material
- Stapler or staple gun for securing insulation
- Caulking gun for applying caulk or sealant
- Hammer for securing insulation supports
- Screwdriver for removing or replacing any obstacles (e.g., electrical outlet covers)
- Ladder or scaffolding for reaching high areas, such as the attic
- Flashlight or headlamp for better visibility in dimly lit areas
- Extension cords for powering tools and equipment
Remember to check the manufacturer’s instructions and recommendations for specific tools or equipment that may be required for the insulation material you’ve chosen. Some insulation products may have additional requirements or specific installation techniques.
By gathering all the necessary materials and tools in advance, you’ll save time and effort during the installation process. In the next step, we will cover the preparatory steps for getting the area ready for insulation installation.
Step 3: Preparing the Area for Insulation Installation
Before you begin installing insulation, it’s crucial to properly prepare the area to ensure a smooth and effective installation. Preparing the area involves cleaning and clearing any obstructions, addressing potential moisture issues, and applying appropriate barriers or insulation supports.
Here’s a step-by-step guide on preparing the area for insulation installation:
- Clean the area: Remove any debris, dust, or existing insulation that may be in the way. Clearing the area will provide a clean and suitable surface for installing the new insulation.
- Address moisture concerns: Insulation should not be installed in areas with existing moisture problems. Address any leaks or moisture issues before proceeding with the installation. This can include fixing roof leaks, repairing plumbing issues, or installing proper drainage systems.
- Apply vapor barrier: If required for your specific insulation type and location, install a vapor barrier to prevent moisture from seeping into the insulation. The vapor barrier should be placed on the warm side of the insulation, facing the interior of the building.
- Seal air leaks: Insulation works most effectively when air leaks are minimized. Seal any gaps, cracks, or openings that may allow air to escape or enter the insulated area. Use weatherstripping or caulk to seal gaps around windows, doors, electrical outlets, and other potential entry points for air.
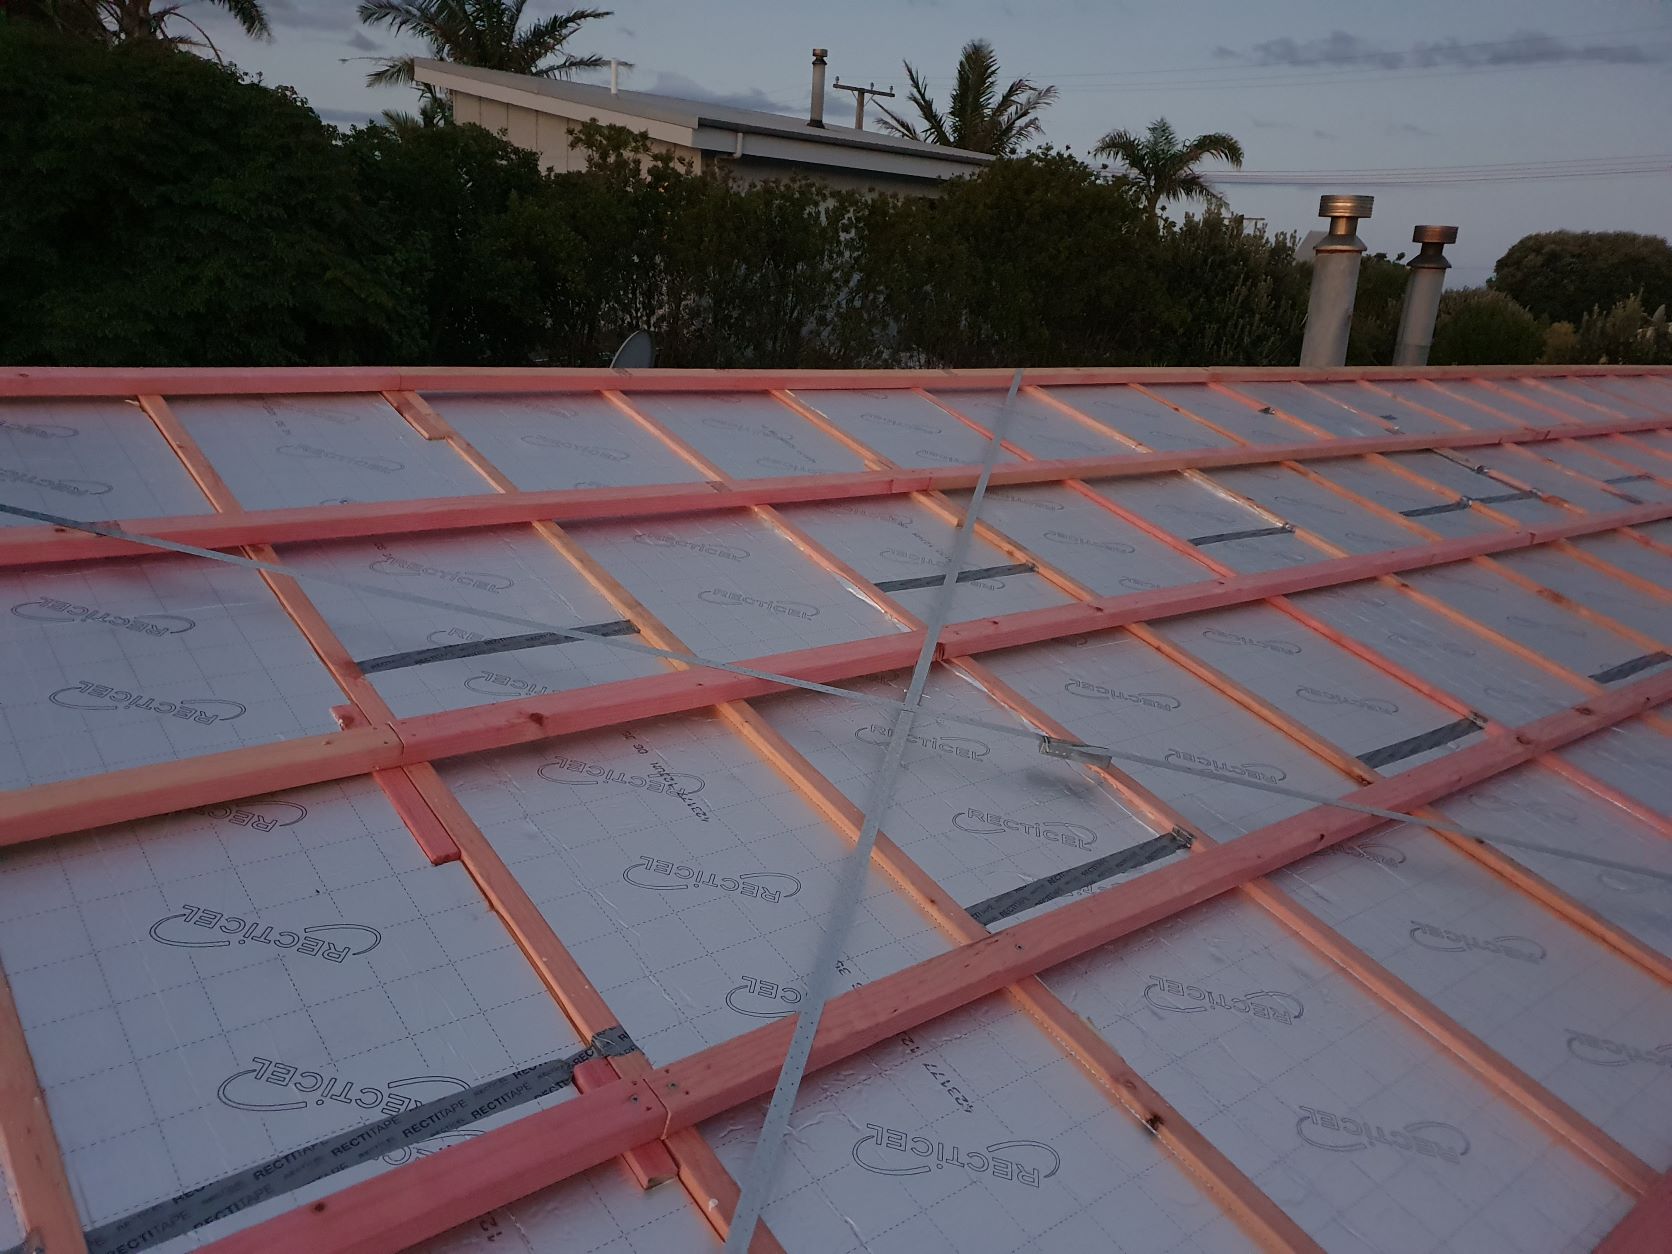
- Install insulation supports: In areas where insulation needs support to stay in place, such as ceilings or roofs with sloped rafters, install insulation supports like hangers or wire mesh. This will ensure the insulation remains secure and properly aligned.
- Protect electrical fixtures: If you’re installing insulation in walls or ceilings that contain electrical fixtures, it’s crucial to take precautions to prevent any contact between the insulation and electrical components. Use protective covers or insulation barrier boxes to ensure safety.
- Create ventilation channels: In the case of attic insulation, create proper ventilation channels by installing baffles. Baffles help maintain airflow in the attic and prevent moisture buildup, ensuring the insulation functions optimally.
By taking these preparatory steps, you will not only create a suitable environment for the insulation installation but also mitigate potential issues that could affect the insulation’s performance. Once the area is properly prepared, you’re ready to move on to the specific installation steps for each area, such as walls, attics, or floors. We’ll cover those in the following steps.
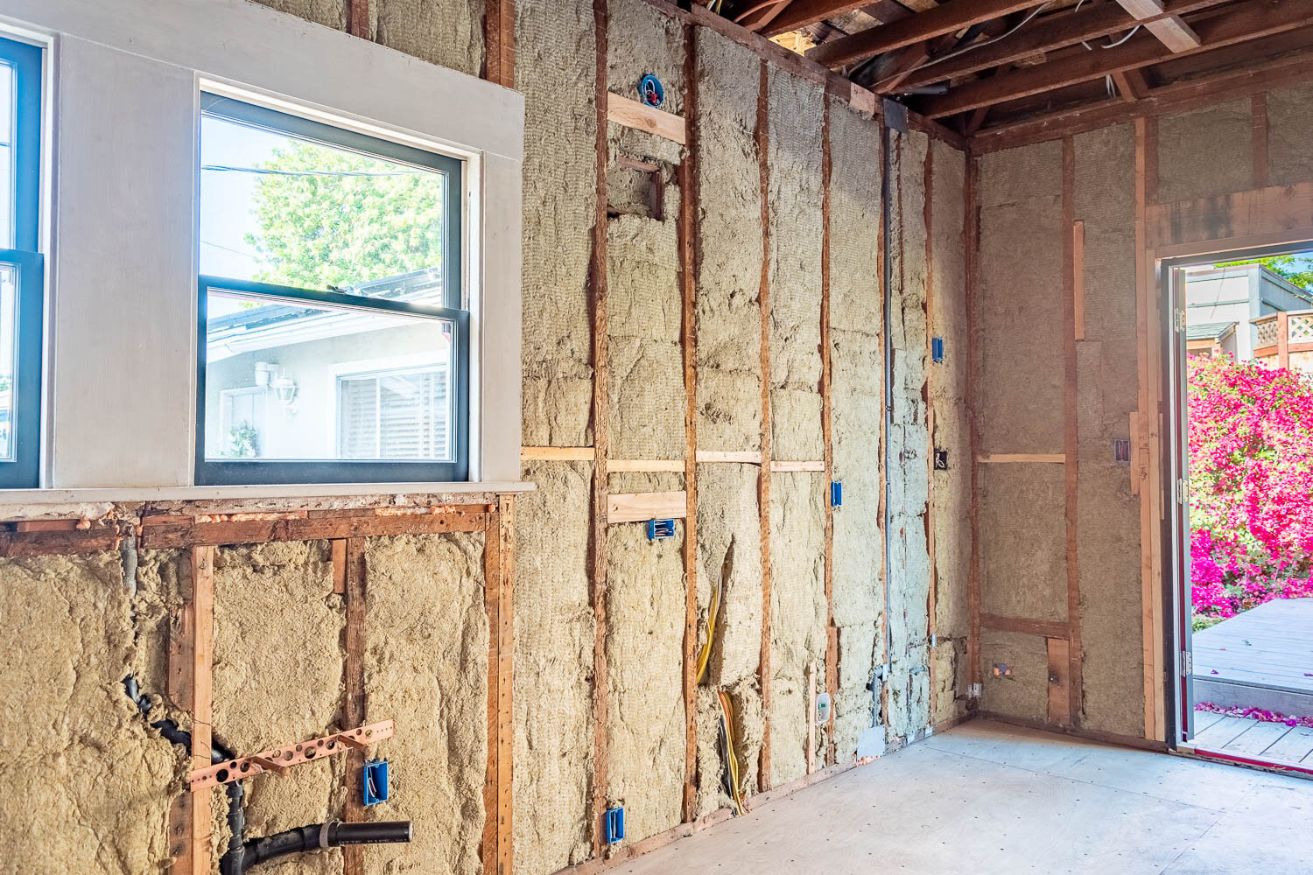
Step 4: Installing Insulation in Walls
Proper insulation in walls is essential for maintaining a comfortable and energy-efficient home. Insulating walls can help reduce heat loss or gain and minimize drafts, leading to improved energy efficiency and increased comfort. Here’s a step-by-step guide on installing insulation in walls:
- Prepare the wall: Ensure the wall is clean, dry, and free of any obstructions. Remove any existing insulation, if necessary.
- Measure and cut: Measure the height and width of the wall cavity, taking into account any electrical outlets or other obstacles. Cut the insulation material to fit the dimensions of the wall cavity using a utility knife or insulation knife.
- Fit the insulation: Carefully place the insulation into the wall cavity, ensuring a snug fit. If necessary, use insulation supports, such as hangers or wire mesh, to hold the insulation in place.
- Seal gaps: Seal any gaps or joints in the insulation with tape or foam sealant to prevent air leakage.
- Repeat for all walls: Continue the same process for each wall in the area you’re insulating, ensuring consistent coverage.
- Replace drywall: Once the insulation is installed, replace the drywall or wall covering as necessary. Cut openings for electrical outlets or switches, ensuring they are properly insulated to avoid any fire hazards.
- Test for coverage: After the installation, test the walls for complete insulation coverage. Use a thermal imaging camera or consult a professional to ensure there are no gaps or areas with inadequate insulation.
While installing insulation in walls, it’s essential to consider the type and thickness of insulation appropriate for your area’s climate and local building codes. Additionally, ensure that insulation does not come into contact with electrical wires or fixtures, as this can be a safety hazard.
Properly insulating your walls can significantly improve your home’s energy efficiency, reduce noise transmission, and enhance the overall comfort of your living space. Proceeding to the next step, we will cover the installation process for attics.
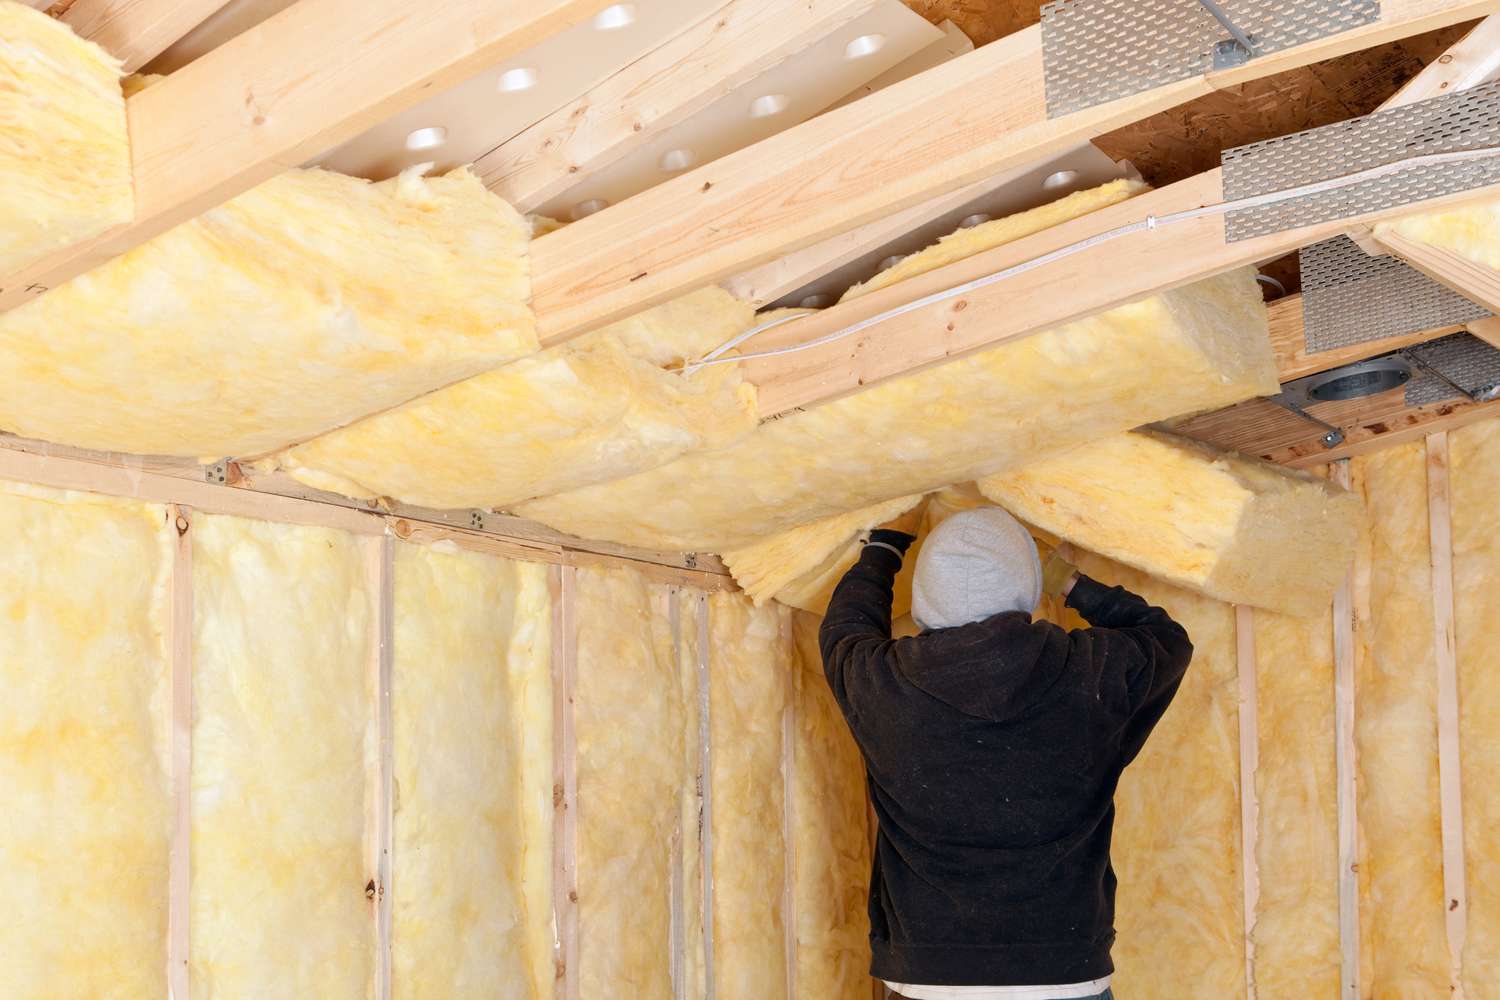
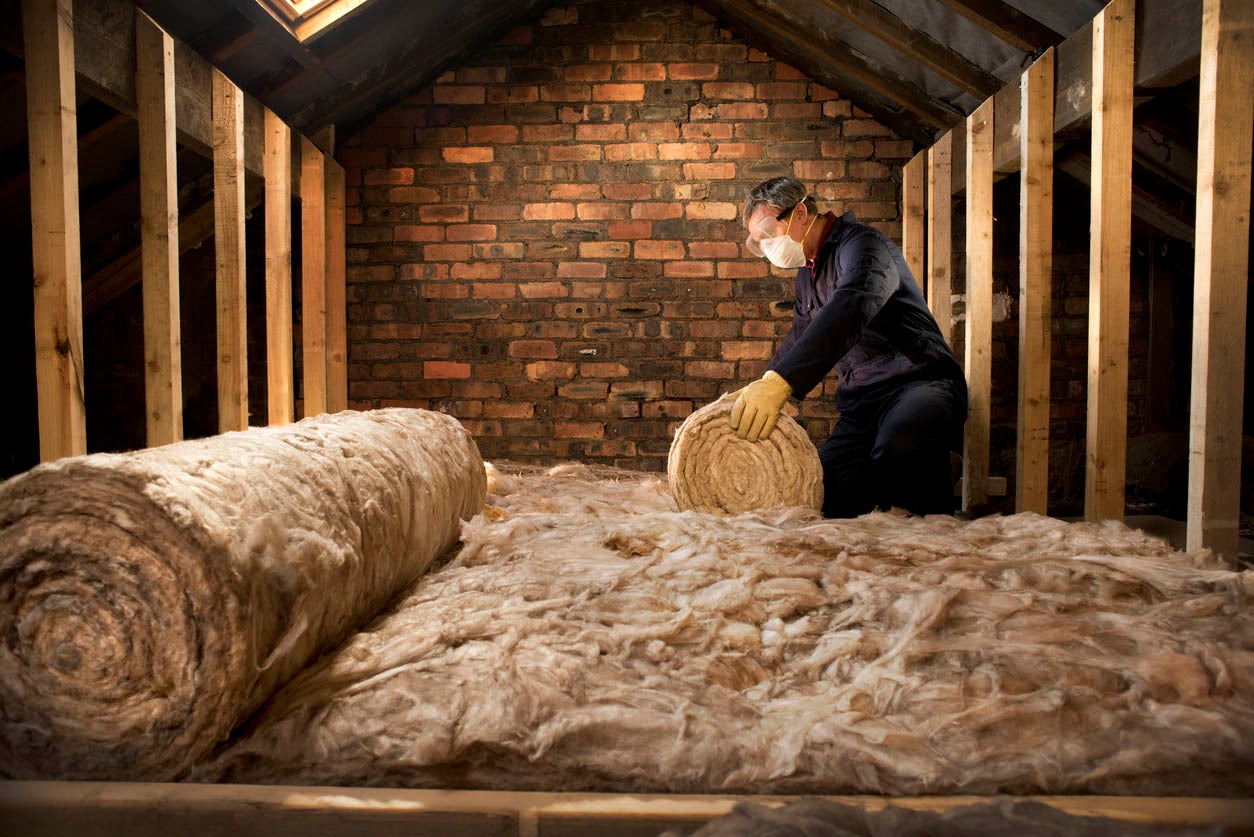
Step 5: Installing Insulation in Attics
Attic insulation is crucial for preventing heat loss or gain in your home and plays a significant role in maintaining consistent indoor temperatures. Installing insulation in the attic can improve energy efficiency, reduce heating and cooling costs, and increase overall comfort. Follow these steps to install insulation in your attic:
- Prepare the attic: Clear the attic of any personal belongings or debris, ensuring a clean and safe workspace. Remove any existing insulation if necessary.
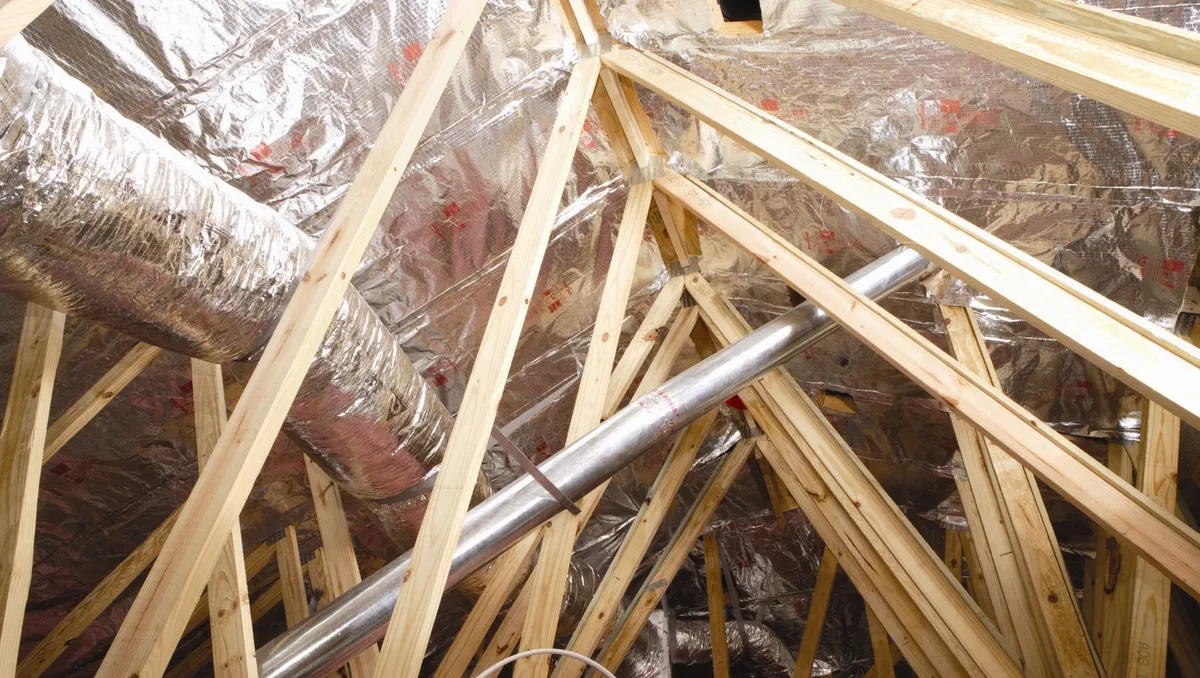
- Assess ventilation: Check the attic’s ventilation to ensure proper airflow. Install baffles or vents as needed to maintain adequate ventilation and prevent moisture buildup.
- Measure and cut: Measure the length and width of the attic floor joists, accounting for any obstructions such as electrical wires or HVAC equipment. Cut the insulation material to fit the dimensions using a utility knife or insulation knife.
- Lay the insulation: Starting from the perimeter, lay the insulation material between the attic floor joists. Ensure a snug fit without compressing or stretching the material, especially around corners or edges.
- Insulate attic access points: Pay attention to insulating the attic access door or hatch. Use weatherstripping or insulation material to seal any gaps and prevent heat transfer.
- Seal air leaks: Seal any gaps or cracks in the attic floor, especially near vents, ductwork, light fixtures, or wiring, using caulk, weatherstripping, or foam sealant. This will prevent air leakage and maintain insulation effectiveness.
- Add additional layers: Depending on the desired insulation level and climate, you may need to add multiple layers of insulation. Lay subsequent layers perpendicular to the previous layer to minimize heat loss through seams.
- Protect recessed light fixtures: If you have recessed light fixtures in the attic, maintain a safe clearance around them, following local building codes and fire safety regulations. Use specially designed insulation covers or enclosures to prevent insulation from coming into direct contact with the fixtures.
- Test for coverage: Once the insulation is installed, check for complete coverage. Ensure there are no gaps, thin spots, or areas with inadequate insulation. Use a thermal imaging camera or consult a professional if necessary.
Properly insulated attics contribute greatly to energy conservation and home comfort. Additionally, attic insulation can help prevent ice dams during winter by maintaining a consistent temperature on the roof surface. Remember to refer to local building codes and regulations and choose the appropriate insulation material and thickness for your climate zone.
With the attic insulation complete, we can now move on to the installation process for floors in the next step.
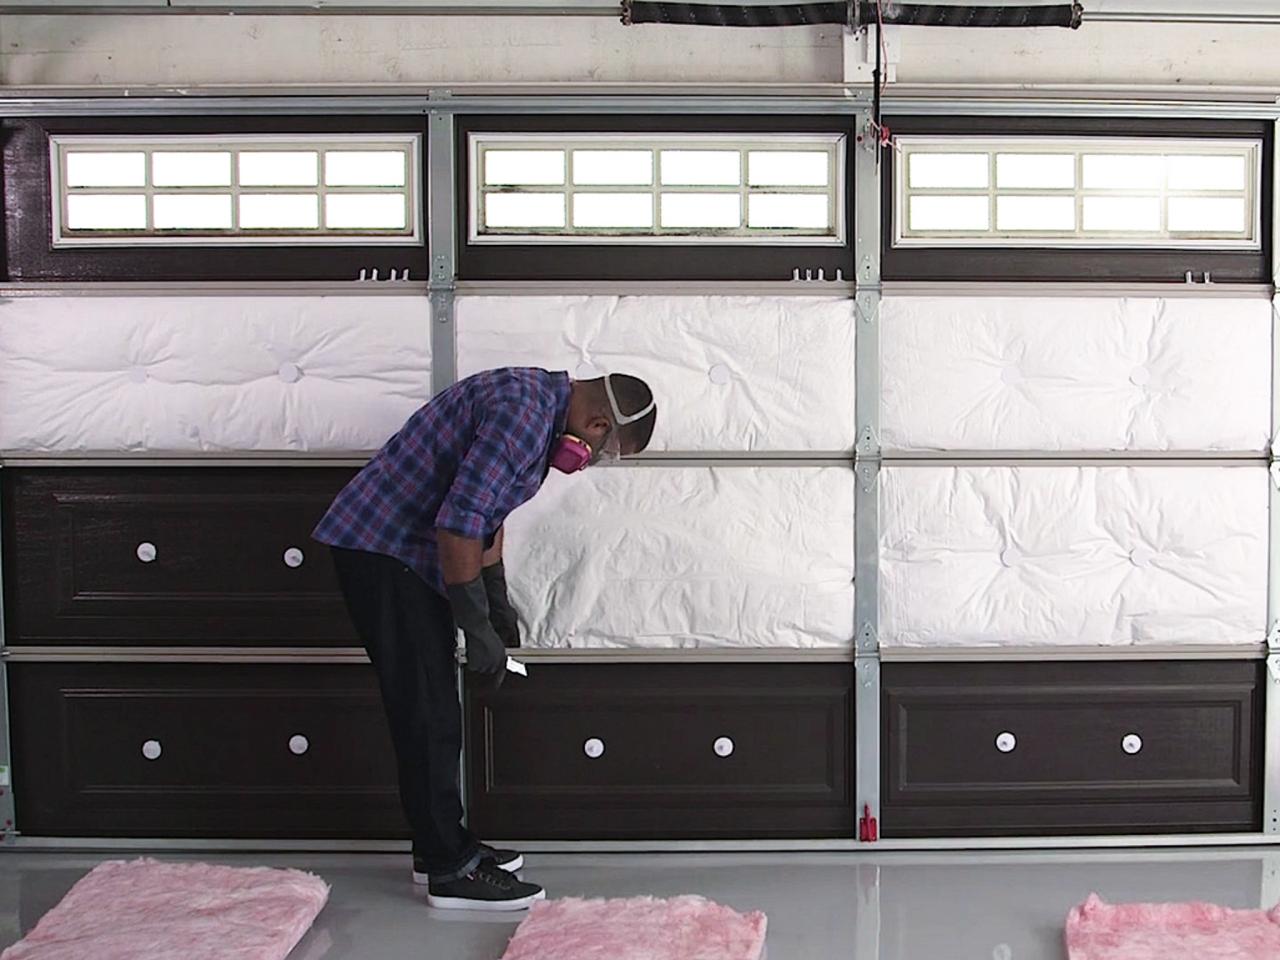
When installing insulation, make sure to wear protective gear such as gloves, a mask, and goggles to avoid irritation from the materials. Always follow manufacturer’s instructions for proper installation techniques.
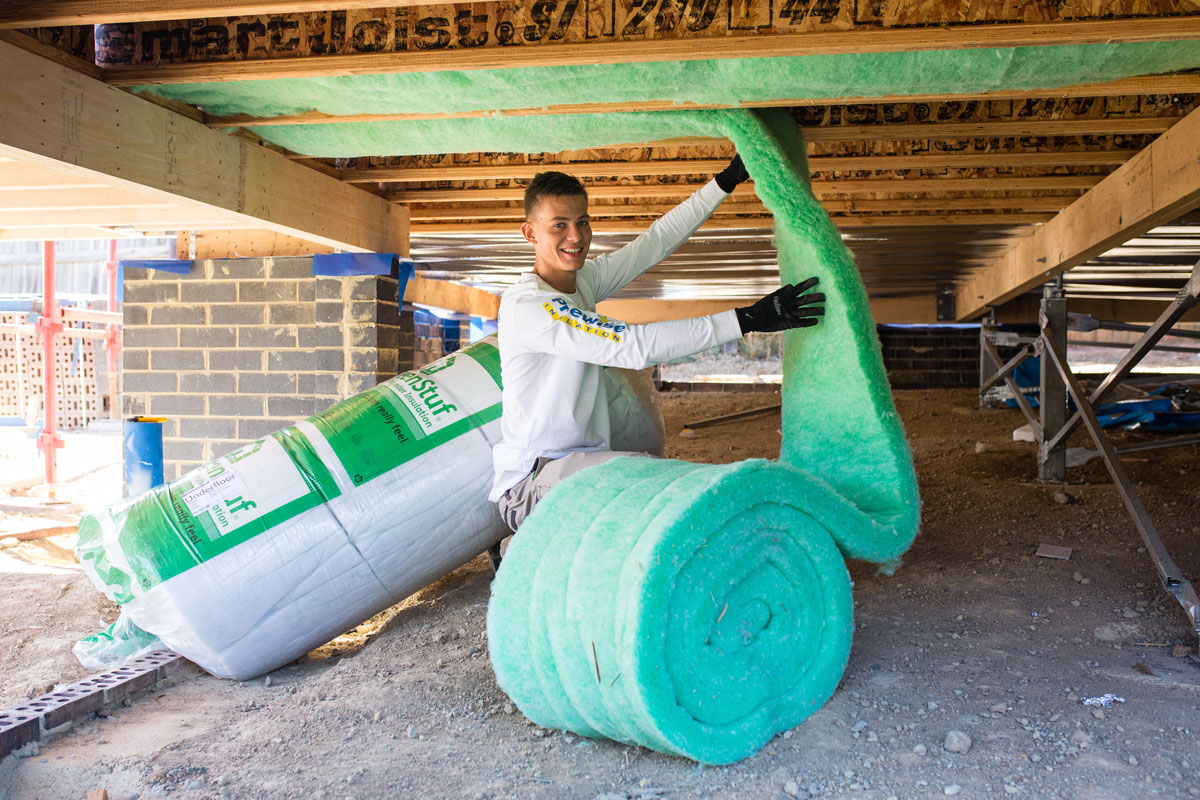
Step 6: Installing Insulation in Floors
Insulating floors can help improve energy efficiency, reduce heat loss, and enhance the comfort of your living space. Whether you have a raised floor, a suspended floor, or a solid concrete floor, proper insulation is essential. Follow these steps to install insulation in floors:
- Determine the insulation type: Depending on the floor type and specific requirements, choose the appropriate insulation material. Common options include fiberglass batts, rigid foam boards, or spray foam insulation.
- Prepare the area: Clear the floor area of any furniture, rugs, or obstructions. If necessary, remove the existing flooring material to access the floor space. Ensure the floor is clean and free of debris.
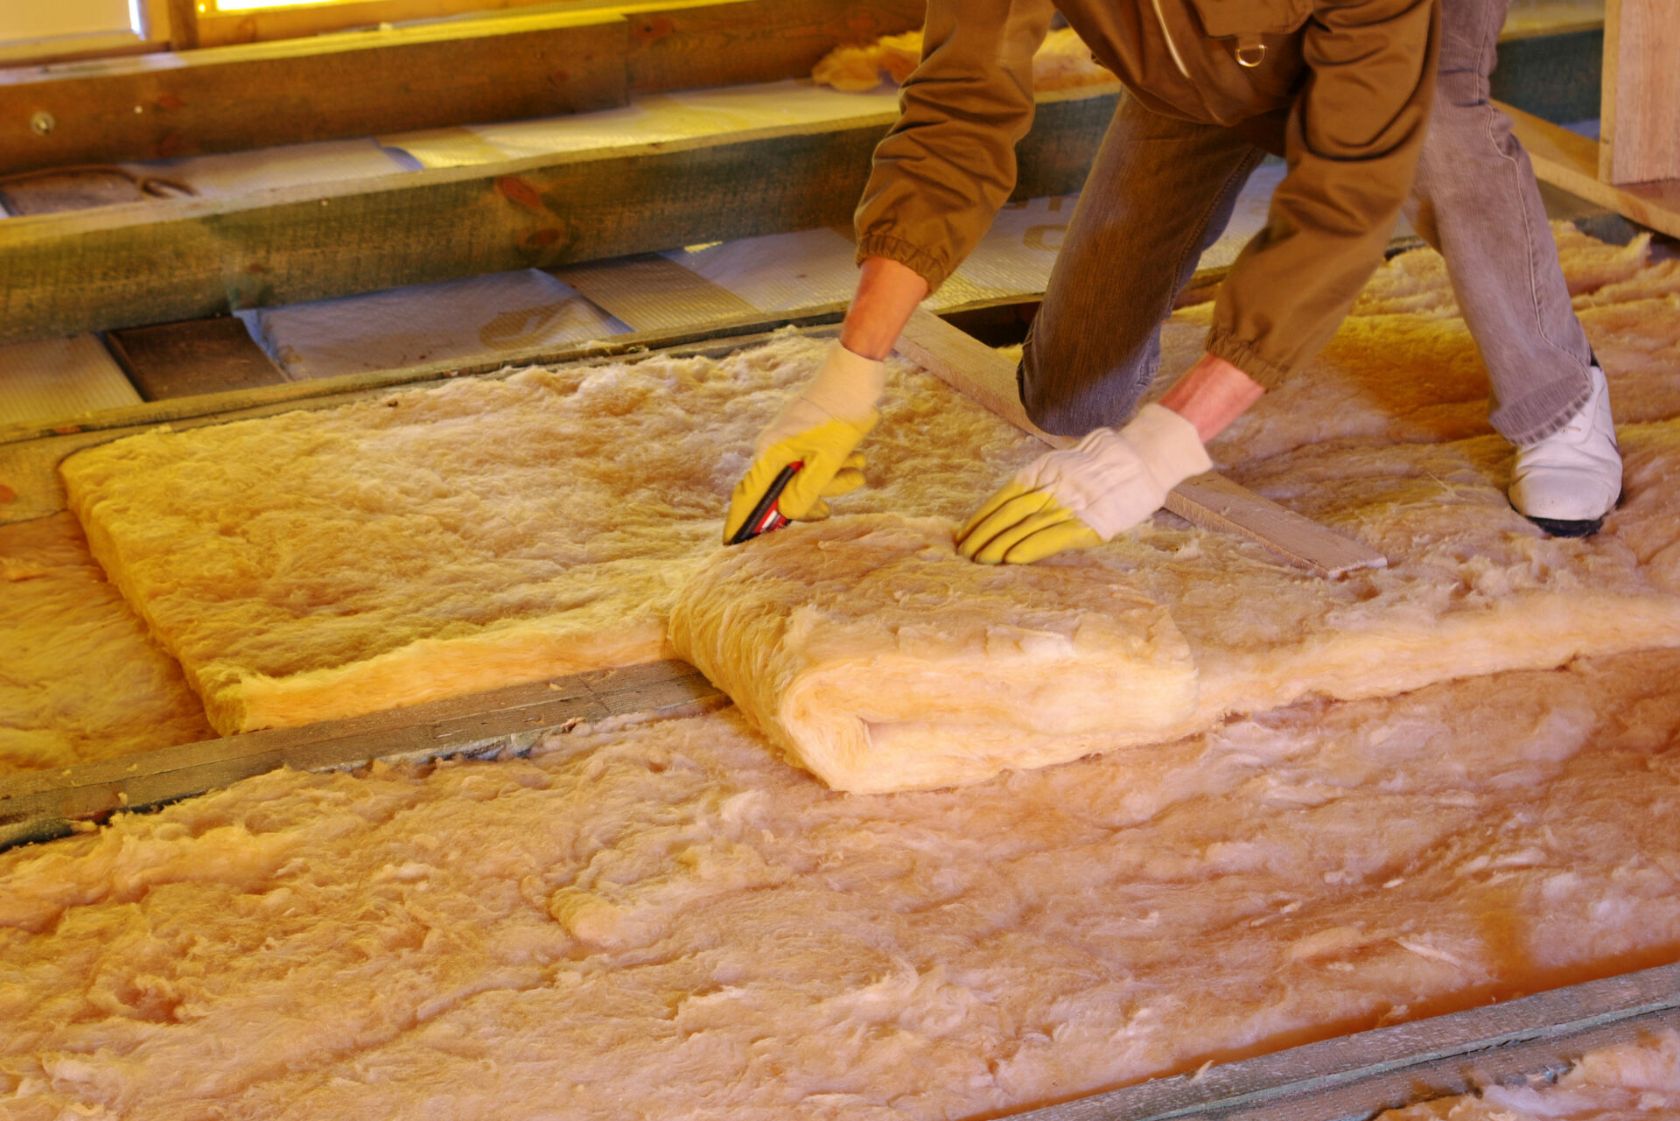
- Measure and cut: Measure the length and width of the floor cavity or joist space. Cut the insulation material to fit the dimensions using a utility knife or insulation knife. Leave a small gap around the edges to allow for expansion.
- Fit the insulation: Place the insulation material between the floor joists, ensuring a snug fit. For suspended floors, the insulation should be supported by insulation supports such as hangers or wire mesh. Fill any gaps or voids with smaller pieces of insulation material.
- Seal air leaks: Use weatherstripping, caulk, or foam sealant to seal any gaps or cracks around the edges of the insulation. This will prevent air leakage and ensure optimal insulation performance.
- Replace the flooring: Once the insulation is installed and sealed, replace the flooring material as necessary. Consider using flooring materials that provide additional thermal insulation, such as carpet with an underlay or engineered wood flooring with built-in insulation.
- Test for coverage: After the installation is complete, check for complete coverage and any areas that may require additional insulation. Use a thermal imaging camera or consult a professional if necessary.
Keep in mind that the specific installation process may vary depending on the type of floor and insulation material you are using. It’s important to consult the manufacturer’s instructions and local building codes to ensure proper installation techniques and compliance.
Properly insulating your floors can help reduce heat transfer between different levels of your home, improve energy efficiency, and increase overall comfort. Moving forward, we will explore the installation process for properly sealing and insulating around windows and doors in the next step.
Step 7: Sealing and Insulating around Windows and Doors
Properly sealing and insulating around windows and doors is crucial for preventing air leakage, reducing drafts, and maximizing energy efficiency in your home. By sealing gaps and insulating these areas, you can maintain a comfortable indoor environment and save on heating and cooling costs. Follow these steps to seal and insulate around windows and doors:
- Inspect the area: Carefully examine the windows and doors for any gaps, cracks, or openings that may allow air leakage.
- Caulk the gaps: Use a high-quality weatherproof caulk to seal gaps between the window or door frames and the surrounding walls. Apply a continuous bead of caulk along the joint, ensuring a complete seal.
- Weatherstrip around doors: Install weatherstripping along the edges of doors to seal gaps and prevent air infiltration. Choose the appropriate type of weatherstripping based on the door material and the size of the gap. Adhesive-backed weatherstripping or door sweeps are common options.
- Apply window film or caulk: For single-pane windows or windows with significant gaps, consider applying a clear plastic window film or using caulk to seal any noticeable areas of air leakage.
- Insulate around windows and doors: Insulate the spaces around windows and doors to prevent heat loss or gain. Use expandable foam spray or insulation strips to fill any gaps between the window or door frame and the wall.
- Install window and door insulation kits: Consider using window insulation film kits or door insulation kits to provide an additional layer of insulation. These kits typically include plastic film or foam panels that can be applied to the interior of windows or doors.
- Test for air leakage: After sealing and insulating, perform a simple air leak test using a candle or an incense stick. Hold it near the sealed areas, and if you notice any flickering or smoke moving, there may still be air leakage that needs to be addressed.
- Check and reseal as necessary: Regularly check for any signs of deterioration or gaps around windows and doors. Replace caulking or weatherstripping that has deteriorated over time to maintain the effectiveness of the sealing and insulation.
Properly sealing and insulating around windows and doors can significantly reduce energy loss and improve the comfort of your home. It’s important to use high-quality materials and follow manufacturer instructions for the best results. Taking the time to seal and insulate these areas will pay off by reducing drafts and maintaining a more comfortable indoor environment.
With windows and doors properly sealed and insulated, we can move on to the next step: ensuring proper ventilation for the insulated area.
Step 8: Properly Ventilating the Insulated Area
While insulation is essential for maintaining a comfortable and energy-efficient home, it’s equally important to ensure proper ventilation within the insulated areas. Proper ventilation helps prevent moisture buildup, improves indoor air quality, and promotes the longevity of your insulation. Follow these steps to properly ventilate the insulated area:
- Evaluate the current ventilation: Assess the existing ventilation system in the insulated area, whether it’s the attic, walls, or floors. Determine if there are any vent openings or if additional ventilation measures are required.
- Install vents and ducts: If the insulated area lacks proper ventilation, install vents, ducts, or other ventilation systems as needed. Ensure that these vents are strategically placed to allow for proper airflow and moisture control.
- Consider natural ventilation options: Utilize natural ventilation methods wherever possible. This can include installing window vents, ridge vents, or vents on exterior walls to allow for the exchange of indoor and outdoor air. Keep in mind that natural ventilation may not be sufficient in all cases, particularly in tightly sealed or highly insulated areas.
- Implement mechanical ventilation: In cases where natural ventilation is limited or insufficient, consider implementing mechanical ventilation systems. This can include installing exhaust fans, whole-house ventilation systems, or balanced ventilation systems to ensure adequate airflow.
- Maintain airflow pathways: Ensure that there are clear pathways for air to circulate throughout the insulated areas. Avoid blocking vents or sealing off airflow by accident during the installation process.
- Monitor for moisture: Regularly inspect the insulated area for signs of moisture buildup or condensation. If excess moisture is present, investigate the cause and take appropriate measures to address the issue, such as improving ventilation or addressing sources of moisture intrusion.
- Consult experts if needed: If you’re unsure about the ventilation requirements or need specialized guidance, consult with professionals such as HVAC technicians, energy auditors, or ventilation specialists to ensure proper ventilation in your insulated areas.
Proper ventilation is essential for the overall performance of your insulation and the health of your home. By ensuring adequate airflow and moisture control, you can maximize your insulation’s effectiveness and maintain a healthy indoor environment for you and your family.
With proper ventilation in place, we can move on to the next step: testing and checking for proper insulation coverage.
Read more: How To Install Foil Insulation
Step 9: Testing and Checking for Proper Insulation Coverage
After completing the insulation installation process, it’s crucial to test and check for proper insulation coverage to ensure its effectiveness and efficiency. This step will help identify any areas with inadequate insulation and allow for necessary adjustments or additions. Follow these steps to test and check for proper insulation coverage:
- Visual inspection: Begin by visually inspecting the entire insulated area. Look for any gaps, thin spots, or areas where insulation may be missing. Check for proper coverage in corners, around obstacles, and in hard-to-reach areas.
- Use a thermal imaging camera: Use a thermal imaging camera or an infrared thermometer to identify areas of temperature difference that can indicate insulation gaps or insufficient coverage. These tools can help detect thermal bridging or areas where heat transfer occurs more easily.
- Consult a professional: If you’re unsure about the insulation coverage or need a more accurate assessment, consult with a professional energy auditor or insulation contractor. They can perform a comprehensive energy audit and thermal imaging assessment to identify any insulation deficiencies.
- Perform a blower door test: A blower door test can help determine the airtightness of your home and identify any air leaks that may affect insulation performance. By pressurizing or depressurizing the home, the blower door test can reveal areas of air infiltration or exfiltration.
- Measure insulation depth or thickness: Measure the depth or thickness of the insulation at various locations using a tape measure or ruler. Compare the measurements to the recommended R-value for your region and insulation type to ensure proper insulation coverage.
- Address any deficiencies: If deficiencies or gaps are identified during the testing and checking process, address them promptly. Add additional insulation material to areas with inadequate coverage, seal any gaps or cracks, and ensure consistent insulation throughout the entire insulated area.
- Maintain and monitor: Regularly monitor the performance of your insulation and conduct periodic checks for any new gaps, settling, or damage. Properly maintaining your insulation will help ensure its long-term effectiveness and efficiency.
Testing and checking for proper insulation coverage is a crucial step in the insulation installation process. It allows you to identify any areas that may require attention and make any necessary adjustments to optimize the performance of your insulation. By ensuring proper coverage, you can maximize energy efficiency, reduce heating and cooling costs, and maintain a comfortable living environment.
With proper insulation coverage confirmed, you have successfully completed the insulation installation process. Your home is now better equipped to maintain energy efficiency, comfort, and sustainability for years to come.
Remember to consult local building codes and regulations, follow manufacturer instructions, and consider hiring professional assistance if needed for specific insulation projects. Safety precautions should always be taken, including the use of personal protective equipment and following best practices for insulation installation.
Now it’s time to sit back, relax, and enjoy the benefits of a well-insulated home!
Conclusion
Congratulations! You have reached the end of our comprehensive guide on how to properly install insulation. By following the step-by-step instructions and recommendations outlined in this article, you are well-equipped to tackle this project and improve the comfort and energy efficiency of your home.
Installing insulation is not only a smart investment in terms of energy savings but also enhances the overall quality of your living space. Properly installed insulation helps regulate temperature, reduces energy consumption, minimizes drafts, and improves indoor comfort levels. Whether you’re insulating walls, attics, floors, or sealing around windows and doors, each step of the process plays a crucial role in achieving optimal insulation coverage.
Remember to assess your insulation needs carefully before beginning the installation. Evaluate the type of insulation suitable for each area, consider climate and local building codes, and gather all the necessary materials and tools in advance. Take the time to prepare the area properly, sealing air leaks, and addressing any moisture concerns. Proper ventilation is essential to ensure moisture control and maintain a healthy indoor environment.
During the installation process, pay attention to details, ensuring a snug fit, sealing gaps, and using the appropriate insulation supports. Regularly test and check for proper insulation coverage to address any deficiencies and maintain the effectiveness of your insulation over time.
We hope that this guide has provided you with valuable insights and guidance for your insulation installation project. However, it’s essential to note that every home is unique, and it is always advisable to consult local building codes, manufacturer guidelines, and consider professional assistance when needed.
By properly installing insulation, you not only reduce your carbon footprint and save on utility bills but also create a more comfortable and sustainable living environment. So, take the knowledge you’ve gained from this guide, roll up your sleeves, and get started on transforming your home into an energy-efficient haven.
Frequently Asked Questions about How To Properly Install Insulation
Was this page helpful?
At Storables.com, we guarantee accurate and reliable information. Our content, validated by Expert Board Contributors, is crafted following stringent Editorial Policies. We're committed to providing you with well-researched, expert-backed insights for all your informational needs.


0 thoughts on “How To Properly Install Insulation”