Articles
How To Remove Blown-in Insulation In Attic
Modified: October 18, 2024
Learn effective methods for removing blown-in insulation in your attic through our informative articles. Safely and efficiently tackle this home improvement project with expert tips and guidance.
(Many of the links in this article redirect to a specific reviewed product. Your purchase of these products through affiliate links helps to generate commission for Storables.com, at no extra cost. Learn more)
Introduction
Welcome to our comprehensive guide on how to remove blown-in insulation in the attic. If you’re dealing with older or damaged insulation, or if you’re planning to upgrade your attic insulation, it’s essential to know how to properly remove existing blown-in insulation. Removing blown-in insulation may seem like a daunting task, but with the right tools, safety precautions, and methods, you can successfully tackle this project.
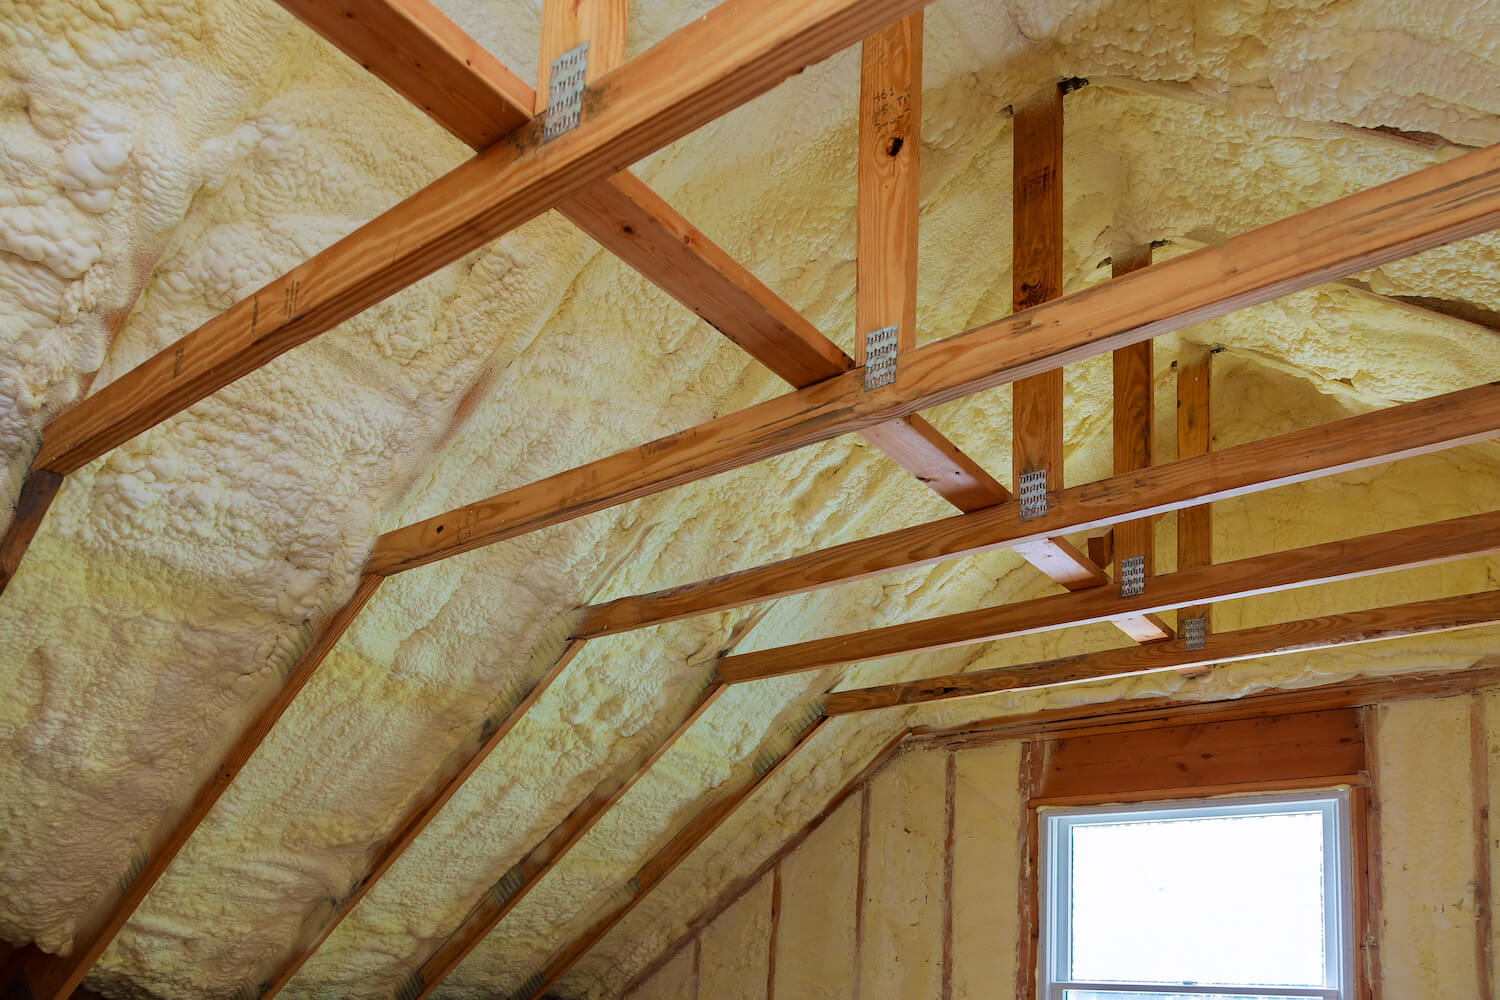
Blown-in insulation is a popular type of insulation used in attics and walls. It consists of loose, fibrous materials such as cellulose, fiberglass, or mineral wool, which are blown into the desired space to create a thermal barrier. Over time, insulation can settle, become damaged by water or pests, or simply lose its effectiveness. In such cases, it is necessary to remove the insulation before installing new or improved insulation.
Before jumping into the removal process, it’s important to assess the condition of your attic and the insulation. Are there any signs of water damage, mold, or pest infestation? Is the insulation evenly spread or concentrated in certain areas? Take the time to thoroughly inspect your attic as it will help you determine the best approach to removing the blown-in insulation.
In this guide, we will walk you through the step-by-step process of safely and effectively removing blown-in insulation. From gathering the necessary tools and materials to the final clean-up, we’ve got you covered. We will also provide valuable safety precautions to ensure that the removal process is carried out without any risk to your health or the structural integrity of your home.
Remember, removing blown-in insulation can be a physically demanding task, so make sure to take breaks, stay hydrated, and enlist the help of a friend or family member if needed. Now, let’s get started and learn how to remove blown-in insulation from your attic!
Key Takeaways:
- Safely and effectively remove blown-in insulation from your attic by following a step-by-step guide, prioritizing safety, and using proper tools and protective gear.
- Create a clean and well-prepared attic space by assessing, preparing, and organizing the work area, utilizing insulation removal equipment, and disposing of insulation responsibly.
Safety Precautions
Before you begin the process of removing blown-in insulation from your attic, it’s important to prioritize safety. Insulation materials may contain harmful fibers, dust, or contaminants that can cause irritation to the skin, eyes, and respiratory system. Additionally, navigating through the attic space can be hazardous due to low visibility, potential tripping hazards, and the risk of falling through the ceiling. Follow these safety precautions to ensure a safe and successful insulation removal process:
- Wear Proper Protective Gear: Before entering the attic, make sure you are equipped with the necessary personal protective equipment (PPE). This should include goggles or safety glasses, a dust mask or respirator, gloves, long-sleeved clothing, and sturdy boots to protect your feet.
- Ensure Adequate Ventilation: Attics can become hot and stuffy, especially during warmer months. Before you start working, ensure proper ventilation in the attic space to prevent overheating and reduce the risk of respiratory distress.
- Turn Off Electricity: Before entering the attic, turn off the electricity to avoid any risk of electrocution. This will also prevent accidental damage to electrical wires during the removal process.
- Use Proper Lighting: Attics are often poorly lit, making it difficult to see where you’re walking and what you’re doing. Use a bright flashlight or headlamp to improve visibility and reduce the risk of tripping or falling.
- Secure Attic Access: Ensure that the access point to the attic is safe and secure. Use a sturdy ladder and make sure it is properly positioned and stable. If using an attic hatch or ladder, ensure that it is in good condition and can support your weight.
- Maintain a Clear Workspace: Clear any clutter, debris, or objects from the attic floor to create a clean and safe workspace. Remove any potential tripping hazards, such as loose boards or nails, and be cautious of electrical wiring or other hidden obstacles.
- Work in Pairs: It’s recommended to have someone else present while working in the attic. They can assist you, provide additional lighting, and be available in case of an emergency.
- Take Breaks and Hydrate: Insulation removal can be physically demanding. Take regular breaks to rest and hydrate, especially if you’re working in a hot and confined space.
- Dispose of Insulation Properly: As you remove the insulation, take care to dispose of it properly according to local regulations. Bag the insulation in heavy-duty plastic bags and seal them tightly to prevent the fibers from spreading.
By following these safety precautions, you can ensure that the removal process is carried out in a safe and controlled manner. Always prioritize your safety and well-being throughout the insulation removal process.
Tools and Materials Needed
Before you begin the process of removing blown-in insulation from your attic, it’s important to gather the necessary tools and materials. Here’s a list of items you’ll need to have on hand for a successful insulation removal:
- Protective Gear: Safety goggles or glasses, a respirator or dust mask, gloves, long-sleeved clothing, and sturdy boots.
- LED Flashlight or Headlamp: Adequate lighting is essential for navigating through the attic space and identifying areas of insulation to be removed.
- Utility Knife: A sharp utility knife will come in handy for cutting and removing any plastic or vapor barriers that may be present.
- Insulation Removal Bags: Heavy-duty plastic bags to collect and dispose of the removed insulation safely.
- Insulation Vacuum or Blower: Depending on the amount of insulation to be removed, you can choose either an insulation vacuum or blower. Renting or purchasing this equipment will make the removal process quicker and more efficient.
- Extension Cord: If you’re using an insulation vacuum or blower, make sure you have a long extension cord to reach the attic space.
- Duct Tape: Use duct tape to secure plastic sheeting over any openings or vents in the attic to prevent insulation from spreading into other areas of your home.
- Broom and Dustpan: A broom and dustpan will come in handy for sweeping up any loose insulation or debris after the removal process.
- Disposable Coveralls: Disposable coveralls can provide an extra layer of protection against insulation fibers and dust.
- Plastic Sheeting: Use plastic sheeting to cover and protect any items or areas in the attic that you wish to keep insulation-free.
- Trash Bags: Keep a supply of trash bags nearby to dispose of any additional waste generated during the removal process.
- Ladder: A sturdy ladder is essential for safe access to the attic. Choose a ladder that is the appropriate height and weight capacity for your needs.
Having these tools and materials readily available will ensure that you can efficiently and safely remove the blown-in insulation from your attic. It’s always a good idea to gather everything you need before starting the project to avoid unnecessary interruptions.
Step 1: Assess the Attic and Insulation
Before you begin the process of removing blown-in insulation from your attic, it’s crucial to assess the condition of your attic and the insulation itself. This will help you determine the best approach to removing the insulation and ensure that any underlying issues are addressed.
Start by entering your attic and taking a close look at the insulation. Look for signs of water damage, mold, pest infestation, or any other issues that may have compromised the insulation’s performance. Pay attention to areas where the insulation is unevenly spread or concentrated, as this may indicate areas of higher insulation density.
Check for any exposed wiring or electrical hazards in your attic. Ensure that the insulation isn’t covering or in direct contact with electrical components or fixtures. If you come across any exposed or damaged wiring, it’s essential to address the issue before proceeding with the removal process.
Take note of any access points, such as hatches or doors, and make sure they are in good condition and easily accessible. Check if there are any obstacles or obstructions in the attic such as ductwork, pipes, or structural elements that may hinder the removal process.
Additionally, consider the overall condition of your attic, including the presence of proper ventilation. Attics with inadequate ventilation can lead to moisture buildup and potential mold issues. Evaluate the ventilation system and make plans to improve it if necessary.
Take measurements of the attic and calculate the approximate square footage to get an idea of the scope of the insulation removal project. This will help you estimate the amount of time, equipment, and labor required for the task.
By carefully assessing the attic and insulation before starting the removal process, you’ll be better equipped to plan and execute each subsequent step. It will also ensure that any underlying issues are addressed, resulting in a more efficient and successful insulation removal.
Step 2: Prepare the Work Area
Once you have assessed the condition of your attic and insulation, the next step in removing blown-in insulation is to prepare the work area. Proper preparation will ensure a safe and organized environment for the removal process.
Start by clearing the attic of any obstacles or obstructions. Remove any stored items or debris that may get in the way or impede your movement. This will give you ample space to maneuver and safely access the areas where insulation needs to be removed.
Before you begin, it’s important to protect any valuable items or sensitive areas in the attic. Cover them with plastic sheeting or drop cloths to prevent them from getting dirty or damaged during the insulation removal process. Pay special attention to electronic equipment, furniture, and any other items that may be susceptible to dust or debris.
Consider sealing off the rest of your home from the attic to prevent insulation fibers from spreading into living areas. Use plastic sheeting and duct tape to cover and seal any openings or vents in the attic. This will help contain the insulation and minimize its dispersal while you remove it.
If there are any exposed wiring or electrical fixtures in the attic, take extra precautions to protect them. Cover them with plastic sheeting or wrap them with insulation-free materials to prevent damage during the removal process.
Ensure that the attic is well-lit to provide sufficient visibility during the insulation removal. Use LED flashlights or headlamps to enhance your ability to see clearly and safely navigate the attic space. Consider setting up additional lighting sources if needed.
Take care to secure any access points or attic hatches to prevent accidents or falls. Ensure that ladders or stairs leading to the attic are stable, properly positioned, and in good condition. Triple-check that they can support your weight and provide safe access to the work area.
By taking the time to prepare the work area, you’ll create a safe and efficient environment for removing the blown-in insulation. With everything organized and protected, you can proceed with the insulation removal process smoothly and effectively.
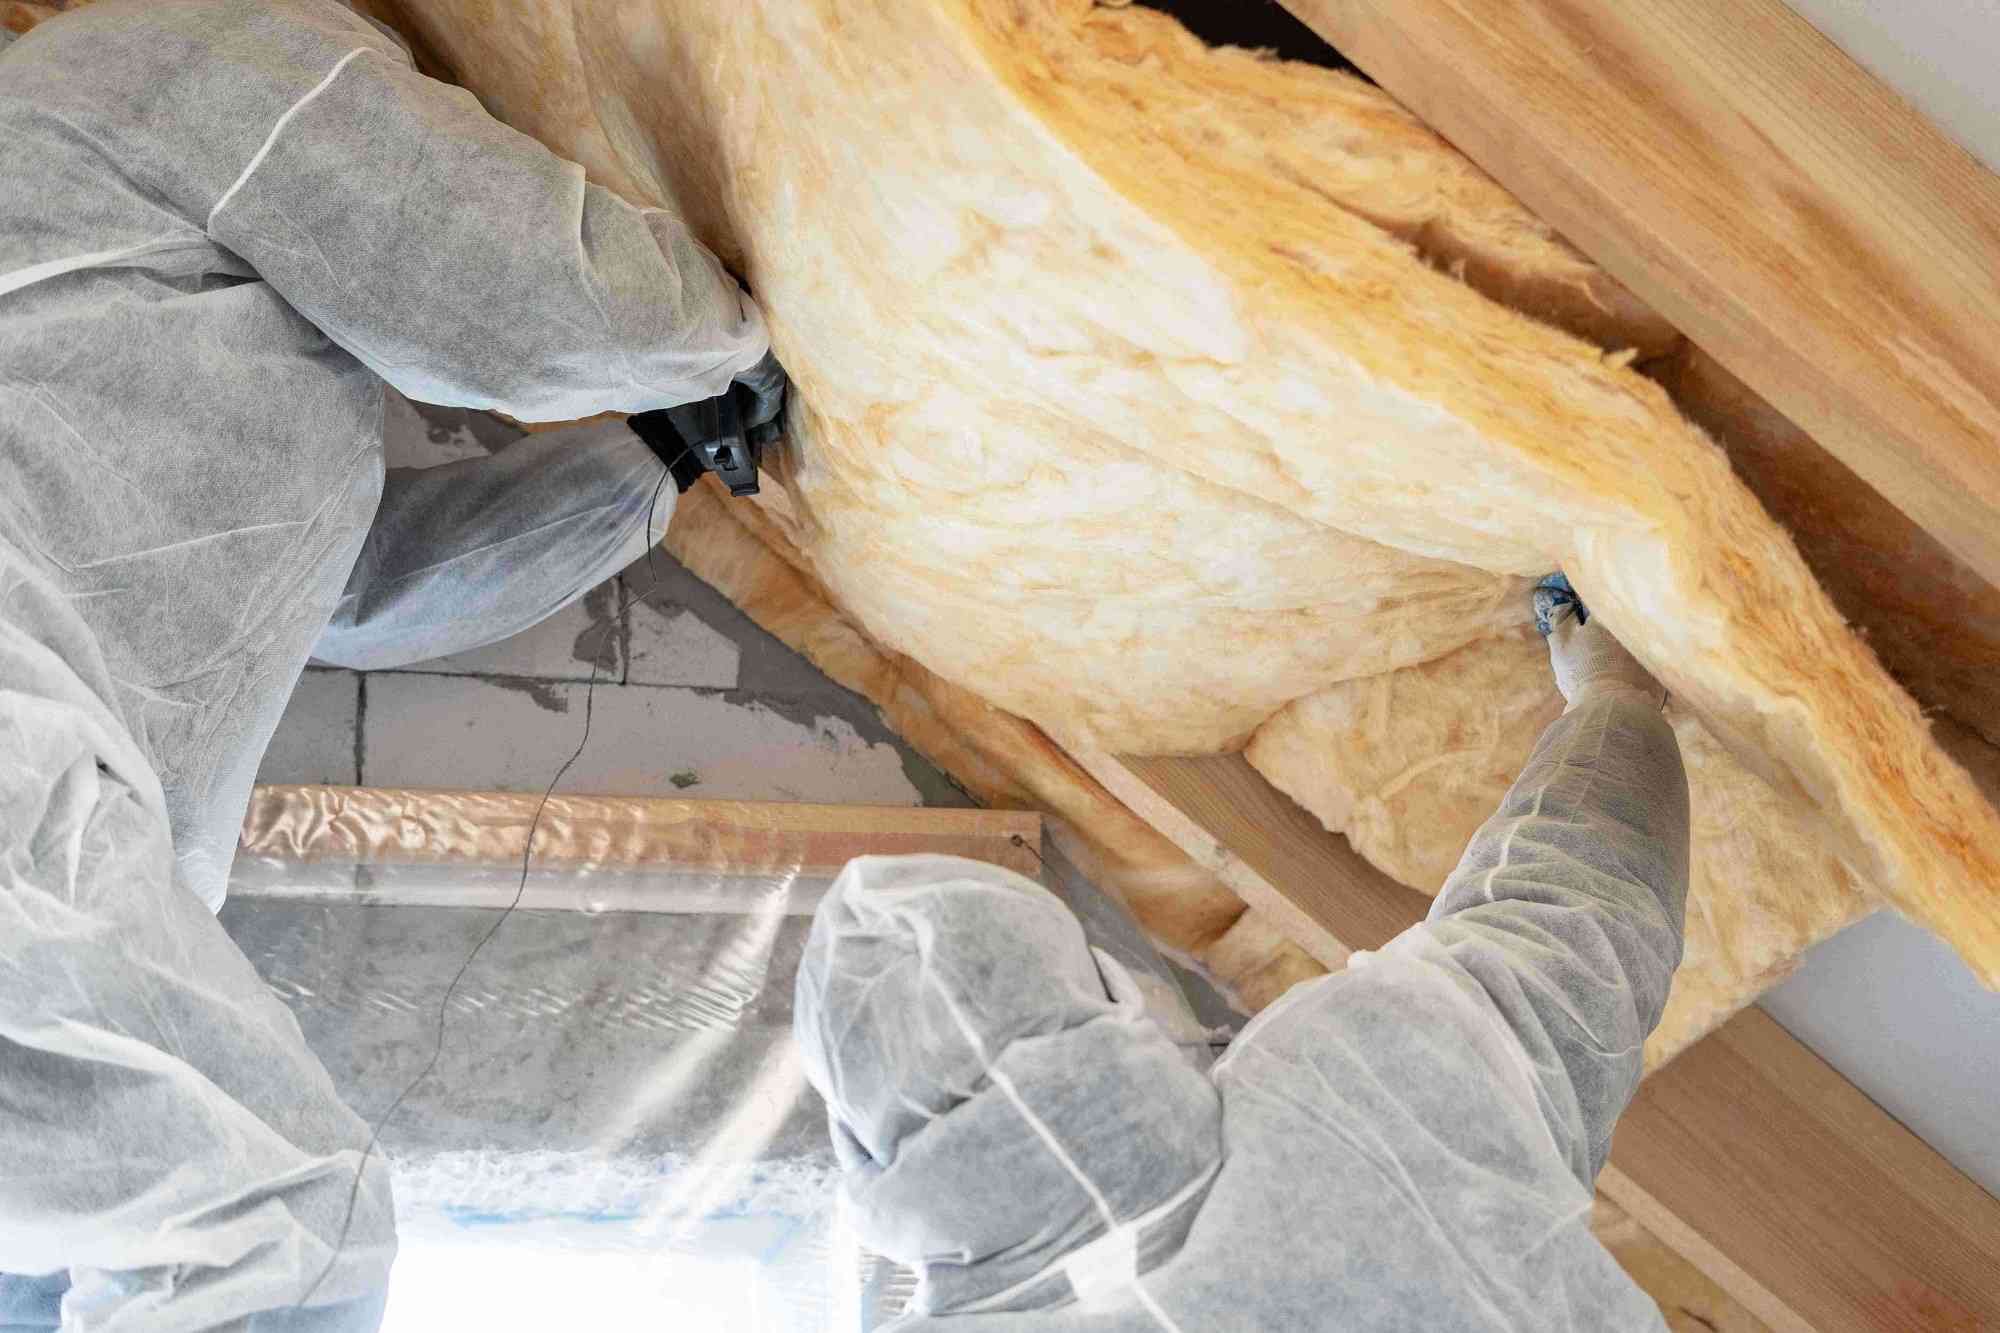
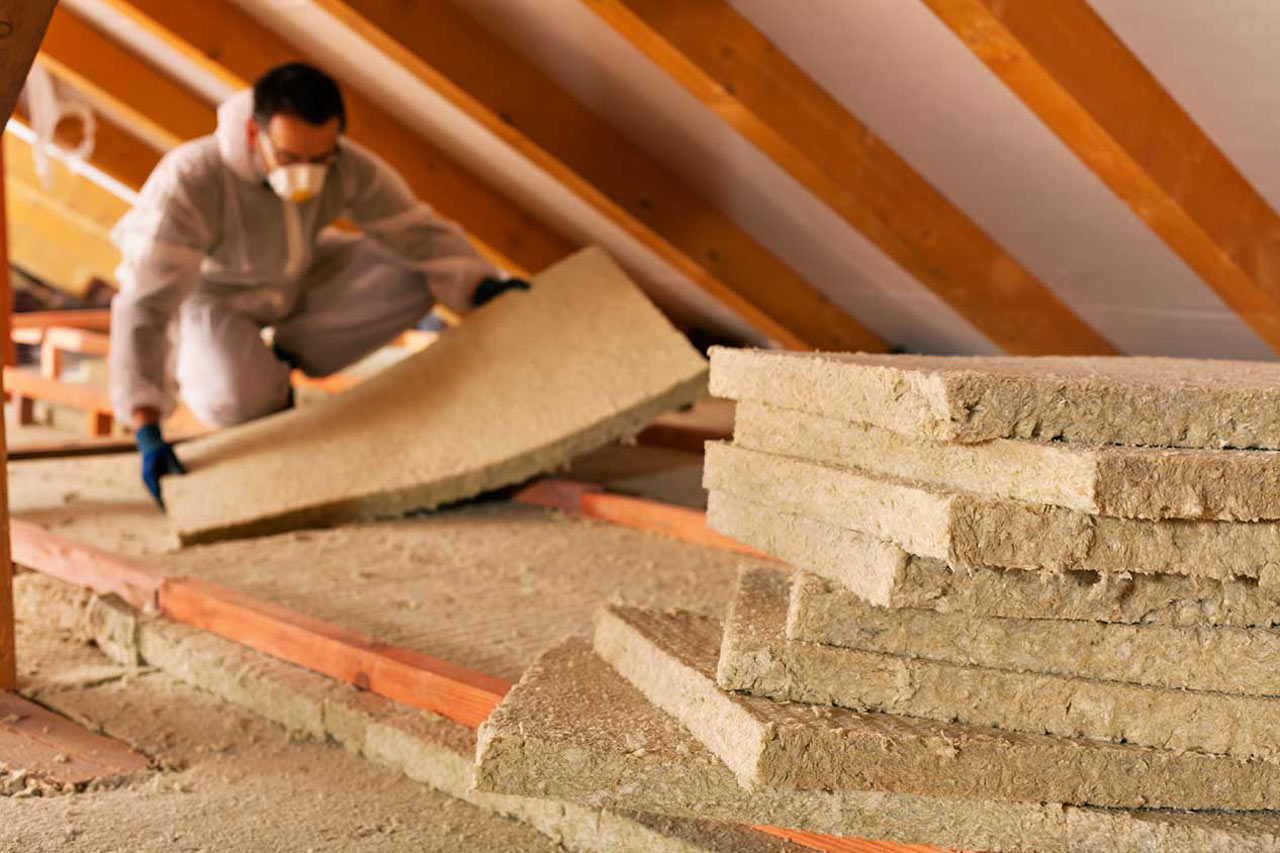
Step 3: Wear Protective Gear
When removing blown-in insulation from your attic, it’s crucial to prioritize your safety by wearing the appropriate protective gear. Insulation materials can contain harmful fibers, dust, and contaminants that can irritate your skin, eyes, and respiratory system. By wearing the following protective gear, you can minimize your exposure to these hazards:
- Safety Goggles or Glasses: Protect your eyes from insulation fibers and airborne particles by wearing safety goggles or glasses. Ensure they fit snugly and provide full coverage.
- Respirator or Dust Mask: Insulation removal produces vast amounts of dust, which may include hazardous particles. Wear a respirator or dust mask to prevent inhalation of these particles and protect your respiratory system. Choose a mask with a high-efficiency particulate air (HEPA) filter for better filtration.
- Gloves: Insulation fibers can cause skin irritation. It’s essential to wear gloves, such as thick work gloves or disposable gloves, to shield your hands from direct contact with the insulation and minimize the risk of any skin-related issues.
- Long-Sleeved Clothing: Protect your arms and torso by wearing long-sleeved clothing, such as a sturdy shirt or coveralls. This will prevent insulation fibers from coming into direct contact with your skin.
- Sturdy Boots: Wear sturdy boots with thick soles to protect your feet from stepping on insulation debris or encountering any sharp objects in the attic space. This will provide better stability and reduce the risk of injury.
It’s important to properly inspect and maintain your protective gear before starting the insulation removal process. Ensure that your goggles or glasses are not scratched and provide clear vision. Check that your respirator or dust mask fits snugly and has a clean, functioning filter. Replace or repair any damaged gloves and ensure that your boots offer good traction and support.
Remember to wear your protective gear throughout the entire insulation removal process. Insulation fibers can become airborne and settle on surfaces even after the main removal is complete. By keeping your protective gear on, you’ll avoid any potential exposure to these fibers.
Additionally, it’s crucial to follow proper handling and disposal practices when removing and disposing of the insulation and any protective gear that may have come into contact with it. Seal used gloves, masks, and disposable coveralls in a plastic bag and dispose of them according to local regulations. Clean or wash reusable protective gear thoroughly after use.
By wearing the appropriate protective gear, you are taking proactive steps to protect your health and safety during the insulation removal process. Prioritizing safety ensures a more successful and risk-free experience.
When removing blown-in insulation in the attic, wear protective clothing, a mask, and goggles to prevent irritation from the fibers. Use a vacuum with a HEPA filter to carefully remove the insulation, and dispose of it properly.
Step 4: Remove Obstacles and Obstructions
Before you start removing the blown-in insulation from your attic, it’s important to clear the space of any obstacles and obstructions that may hinder your progress. Clearing the area will make it easier for you to access the insulation and ensure a smoother removal process. Follow these steps to remove obstacles and obstructions in your attic:
- Clear the Floor: Remove any stored items, debris, or obstructions from the attic floor. This includes old boxes, furniture, or any other items that may block your path or make it difficult to move around.
- Organize Cables and Wiring: Take the time to organize any cables or wiring in the attic. Secure them properly and ensure they are neatly bundled or tucked away to prevent any tripping hazards or accidental damage during the insulation removal process.
- Reposition or Remove Large Obstacles: If there are any larger obstacles such as equipment or bulky objects in the attic, consider repositioning them or removing them temporarily. This will create more space to work and allow for easier access to the insulation.
- Clear Pathways: Clear any pathways or access routes that lead to the areas where the insulation needs to be removed. This will allow you to move freely and safely without stumbling over objects or getting tangled in cables.
- Repair or Reinforce Structural Issues: If you encounter any structural issues in the attic, such as weakened floorboards or damaged support beams, address them before proceeding with the insulation removal. Consult a professional if necessary to ensure the attic is structurally sound.
Removing obstacles and obstructions will create a safer and more efficient workspace for the insulation removal process. It will help minimize the risk of accidents or injuries and allow for smoother navigation throughout the attic.
As you clear the space, remember to be cautious of any live electrical wires, plumbing pipes, or other hidden hazards that may be present in the attic. Take the necessary precautions to avoid contact with these elements and work around them safely.
By removing obstacles and obstructions, you’ll have a clear path for removing the blown-in insulation and ensure a more streamlined and successful removal process.
Step 5: Create an Extraction Point
Creating an extraction point is a crucial step in the process of removing blown-in insulation from your attic. An extraction point is where you will direct the insulation towards for efficient removal. By following these steps, you can create an effective extraction point:
- Locate an Accessible Area: Choose a location in the attic that is easily accessible and provides ample space for setting up the extraction point. This area should be clear of any obstructions or obstacles.
- Clear the Area: Remove any debris, objects, or insulation that may be present in the chosen extraction point area. Make sure the space is clean and free of any potential blockages that could hinder the extraction process.
- Cover or Seal Openings: If there are any vents, openings, or ducts near the extraction point, cover them with plastic sheeting or use duct tape to seal them off. This will prevent insulation fibers from spreading into other areas of your home during the removal process.
- Set Up the Insulation Vacuum or Blower: Place the insulation vacuum or blower near the extraction point. Make sure it is securely positioned and connected to a power source or extension cord, if required. Follow the manufacturer’s instructions for proper setup and operation.
- Arrange the Disposal Bags: Position heavy-duty plastic bags or containers near the extraction point to collect the removed insulation. Ensure that the bags are easily accessible and can accommodate the volume of insulation you’ll be removing.
- Create a Barrier: Use plastic sheeting or drop cloths to create a barrier around the extraction point. This will help contain the blown-in insulation and prevent it from spreading beyond the designated area.
By creating a well-defined extraction point, you can efficiently direct the removed insulation to a specific area for disposal. This will minimize the time and effort required to clean up the attic and ensure that the insulation does not spread throughout the space.
Remember, the setup of the extraction point may vary depending on the equipment and method you are using to remove the blown-in insulation. Always refer to the manufacturer’s instructions and follow their recommendations for setting up the extraction point.
Once the extraction point is established, you are ready to proceed with removing the blown-in insulation from your attic in a controlled and effective manner.
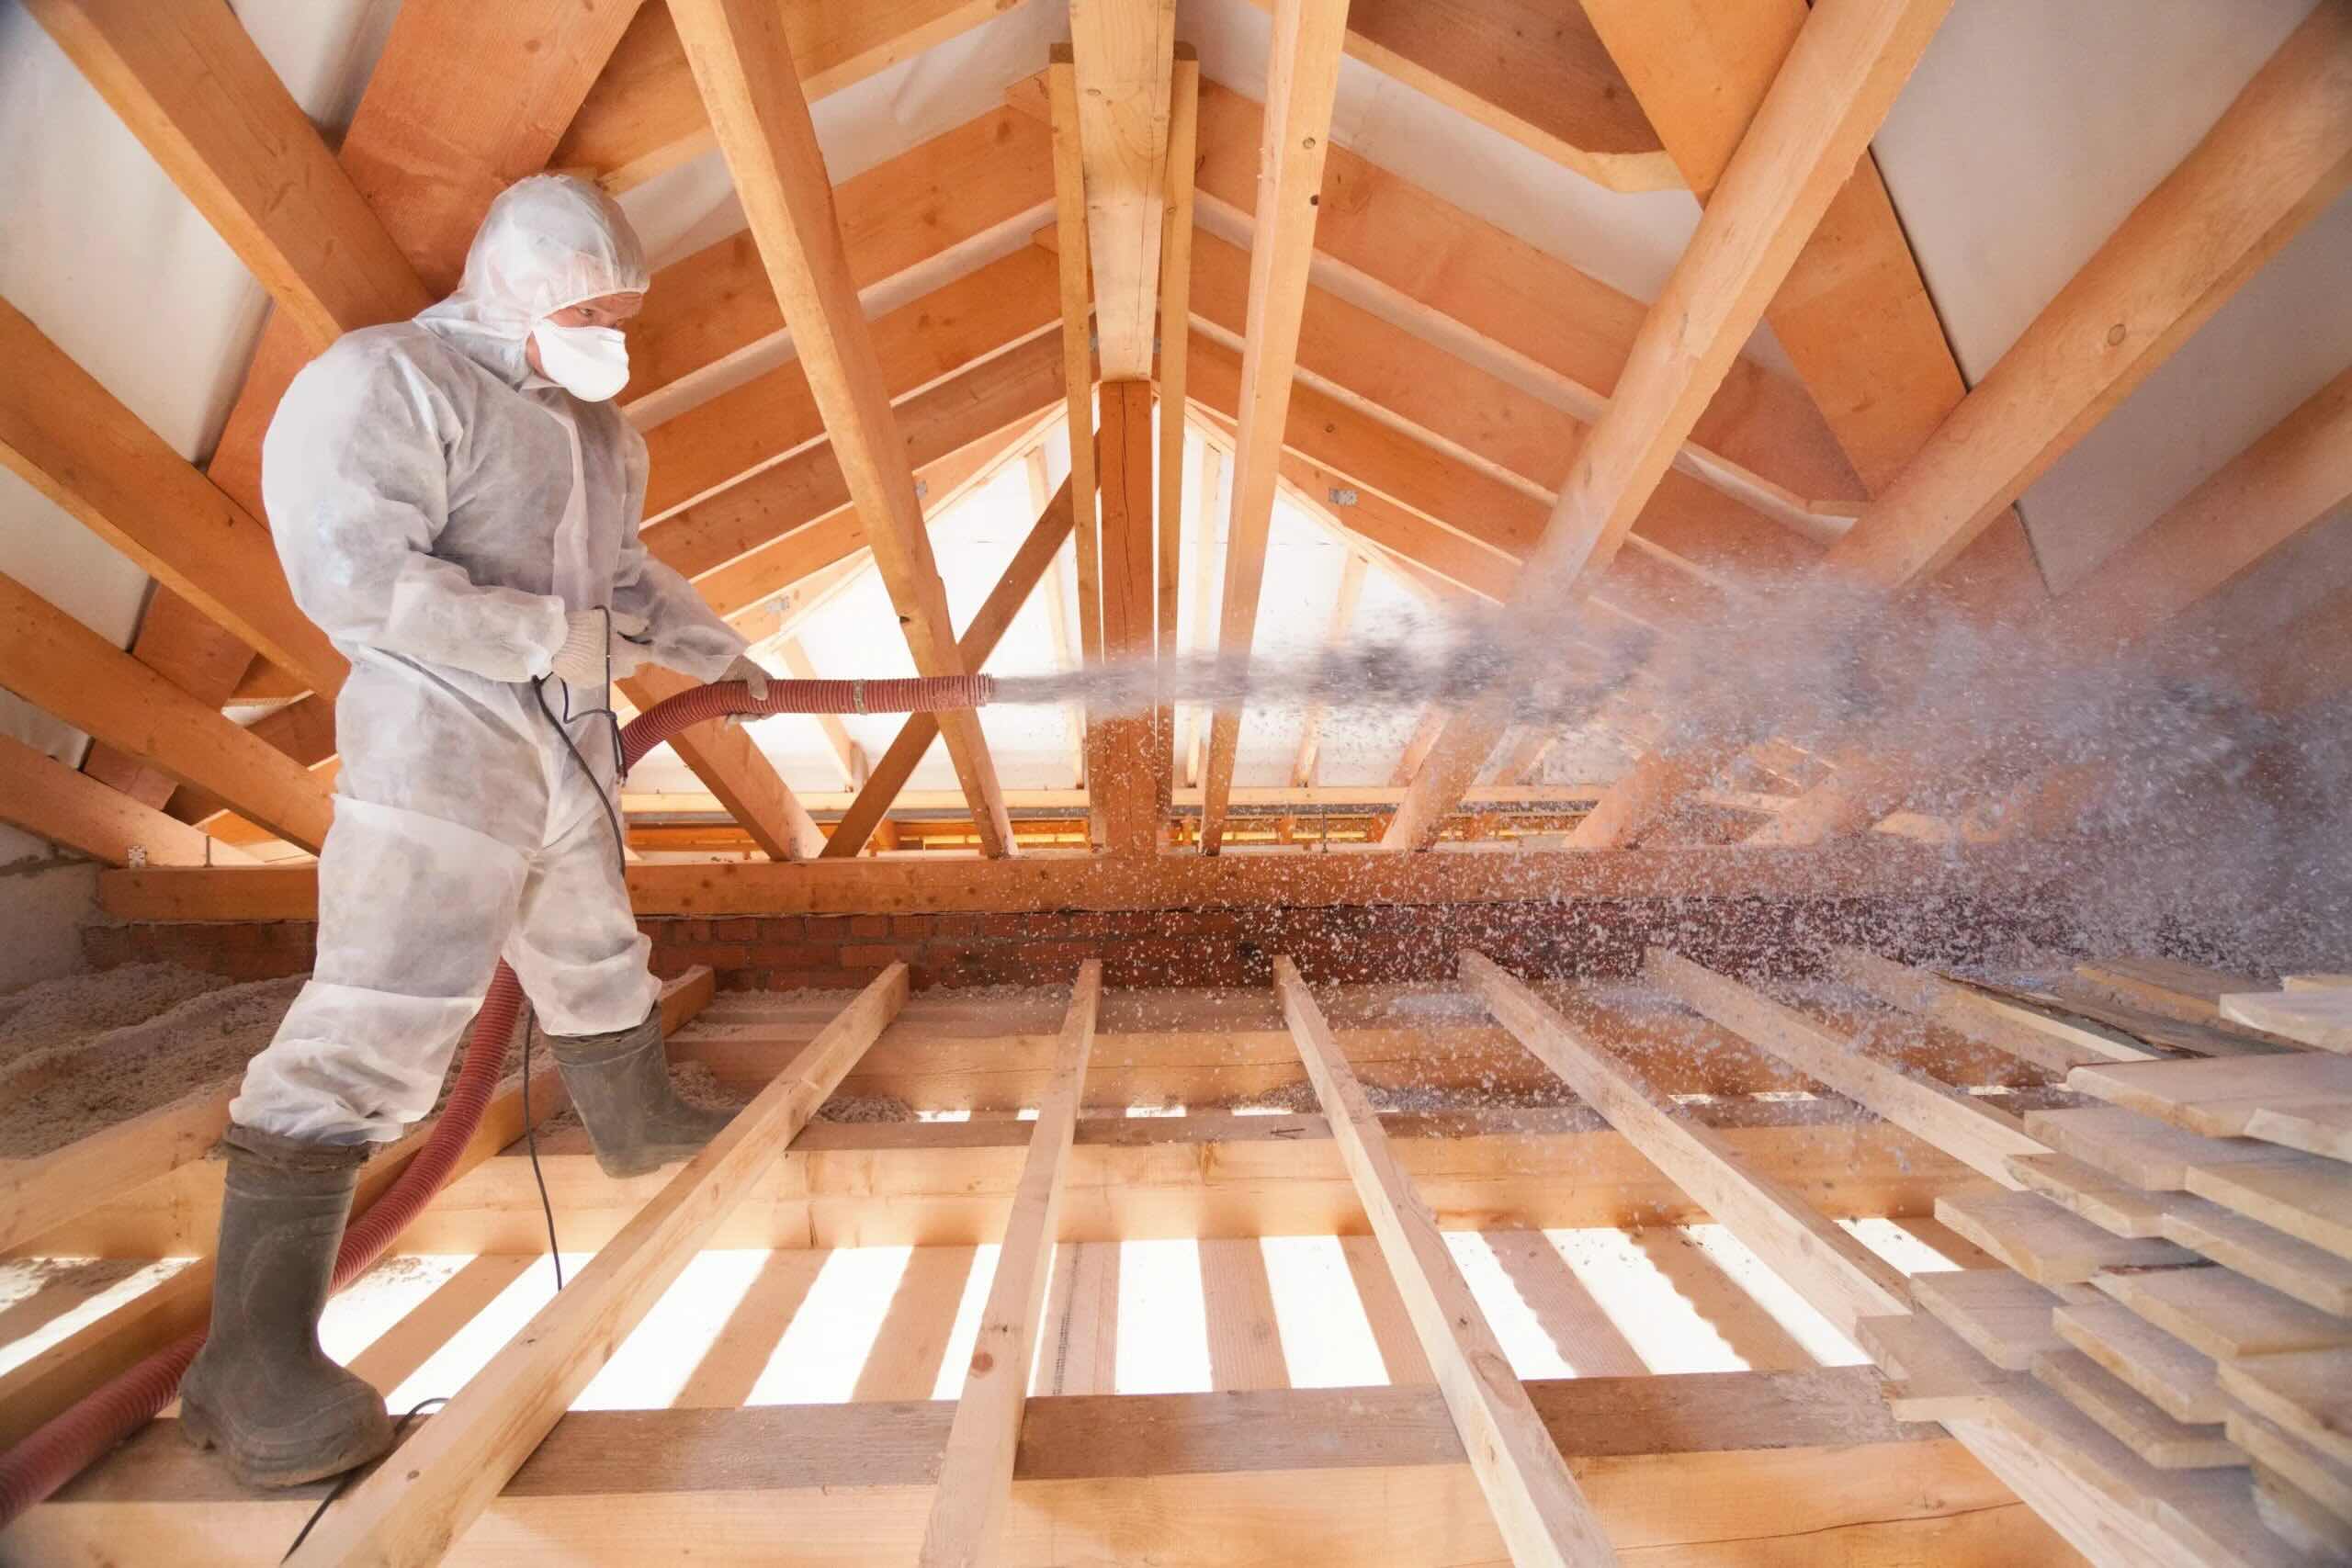
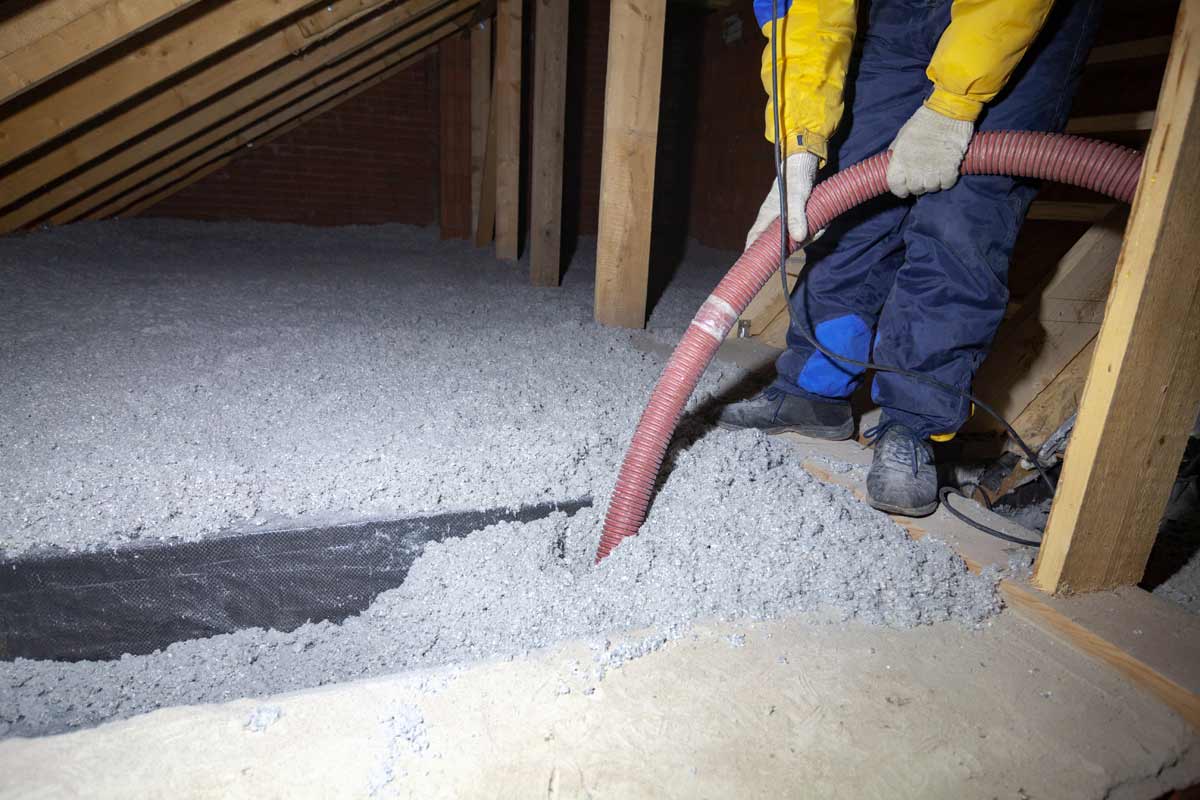
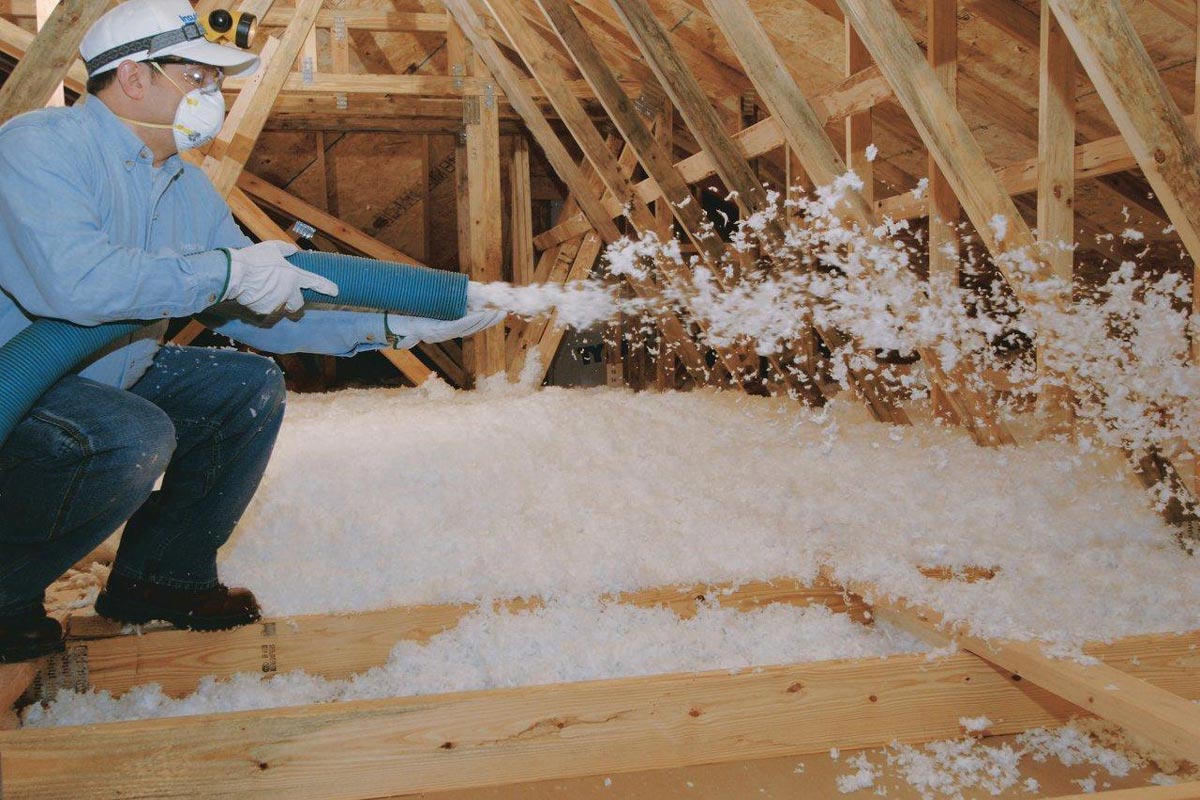
Step 6: Use Insulation Vacuum or Blower
Using an insulation vacuum or blower is a key step in the process of removing blown-in insulation from your attic. The method you choose will depend on the amount of insulation to be removed and the equipment you have available. Follow these steps to effectively use an insulation vacuum or blower:
- Position the Equipment: Place the insulation vacuum or blower near the extraction point, ensuring it is secure and properly connected to a power source or extension cord. Position it in a way that allows for easy access and maneuverability during the removal process.
- Turn on the Equipment: Before starting the removal process, turn on the insulation vacuum or blower according to the manufacturer’s instructions. Allow it to reach its full operating speed or capacity before beginning the actual removal.
- Work in Sections: Divide the attic into manageable sections. Start in one corner and systematically work your way across the attic, removing the blown-in insulation in small sections at a time. This will help keep the process organized and ensure that all areas are thoroughly cleaned.
- Direct the Hose or Nozzle: Use the hose or nozzle of the insulation vacuum or blower to gently collect the blown-in insulation. Direct the airflow or suction towards the targeted insulation, being careful not to dislodge or damage any wires, fixtures, or other elements in the attic.
- Move in a Controlled Manner: Slowly move the hose or nozzle in a back-and-forth or sweeping motion, collecting the insulation as you go. Take your time and maintain a steady pace to ensure efficient removal without causing unnecessary disturbance or mess.
- Avoid Overfilling the Bags: As you collect the insulation, regularly check the disposal bags or containers to make sure they are not becoming too full. Replace or empty the bags as needed to prevent any overflow or clogging in the equipment.
- Work from Top to Bottom: Start removing insulation from the highest areas of the attic and work your way down. This will prevent any loose debris or insulation from falling onto areas you have already cleared.
- Be Mindful of Equipment Heat: Insulation vacuum or blower motors can generate heat during operation. Be mindful of the equipment’s temperature and take breaks as needed to prevent overheating and prolong the lifespan of the machine.
Take your time and work systematically to ensure thorough removal of the blown-in insulation. Pay attention to detail and be mindful of any potential hazards or obstacles in the attic. If you are using an insulation vacuum or blower for an extended period, make sure to take regular breaks, stay hydrated, and monitor your energy levels.
By effectively utilizing the insulation vacuum or blower, you can efficiently remove the blown-in insulation from your attic, leaving you with a clean and clear space for any future insulation needs or upgrades.
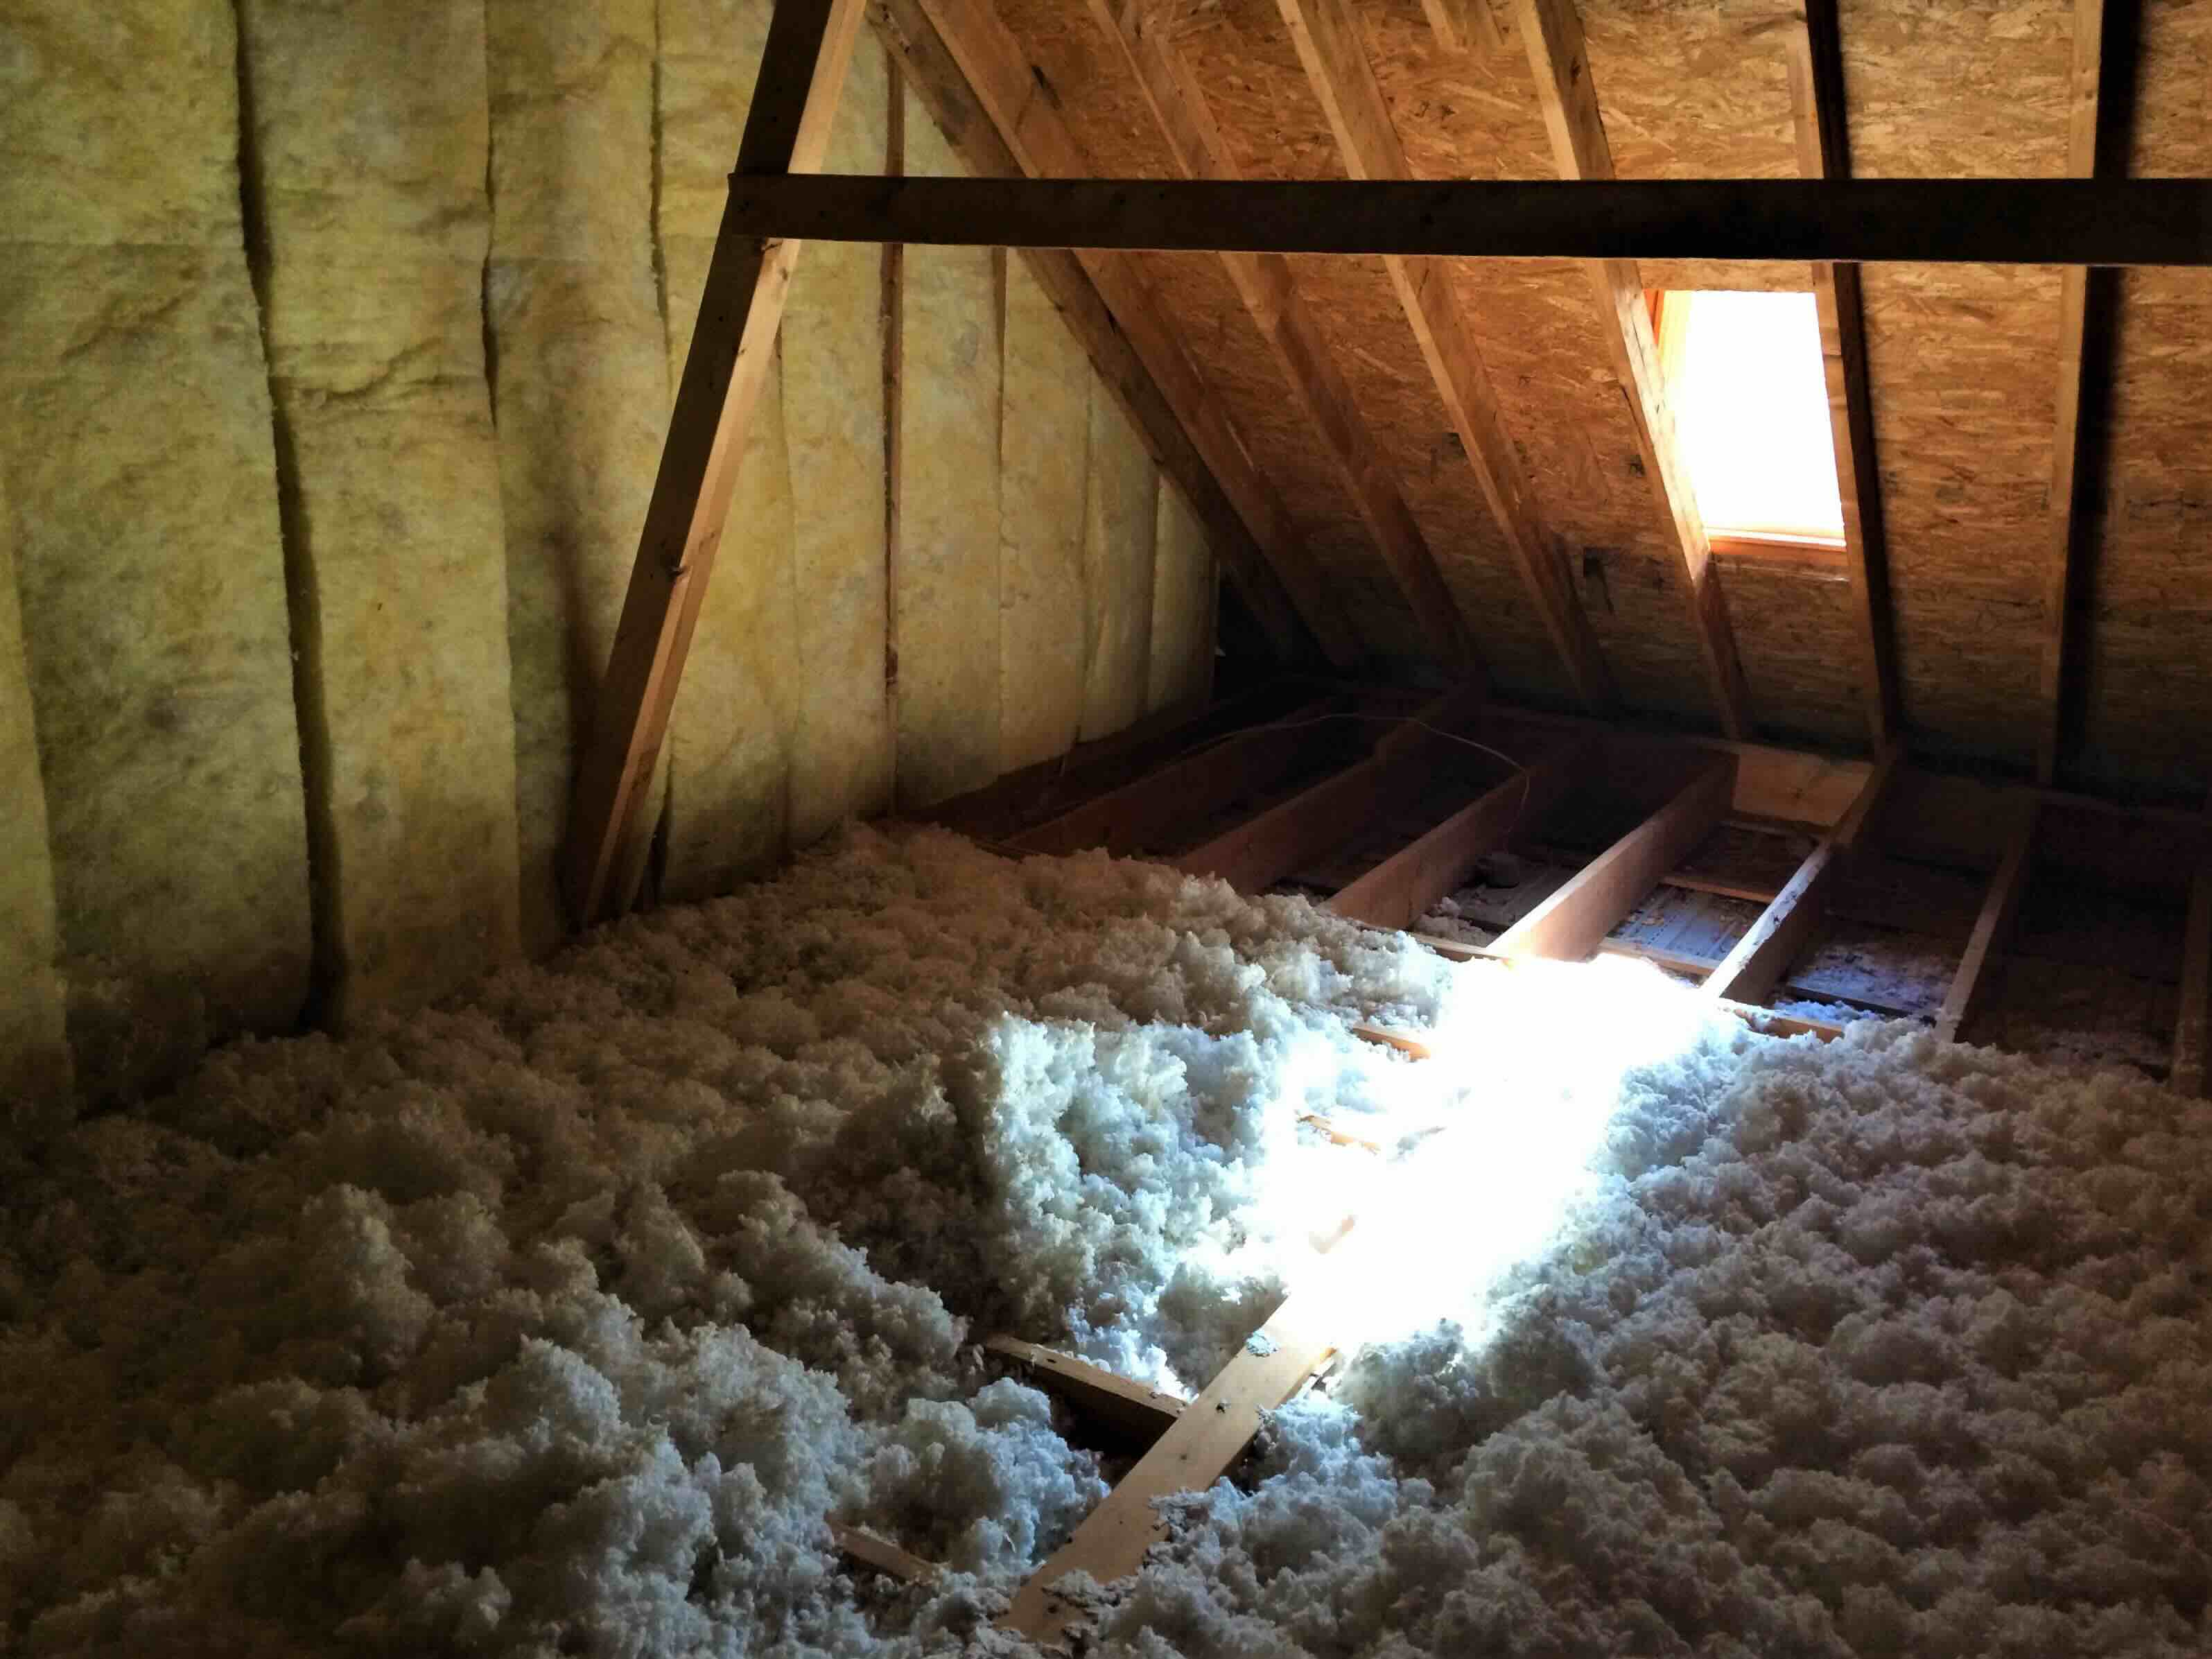
Step 7: Collect and Dispose of Insulation
Once the blown-in insulation has been removed from your attic, it’s important to collect and dispose of it properly. Proper disposal ensures environmental responsibility and prevents any potential health hazards. Follow these steps to collect and dispose of the insulation:
- Turn off the Equipment: Before you begin collecting the insulation, turn off the insulation vacuum or blower and disconnect it from the power source. This will prevent any accidental release of insulation during the collection process.
- Gather the Collection Bags: Gather the disposal bags or containers that you have prepared near the extraction point. Ensure that they are easily accessible and can securely hold the collected insulation.
- Seal the Bags: As you collect the insulation, use zip ties or twist ties to securely seal the disposal bags. This will prevent any fibers or dust from escaping and causing a potential mess or health hazards.
- Minimize Dust: While collecting the insulation, be mindful of minimizing dust as much as possible. Use slow and controlled movements when handling the bags to avoid stirring up the insulation and releasing dust into the air.
- Dispose of the Insulation: Check the local regulations and guidelines for proper disposal of insulation in your area. Some areas allow for the disposal of insulation as regular household waste, while others may require special disposal methods. Follow the designated disposal options to ensure compliance.
- Transport Carefully: If you need to transport the collected insulation to a disposal facility, exercise caution to avoid any spills or leakage. Use a secure vehicle with a covered storage area, or double-bag the insulation to prevent any potential mess during transportation.
- Clean the Work Area: Once the insulation has been collected and disposed of, take the time to clean up the work area. Use a broom and dustpan to sweep up any remaining debris or insulation particles. Dispose of the collected debris according to local waste disposal guidelines.
- Store Equipment Properly: After the insulation removal process is complete, properly store the insulation vacuum, blower, or any other equipment you have used. Clean and maintain them as per the manufacturer’s instructions to ensure their longevity and efficient operation for future use.
Properly collecting and disposing of the insulation is essential for maintaining a clean and safe environment. By following the recommended steps and adhering to local waste disposal regulations, you can ensure responsible handling and disposal of the removed insulation.
Remember, insulation materials may contain harmful fibers, so it’s important to handle the collected insulation with care and take precautions to minimize any potential dust or particle release. By disposing of the insulation properly, you contribute to a cleaner and healthier environment.
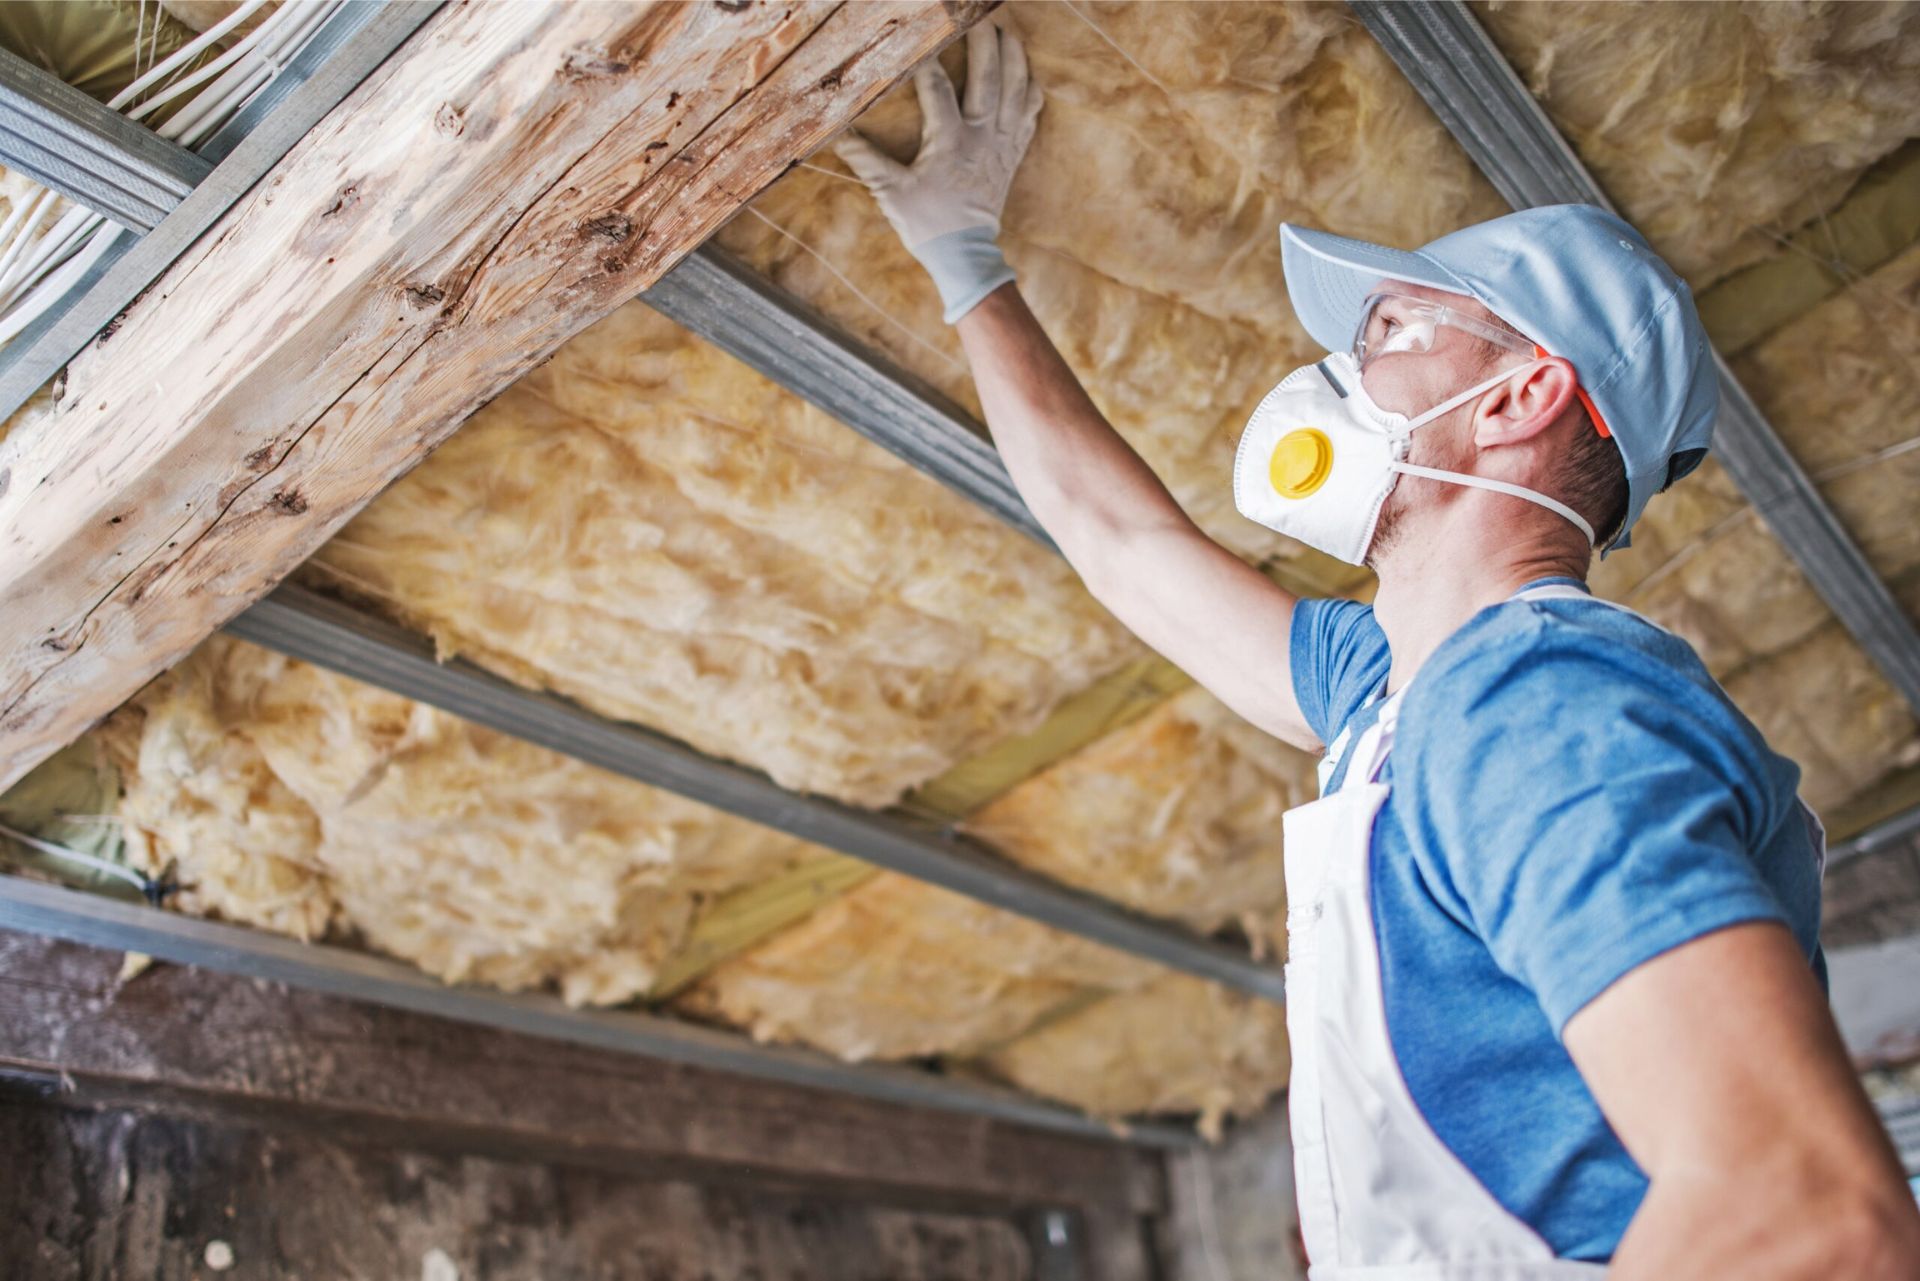
Step 8: Clean Up and Finalize
After successfully removing and disposing of the blown-in insulation from your attic, it’s time to clean up and finalize the project. This step ensures that your attic is left in a clean and organized state and prepares it for any future insulation or renovation projects. Follow these steps to complete the clean-up process:
- Inspect the Attic: Take a final look around the attic to ensure that all insulation has been removed. Check corners, crevices, and hard-to-reach areas to make sure no insulation fibers are left behind.
- Dispose of Cleaning Materials: If you used disposable gloves, coveralls, or other protective gear during the removal process, discard them according to local waste disposal regulations. Properly seal them in a bag before placing them in a waste bin.
- Sweep and Vacuum: Using a broom or vacuum cleaner, thoroughly sweep or vacuum the attic floor to remove any remaining dust, debris, or small insulation particles. Pay extra attention to corners and edges where debris may accumulate.
- Inspect for Damage or Issues: Take this opportunity to inspect the attic for any damage, leaks, or issues that need attention. Look for signs of water damage, pest infestation, or deteriorated insulation. Address any problems that you come across or consult a professional if necessary.
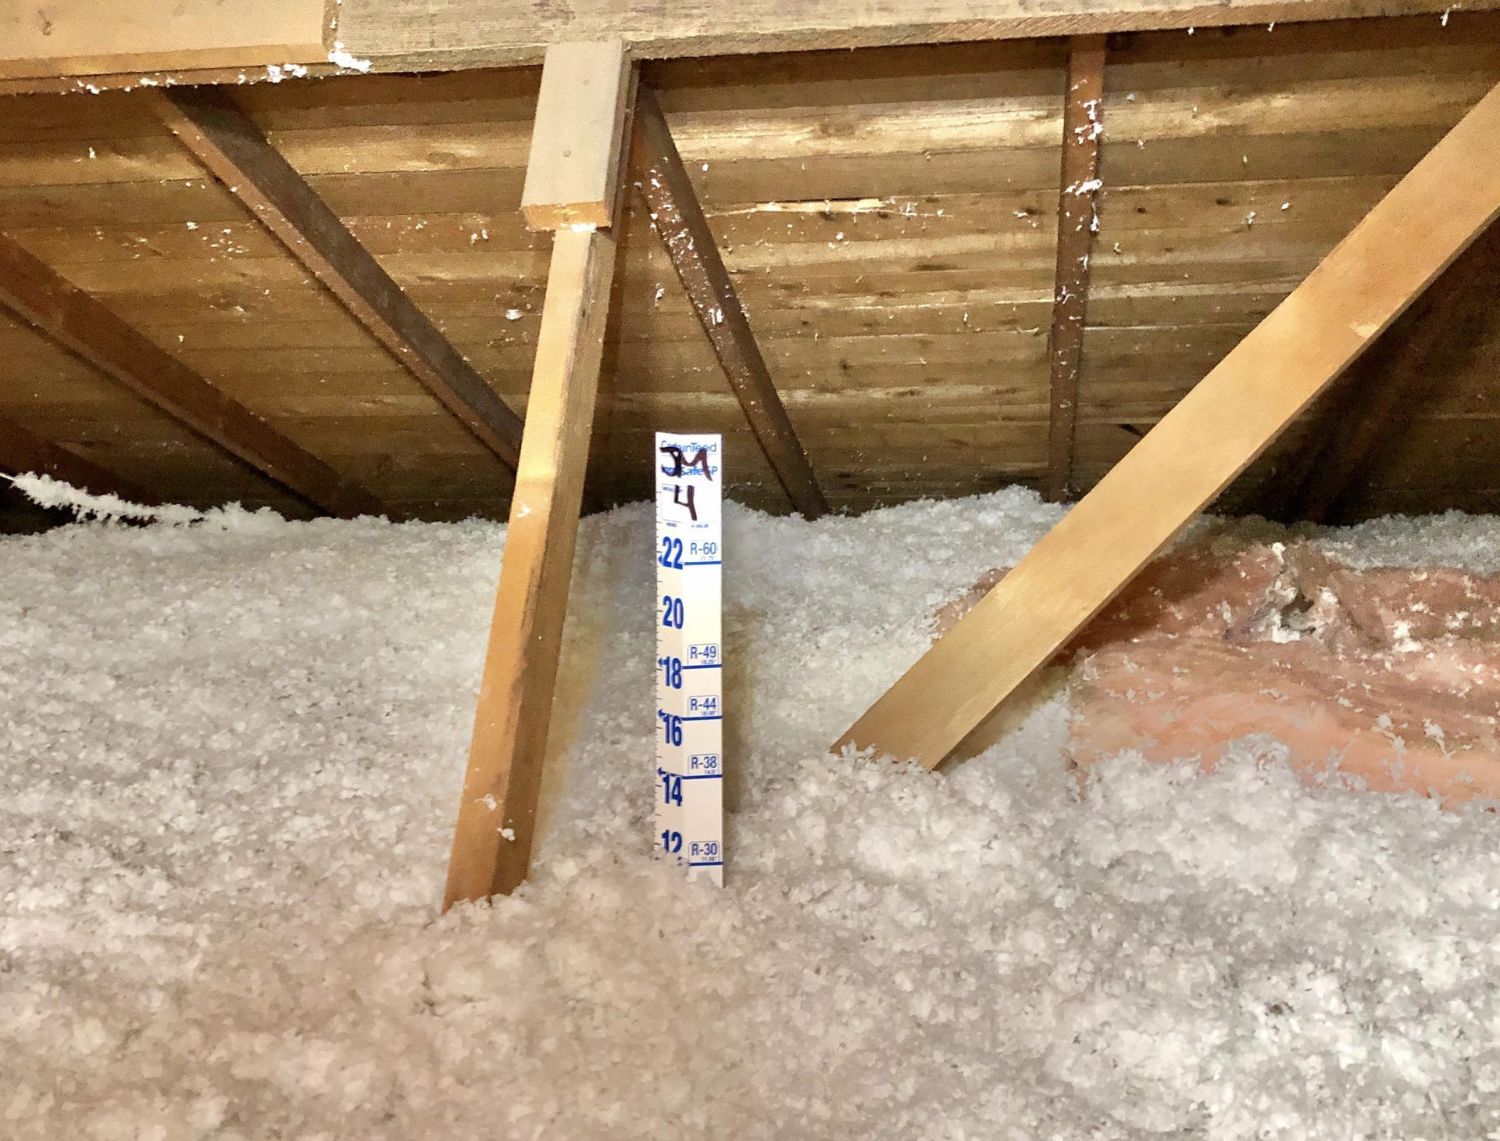
- Check Insulation Requirements: If you plan to install new insulation in your attic, double-check the recommended insulation requirements for your region or climate. This will help you determine the appropriate insulation type and R-value for optimal energy efficiency.
- Consider Air Sealing: To improve the energy efficiency of your attic, consider air sealing any gaps, cracks, or openings that may allow air leakage. This will help prevent heat loss and maintain a more consistent temperature in your home.
- Organize and Store: If you stored any items in the attic during the insulation removal process, take the opportunity to organize and properly store them. Use labeled boxes or containers to keep your belongings easily accessible and protected.
- Secure Attic Access Point: Ensure that the access point to the attic, such as a hatch or door, is securely closed and latched. Consider installing weatherstripping or insulation around the access point to prevent drafts and heat loss.
- Maintain Regular Maintenance: Keep your attic well-maintained by performing regular inspections and addressing any issues promptly. Regular maintenance will help to prolong the life of your insulation and ensure optimal energy efficiency.
Completing the clean-up and finalization steps will leave your attic in a tidy and well-prepared state for future use. It also gives you an opportunity to address any underlying issues and ensure the long-term effectiveness of your attic insulation.
Remember, attic insulation plays a crucial role in maintaining a comfortable and energy-efficient home. Regularly monitor the condition of your insulation and consider upgrading or replacing it as needed to maximize your home’s energy efficiency.
Conclusion
Removing blown-in insulation from your attic is a challenging yet necessary task, whether you’re upgrading your insulation or dealing with damaged or aged materials. By following the step-by-step guide outlined in this article, you can successfully remove the blown-in insulation while maintaining safety and cleanliness.
Start by assessing your attic and insulation, as this will help you understand the condition of the space and plan accordingly. Take the necessary safety precautions, wear protective gear, and prepare the work area to create a safe and organized environment. Remove any obstacles and obstructions to ensure easy access to the insulation.
Next, create an extraction point and use an insulation vacuum or blower to efficiently remove the insulation. Work in sections, direct the equipment carefully, and remember to take breaks and stay hydrated during the process.
Once the insulation is removed, collect and dispose of it following local regulations. Clean up the attic, inspect for any damage, and take note of any insulation requirements for future installations.
By diligently following these steps and paying attention to safety, you can successfully remove blown-in insulation from your attic. Remember, maintaining a clean and well-insulated attic is essential for energy efficiency and a comfortable living environment.
When in doubt, consult professionals in the field to ensure you’re following the best practices for insulation removal and disposal. And always prioritize your safety and the safety of your home throughout the entire process.
By investing the time and effort to remove blown-in insulation properly, you’re taking an important step towards improving your home’s energy efficiency and creating a healthier living space for you and your family.
Frequently Asked Questions about How To Remove Blown-in Insulation In Attic
Was this page helpful?
At Storables.com, we guarantee accurate and reliable information. Our content, validated by Expert Board Contributors, is crafted following stringent Editorial Policies. We're committed to providing you with well-researched, expert-backed insights for all your informational needs.


0 thoughts on “How To Remove Blown-in Insulation In Attic”