Articles
How To Remove Drywall Ceiling With Insulation
Modified: October 20, 2024
Learn how to remove a drywall ceiling with insulation in this informative article. Discover step-by-step instructions and expert tips to make the process easier.
(Many of the links in this article redirect to a specific reviewed product. Your purchase of these products through affiliate links helps to generate commission for Storables.com, at no extra cost. Learn more)
Introduction
When it comes to renovating a home or repairing damage, there may come a time when you need to remove a drywall ceiling. Whether you’re dealing with water damage, outdated materials, or simply looking to create a new design, knowing how to safely remove a drywall ceiling with insulation is essential.
Removing a drywall ceiling may seem like a daunting task, but with the right tools and preparation, it can be a manageable DIY project. This article will guide you through the steps involved in removing a drywall ceiling with insulation, ensuring that you complete the job safely and efficiently.
Before you begin, it’s important to gather the necessary tools and materials for the job. Having everything you need on hand will save you time and frustration during the process. Let’s take a look at what you’ll need:
- Protective gear: Safety goggles, gloves, and a dust mask
- Tools: Utility knife, drywall saw, pry bar, hammer, and a ladder or scaffold
- Materials: Plastic sheets, plastic bags, and tape for containment, as well as a disposal plan for the removed materials
Now that you have your tools and materials ready, it’s time to prepare the work area. Start by removing any furniture or valuable items from the room to avoid potential damage. Cover the floor with plastic sheets to protect it from dust and debris.
Next, you’ll need to remove any fixtures or lighting attached to the drywall ceiling. Turn off the electricity at the circuit breaker and carefully remove the fixtures or lighting. If necessary, have a licensed electrician assist you in disconnecting and removing any electrical components.
Safety should be your top priority throughout the process. The removal of a drywall ceiling can create a significant amount of dust and debris, so it’s essential to wear protective gear such as safety goggles, gloves, and a dust mask. Additionally, be cautious when using any tools, especially when working from a ladder or scaffold. Take your time and be mindful of potential hazards.
Now that the work area is prepared and safety measures are in place, it’s time to start cutting and removing the drywall ceiling. Begin by creating a small hole in the center of the ceiling with a utility knife. Use a drywall saw to cut along the edges of the room, creating sections that can be easily removed. Using a pry bar and hammer, carefully remove each section, ensuring that the insulation is also removed along with the drywall.
Dealing with insulation can be a messy task. Some insulation materials may contain harmful substances such as asbestos, so it’s crucial to identify and handle them appropriately. If you suspect the insulation contains asbestos, it’s best to consult with a professional insulation removal service to ensure proper handling and disposal.
Once the drywall ceiling and insulation have been removed, it’s time to dispose of the materials. Place the debris in plastic bags and seal them securely. Check with your local waste management facility for guidelines on disposal.
Finally, it’s essential to clean up the work area thoroughly. Remove the plastic sheets from the floor and dispose of any remaining debris. Vacuum the area to remove any dust and ensure that it’s ready for the next step in your renovation or repair project.
Removing a drywall ceiling with insulation may require some time and effort, but with the right tools, knowledge, and precautions, it can be a successful DIY project. By following the steps outlined in this article, you’ll be able to remove the old ceiling and insulation safely and efficiently, making way for your desired changes and improvements.
Remember, if you’re unsure about any aspect of the process or encounter materials that could be hazardous, it’s always best to seek professional assistance. Now that you’re equipped with the necessary information, go ahead and tackle that drywall ceiling removal with confidence!
Key Takeaways:
- Safely removing a drywall ceiling with insulation requires proper preparation, protective gear, and careful handling of materials. Prioritize safety, follow guidelines, and seek professional assistance if needed.
- Thoroughly clean the work area after removing a drywall ceiling to ensure a fresh and dust-free environment for the next phase of your project. Proper disposal of materials is crucial for safety and environmental protection.
Tools and Materials Required
Before you start removing a drywall ceiling with insulation, it’s important to gather all the necessary tools and materials to ensure a smooth and efficient process. Having everything you need on hand will save you time and frustration during the project. Here are the essential tools and materials you’ll need:
Protective Gear
- Safety goggles: Protect your eyes from dust and debris.
- Gloves: Keep your hands safe and provide a better grip on tools.
- Dust mask: Prevent inhalation of dust particles.
Tools
- Utility knife: Used for scoring and cutting drywall.
- Drywall saw: Ideal for making precise cuts in drywall.
- Pry bar: Helps in removing the sections of drywall
- Hammer: Used with the pry bar to remove nails and other fasteners.
- Ladder or scaffold: Provides access to higher areas of the ceiling.
Materials for Containment and Disposal
- Plastic sheets: Cover the floor and furniture to protect them from dust and debris.
- Plastic bags: Used to collect and dispose of the removed drywall and insulation.
- Tape: Secure the plastic sheets and seal the plastic bags.
- Disposal plan: Check local regulations and guidelines for proper disposal of construction debris.
Having these tools and materials readily available will make the process of removing a drywall ceiling with insulation much more efficient and safer. It’s important to choose high-quality tools and ensure that your protective gear fits properly to provide adequate protection.
If you have any doubts about the tools and materials needed for the specific type of drywall ceiling and insulation you are dealing with, it’s recommended to consult with a professional or conduct thorough research to ensure you have the right equipment for the job.
Remember, safety should always be a top priority when working on any construction or renovation project. Make sure to wear your protective gear throughout the process and follow proper safety protocols. By having the right tools and materials and taking the necessary precautions, you’ll be well-equipped to remove a drywall ceiling with insulation successfully.
Read more: How To Remove Drywall
Preparing the Work Area
Before you start removing a drywall ceiling with insulation, it’s crucial to properly prepare the work area. Taking the time to prepare will help ensure a smooth and efficient process, as well as protect any valuables and minimize the mess. Here are the steps to preparing the work area:
Remove Furniture and Valuables
Start by removing any furniture, decorations, and other valuables from the room. This will protect them from potential damage during the ceiling removal process. Cover them with plastic sheets or move them to a safe area outside the work zone.
Cover the Floor
Next, cover the floor with plastic sheets or drop cloths to protect it from dust, debris, and potential damage. Secure the edges of the sheets with tape to keep them in place and create a sealed area.
Containment and Ventilation
Use plastic sheets or tarps to create a containment area around the work zone. This will prevent dust and debris from spreading to other areas of the house. Seal the sheets or tarps securely with tape to create a barrier.
It is also essential to ensure proper ventilation in the work area. Open windows and use fans to improve air circulation and remove dust and fumes. If necessary, consider using dust barriers or negative air pressure machines to further control the air quality.
Protective Gear
Before you start the removal process, put on your protective gear. This should include safety goggles to protect your eyes from debris, gloves to safeguard your hands, and a dust mask to prevent inhalation of dust particles.
Prepare Your Tools and Materials
Gather all the necessary tools and materials required for the ceiling removal process. Make sure everything is easily accessible, allowing you to work efficiently without interruptions.
By properly preparing the work area, you can minimize the risks of damage to furniture and valuables, contain the dust and debris, and ensure a safer working environment. Remember to always prioritize safety and follow proper procedures when preparing the work area for a drywall ceiling removal.
Removing Fixtures and Lighting
Before you begin removing a drywall ceiling with insulation, it’s important to address any fixtures and lighting that are attached to the ceiling. By safely removing these items first, you can avoid potential damage and work more efficiently. Here are the steps to follow when removing fixtures and lighting:
Turn Off the Electricity
Prior to handling any electrical components, ensure that the electricity is turned off at the main circuit breaker. This step is crucial for your safety and the prevention of any electrical accidents. Double-check that the power is indeed off by testing the fixtures or lighting with a voltage tester.
Read more: How Thick Should Ceiling Drywall Be?
Create a Safe Workspace
Set up a stable and safe workspace with ample lighting to help you see and navigate the area. Use a ladder or scaffold, if needed, to reach higher fixtures or lighting. Make sure the ladder or scaffold is secure and stable before ascending.
Remove Light Bulbs and Covers
Carefully remove any light bulbs or covers from the fixtures. You may need a step stool or ladder to reach lights installed at higher heights. Place the light bulbs and covers in a safe spot away from the work area to avoid damage or breakage during the removal process.
Detach the Fixtures
Depending on the type of fixtures, you may need to loosen screws or unhook attachments to detach them from the ceiling. Use appropriate tools, such as a screwdriver or pliers, to disconnect the fixtures safely. If you’re uncertain about the process or encounter complicated fixtures, consult the manufacturer’s instructions or seek professional assistance.
Disconnect Wiring
If the fixtures are hardwired, it’s crucial to safely disconnect the wiring. This step may involve removing wire nuts or unscrewing terminal connectors. Again, if you’re unsure about handling electrical connections, it’s best to consult with a licensed electrician to ensure both your safety and the proper disconnection of the wiring.
Read more: How To Repair Drywall Tape On Ceiling
Secure Exposed Wires
After disconnecting the fixtures, take extra precautions to secure any exposed wires. Safely cap the wires with wire nuts and use electrical tape to ensure they are tightly covered and protected. This step is essential for preventing any accidental contact with live wires.
Label Wires (If Needed)
If you plan on reinstalling the fixtures later or need to identify specific wires, consider labeling them before removing. This will make the reinstallation process easier and prevent any confusion or mistakes when reconnecting the electrical components later on.
By taking the time to remove fixtures and lighting before tackling the drywall ceiling, you can prevent potential damage and work more efficiently. Remember to always prioritize safety, follow electrical safety guidelines, and consult professionals if you’re unsure about any aspect of the process.
Ensuring Safety Measures
When it comes to removing a drywall ceiling with insulation, safety should always be a top priority. This process involves potential hazards such as dust, debris, and working from heights. By taking the necessary safety measures, you can minimize risks and create a safer working environment. Here are some important safety tips to consider:
Protective Gear
Before you begin the removal process, make sure you’re equipped with the appropriate protective gear. This should include safety goggles to protect your eyes from dust and debris, gloves to safeguard your hands, and a dust mask to prevent inhalation of harmful particles. Additionally, consider wearing long sleeves and pants to protect your skin from scratches and irritants.
Read more: How To Insulate A Garage Ceiling
Tool Safety
Use the correct tools for the job and ensure they are in good working condition. Inspect your tools before use to check for any damage or defects that could compromise your safety. Follow the manufacturer’s instructions and guidelines when using tools, whether it’s a utility knife, drywall saw, pry bar, or ladder. Handle tools with care, avoiding any unnecessary risks or maneuvers that could lead to accidents.
Working from Heights
If you’re working from a ladder or scaffold when removing a drywall ceiling, it’s crucial to prioritize ladder safety. Make sure the ladder is in good condition, stable, and placed on a flat, level surface. Use all the necessary safety precautions, such as locking the ladder’s spreader bars and maintaining three points of contact with the ladder at all times. If using a scaffold, ensure it is properly assembled and stable, with guardrails in place to prevent falls.
Dust and Debris Control
Removing a drywall ceiling can create a significant amount of dust and debris. Consider using dust barriers or plastic sheets to contain the work area and minimize the spread of particles to other areas of your home. Open windows and use fans to improve ventilation and help control the dust. Additionally, periodically wetting the ceiling and insulation with a mist sprayer can help reduce the amount of dust generated during the removal process.
Electrical Safety
If you’re removing a drywall ceiling with electrical fixtures, it’s crucial to follow proper electrical safety procedures. Before starting any work, turn off the electricity at the main circuit breaker. Test the fixtures with a voltage tester to ensure the power is indeed off. If you’re uncertain about working with electrical connections, it’s best to consult with a licensed electrician to ensure your safety and the proper disconnection of the wiring.
Read more: How To Attach Insulation To Ceiling
Asbestos and Hazardous Materials
It’s important to be aware that some older insulation materials may contain hazardous substances such as asbestos. If you suspect the insulation contains asbestos, it’s best to consult with a professional insulation removal service. They can assess the situation, test for asbestos, and ensure proper handling and disposal if necessary. Do not disturb or attempt to remove insulation suspected to contain asbestos without professional guidance.
By following these safety measures, you can minimize risks, protect yourself from potential hazards, and create a safer working environment when removing a drywall ceiling with insulation. Always prioritize safety, use the appropriate protective gear, and seek professional assistance when needed. Your well-being is paramount throughout the process.
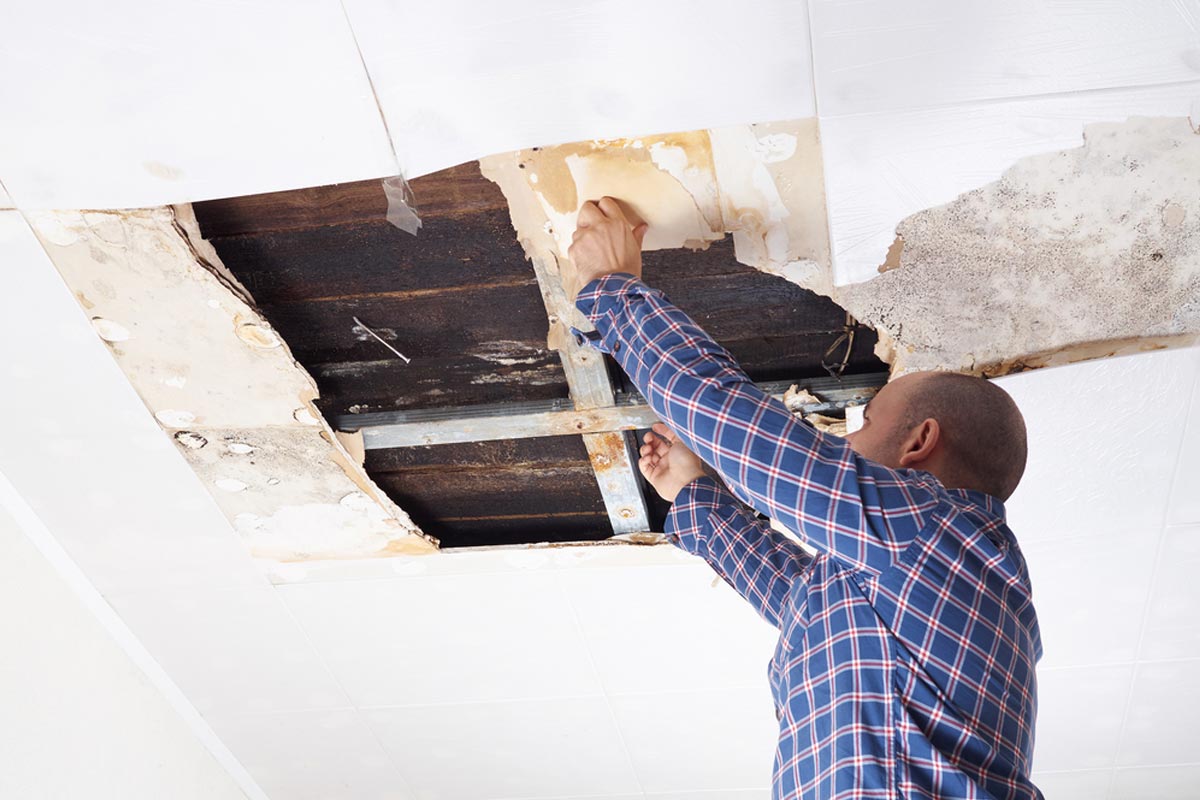
Cutting and Removing the Drywall Ceiling
Once you have prepared the work area and ensured safety measures, it’s time to start cutting and removing the drywall ceiling. This process requires careful attention and precision to minimize damage and ensure a smooth removal. Follow these steps to effectively cut and remove the drywall ceiling:
1. Start with a Small Hole
Using a utility knife, carefully create a small hole in the center of the drywall ceiling. This hole will allow you to assess the condition of the ceiling and insulation. Be cautious to avoid damaging any electrical or plumbing elements that may be hidden within the ceiling.
2. Cut Along the Edges
Using a drywall saw, begin cutting along the edges of the room. Start from the hole you created earlier and work your way towards the walls. Follow the lines where the drywall is attached to the ceiling joists. Take your time to ensure clean and straight cuts.
Read more: How To Install Insulation In The Ceiling
3. Create Manageable Sections
As you cut along the edges, create smaller sections of drywall that you can easily handle and remove. This will make the process more manageable and prevent excess strain on yourself or the ceiling structure. Typically, sections of around 2 feet by 4 feet in size work well. Use the utility knife or drywall saw to score the joints between the sections.
4. Remove Nails and Fasteners
Once you have cut the ceiling into sections, use a pry bar and a hammer to carefully remove the drywall. Start by locating any nails or other fasteners securing the drywall to the ceiling joists. Gently pry the section of drywall away from the joists, being mindful not to damage any electrical or plumbing components.
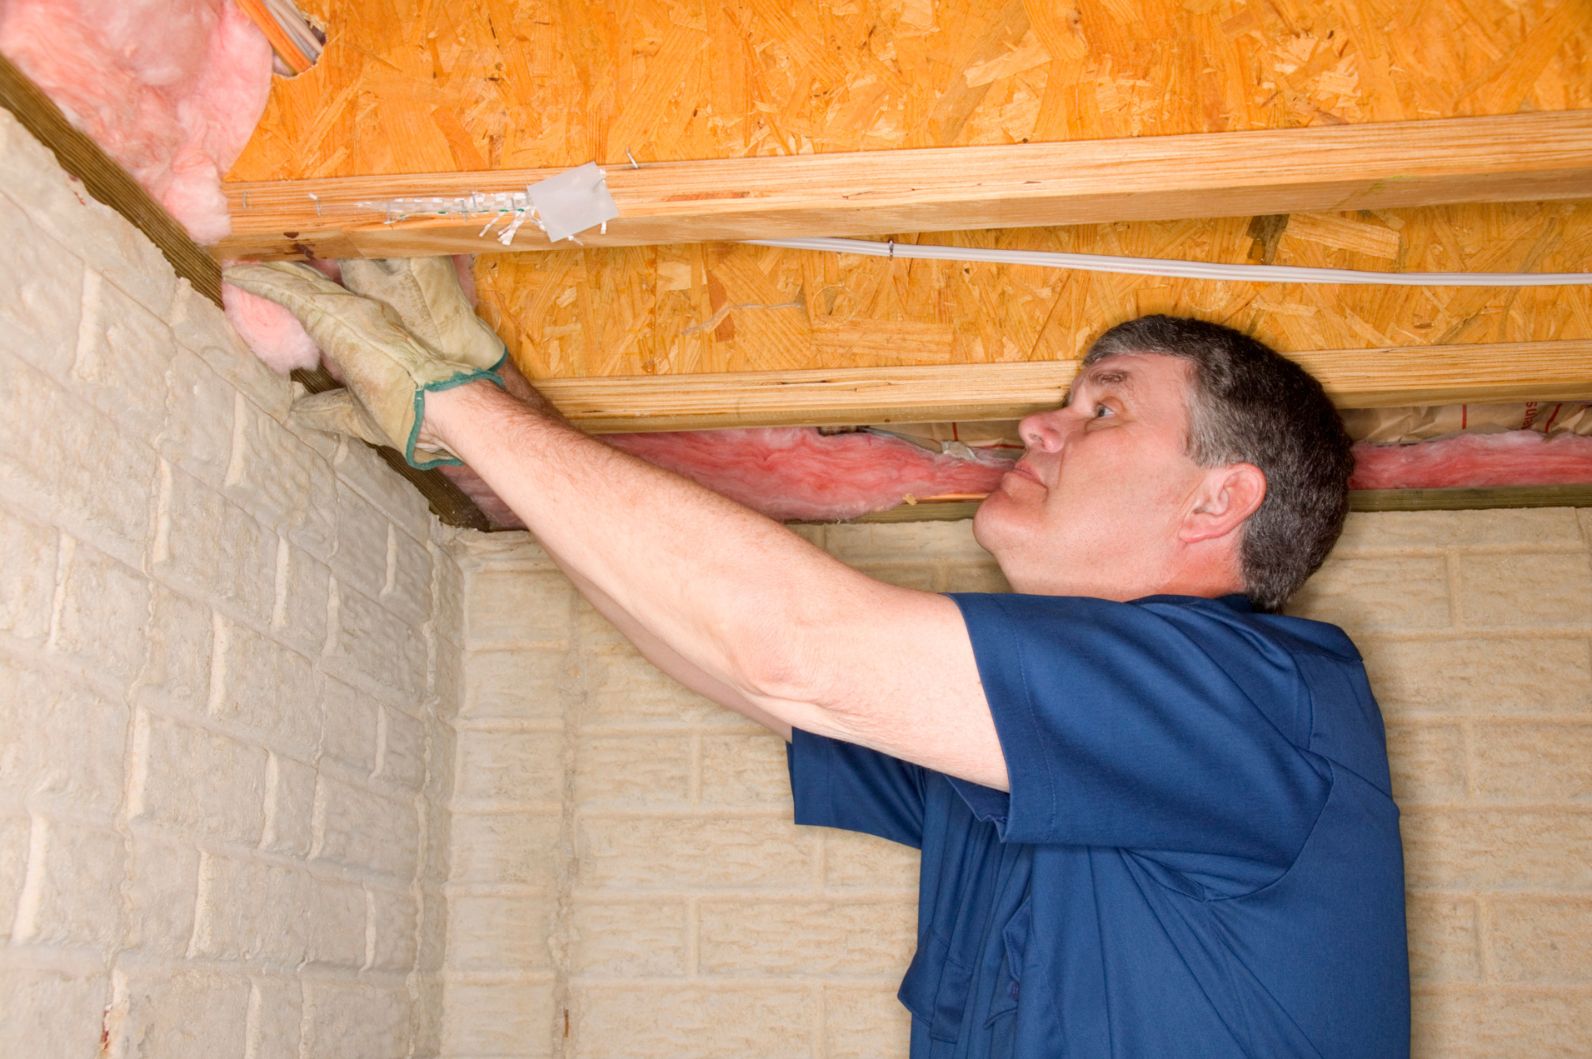
5. Remove Insulation
During the removal process, it’s important to remove the insulation alongside the drywall. Insulation is typically held in place by friction or attachment to the drywall. Carefully remove the insulation from the section of drywall you just cut and set it aside for proper disposal. Take care not to disturb any electrical or plumbing elements that may be present.
6. Repeat the Process
Continue cutting and removing the drywall ceiling section by section until the entire ceiling is removed. Take your time and work systematically to ensure a thorough removal. Be mindful of any obstacles, such as light fixtures or vents, and work around them or remove them if necessary.
Throughout the cutting and removal process, remember to wear your protective gear, including safety goggles, gloves, and a dust mask. Proper protective gear will safeguard you from dust, debris, and potential harm during the removal process.
By following these steps, you can effectively cut and remove the drywall ceiling with precision and care. Take your time, work systematically, and be mindful of any electrical or plumbing components hidden within the ceiling. With the drywall ceiling removed, you are ready to move on to the next steps of your renovation or repair project.
Read more: How To Remove Z-brick From Drywall
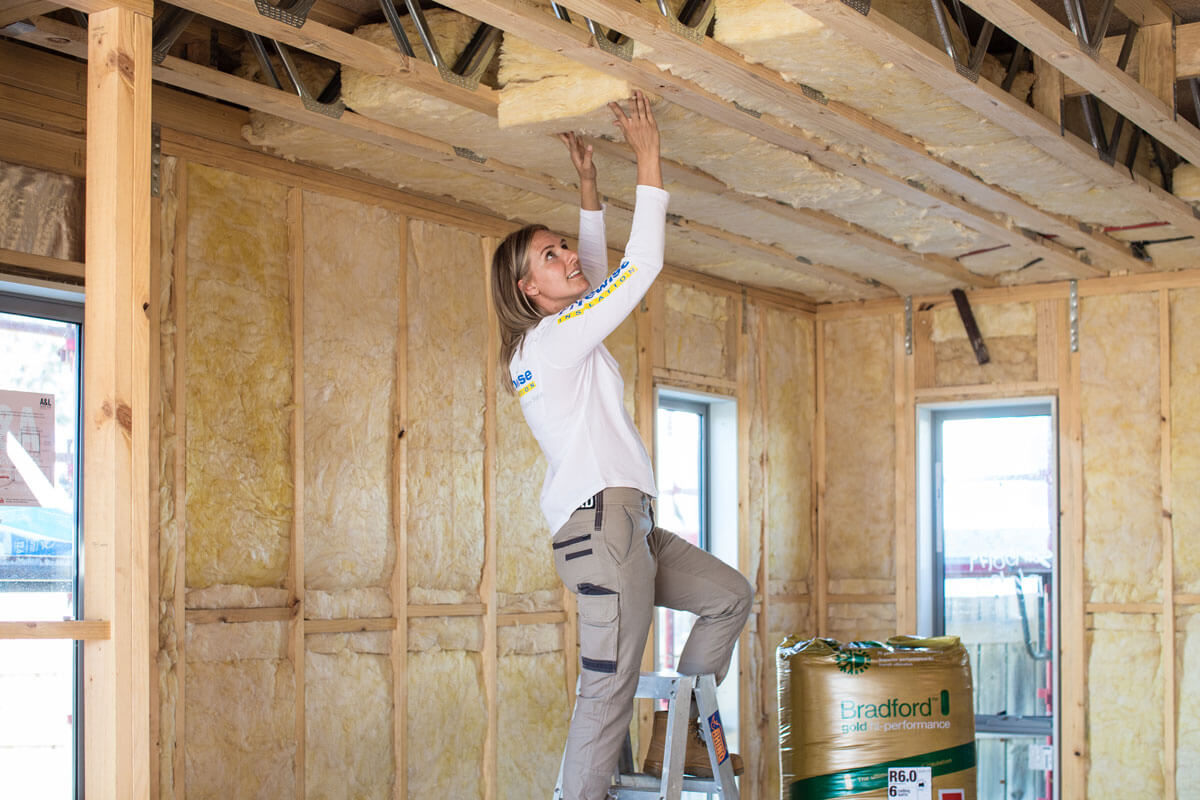
Dealing with Insulation
When removing a drywall ceiling, it’s important to address the insulation alongside the drywall. Insulation plays a crucial role in maintaining energy efficiency and regulating temperature within a space. Here are some essential steps to follow when dealing with insulation:
1. Assess the Type of Insulation
Before handling the insulation, it’s crucial to determine the type of insulation you’re dealing with. Common types include fiberglass, cellulose, mineral wool, or foam insulation. If you suspect that the insulation may contain hazardous materials such as asbestos, it’s vital to take extra precautions and consult with professionals for proper testing and removal.
2. Wear Protective Gear
Protective gear is essential when dealing with insulation. Wear safety goggles, gloves, a dust mask, and long sleeves to prevent any skin exposure to fibers or particles. Proper attire will protect you from potential irritation or allergic reactions.
3. Remove Insulation Carefully
Using gloved hands or a scoop, carefully remove the insulation from the sections of drywall that you have already cut and removed. Place the insulation directly into plastic bags for proper containment and disposal. Be gentle to avoid disturbing any potential contaminants or harmful substances.
Read more: How To Insulate A Vaulted Ceiling
4. Dispose of Insulation Properly
Ensure that the bagged insulation is securely sealed to prevent any release of fibers or particles. Check local regulations and guidelines for proper disposal. Contact your local waste management facility for specific instructions on how to dispose of the insulation safely and adhere to any required procedures.
5. Asbestos or Hazardous Materials
If you suspect that the insulation contains asbestos or other hazardous materials, it’s crucial to consult with professionals who specialize in the removal and disposal of such materials. Asbestos can be extremely dangerous if handled improperly, so it’s best to leave it to the experts who have the necessary knowledge and equipment to safely handle and dispose of it.
6. Clean and Inspect the Work Area
After the insulation has been removed and properly disposed of, it’s essential to clean up the work area thoroughly. Utilize a vacuum equipped with a HEPA filter to remove any remaining dust or debris. Inspect the area to ensure that all insulation and particulate matter has been removed, leaving a clean and safe environment for the next phase of your project.
Remember, if you are unsure about the type of insulation you’re dealing with or suspect it may contain hazardous materials, it’s crucial to seek professional guidance. They will be able to accurately identify the insulation and guide you through the appropriate handling and disposal procedures.
By following these steps and taking the necessary precautions, you can effectively deal with the insulation during the process of removing a drywall ceiling. Prioritizing safety and adhering to proper handling and disposal practices will ensure a safe and efficient removal process.
Disposing of the Removed Materials
Proper disposal of the materials removed during the process of removing a drywall ceiling is essential for the safety of both you and the environment. These materials can include the drywall itself, insulation, and other debris generated during the removal process. Follow these steps to ensure responsible disposal:
1. Segregate the Materials
Separate the different materials into their respective categories. Place drywall pieces in one area, insulation in another, and any other debris in a separate pile. This will make it easier to handle and dispose of each material properly.
2. Bag and Seal Drywall Pieces
Dispose of the drywall pieces in sturdy plastic bags. Ensure that the bags are securely sealed to prevent dust, debris, or loose particles from escaping. This will help minimize environmental impact and prevent potential health hazards.
3. Bag and Seal Insulation
If the insulation does not contain hazardous materials, such as asbestos, place it in plastic bags. Seal the bags tightly to prevent any fibers or loose insulation from escaping. Make sure to handle the insulation with gloves and take care to avoid inhaling any particles.
4. Properly Dispose of Hazardous Materials
If you suspect that the insulation or any other materials contain hazardous substances like asbestos or other toxic components, it’s crucial to seek professional assistance. Consult with specialists who are trained in handling and disposing of such materials safely and in accordance with local regulations and guidelines.
5. Check Local Regulations
Research and adhere to the local regulations regarding the disposal of construction materials. Municipalities may have specific rules and guidelines for the disposal of drywall, insulation, and other construction debris. Contact your local waste management facility or visit their website for information on proper disposal methods, recycling options, and any fees or permits required.
6. Arrange for Collection or Drop-off
Arrange for the collection or drop-off of the disposed materials as per your local waste management guidelines. Some municipalities may offer curbside pickup for construction debris, while others may require you to transport the materials to a designated recycling or disposal center. Follow the instructions provided by your local waste management facility to ensure that the materials are disposed of in an appropriate and environmentally-friendly manner.
7. Document Disposal
Remember to keep any documentation or receipts related to the disposal of the materials. This can serve as proof of responsible disposal, which may be important for compliance purposes or future reference.
By following the proper disposal procedures for the removed materials, you ensure that potential environmental and health risks are minimized. Responsible disposal also contributes to sustainable waste management practices and helps protect the well-being of the community and the environment as a whole.
Cleaning Up
After successfully removing a drywall ceiling and disposing of the materials, it’s important to thoroughly clean up the work area. Proper cleaning will ensure that any remaining dust and debris are removed, leaving the space ready for the next phase of your project. Follow these steps to effectively clean up after removing a drywall ceiling:
Read more: How To Hold Up Insulation In Ceiling
1. Remove Plastic Sheets and Drop Cloths
Start by removing the plastic sheets or drop cloths that were used to protect the floor and furniture. Carefully fold them inward to contain any dust and debris, then dispose of them properly according to local waste guidelines.
2. Vacuum the Area
Use a vacuum cleaner equipped with a HEPA filter to thoroughly clean the entire work area. Pay close attention to corners, edges, and any surfaces that may have accumulated dust or small debris during the removal process. Vacuum the walls, floors, and any other exposed surfaces to ensure a clean environment.
3. Wipe Down Surfaces
After vacuuming, use a damp cloth or sponge to wipe down any remaining dust or residue from surfaces. This includes walls, windowsills, baseboards, and any other areas that may have collected debris during the project. Take care to remove all traces of dust, ensuring a clean and dust-free environment.
4. Clean Tools and Equipment
Properly clean and store all tools and equipment used during the removal process. Wipe or brush off any debris and dust, and store them in a safe and organized manner for future use. Maintaining clean and well-maintained tools will prolong their lifespan and ensure optimal performance in future projects.
Read more: How To Insulate A Ceiling Without Attic
5. Ventilate the Area
Open windows and use fans to improve air circulation and ventilation in the newly cleaned space. This will help remove any lingering dust particles and freshen the air. If needed, consider using air purifiers to further improve the air quality and eliminate any residual dust or odors.
6. Inspect for Any Remaining Debris
Carefully inspect the area to check for any remaining debris that may have been missed during the cleaning process. Pay attention to corners, crevices, and hard-to-reach areas. Use a flashlight if necessary to ensure thorough inspection and remove any remaining dust or debris.
7. Dispose of Cleaning Materials
Dispose of any cleaning cloths, sponges, or rags used during the cleanup process. If they contain dust or debris, place them in a plastic bag and seal it securely before disposing of them according to local waste management guidelines.
Completing a thorough cleaning after removing a drywall ceiling will help create a clean and safe environment for the next phase of your project. By following these steps, you can ensure that any remaining dust and debris are effectively removed, leaving you with a clean and fresh space ready for further renovation or repair.
Conclusion
Removing a drywall ceiling with insulation can be a challenging yet rewarding process. By following the right steps and taking the necessary precautions, you can tackle this project with confidence. Throughout the process, it’s important to prioritize safety, wear protective gear, and handle tools with care.
Preparing the work area, removing fixtures and lighting, and ensuring safety measures are essential steps before diving into the actual removal process. Properly cutting and removing the drywall ceiling section by section will help you maintain control and minimize damage.
Dealing with insulation requires caution, especially if it contains hazardous materials like asbestos. It’s crucial to identify and handle such insulation appropriately or seek professional assistance when needed. Responsible disposal of the removed materials is also important to protect your health and the environment.
Lastly, don’t forget to thoroughly clean up the work area after the removal process. Proper cleaning will ensure a fresh and dust-free space for your next project.
In conclusion, removing a drywall ceiling with insulation can be a fulfilling DIY project. By following the steps outlined in this article, you have gained the knowledge and understanding to successfully navigate through each stage of the process. Remember to consult professionals when dealing with potentially hazardous materials, and always prioritize safety and responsible disposal.
Now that you’re equipped with the necessary information, it’s time to confidently take on the task of removing a drywall ceiling with insulation and transform your space according to your desired vision. Happy renovating!
Frequently Asked Questions about How To Remove Drywall Ceiling With Insulation
Was this page helpful?
At Storables.com, we guarantee accurate and reliable information. Our content, validated by Expert Board Contributors, is crafted following stringent Editorial Policies. We're committed to providing you with well-researched, expert-backed insights for all your informational needs.
0 thoughts on “How To Remove Drywall Ceiling With Insulation”