
Articles
How To Remove Molding From Floor
Modified: February 23, 2024
Learn how to remove molding from your floor with our informative articles. Transform your space with these expert tips and techniques.
(Many of the links in this article redirect to a specific reviewed product. Your purchase of these products through affiliate links helps to generate commission for Storables.com, at no extra cost. Learn more)
Introduction
Removing molding from the floor is a common task when renovating or upgrading a space. Whether you’re changing the flooring or simply updating the aesthetics, knowing how to remove molding properly is essential. Molding, such as baseboards, quarter round, shoe molding, or crown molding, not only adds a finishing touch to a room but also provides protection to the walls and floors. However, over time, these moldings may become worn, outdated, or damaged, necessitating their removal.
In this article, we will guide you through the process of removing different types of molding from the floor. We will go step by step, providing safety precautions and outlining the tools and materials you will need for the job. So, let’s roll up our sleeves and get started!
Key Takeaways:
- Safety first! Prioritize protective gear and a clear workspace when removing floor molding. Assess the type of molding and condition to determine the best removal approach for a successful and rewarding transformation.
- After removing molding, patch and repair the floor as needed for a smooth surface. Consider sanding and refinishing for a polished, new look, but always prioritize caution and consult professionals if unsure.
Read more: How To Remove Mold From Attic
Tools and Materials Needed
Before you begin removing molding from the floor, it’s important to gather the necessary tools and materials. Having the right equipment will make the process easier and more efficient. Here are the tools and materials you will need:
- Utility knife or painter’s knife
- Pry bar or crowbar
- Hammer
- Chisel
- Pliers
- Putty knife
- Safety goggles
- Dust mask
- Gloves
- Drop cloth or plastic sheeting
- Caulk remover (if applicable)
- Patching compound
- Sanding block or sandpaper (if refinishing the floor)
- Wood glue (for reinstallation, if needed)
- Paint or stain (if refinishing the molding)
These tools and materials are essential for safely removing molding without damaging the floor or walls. Make sure to gather everything before you begin the process to avoid any delays or interruptions.
Step 1: Safety Precautions
Before diving into the process of removing molding from the floor, it’s crucial to prioritize safety. Taking the necessary precautions will help prevent accidents and injuries. Follow these safety guidelines:
- Put on safety goggles to protect your eyes from flying debris or dust particles.
- Wear a dust mask to prevent inhalation of dust and particles that may be released during the removal process.
- Don gloves to protect your hands from sharp edges or splinters.
- Clear the area around the molding to create a safe workspace. Remove furniture, rugs, and other items that may obstruct your movement.
- Place a drop cloth or plastic sheeting on the floor to catch any debris or materials that may fall during the removal process.
- Ensure that you have good lighting in the area to clearly see what you’re doing and avoid any accidents.
- Use caution when handling tools such as pry bars or chisels. Keep them away from your body and be mindful of your surroundings.
By following these safety precautions, you can minimize the risk of accidents and injuries while removing molding from the floor. Remember, safety should always be the top priority.
Step 2: Assessing the Type of Molding
Before you begin removing molding from the floor, it’s important to assess the type of molding you’re dealing with. Different types of molding may require different techniques and tools for removal. Here are some common types of molding:
- Baseboards: These are typically installed along the bottom of the walls where they meet the floor. They provide a decorative transition between the wall and the floor.
- Quarter round: This type of molding is used to cover gaps between the baseboards and the flooring. It is typically rounded in shape.
- Shoe molding: Similar to quarter round molding, shoe molding is used to cover gaps between the baseboards and the flooring. However, it has a rectangular shape and is slightly taller than quarter round.
- Crown molding: Crown molding, also known as cornice molding, is installed at the junction of the walls and ceiling. It adds an elegant touch to a room.
Identifying the type of molding in your space will help you determine the best approach for removal. Each type may require specific tools or techniques. For example, baseboards and quarter round molding are typically easier to remove compared to crown molding, which may be more intricate and require delicate handling.
Take a close look at the molding and assess its condition. If the molding is old or brittle, extra care should be taken during the removal process to avoid damage. Additionally, note whether the molding is attached with nails, adhesive, or both, as this will impact the removal method.
By assessing the type and condition of the molding beforehand, you can plan your approach and ensure a smooth and successful removal process.
Step 3: Removing Baseboards
Baseboards are one of the most common types of molding found along the floor, and removing them can significantly transform the look of a room. Follow these steps to remove baseboards:
- Start by scoring the caulk or paint along the top edge of the baseboard using a utility knife or painter’s knife. This will help loosen the bonding and make the removal process easier.
- Locate the nails or screws securing the baseboard to the wall. They are usually spaced every few feet. Look for small indentations or paint discoloration as indicators of their position.
- Position a pry bar or crowbar between the baseboard and the wall near one end.
- Gently apply pressure to pry the baseboard away from the wall. Be cautious not to damage the wall or the baseboard during this step.
- Continue moving along the length of the baseboard, prying it away from the wall inch by inch. Use a small block of wood or a putty knife as a buffer between the pry bar and the wall to minimize damage.
- If the baseboard is difficult to remove, gently tap a chisel or a flathead screwdriver between the baseboard and the wall to create a gap. This will help release the bond and make it easier to pry off.
- Once the baseboard is completely removed, set it aside carefully if you plan to reuse it. If not, dispose of it properly.
Repeat these steps for each section of baseboard until all the molding has been removed. Take your time and be patient to avoid any damage to the wall or the floor. Remember, if you plan to reinstall the baseboard, label each piece to ensure easy reassembly later on.
Removing baseboards is a crucial step in various home improvement projects, including flooring installation or painting. By following these steps, you can safely and effectively remove baseboards without much hassle.
Read more: How To Remove Mold From Showerhead
Step 4: Removing Quarter Round Molding
Quarter round molding is commonly used to cover gaps between the baseboards and the flooring. If you are looking to remove this type of molding, follow these steps:
- Start by examining the quarter round molding to determine how it is attached to both the baseboards and the floor. It is typically secured with nails or adhesive.
- If the quarter round molding is painted, use a utility knife or painter’s knife to score along the top edge where it meets the baseboard. This will break the seal and make the removal process easier.
- Locate the nails securing the molding to the baseboards. This can usually be done by examining the molding and looking for slight indentations or paint discoloration.
- Place a pry bar or crowbar under one end of the quarter round molding, near a nail.
- Apply gentle pressure to pry the molding away from the baseboard. If there is adhesive, you may need to use a chisel to create a small gap.
- Continue to move along the length of the molding, prying it away from the baseboard inch by inch. Take care not to damage the baseboard or the floor during this process.
- If necessary, use a putty knife or a small block of wood as a buffer to protect the wall or the flooring.
- After the quarter round molding is fully removed, set it aside if you plan to reuse it. Otherwise, dispose of it properly.
Take your time and be patient when removing quarter round molding. Be cautious not to damage the baseboard or the flooring, especially if you plan to reuse the molding. Repeat these steps for each section of quarter round molding until all the pieces have been removed.
Removing quarter round molding may be necessary when replacing the flooring or making changes to the baseboards. By following these steps, you can successfully remove quarter round molding and achieve a clean, updated look in your space.
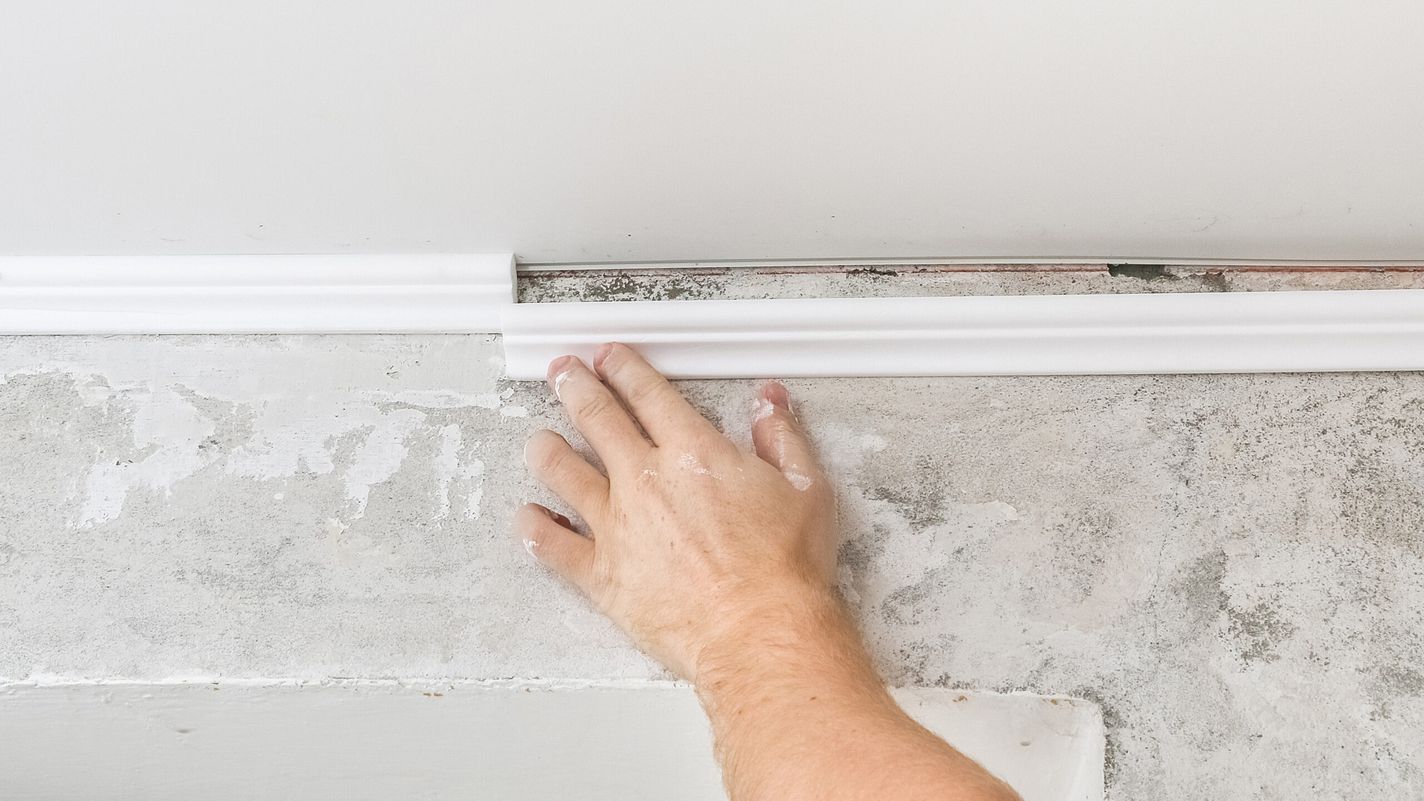
Use a putty knife to gently pry the molding away from the floor. Start at one end and work your way along, being careful not to damage the molding or the floor.
Step 5: Removing Shoe Molding
Shoe molding, also known as base shoe molding, is similar to quarter round molding and is used to cover gaps between the baseboards and the flooring. If you need to remove shoe molding, follow these steps:
- Inspect the shoe molding to identify how it is attached to the baseboards and the floor. It is typically nailed into place, but in some cases, adhesive might also be used.
- If the shoe molding is painted, score along the top edge where it meets the baseboard using a utility knife or painter’s knife.
- Locate the nails securing the molding to the baseboard. These are usually spaced every few feet.
- Position a pry bar or crowbar near one end of the shoe molding, close to a nail.
- Apply gentle pressure to pry the shoe molding away from the baseboard. Use caution to avoid damaging the baseboard or the floor.
- Gradually move along the length of the molding, prying it away from the baseboard. If adhesive is present, gently tap a chisel or flathead screwdriver to create a small gap before prying.
- Use a small block of wood or a putty knife as a buffer between the pry bar and the wall to prevent damage.
- Once the shoe molding is fully removed, set it aside if you plan to reuse it. If not, dispose of it responsibly.
Take your time and be patient when removing shoe molding to avoid any accidental damage. Repeat these steps for each section of shoe molding until all the pieces have been successfully removed.
Removing shoe molding may be necessary when replacing the flooring or making changes to the baseboards. By following these steps, you can safely and effectively remove shoe molding without causing any unnecessary damage.
Step 6: Removing Crown Molding
Crown molding adds an elegant touch to the junction of walls and ceilings. If you need to remove crown molding, follow these steps:
- Start by carefully examining the crown molding to understand how it is secured to the wall.
- Using a utility knife or painter’s knife, score along the seams where the crown molding meets the wall and ceiling. This will help break the seal and make removal easier.
- Locate the nails or screws holding the crown molding in place. These are typically spaced along the length of the molding.
- Insert a pry bar or crowbar at one end of the crown molding, near a nail or screw.
- Gently apply pressure to pry the molding away from the wall without causing damage. If needed, use a chisel to create a small gap for easier prying.
- Continue to move along the length of the crown molding, gradually prying it away from the wall. Take care to avoid excessive force that could crack the molding or damage the wall.
- If necessary, use a putty knife or a small block of wood as a buffer between the pry bar and the wall to prevent any unintentional damage.
- Once the crown molding is fully removed, set it aside if you plan to reuse it. Otherwise, dispose of it properly.
Removing crown molding requires caution and precision due to its delicate nature. Take your time and proceed slowly to avoid causing any damage to the molding or the wall. Repeat these steps for each section of crown molding until the entire length has been successfully removed.
Removing crown molding can be challenging, especially if it has intricate details or is installed in high areas. If you’re unsure about the process, it’s always recommended to seek the assistance of a professional to ensure a safe and proper removal.
Step 7: Patching and Repairing the Floor
Once you have successfully removed the molding from the floor, it’s important to assess the condition of the floor and address any damages or gaps that may have been left behind. Follow these steps to patch and repair the floor:
- Start by thoroughly inspecting the floor for any visible damage, such as scratches, dents, or holes. Take note of the size and severity of the issues.
- If there are small scratches or minor imperfections, you can often address them by using a wood filler or putty. Select a color that matches the floor and follow the manufacturer’s instructions for application.
- For larger gaps or holes, you may need to apply a patching compound. Ensure that the compound is suitable for the type of flooring material you have.
- Carefully follow the instructions on the patching compound, mixing it as directed. Use a putty knife or a trowel to apply the compound, filling in the gaps or holes.
- Smooth the surface of the patching compound using the putty knife or trowel. Make sure it is level with the surrounding floor to create a seamless finish.
- Allow the patching compound to dry completely according to the manufacturer’s instructions. This may take several hours or longer, depending on the product.
- Once the compound is fully dried, lightly sand the patched areas to ensure a smooth and even surface. Use a sanding block or sandpaper with a fine grit to avoid damaging the surrounding floor.
- After sanding, clean the area and remove any dust or debris. You can use a vacuum cleaner or a damp cloth to achieve a clean surface.
Keep in mind that the specific steps for patching and repairing the floor may vary depending on the type of flooring material you have. It’s always recommended to consult the manufacturer’s guidelines or seek professional advice for specific instructions.
Patching and repairing the floor is an important part of the process when removing molding. By addressing any damages or gaps, you can ensure a smooth and visually pleasing finish for your newly updated space.
Read more: How To Remove Mold From Pillows
Step 8: Sanding and Refinishing (Optional)
If you want to give your floor a fresh and polished look after removing the molding, sanding and refinishing the surface can be a great option. This step is optional and should only be done if the floor requires it or if you desire a new finish. Follow these steps for sanding and refinishing:
- Start by thoroughly cleaning the floor to remove any dirt, dust, or debris. Use a broom, vacuum cleaner, or a damp cloth to ensure a clean surface.
- If necessary, rent a floor sander from a local hardware store. Choose the appropriate type of sander depending on your floor material. It’s recommended to start with a low-grit sandpaper and gradually work your way up to higher-grit sandpaper for a smoother finish.
- Put on protective eyewear, a dust mask, and gloves before operating the floor sander. Follow the manufacturer’s instructions for safe and proper use.
- Begin sanding the floor, working in small sections at a time. Move the sander in the direction of the wood grain to avoid creating any noticeable patterns or scratches.
- Continue sanding the entire floor surface, paying extra attention to any areas that may require more sanding, such as stains or imperfections.
- Once you have completed the sanding process, use a vacuum cleaner or a damp cloth to remove any dust or debris from the floor.
- If you want to apply a new finish to the floor, ensure that the surface is clean and dry. Choose a suitable stain or floor finish according to your preference and the manufacturer’s recommendations.
- Apply the stain or finish using a brush or rag, following the proper application instructions provided by the manufacturer. Allow the stain or finish to dry completely before walking on the floor or moving furniture back into the room.
Sanding and refinishing the floor can bring new life to your space, providing a fresh and aesthetically pleasing finish. However, keep in mind that this step requires careful planning and consideration of the floor’s condition. If you are unsure about the process or lack experience, it is strongly recommended to consult a professional to ensure the best results.
With the sanding and refinishing process complete, your newly updated floor will shine and complement the overall look of your space.
Conclusion
Removing molding from the floor is a task that can significantly transform the appearance and functionality of a room. Whether you’re updating your flooring, renovating, or simply refreshing the space, knowing how to properly remove molding is essential. Throughout this article, we have provided a comprehensive guide on how to remove various types of molding, including baseboards, quarter round molding, shoe molding, and crown molding.
Remember to always prioritize safety by wearing protective gear and creating a safe workspace. Assess the type of molding and its condition to determine the best approach for removal. Use the appropriate tools and techniques to gently pry the molding away from the wall and floor, taking care not to cause any damage in the process.
After removing the molding, it’s important to assess and address any damages or gaps left behind. Patch and repair the floor as needed, filling in any imperfections to achieve a smooth surface. If desired, you can take it a step further and sand and refinish the floor for a polished, new look.
Throughout the entire process, be patient, meticulous, and mindful of the materials and surfaces involved. When done correctly, the removal of molding from the floor can be a rewarding task that breathes new life into your space.
Whether you’re a seasoned DIY enthusiast or a beginner, it’s always helpful to consult resources, tutorials, or professionals if you have any questions or concerns. By successfully removing molding and revitalizing your floor, you can create a visually pleasing environment that reflects your personal style and enhances the overall ambiance of your home.
Frequently Asked Questions about How To Remove Molding From Floor
Was this page helpful?
At Storables.com, we guarantee accurate and reliable information. Our content, validated by Expert Board Contributors, is crafted following stringent Editorial Policies. We're committed to providing you with well-researched, expert-backed insights for all your informational needs.


0 thoughts on “How To Remove Molding From Floor”