Home>Articles>How To Remove A Window And Replace With Siding
Articles
How To Remove A Window And Replace With Siding
Modified: October 28, 2024
Learn how to remove a window and replace it with siding in this informative article. Step-by-step instructions and tips for a successful project.
(Many of the links in this article redirect to a specific reviewed product. Your purchase of these products through affiliate links helps to generate commission for Storables.com, at no extra cost. Learn more)
Introduction
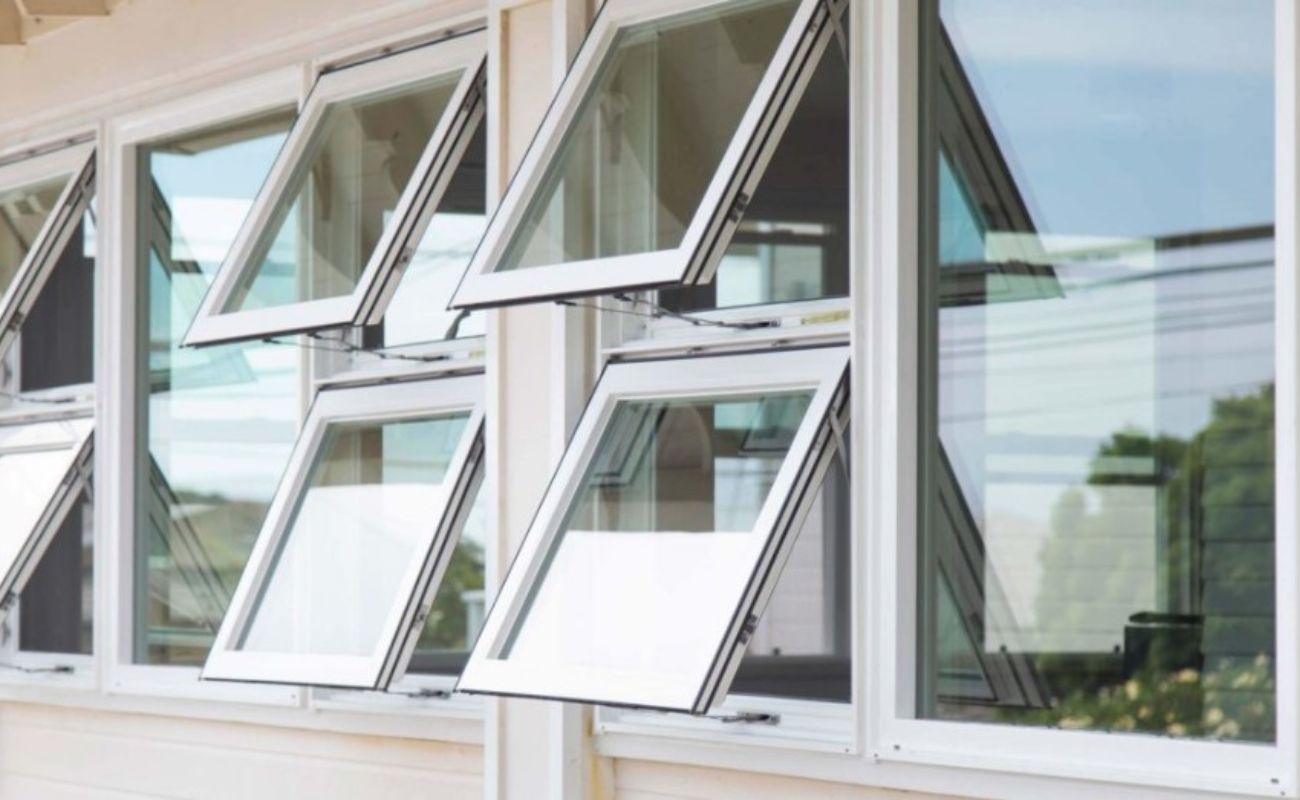
Welcome to our comprehensive guide on how to remove a window and replace it with siding. If you’re looking to update the exterior of your home, replacing a window with siding can be a great option. This project not only improves the appearance of your house but also eliminates the need for maintenance and reduces the risk of window-related issues in the future.
Before you begin, it’s important to gather all the necessary materials and tools. This includes the siding panels, a pry bar or crowbar, a circular saw, a utility knife, a drill, screws or nails, caulk, a caulk gun, a level, a tape measure, and safety equipment such as gloves and goggles.
Once you have everything you need, you can move on to preparing the window opening. This involves removing any window trim or molding and ensuring that the opening is clean and free of debris.
After preparing the window opening, the next step is to remove and dispose of the window. This can be done by carefully prying off the window sashes, removing any remaining screws or nails, and then lifting the window out of the frame. Proper disposal of the old window is essential, so be sure to follow local regulations and guidelines.
With the window out of the way, you can now start installing the new siding. Measure and cut the siding panels to fit the opening, ensuring a proper fit. Use a level to ensure that the siding is straight and level before securing it in place with screws or nails.
Once the siding is secured, it’s important to caulk and seal the edges to prevent any moisture from seeping in. Use a high-quality exterior caulk and apply it along the edges of the siding, smoothing it out with a caulk gun. This will help create a watertight seal and protect against any potential leaks.
After completing the installation, it’s time to do some final touches and cleaning up. Trim any excess siding, touch up any paint, and clean up any debris or mess from the installation process. Step back and admire your newly replaced window with siding.
While removing a window and replacing it with siding may seem like a daunting task, with the right materials, tools, and instructions, it can be a rewarding home improvement project. So, grab your tools and get ready to transform the look of your home!
Key Takeaways:
- Replacing a window with siding can enhance your home’s appearance, reduce maintenance needs, and improve energy efficiency. Follow the step-by-step guide for a successful and rewarding home improvement project.
- Proper preparation, careful installation, and thorough sealing are essential for a seamless and durable siding replacement. Enjoy the transformed exterior and the long-term benefits of your accomplished project.
Read more: How To Replace Passenger Side Window Glass
Step 1: Gather Materials and Tools
The first step in removing a window and replacing it with siding is to gather all the necessary materials and tools. Having everything you need at the beginning will make the process smoother and more efficient.
Here’s a list of the materials and tools you’ll need for this project:
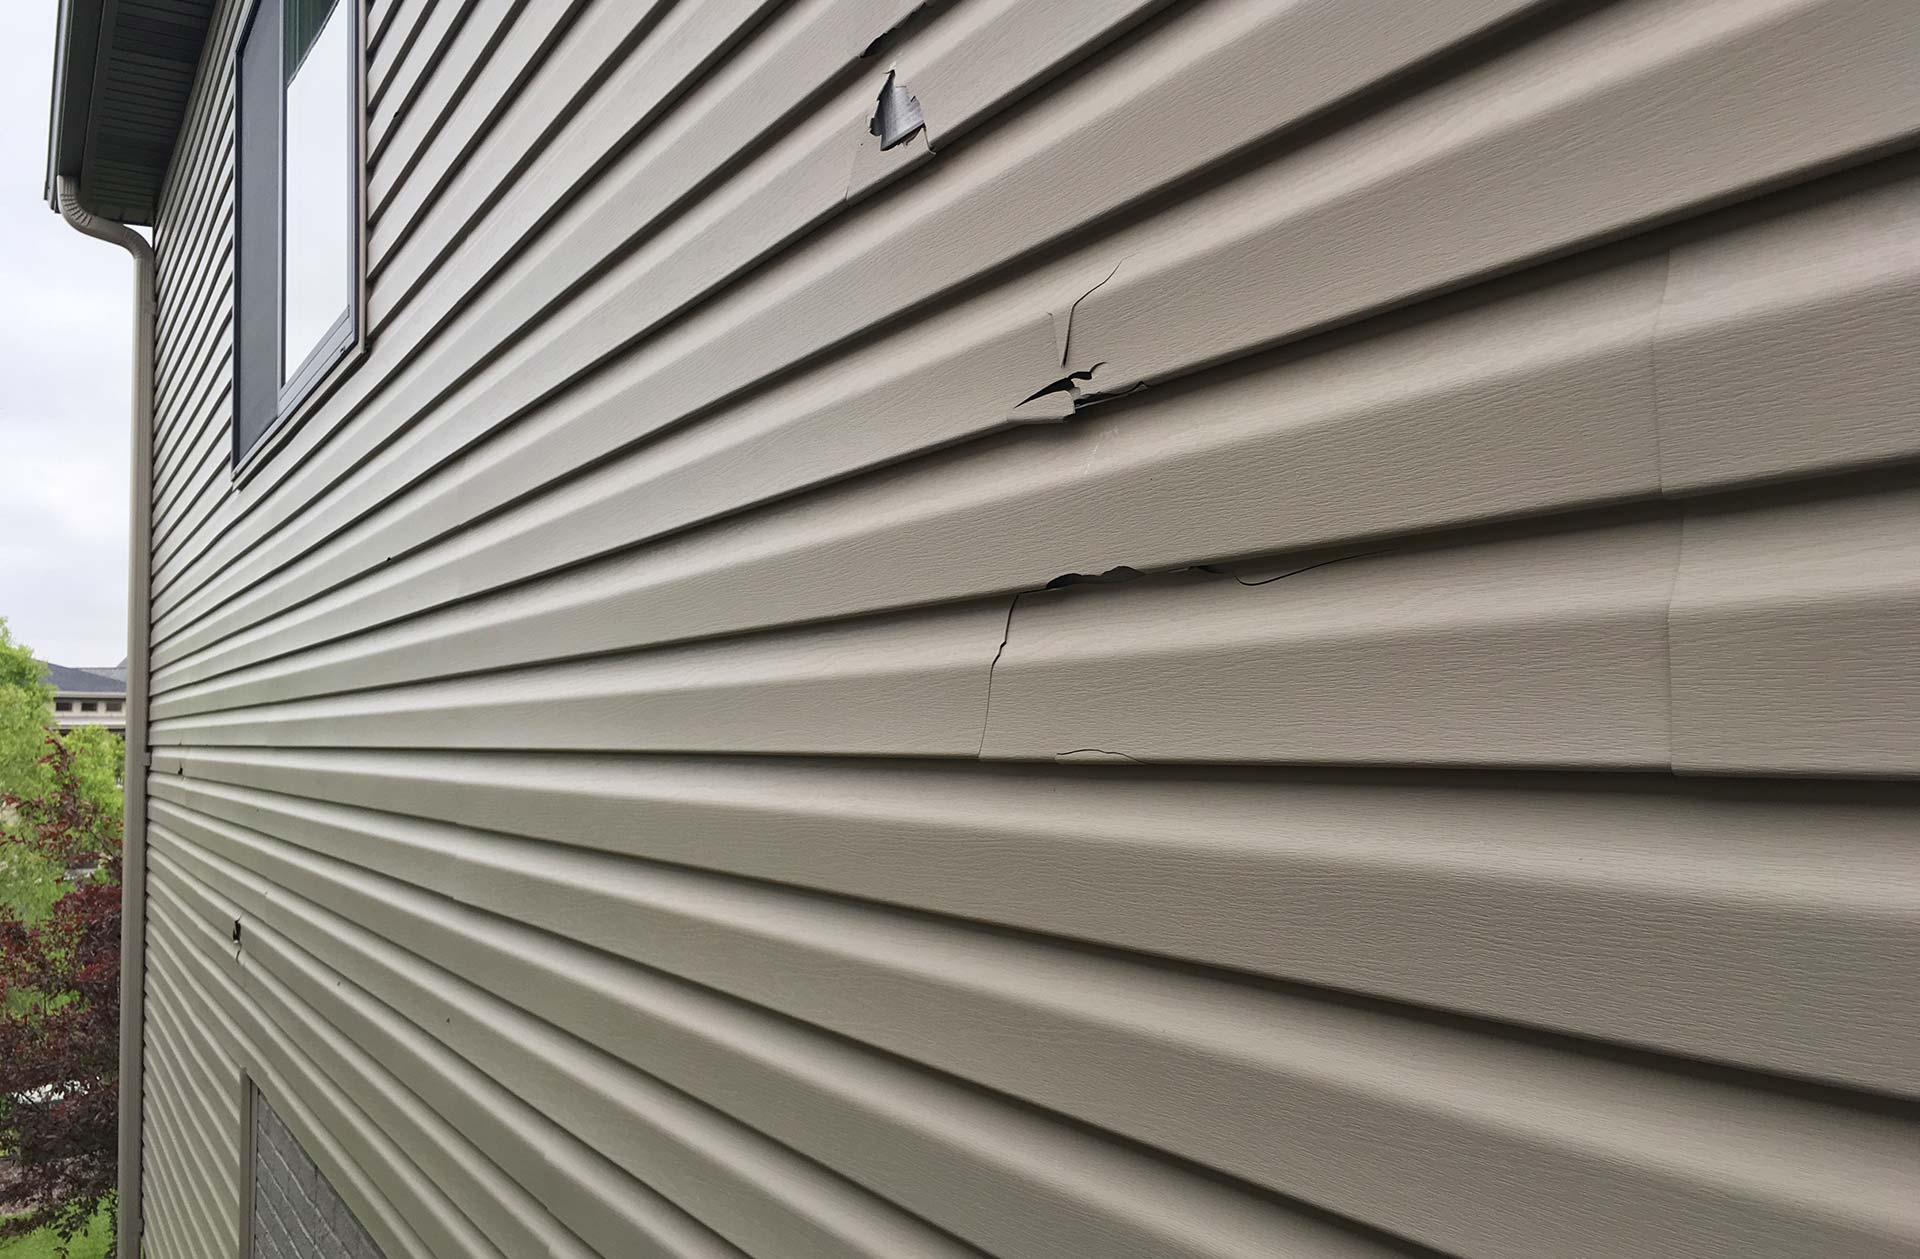
- Siding panels: Measure the size of the window opening to determine how many panels you’ll need. Choose a siding material that matches the exterior of your home and provides durability and weather resistance.
- Pry bar or crowbar: This tool will be used to remove any window trim or molding around the window opening.
- Circular saw: A circular saw with a fine-toothed blade will come in handy for cutting the siding panels to fit the window opening.
- Utility knife: Use a utility knife to score and cut through any caulk or sealant around the window.
- Drill: A drill will be needed to remove any screws or nails holding the window in place.
- Screws or nails: These fasteners will be used to secure the siding panels in place.
- Caulk and caulk gun: High-quality exterior caulk is essential for sealing the edges of the siding and preventing water infiltration.
- Level: Use a level to ensure that the siding panels are straight and level during installation.
- Tape measure: Accurate measurements are crucial for cutting the siding panels to the correct size.
- Safety equipment: Safety should always be a priority when working with tools. Be sure to wear gloves and goggles to protect your hands and eyes.
By gathering these materials and tools before you begin the project, you’ll save time and avoid any unnecessary trips to the hardware store. Make sure to check that everything is in good working condition and that you have enough of each item to complete the job.
It’s also a good idea to familiarize yourself with the instructions and safety guidelines provided with your specific siding material. Some materials may have unique installation requirements or precautions to be aware of.
Once you have all the necessary materials and tools at hand, you’re ready to move on to the next step: preparing the window opening.
Step 2: Prepare the Window Opening
After gathering the materials and tools, the next step in removing a window and replacing it with siding is to prepare the window opening. This involves removing any window trim or molding and ensuring that the opening is clean and free of debris.
Here’s a step-by-step guide on how to prepare the window opening:
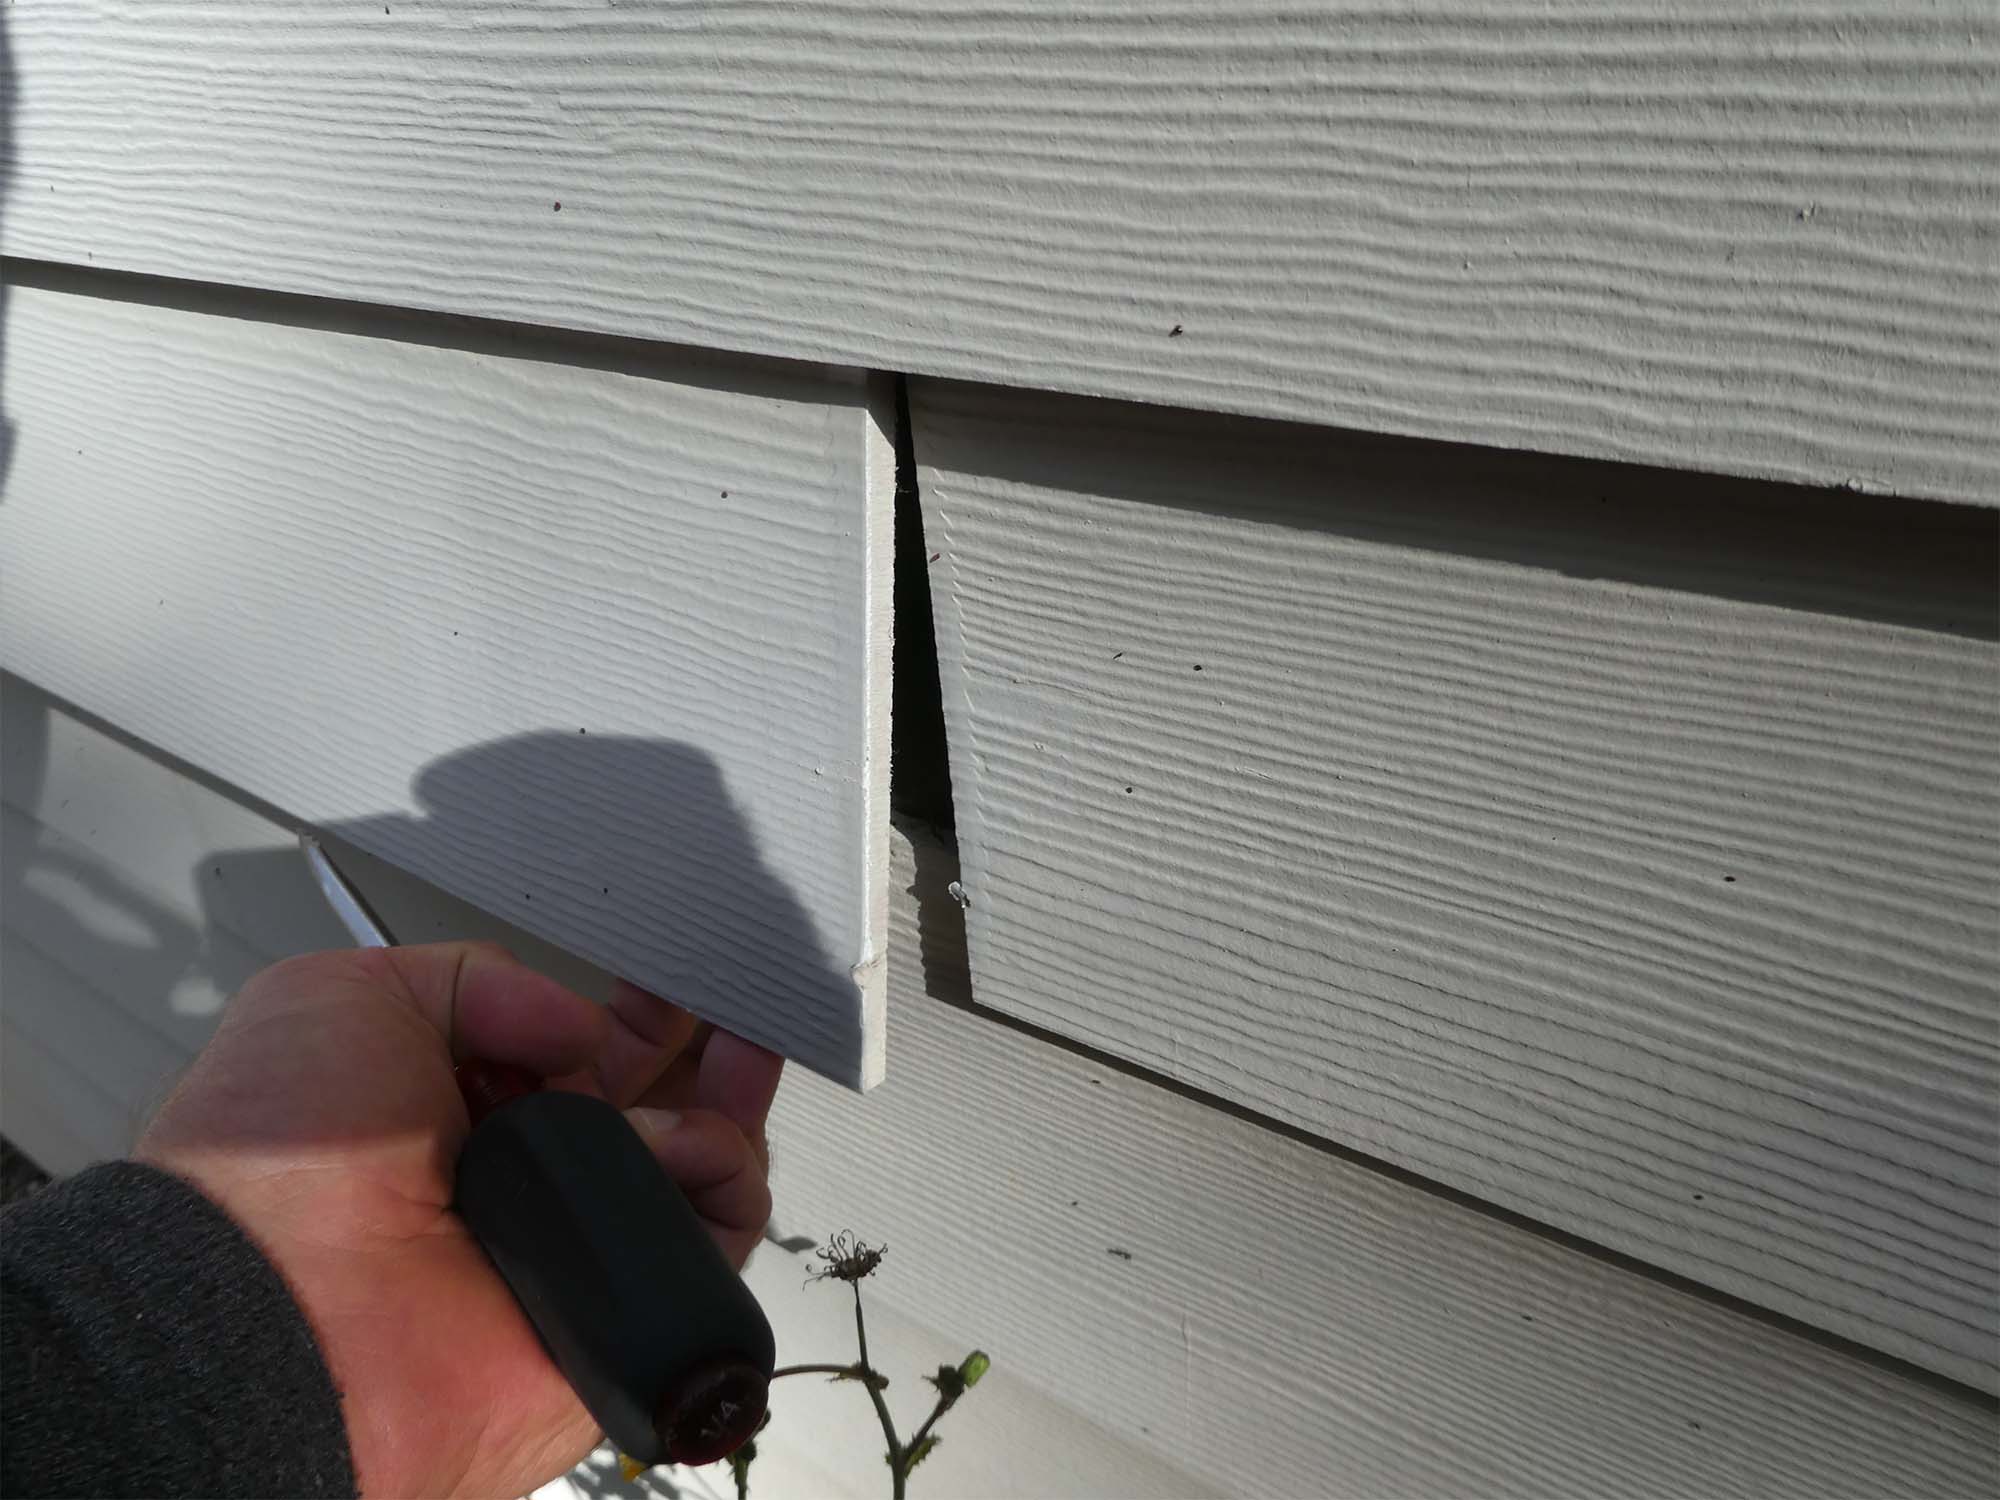
- Start by carefully removing any window trim or molding around the window. Use a pry bar or crowbar to gently pry it off, being careful not to damage the surrounding surfaces.
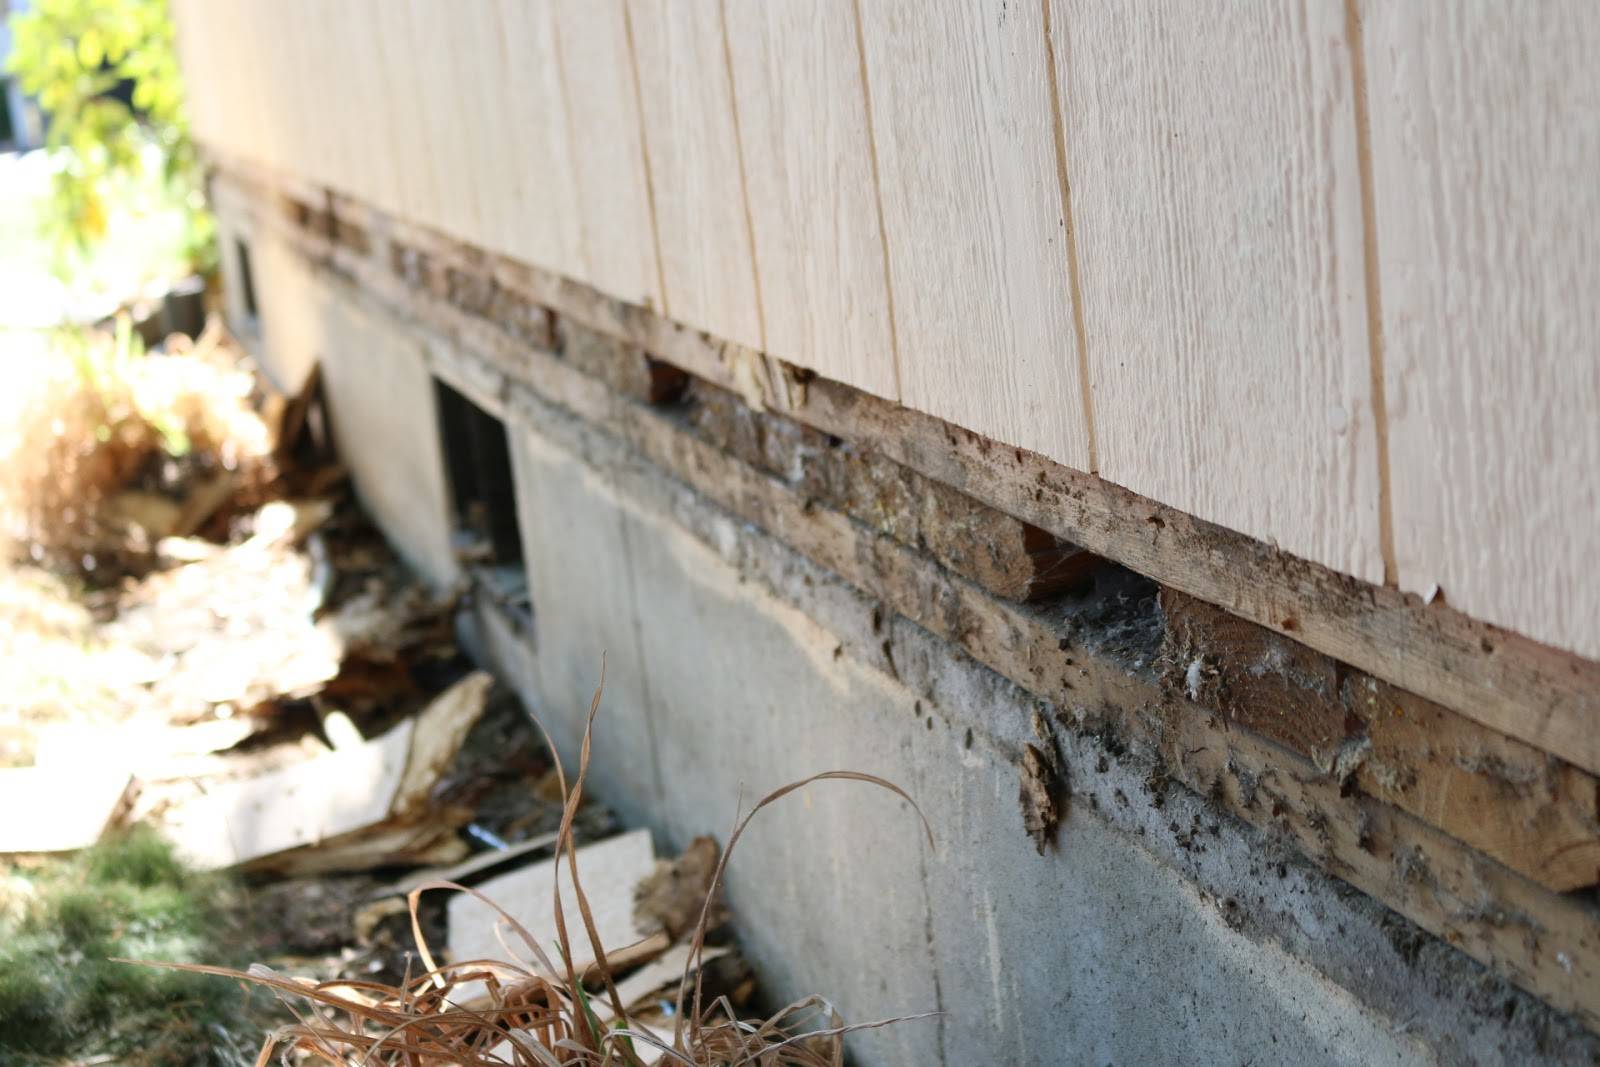
- Once the trim or molding is removed, inspect the window opening for any signs of damage or deterioration. Look for rot, water damage, or any other problems that may need to be addressed before installing the new siding.
- Clear away any dirt, dust, or debris from the window opening. Use a brush or vacuum cleaner to ensure that the area is clean and ready for the installation of the siding.
- If there are any gaps or cracks around the edges of the window opening, fill them in with caulk. This will help create a smooth and even surface for the siding to be installed on.
- Finally, measure the dimensions of the window opening. These measurements will be used to cut the siding panels to the correct size.
Preparing the window opening is a crucial step in the process, as it ensures that the siding will be installed properly and securely. By removing any trim or molding and cleaning the area, you create a clean slate for the new siding to be installed on. Additionally, addressing any damage or gaps in the window opening will help prevent any future issues with the siding.
Once the window opening is prepared, you’re ready to move on to the next step: removing and disposing of the window.
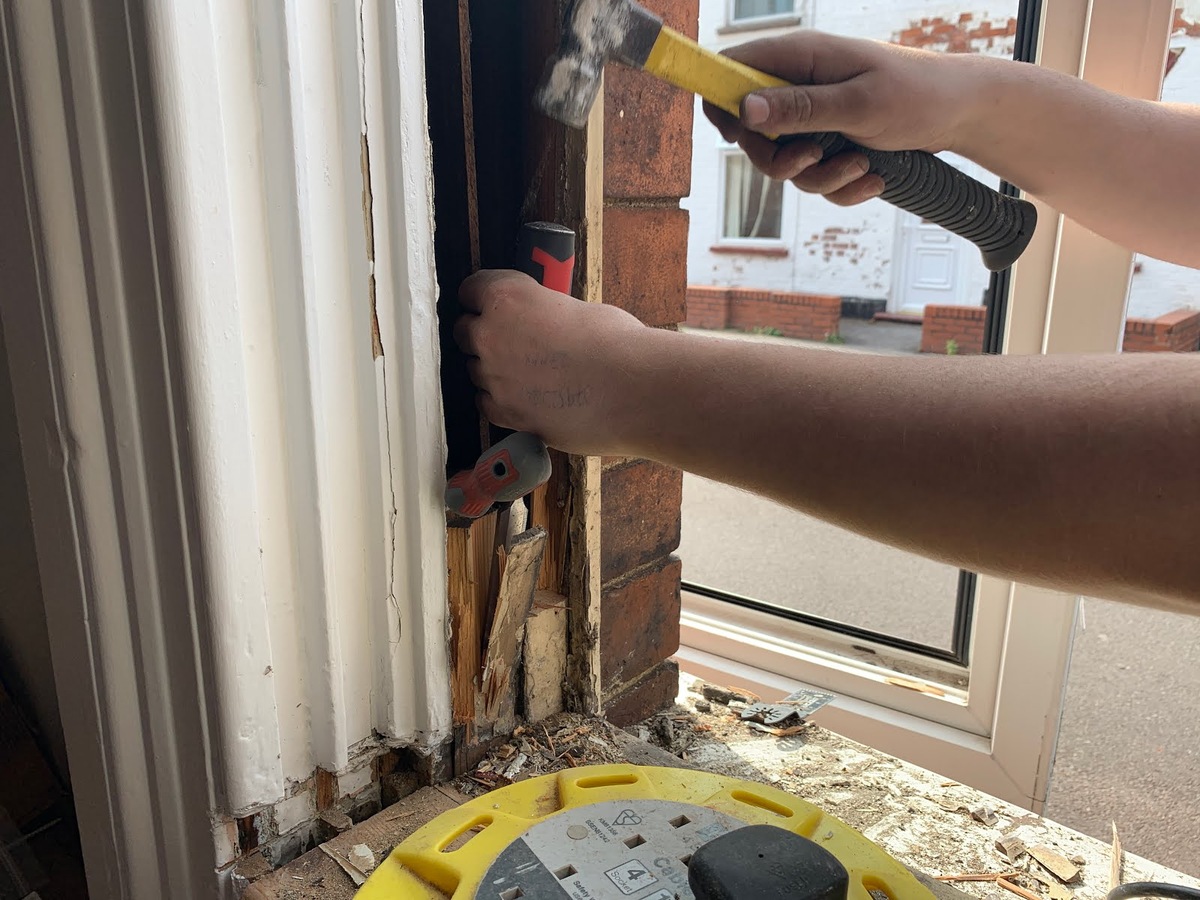
Step 3: Remove and Dispose of the Window
With the window opening prepared, it’s time to remove the existing window and dispose of it properly. This step requires caution and care to ensure that the window is removed safely and without causing damage to the surrounding area.
Follow these steps to remove and dispose of the window:
- Start by removing any screws or nails that may be securing the window in place. Use a drill or a screwdriver to carefully remove these fasteners.
- Next, use a pry bar or crowbar to carefully pry off the window sashes. Gently insert the pry bar between the frame and the sashes and apply pressure to release them. Be cautious not to use excessive force that could cause damage to the surrounding structure.
- After removing the sashes, inspect the window frame for any remaining screws or nails. Remove them using a drill or a screwdriver.
- Once all fasteners have been removed, lift the window out of the frame. This may require the assistance of a helper, especially if the window is large or heavy.
- Place the removed window in a safe location where it won’t cause any obstructions or hazards. If the window is still in good condition, consider donating it or selling it to someone who could make use of it.
- Properly dispose of any broken or damaged window components. Refer to local regulations and guidelines for the correct method of disposal. Some areas have specific requirements for disposing of glass and other window materials.
Removing and disposing of the window is an essential step in the process, as it clears the way for the installation of the new siding. It’s important to handle the window with care during removal to prevent any injuries or damage. If you’re uncertain about any aspect of the removal process, it’s advisable to seek guidance from a professional.
With the old window removed and disposed of, you can now proceed to the next step: installing the new siding.
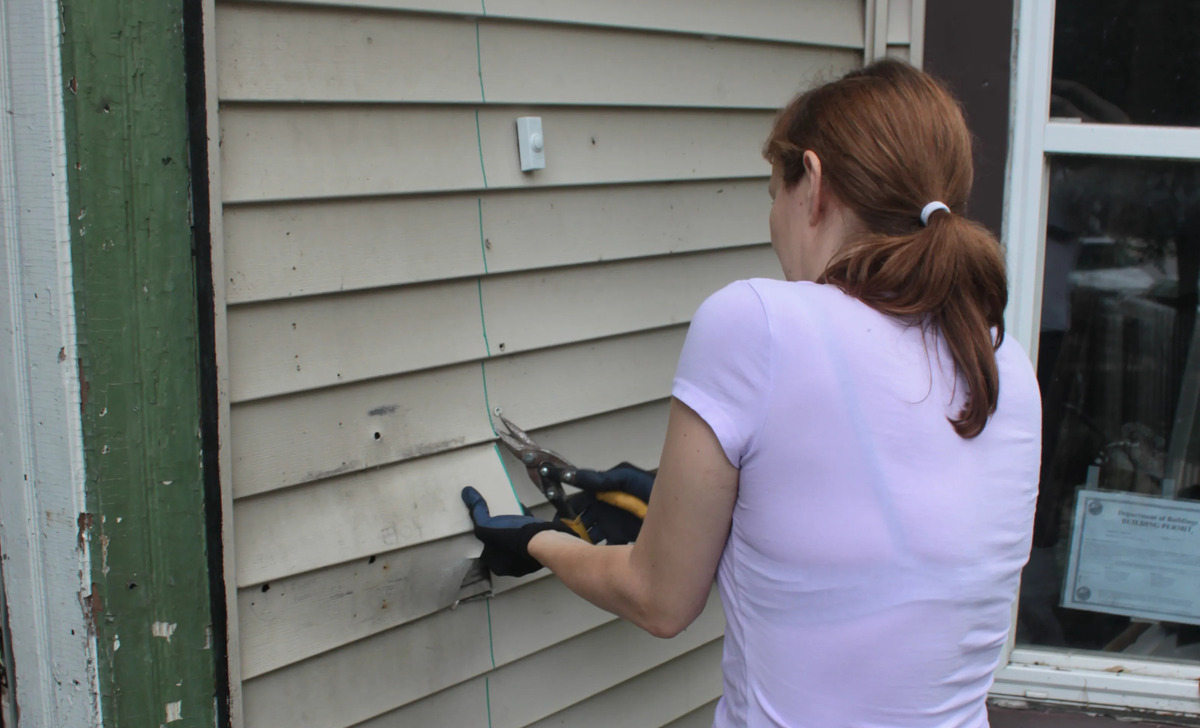
Step 4: Install New Siding
With the old window removed, it’s time to install the new siding and transform the window opening into a seamless part of your exterior wall. Proper installation is crucial to ensure the longevity and visual appeal of the siding.
Follow these steps to install the new siding:
- Measure the dimensions of the window opening and transfer those measurements onto the siding panels. Use a pencil or marker to mark the cutting lines.
- Using a circular saw with a fine-toothed blade, carefully cut along the marked lines. Take your time and ensure clean and straight cuts.
- Hold the first siding panel up to the window opening and check that it fits properly. Make any necessary adjustments to the panel by trimming it further if needed.
- Once you’re satisfied with the fit, position the siding panel flush against the wall, aligning it with the other existing siding panels if applicable.
- Use a level to make sure that the panel is straight and level. Make any adjustments as needed.
- Secure the siding panel in place by driving screws or nails through the pre-drilled holes or the designated attachment points on the panel. Be sure to follow the manufacturer’s instructions for the recommended fasteners and spacing.
- Repeat the process with the remaining siding panels, ensuring that each one is properly aligned, leveled, and securely attached to the wall.
During the installation process, it’s important to check the alignment and levelness of each panel as you go. This will help maintain a consistent and professional look once the siding is complete.
If you’re using siding panels with interlocking edges, make sure the panels are interlocked securely to prevent any gaps or misalignment. If necessary, apply gentle pressure or use a rubber mallet to lock them into place.
Remember to leave a small gap between the siding panels and the surrounding structure to allow for natural expansion and contraction due to temperature changes.
Installing the new siding may require the help of a second person, especially for larger panels or hard-to-reach areas. Having an extra set of hands can make the process faster and more efficient.
Once all the siding panels are installed, step back and admire your progress. The window opening is now seamlessly integrated into the exterior wall with the new siding.
In the next step, we’ll discuss how to secure the siding and ensure a durable and weather-resistant finish.
When removing a window and replacing it with siding, be sure to properly seal and weatherproof the area to prevent any water damage. Use a waterproof membrane and flashing to ensure a tight seal.
Step 5: Secure the Siding
After installing the new siding, it’s important to secure it properly to ensure a durable and long-lasting finish. Securing the siding will help prevent any shifting, warping, or damage caused by weather elements or external forces.
Here’s how you can securely attach the siding:
- Starting from the bottom, carefully drive screws or nails through the designated attachment points on the siding panels. Be sure to follow the manufacturer’s recommendations for the recommended fasteners and spacing.
- Continue working your way up the siding, securing each panel at the designated attachment points.
- Drive the fasteners in straight and with the appropriate force. Avoid over-tightening, as it could cause damage to the siding or compromise its integrity.
- As you secure each panel, double-check that they remain aligned and level with the surrounding panels. If any adjustments are needed, make them before moving on to the next panel.
- If you’re using siding panels with interlocking edges, make sure they are securely interlocked to create a tight and seamless connection between panels.
- Repeat the process for all the siding panels to ensure that each one is firmly secured to the wall.
Properly securing the siding is crucial to its performance and longevity. Make sure to follow the manufacturer’s instructions regarding the recommended fasteners and spacing. Using the wrong type of fastener or improper spacing can compromise the integrity of the siding and increase the risk of damage.
It’s also important to take into account the exterior conditions and climate of your area. If you live in a region with high winds or extreme weather, you may need to take additional precautions, such as using longer or stronger fasteners or adding extra reinforcement.
By securely attaching the siding, you can have peace of mind knowing that it will stay in place and withstand the elements for years to come.
In the next step, we’ll discuss how to caulk and seal the siding to ensure a watertight and weather-resistant finish.
Step 6: Caulk and Seal the Siding
Once the siding is securely attached, the next step is to caulk and seal the edges to create a watertight and weather-resistant finish. Caulking and sealing will help prevent any water infiltration, maintain the integrity of the siding, and protect your home from potential damage.
Follow these steps to properly caulk and seal the siding:
- Inspect the edges of the siding and identify any gaps or openings between the siding panels and the surrounding structure.
- Using a high-quality exterior caulk, load the caulk gun and cut the tip of the caulk tube at a 45-degree angle.
- Apply a thin and even bead of caulk along the edges of the siding, filling in any gaps or openings. Start from the bottom and work your way up, ensuring complete coverage.
- Smooth out the caulk with a caulk smoothing tool, your finger, or a damp cloth to create a neat and seamless finish. Wipe away any excess caulk.
- Repeat the process for all the edges and joints where the siding meets other surfaces, such as windows, doors, and trim.
- Allow the caulk to cure according to the manufacturer’s instructions. This typically takes around 24 hours, but it may vary depending on the specific caulk product.
When selecting an exterior caulk, opt for a product that is specifically designed for outdoor use and has excellent adhesion and weather resistance properties. Silicone or polyurethane caulks are often recommended for their durability and flexibility.
Ensuring proper caulking and sealing is crucial to prevent water infiltration and maintain the longevity of the siding. Water intrusion can lead to rot, mold growth, and damage to the underlying structure, so taking the time to seal any potential entry points is essential.
Regularly inspect the caulked areas for any signs of deterioration or cracking. If needed, reapply caulk to maintain a watertight seal and protect against any potential leaks.
In the final step, we’ll discuss how to clean up and add final touches to complete the process of removing a window and replacing it with siding.
Step 7: Clean up and Final Touches
With the siding installed, caulked, and sealed, it’s time to clean up the area and add final touches to complete the process of removing a window and replacing it with siding. Cleaning up and paying attention to the details will ensure a polished and professional finish to your home’s exterior.
Follow these steps to clean up and add final touches:
- Trim any excess siding as needed. Use a circular saw or a utility knife to trim the siding panels, ensuring that they align neatly with the surrounding surfaces.
- Touch up any paint or stain on the siding or the surrounding structure. If there are any scuffs or marks, matching the color with touch-up paint will help maintain a uniform appearance.
- Inspect the area for any debris or mess from the installation process. Clean up any leftover materials, tools, or waste to leave the area neat and tidy.
- Take a step back and assess the overall appearance. Ensure that the siding is aligned, level, and properly installed. Check for any visible gaps, loose panels, or imperfections that require adjustment or repair.
- Consider adding any finishing touches to enhance the aesthetics of the siding installation. This could include decorative trim, shutters, or other architectural elements that complement your home’s style.
By taking the time to clean up and attend to the final touches, you can achieve a professional and polished look for your newly replaced window with siding. This attention to detail will contribute to the overall beauty and curb appeal of your home.
Remember to refer to the product specifications and manufacturer’s instructions for any specific cleaning or maintenance recommendations for your chosen siding material. Regular cleaning and maintenance will help prolong the lifespan of the siding and keep it looking its best.
Congratulations! You have successfully completed the process of removing a window and replacing it with siding. This home improvement project not only enhances the appearance of your house but also provides long-term benefits in terms of durability, low maintenance, and improved energy efficiency.
Enjoy your newly transformed exterior, and take pride in the fact that you accomplished this project to enhance the beauty and functionality of your home!
Conclusion
Removing a window and replacing it with siding is a significant home improvement project that can greatly enhance the appearance and functionality of your home’s exterior. By following the steps outlined in this comprehensive guide, you can successfully complete the process and enjoy the benefits that come with it.
Throughout the process, it’s important to gather all the necessary materials and tools, prepare the window opening, and remove the old window safely and responsibly. Installing the new siding requires careful measurement, alignment, and secure attachment to ensure a seamless and professional finish.
Caulking and sealing the edges of the siding is crucial to prevent water infiltration and maintain the integrity of the installation. Taking the time to clean up the area and adding final touches will add the finishing touches to your project, leaving your home looking beautiful and well-maintained.
By replacing a window with siding, you not only improve the aesthetics of your home but also eliminate the need for window maintenance and reduce the risk of window-related issues. Additionally, siding provides added insulation and weather resistance, which can contribute to improved energy efficiency and cost savings.
Remember, it’s always a good idea to consult with professionals or refer to manufacturer’s instructions for specific guidance and recommendations based on your specific circumstances and the type of siding materials you are using.
Now that you have completed this project, take a step back and admire the transformation of your home. You have not only accomplished a challenging task but also added value and curb appeal to your property.
So, go ahead and enjoy the benefits of your new siding, knowing that you have taken a significant step towards improving your home’s exterior for years to come!
Frequently Asked Questions about How To Remove A Window And Replace With Siding
Was this page helpful?
At Storables.com, we guarantee accurate and reliable information. Our content, validated by Expert Board Contributors, is crafted following stringent Editorial Policies. We're committed to providing you with well-researched, expert-backed insights for all your informational needs.


0 thoughts on “How To Remove A Window And Replace With Siding”