Home>Articles>How To Remove Artillery Fungus From Vinyl Siding
Articles
How To Remove Artillery Fungus From Vinyl Siding
Modified: October 28, 2024
Learn effective methods to remove artillery fungus from vinyl siding using simple articles. Say goodbye to stubborn stains and restore the beauty of your home exterior.
(Many of the links in this article redirect to a specific reviewed product. Your purchase of these products through affiliate links helps to generate commission for Storables.com, at no extra cost. Learn more)
Introduction
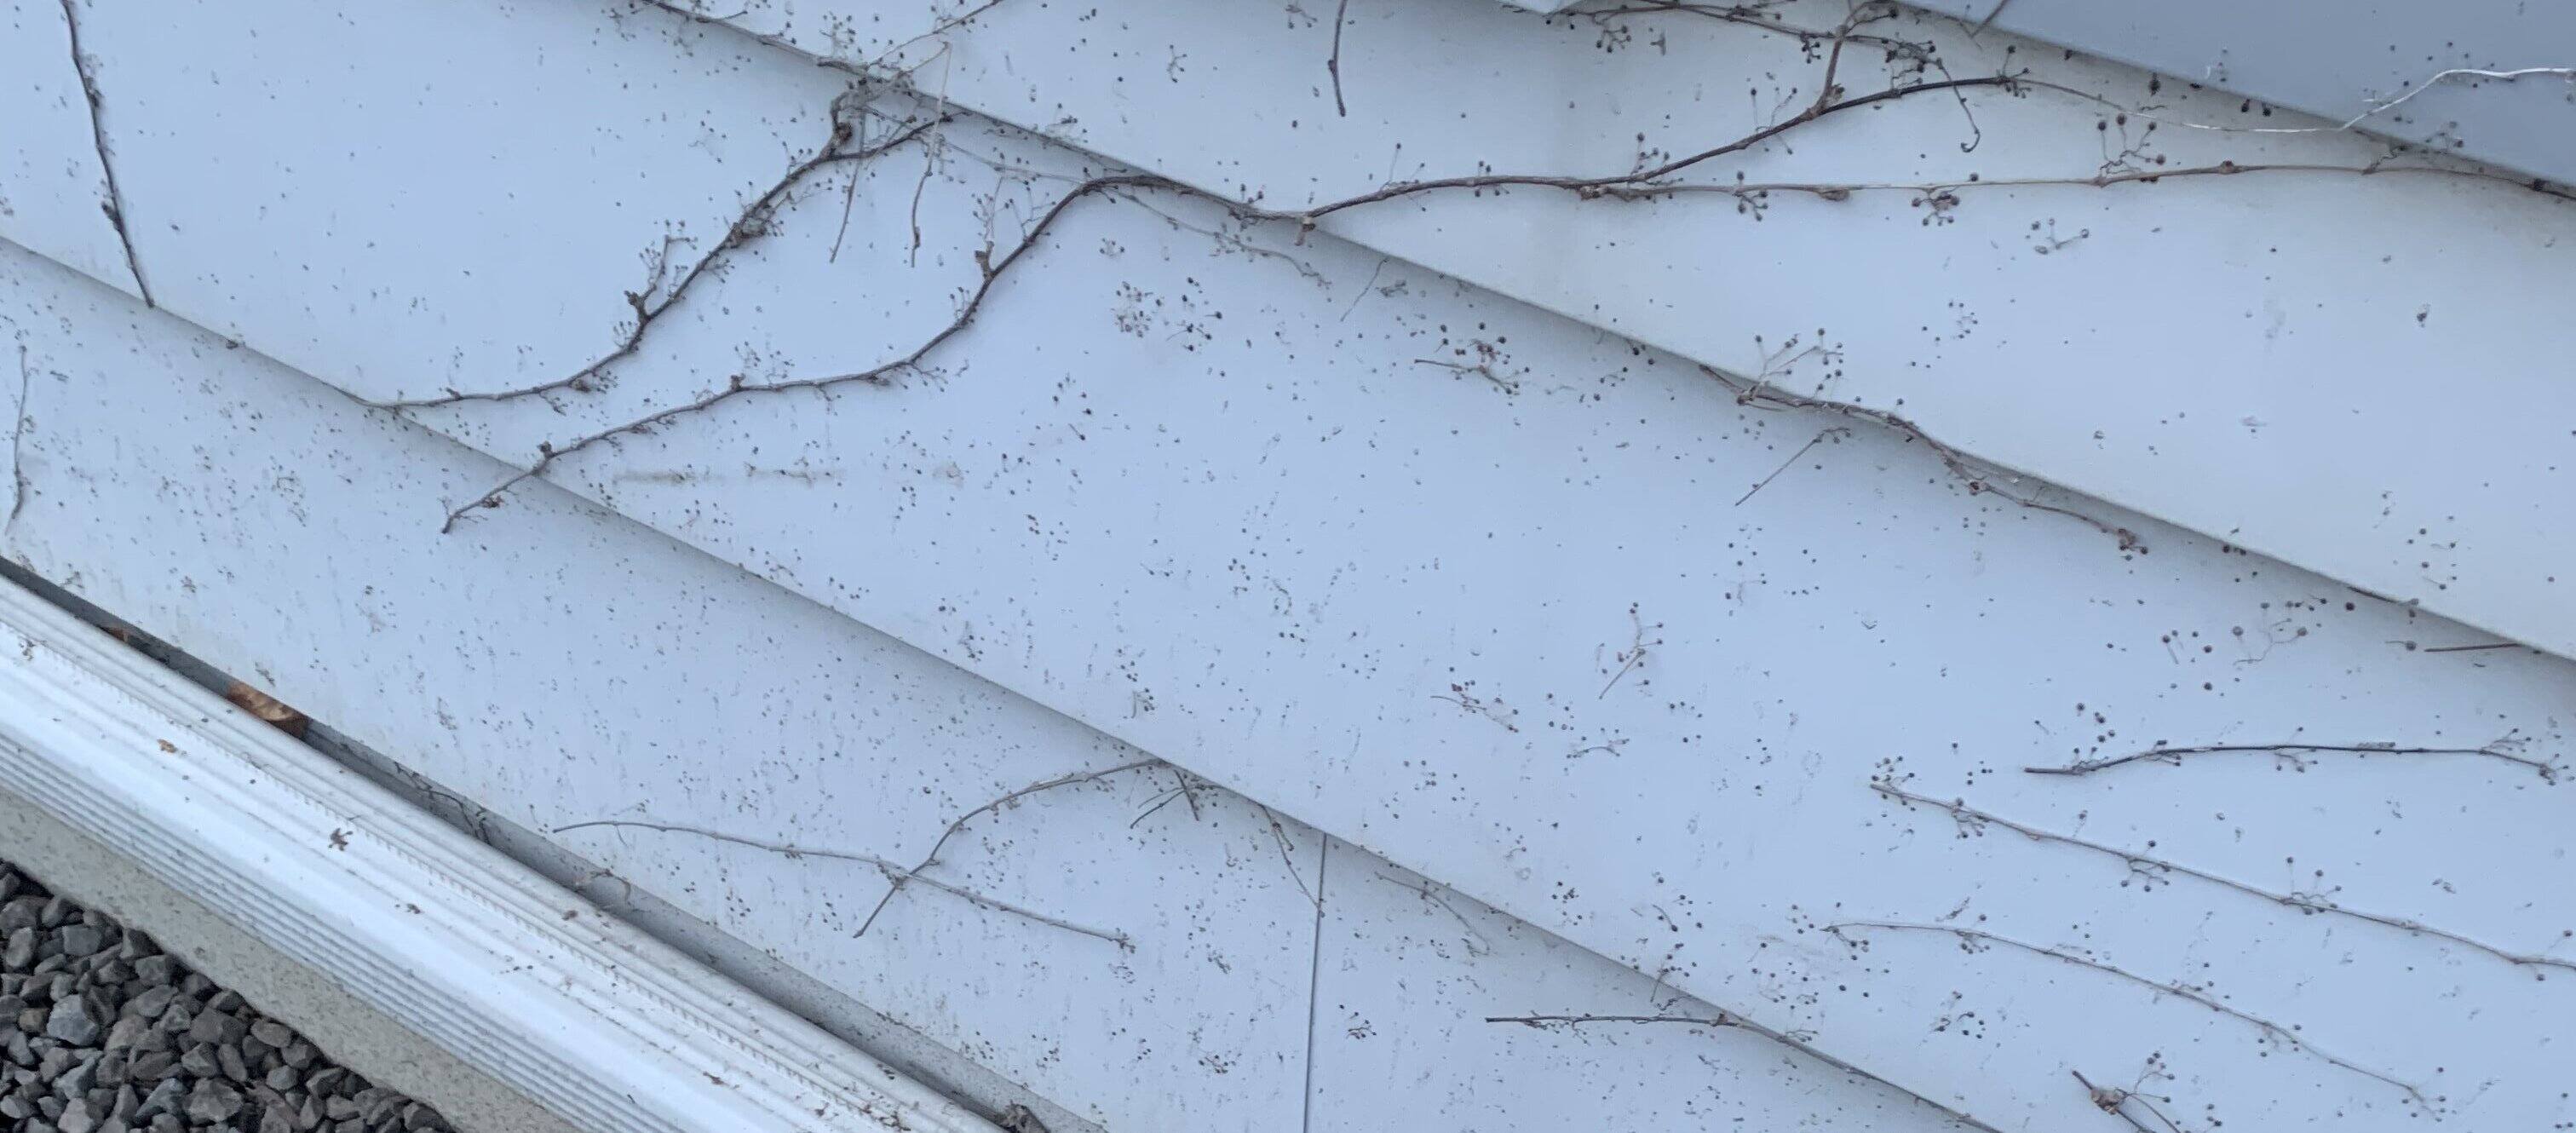
Artillery fungus is a common problem that many homeowners face, especially those with vinyl siding. This fungus, commonly known as shotgun fungus, has the ability to shoot tiny black spores onto surfaces, leaving small, unsightly spots that can be quite difficult to remove.
While artillery fungus does not pose any health risks, it can be a nuisance and negatively impact the aesthetic appeal of your vinyl siding. If left untreated, these spores can become embedded in the material, making it even harder to remove them in the future.
In this article, we will guide you through the process of removing artillery fungus from your vinyl siding. By following these steps and utilizing the right tools and solutions, you can restore the beauty of your home’s exterior and prevent future growth of this pesky fungus.
So, let’s dive in and discover how you can effectively remove artillery fungus from your vinyl siding!
Key Takeaways:
- Proper preparation, including wearing protective gear, choosing the right time, and pre-soaking the siding, is essential for effectively removing artillery fungus from vinyl siding. These steps create an optimal environment for successful fungus removal.
- Preventing future growth of artillery fungus involves maintaining proper landscaping, conducting regular inspections, and considering non-organic mulch or protective coatings. By staying proactive and implementing preventive measures, homeowners can preserve the cleanliness and appearance of their vinyl siding.
Read more: How To Remove Caulk From Vinyl Siding
Understanding Artillery Fungus
Before we delve into the process of removing artillery fungus from vinyl siding, it is important to have a basic understanding of what this fungus is and why it can be a problem.
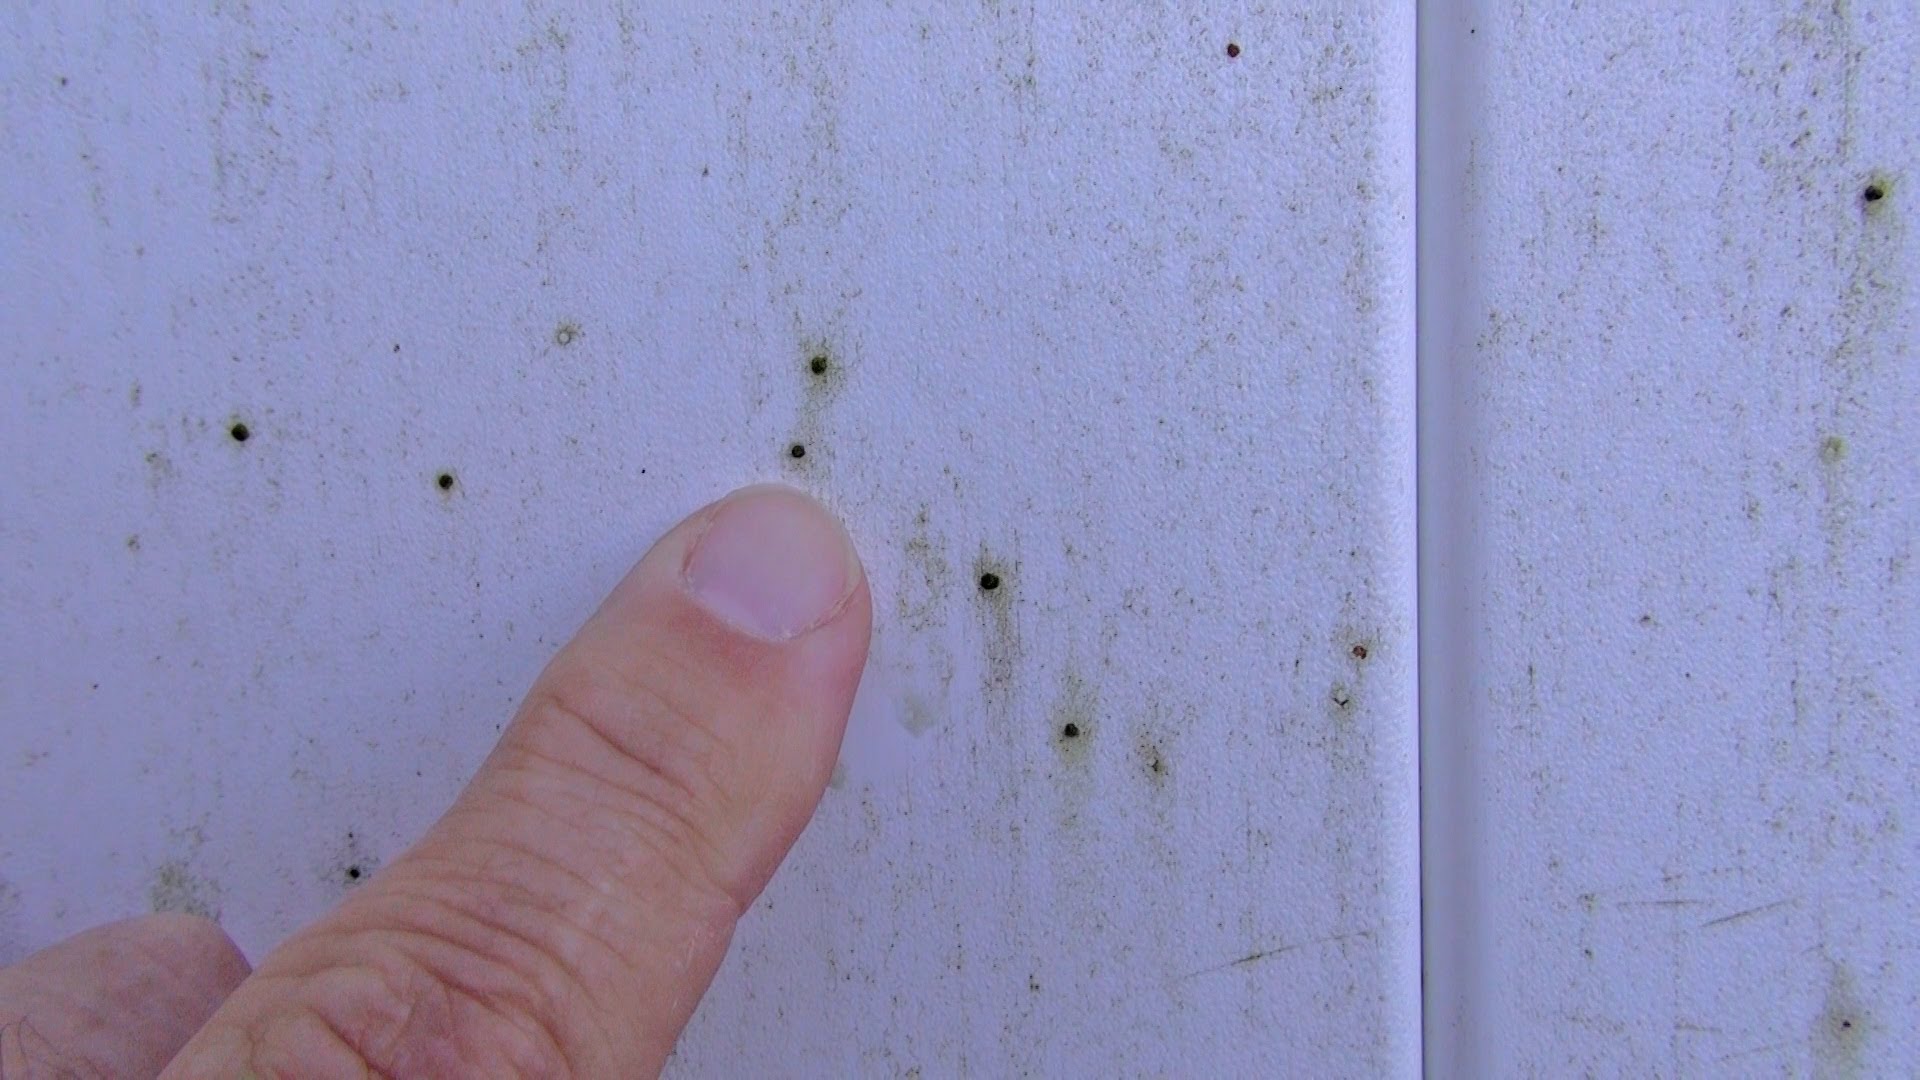
Artillery fungus, scientifically known as Sphaerobolus, is a type of fungus commonly found in decaying organic matter such as mulch or wood chips. It thrives in moist and shady environments, making it a common occurrence in outdoor areas with landscaping.
What sets artillery fungus apart from other fungi is its unique reproductive mechanism. This fungus develops spore-filled structures called perfruiting bodies, which resemble tiny black or brown cups. These cups contain spores that can be forcefully ejected up to 20 feet away when conditions are right.
When these spores come into contact with surfaces such as vinyl siding, they stick and dry out, leaving behind small black spots that are difficult to remove. These spots can be unsightly and can greatly diminish the overall appearance of your vinyl siding.
It is important to note that artillery fungus does not directly damage the vinyl siding itself, but the aesthetic impact can be significant. Additionally, if the spores remain on the surface for an extended period, they can become embedded in the material, making future removal even more challenging.
Now that we have a clear understanding of what artillery fungus is and how it can affect your vinyl siding, let’s move on to the preparation process before attempting to remove it.
Preparing for the Removal Process
Before diving into the actual removal of artillery fungus from your vinyl siding, it is essential to take some preparatory steps to ensure a smooth and effective process. These steps will help protect your siding and facilitate the removal of spores.
Here are some key actions to take before starting the removal process:
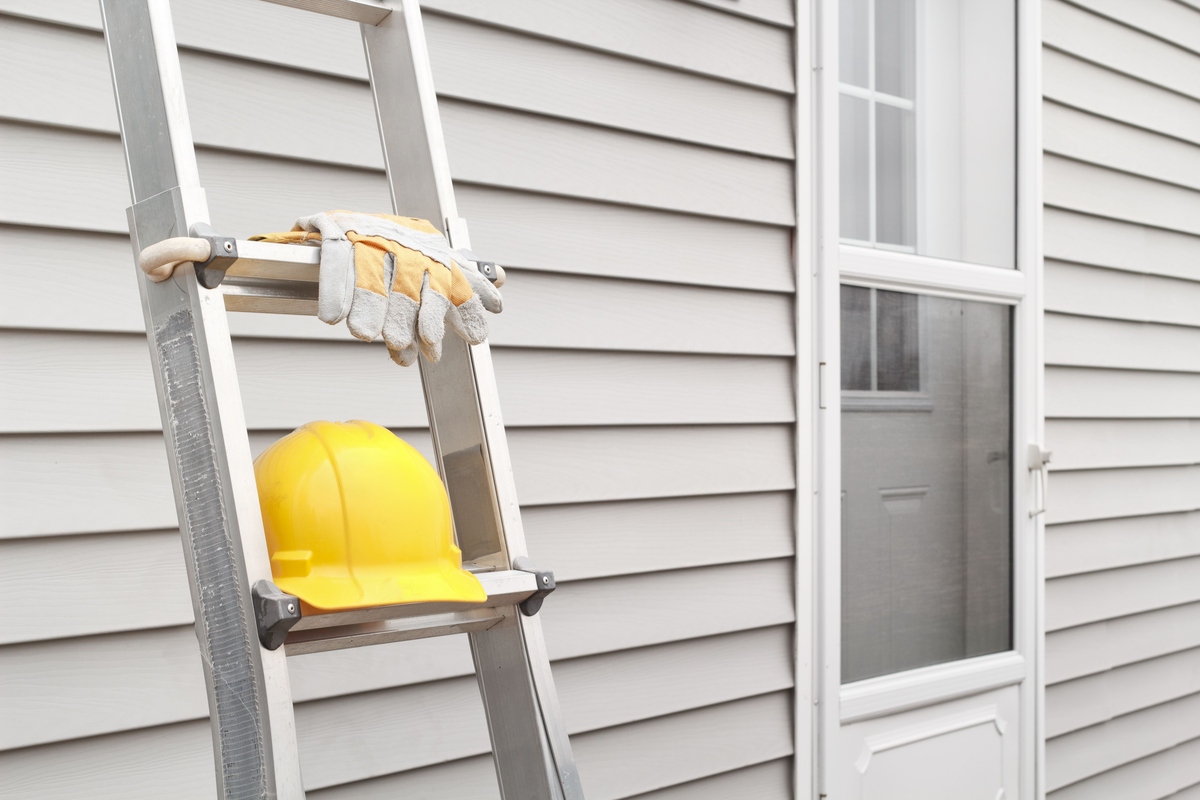
- Wear protective gear: As a precautionary measure, it is advised to wear gloves, eye protection, and a mask while handling artillery fungus. This will protect you from any potential irritation or allergic reactions.
- Choose the right time: It is best to tackle the removal process on a cool and cloudy day to prevent any cleaning solutions from drying out too quickly. Avoid working in direct sunlight as it can make the removal process more challenging.
- Cover nearby plants and surfaces: To prevent any damage or accidental spore transfer, cover any nearby plants, surfaces, or items with plastic sheets or drop cloths. This will help contain the spores and protect the surrounding area.
- Inspect and clean gutters: Check your gutters for any signs of artillery fungus or buildup. Clear out any debris or buildup to minimize the risk of spores spreading to your vinyl siding during the removal process.
- Pre-soak the siding: Before applying any cleaning solutions, pre-soak the affected areas of your vinyl siding with water. This will help loosen the spores and make them easier to remove.
By following these preparatory steps, you will create a favorable environment for effective removal of artillery fungus. Once you have taken these precautions, you can proceed with the actual removal process, which we will outline in the following steps.
Step 1: Gathering the Necessary Supplies
Before you begin the process of removing artillery fungus from your vinyl siding, it is important to gather all the necessary supplies. Having the right tools and cleaning solutions on hand will make the removal process much easier and more efficient. Here are the essential supplies you will need:
- Protective Gear: As mentioned earlier, it is crucial to protect yourself during the removal process. Wear gloves, eye protection, and a mask to safeguard against any potential irritation or allergic reactions.
- Soft-bristle Brush or Sponge: A soft-bristle brush or sponge will be used to gently scrub the affected areas of the vinyl siding. Make sure to choose a brush or sponge that is suitable for use on delicate surfaces to prevent any scratches or damage.
- Cleaning Solution: You have several options for a cleaning solution:
- – Mild Dish Soap Solution: Mix a small amount of mild dish soap with water to create a gentle cleaning solution.
- – Vinegar Solution: Dilute white vinegar with water in a 1:1 ratio to create a natural cleaning solution.
- – Commercial Vinyl Siding Cleaner: You can also opt for a commercial vinyl siding cleaner, which is specifically formulated to remove dirt, grime, and stains from vinyl surfaces.
Choose the option that suits your preference and availability.
- Bucket: A bucket will be used to mix the cleaning solution and water, making it easily accessible during the removal process.
- Water Hose or Pressure Washer: A water hose or pressure washer will be needed to rinse off the cleaning solution and spores from the vinyl siding. If using a pressure washer, make sure to adjust the pressure to a gentle setting to avoid causing any damage to the siding.
By gathering these supplies before starting the removal process, you will be well-prepared and equipped to effectively remove artillery fungus from your vinyl siding. Once you have everything ready, you can move on to the next steps and begin restoring the beauty of your siding.
Step 2: Preparing the Vinyl Siding Surface
Before applying any cleaning solution or starting the actual removal process, it is important to prepare the surface of your vinyl siding. This will ensure that the cleaning solution can work effectively and optimize the removal of artillery fungus.
Here are the steps to prepare the vinyl siding surface:
- Pre-soak the siding: As mentioned earlier, pre-soaking the affected areas of the siding with water will help loosen the spores and make them easier to remove. Use a hose or bucket to thoroughly wet the areas where the artillery fungus is present.
- Test the cleaning solution: Before applying the cleaning solution to the entire siding, it is recommended to test it on a small, inconspicuous area first. This will ensure that the solution does not cause any discoloration or damage to the siding.
- Mix the cleaning solution: Dilute the cleaning solution of your choice with water, following the instructions on the product label or using the appropriate mixture ratio for homemade solutions.
- Apply the cleaning solution: Use a soft-bristle brush or sponge to apply the cleaning solution to the affected areas of the vinyl siding. Start from the bottom and work your way up, applying the solution in a gentle, circular motion.
- Allow the solution to sit: Let the cleaning solution sit on the siding for a few minutes to penetrate and loosen the spores. This will enhance the effectiveness of the solution in removing the artillery fungus.
By properly preparing the vinyl siding surface, you create an optimal environment for the cleaning solution to work its magic. This will help in the successful removal of the artillery fungus in the next steps of the process.
Mix equal parts of white vinegar and water in a spray bottle. Spray the affected area and let it sit for a few minutes, then scrub with a soft brush. Rinse with water. Repeat if necessary.
Step 3: Applying the Removal Solution
After preparing the vinyl siding surface, it’s time to apply the removal solution to effectively eliminate the artillery fungus. The cleaning solution will work to break down and dissolve the spores, making them easier to remove from the siding.
Here’s how to apply the removal solution:
- Dip the brush or sponge: Dip your soft-bristle brush or sponge into the cleaning solution, making sure to saturate it with the solution. This will allow for better distribution and penetration of the solution on the vinyl siding.
- Gently apply the solution: Starting from the bottom of the affected areas, apply the removal solution to the vinyl siding using gentle, circular motions. Work your way up, covering all the spots and ensuring even distribution of the solution.
- Focus on heavily affected areas: Pay additional attention to areas with a higher concentration of spores or more stubborn spots. Give these areas a little extra scrubbing and apply a bit more of the removal solution if needed.
- Let the solution sit: Allow the removal solution to sit on the vinyl siding for a few minutes, giving it time to work its magic on the artillery fungus spores. This will help break down the spores and make them easier to remove.
By following these steps, you can effectively apply the removal solution to eliminate the artillery fungus from your vinyl siding. The next step will involve scrubbing the affected areas to physically remove the spores and restore the exterior of your home.
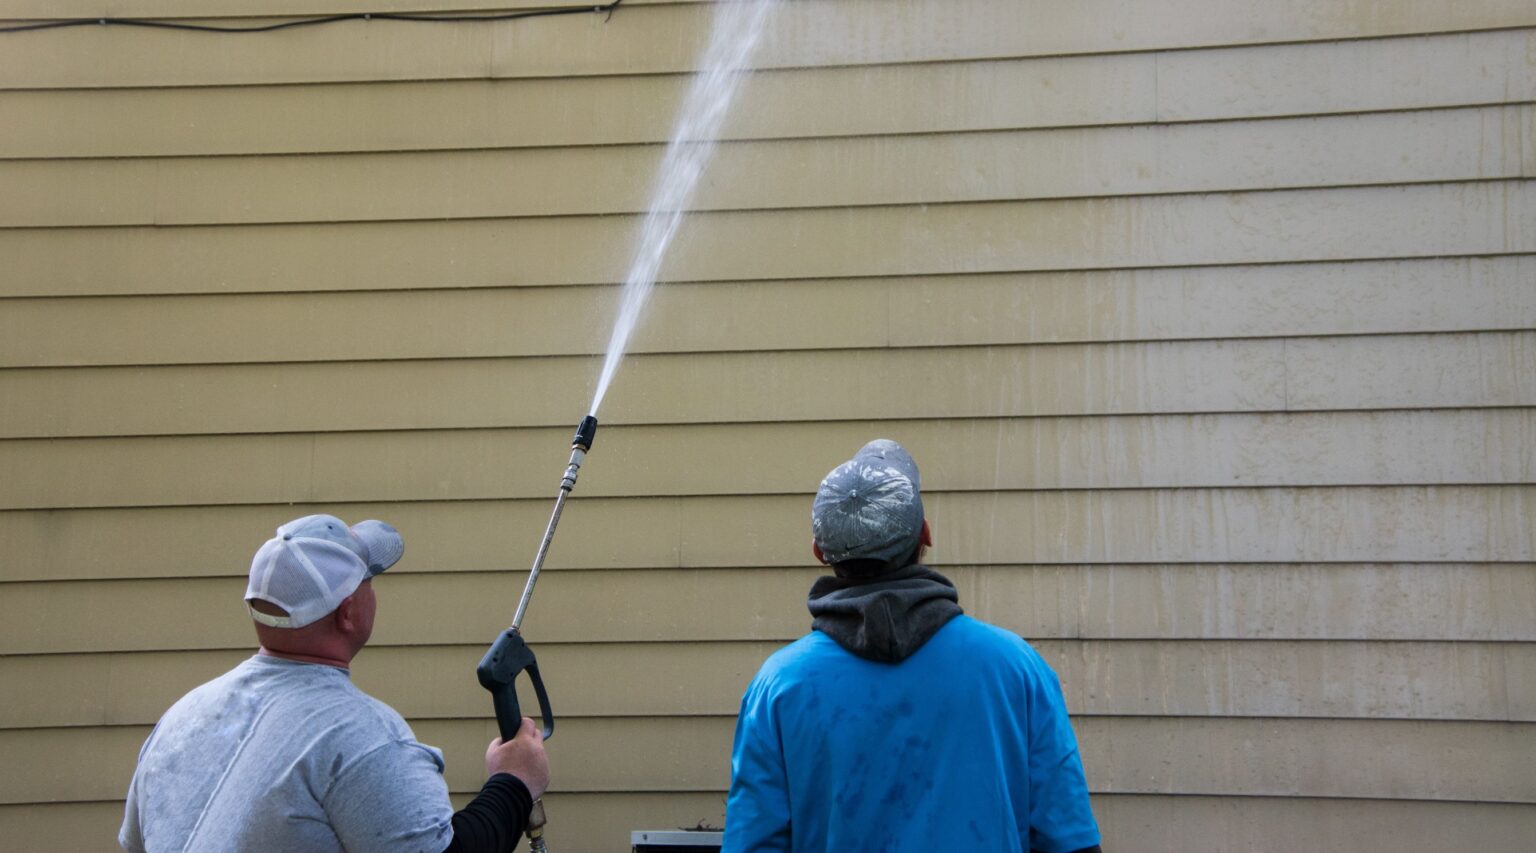
Step 4: Scrubbing the Affected Areas
Now that you’ve allowed the removal solution to sit on the vinyl siding and break down the artillery fungus spores, it’s time to physically scrub the affected areas. This step involves using a soft-bristle brush or sponge to gently agitate the spores and remove them from the surface of the siding.
Here’s how to effectively scrub the affected areas:
- Dampen the brush or sponge: Before scrubbing, dampen your soft-bristle brush or sponge with water to prevent any scratching or damage to the vinyl siding.
- Gently scrub the spots: Starting from the bottom and working your way up, use gentle, circular motions to scrub the areas with artillery fungus spots. Apply slight pressure to dislodge the spores without causing any harm to the siding.
- Pay attention to stubborn spots: If you encounter any stubborn spots that are not easily coming off, spend a bit more time scrubbing those areas. An extra gentle scrubbing or applying a bit more of the cleaning solution can help loosen the spores.
- Rinse off the loosened spores: As you scrub, you will notice the spores loosening and coming off the siding. Rinse your brush or sponge regularly and use clean water to wash away the loosened spores. This will prevent them from resettling on the siding.
- Continue until all spores are removed: Repeat the scrubbing process until all the artillery fungus spores have been successfully removed from the vinyl siding. Take your time and ensure that the spots are no longer visible.
By following these steps, you will be able to effectively scrub the affected areas and remove the artillery fungus from your vinyl siding. Now, let’s move on to the final step of the removal process: rinsing and repeating if necessary.
Step 5: Rinse and Repeat if Necessary
Once you have finished scrubbing the affected areas and removing the artillery fungus spores from your vinyl siding, it’s important to thoroughly rinse off any remaining cleaning solution and residue. Additionally, depending on the severity of the fungus infestation, you may need to repeat the cleaning process to ensure complete removal.
Here’s what you need to do:
- Rinse off the cleaning solution: Use a water hose or pressure washer on a gentle setting to rinse off the cleaning solution from the vinyl siding. Start from the top and work your way down, ensuring that all the solution and residue are completely washed away.
- Inspect for remaining spots: After rinsing, carefully examine the vinyl siding to check if there are any remaining spots or visible traces of the artillery fungus. If you spot any, repeat the scrubbing process on those specific areas using the cleaning solution and brush.
- Rinse again: Once you have repeated the scrubbing process on any remaining spots, rinse off the siding once again to remove any leftover residue or spores. This final rinse will help ensure that the vinyl siding is free from artillery fungus.
- Dry the siding: Allow the vinyl siding to air dry naturally after the rinsing process. Avoid direct sunlight if possible, as it can cause streaks or water spots on the surface.
- Inspect and repeat, if needed: After the vinyl siding is dry, inspect it once more for any lingering spots or signs of the artillery fungus. If necessary, repeat the cleaning process on those areas until all traces of the fungus are completely gone.
By thoroughly rinsing and, if needed, repeating the cleaning process, you can ensure that your vinyl siding is free from artillery fungus and restored to its original clean and pristine condition.
Now that you have successfully removed the artillery fungus, let’s move on to the final section: preventing future growth to maintain the appearance of your vinyl siding.
Preventing Future Growth of Artillery Fungus
After investing time and effort into removing artillery fungus from your vinyl siding, it is important to take preventative measures to avoid future growth and reoccurrence. By implementing these preventive strategies, you can maintain the cleanliness and appearance of your siding.
Here are some tips to prevent future growth of artillery fungus:
- Proper landscaping: Maintain a clear space between organic materials, such as mulch or wood chips, and your vinyl siding. This helps minimize the chances of artillery fungus spores finding their way onto the siding.
- Regular inspection: Conduct regular inspections of your vinyl siding to identify any signs of fungus growth or spore buildup. Early detection allows for prompt action and prevents the spread of the fungus.
- Promptly remove organic debris: Clear away any fallen leaves, twigs, or other organic debris from the vicinity of your vinyl siding. Regularly clean your gutters to prevent buildup, as this can serve as a potential breeding ground for artillery fungus.
- Avoid over-watering: Excessive moisture can create a conducive environment for the growth of artillery fungus. Ensure proper drainage to prevent water from accumulating near the siding, and avoid over-watering plants near the siding as well.
- Regular cleaning and maintenance: Perform routine cleaning of your vinyl siding to keep it free from dirt, grime, and organic matter. This helps reduce the likelihood of artillery fungus finding a favorable environment to grow.
- Consider non-organic mulch: If you prefer to use mulch near your vinyl siding, consider opting for non-organic alternatives such as rubber mulch or stone chips. These materials are less likely to harbor artillery fungus spores.
- Apply a protective coating: Consider applying a protective coating or sealer specifically designed for vinyl siding. This can help create a barrier that prevents the adhesion of artillery fungus spores.
By following these preventive measures, you can significantly reduce the chances of artillery fungus reoccurring on your vinyl siding. Regular maintenance and a proactive approach will go a long way in preserving the aesthetics and longevity of your siding.
With these steps in mind, you now understand the proper techniques for removing artillery fungus and preventing its return. By taking action and implementing these strategies, you can ensure that your vinyl siding remains fungus-free and maintains its original beauty.
Remember to periodically inspect your siding and address any signs of fungus growth promptly to prevent further issues. By staying vigilant and proactive, you can protect your home’s exterior and enjoy a clean and attractive living space.
Happy cleaning and fungus-free siding maintenance!
Read more: How To Remove Vinyl From Glass
Conclusion
Removing artillery fungus from vinyl siding can be a challenging task, but with the right approach and techniques, you can restore the beauty of your home’s exterior. By following the step-by-step process outlined in this article, you can effectively remove the fungus and prevent its reoccurrence.
Understanding the nature of artillery fungus and taking the necessary preparatory steps are crucial in ensuring a successful removal process. By gathering the proper supplies and properly preparing the vinyl siding surface, you create the best environment for the cleaning solution to work effectively.
Applying the removal solution and scrubbing the affected areas gently with a soft-bristle brush or sponge helps to break down and remove the spores. Rinse the siding thoroughly and repeat the cleaning process if necessary to ensure complete removal of the fungus.
Preventing future growth of artillery fungus requires ongoing maintenance and proper landscaping practices. Regular inspections, prompt debris removal, and proper drainage are important to minimize the conditions that favor fungus growth. Considering non-organic mulch or applying a protective coating can also provide additional protection for your vinyl siding.
By implementing these preventive measures and staying proactive, you can maintain the cleanliness and appearance of your vinyl siding for years to come.
Remember, a clean and well-maintained home exterior not only adds curb appeal but also preserves the value of your property. Taking the time to remove artillery fungus and prevent its return is a worthwhile investment in the long-term beauty and value of your home.
We hope that this article has provided you with the knowledge and guidance needed to tackle the task of removing artillery fungus from your vinyl siding. Armed with this information, you can confidently embark on the removal process and enjoy a fungus-free and attractive home exterior.
Happy cleaning and maintaining your vinyl siding!
Now that you've tackled artillery fungus, why not spruce up your home's exterior even more? Considering new options for your house's cladding could be the next step. Our guide on top choices for vinyl siding in the upcoming year offers fresh, stylish alternatives that might just perfect your abode's aesthetic. Additionally, keeping up with regular home maintenance ensures your space remains in tip-top shape. We’ve compiled essential tasks every homeowner should manage to maintain their property’s value and charm.
Frequently Asked Questions about How To Remove Artillery Fungus From Vinyl Siding
Was this page helpful?
At Storables.com, we guarantee accurate and reliable information. Our content, validated by Expert Board Contributors, is crafted following stringent Editorial Policies. We're committed to providing you with well-researched, expert-backed insights for all your informational needs.


0 thoughts on “How To Remove Artillery Fungus From Vinyl Siding”