Articles
How To Remove Tile From Concrete Floor
Modified: December 7, 2023
Learn how to remove tile from a concrete floor with our helpful articles. Find step-by-step guides and expert tips to make the process easier.
(Many of the links in this article redirect to a specific reviewed product. Your purchase of these products through affiliate links helps to generate commission for Storables.com, at no extra cost. Learn more)
Introduction
Removing tile from a concrete floor can be a daunting task, but with the proper tools and techniques, it can be accomplished with relative ease. Whether you’re renovating your space, repairing a damaged floor, or simply looking to change the aesthetic, knowing how to remove tile from a concrete floor is a valuable skill.
In this article, we will guide you through the step-by-step process of removing tile from a concrete floor. We will cover the materials you’ll need, safety precautions to take, and the techniques for effectively and efficiently removing the tile. By following these instructions, you can tackle this project successfully and with confidence.
Key Takeaways:
- Proper preparation, safety precautions, and the right tools are essential for efficiently removing tile from a concrete floor. Following the step-by-step process outlined in the article ensures a successful and safe tile removal project.
- From scoring and removing grout to breaking and lifting tiles, each step in the tile removal process requires patience, caution, and attention to detail. Thoroughly cleaning and patching the concrete floor sets the stage for a seamless transition to new flooring.
Materials Needed
Before you begin the process of removing tile from a concrete floor, gather the following materials:
- Protective Gear: Safety goggles, gloves, and a dust mask are essential to protect yourself from flying debris and dust.
- Tile Chisel: A sturdy tile chisel with a wide, flat blade will help you remove the tile without causing damage to the concrete floor.
- Hammer: A heavy-duty hammer will be used to break the tile and loosen it from the floor.
- Grout Saw or Multi-Tool: You will need a grout saw or a multi-tool with a grout removal attachment to score and remove the grout between the tiles.
- Pry Bar: A pry bar will assist in lifting and removing the tiles once they are loose.
- Bucket: A bucket will be used to collect the broken tiles and debris during the removal process.
- Shop Vacuum: A shop vacuum will help to clean up any dust and debris after removing the tiles.
- Concrete Patching Compound: Depending on the condition of the concrete floor, you may need a concrete patching compound to fill any holes or level the surface after tile removal.
- Trowel: A trowel will be used to apply the concrete patching compound to the floor.
- Cleaning Supplies: Have some soap, water, and a scrub brush or sponge ready for cleaning the floor after tile removal.
Make sure you have all the necessary materials before you start the tile removal process. Being prepared will help you work efficiently and safely.
Step 1: Preparation
Before you begin removing the tile from the concrete floor, it’s important to properly prepare the area. Follow these steps to ensure a smooth and successful tile removal process:
- Clear the Area: Remove all furniture, rugs, and any other items from the room to create an open space for easy access and movement.
- Protect Adjacent Surfaces: Use drop cloths or plastic sheets to cover any nearby surfaces, such as walls or cabinets, to protect them from debris and potential damage.
- Disconnect Utilities: If there are any electrical outlets or HVAC vents near the tile removal area, turn off the power and disconnect them to avoid any accidents.
- Ventilation: Open windows or use fans to ensure proper ventilation and to minimize the amount of dust and fumes in the room.
- Prepare Tools: Gather all the materials and tools you will need for the tile removal process, as mentioned in the previous section.
By taking the time to properly prepare the area, you can ensure a safe and efficient tile removal process. This preparation will help minimize the risk of damage to the surrounding surfaces and create a clean working environment.
Step 2: Safety Precautions
When removing tile from a concrete floor, it is important to prioritize safety. Follow these safety precautions to protect yourself and prevent any potential accidents:
- Wear Protective Gear: Put on safety goggles, gloves, and a dust mask to protect your eyes, hands, and respiratory system from debris and dust.
- Use Proper Lifting Techniques: Bend your knees and lift with your legs rather than your back when lifting and carrying heavy tiles or materials. This will help prevent strain and injury.
- Be Cautious with Tools: Handle tools, such as the tile chisel and hammer, with care and avoid using excessive force. Make sure to use the tools properly and follow the manufacturer’s guidelines.
- Mind Your Surroundings: Be aware of your surroundings and any obstacles that may be in your way. Work in a well-lit area and keep the floor clear of any tripping hazards.
- Protect Floors: Use drop cloths or protective sheets to cover the floor and prevent damage to surrounding areas. This will also make it easier to clean up debris later on.
- Use Caution When Breaking Tiles: Take care when breaking the tile to avoid flying shards. Wear safety goggles and work in a controlled manner to minimize the risk of injury.
- Properly Dispose of Debris: Place broken tiles, dust, and debris in a bucket or garbage bag for proper disposal. Do not leave them lying around where they can pose a safety hazard.
Remember, prioritizing safety is crucial when undertaking any home improvement project. By following these safety precautions, you can ensure a safe working environment and minimize the risk of accidents or injuries.
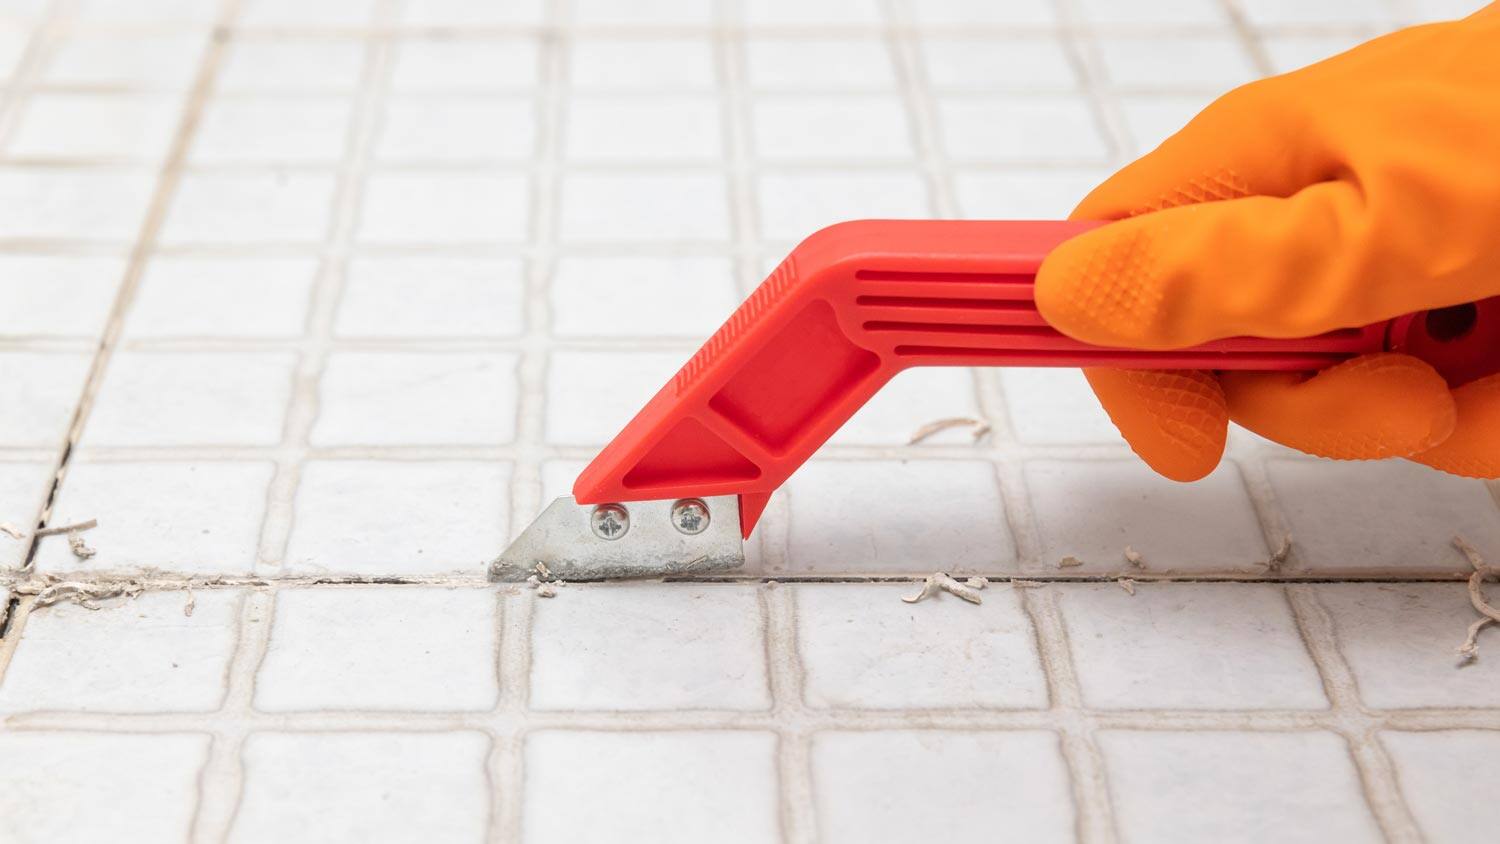
Step 3: Scoring the Grout
Once you have taken the necessary safety precautions, it’s time to begin the tile removal process. The first step is to score the grout between the tiles. This will help weaken the bond between the tiles and make it easier to remove them. Follow these steps to score the grout:
- Select a Grout Saw or Multi-Tool: Choose a grout saw or a multi-tool with a grout removal attachment. These tools are specifically designed to remove grout effectively.
- Set the Depth of the Blade: Adjust the depth of the blade on the grout saw or multi-tool so that it matches the thickness of the grout without touching the tile or concrete.
- Hold the Tool at a 45-Degree Angle: Hold the grout saw or multi-tool at a 45-degree angle and apply gentle pressure to the grout lines. Begin scoring the grout by running the tool along the grout lines.
- Work in Small Sections: Divide the floor into manageable sections and work on one section at a time. This will help ensure that you score all the grout lines thoroughly.
- Go Over the Grout Lines: Repeat the scoring process, going over each grout line multiple times to ensure that the grout is sufficiently weakened.
- Clean Out the Dust: Use a brush or vacuum to remove any dust or debris that may have accumulated in the grout lines.
Scoring the grout is an important step in the tile removal process. It helps break down the grout and prepares it for removal in the following steps. Take your time and ensure that all the grout lines are properly scored before moving on to the next step.
Read more: How To Remove Hairspray From Tile Floor
Step 4: Removing the Grout
After scoring the grout, it’s time to remove it. This step is crucial in order to separate the tiles from the concrete floor. Follow these steps to effectively remove the grout:
- Choose a Grout Removal Tool: Select a grout removal tool such as a grout saw, grout scraper, or a multi-tool with a grout removal attachment. Choose a tool that suits the size and depth of your grout lines.
- Hold the Tool at a 45-Degree Angle: Hold the grout removal tool at a 45-degree angle and apply gentle pressure against the grout line. Begin scraping or cutting out the grout, starting from one end of the line and working your way to the other.
- Work in Small Sections: Divide the floor into manageable sections and remove the grout one section at a time. This will help you maintain control and avoid damaging the tiles or concrete floor.
- Clear Out the Loose Grout: As you remove the grout, use a brush or vacuum to clear out the loose debris. This will allow you to assess the progress and ensure that the grout is fully removed.
- Check for Any Remaining Grout: Inspect the grout lines to ensure that all grout has been removed. If you find any remaining grout, repeat the removal process in those areas until the grout is completely gone.
Removing the grout is a critical step in the tile removal process as it helps loosen the tiles and prepares them for extraction. Take your time and be thorough in order to fully remove the grout and achieve the best results.
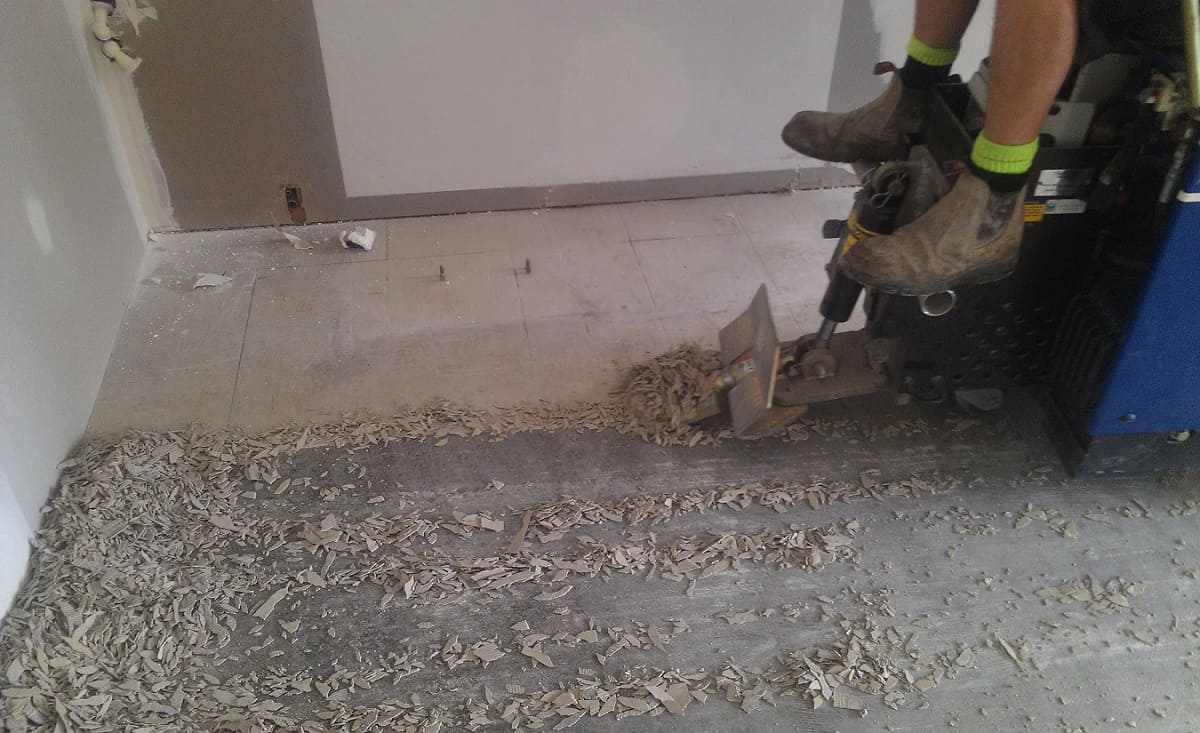
Use a chisel and hammer to break the tile into smaller pieces. Then, use a floor scraper to remove the remaining adhesive and grout from the concrete floor. Wear safety goggles and gloves for protection.
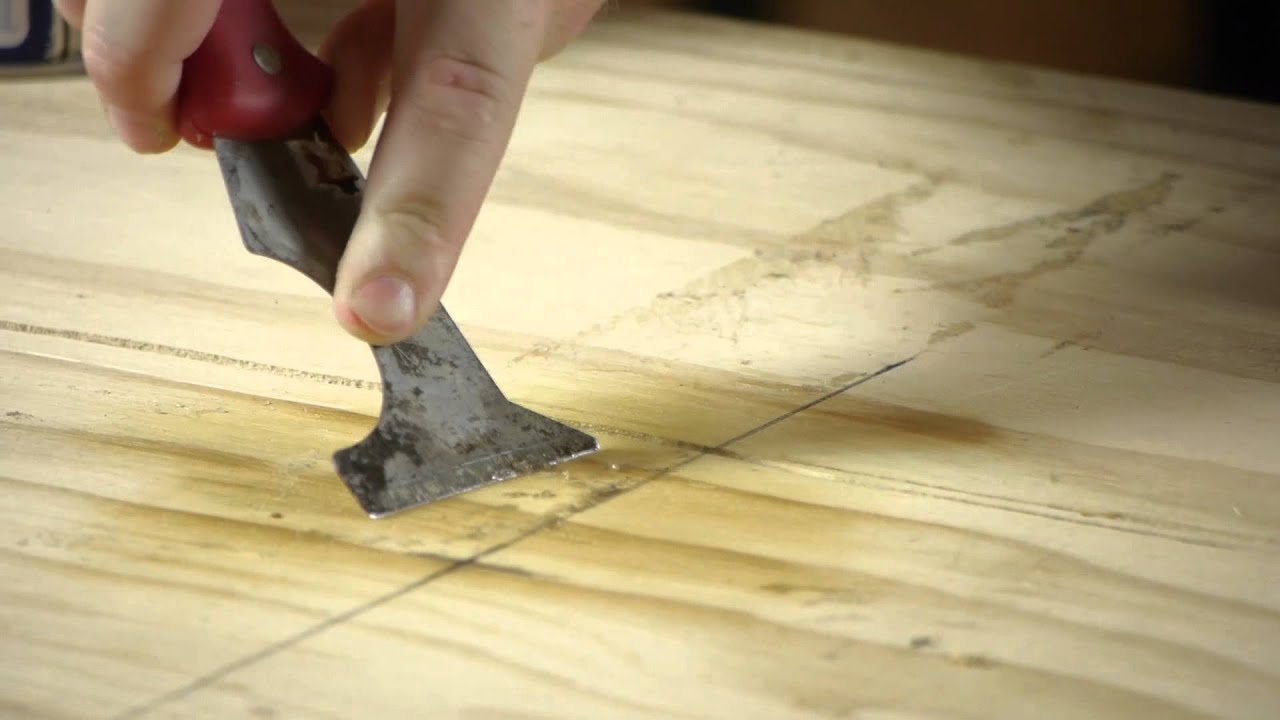
Step 5: Breaking the Tile
Once the grout has been removed, it’s time to break the tiles and free them from the concrete floor. Breaking the tile requires some caution and precision to avoid damaging the surrounding tiles or the floor itself. Follow these steps to break the tile:
- Put on Safety Gear: Wear safety goggles, gloves, and a dust mask to protect yourself from flying debris.
- Identify a Starting Point: Choose a tile near the edge of the room or an area where you can easily access the floor underneath.
- Score the Surface of the Tile: Use a tile chisel or a handheld tile scorer to score the surface of the tile. This will create weak points and make it easier to break the tile.
- Position the Chisel: Place the tile chisel on the scored line and angle it downwards towards the concrete floor.
- Tap the Chisel: Use a hammer or mallet to gently tap the chisel, applying pressure to break the tile along the scored line. Be careful not to hit too hard and cause damage to the surrounding tiles.
- Repeat the Process: Move to the adjacent tiles and repeat the scoring and tapping process to break them. Work in small sections to maintain control and minimize the risk of mishaps.
- Clear the Broken Tile: Once a tile is broken, use a pry bar to lift and remove the broken pieces from the concrete floor. Place them in a bucket or garbage bag for disposal.
Breaking the tile requires patience and precision. Take your time and be cautious to avoid damaging the surrounding tiles or the floor. By following these steps, you can successfully remove the broken tile and move on to the next ones.
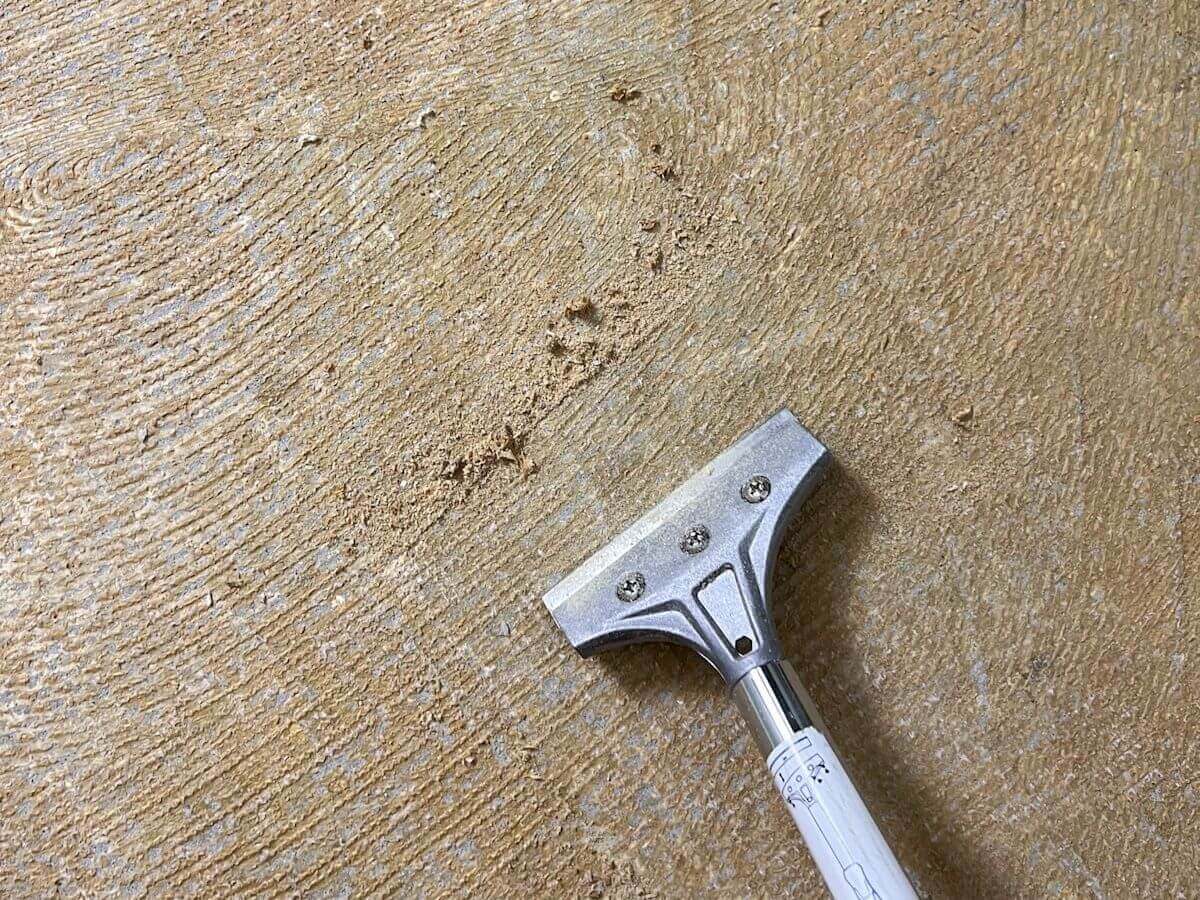
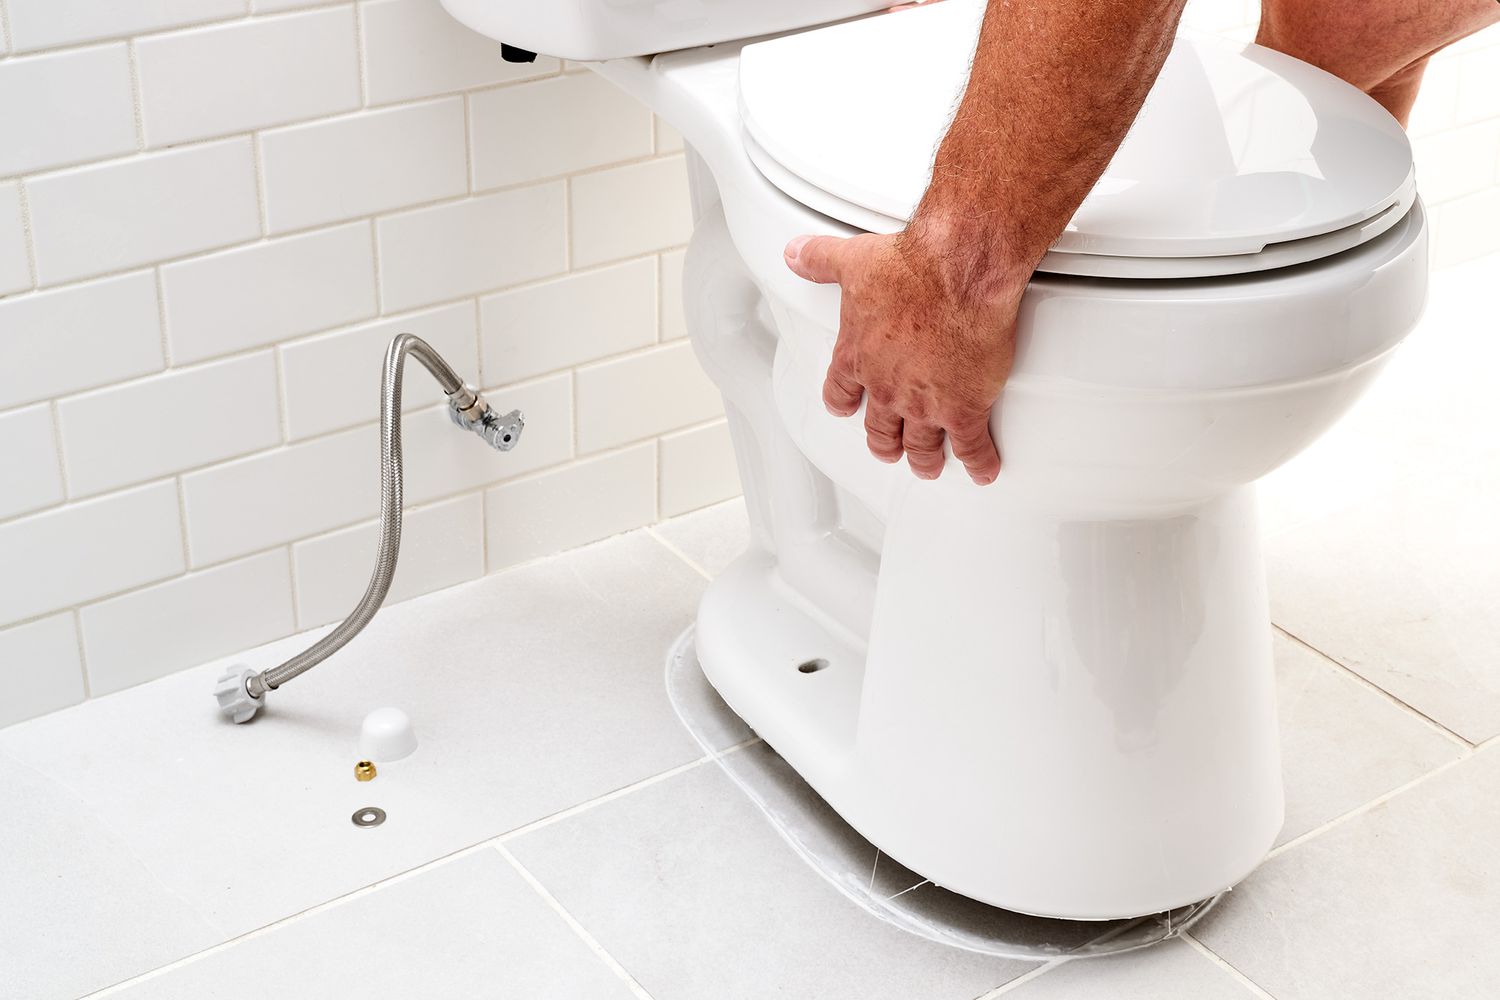
Step 6: Removing the Tile
With the tiles broken, the next step is to remove them from the concrete floor. This process involves carefully prying up and lifting each broken tile. Follow these steps to effectively remove the tiles:
- Position the Pry Bar: Slide a pry bar under the broken tile, inserting it into the gap created by the broken pieces.
- Apply Gradual Pressure: Use the pry bar to apply gentle and even pressure to lift the broken tile from the concrete floor. Do this slowly to avoid any sudden movements that may damage the surrounding tiles or the floor.
- Continue Lifting: Gradually lift the broken tile until it separates from the floor. If necessary, use the tile chisel and hammer to further loosen any stubborn pieces.
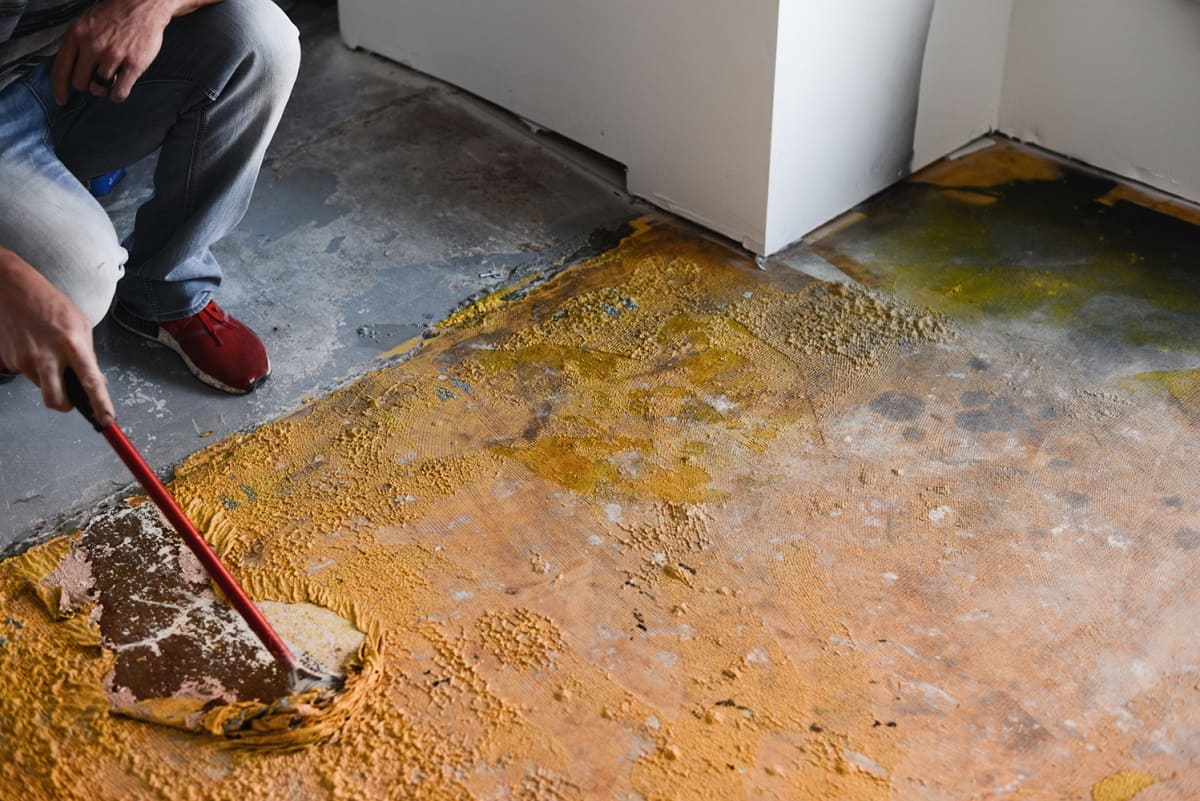
- Remove Adhesive Residue: Once the broken tile is removed, you may notice adhesive residue on the concrete floor. Use a scraper or the flat edge of the pry bar to scrape away the remaining adhesive.
- Clear the Area: Place the broken tile, debris, and any adhesive remnants in a bucket or garbage bag for proper disposal. Keep the work area clean and organized as you continue the tile removal process.
- Repeat the Process: Move on to the next broken tile and repeat the steps until all the tiles have been removed.
When removing the tiles, it’s essential to be patient and cautious to prevent any damage to the surrounding tiles or the concrete floor. Take care when using the pry bar and follow the steps consistently for safe and effective tile removal.
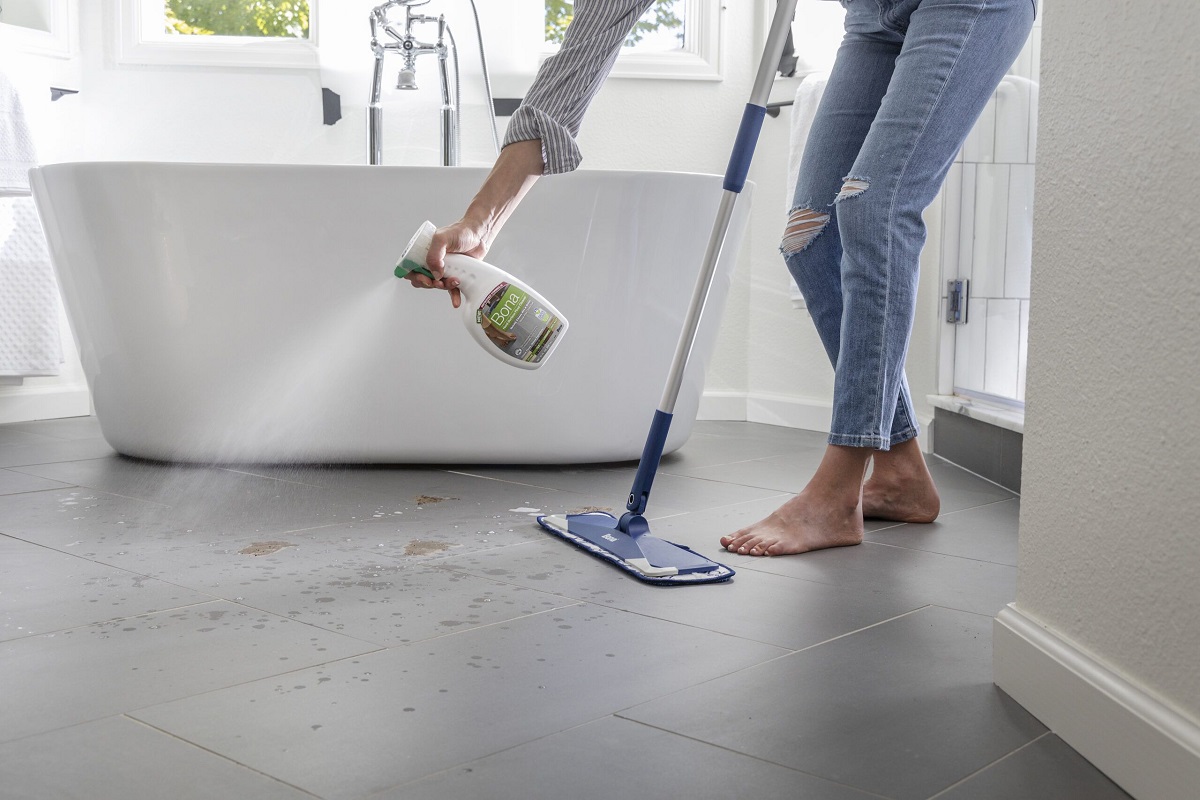
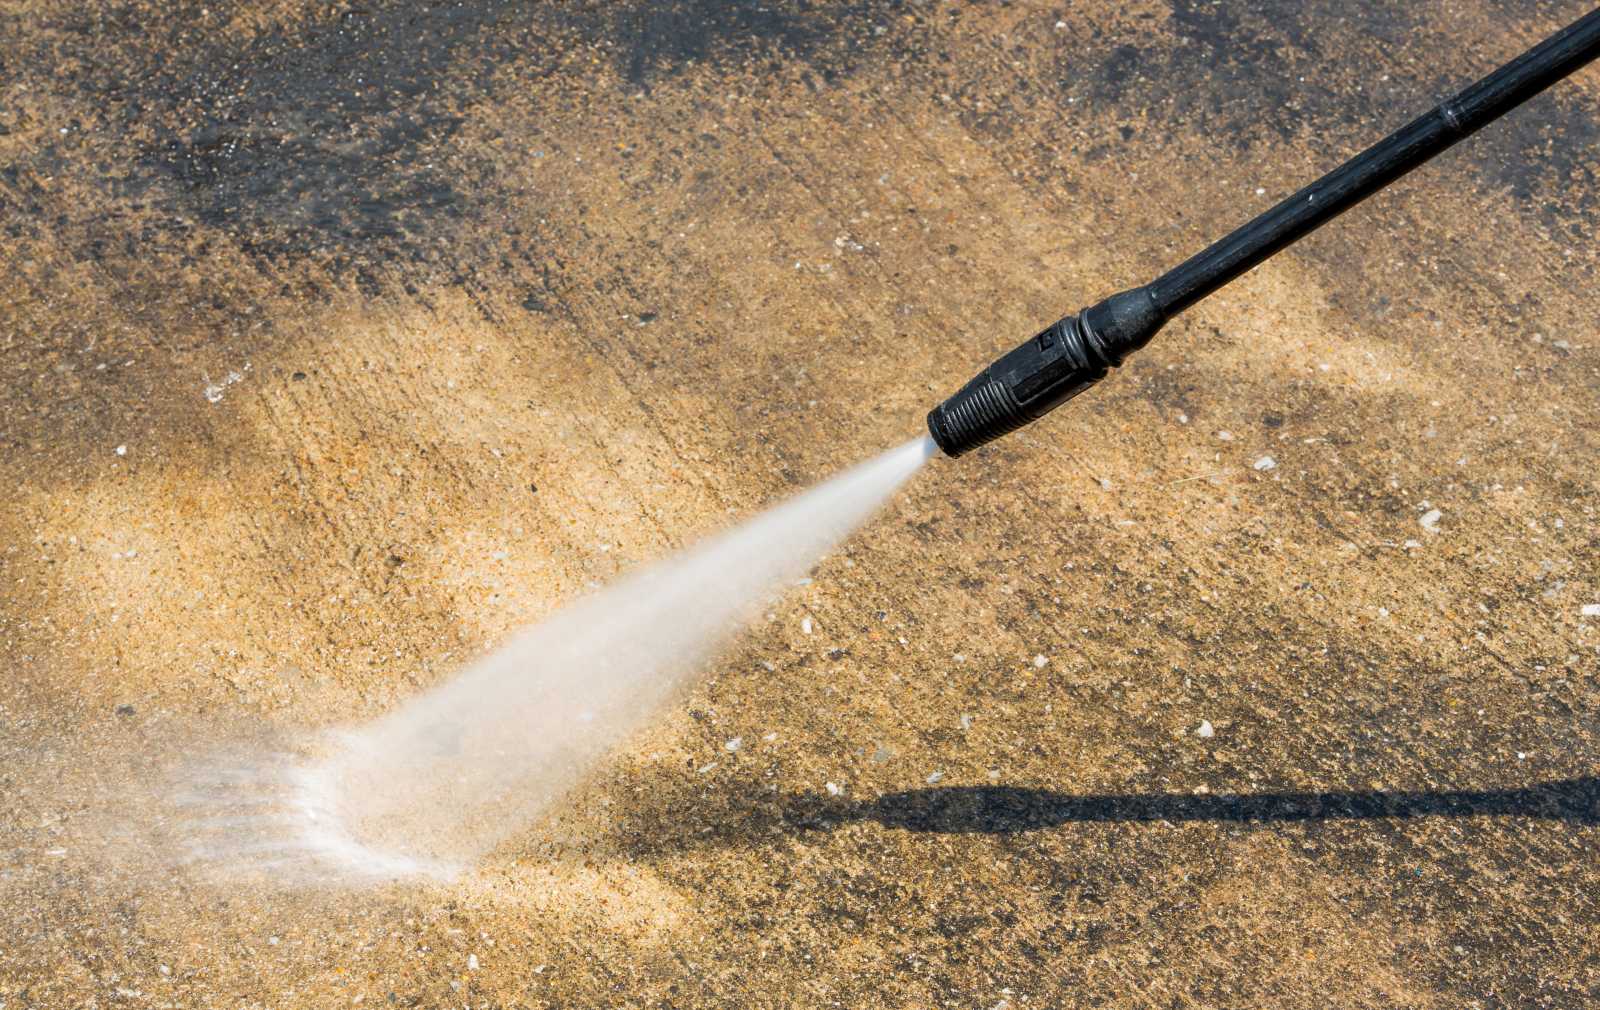
Step 7: Cleaning the Concrete Floor
After removing the tiles, it’s important to thoroughly clean the concrete floor to prepare it for further steps in the process. There may be leftover debris, adhesive residue, or dust that needs to be removed. Follow these steps to clean the concrete floor:
- Sweep or Vacuum: Begin by sweeping the floor to remove any loose debris or dust. Alternatively, you can use a shop vacuum to efficiently clean the surface.
- Scrub with Soapy Water: Fill a bucket with warm water and add a mild detergent or floor cleaning solution. Use a scrub brush or a sponge to scrub the concrete floor thoroughly, paying attention to any areas with adhesive residue or stubborn dirt.
- Rinse with Clean Water: After scrubbing, rinse the floor with clean water to remove any soap or cleaning solution residue. This will help ensure a residue-free surface.
- Dry the Floor: Use a mop or clean towels to dry the concrete floor completely. This step is important to prevent any moisture from affecting subsequent steps, such as patching or applying new flooring.
- Inspect for Remaining Debris: Take a careful look at the cleaned concrete floor to ensure that there is no remaining debris, adhesive residue, or dust. If necessary, re-clean any areas that require additional attention.
By properly cleaning the concrete floor, you provide a clean and smooth surface for any future steps in your project. This step also helps ensure the best possible results and a polished final appearance for your new flooring.
Read more: How To Remove Vinyl Tiles From Floor
Step 8: Patching and Smoothing the Surface
Once the concrete floor is clean and free of debris, it’s time to patch and smooth the surface in preparation for new flooring. This step is crucial for achieving a level and seamless finish. Follow these steps to effectively patch and smooth the concrete surface:
- Inspect the Floor: Carefully examine the concrete floor for any cracks, chips, or uneven areas. Note any areas that require patching or leveling.
- Prepare the Patching Compound: Mix the concrete patching compound according to the manufacturer’s instructions. Use a trowel or a putty knife to create a smooth consistency.
- Apply the Patching Compound: Begin by applying a thin layer of the patching compound to the damaged or uneven areas of the concrete floor. Use the trowel or putty knife to spread the compound evenly, ensuring it fills any cracks or gaps.
- Smooth and Level the Surface: Use a trowel or a straight edge to level the patching compound and create a smooth surface. Ensure that the patched areas are flush with the rest of the floor.
- Allow the Compound to Dry: Follow the drying time specified by the manufacturer. It is important to allow the patching compound sufficient time to cure and harden properly.
- Sand and Smooth: Once the patching compound is fully dry, use sandpaper or a sanding block to smooth out any rough or uneven areas on the surface of the concrete floor.
- Clean the Surface: After sanding, thoroughly clean the concrete floor to remove any dust or debris resulting from the patching and sanding process.
Patching and smoothing the concrete surface is a vital step in creating a level and even base for your new flooring. Taking the time to properly execute this step will ensure a seamless transition and a professional-looking result.
Conclusion
Removing tile from a concrete floor may seem like a daunting task, but with the right tools and steps, it can be accomplished efficiently and effectively. By following the step-by-step guide outlined in this article, you can successfully remove the tile and prepare the concrete floor for further renovation or new flooring installation.
Starting with proper preparation and safety precautions, such as clearing the area and wearing protective gear, sets the foundation for a smooth tile removal process. Scoring and removing the grout between the tiles helps weaken the bond and makes it easier to break them. Breaking the tile with caution, using tools like a tile chisel and pry bar, allows for the removal of individual tile pieces.
Once the tiles are removed, cleaning the concrete floor ensures a debris-free surface, providing a clean canvas for the next steps. Patching and smoothing the surface with a suitable compound guarantees a level and even base for any future flooring installation.
Remember to take your time, follow the instructions carefully, and prioritize safety. Do not rush the process to avoid accidents or damage to the floor or surrounding tiles. If in doubt, always consult with professionals or seek expert advice.
By following this comprehensive guide, you can confidently remove tile from a concrete floor and achieve a successful outcome. Whether you’re renovating, repairing, or changing the aesthetic, the knowledge gained from this article empowers you to tackle the tile removal process with ease.
Frequently Asked Questions about How To Remove Tile From Concrete Floor
Was this page helpful?
At Storables.com, we guarantee accurate and reliable information. Our content, validated by Expert Board Contributors, is crafted following stringent Editorial Policies. We're committed to providing you with well-researched, expert-backed insights for all your informational needs.


0 thoughts on “How To Remove Tile From Concrete Floor”