
Articles
How To Remove Shower Floor Tile
Modified: January 19, 2024
Learn how to efficiently remove shower floor tiles with our informative articles. Discover effective techniques and expert advice to make your tile removal project a success.
(Many of the links in this article redirect to a specific reviewed product. Your purchase of these products through affiliate links helps to generate commission for Storables.com, at no extra cost. Learn more)
Introduction
Removing shower floor tiles can be a daunting task, but with the right tools, materials, and knowledge, it can be accomplished with relative ease. Whether you’re looking to update the look of your bathroom or need to repair damaged tiles, this step-by-step guide will walk you through the process of removing shower floor tiles.
Before we dive into the details, it’s important to note that removing shower floor tiles can be a messy and time-consuming project. It requires patience, careful preparation, and attention to detail. With that said, let’s gather all the necessary tools and materials to get started.
Key Takeaways:
- Removing shower floor tiles requires patience, proper preparation, and the right tools. By following the step-by-step guide, you can confidently tackle the project and create a refreshed and beautiful shower floor.
- Thoroughly cleaning the subfloor, addressing any damage, and properly preparing for new tile installation are crucial for a successful and visually pleasing result. Take your time and enjoy your newly renovated shower floor!
Read more: How To Clean Shower Floor Tile
Tools and Materials Needed
Before you begin removing the shower floor tiles, it’s essential to gather all the necessary tools and materials. Here’s a list of what you’ll need:
- Protective gear: Safety glasses, gloves, and a mask
- Grout removal tool: Such as a grout saw or oscillating tool
- Putty knife or scraper
- Hammer
- Chisel
- Pry bar or crowbar
- Bucket
- Tile adhesive remover or solvent
- Scrub brush
- Shop vacuum or broom and dustpan
- Cement board or backer board (if necessary)
- Replacement tiles (if needed)
Ensure you have all these tools and materials ready before you start the tile removal process. Having them on hand will make the job more efficient and help you avoid any unnecessary delays.
Step 1: Prepare the Area
Before you start removing the shower floor tiles, it’s crucial to prepare the area to ensure a smooth and clean process. Here are the steps to follow:
- Clear the area: Remove any items or accessories from the shower floor, such as rugs, toiletries, and shower caddies. This will give you more space to work and prevent any damage or obstruction.
- Protect surrounding surfaces: Cover the bathtub, walls, and any nearby fixtures with plastic sheets or drop cloths. This will help protect them from dust, debris, and potential damage during the tile removal process.
- Turn off the water supply: Locate the shut-off valve for the shower and turn off the water supply. It’s essential to prevent any accidental water leaks or splashes during the tile removal process.
- Prepare yourself: Put on your safety glasses, gloves, and mask to protect yourself from any potential injuries, dust, or fumes.
By taking the time to properly prepare the area, you’ll minimize the risk of damaging other surfaces and create a safe and clean workspace for the tile removal process. Now, let’s move on to the next step of removing the grout.
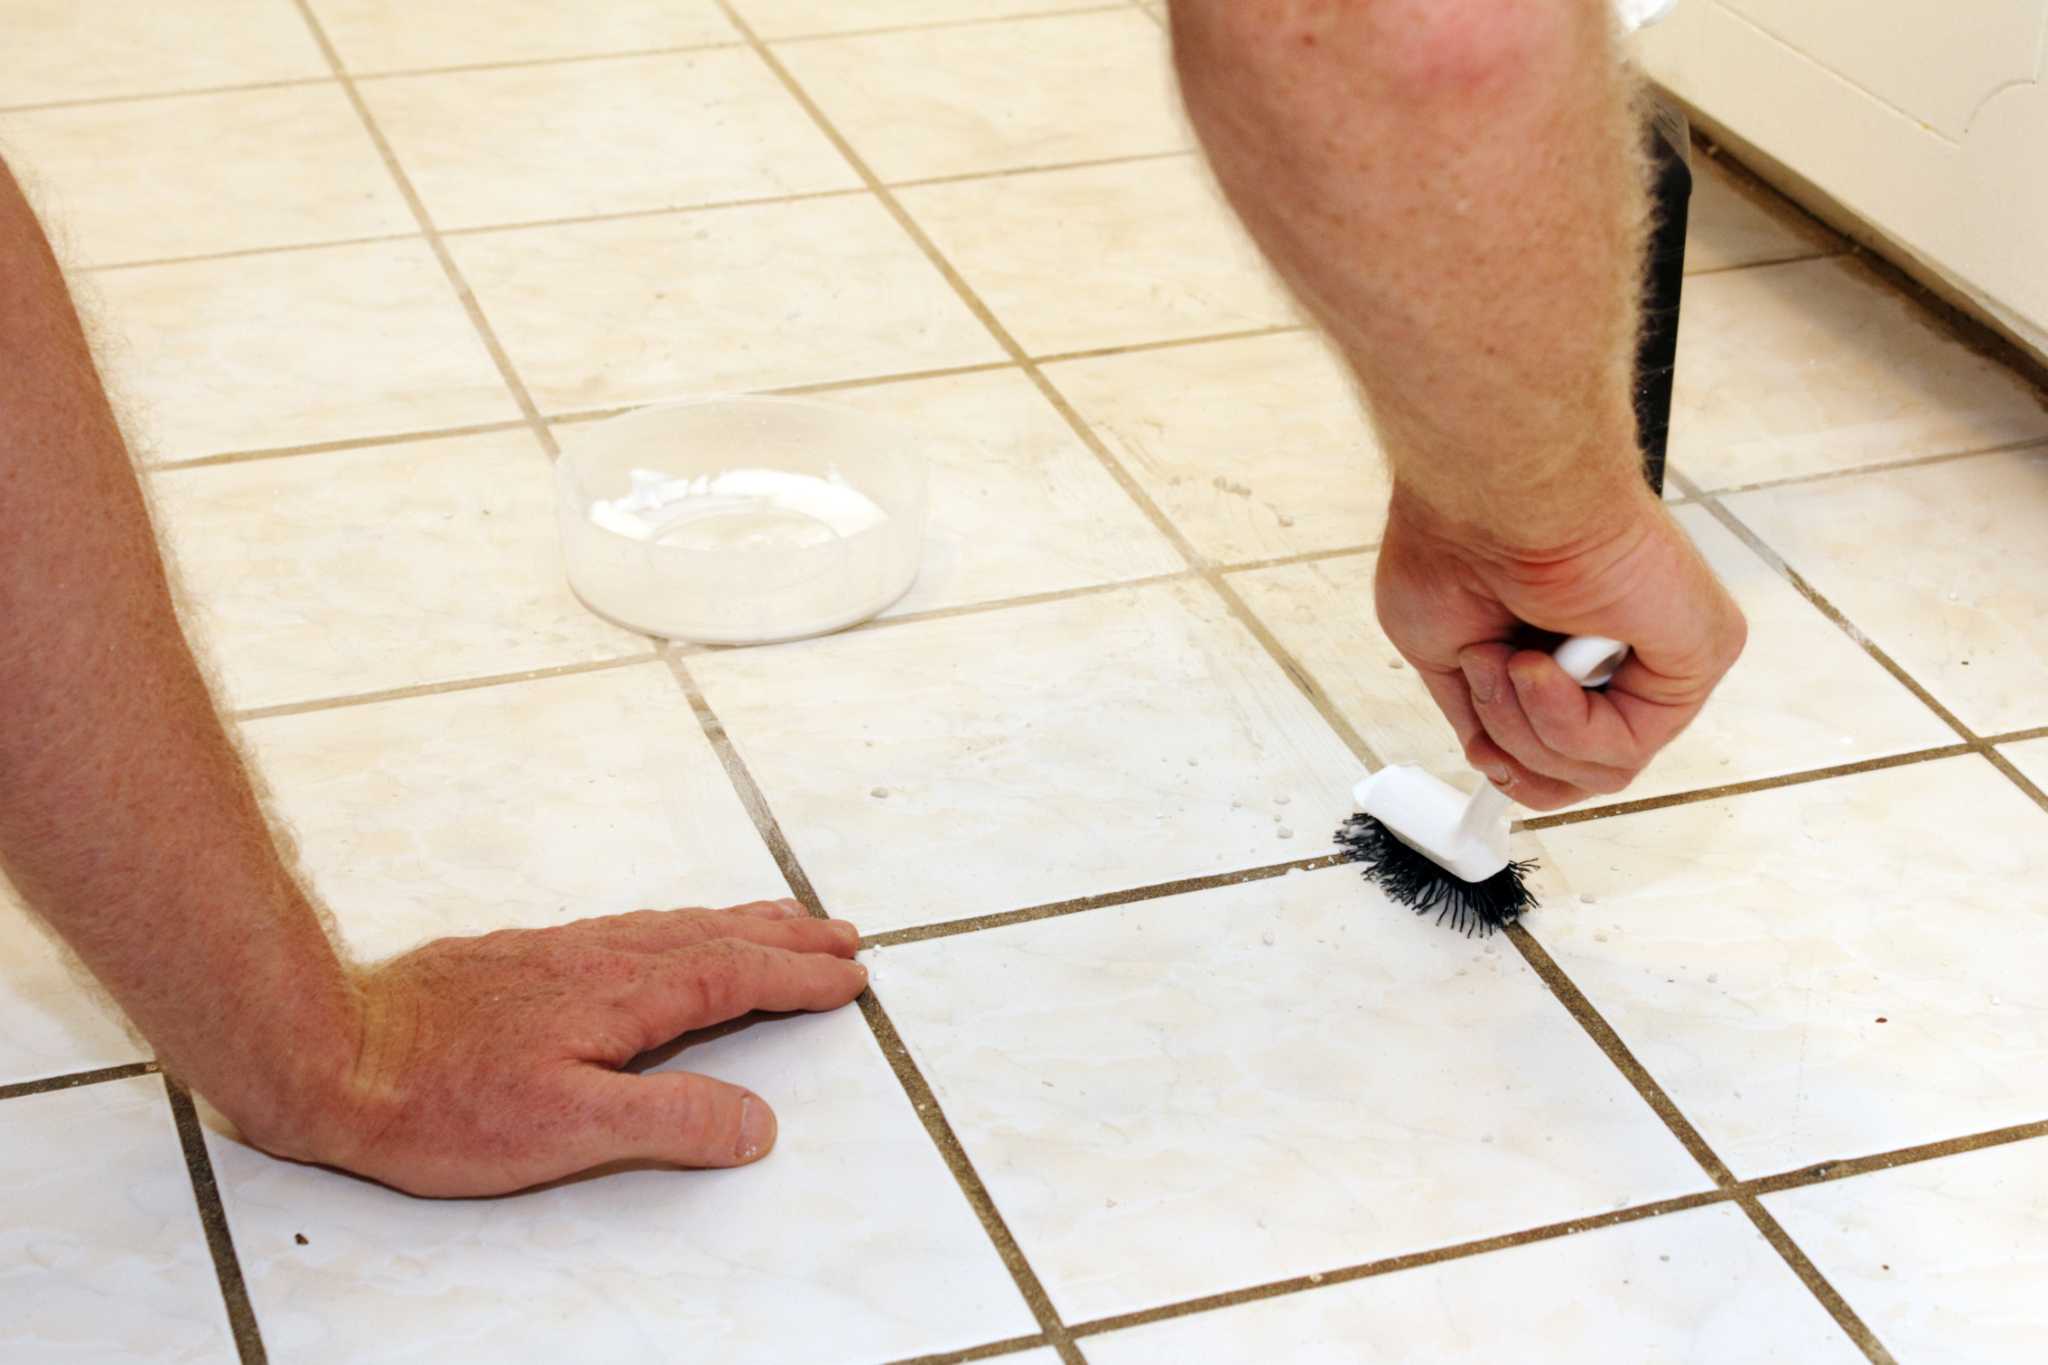
Step 2: Remove the Grout
Once the area is prepared, it’s time to start removing the grout. The grout between the tiles acts as a binding agent and needs to be removed before you can proceed with tile removal. Here’s how to remove the grout:
- Choose a grout removal tool: Depending on your preference and the size of the grout lines, you can use a grout saw or an oscillating tool with a grout removal attachment.
- Start at one corner: Begin by positioning the grout removal tool at a 45-degree angle against the grout line in one corner of the shower floor.
- Apply firm but gentle pressure: With a back-and-forth motion, move the grout removal tool along the grout line. Be careful not to apply too much pressure, as it may damage the adjacent tiles.
- Work systematically: Continue removing the grout from one grout line to the next, working your way across the entire shower floor. Take breaks if needed to avoid straining your hand or causing fatigue.
- Clean the grout debris: Use a vacuum cleaner or a small brush to remove the loose grout debris from the grout lines. This will help you assess the condition of the tiles and prepare for the next step.
Removing the grout can be a time-consuming process, especially if the tiles are tightly spaced or if the grout is stubborn. Take your time and be patient, ensuring that you remove all the grout before proceeding to the next step.
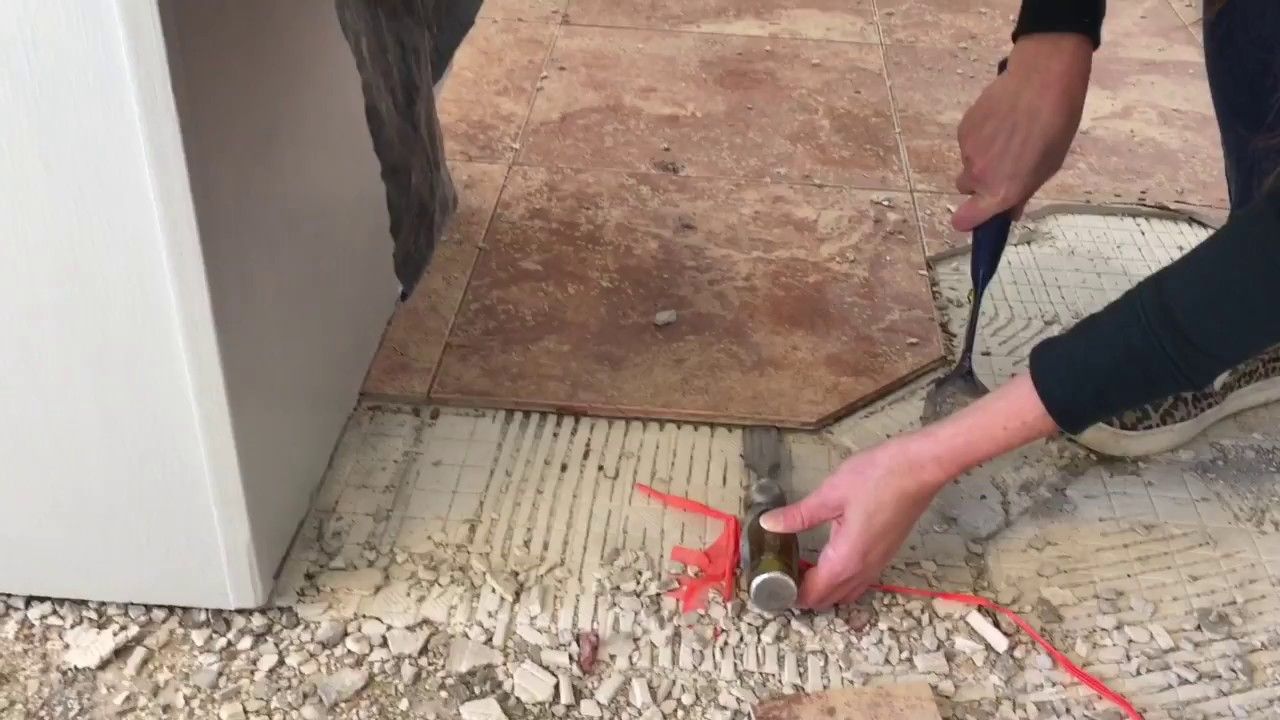
Step 3: Loosen the Tiles
With the grout removed, it’s time to loosen the tiles from the shower floor. This step is crucial to ensure that the tiles can be easily lifted without causing damage. Follow these steps to effectively loosen the tiles:
- Inspect the tiles: Carefully examine the tiles to identify any loose or cracked ones. These tiles will be the easiest to remove and can act as starting points for the rest of the tiles.
- Protect the adjacent tiles: To prevent any damage to the neighboring tiles, place a piece of cardboard or a thin wooden board against them. This will serve as a buffer and absorb any impact or pressure.
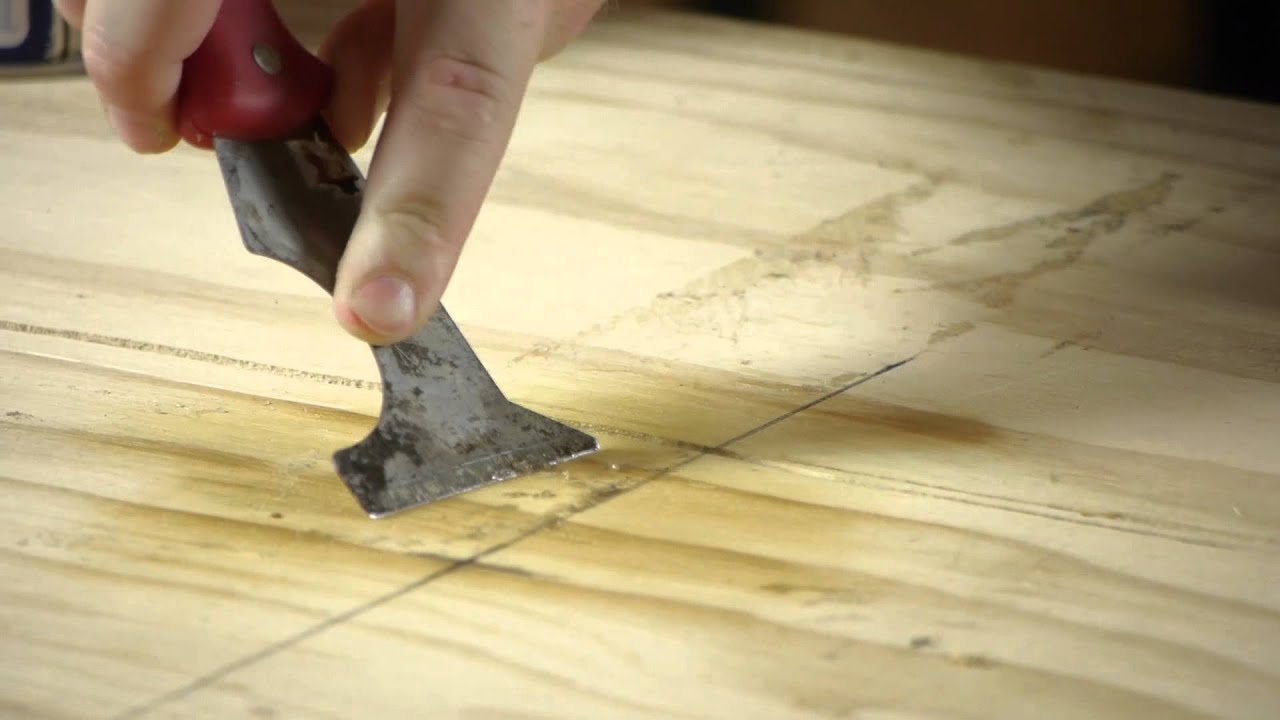
- Start with the first tile: Using a putty knife or scraper, gently insert the tool underneath the edge of the first tile. Apply even pressure to lift the tile slightly. If it resists, tap the edge gently with a hammer to help loosen it.
- Work your way across: Once the first tile is loosened, move on to the adjacent tiles. Repeat the process of inserting the tool, applying pressure, and tapping if necessary. Take your time to ensure that each tile is loosened before proceeding to the next one.
- Remove the loose tiles: As the tiles become loosened, gently lift them from the shower floor. Place them in a bucket or designated area for disposal.
It’s important to be careful and gentle when loosening the tiles to avoid causing any damage to the subfloor or surrounding tiles. If you encounter any stubborn tiles that won’t budge, you may need to use a chisel or pry bar for additional leverage.
Now that the tiles are removed, it’s time to clean the surface and prepare for the next steps of the tile removal process.
Use a hammer and chisel to carefully break up the grout and tiles. Start from the edges and work your way towards the center to avoid damaging the surrounding tiles. Be sure to wear eye protection and work slowly to avoid injury.
Read more: How To Tile A Shower Floor Slope
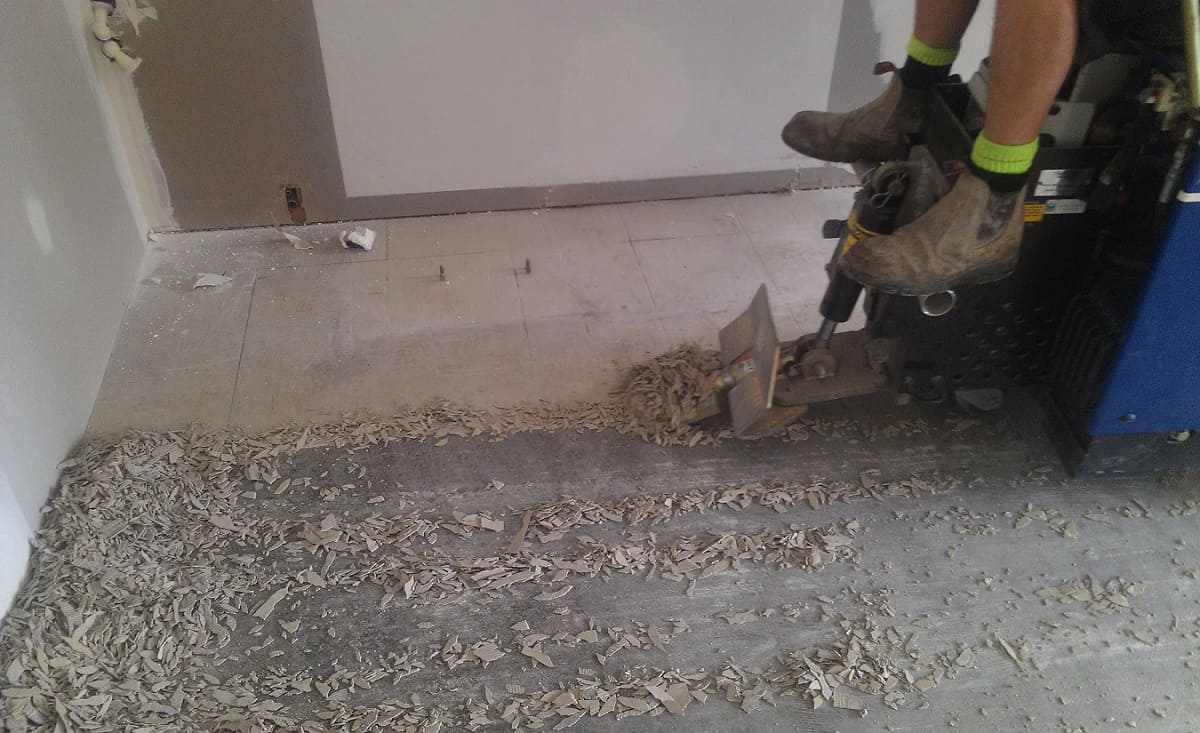
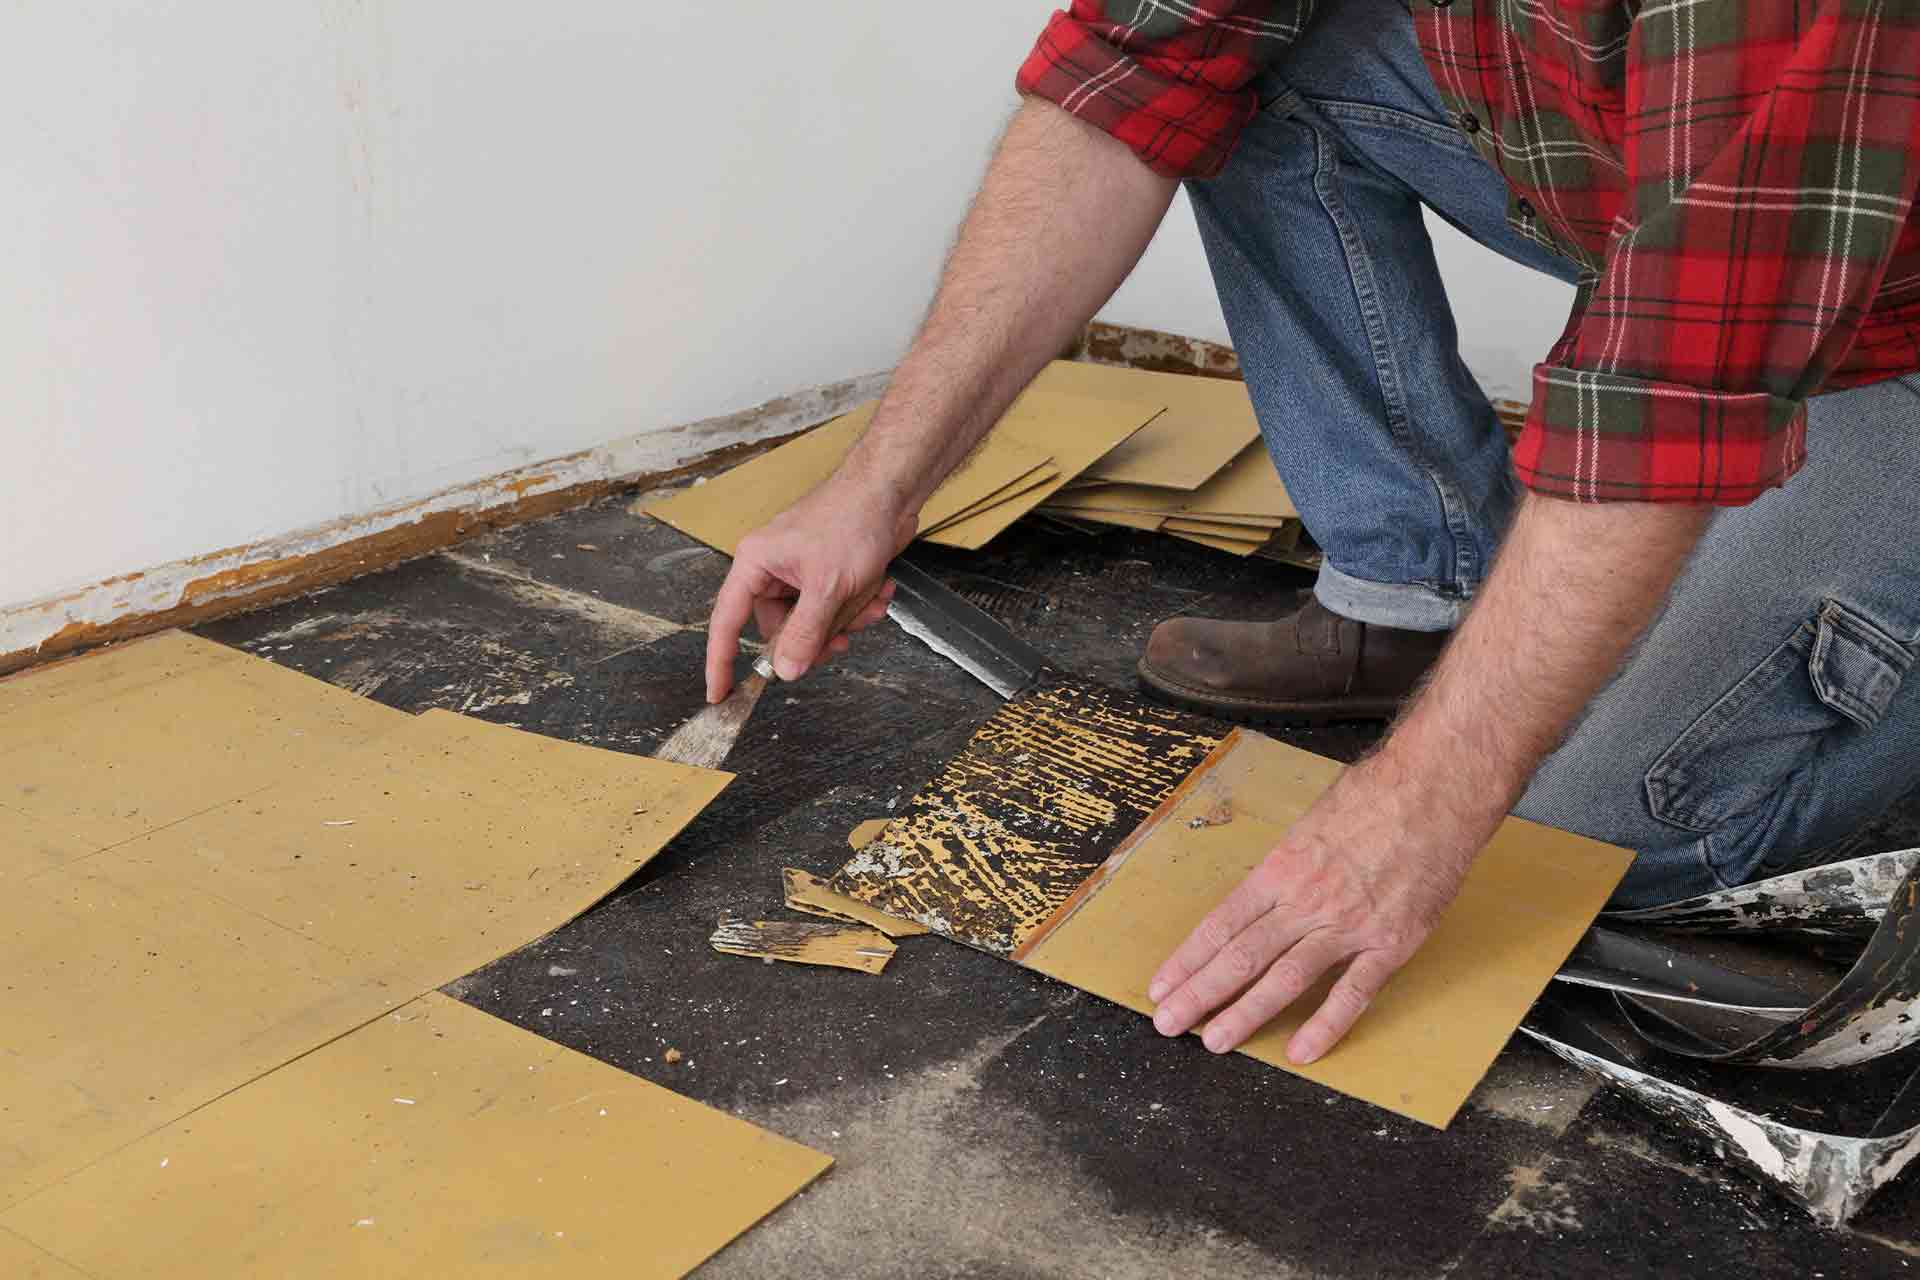
Step 4: Remove the Tiles
Now that the tiles are loosened, it’s time to remove them from the shower floor. Follow these steps to ensure a smooth and effective tile removal process:
- Start at the edges: Begin removing the tiles from the outer edges of the shower floor. This will make it easier to access and remove the tiles in the center.
- Use a pry bar or crowbar: Insert a pry bar or crowbar underneath the edge of the tile and gently pry it up. Apply steady and even pressure to lift the tile from the adhesive below.
- Work in small sections: Depending on the size of your shower floor, it’s recommended to work in small sections. Remove a few tiles at a time to prevent overwhelming yourself and keep the process manageable.
- Clean as you go: As you remove each tile, place it in a bucket or designated area. This will help keep the work area clean and prevent any potential tripping hazards.
- Remove any remaining adhesive: After all the tiles are removed, you may notice some adhesive residue on the shower floor. Use a scraper or putty knife to remove any remaining adhesive. You want to ensure that the surface is smooth and free from any debris before proceeding.
Throughout the tile removal process, it’s crucial to take your time and be careful to prevent any damage to the subfloor or adjacent tiles. By following these steps, you’ll be able to remove the tiles effectively and prepare the surface for the next steps of the project.
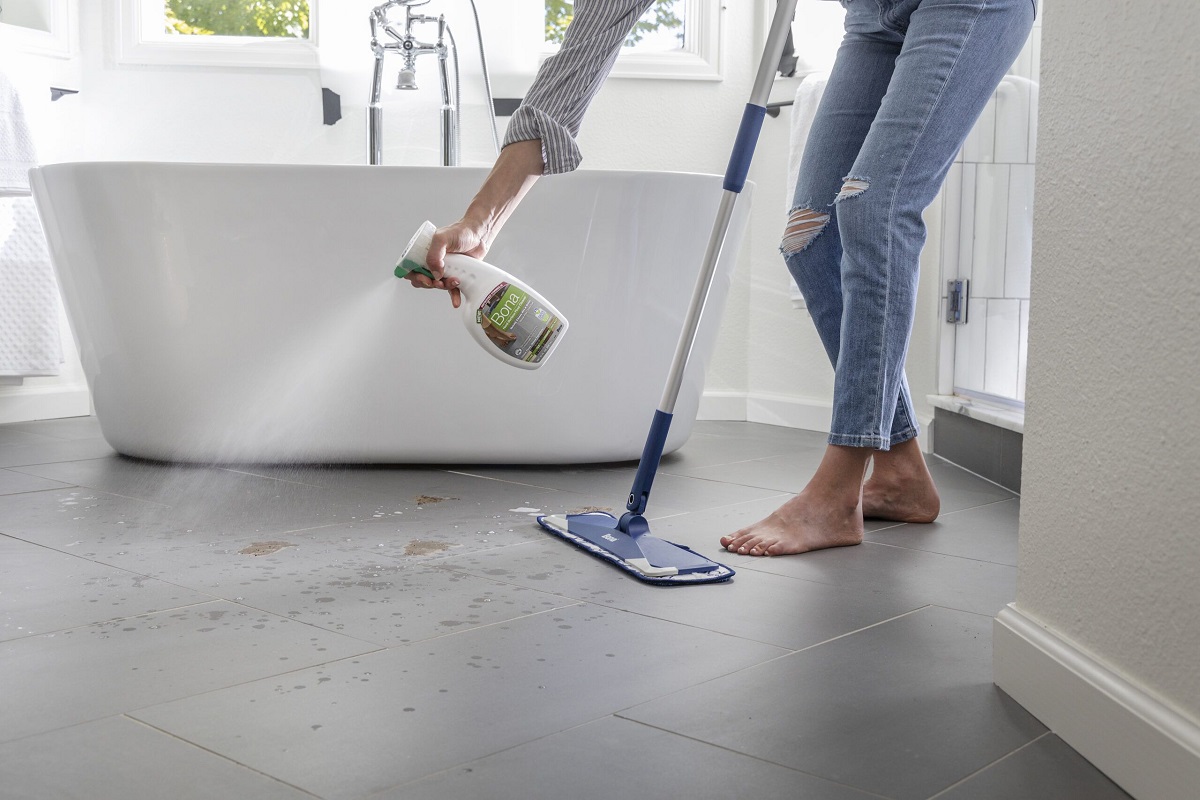
Step 5: Clean the Surface
After removing the tiles, it’s essential to clean the surface thoroughly before proceeding with any repairs or installing new tiles. This step ensures a clean and smooth base for the next phase of your project. Follow these steps to clean the shower floor:
- Sweep or vacuum the area: Start by clearing away any loose debris, dust, or grout remnants. Use a broom or a vacuum cleaner to thoroughly clean the surface. This will provide a clear view of the condition of the subfloor.
- Inspect for any damage: Take a careful look at the subfloor to check for any signs of damage, such as rot, cracks, or water damage. If you notice any significant issues, it’s crucial to address them before proceeding with repairs or new tile installation.
- Remove adhesive residue: Use a scraper or putty knife to remove any adhesive residue that may still be on the subfloor. Gently scrape away any remaining remnants, ensuring that the surface is smooth and clean.
- Wash the floor: Mix a mild detergent with warm water and use a scrub brush or sponge to clean the surface. Scrub away any stubborn dirt or stains, paying close attention to the grout lines. Rinse with clean water to remove any soapy residue.
- Dry the floor: Allow the shower floor to dry completely before proceeding with any repairs or tile installation. This will prevent any issues with adhesion or moisture-related problems in the future.
By thoroughly cleaning the shower floor, you’re creating a clean and ready-to-use surface for the next steps of your project. Take your time to ensure that the subfloor is clean and free from any debris or adhesive residue before moving forward.
Step 6: Replace or Repair Any Subfloor Damage
Once the shower floor is clean and dry, it’s important to assess the condition of the subfloor and address any damage that may be present. Repairing or replacing the subfloor is crucial to ensure a stable and long-lasting foundation for your new tiles. Follow these steps to replace or repair any subfloor damage:
- Inspect the subfloor: Carefully examine the subfloor for any signs of damage, such as rot, water damage, or weakened areas. Pay close attention to the corners, edges, and areas around the drain.
- If you notice any significant damage, it’s recommended to consult with a professional contractor or a qualified handyman. They can assess the severity of the damage and provide guidance on the best course of action.
- If the damage is minor, you may be able to repair it yourself. Remove any weakened or damaged sections of the subfloor using a circular saw, making sure to cut along the joists for support.
- Replace the damaged sections with new plywood or cement board, making sure they are properly sized and fit snugly against the surrounding subfloor.
- Secure the new subfloor sections in place using screws or nails, ensuring they are level and flush with the existing subfloor.
- If necessary, apply a layer of thin-set mortar or adhesive to ensure proper bonding between the new subfloor and the existing surface.
- Allow the repairs to dry and cure according to the manufacturer’s instructions before proceeding with the tile installation.
Addressing any subfloor damage is crucial to prevent future issues with your shower floor tiles. If you’re unsure about your repair skills or the extent of the damage, it’s always best to seek professional assistance to ensure a safe and effective repair.
Step 7: Prepare for New Tiles
With the subfloor repaired and in good condition, you’re now ready to prepare for the installation of new tiles on your shower floor. This final step ensures that your tile installation goes smoothly and results in a durable and visually appealing finish. Follow these steps to prepare for the installation of new tiles:
- Measure and plan: Take accurate measurements of your shower floor to determine the amount of tile and any necessary cuts. Plan the layout of the tiles, considering factors such as the pattern, alignment, and spacing.
- Select your tiles: Choose the type, style, and color of tiles that best suit your bathroom decor and personal preferences. Ensure that the tiles are suitable for wet areas and have slip-resistant properties for safety.
- Gather the necessary materials: In addition to the tiles, you’ll need tile adhesive, a trowel, tile spacers, grout, a grout float, and a sponge for grouting. Make sure you have all the required materials on hand.
- Prepare the surface: Clean the shower floor once more to remove any dust or debris. Ensure that it is dry and free from any obstacles. If necessary, apply a waterproofing membrane or primer to the subfloor to enhance tile adhesion and prevent moisture penetration.
- Apply the adhesive: Follow the manufacturer’s instructions to mix and apply the tile adhesive onto the shower floor. Use a notched trowel to create even ridges in the adhesive, ensuring optimal bonding between the tiles and the subfloor.
- Install the tiles: Begin laying the tiles on the shower floor, following your planned layout. Use tile spacers to ensure consistent spacing between the tiles and create neat and uniform grout lines.
- Allow the adhesive to cure: Once all the tiles are in place, allow the adhesive to cure for the recommended amount of time. This will ensure that the tiles are securely bonded to the subfloor, providing a stable and long-lasting installation.
- Grout the tiles: Mix the grout according to the manufacturer’s instructions and use a grout float to apply it to the spaces between the tiles. Hold the float at a diagonal angle to press the grout into the joints, then remove any excess with a sponge.
- Final clean-up: After the grout has dried, wipe the tiles with a clean, damp sponge to remove any grout residue. Polish the tiles with a soft cloth to reveal their natural beauty.
By properly preparing for new tile installation, you’ll ensure a successful and visually pleasing result. Take your time during this step to ensure accurate measurements, careful tile placement, and clean grout application. Once complete, you can enjoy your newly renovated shower floor!
Read more: How To Remove Asbestos Tile Floor
Conclusion
Removing shower floor tiles may seem like a daunting task, but with the right tools, materials, and knowledge, it can be accomplished successfully. By following the step-by-step guide outlined in this article, you’ll be able to confidently remove old tiles, clean the surface, and prepare for the installation of new tiles. The process requires patience, attention to detail, and proper safety measures, but the end result will be a refreshed and beautiful shower floor.
Throughout the process, it’s important to pay close attention to the condition of the subfloor and address any damage or issues that may arise. By repairing or replacing the subfloor as needed, you’ll ensure a stable and long-lasting base for your new tiles.
Remember to take your time and follow the manufacturer’s instructions for any adhesives, grouts, or materials used. This will help to ensure proper bonding, durability, and a professional-looking finish.
Once the tile removal and installation process is complete, you can enjoy the satisfaction of a newly renovated shower floor. It’s a fantastic way to update the look of your bathroom and create a more pleasant and enjoyable bathing experience.
If you find yourself unsure or uncomfortable with any steps in the process, it’s always best to seek professional guidance. They can provide expert advice and assistance to ensure a successful project.
Remember, with thorough preparation, attention to detail, and a bit of patience, you can easily remove shower floor tiles and transform your bathroom into a space that is both functional and aesthetically pleasing.
Frequently Asked Questions about How To Remove Shower Floor Tile
Was this page helpful?
At Storables.com, we guarantee accurate and reliable information. Our content, validated by Expert Board Contributors, is crafted following stringent Editorial Policies. We're committed to providing you with well-researched, expert-backed insights for all your informational needs.


0 thoughts on “How To Remove Shower Floor Tile”