Articles
How To Remove Asbestos Tile Floor
Modified: August 28, 2024
Learn effective methods and safety precautions to remove asbestos tile floor in this informative article. Protect yourself and your family from exposure to harmful asbestos fibers.
(Many of the links in this article redirect to a specific reviewed product. Your purchase of these products through affiliate links helps to generate commission for Storables.com, at no extra cost. Learn more)
Introduction
Welcome to our comprehensive guide on how to remove asbestos tile floors. Asbestos was a commonly used material in the past due to its durability and fire-resistant properties. However, as we now know, asbestos exposure can lead to serious health issues, including lung cancer and mesothelioma. Therefore, it is crucial to handle asbestos-containing materials with extreme caution and follow proper removal procedures.
In this article, we will provide you with a step-by-step guide on removing asbestos tile floors safely and efficiently. We will also discuss the necessary tools and safety equipment you will need, as well as the precautions to take before, during, and after the removal process.
Please note that asbestos removal can be hazardous, and it is highly recommended to consult with a professional asbestos abatement company before attempting any removal work. If you decide to undertake this task yourself, proceed with utmost care and always prioritize your safety and the safety of others.
Now, let’s dive into the necessary steps and precautions to follow when removing asbestos tile floors.
Key Takeaways:
- Prioritize safety and proper procedures when removing asbestos tile floors. Gather necessary tools, prepare the workspace, and follow precautions to minimize exposure. Consider professional assistance for safe and effective removal.
- Proper disposal and thorough cleaning post-removal are crucial for minimizing asbestos exposure. Stay informed, monitor for residue, and prioritize ongoing safety measures to protect your home and loved ones.
Read more: How To Remove Shower Floor Tile
Step 1: Gather Required Tools and Safety Equipment
Before starting the asbestos tile removal process, it is essential to gather the necessary tools and safety equipment to protect yourself and minimize the risk of asbestos exposure. Here are the items you will need:
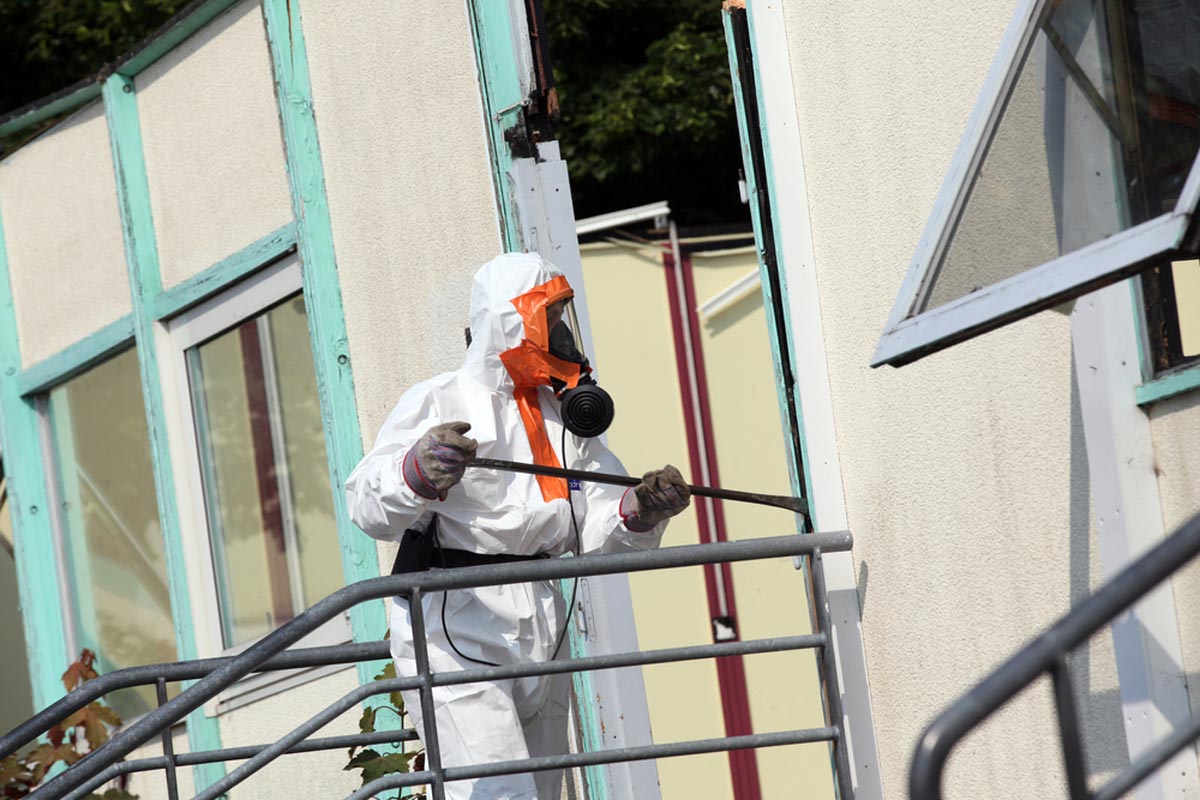
- Personal Protective Equipment (PPE): This includes a disposable asbestos-rated coverall, respirator with a HEPA filter, gloves, and safety goggles. The PPE will help prevent asbestos fibers from coming into contact with your skin, eyes, and airways.
- Plastic Sheeting: Use heavy-duty plastic sheeting to isolate the work area and create a containment zone around the asbestos tiles. This will prevent asbestos fibers from spreading to other areas of your home.
- Utility Knife: A sharp utility knife will be useful for cutting and removing the tiles. Make sure the blade is new and sharp to make the process easier.
- Water Spray Bottle: Fill a spray bottle with water to wet the tiles before removal. Wetting the tiles helps minimize the release of asbestos fibers into the air.
- Plastic Bags: Use thick, asbestos-rated plastic bags to safely dispose of the removed asbestos tiles. Double bagging is recommended for added protection.
- Tape: Use duct tape or specialized asbestos tape to seal the plastic sheeting and ensure a secure containment area.
- Disposable Wet Wipes: Keep a supply of disposable wet wipes nearby to clean any surfaces that come into contact with asbestos dust or fibers.
- Disposable Trash Bags: You will need these bags to dispose of any contaminated materials, including used PPE and wipes.
- Asbestos Waste Disposal Container: It is essential to have a designated container for asbestos waste. Make sure it complies with local regulations for safe disposal.
- First Aid Kit: Have a well-stocked first aid kit handy in case of any minor injuries.
Once you have gathered all the necessary tools and safety equipment, you will be better prepared to tackle the asbestos tile removal process effectively and safely. Remember to always prioritize your safety and follow proper guidelines to minimize the risk of asbestos exposure.
Step 2: Prepare the Workspace
Before you begin removing asbestos tiles, it’s crucial to properly prepare the workspace. This step ensures that you create a controlled environment and minimize the risk of asbestos fibers spreading to unaffected areas of your home. Follow these guidelines to prepare your workspace:
- Isolate the Area: Close off the work area from the rest of your home by sealing any doors, windows, and vents with plastic sheeting and duct tape. This prevents the contamination from spreading.
- Turn Off HVAC Systems: Shut down any heating, ventilation, and air conditioning (HVAC) systems to prevent the circulation of asbestos fibers throughout your home. If possible, cover the vents and ducts with plastic sheeting to further ensure containment.
- Clear the Space: Remove all furniture, rugs, curtains, and other items from the workspace to create a clear and unobstructed area for asbestos tile removal. This will also protect your belongings from potential contamination.
- Use Warning Signs: Place clear warning signs or barricades around the work area to alert others and prevent accidental exposure. Restrict access to the area until the asbestos removal process is complete.
- Ventilate the Workspace: Open windows and use fans to increase ventilation in the work area. This helps to dissipate any airborne asbestos fibers and reduce the concentration of asbestos dust.
- Cover Surfaces: Cover any surfaces, such as countertops or cabinets, that cannot be removed from the workspace with plastic sheeting. This provides an extra layer of protection against asbestos dust settling on these surfaces.
By properly preparing the workspace, you create a safe and controlled environment for asbestos tile removal. These precautions help contain the asbestos fibers, reduce the risk of spreading contamination, and protect both you and your home from exposure.
Step 3: Precautions to Take Before Removing Asbestos Tiles
Prior to removing asbestos tiles, it is crucial to take certain precautions to minimize the risk of asbestos exposure. Asbestos fibers can become airborne during the removal process, posing a health hazard to you and those around you. Follow these precautions:
- Educate Yourself: Learn about the proper handling and removal of asbestos-containing materials. Familiarize yourself with local regulations and guidelines to ensure compliance with safety standards.
- Assess the Tiles: Determine if your tiles actually contain asbestos. If you are unsure, consider hiring a professional to conduct a thorough asbestos inspection or have a sample of the tiles tested by a certified asbestos laboratory.
- Create a Work Plan: Develop a detailed work plan that outlines the steps involved in the removal process. This will help you stay organized and focused, ensuring proper safety measures are followed.
- Protective Clothing: Put on your personal protective equipment (PPE), including coveralls, respirator, gloves, and safety goggles, before entering the work area. Make sure your PPE is in good condition and fits snugly for maximum protection.
- Wet the Tiles: Thoroughly wet the asbestos tiles using a water spray bottle. Wetting the tiles helps to minimize the release of asbestos fibers into the air during removal.
- Seal Off the Work Area: Create a containment area by sealing off the work area with plastic sheeting and duct tape. This prevents asbestos fibers from spreading to other parts of your home during the removal process.
- Prepare a Decontamination Area: Set up a decontamination area near the work area. This area should be equipped with garbage bags, disposable wet wipes, and a place to safely remove and dispose of contaminated PPE after each work session.
- Minimize Air Disturbance: Avoid activities that can disturb the air, such as running fans or sweeping. This helps prevent the spread of asbestos fibers beyond the containment area.
- Inform Others: Inform family members, neighbors, and anyone else in the vicinity about the asbestos removal work that is taking place. Advise them to steer clear of the area during the process.
- Have a Waste Disposal Plan: Develop a proper waste disposal plan for the asbestos-containing materials. Consult local authorities and follow their guidelines for safe and legal disposal.
By taking these precautions, you significantly reduce the risk of exposing yourself and others to asbestos fibers. Remember, the safety of everyone involved is of utmost importance during the asbestos tile removal process.
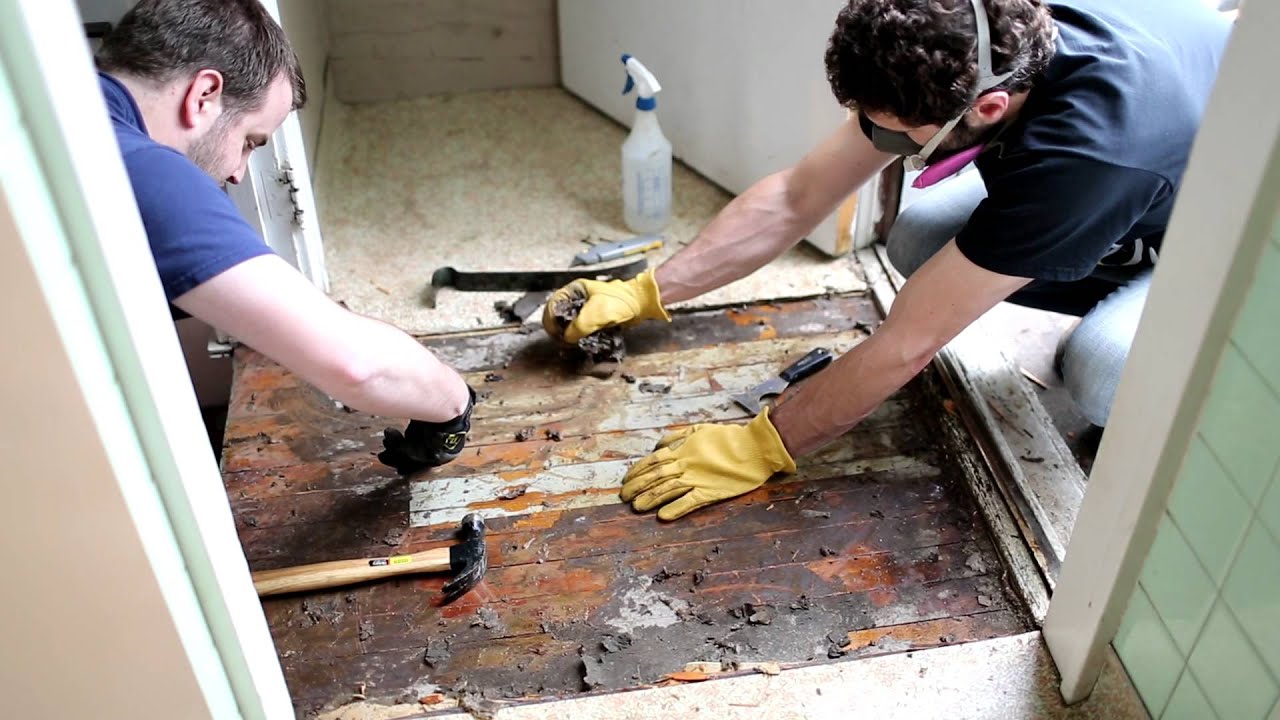
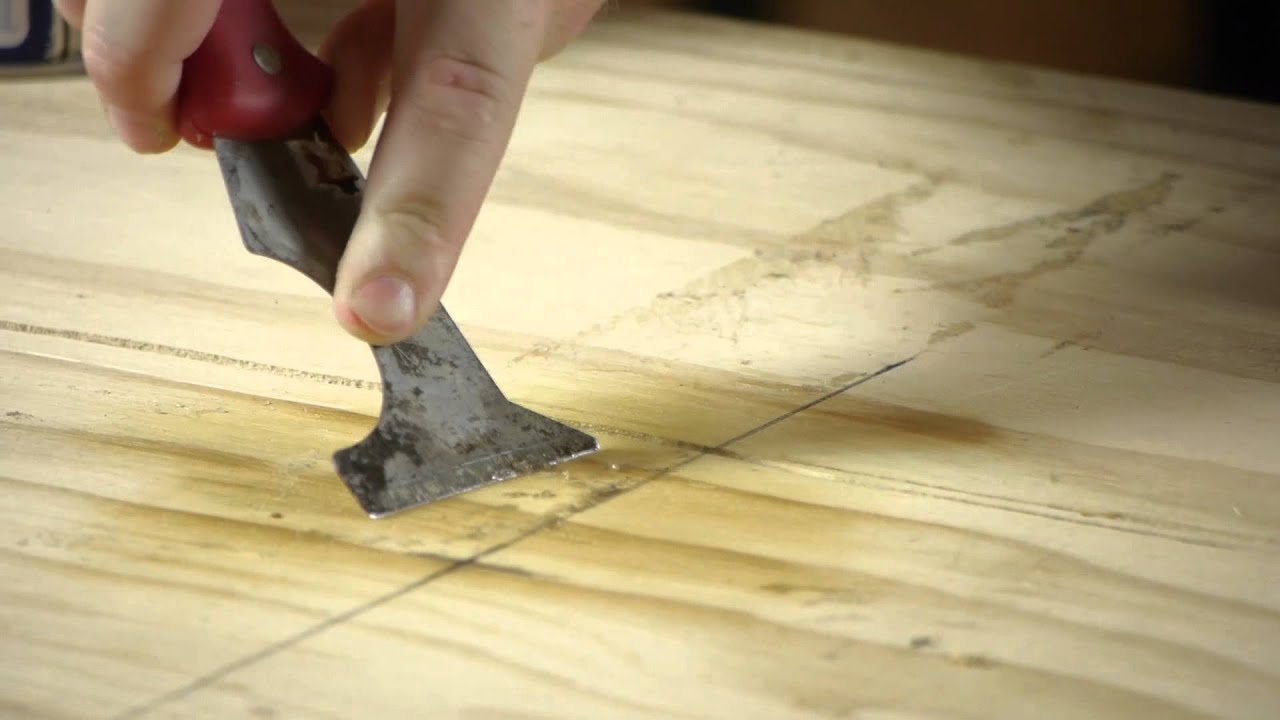
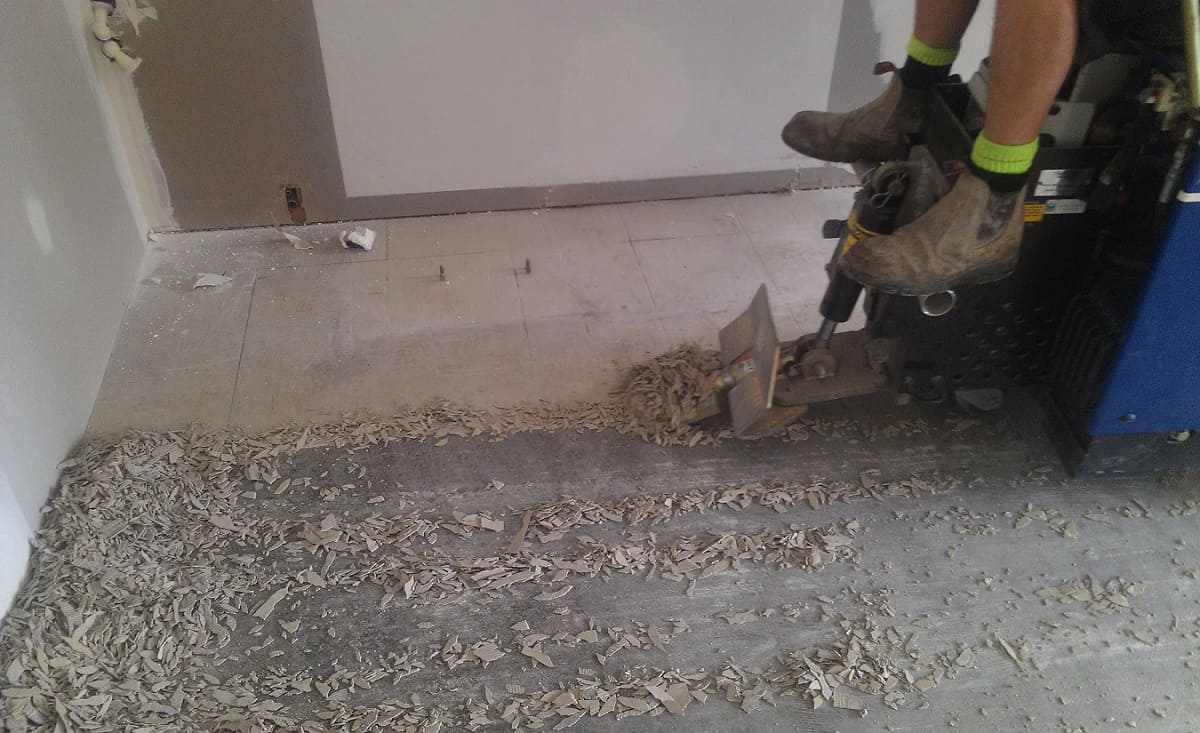
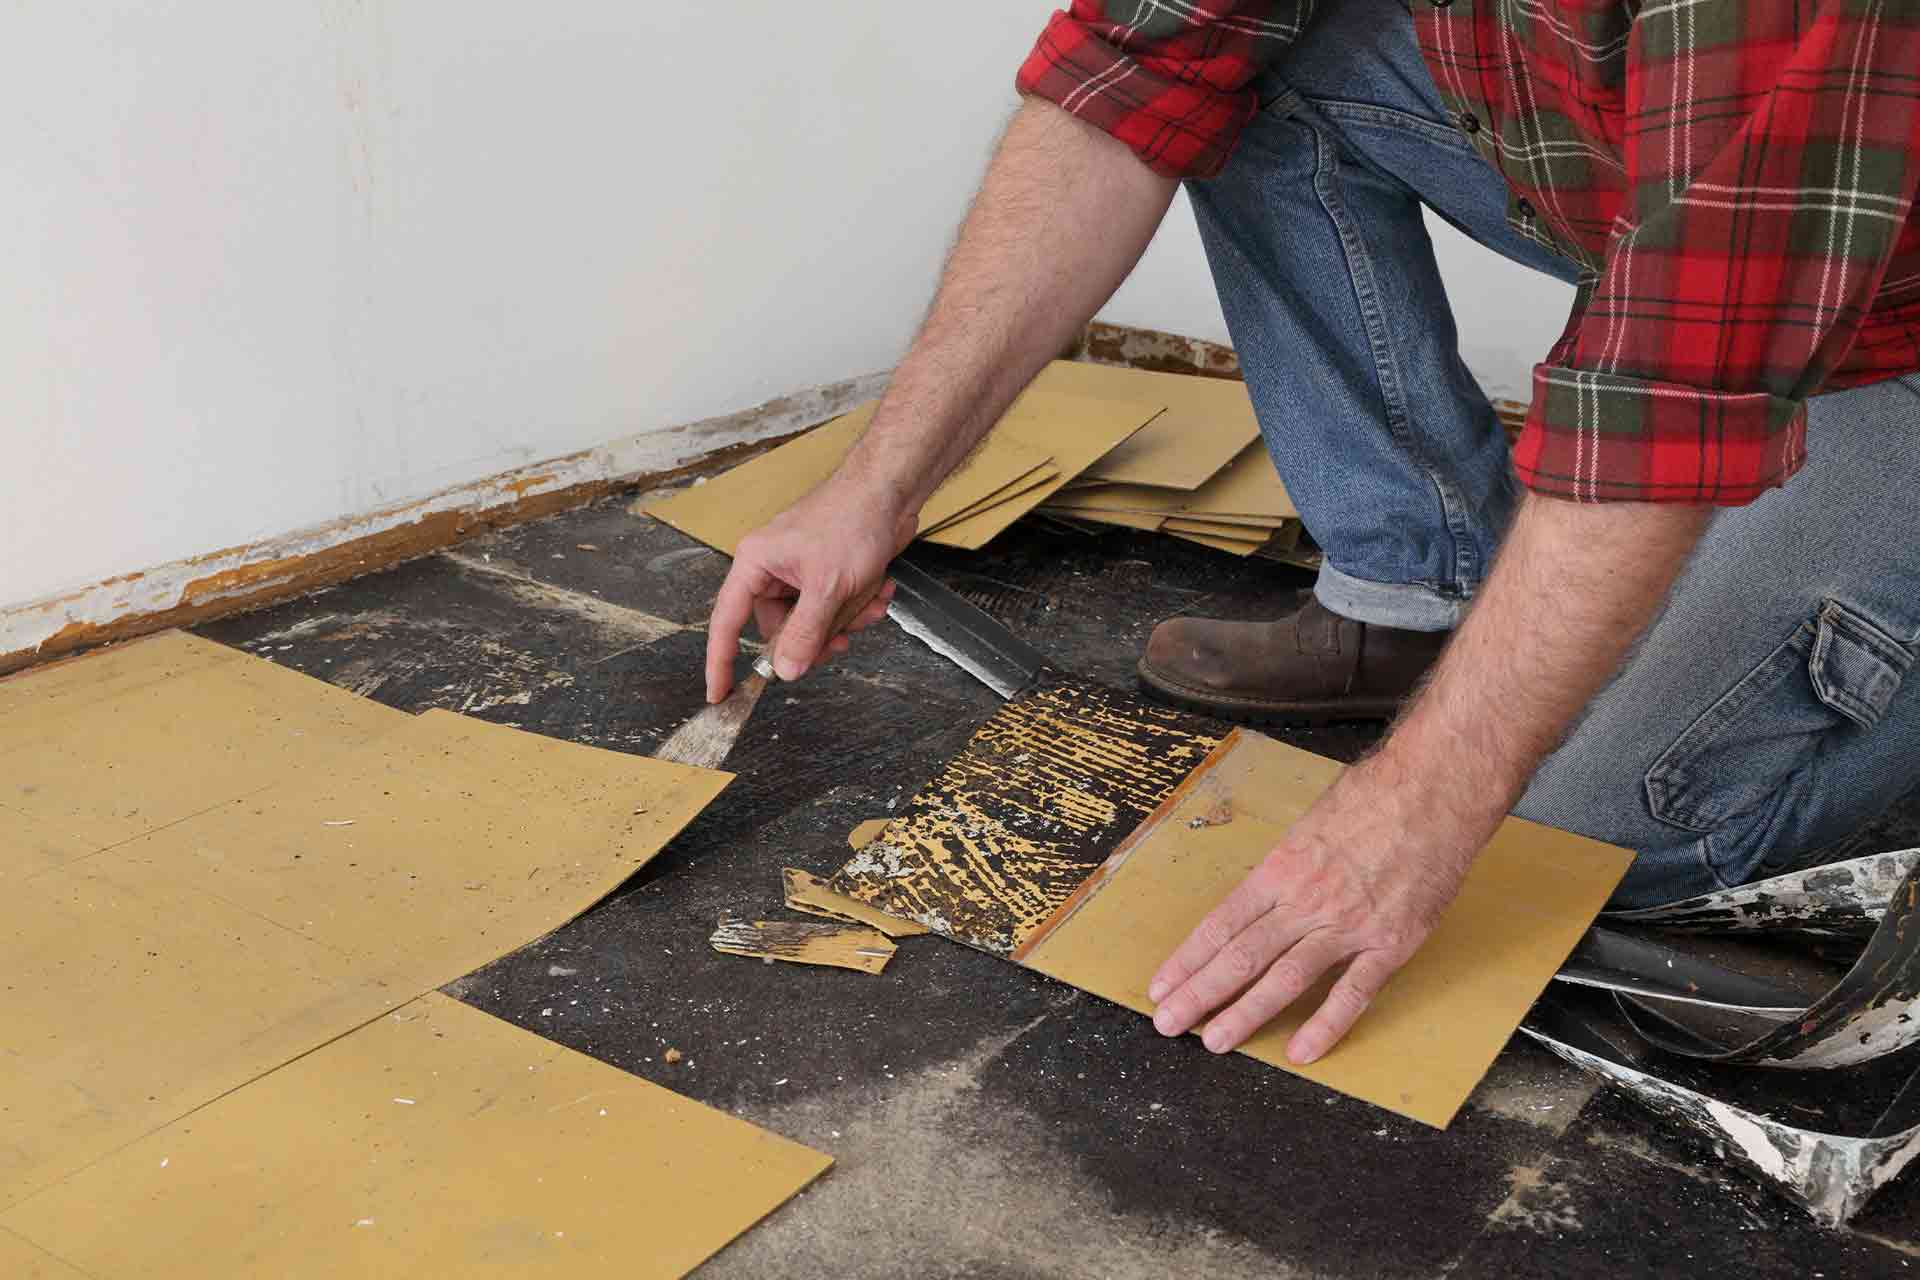
Step 4: Methods for Asbestos Tile Removal
When it comes to removing asbestos tiles, there are a few different methods you can choose from. The method you select depends on various factors, such as the condition of the tiles, your level of experience, and the local regulations in your area. Here are some commonly used methods for asbestos tile removal:
- Encapsulation: In some cases, it may be possible to encapsulate the asbestos tiles rather than removing them. This method involves applying a sealant or adhesive over the tiles to prevent the release of asbestos fibers. Encapsulation is typically used when the tiles are in good condition and not friable (easily crumbled).
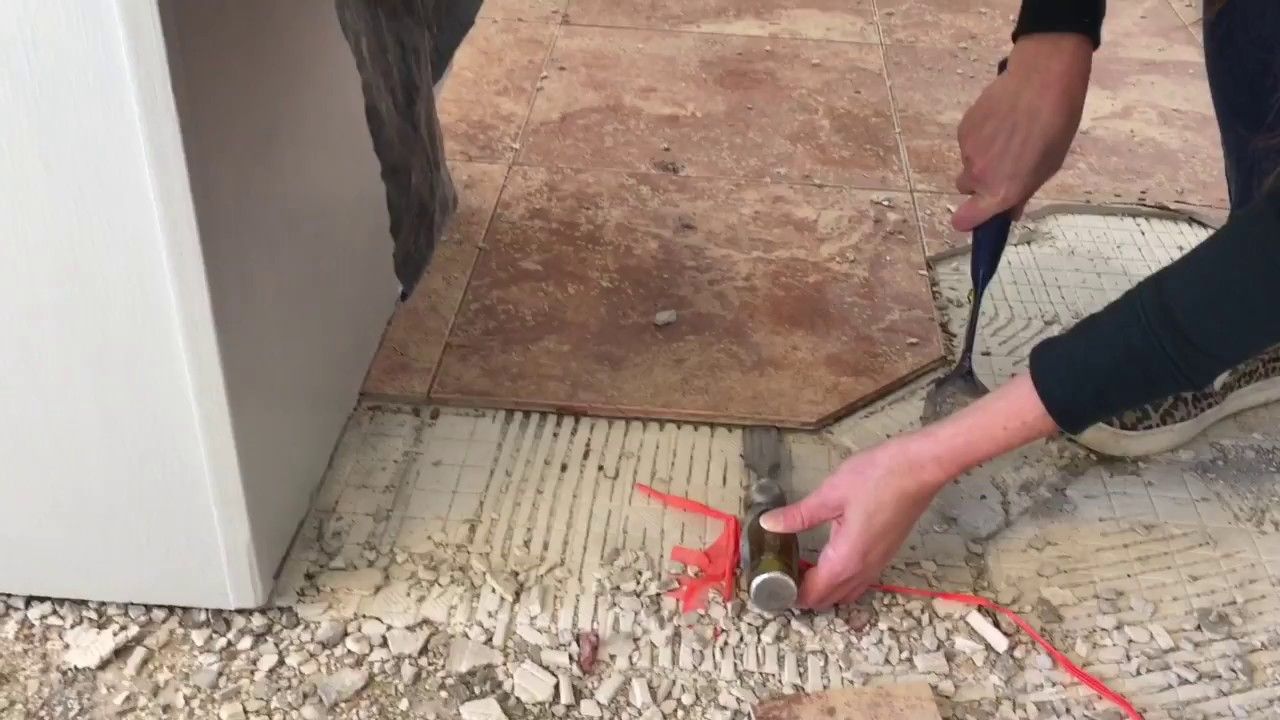
- Removal in Whole Sheets: If the tiles are relatively intact and can be lifted without breaking into small pieces, removing them in whole sheets may be an option. Start by wetting the tiles with water to minimize fiber release and use a pry bar to gently lift and remove the entire sheet. Place the sheets directly into an asbestos waste disposal bag for proper disposal.
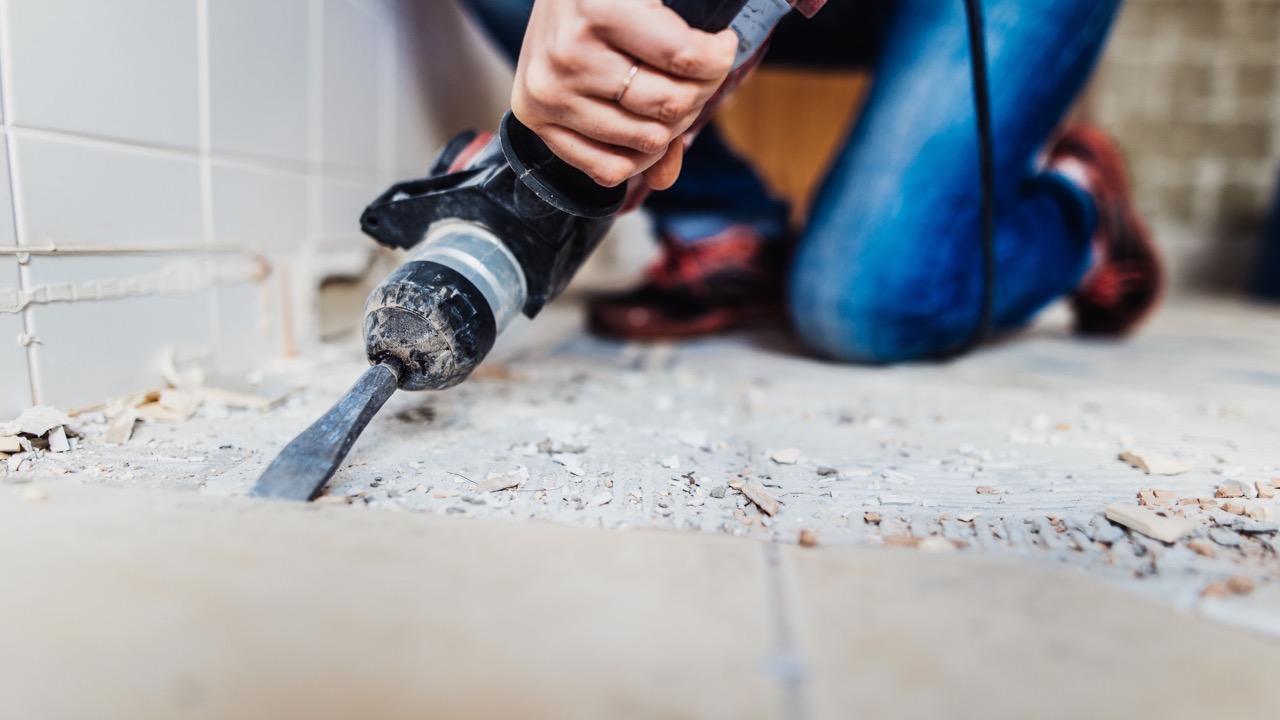
- Scraping: This method involves using a floor scraper or putty knife to carefully scrape off the asbestos tiles from the floor. It is important to wet the tiles before scraping to minimize the release of fibers. The scraped tiles should be placed directly into asbestos waste disposal bags.
- Heat Treatment: Heat can be used to loosen the adhesive holding the tiles in place, making it easier to remove them. However, this method requires specialized equipment and should only be performed by trained professionals to prevent the release of asbestos fibers.
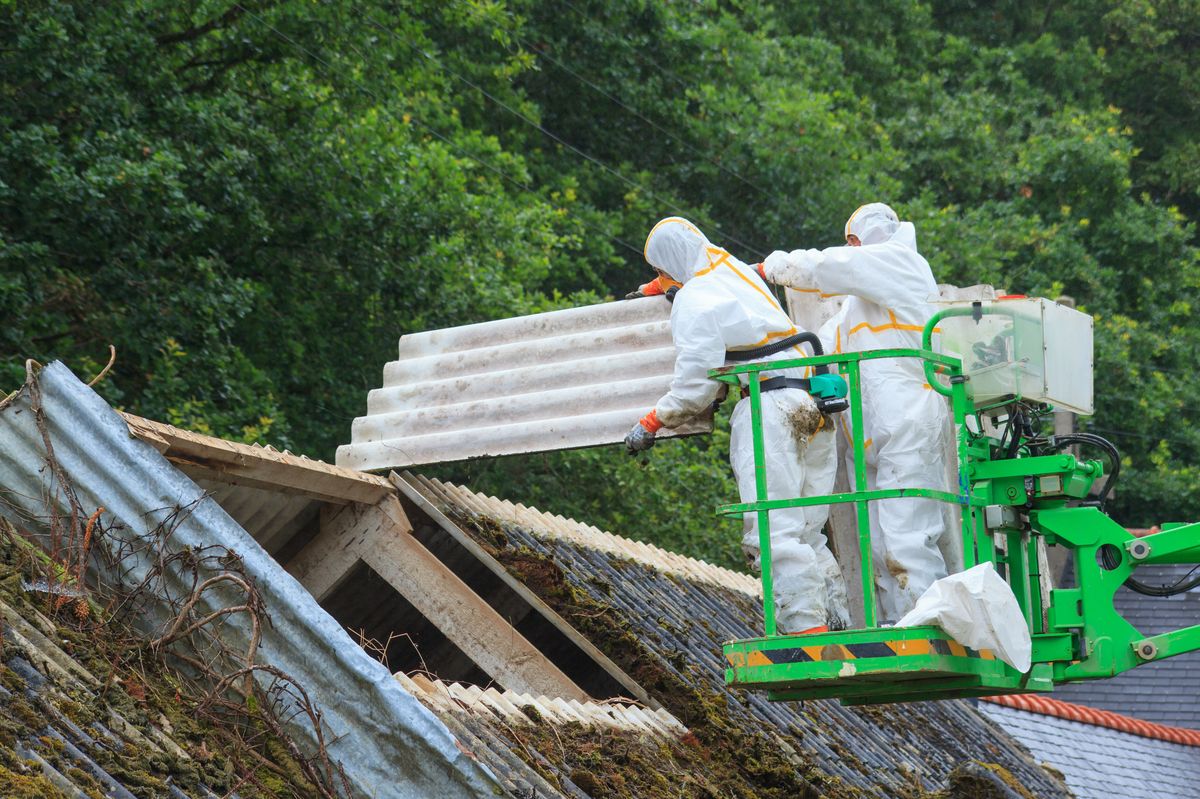
- Professional Abatement: If you are uncertain or uncomfortable with removing asbestos tiles yourself, it is best to hire a professional asbestos abatement company. These experts have the necessary training, equipment, and knowledge to safely and effectively remove the tiles, ensuring minimal risk of asbestos exposure.
Regardless of the method you choose, always prioritize safety and follow proper guidelines. Remember to continuously wet the tiles during removal, work in small sections to prevent excessive fiber release, and properly dispose of all asbestos-containing materials.
It is essential to note that asbestos removal can be a hazardous process. Therefore, it is strongly recommended to consult with professionals or local authorities who specialize in asbestos removal to ensure proper handling and adherence to regulations in your area.
When removing asbestos tile floor, it’s important to wear protective gear such as a mask and gloves to avoid inhaling or touching the harmful fibers. It’s also crucial to wet the tiles before removal to minimize the release of asbestos fibers into the air.
Read more: How To Remove Stain On Tile Floor
Step 5: Proper Disposal of Asbestos Tiles
Proper disposal of asbestos tiles is crucial to prevent the release of dangerous asbestos fibers into the environment. It is important to follow the guidelines and regulations set by your local authorities to ensure safe and legal disposal. Here are some essential steps to take when disposing of asbestos tiles:
- Double Bagging: Place the removed asbestos tiles in asbestos-rated plastic bags. It is recommended to double bag the tiles to provide an extra layer of protection.
- Sealing Bags: Seal the bags tightly using duct tape or specialized asbestos tape. This will prevent any fibers from escaping during transportation and disposal.
- Labeling: Clearly mark each bag with a label indicating that it contains asbestos waste. This helps ensure that the bags are handled with precaution during transportation and disposal.
- Transportation: If you decide to transport the bags yourself, make sure to handle them with care and avoid any actions that could cause them to break or release fibers into the air. Always comply with local regulations regarding transportation of asbestos waste.
- Disposal Location: Contact your local authorities or waste management facilities to inquire about the designated asbestos waste disposal location in your area. They will provide you with the necessary information and guidelines for proper disposal.
- Professional Disposal: Alternatively, you can hire a licensed asbestos removal company to handle the disposal for you. These professionals are trained in asbestos waste management and know the proper procedures for disposal.
- Documentation: Keep a record of the disposal process, including dates, locations, and any relevant documents or receipts. This documentation may be required to prove proper disposal if needed in the future.
It is important to understand that improper disposal of asbestos waste is illegal and poses significant health and environmental risks. By following the proper procedures for disposal, you help protect yourself, your community, and the environment from the potential dangers of asbestos exposure.
Always remember to prioritize safety and consult with local authorities or professionals regarding the regulations and guidelines specific to your area.
Step 6: Cleaning Up After Asbestos Tile Removal
After successfully removing asbestos tiles from your floor, it is crucial to thoroughly clean up the work area to ensure the removal of any remaining asbestos fibers. Follow these steps to properly clean up after asbestos tile removal:
- Containment Removal: Begin by carefully removing the plastic sheeting and containment barriers used to isolate the work area. Take extra precautions to prevent any asbestos dust from becoming airborne during this process.
- Wet Cleaning: Wet clean all surfaces in the work area using a damp cloth or disposable wet wipes. This includes walls, floors, windowsills, and any nearby objects that may have come into contact with asbestos dust or fibers.
- HEPA Vacuuming: Use a vacuum cleaner equipped with a high-efficiency particulate air (HEPA) filter to thoroughly vacuum the work area. Pay attention to corners, crevices, and any areas where asbestos dust may have settled.
- Proper Disposal: Empty the vacuum bag or canister directly into an asbestos waste disposal bag. Seal the bag tightly and label it as asbestos waste.
- Final Wet Cleaning: Perform a final wet cleaning of the entire work area using clean water and disposable wet wipes. This ensures that any remaining asbestos dust or debris is effectively removed.
- Removal of PPE: Carefully remove your personal protective equipment (PPE), such as coveralls, gloves, and goggles, in the decontamination area. Place the used PPE directly into asbestos waste disposal bags for proper disposal.
- Proper Waste Disposal: Dispose of all asbestos waste, including used PPE, wet wipes, and vacuum bags, in accordance with local regulations and guidelines. Contact your local authorities or waste management facilities to ensure proper disposal methods.
- Post-Cleanup Inspection: After completing the cleanup process, visually inspect the work area to ensure that it is free from any visible asbestos debris or dust. Conduct air monitoring if necessary to verify the effectiveness of the cleanup.
It is paramount to follow these cleaning procedures diligently to minimize the risk of asbestos exposure and ensure a safe environment for you and others. Remember, proper cleanup is an essential final step in the asbestos tile removal process.
If you have any concerns about the cleanliness of the work area post-cleanup or are uncertain about any step in the process, it is advisable to consult with professionals or local authorities who specialize in asbestos removal for guidance.
Step 7: Final Safety Measures
Even after completing the asbestos tile removal process and cleaning up the work area, it is important to take final safety measures to ensure the ongoing safety of your home and those who reside in it. Follow these final safety measures:
- Clearance Testing: Consider conducting clearance testing to verify that the area is free of asbestos fibers and safe to inhabit. This testing is typically performed by a qualified asbestos professional to provide you with peace of mind.
- Monitoring for Residue: Keep an eye out for any signs of asbestos residue in the days and weeks following the removal process. If you notice any suspicious dust or debris, contact a professional to investigate and address the issue.
- Education and Awareness: Educate yourself and your family members about the risks of asbestos exposure and the proper precautions to take. This includes knowing the signs and symptoms of asbestos-related diseases and seeking medical attention if necessary.
- Maintenance and Repairs: Asbestos-containing materials may still be present in other areas of your home. If you plan to undertake any renovations or repairs in the future, make sure to consult professionals who can identify potential asbestos-containing materials and handle them safely.
- Regular Cleaning: Implement a regular cleaning routine in your home to reduce the accumulation of dust and debris. Use damp cleaning methods and a vacuum cleaner with a HEPA filter to capture and trap any potential asbestos fibers.
- Monitor for Changes: Keep a watchful eye on the condition of your flooring and other materials that may contain asbestos. Any deterioration, damage, or signs of wear should be promptly addressed to prevent the release of asbestos fibers.
- Professional Support: If you have concerns or further questions regarding asbestos, consider seeking advice from professionals in the field, such as asbestos consultants or abatement companies.
By consistently following these final safety measures, you can ensure the continued safety of your home and the well-being of its occupants. Remember that asbestos exposure is a serious health risk, and proactive measures are essential for minimizing that risk.
Stay informed, remain vigilant, and prioritize the safety of your home and your loved ones.
Conclusion
Removing asbestos tile floors is a process that requires careful planning, proper tools, and adherence to safety protocols. By following the step-by-step guide outlined in this article, you can tackle this task safely and effectively while minimizing the risk of asbestos exposure. Remember, however, that asbestos removal can be hazardous, and it is always advisable to consult with professionals for assistance or to hire a licensed asbestos abatement company.
Throughout the process, you learned the importance of gathering the necessary tools and safety equipment, preparing the workspace, and taking precautions to minimize the risk of asbestos exposure. You were introduced to various methods for asbestos tile removal, including encapsulation, removal in whole sheets, scraping, heat treatment, and the option of professional abatement. Furthermore, proper disposal of asbestos waste and comprehensive cleaning post-removal were emphasized to ensure the safety of yourself and others.
It is crucial to stay informed about local regulations and guidelines for asbestos removal and disposal. Additionally, ongoing awareness and regular maintenance are essential to prevent future asbestos-related issues and ensure the continued safety of your home. If in doubt, consult professionals who specialize in asbestos removal and management for guidance.
Remember, the health risks associated with asbestos exposure cannot be taken lightly. Your safety and the safety of others should always be a top priority. By approaching asbestos tile removal with caution, following proper procedures, and seeking professional assistance when needed, you can effectively manage this potential hazard and create a safer living environment for yourself and your loved ones.
Stay well-informed, take the necessary steps, and always employ caution when dealing with asbestos-containing materials. Your diligence and care will go a long way in protecting your health and the well-being of those around you.
Frequently Asked Questions about How To Remove Asbestos Tile Floor
Was this page helpful?
At Storables.com, we guarantee accurate and reliable information. Our content, validated by Expert Board Contributors, is crafted following stringent Editorial Policies. We're committed to providing you with well-researched, expert-backed insights for all your informational needs.


0 thoughts on “How To Remove Asbestos Tile Floor”