Articles
How To Lay Tile On Concrete Floor
Modified: August 26, 2024
Learn the step-by-step process of laying tile on a concrete floor with our comprehensive articles. Achieve a professional finish and transform your space.
(Many of the links in this article redirect to a specific reviewed product. Your purchase of these products through affiliate links helps to generate commission for Storables.com, at no extra cost. Learn more)
Introduction
Laying tile on a concrete floor is a great way to add beauty and durability to any space. Whether you’re installing tile in a bathroom, kitchen, or outdoor patio, the process is relatively straightforward. By following the proper steps, you can achieve a professional-looking finish that will last for years to come.
Before you begin the tile installation process, it’s important to understand the basics of working with tile on a concrete floor. This article will guide you through each step, from preparing the surface to grouting and sealing the tiles.
One of the first steps in laying tile on a concrete floor is to ensure that the surface is properly prepared. This involves clearing the area of any furniture or obstacles, repairing any cracks or damage, and making sure the floor is clean and dry. By taking the time to prep the floor, you’ll create a solid foundation for the tile installation.
Key Takeaways:
- Proper preparation is essential for laying tile on a concrete floor. Clearing the area, repairing any damage, and ensuring a clean, dry surface sets the foundation for a successful and long-lasting tile installation.
- Planning, precision, and patience are key to achieving a professional-looking tile floor. From layout design to grout application and sealing, attention to detail ensures a beautiful and durable end result.
Read more: How To Lay Concrete Tiles Outdoor
Step 1: Preparing the Concrete Floor
Begin by clearing the area of any furniture, rugs, or other items that may be in the way. Sweep or vacuum the entire floor to remove any dust, dirt, or debris.
If you notice any cracks or damage in the concrete, it’s essential to repair them before proceeding. Small cracks can be filled with a concrete patching compound, while larger cracks may require professional assistance. Once the repairs are complete, allow the patching compound to dry fully according to the manufacturer’s instructions.
Before applying the tile, it’s crucial to ensure that the concrete floor is clean and dry. Use a damp mop or sponge to remove any remaining dust or debris. If there are any oily or greasy stains on the floor, use a degreasing cleaner to remove them. Allow the floor to dry completely before moving on to the next steps.
Step 2: Planning the Tile Layout
Once the concrete floor is prepped and ready, it’s time to plan the tile layout. Start by determining the starting point for your installation. This is usually a focal point in the room, such as the center of a bathroom floor or the center of a kitchen backsplash.
Measure the dimensions of the room and determine the size of the tiles you’ll be using. It’s important to account for any necessary spacing between the tiles, known as grout lines. Use a chalk line or a straightedge to mark the layout on the floor, ensuring that the lines are square and level.
Before applying the mortar and setting the tiles, it’s a good idea to dry-lay the tiles to ensure everything fits properly. This involves placing the tiles on the floor without adhesive to check the layout and make any adjustments as needed.
With the layout planned and the tiles dry-laid, you’re ready to move on to the next step: applying thinset mortar.
…
Key Takeaways:
- Proper preparation is essential for laying tile on a concrete floor. Clearing the area, repairing any damage, and ensuring a clean, dry surface sets the foundation for a successful and long-lasting tile installation.
- Planning, precision, and patience are key to achieving a professional-looking tile floor. From layout design to grout application and sealing, attention to detail ensures a beautiful and durable end result.
Read more: How To Lay Concrete Tiles Outdoor
Step 1: Preparing the Concrete Floor
Prior to laying tile on a concrete floor, it’s crucial to prepare the surface properly. This ensures a smooth and even installation that will last for years to come. There are a few key steps involved in preparing the concrete floor:
Clearing the Area
The first step is to clear the area of any furniture, rugs, or other items that may be in the way. This will provide you with a clean and open space to work in. Take the time to remove any obstacles and create a clear path for the tile installation process.
Read more: How To Lay Out Floor Tile
Repairing any Cracks or Damage
Inspect the concrete floor for any cracks or damage that may need to be repaired. Small cracks can usually be filled with a concrete patching compound. Apply the compound according to the manufacturer’s instructions, ensuring that it fills the cracks completely. For larger cracks or significant damage, it’s recommended to consult a professional for the necessary repairs.
Ensuring the Surface is Clean and Dry
Before applying any adhesive or mortar, it’s essential to ensure that the concrete floor is clean and dry. Sweep or vacuum the entire floor to remove any dust, dirt, or debris. If there are any oily or greasy stains on the floor, use a degreasing cleaner to remove them. Rinse the floor with clean water and allow it to dry fully.
Once the floor is clean, it’s a good idea to test for moisture. High levels of moisture can affect the bonding of the tile adhesive and lead to issues down the line. Perform a moisture test using a moisture meter or by placing a plastic sheet on the floor and checking for any condensation or water droplets after 24 hours.
If the moisture levels are too high, it’s important to address the issue before proceeding with the tile installation. This may involve installing a moisture barrier or addressing any underlying moisture problems in the concrete. Consult a professional if you are unsure how to properly address high moisture levels.
Taking the time to properly prepare the concrete floor sets the foundation for a successful tile installation. Once the area is cleared, any cracks or damage are repaired, and the surface is clean and dry, you’re ready to move on to the next step: planning the tile layout.
Step 2: Planning the Tile Layout
Before you start laying tiles on the concrete floor, it’s important to plan the layout to ensure a visually pleasing and symmetrical installation. Proper planning will help you determine the starting point, measure and mark the layout accurately, and dry-lay the tiles before applying any adhesive.
Determining the Starting Point
The starting point of your tile installation is crucial as it sets the tone for the entire project. Typically, the starting point is a focal point in the room, such as the center of a bathroom floor or the center of a kitchen backsplash. Take into consideration any existing features or fixtures in the room that may influence the starting point selection.
Read more: How To Lay Mosaic Floor Tile
Measuring and Marking the Layout
Measure the dimensions of the room and determine the size of the tiles you’ll be using. This information will help you calculate the number of tiles needed and establish the layout. It’s important to account for any necessary spacing between the tiles, known as grout lines. Standard grout lines are typically 1/8 to 1/4 inch wide.
Mark the layout on the concrete floor using a chalk line or a straightedge. Start by dividing the room into quadrants to establish a reference point. Ensure that the lines are square and level by using a carpenter’s square or a level. This will help you maintain straight lines throughout the installation.
Dry-Laying the Tiles
Before applying any adhesive, dry-lay the tiles on the concrete floor to visualize how they will fit and make any necessary adjustments. Start from the reference point established during the layout marking. Place the tiles on the floor without any adhesive, following the predetermined layout.
This step allows you to check the tile placement, make sure the layout is visually appealing, and ensure that there are no odd cuts or small tile pieces near the walls or corners. It’s an opportunity to make any adjustments before permanently setting the tiles with adhesive.
Take your time during the planning phase to ensure a well-designed layout. By determining the starting point, accurately measuring and marking the layout, and dry-laying the tiles, you will have a clear vision of how the final tile installation will look.
With the tile layout planned out, you’re now ready to move on to the next step: applying thinset mortar to secure the tiles to the concrete floor.
Step 3: Applying Thinset Mortar
Once you have planned the tile layout on your concrete floor, it’s time to apply thinset mortar. Thinset mortar is a cement-based adhesive that helps bond the tiles to the surface securely. Here are the key steps for applying thinset mortar:
Mixing the Thinset Mortar
Start by preparing the thinset mortar according to the manufacturer’s instructions. Typically, thinset mortar comes in powder form that needs to be mixed with water. Use a clean bucket and a mixing paddle attachment for your drill to achieve a smooth and consistent consistency. Follow the ratio specified on the packaging to ensure the proper consistency of the mortar.
Start by adding the required amount of water to the bucket, and then slowly add the thinset powder while continuously mixing. Mix until you achieve a thick, yet spreadable consistency that holds its shape. Avoid adding too much water at once, as it can lead to a runny and weak mixture. It’s better to add small amounts of water gradually until the desired consistency is reached.
Read more: How To Lay A Ceramic Tile Floor
Applying the Thinset to the Floor
Using a notched trowel, start applying the thinset mortar to the concrete floor. Hold the trowel at a 45-degree angle and spread a layer of mortar onto the floor, covering an area that you can work with comfortably. The size of the area will depend on how quickly you can lay the tiles before the mortar begins to dry.
Use the notched side of the trowel to create ridges in the thinset mortar. The size of the notches will vary depending on the size of the tiles and the recommendations provided by the tile manufacturer. Generally, larger tiles require larger notches to ensure proper adhesive coverage.
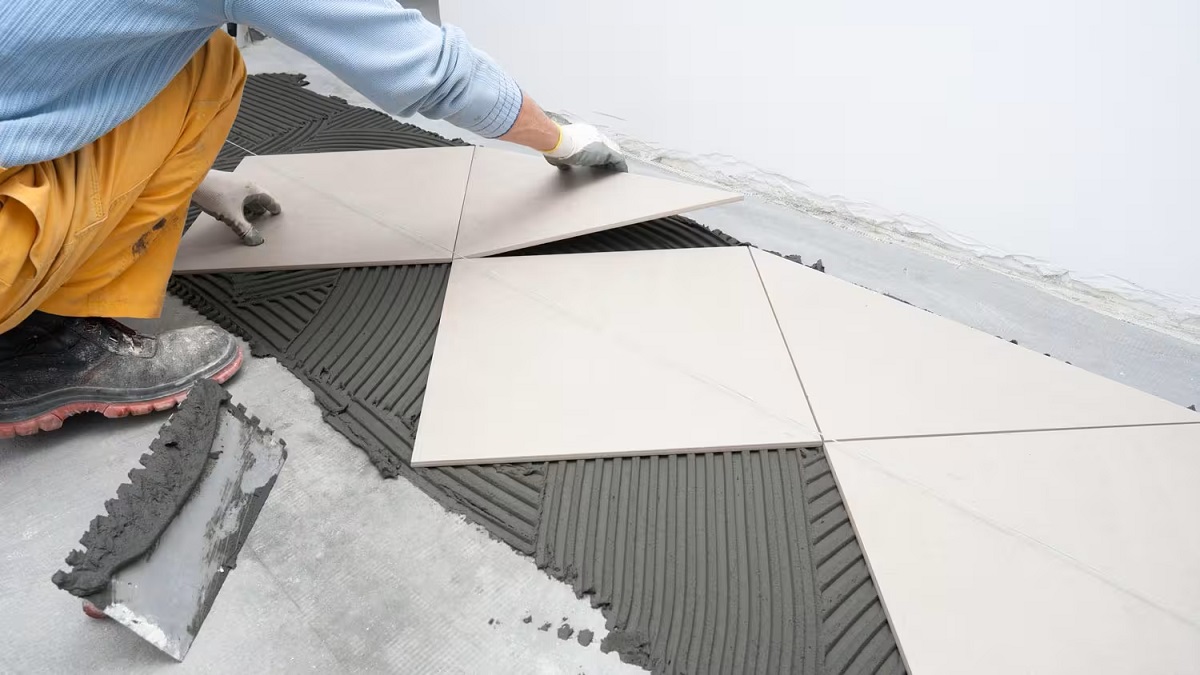
Work in small sections, as you want to lay the tiles in the thinset while it is still wet. Press the tiles firmly into the mortar, ensuring they are flat and level. Use a slight twisting motion to set the tiles in place and ensure good adhesive contact. Be mindful of the layout lines you marked previously and maintain even spacing between the tiles.
Continue applying thinset mortar and laying tiles in manageable sections until the entire floor is covered. Periodically check the levelness of the tiles using a level or a straight edge to ensure a smooth and even surface. If necessary, adjust the tiles by pressing them down or adding/removing mortar as needed.
Remember to work efficiently as thinset mortar dries relatively quickly. Only spread enough mortar that you can comfortably place tiles within the setting time specified by the manufacturer.
With the thinset mortar applied and tiles in place, you’re ready to move on to the next step: setting the tiles firmly on the concrete floor.
Step 4: Setting the Tiles
With the thinset mortar applied to the concrete floor, it’s time to set the tiles in place. This step involves placing the first tile, ensuring proper spacing between the tiles, and pressing them firmly into the mortar for a secure bond. Here’s how to set the tiles effectively:
Placing the First Tile
The first tile you lay will serve as the starting point for the rest of the installation. Place the tile in the corner of the room or the predetermined starting point based on your layout plan. Press the tile into the mortar, giving it a slight twisting motion to ensure it is securely adhered.
Ensuring Proper Spacing
Proper spacing between tiles is essential to achieve a professional finish. Use tile spacers to ensure consistent spacing throughout the installation. These small plastic crosses or T-shaped tools will help you maintain even grout lines. Place the spacers at the corners of each tile to create uniform gaps.
Depending on the size of the tiles and your design preferences, spacing can vary. Generally, a 1/8 to 1/4-inch gap is recommended for most tile installations. However, always refer to the specifications provided by the tile manufacturer for the precise spacing requirements.
Read more: How To Lay Tile On Wood Floor
Pressing the Tiles into the Mortar
After setting the first tile and spacing it properly, continue laying the rest of the tiles in the pattern and design you have planned. Press each tile firmly into the mortar, ensuring it sits flush and level with the adjacent tiles. Use a tile leveling system if desired to achieve an even and flat surface.
As you work, periodically check the levelness of the tiles using a level or a straightedge. Adjust any tiles that may be slightly uneven by pressing them down or gently wiggling them to distribute the mortar underneath. It’s crucial to correct any uneven tiles during this stage to avoid problems during grouting.
Continue setting the tiles in sections, working from the starting point and gradually moving your way across the floor. Periodically step back to assess the overall pattern, spacing, and alignment of the tiles. Make any adjustments as needed to maintain the desired layout.
Remember to work in small sections, as the thinset mortar will start to dry. Only spread enough mortar that you can comfortably lay tiles within the recommended setting time specified by the manufacturer.
By setting the tiles carefully, ensuring proper spacing, and pressing them firmly into the mortar, you’ll achieve a properly installed and visually pleasing tile floor. Once all the tiles are in place, it’s time to move on to the next step: cutting and fitting any tiles that require adjustments.
Step 5: Cutting and Fitting Tiles
When installing tiles on a concrete floor, it’s inevitable that you’ll encounter areas that require customized cuts and fitting. This step involves measuring and marking for cuts, using the appropriate tools to make precise cuts, and fitting tiles around obstacles. Here’s how to cut and fit tiles effectively:
Measuring and Marking for Cuts
Begin by measuring the area where a tile needs to be cut. Use a tape measure to determine the exact dimensions and mark the cutting line on the tile’s surface. It’s important to account for the gap between the tile and any adjacent surfaces or obstacles, as well as the required spacing for grout lines.
Double-check your measurements to ensure accuracy, and use a straightedge or a square to create a clear cutting line on the tile’s surface. It’s a good idea to label the tile with a pencil or marker indicating which side should be cut.
Using a Tile Cutter or Wet Saw
Depending on the type of tile and the complexity of the cuts needed, you can choose between using a tile cutter or a wet saw.
A tile cutter is suitable for straight cuts and is commonly used for ceramic or porcelain tiles. Place the tile on the cutter, aligning the cutting line with the scoring wheel, and apply consistent pressure to score the tile along the cutting line. Gently press down on the handle to snap the tile along the scored line.
For more intricate cuts, such as curves or diagonal lines, a wet saw is the tool of choice. A wet saw utilizes a diamond-coated blade and a water reservoir to create precise cuts. Follow the manufacturer’s instructions for operating the wet saw and make smooth, controlled cuts along the marked lines.
Read more: How To Lay Peel And Stick Tile Floors
Fitting Tiles around Obstacles
When installing tiles, you may encounter obstacles such as electrical outlets, pipes, or corners that require special cuts and fitting. Carefully measure and mark the tile to fit around the obstacle, taking into account any necessary gaps or spacing.
For irregular shapes or small cuts, you can use tile nippers or a rotary tool with a tile-cutting attachment. These tools allow you to nibble away small sections of the tile until the desired shape is achieved. Take your time and make small, gradual adjustments to ensure a precise fit.
Once the cuts are made and the tiles are fitted, check the positioning and alignment before proceeding. Make any necessary adjustments to ensure the tiles fit seamlessly and align with the rest of the installation.
By measuring and marking for cuts accurately, using the appropriate tools, and fitting tiles around obstacles meticulously, you’ll ensure a professional-looking tile installation on your concrete floor. With all the tiles in place and customized cuts fitted, it’s time to allow the mortar to cure properly before moving on to the next step: grouting.
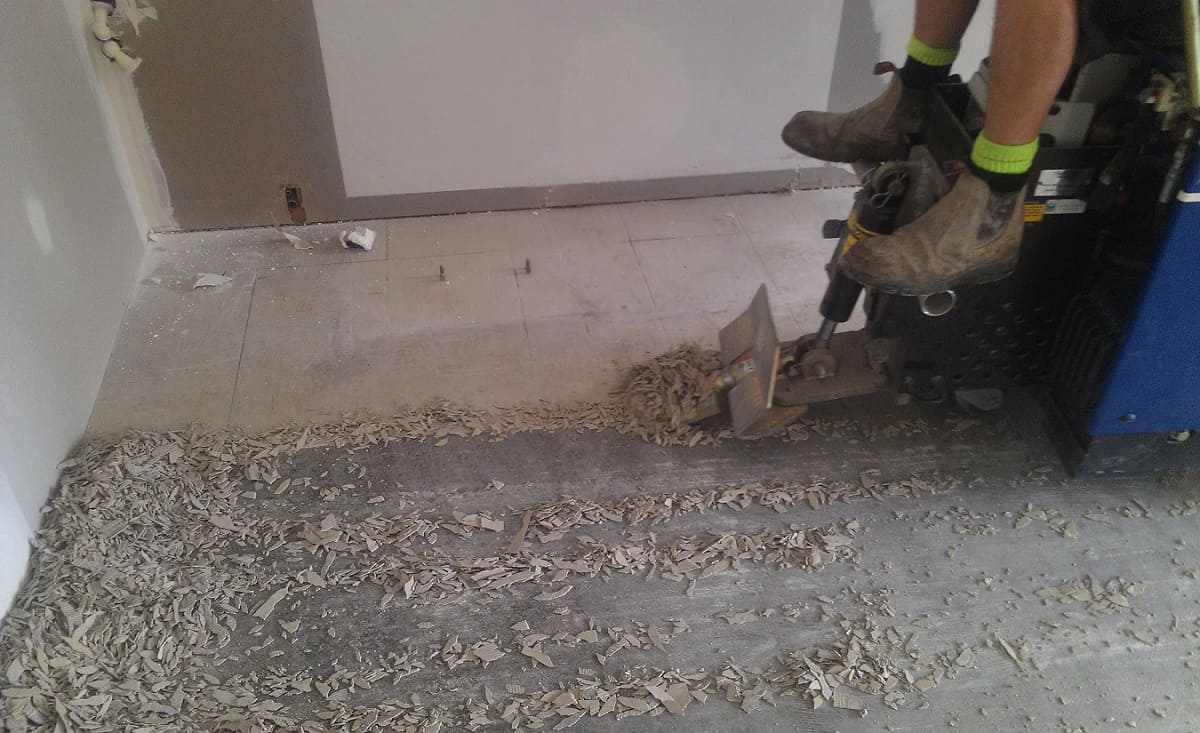
Step 6: Allowing the Mortar to Cure
Once you have set all the tiles in place on the concrete floor, it’s crucial to allow the mortar to properly cure. This step involves waiting for the mortar to dry and harden before moving on to the next stage of the tile installation process. Here’s what you need to do:
Waiting for the Mortar to Dry
The drying time for the thinset mortar will vary depending on factors such as the type of mortar, room temperature, and humidity levels. It’s important to follow the manufacturer’s instructions regarding the recommended drying time. In general, allow the mortar to dry for at least 24 to 48 hours before proceeding.
During this curing period, it’s essential to keep the area free from foot traffic and excessive moisture. Avoid walking on the tiles or placing heavy objects on them to prevent any shifting or damage to the newly laid tiles. Adequate curing allows the mortar to fully harden and bond with the concrete floor, ensuring a strong and durable tile installation.
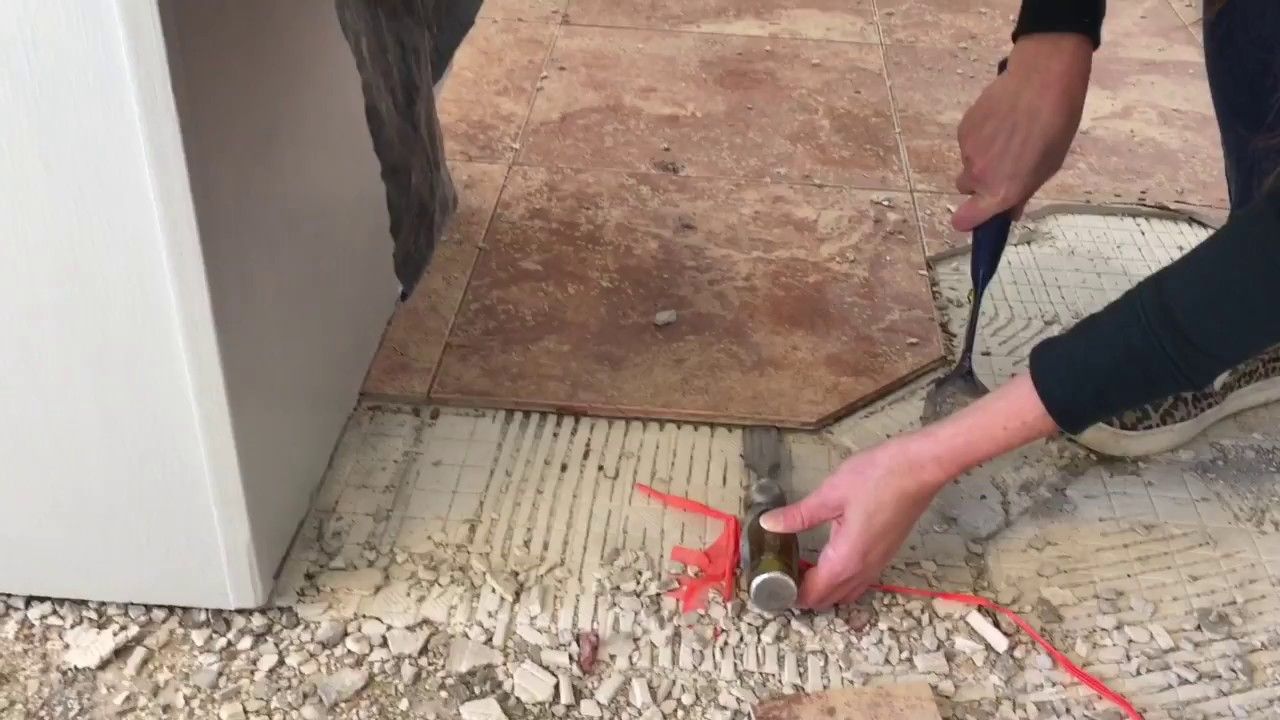
Cleaning Excess Mortar from the Tiles
While waiting for the mortar to cure, it’s a good idea to clean off any excess mortar or grout that may have accumulated on the tiles’ surface. You can do this by using a damp sponge, gently wiping away any visible residue. Be cautious not to disturb or dislodge the tiles while cleaning.
If the mortar has hardened and is difficult to remove, you may need to carefully scrape it off with a utility knife or a grout removal tool. Take care not to scratch or damage the tiles during this process. Complete this cleaning step before the mortar fully cures, as it becomes much more challenging to remove once it has hardened completely.
By allowing the mortar to cure properly and ensuring the tiles are clean from excess mortar, you create the ideal conditions for the next step: grouting the tiles.
Please note that the curing time may vary depending on the specific type of thinset mortar you are using. Always refer to the manufacturer’s instructions for the precise drying time and curing process to achieve the best results.
Read more: How To Lay Peel And Stick Floor Tile
Step 7: Grouting the Tiles
Once the mortar has properly cured and the tiles are firmly in place on the concrete floor, it’s time to move on to the next stage: grouting. Grout fills the gaps between the tiles, providing stability, preventing water penetration, and enhancing the overall appearance of the tiled surface. Here’s how to grout the tiles effectively:
Mixing the Grout
Start by preparing the grout according to the manufacturer’s instructions. Grout typically comes in powder form and needs to be mixed with water. Use a clean bucket and a mixing paddle attachment for your drill to achieve a smooth and consistent consistency. Follow the ratio specified on the packaging to ensure the proper consistency of the grout.
Add the required amount of water to the bucket, and then slowly add the grout powder while continuously mixing. Mix until you achieve a thick, yet spreadable consistency. Be mindful not to add too much water at once, as this can result in a runny grout mixture. It’s better to add small amounts of water gradually until the desired consistency is reached.
Applying the Grout to the Tile Joints
Once the grout is mixed, use a grout float or a rubber grout trowel to apply the grout to the tile joints. Hold the float or trowel at a 45-degree angle and spread the grout diagonally across the tiles, making sure to push it into the joints. Work in small sections to ensure that the grout does not dry before you can clean it off.
Use the float or trowel to remove any excess grout from the tile surface, holding it at a steeper angle to scrape away the excess. Be careful not to dig into the joints or dislodge the tiles while doing this. As you work, periodically clean off the excess grout from the float or trowel to avoid smearing it onto the tiles.
Cleaning off Excess Grout
After applying the grout, allow it to set for a short period, typically 15-30 minutes, or as indicated on the grout packaging. The grout will become slightly firm but still pliable. At this point, use a damp sponge or a grout sponge to gently wipe away any haze or residue from the tile surface.
Hold the sponge at a 45-degree angle and lightly wipe over the tiles, being careful not to remove too much grout from the joints. Rinse the sponge frequently in a bucket of clean water to avoid spreading grout residue. Repeat this process, rinsing the sponge and wiping until the tiles are clean and the grout lines are smooth and even.
Allow the grout to fully cure, as per the manufacturer’s instructions. This curing period may take several days, during which you should avoid excessive moisture and heavy foot traffic on the tiled surface.
By mixing the grout correctly, applying it to the tile joints, and cleaning off excess grout, you’ll achieve a professional finish for your tiled concrete floor. Once the grout is fully cured, it’s time to move on to the final step: sealing the tiles.
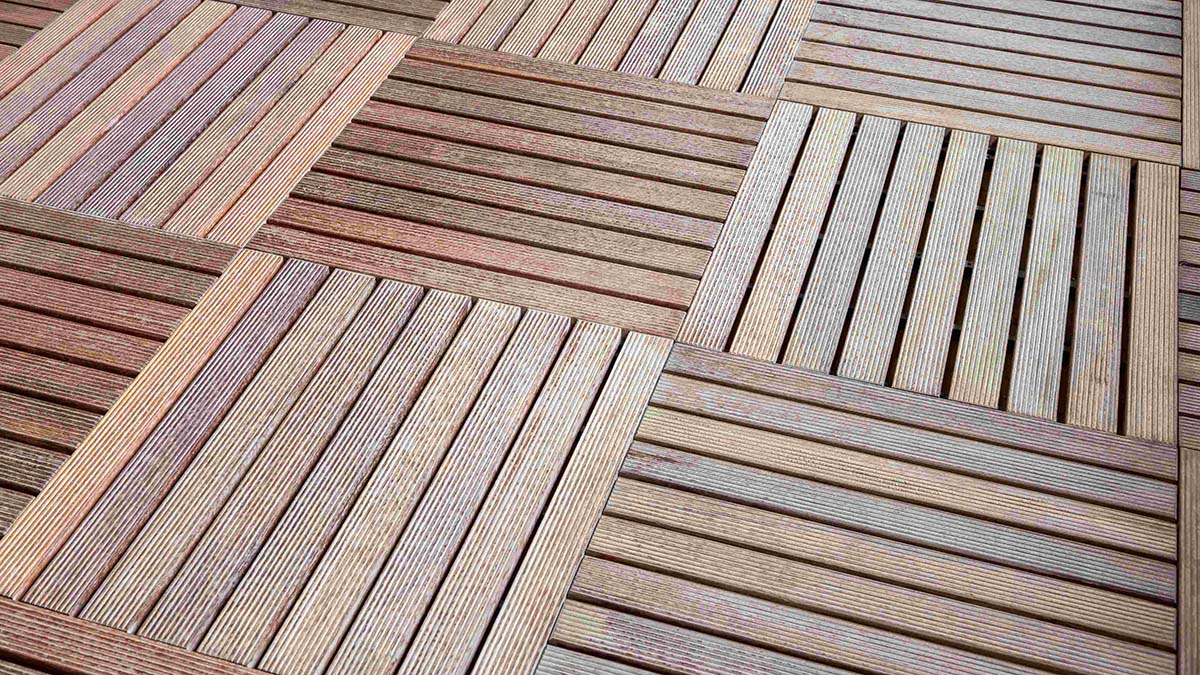
Step 8: Sealing the Tiles
After the grout has fully dried and cured, it’s important to seal the tiles to enhance their durability and protect them from stains and moisture. Sealing the tiles will help maintain their appearance and make them easier to clean. Here’s how to seal the tiles on your concrete floor:
Allowing the Grout to Dry
Before applying the sealer, ensure that the grout has completely dried and cured according to the manufacturer’s instructions. This usually takes a minimum of 48 hours, but it can vary depending on various factors such as humidity and temperature.
It’s essential to wait until the grout is fully dry before sealing to avoid trapping any moisture or impurities beneath the sealant. Patience during this step will ensure the best results and long-lasting protection for your tiles.
Applying a Sealer to Protect the Tiles
Choose a suitable sealer based on the type of tiles you have installed and follow the manufacturer’s instructions for application. There are various types of sealers available, such as penetrating sealers or topical sealers, each with its own application process.
Prior to applying the sealer, ensure that the tiles are clean and free from any dust, dirt, or residue. Use a mild cleaner or a recommended tile cleaner to thoroughly clean the surface. Allow the tiles to dry completely before proceeding with the sealer application.
Using a brush or roller, apply the sealer evenly over the entire surface of the tiles. Ensure that the sealer penetrates into the pores of the tiles and grout lines. It’s important to follow the recommended drying time indicated by the sealer manufacturer before exposing the tiles to foot traffic or any other potential sources of moisture.
Keep in mind that some sealers may require multiple coats for complete protection. Follow the manufacturer’s instructions regarding recommended drying times between coats, if applicable.
Sealing the tiles not only helps protect them from stains and moisture but also makes cleaning and maintenance easier in the long run. It adds an extra layer of defense while preserving the beauty of your tiled concrete floor.
Congratulations! You have now completed the process of laying and sealing tiles on your concrete floor. With proper care and maintenance, your tiled floor will provide you with years of durability and aesthetic appeal.
Conclusion
Congratulations on successfully laying tile on your concrete floor! By following the step-by-step process outlined in this article, you have transformed your space with a beautiful and durable flooring option. Let’s recap the key points:
– Preparing the concrete floor: Clearing the area, repairing any cracks or damage, and ensuring a clean and dry surface are crucial for a successful tile installation.
– Planning the tile layout: Determining the starting point, measuring and marking the layout, and dry-laying the tiles allow you to visualize the end result and make any necessary adjustments.
– Applying thinset mortar: Mixing the mortar and applying it to the floor provides a strong and stable foundation for the tiles.
– Setting the tiles: Placing the first tile, ensuring proper spacing, and pressing the tiles firmly into the mortar create a secure and visually appealing tile installation.
– Cutting and fitting tiles: Measuring and marking for cuts, using the appropriate tools, and fitting tiles around obstacles customize the installation to fit the unique dimensions of your space.
– Allowing the mortar to cure: Waiting for the mortar to dry and cleaning off excess mortar from the tiles provides a solid base for grouting.
– Grouting the tiles: Mixing the grout, applying it to the tile joints, and cleaning off excess grout result in a finished look with uniform grout lines.
– Sealing the tiles: Allowing the grout to dry and applying a sealer protects the tiles from stains, moisture, and makes cleaning and maintenance easier.
Remember to refer to the instructions provided by the manufacturers of the materials and tools you are using, as they may have specific guidelines that are vital to follow for the best results.
With your newly tiled concrete floor, you have not only enhanced the beauty and functionality of your space but also added value to your home. Enjoy the durability and aesthetic appeal of your tiled floor, and don’t forget to maintain it regularly to keep it looking its best.
Thank you for your dedication and attention to detail throughout this tile installation process. Now sit back, relax, and enjoy your stunning tiled concrete floor!
Frequently Asked Questions about How To Lay Tile On Concrete Floor
Was this page helpful?
At Storables.com, we guarantee accurate and reliable information. Our content, validated by Expert Board Contributors, is crafted following stringent Editorial Policies. We're committed to providing you with well-researched, expert-backed insights for all your informational needs.


0 thoughts on “How To Lay Tile On Concrete Floor”