
Articles
How To Turn On A Water Heater
Modified: October 31, 2024
Learn the step-by-step process to turn on a water heater with our informative articles. Never be left without hot water again!
(Many of the links in this article redirect to a specific reviewed product. Your purchase of these products through affiliate links helps to generate commission for Storables.com, at no extra cost. Learn more)
Introduction
Having a properly functioning water heater is essential for everyday tasks such as showering, washing dishes, and doing laundry. However, there may come a time when you need to turn on a water heater, whether you’re activating it for the first time or after a period of being turned off. Regardless of the reason, knowing how to effectively turn on a water heater is a valuable skill that can save you time and money.
In this article, we will walk you through the step-by-step process of turning on a water heater. We will cover everything from gathering the necessary tools and materials to adjusting the temperature and inspecting for leaks. By the end of this guide, you will have the knowledge to confidently turn on your water heater and enjoy a steady supply of hot water.
Before proceeding, it’s important to note that working with a water heater involves handling gas or electricity, so ensure your safety by following proper precautions. If you are uncomfortable or unsure about any steps, it is always best to consult a professional.
Now, let’s dive into the step-by-step process of turning on a water heater!
Key Takeaways:
- Safety first! Gather the necessary tools, locate the water heater, and prepare it before turning on. Always turn off the power and water supply, and understand the type of ignition system your water heater uses.
- After lighting the pilot light or using the ignition button, adjust the temperature and inspect for leaks. Regular maintenance ensures your water heater operates efficiently, providing a reliable supply of hot water.
Read more: How To Turn Down Water Heater
Step 1: Gather Necessary Tools and Materials
Before you start the process of turning on your water heater, it’s essential to gather all the necessary tools and materials. Having everything you need on hand will make the process smoother and more efficient. Here are the tools and materials you will need:
- Adjustable wrench: This will be used to loosen and tighten the connections.
- Screwdriver: Depending on the type of water heater you have, you may need a screwdriver to access certain components.
- Gas shut-off valve: If you have a gas water heater, locate the gas shut-off valve and ensure it is in the “on” position.
- Water shut-off valve: To ensure a proper seal and prevent leaks, locate the water shut-off valve and make sure it is fully open.
- Ignition source: Some water heaters have a pilot light that needs to be lit to ignite the burner. In that case, you will need an ignition source such as a barbecue lighter or long matches.
Once you have gathered all the necessary tools and materials, you are ready to move on to the next step. Having everything handy will streamline the process and minimize the risk of interruptions or delays.
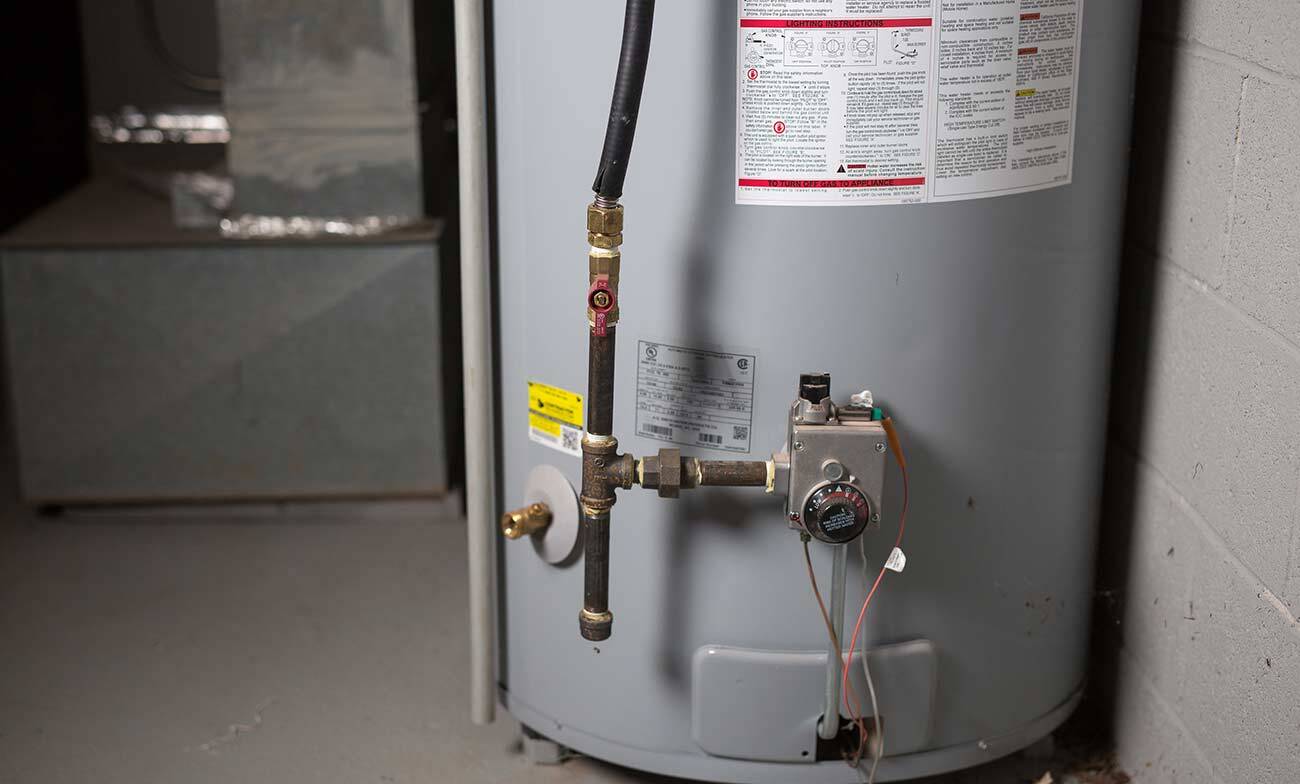
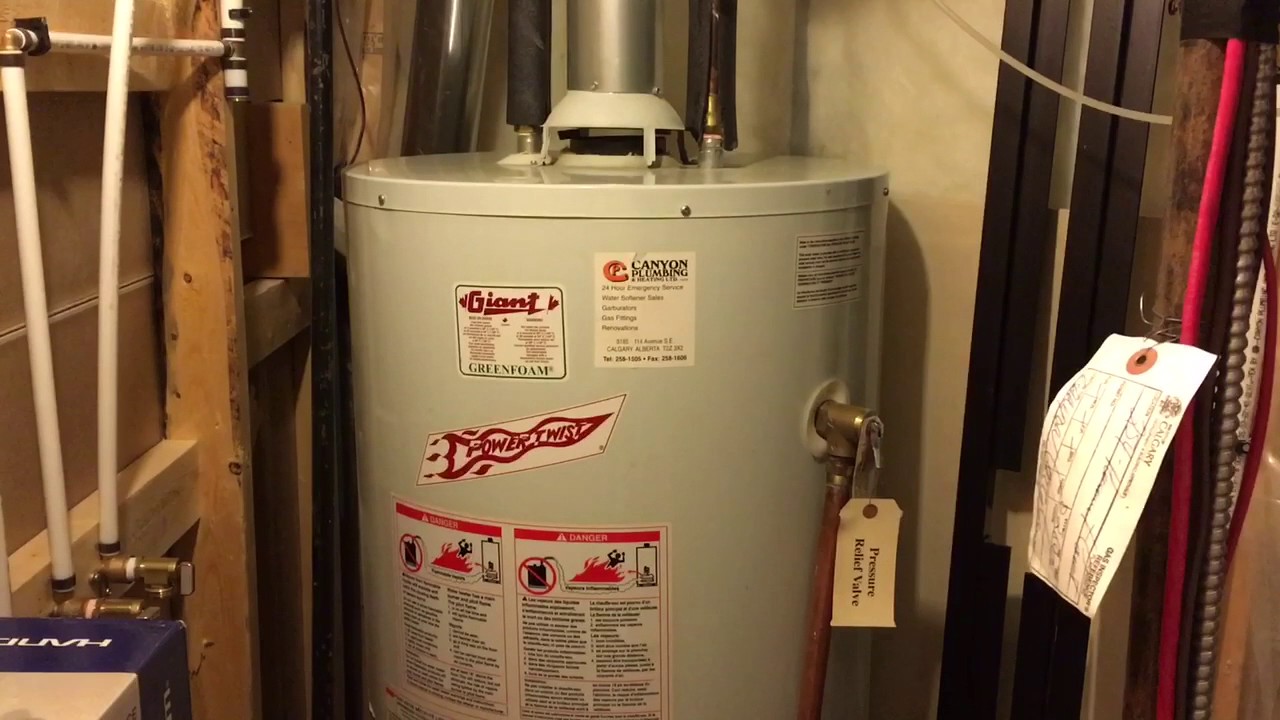
Step 2: Locate the Water Heater
The next step in turning on a water heater is to locate its position in your home. Depending on the type of dwelling you have, the water heater may be in different areas. Here are a few common places where you may find the water heater:
- Utility room or basement: This is a common location for water heaters in houses or larger buildings. Look for a dedicated room or an area in the basement with pipes and a ventilation system.
- Closet or storage room: In apartments or smaller homes, the water heater may be installed in a closet or a designated storage area. Check areas where you have seen pipes or access panels.
- Garage or exterior: Some homes have water heaters installed in the garage or on the exterior of the building. This is often the case for tankless or outdoor water heaters.
Once you have identified the location of the water heater, make sure there is a clear path to access it. Remove any objects or obstacles that may hinder your ability to safely work on the water heater.
If you are having trouble locating the water heater or are unsure about its placement, refer to your home’s blueprint or consult with a professional. It is crucial to know where the water heater is located before proceeding with the next steps.
Step 3: Prepare the Water Heater
Before turning on your water heater, it’s important to prepare it by following a few essential steps. These steps help ensure that the water heater is ready for operation and minimize the risk of any complications. Follow the instructions below to prepare your water heater:
- Read the manufacturer’s instructions: Different water heaters may have specific guidelines for preparation and operation. Take the time to read the manufacturer’s instructions or consult the owner’s manual for your specific model.
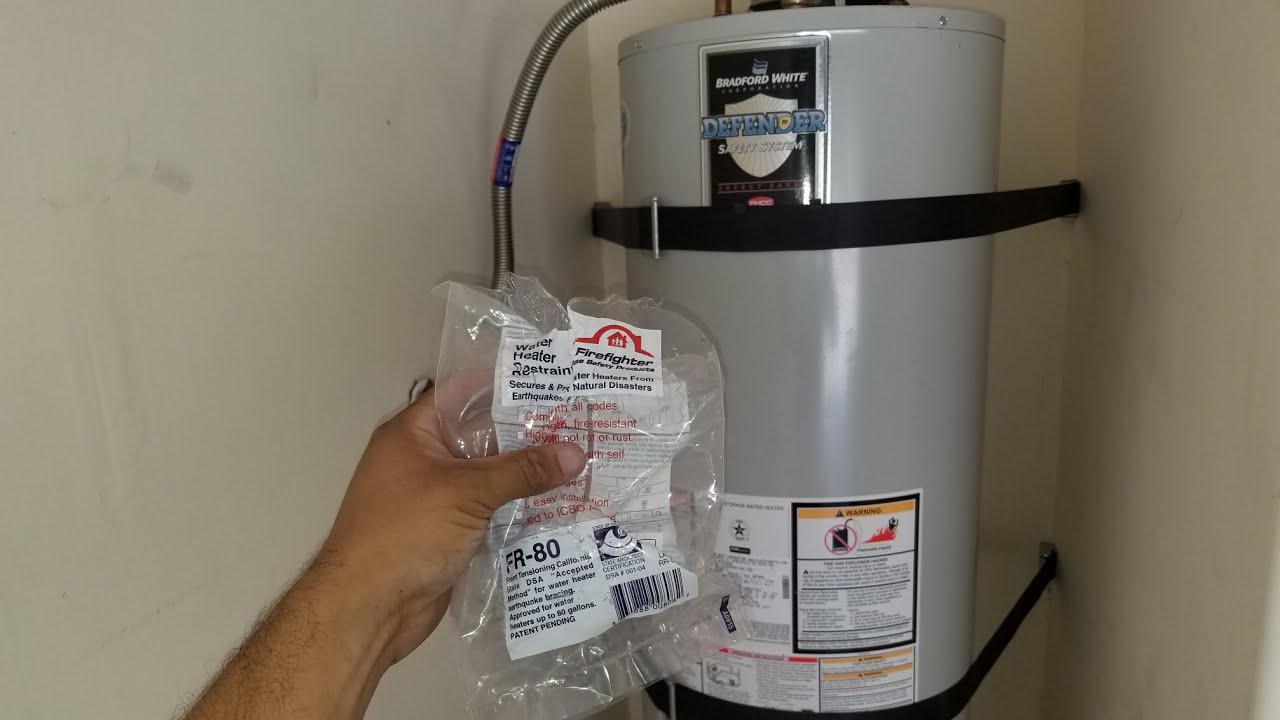
- Inspect the water heater: Check the water heater for any visible signs of damage or leaks. Look for rust, corrosion, or loose connections. If you notice any issues, it is best to address them before proceeding with the next steps.
- Clean the area around the water heater: Remove any debris, dust, or flammable materials that may be in close proximity to the water heater. Ensuring a clean and clutter-free environment reduces the risk of accidents or fire hazards.
- Check the pressure relief valve: Locate the pressure relief valve on the water heater and ensure it is functioning correctly. Test the valve by lifting the lever or following the manufacturer’s instructions.
- Check the venting system (for gas water heaters): If you have a gas water heater, inspect the venting system to ensure it is clear of obstructions and functioning properly. A blocked vent can lead to carbon monoxide buildup, which is extremely dangerous.
By taking the time to prepare your water heater, you are ensuring that it is in proper working condition and reducing the risk of potential issues. Once you have completed these steps, you are ready to move on to the next stage of turning on your water heater.
Step 4: Turn Off the Power
Before proceeding any further, it’s crucial to turn off the power to your water heater. This step is essential for your safety and prevents any accidents or electrical shocks. Follow the instructions below to turn off the power:
- Electric water heater: Locate the circuit breaker panel in your home. Look for the breaker that controls the power supply to your water heater and switch it off. It’s important to confirm that the power is completely off by testing the water heater to ensure it doesn’t turn on.
- Gas water heater: Determine the gas shut-off valve near the water heater and turn it to the “off” position. This will cut off the gas supply to the water heater and prevent the burner from igniting. Ensure the valve is completely closed.
Once the power has been turned off, it’s advisable to wait for a few minutes to allow any residual heat or gas to dissipate. This will further ensure your safety when working on the water heater.
Remember, electricity and gas can be dangerous if mishandled. If you’re unsure about turning off the power or have any concerns, it’s best to contact a qualified professional.
With the power safely turned off, you’re now ready to move on to the next step of turning on your water heater.
Read more: How To Turn Off Hot Water Heater
Step 5: Turn Off the Water Supply
Before proceeding with turning on your water heater, it is important to turn off the water supply. This step ensures that you can work on the unit without the risk of water leakages or flooding. Follow these instructions to turn off the water supply:
- Locate the water shut-off valve: The water shut-off valve is usually located near the water heater. It may be a lever or a knob that you can twist or turn.
- Close the water shut-off valve: Turn the valve clockwise to close it completely. Ensure that the valve is tightly closed to prevent any water from entering the water heater.
- Open a nearby faucet: To relieve any pressure in the water heater and drain the remaining water, open a faucet located close to the water heater. This will allow the water to flow out and empty the lines.
Once you have closed the water shut-off valve and opened the nearby faucet, wait for a few minutes until the water stops flowing. This step helps to ensure that there is no remaining water pressure inside the water heater.
By turning off the water supply, you are safeguarding against any potential leaks or water damage while working on your water heater. It is crucial to complete this step before proceeding to the next steps of turning on the water heater.
Make sure the gas or electricity supply to the water heater is turned on. For gas heaters, check the pilot light and for electric heaters, ensure the circuit breaker is on.
Step 6: Pilot Light vs. Ignition Button
When it comes to turning on a water heater, there are generally two methods depending on the type of water heater you have: pilot light ignition or an ignition button. It’s important to understand the difference between these two methods before proceeding to the next steps:
- Pilot light ignition: Some older models of gas water heaters utilize a pilot light to ignite the burner. The pilot light is a small flame that is constantly burning and is used to ignite the gas when the water heater is activated.
- Ignition button: Modern gas water heaters often come with an ignition button or an electronic ignition system. This system eliminates the need for a continuously burning pilot light. Instead, when the water heater is turned on, the ignition button or system will electronically spark to ignite the gas burner.
Before proceeding, identify the type of water heater you have and familiarize yourself with the specific method it uses for ignition. This will ensure that you perform the appropriate steps in the next stage.
If you have a pilot light ignition system, you will need to manually light the pilot light. If you have an ignition button, you can proceed with the next steps to activate the water heater.
Understanding whether you have a pilot light or an ignition button is essential to properly turning on your water heater. Once you’ve determined which method your water heater utilizes, you’re now ready to move on to the next steps.
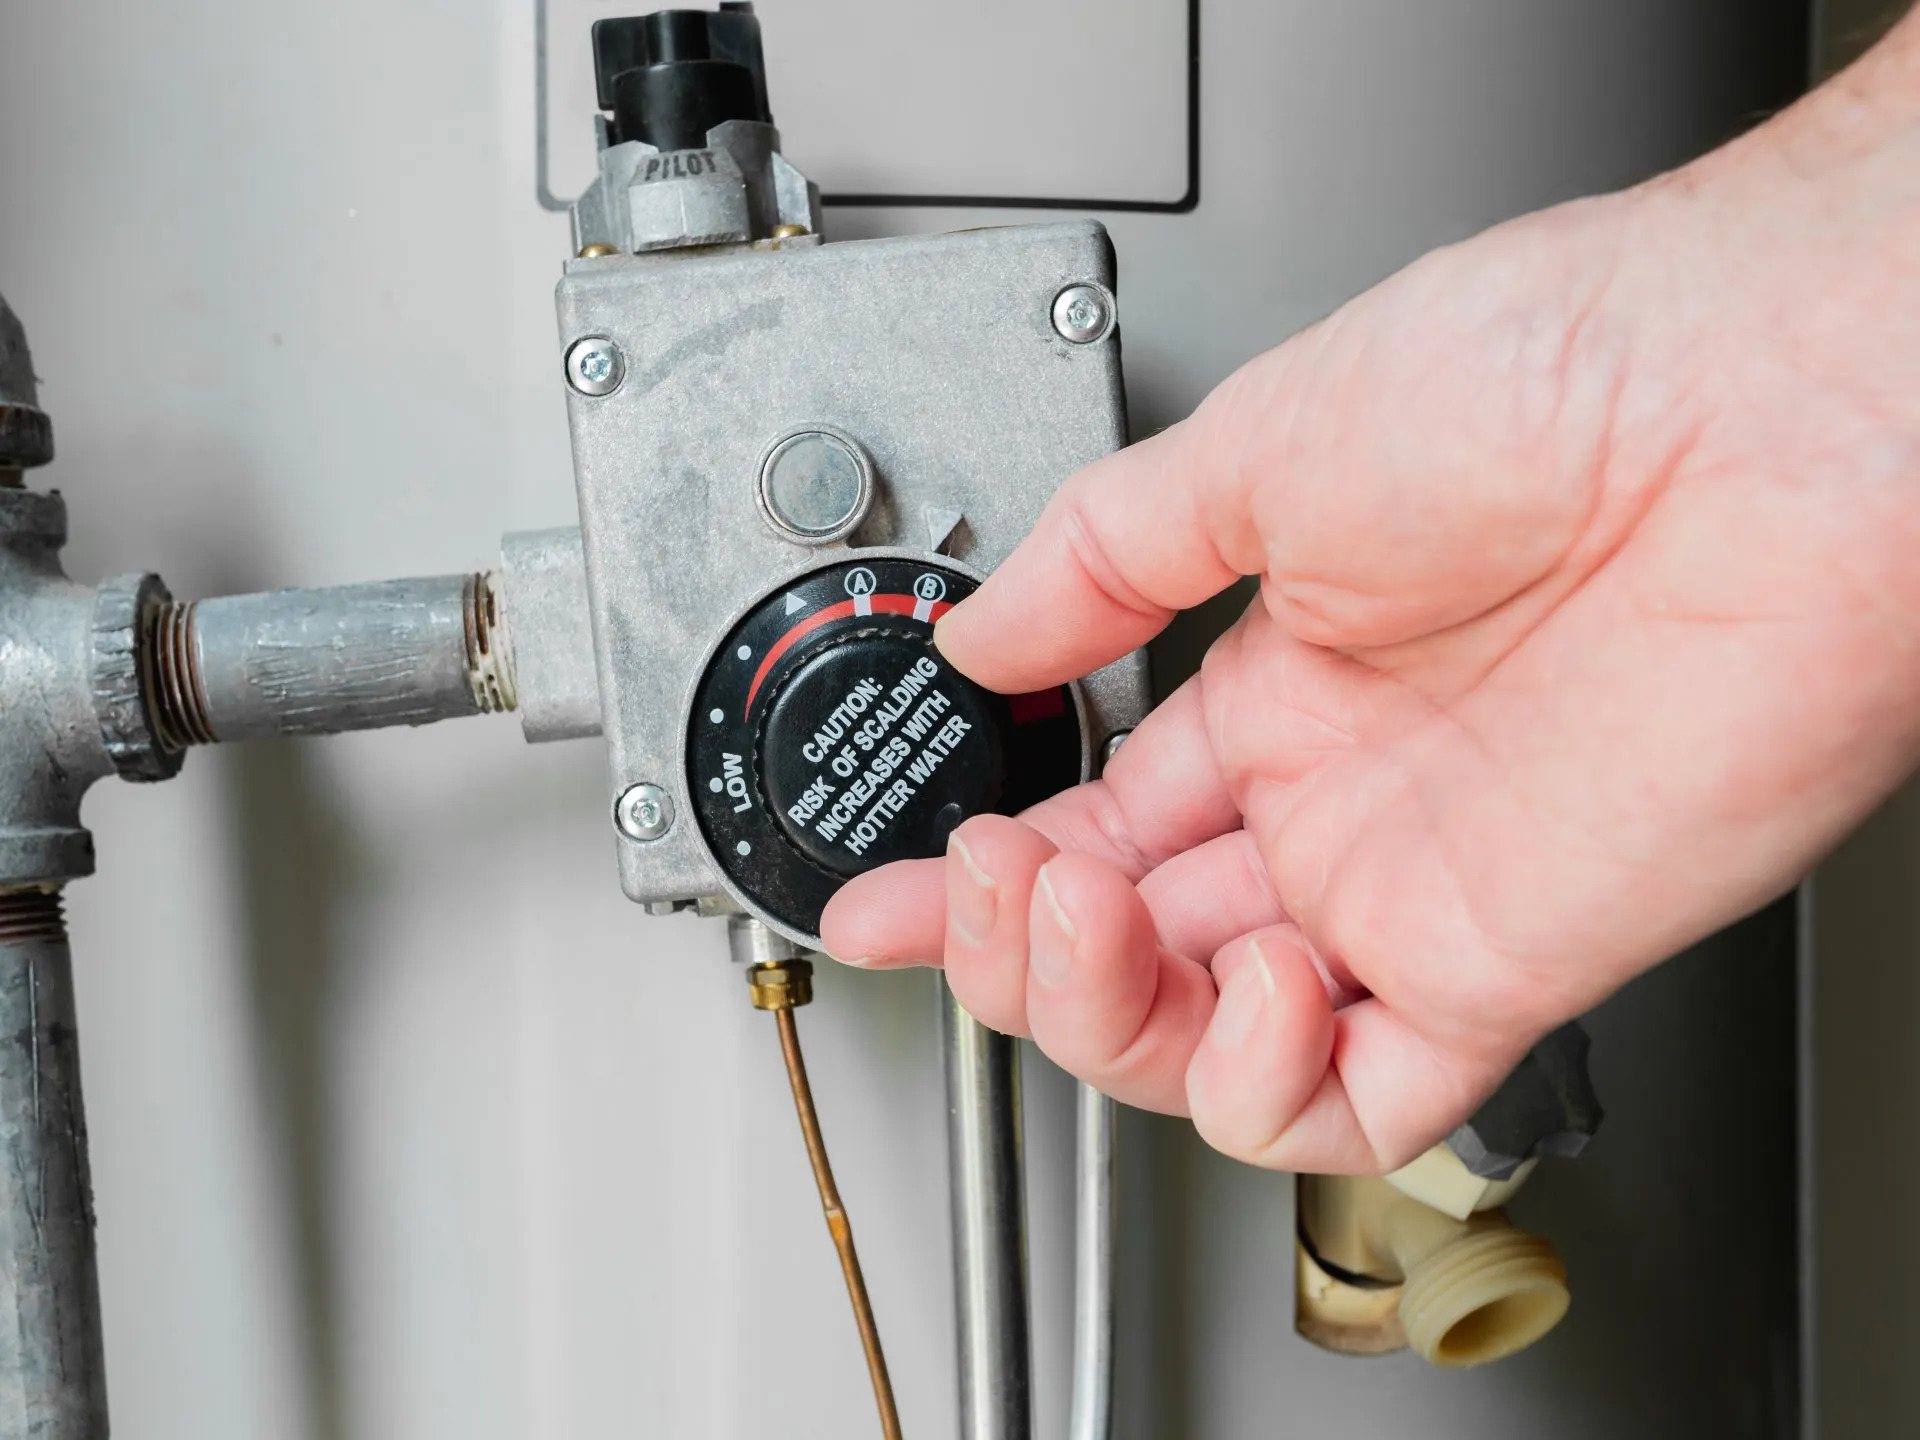
Step 7: Turn On the Pilot Light
If your gas water heater has a pilot light ignition system, you will need to manually light the pilot light. Follow these steps to turn on the pilot light:
- Locate the pilot control knob: It is typically located near the bottom of the water heater. Look for a knob with labels such as “On,” “Pilot,” or “Off.”
- Set the control knob to “Off”: Before attempting to relight the pilot light, ensure that the control knob is set to the “Off” position. This ensures that the gas supply to the pilot light is cut off.
- Turn the control knob to “Pilot”: Now, turn the control knob to the “Pilot” position. You may find a small picture indicating the pilot position. Hold the knob in this position.
- Press the ignition button (if applicable): If your water heater has an ignition button, press and hold it while continuing to hold the control knob in the “Pilot” position. This will create a spark to ignite the pilot light.
- Light the pilot light: While still holding the control knob in the “Pilot” position, use a long match or a lighter to light the pilot light. Gently move the flame towards the pilot assembly until the flame ignites.
- Continue holding the control knob: After the pilot light ignites, keep holding the control knob for about 30 seconds to allow the thermocouple (a safety device) to heat up.
- Release the control knob: After the 30-second interval, slowly release the control knob. The pilot light should stay lit. If it doesn’t, repeat the process from step 3, ensuring that the pilot light is fully ignited.
Once you’ve successfully lit the pilot light and it remains lit after releasing the control knob, you can proceed to the next steps to fully activate your water heater.
It’s important to note that if you encounter any difficulties or if the pilot light does not stay lit, it may be a sign of a more significant issue. In such cases, it is advisable to contact a professional to inspect and repair your water heater.
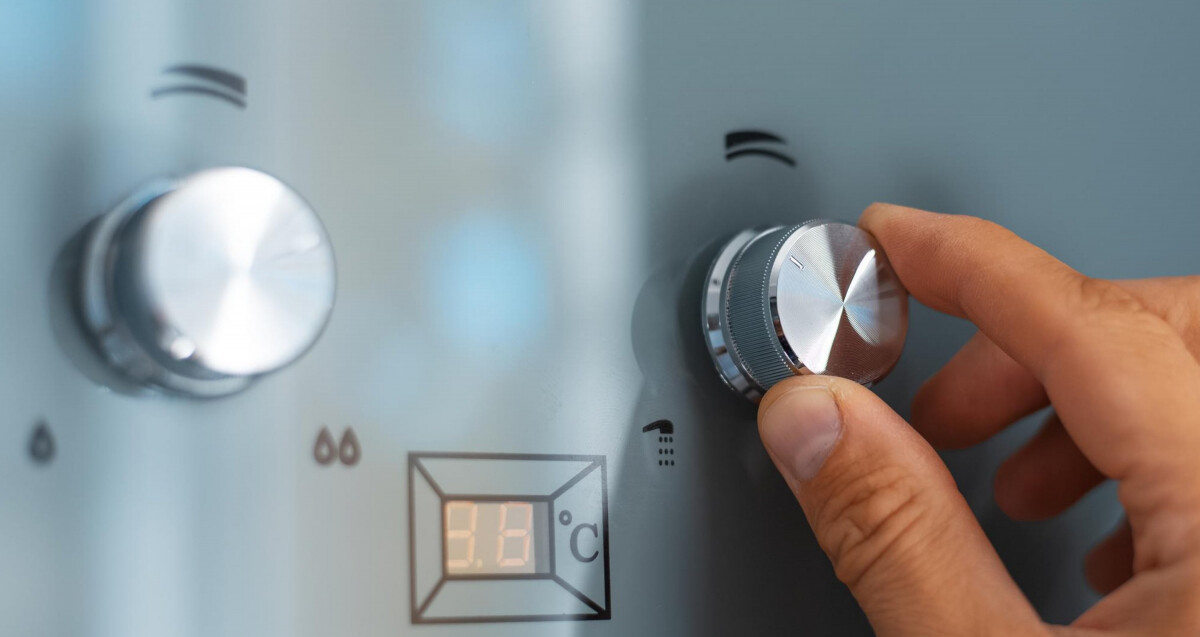
Step 8: Adjust the Temperature
Now that you have successfully turned on your water heater and the pilot light is lit, you can proceed to adjust the temperature settings. Follow these steps to adjust the temperature:
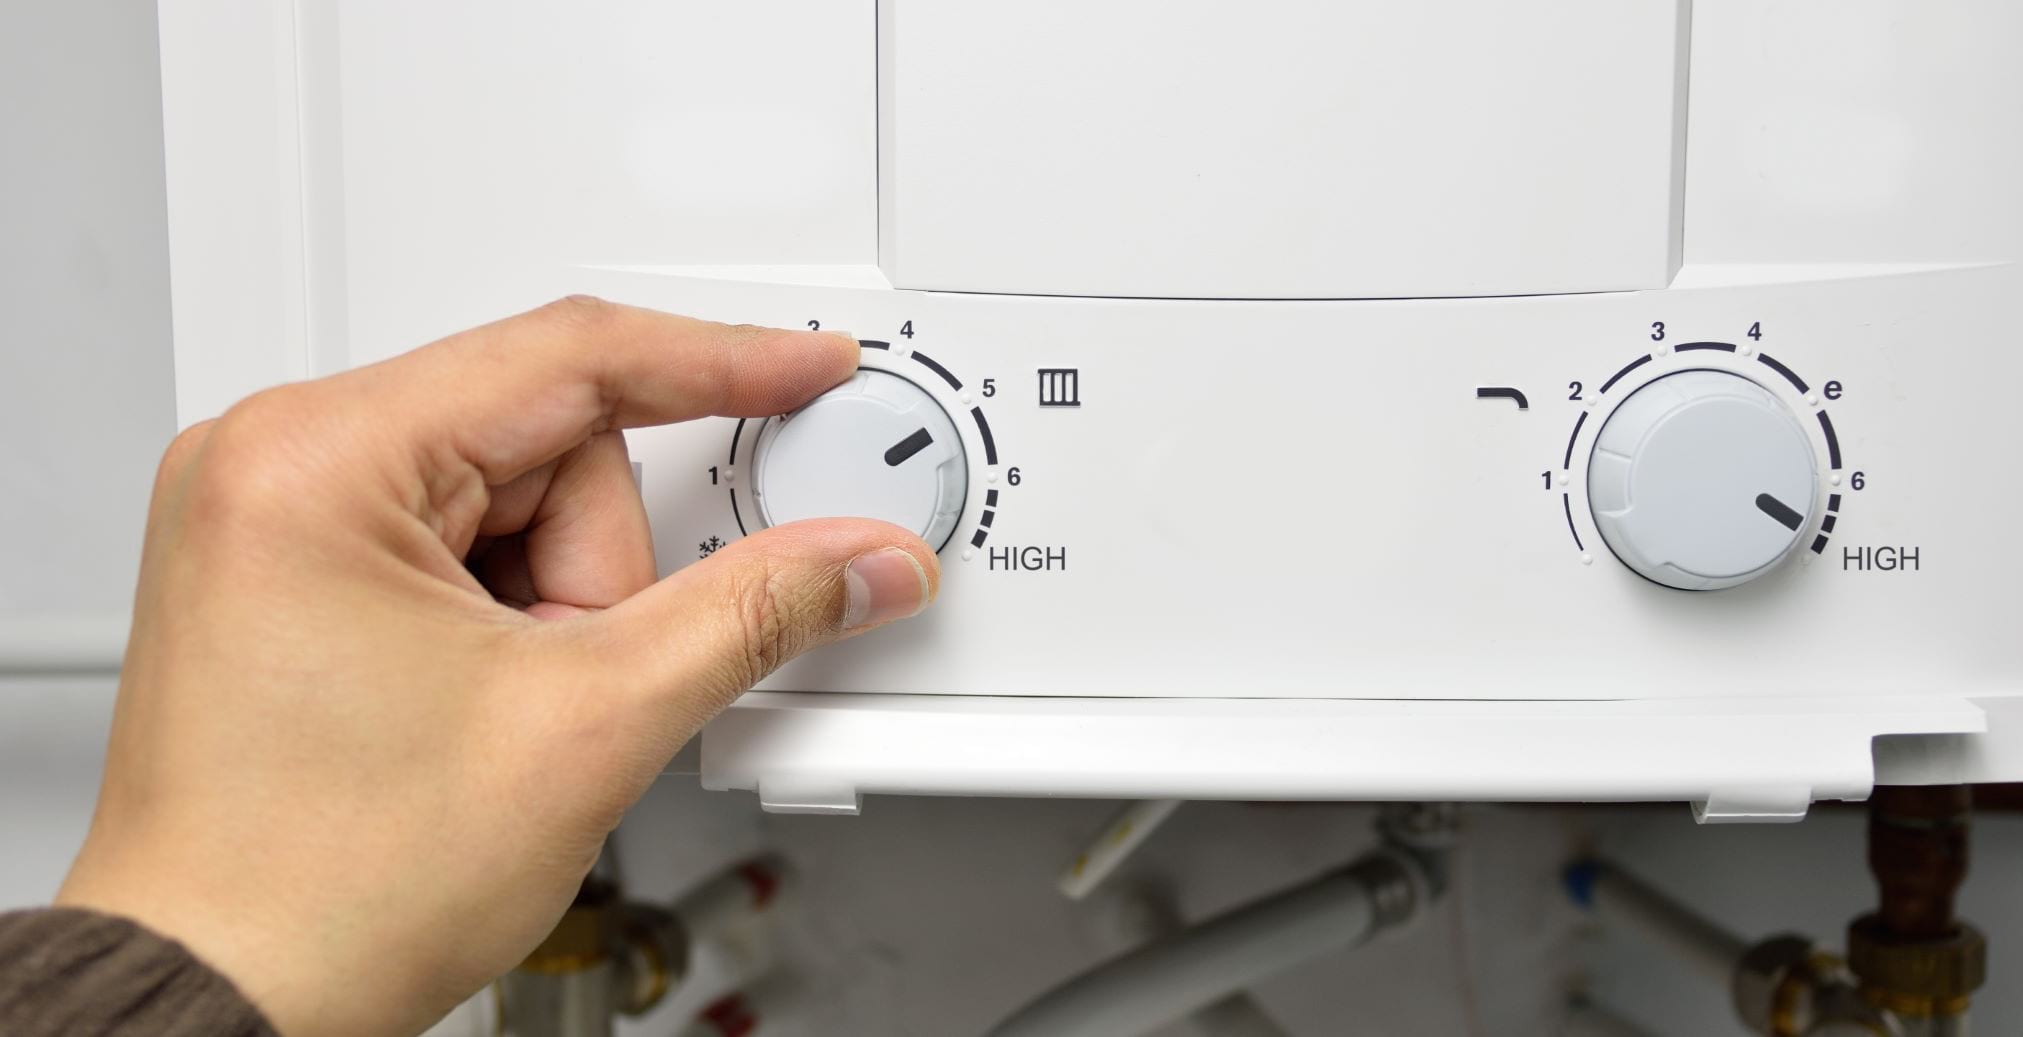
- Locate the temperature control dial: Look for the temperature control dial on your water heater. It is typically located on the front or the side of the unit.
- Understand the temperature options: The temperature control dial will have different temperature settings marked on it, usually ranging from low to high. Refer to the manufacturer’s instructions or guidelines to determine the recommended temperature for your specific model.
- Turn the temperature control dial: Using a flathead screwdriver or your hand, turn the temperature control dial to the desired temperature setting. It’s important to consider factors such as comfort, energy efficiency, and any specific requirements you may have.
- Allow the water heater to heat up: Once you have set the desired temperature, allow the water heater some time to heat up. This usually takes around 1 to 2 hours, although it may vary depending on the size and efficiency of the unit.
It’s important to note that setting the temperature too high can lead to scalding water and wasted energy. On the other hand, setting the temperature too low may result in inadequate hot water. Find a balance that suits your needs while considering safety and energy efficiency.
By adjusting the temperature to your preference, you can ensure that the water heater provides hot water at the desired temperature for your household.
Read more: How To Turn Off Gas Water Heater
Step 9: Inspect for Leaks
After turning on your water heater and adjusting the temperature, it’s important to inspect the unit for any potential leaks. A leak can indicate a problem with the water heater and should be addressed promptly to prevent further damage or water wastage. Follow these steps to inspect for leaks:
- Check around the water heater: Carefully inspect the area around the water heater, including the connections, valves, and pipes. Look for any signs of water dripping, pooling, or moisture.
- Inspect the pressure relief valve: Locate the pressure relief valve on the water heater and check for any water dripping from the valve or its surrounding area. A small amount of water discharge from the valve during operation is normal, but continuous dripping may indicate a problem.
- Check the drain valve: The drain valve is typically located near the bottom of the water heater. Inspect this valve for any signs of leakage or dripping.
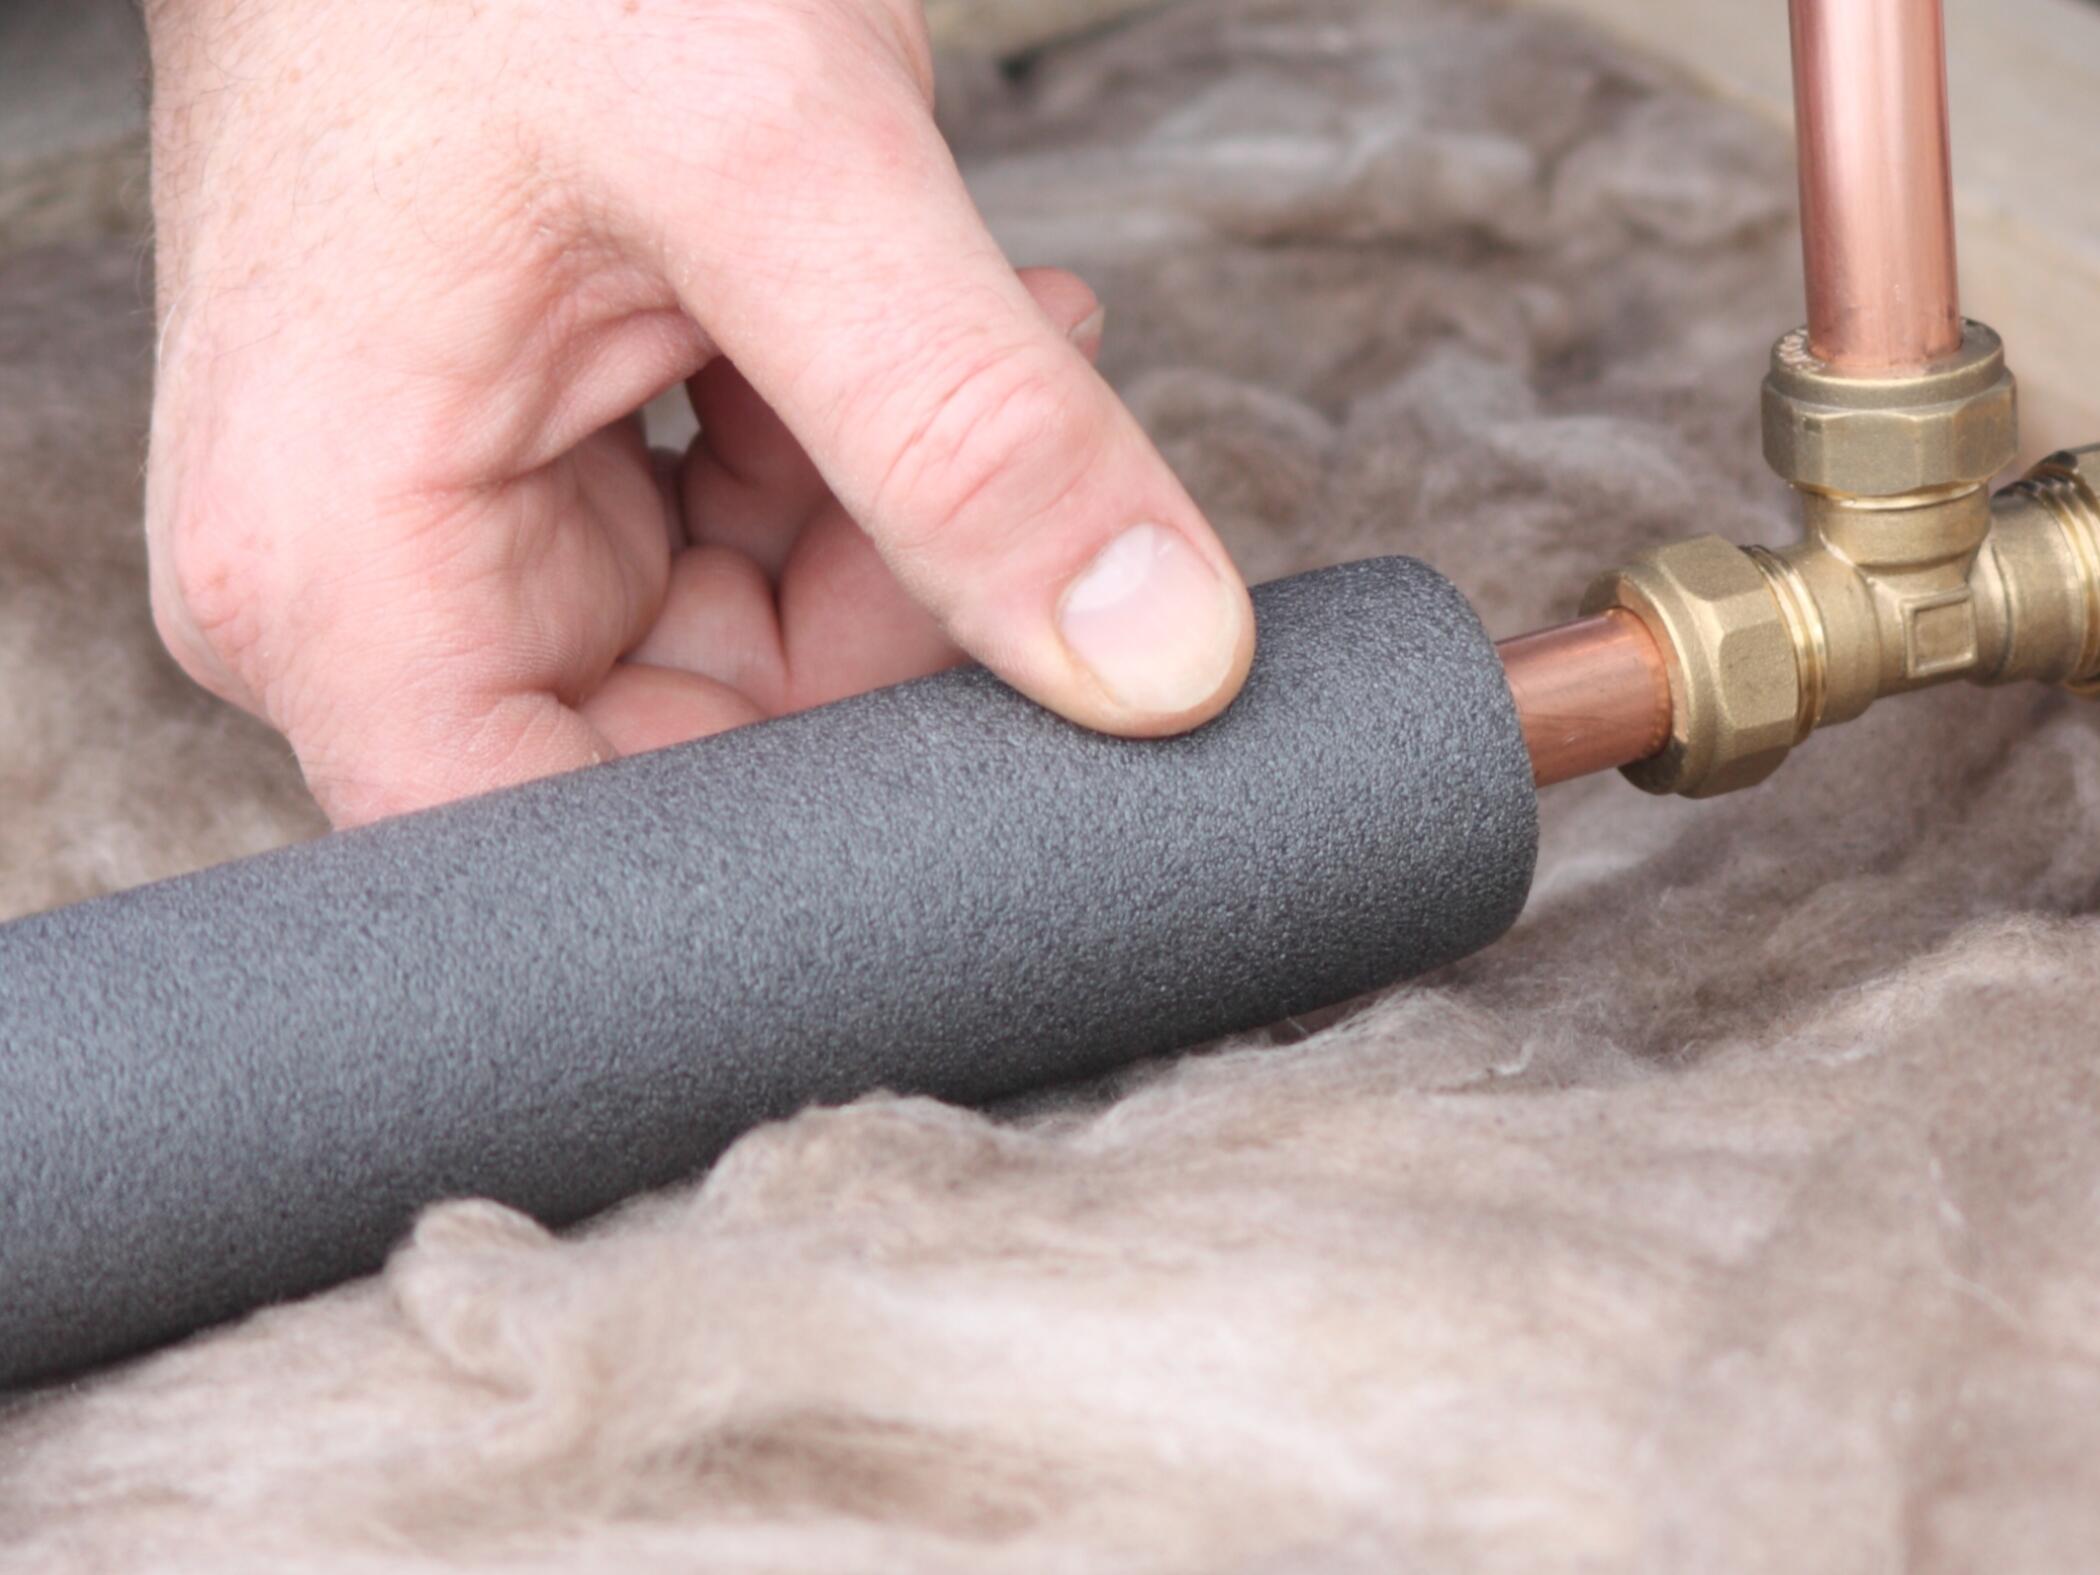
- Examine the pipes and fittings: Inspect the pipes and fittings connected to the water heater for any signs of water leakage or loose connections. Pay close attention to any visible joints or areas where pipes are connected.
- Monitor for changes: After the initial inspection, keep an eye on the water heater over the next few hours or days. Look out for any new signs of leakage or water accumulation. If you notice any changes, take appropriate action to address the issue.
If you detect any leaks during the inspection, it is advisable to turn off the water heater, shut off the water supply, and contact a professional plumber to assess and repair the issue. Ignoring leaks can lead to further damage, water wastage, and potentially higher utility bills.
Regularly inspecting your water heater for leaks is an important part of preventative maintenance. By promptly addressing any leaks, you can ensure the efficient and safe operation of your water heater.
Conclusion
Turning on a water heater may seem like a daunting task, but with the right knowledge and steps, it becomes a straightforward process. By following the step-by-step guide outlined in this article, you can easily turn on your water heater and enjoy a consistent supply of hot water.
Remember, safety is of utmost importance when working with a water heater. Always take the necessary precautions and, if unsure, consult a professional. Additionally, familiarize yourself with the specific instructions and guidelines provided by the manufacturer for your particular model of water heater.
From gathering the necessary tools and materials to adjusting the temperature, every step plays a crucial role in successfully turning on your water heater. It is essential to prepare the water heater, turn off the power and water supply, and understand the type of ignition system your water heater utilizes.
Inspecting for leaks is a final but crucial step to ensure the proper functioning of your water heater. Identifying and addressing any leaks promptly can help prevent water damage and increase the longevity of your water heater.
By following these steps and conducting regular maintenance, you can ensure your water heater operates efficiently, providing you with a reliable supply of hot water for your everyday needs.
If you encounter any challenges or are unsure about any step, it is always recommended to seek assistance from a professional plumber or technician. They can provide expert guidance and help resolve any issues or concerns you may have.
Now that you have a comprehensive understanding of how to turn on a water heater, you can confidently navigate this process and enjoy the comfort and convenience of hot water whenever you need it.
Frequently Asked Questions about How To Turn On A Water Heater
Was this page helpful?
At Storables.com, we guarantee accurate and reliable information. Our content, validated by Expert Board Contributors, is crafted following stringent Editorial Policies. We're committed to providing you with well-researched, expert-backed insights for all your informational needs.


0 thoughts on “How To Turn On A Water Heater”