Articles
How To Repair Vertical Wood Siding
Modified: May 6, 2024
Learn the step-by-step process of repairing vertical wood siding with our informative articles. Find expert tips and tricks to ensure a successful repair.
(Many of the links in this article redirect to a specific reviewed product. Your purchase of these products through affiliate links helps to generate commission for Storables.com, at no extra cost. Learn more)
Introduction
Vertical wood siding can add a beautiful and natural touch to the exterior of your home. However, over time, it is not uncommon for the siding to become damaged or worn, requiring repair. Whether it’s due to age, weather exposure, or accidental impact, repairing vertical wood siding is a task that can be done by homeowners with the right tools and knowledge.
In this article, we will guide you through the process of repairing vertical wood siding, from inspection to finishing touches. By following these steps, you can restore the appearance and functionality of your siding, prolonging its lifespan and maintaining the overall aesthetics of your home.
Before we dive into the repair process, let’s take a look at the tools and materials you will need:
Key Takeaways:
- Proper inspection, cleaning, and careful removal of damaged siding are essential for a successful repair. Attention to detail and safety measures ensure a seamless integration with the existing siding.
- From preparing and installing replacement pieces to checking for proper alignment and adding finishing touches, each step contributes to a professional-looking repair. With the right tools and materials, homeowners can restore the beauty and functionality of their vertical wood siding.
Read more: What Is Vertical Siding
Tools and Materials Needed
- Protective eyewear
- Work gloves
- Tape measure
- Pry bar
- Hammer
- Nail set
- Replacement siding pieces
- Circular saw or table saw
- Safety goggles
- Sanding block or sandpaper
- Exterior-grade paint or stain
- Paintbrush or paint sprayer
Now that you have gathered the necessary tools and materials, let’s jump into the step-by-step process of repairing your vertical wood siding.
Key Takeaways:
- Proper inspection, cleaning, and careful removal of damaged siding are essential for a successful repair. Attention to detail and safety measures ensure a seamless integration with the existing siding.
- From preparing and installing replacement pieces to checking for proper alignment and adding finishing touches, each step contributes to a professional-looking repair. With the right tools and materials, homeowners can restore the beauty and functionality of their vertical wood siding.
Read more: What Is Vertical Siding
Tools and Materials Needed
Before you begin repairing vertical wood siding, it’s important to gather the necessary tools and materials. Having everything ready at the start will save you time and make the process smoother. Here’s a list of what you’ll need:
- Protective eyewear: Safety should always be a priority. Wear protective eyewear to shield your eyes from any debris or flying particles.
- Work gloves: Gloves will protect your hands from potential splinters or injuries while working with the siding.
- Tape measure: Accurate measurements are essential for cutting and installing the replacement siding pieces.
- Pry bar: A pry bar will help you carefully remove the damaged siding without causing further damage.
- Hammer: You’ll need a hammer to drive in nails and secure the replacement pieces in place.
- Nail set: A nail set is used to recess the nail heads below the surface of the siding, creating a smooth finish.
- Replacement siding pieces: Depending on the extent of the damage, you may need to have replacement vertical wood siding pieces on hand.
- Circular saw or table saw: If you need to cut new siding pieces, a circular saw or table saw will make the job easier and more precise.
- Safety goggles: Along with your protective eyewear, safety goggles will provide additional protection for your eyes during cutting or sawing.
- Sanding block or sandpaper: To ensure a smooth and seamless repair, you’ll need a sanding block or sandpaper to smooth any rough edges.
- Exterior-grade paint or stain: If you’re replacing a section of the siding or want to touch up the repaired area, exterior-grade paint or stain will help match the existing color or finish.
- Paintbrush or paint sprayer: Depending on your preference, you can use a paintbrush or a paint sprayer to apply the paint or stain to the repaired area.
By having these tools and materials readily available, you’ll be well-equipped to tackle the repair process and achieve professional-looking results. Now that you have everything set, let’s move on to the step-by-step process of repairing vertical wood siding.
Step 1: Inspection
The first step in repairing vertical wood siding is to thoroughly inspect the damaged area. Take a close look at the siding to identify any signs of rot, warping, or surface damage. It’s important to assess the extent of the damage before proceeding, as it will determine the scope of the repair.
Start by walking around the exterior of your home and visually inspecting the siding from a distance. Look for any areas that appear discolored, cracked, or have noticeable gaps. These are indications that the siding may be damaged and in need of repair.
Next, get closer to the siding and use your hands to feel for any soft or spongy spots. These could be signs of rot or decay. Gently press on the siding in various areas to check for stability. Loose or wobbly pieces will need to be replaced.
Pay close attention to areas where the siding meets windows, doors, or corners of the house. These areas are more prone to damage or wear due to exposure to moisture and shifting temperatures.
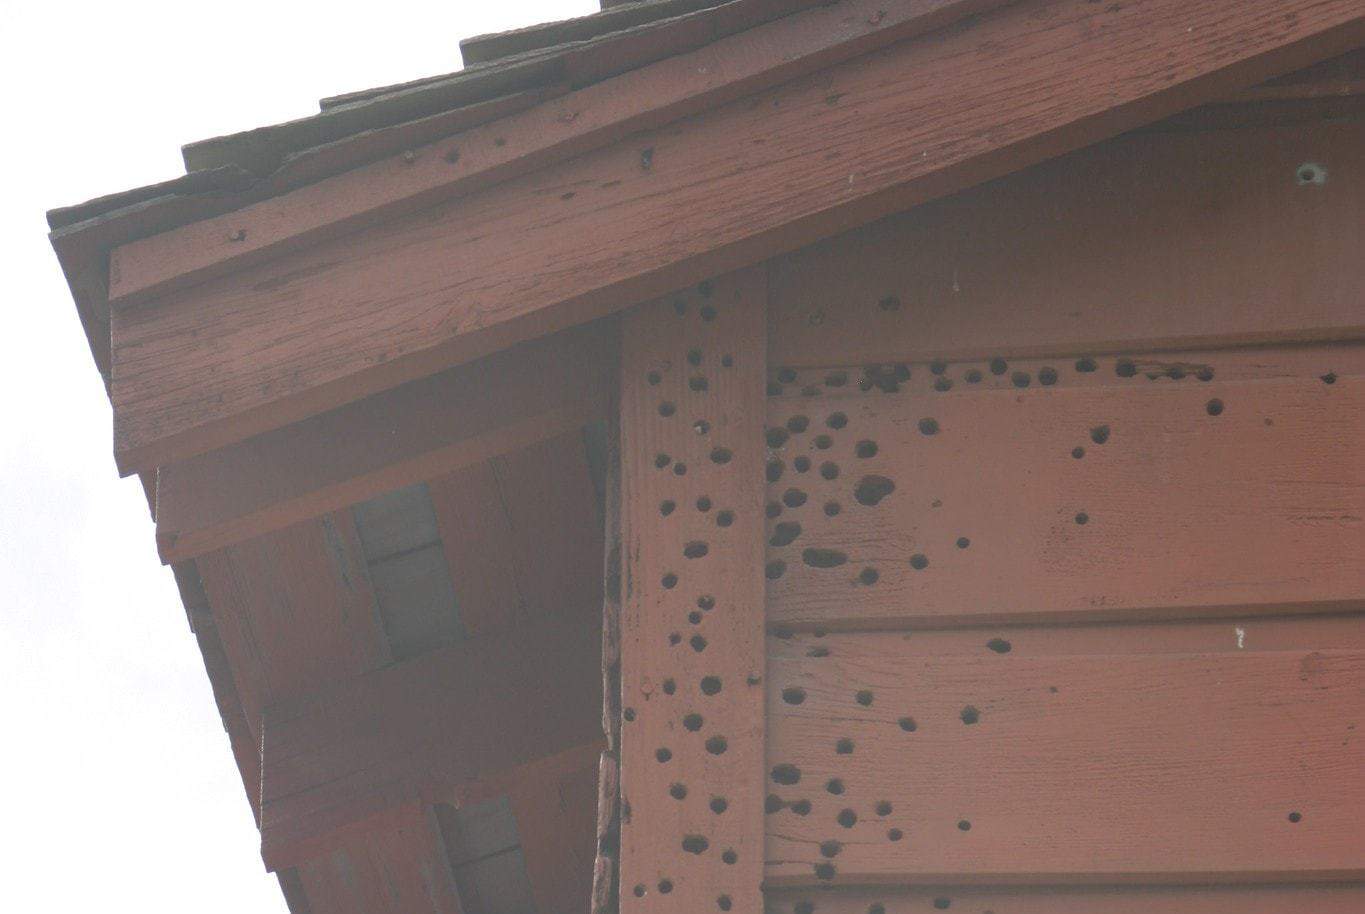
During your inspection, also check for signs of insect infestation, such as small holes or trails. Insects like termites or carpenter ants can cause significant damage to wood siding and may require professional intervention.
Make a note of all the areas that require repair or replacement. This will help you plan your materials and approach for the subsequent steps.
Remember, if you notice extensive damage or are unsure about the repairs, it’s recommended to consult a professional siding contractor who can assess the situation and provide expert guidance.
Once you’ve completed a thorough inspection and identified the areas in need of repair, you’re ready to move on to the next step: cleaning the siding.
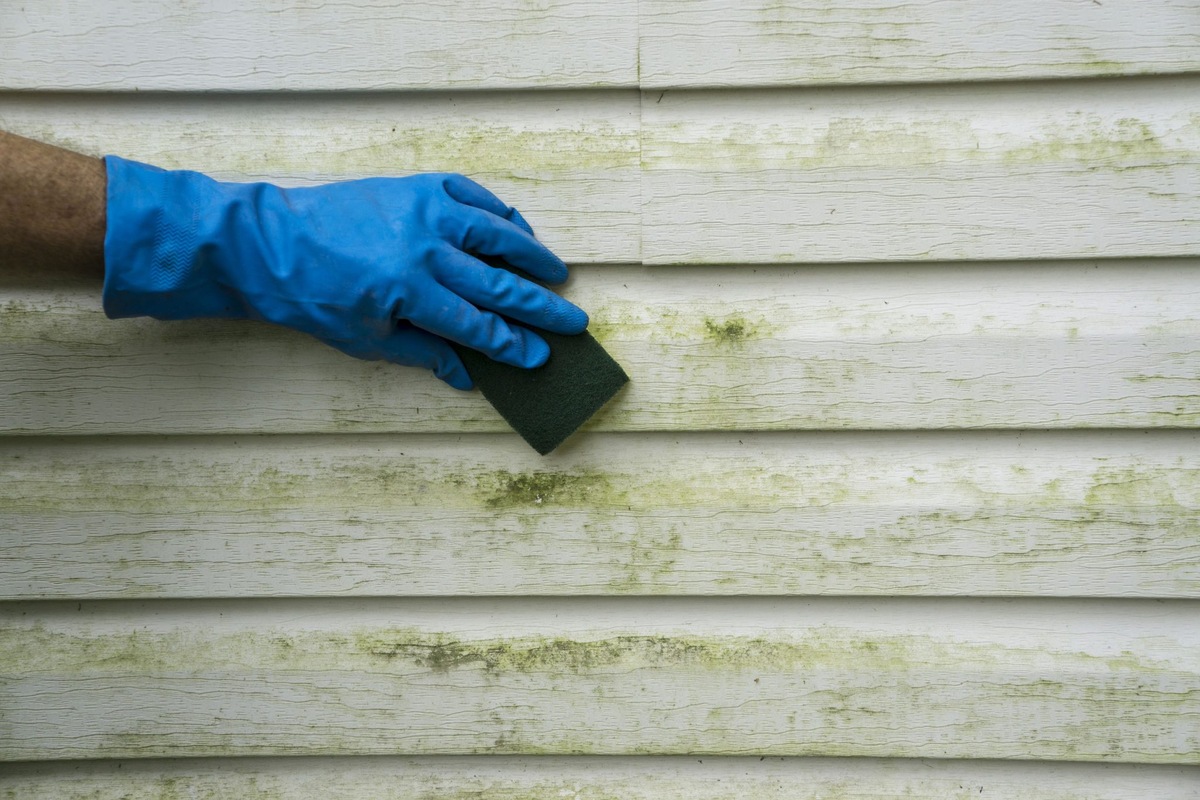
Step 2: Cleaning
After inspecting the damaged areas of the vertical wood siding, it’s crucial to clean the surfaces before proceeding with the repair. Cleaning will remove any dirt, debris, or mildew that may have accumulated over time, ensuring proper adhesion of the new siding pieces and improving the overall appearance of the repaired area.
To clean the siding, follow these steps:
- Start by protecting yourself with gloves and safety goggles.
- Use a soft-bristle brush or a sponge to scrub the damaged areas gently. Avoid using abrasive brushes, as they can cause further damage to the wood.
- For tough stains or mildew, mix a solution of mild detergent or wood cleaner with water according to the manufacturer’s instructions.
- Dip the brush or sponge into the cleaning solution and scrub the siding in a circular motion. Pay special attention to the damaged areas.
- Rinse the siding thoroughly with water, either using a hose or a bucket of clean water and a sponge.
- Allow the siding to dry completely before moving on to the next step.
Cleaning the siding not only prepares the surface for repair but also helps to maintain its overall condition and prevents further deterioration. It’s important to note that if you discover any underlying issues during the cleaning process, such as severe rot, it may be necessary to consult a professional for further assessment and repairs.
Once the siding is clean and dry, you can proceed to the next step: removing the damaged siding pieces.
Read more: How To Replace Rotted Wood Siding
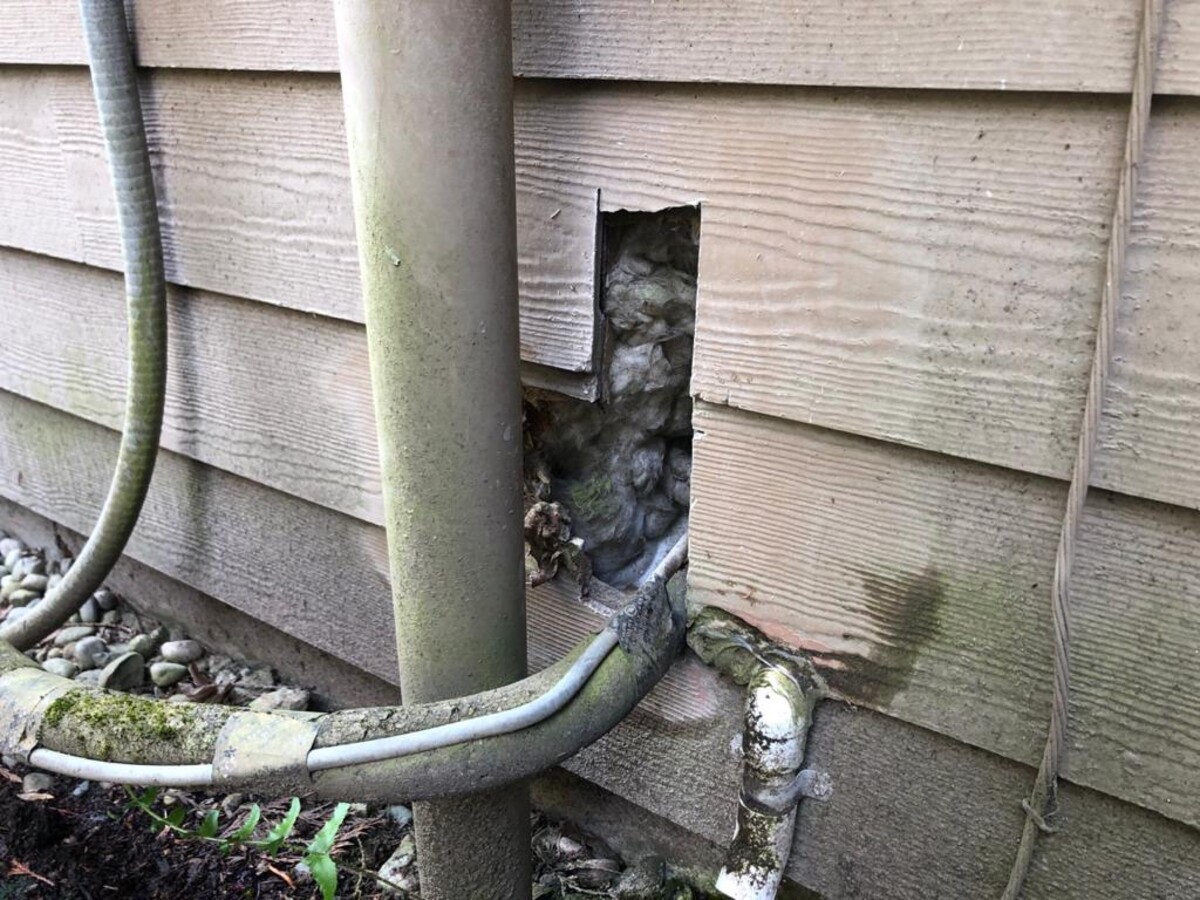
Step 3: Removing Damaged Siding
With the inspection and cleaning complete, it’s time to move on to removing the damaged vertical wood siding. This step involves careful extraction of the compromised pieces to make way for the new siding.
To remove the damaged siding, follow these steps:
- Put on protective eyewear and work gloves to ensure your safety.
- Starting from the topmost piece of damaged siding, insert a pry bar at the bottom edge of the siding and gently pry it away from the wall.
- If the siding is stubborn, you may need to use a hammer to tap the pry bar and create more leverage. Be cautious not to apply excessive force, as this may cause further damage.
- Work your way down, prying off one piece at a time. Take note of the order in which the pieces were removed, as this will be helpful during the installation process.
- During the removal process, make sure to set aside any nails that were attached to the damaged siding pieces. You will need these later to secure the new siding.
- Remove any remaining nails or debris from the area to ensure a smooth surface for the installation of the replacement siding.
As you remove the damaged siding, be mindful of any adjacent trim or surrounding elements. Take care not to damage or dislodge these parts during the removal process.
Once all the damaged siding has been successfully removed, you can move on to the next step: preparing the replacement pieces.
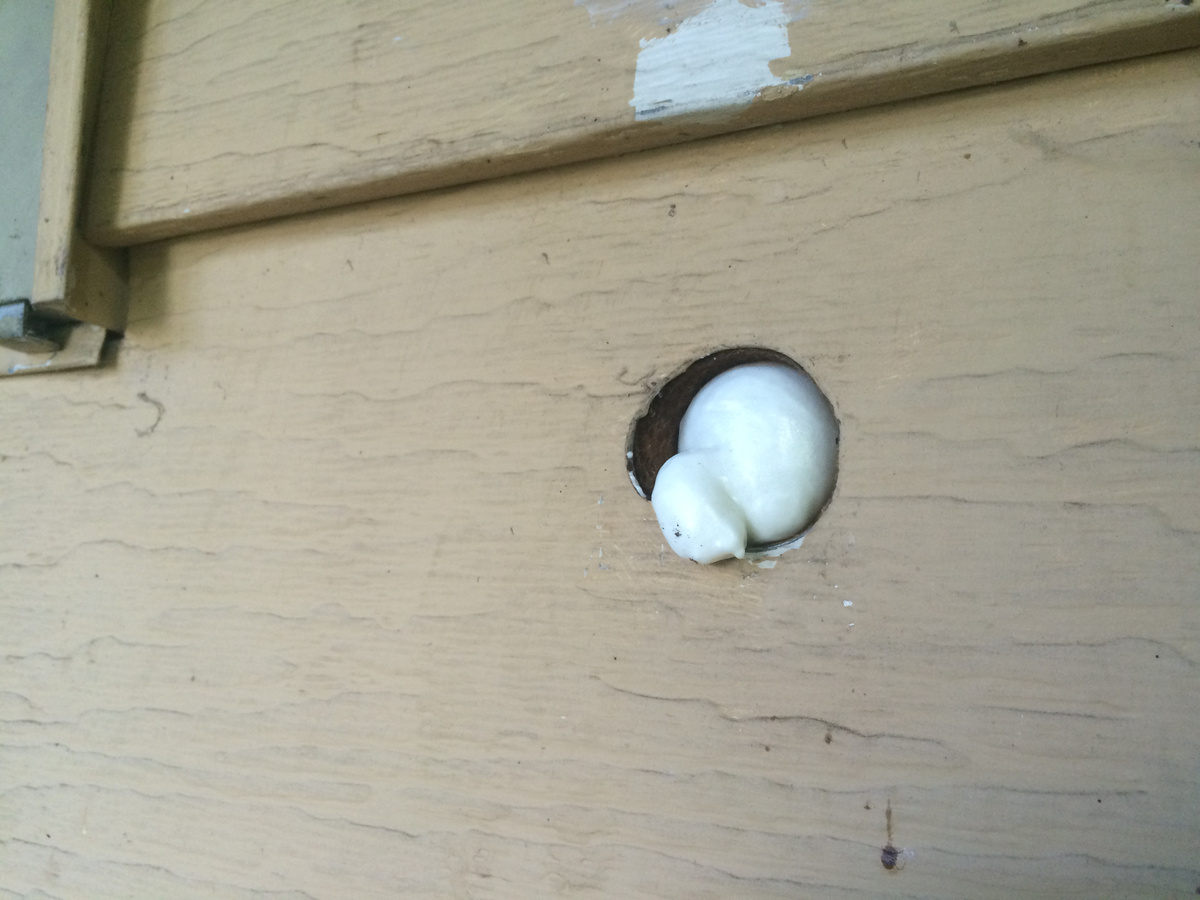
When repairing vertical wood siding, make sure to use a wood filler to fill in any cracks or holes, sand the area smooth, and then apply a primer before painting to ensure a seamless finish.
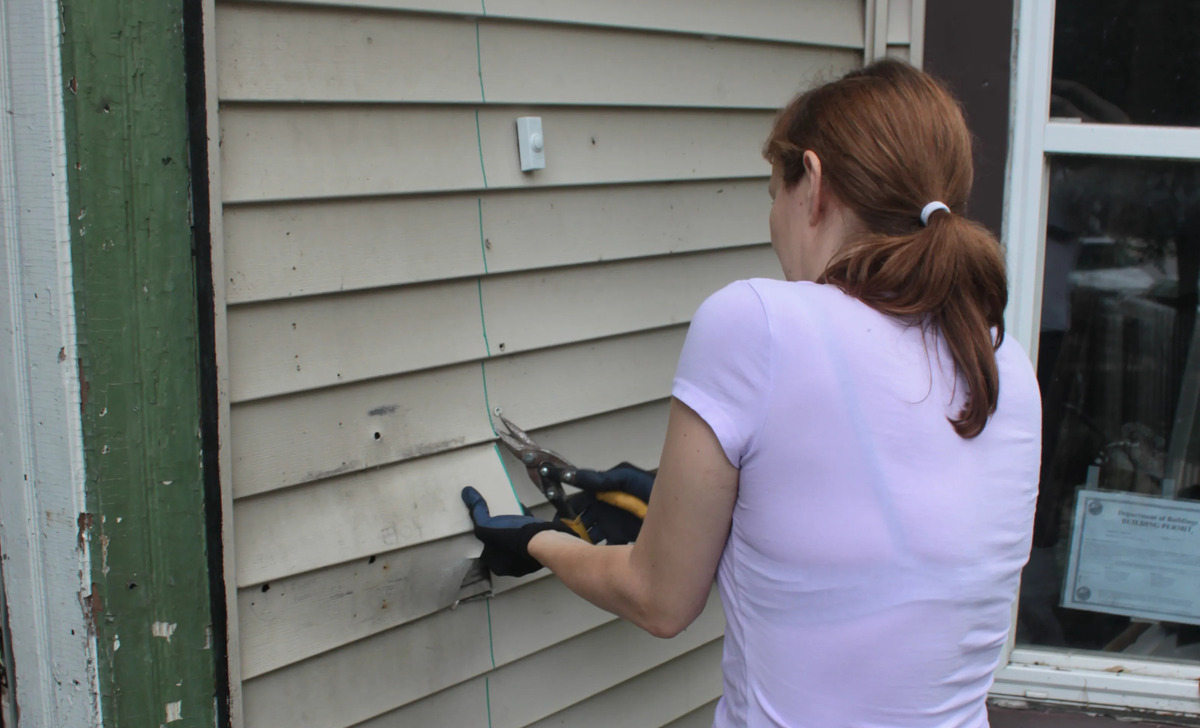
Step 4: Preparing Replacement Pieces
After removing the damaged vertical wood siding, it’s time to prepare the replacement pieces that will seamlessly mend the exterior of your home. This step involves measuring and cutting the new siding to ensure a proper fit and match with the existing siding.
Here’s how you can prepare the replacement pieces:
- Begin by measuring the length and width of the opening where the damaged siding was removed. Use a tape measure to get accurate dimensions.
- Transfer the measurements to the replacement siding, making sure to account for any overlapping or expansion gaps as specified by the manufacturer.
- Using a circular saw or a table saw, carefully cut the replacement siding pieces according to the measurements taken. Remember to follow all safety guidelines when operating power tools.
- Smooth the cut edges of the new siding using a sanding block or sandpaper. This will ensure a clean and professional-looking finish.
- If needed, apply a coat of primer to the cut edges of the replacement pieces. This will help protect the wood and promote better paint adhesion.
It’s essential to handle the replacement siding pieces with care to prevent any damage. Avoid dropping them or placing them on rough or uneven surfaces that could cause dents or scratches.
Once you have prepared the replacement pieces, it’s time to move on to the next step: installing the new siding.
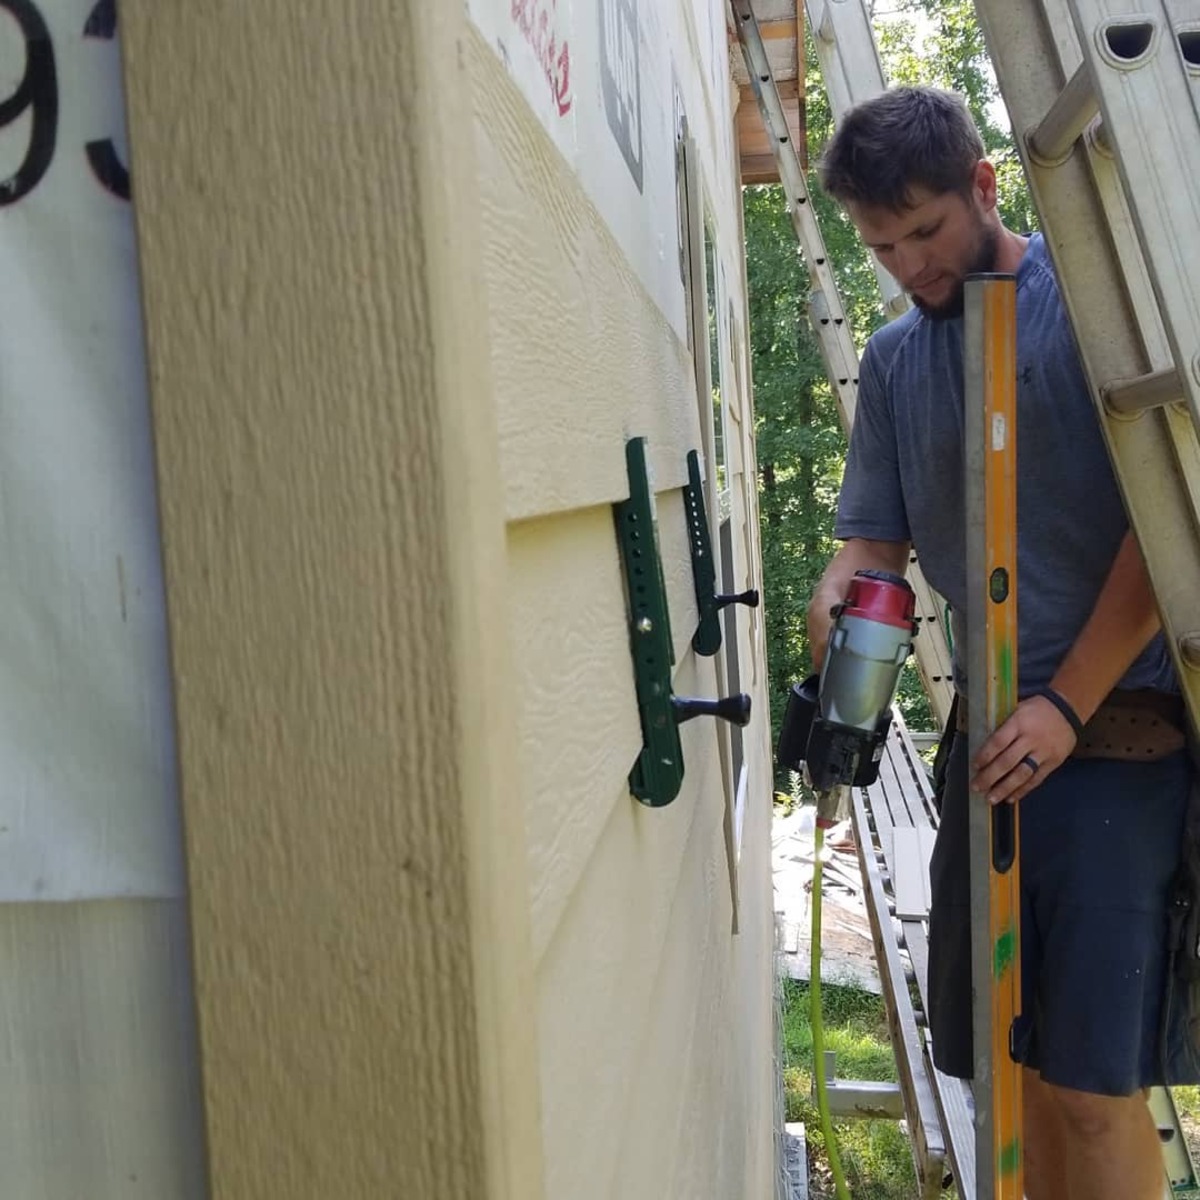
Step 5: Installing New Siding
With the replacement siding pieces prepared, it’s time to install them and restore the exterior of your home. This step involves securely attaching the new siding to the wall, ensuring a tight fit and proper alignment with the existing siding.
Follow these steps to install the new siding:
- Start at the bottom of the wall where the damaged siding was removed. Align the bottom edge of the first replacement piece with the bottom edge of the adjacent siding.
- Insert nails through the pre-drilled holes or evenly spaced along the top edge of the replacement siding. Make sure to drive the nails at a slight downward angle for better stability.
- Once the first piece is securely in place, align the groove or overlap of the next replacement piece with the tongue or underlap of the previously installed piece.
- Insert nails along the top edge of the second replacement piece, following the same downward angle as before.
- Continue this pattern, installing one piece at a time, until you reach the top of the wall or complete the desired repair area.
- Ensure that each replacement piece fits snugly and aligns properly with the adjacent siding. If necessary, use a pry bar or hammer to adjust the position slightly.
- Drive additional nails through the side edges of the replacement siding, roughly 2 to 3 inches from each end, to provide extra stability.
Throughout the installation process, it’s important to maintain an even spacing between the siding pieces to prevent gaps or overlapping. This will ensure a seamless and visually appealing repair.
Take your time and double-check the alignment and positioning of each replacement piece as you go. It’s crucial to maintain a consistent level and avoid any noticeable deviations from the rest of the siding.
Once all the replacement siding pieces have been securely installed, it’s time to move on to the next step: checking for proper alignment.
Step 6: Checking for Proper Alignment
After installing the new siding pieces, it’s important to double-check for proper alignment and ensure that the repair blends seamlessly with the existing siding. This step involves inspecting the installation and making any necessary adjustments to achieve a uniform appearance.
Follow these steps to check for proper alignment:
- Stand back and visually examine the repaired area from a distance. Look for any noticeable differences in the alignment, spacing, or overall appearance of the new siding.
- Check the vertical and horizontal lines of the replacement pieces, making sure they align evenly with the adjacent siding. Use a level or straight edge to assist you in assessing the alignment.
- If you spot any areas that require adjustment, gently tap the siding pieces with a hammer or pry bar to align them properly. Take care not to damage the new siding or surrounding areas.
- Ensure that the replacement pieces fit snugly together without any gaps or overlapping. If necessary, adjust the spacing or trim the edges of the siding to achieve a seamless transition.
- Inspect the entire repaired area, paying attention to the joints between the new and existing siding. Make sure there are no visible gaps or discrepancies that could compromise the appearance or integrity of the repair.
- Once you are satisfied with the alignment and overall appearance, move on to the final step: painting and finishing touches.
Taking the time to carefully check for proper alignment will result in a professional-looking repair that seamlessly blends with the existing siding. It’s important to achieve a consistent and cohesive appearance to enhance the overall aesthetics of your home’s exterior.
With the alignment checked and adjusted if necessary, you’re ready to move on to the final step of the repair process: painting and adding finishing touches.
Read more: How To Install Vertical Hardie Board Siding
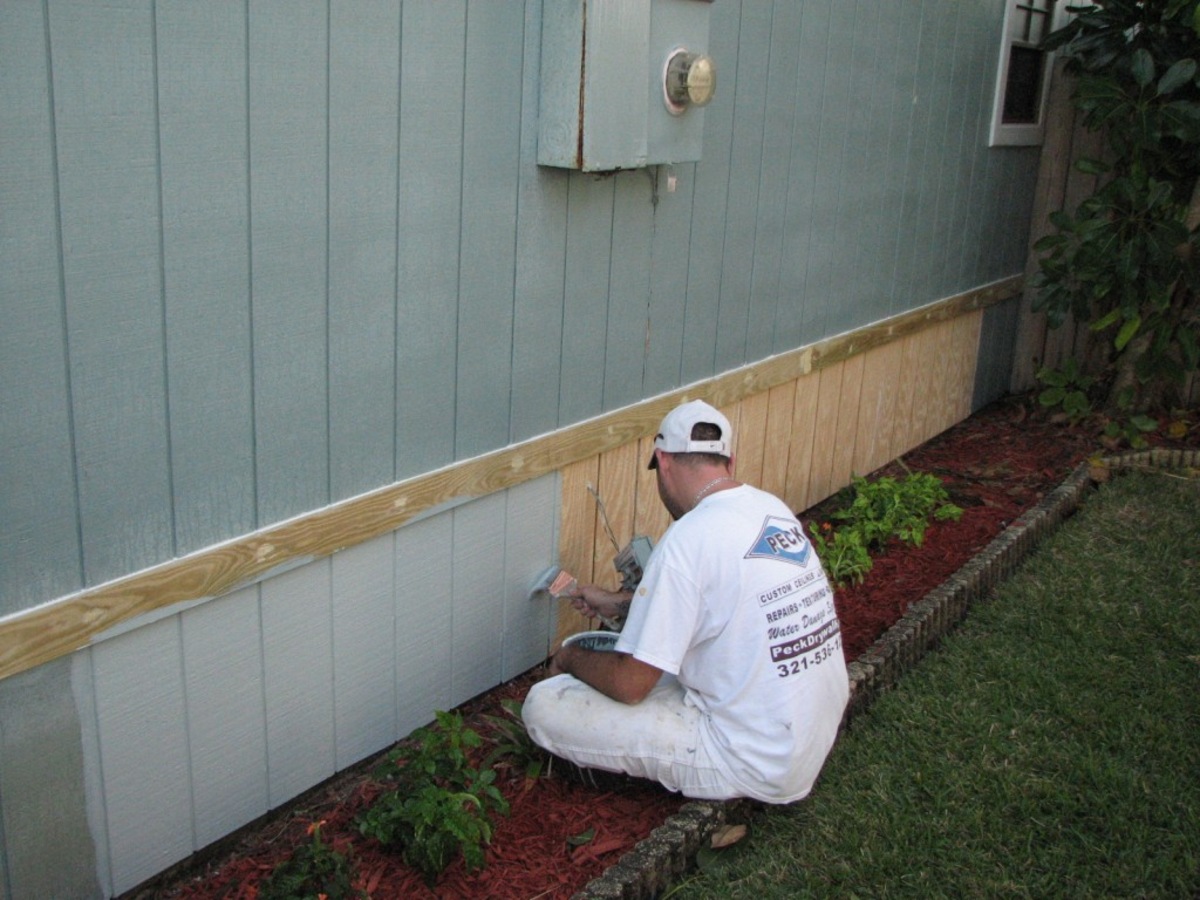
Step 7: Painting and Finishing Touches
Once you have completed the installation and checked for proper alignment, the final step in repairing vertical wood siding is painting and adding the finishing touches. This step not only enhances the visual appeal of the repair but also protects the siding from weathering and extends its lifespan.
Follow these steps to paint and add finishing touches to your repaired siding:
- Start by thoroughly cleaning the repaired area to remove any dust or debris accumulated during the installation process.
- If necessary, use a putty knife to fill any nail holes or gaps between the siding pieces with exterior wood filler. Smooth the filler with the putty knife and allow it to dry according to the manufacturer’s instructions.
- Once the repairs are filled and dry, lightly sand the repaired area to ensure a smooth surface for painting. Use sandpaper or a sanding block with a fine grit to avoid damaging the wood.
- Wipe away any sanding dust with a damp cloth.
- If you desire a uniform look, consider applying a primer to the repaired area before painting. Priming will help the paint adhere better and provide an even finish.
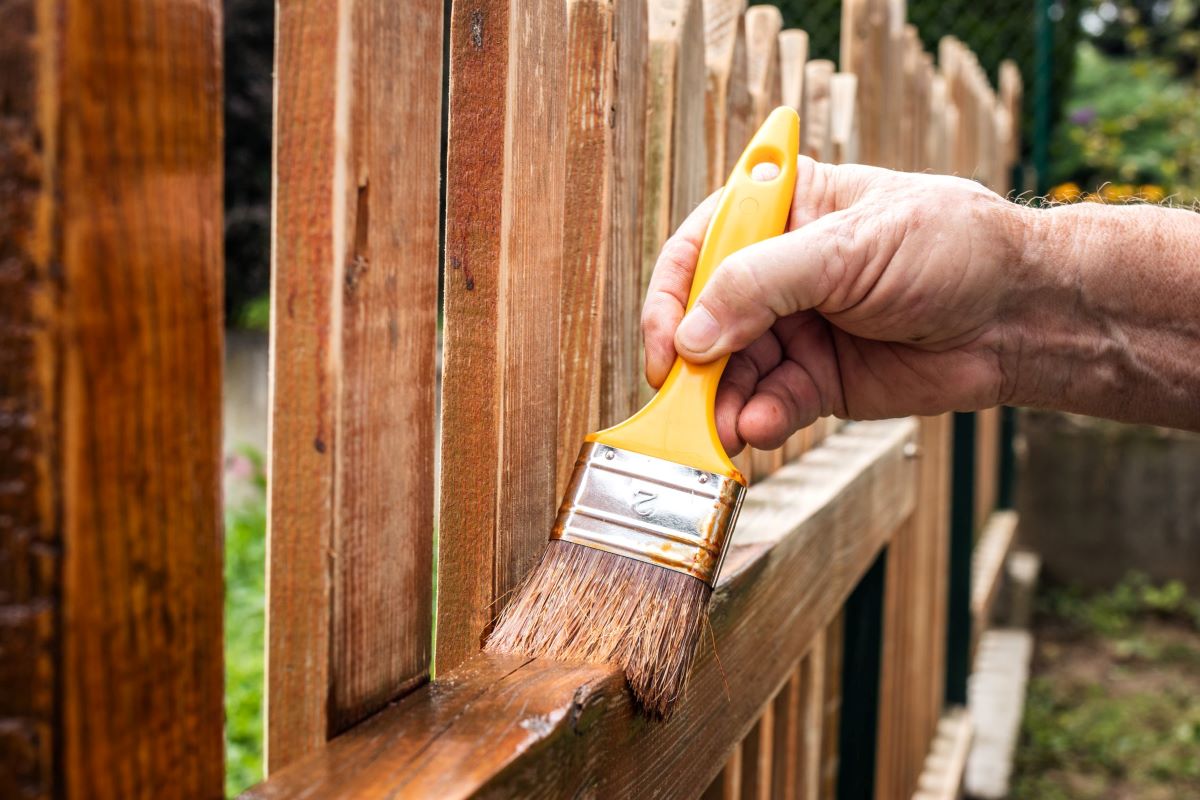
- Select an exterior-grade paint or stain that matches the color and finish of the existing siding. Apply the paint or stain to the repaired area, following the manufacturer’s instructions.
- Use a paintbrush or paint sprayer to evenly coat the repaired siding. Pay attention to any overlapping areas, ensuring that the paint or stain is applied smoothly and evenly.
- Allow the paint or stain to dry completely according to the manufacturer’s instructions.
- If necessary, apply an additional coat of paint or stain for optimal coverage and durability. Follow the recommended drying time between coats.
- Inspect the finished repair, checking for any touch-ups or final adjustments that may be needed. Make sure the paint or stain matches the surrounding siding and the repair seamlessly blends with the rest of the exterior.
By painting and adding the finishing touches, you not only protect the repaired area but also ensure a cohesive and visually appealing result. Take pride in your work and admire the restored beauty of your home’s vertical wood siding.
With the final step complete, you have successfully repaired your vertical wood siding. Now you can enjoy the renewed aesthetics and long-lasting functionality of your beautifully restored siding.
Remember, regular maintenance and proper care can help extend the lifespan of your vertical wood siding and prevent future damage. Keep an eye out for signs of wear and address them promptly to maintain the integrity and beauty of your home’s exterior.
Congratulations on a job well done!
Conclusion
Repairing vertical wood siding is a rewarding task that allows you to restore the beauty and functionality of your home’s exterior. By following the step-by-step process outlined in this article, you can successfully repair damaged areas, ensuring a seamless integration with the existing siding.
From inspecting the siding and cleaning the surfaces to removing the damaged siding and installing the replacement pieces, every step is crucial in achieving a professional-looking repair. Paying attention to proper alignment and taking the time to paint and add finishing touches will further enhance the results.
Remember to gather all the necessary tools and materials before starting the repair process, and don’t hesitate to seek professional help if you encounter extensive damage or need expert guidance.
With proper care and maintenance, your vertical wood siding will continue to enhance the exterior of your home for years to come. Regularly inspect the siding for any signs of wear, and address any issues promptly to prevent further damage.
By taking the time to repair and maintain your vertical wood siding, you can enjoy a beautiful and durable exterior that adds value and curb appeal to your home.
So roll up your sleeves, gather your tools, and embark on the journey of repairing and revitalizing your vertical wood siding. You’ll not only restore the charm of your home but also gain a sense of accomplishment and pride in your DIY skills!
Excited to delve deeper into home improvement? Our next reads are just up your alley! Wondering about different styles and benefits of house coverings? Our article on vertical siding will clear up any confusion, providing insights into why this option might be perfect for your home. For those with a knack for crafting, don't miss our roundup on woodworking trends and projects where you'll find the latest trends and projects to inspire your next creation. Jump right in and give these pieces a read—you won't regret it!
Frequently Asked Questions about How To Repair Vertical Wood Siding
Was this page helpful?
At Storables.com, we guarantee accurate and reliable information. Our content, validated by Expert Board Contributors, is crafted following stringent Editorial Policies. We're committed to providing you with well-researched, expert-backed insights for all your informational needs.


0 thoughts on “How To Repair Vertical Wood Siding”