Articles
How To Lay Tile On Wood Floor
Modified: October 20, 2024
Learn how to lay tile on a wood floor with these informative articles. Discover step-by-step instructions and expert tips to achieve a professional-looking tile installation.
(Many of the links in this article redirect to a specific reviewed product. Your purchase of these products through affiliate links helps to generate commission for Storables.com, at no extra cost. Learn more)
Introduction
Welcome to the world of tile installation! If you have a wood floor and dream of adding a beautiful tile surface, you’ve come to the right place. In this article, we will guide you through the step-by-step process of laying tile on a wood floor.
Tile flooring offers numerous benefits, such as durability, versatility, and easy maintenance. By installing tile over a wood floor, you can give your space a stylish and modern look while preserving the stability and warmth of the wood beneath.
Before diving into the installation process, it’s important to gather the necessary materials. Having everything on hand will save you time and ensure a smooth installation. Let’s take a look at what you’ll need:
Key Takeaways:
- Transform your wood floor with durable and visually appealing tile installation. Follow step-by-step guidance for proper preparation, layout planning, adhesive mixing, and grouting to achieve professional results.
- Attention to detail and careful execution are key to a successful tile installation. Take pride in your work and enjoy the beauty and durability of your newly tiled wood floor.
Read more: How To Lay Out Floor Tile
Materials Needed
Before getting started on your tile installation project, gather the following materials:
- Tile: Choose the type, color, and size of tile that suits your style and space. Consider factors like durability, slip resistance, and maintenance.
- Wood Floor Preparation Materials: This includes a sander or sandpaper to smooth out any imperfections on the wood surface, as well as wood filler to repair any cracks or gouges.
- Primer: A primer is necessary to ensure proper adhesion between the wood floor and the tile adhesive. Choose a primer suitable for both wood and tile surfaces.
- Tile Adhesive: Select a high-quality tile adhesive that is compatible with the type of tile you are using and the wood surface. Opt for a flexible adhesive that can accommodate movement and prevent tile cracking.
- Notched Trowel: A notched trowel is used to spread adhesive evenly on the wood floor. The size of the notches should match the recommended adhesive coverage for your specific tile.
- Tile Cutter or Wet Saw: Depending on the size and complexity of your project, you may need a tile cutter or wet saw to make precise cuts and fit tiles around obstacles or along edges.
- Grout: Choose a grout color that complements your tile and desired aesthetic. Ensure it is suitable for the type of tile you are using.
- Grout Float: A grout float is used to spread and press grout into the spaces between the tiles. Look for a float with a comfortable handle and a non-abrasive surface.
- Tile Spacers: These small plastic crosses or wedges are placed between tiles to maintain consistent spacing and allow for grout lines. Choose spacers that match your desired grout line width.
- Sponge or Grout Cleaning Tool: A sponge or grout cleaning tool is needed to remove excess grout and clean the surface once grouting is complete.
- Bucket and Mixing Tools: You’ll need a bucket for mixing the tile adhesive and grout, as well as tools like a mixing paddle or drill attachment.
Having all these materials ready before starting the project will ensure a smoother installation process and help you achieve professional-looking results. Once you have everything in hand, it’s time to prepare the wood floor for tile installation.
Preparing the Wood Floor
Properly preparing the wood floor is crucial to ensure a successful tile installation. Follow these steps to prepare the wood floor:
- Clean the Floor: Remove any furniture or obstacles from the room. Sweep or vacuum the wood floor to remove any dirt, debris, or dust. Ensure the floor is completely clean before moving on to the next step.
- Inspect and Repair: Carefully inspect the wood floor for any visible damage, such as cracks, gaps, or loose boards. Use a sander or sandpaper to smooth out any imperfections or rough spots. Fill in any cracks, gaps, or holes with suitable wood filler and allow it to dry completely. Sand the filled areas to create a smooth and level surface.
- Check for Moisture: It’s essential to ensure that the wood floor is dry and moisture-free to prevent future issues. Use a moisture meter to check the moisture content of the wood. Ideally, the moisture content should be below 4% to proceed with the tile installation.
- Stabilize the Floor: If the wood floor feels unstable or has excessive movement, it may be necessary to add additional support. Consult a professional or a structural engineer to assess and address any structural issues.
- Remove Baseboards: If there are existing baseboards or moldings along the edges of the wood floor, consider removing them temporarily to facilitate a clean and precise tile installation. Use a pry bar or a putty knife to gently remove the baseboards without causing damage.
By thoroughly preparing the wood floor, you are ensuring a stable foundation for the tile installation. Taking the time to clean, inspect, repair, check for moisture, and stabilize the floor will help prevent any future issues and ensure a durable and long-lasting tile floor.
Applying Primer
Applying a primer is an important step in the tile installation process, especially when tiling over a wood floor. The primer creates a barrier between the wood surface and the tile adhesive, ensuring proper adhesion and preventing any potential damage to the wood. Follow these steps to apply primer on the wood floor:
- Prepare the Area: Ensure the wood floor is clean and free of any debris. Remove any dust or dirt using a broom or vacuum cleaner.
- Choose the Right Primer: Select a primer that is suitable for both wood and tile surfaces. Consult the manufacturer’s instructions to ensure compatibility with the specific materials you are using.
- Mix the Primer: If the primer requires mixing, carefully follow the manufacturer’s instructions. Use a stirring stick or a drill attachment to mix the primer thoroughly until it is well-blended.
- Apply the Primer: Start applying the primer to the wood floor using a paint roller or brush. Work in small sections, covering the entire surface evenly. Avoid leaving any puddles or thick layers of primer.
- Allow the Primer to Dry: Follow the recommended drying time specified by the manufacturer. It typically takes a few hours for the primer to dry completely. Ensure that the area is well-ventilated during the drying process.
- Inspect the Primed Surface: After the primer has dried, inspect the primed wood floor for any missed spots or uneven areas. If necessary, apply a second coat of primer to ensure complete coverage and a smooth surface.
Applying primer to the wood floor creates a protective layer, enhancing the adhesion of the tile adhesive and promoting a long-lasting installation. Take your time during this step, ensuring that the primer is applied evenly and allowed to dry thoroughly before proceeding with the next steps of the tile installation process.
Measuring and Planning Tile Layout
Before diving into the tile installation, it’s important to measure the room and plan the layout to ensure a visually pleasing and balanced tile arrangement. Follow these steps to accurately measure and plan your tile layout:
- Measure the Room: Use a measuring tape to measure the length and width of the room. Record these measurements on a piece of paper or make a sketch of the room’s layout.
- Consider the Tile Size: Take into account the size of the tile you have chosen. Larger tiles can create a spacious and modern look, while smaller tiles can add intricate detailing. Keep in mind that using larger tiles may require fewer cuts.
- Decide on the Tile Layout: Consider the orientation of the tiles. You can choose between a standard grid pattern, a diagonal pattern, or a herringbone pattern, among others. Visualize how the tile layout will look in the room and determine which pattern suits your style and space.
- Find the Center Point: To create a balanced and symmetrical layout, locate the center point of the room. Measure and mark the center point on both the length and width of the floor.
- Create Snap Lines: Use a chalk snap line or a straightedge and pencil to create reference lines that extend from the center point to the walls. These lines will guide the tile installation and help maintain a straight and even layout.
- Mock-up the Layout: Before diving into the full installation, consider dry-fitting a row of tiles along the reference lines to visualize the final outcome. This gives you the opportunity to make any adjustments or changes to the layout if necessary.
By accurately measuring the room and planning the tile layout, you can ensure a smooth and visually appealing installation. Take the time to consider tile size, layout patterns, and make mock-ups to visualize the final result. This careful planning will set the foundation for a successful tile installation project.
Read more: How To Lay Tile On Concrete Floor
Mixing Tile Adhesive
Mixing the tile adhesive correctly is crucial for a strong and durable bond between the tiles and the wood floor. Follow these steps to properly mix the tile adhesive:
- Read the Instructions: Carefully read the manufacturer’s instructions on the adhesive packaging. Different types of tile adhesives may have specific mixing ratios or requirements.
- Gather the Supplies: Gather all the necessary tools and materials for mixing the adhesive, including a bucket, mixing paddle, and the tile adhesive itself.
- Pour the Adhesive: Pour the appropriate amount of tile adhesive into the bucket, following the recommended mixing ratio specified by the manufacturer.
- Add Water: Begin adding water to the adhesive gradually. Use a measuring container or follow the guidelines provided by the adhesive manufacturer to achieve the correct water-to-adhesive ratio. It is generally best to add the water slowly to avoid creating a mixture that is too watery.
- Mix Thoroughly: Insert the mixing paddle into the bucket and use a drill or your hands to mix the adhesive and water thoroughly. Ensure that there are no lumps or dry spots in the mixture. Continue mixing until you achieve a smooth and consistent consistency.
- Double Check the Consistency: The tile adhesive should have a creamy and somewhat thick consistency. It should be easy to spread but not too runny. If the adhesive appears too thick or dry, add small amounts of water and mix again. If it is too thin, add more adhesive and remix.
- Let the Adhesive Rest: Allow the mixed adhesive to rest for a few minutes, as specified by the manufacturer. This resting period allows the adhesive components to activate and ensures optimal bonding properties.
Properly mixing the tile adhesive is essential to create a strong bond between the tiles and the wood floor. Take the time to carefully follow the manufacturer’s instructions, achieve the correct water-to-adhesive ratio, and ensure a smooth and consistent mix. With a well-mixed adhesive, you’re ready to move on to laying the first tile.
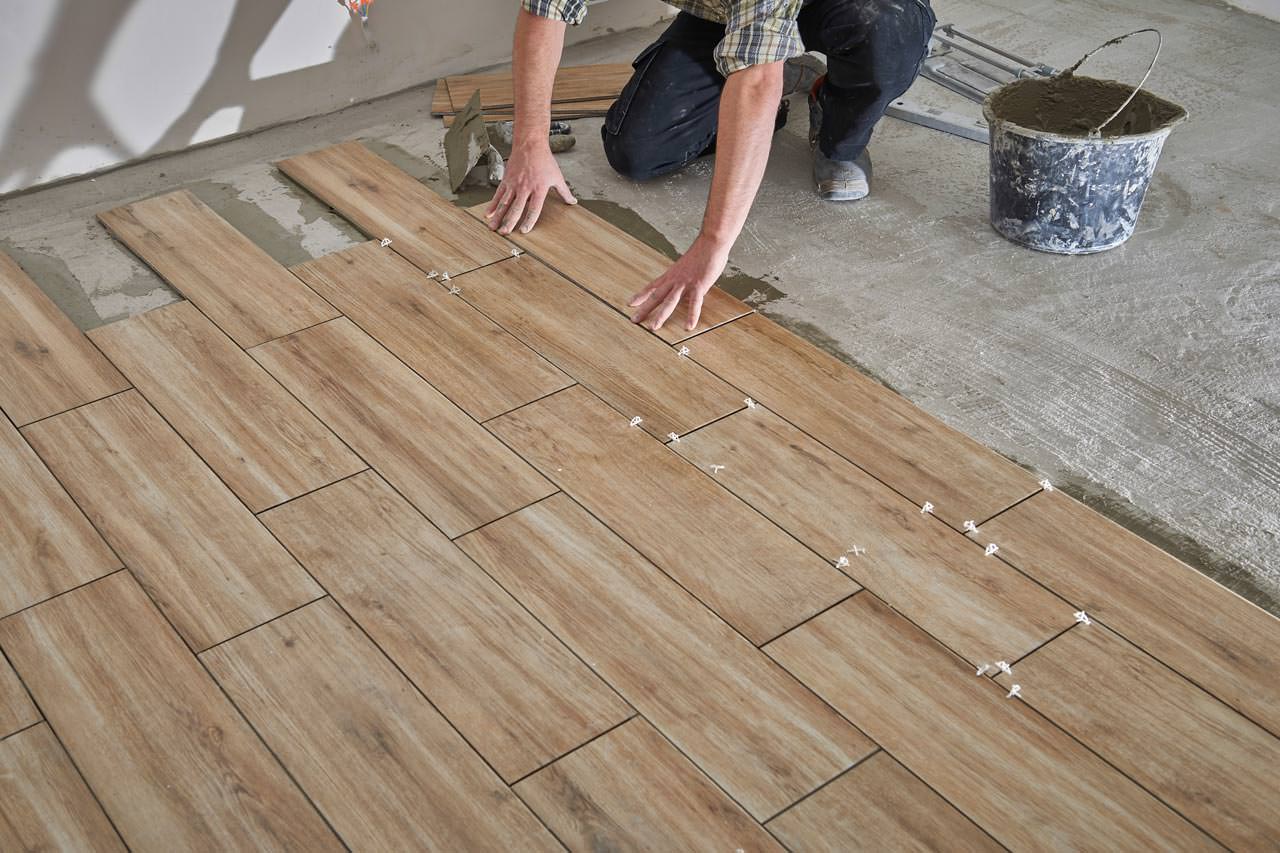
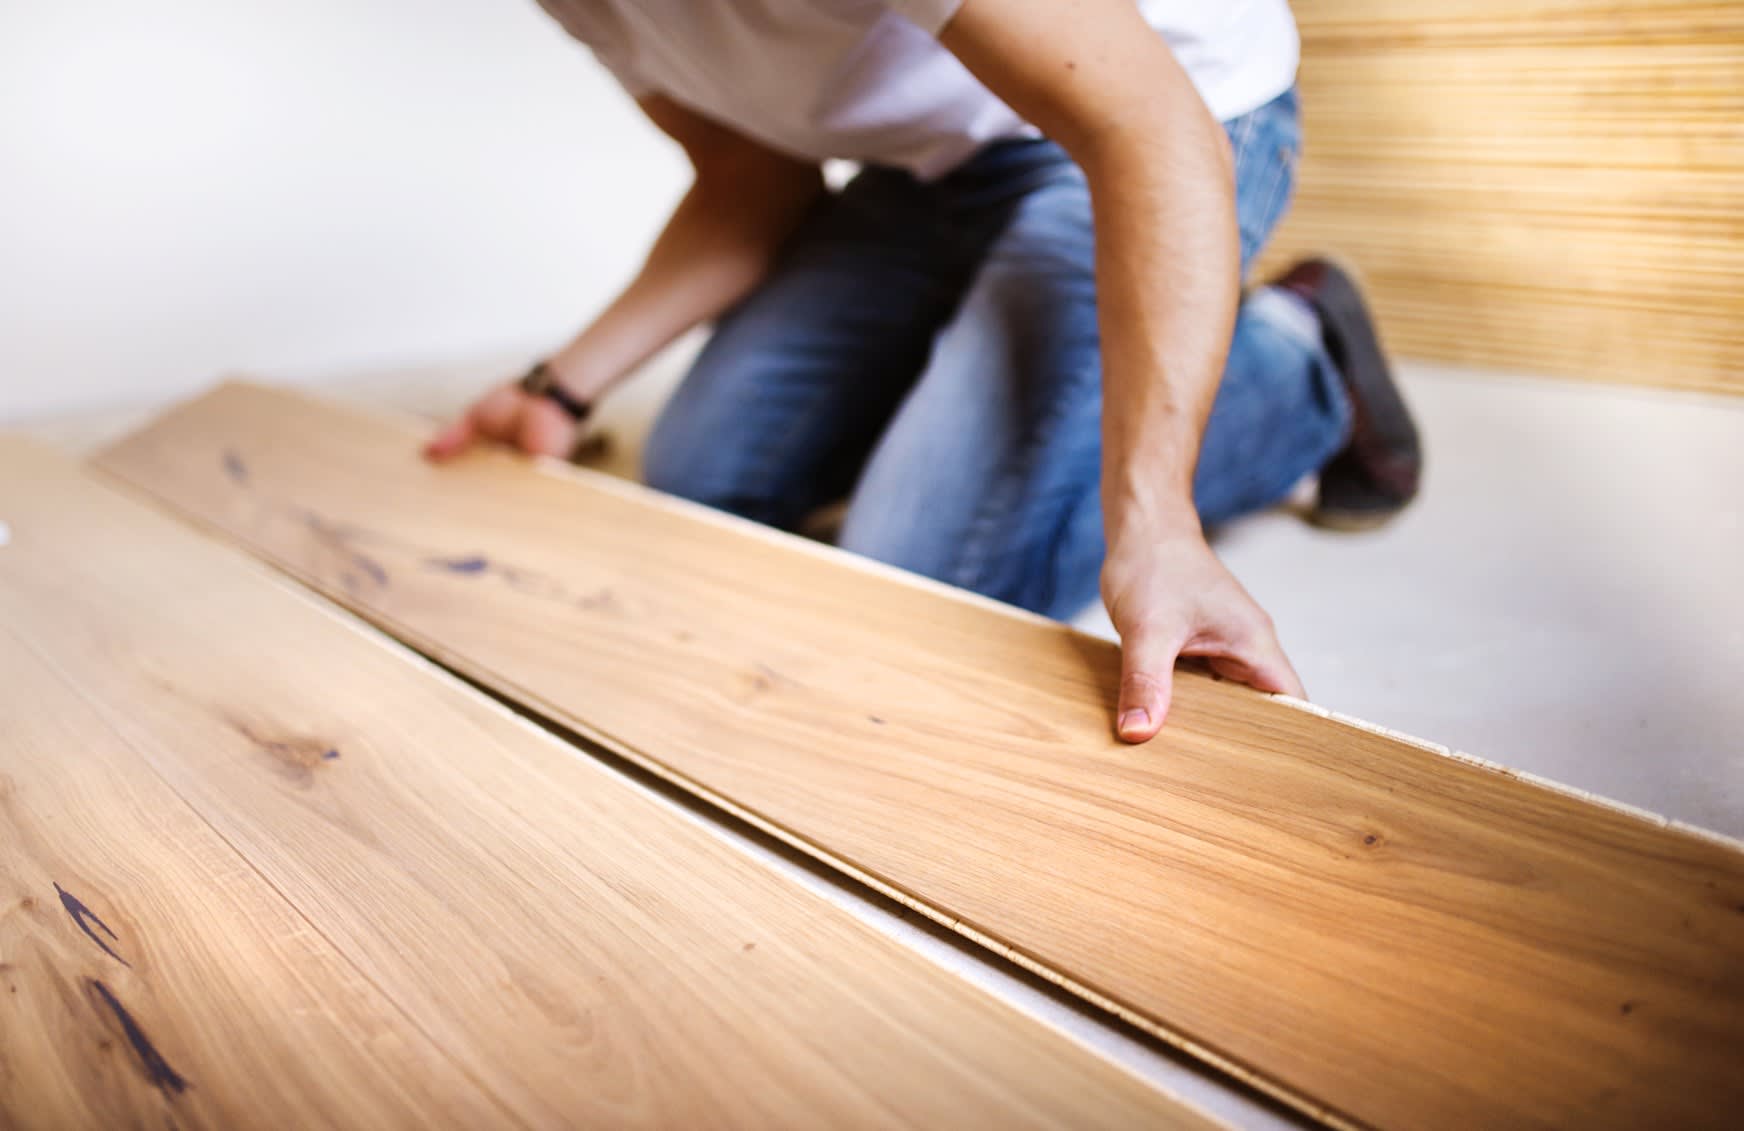
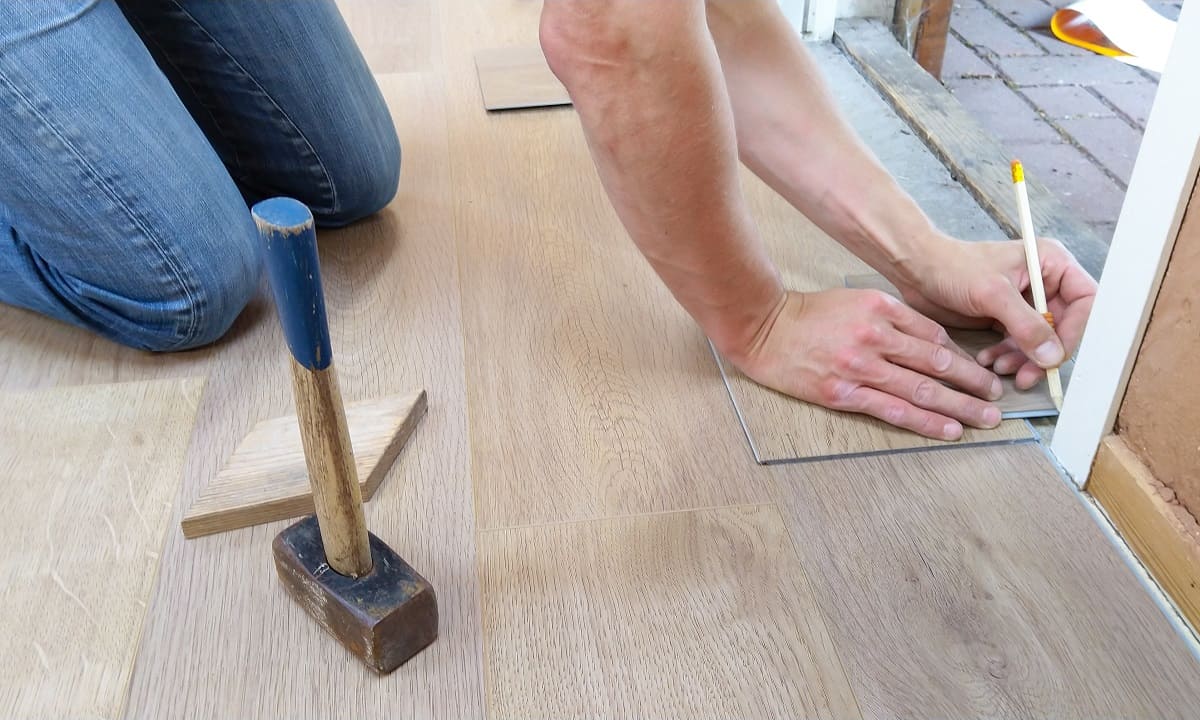
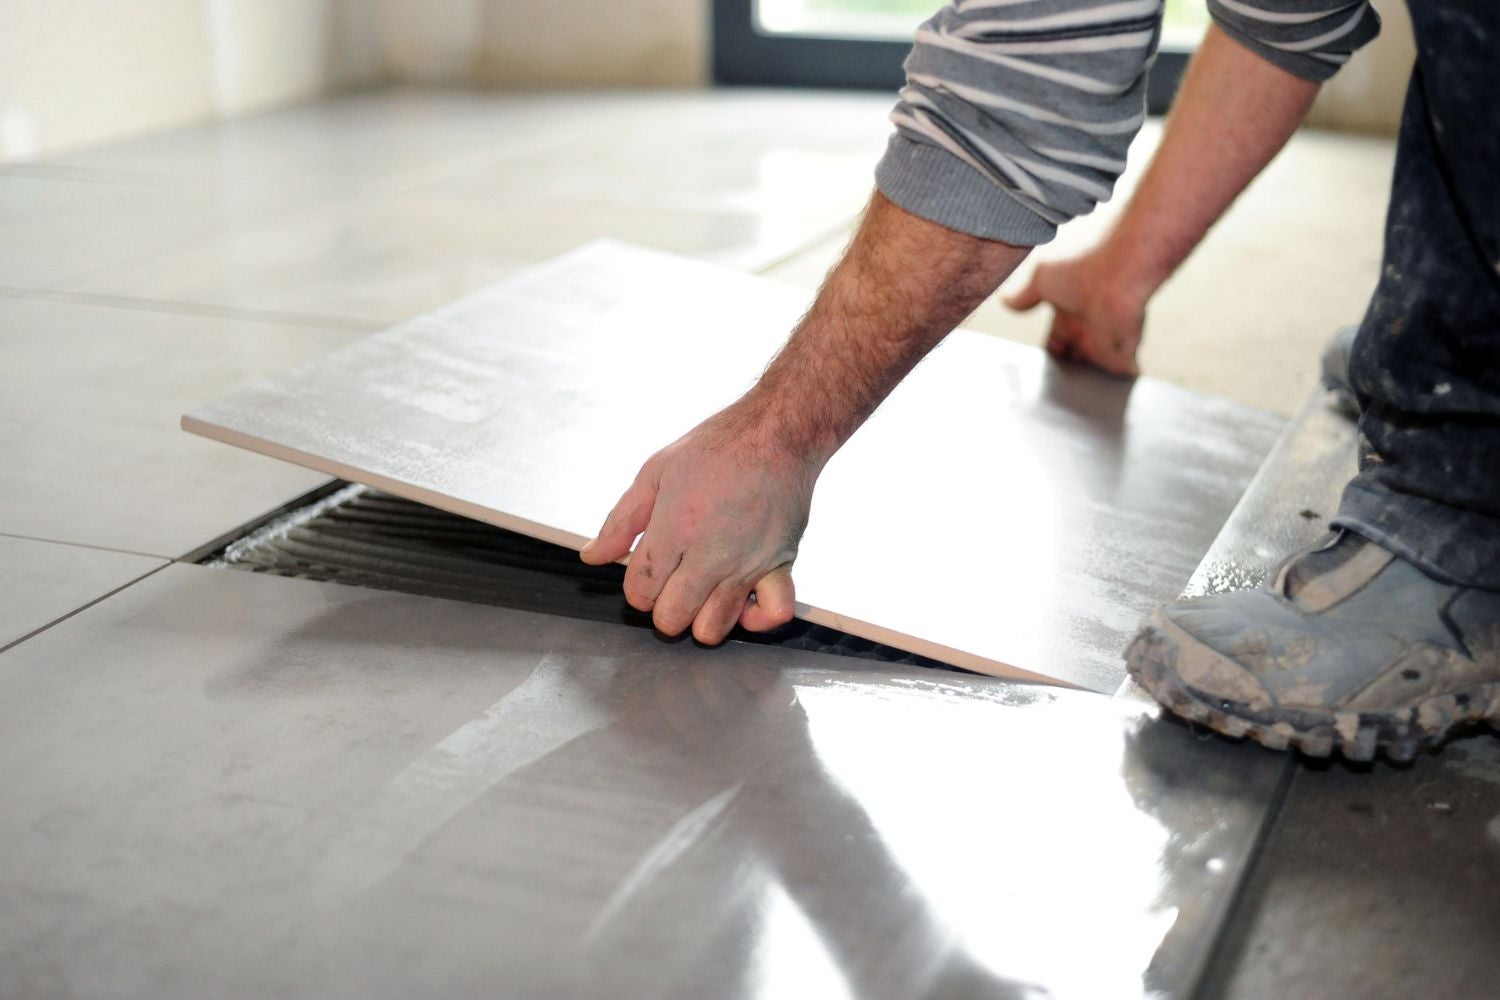
Laying the First Tile
Laying the first tile sets the foundation for the entire tile installation process. Follow these steps to properly lay the first tile:
- Mark the Starting Point: Use a chalk line or a straightedge to create a reference line on the wood floor. This line will guide the placement of the first tile and ensure a straight and even installation.
- Apply Tile Adhesive: Using a notched trowel, spread a layer of tile adhesive onto the wood floor within the designated area of the starting point. Ensure that the adhesive is evenly distributed and with consistent coverage.
- Place the First Tile: Carefully place the first tile onto the adhesive within the marked starting point. Press the tile down firmly to ensure it adheres to the adhesive and is level with the reference line.
- Check the Alignment: Use a level or a straightedge to ensure the first tile is level and aligned with the reference line. Adjust the tile if necessary before the adhesive sets.
- Set the Spacing: Insert tile spacers around the first tile to maintain a consistent gap between tiles. The size of the spacers will depend on your desired grout line width.
- Continue with the Next Tiles: Once the first tile is in place, continue laying the adjacent tiles, following the same process. Apply adhesive, place the tile, check alignment, and set the spacing with tile spacers.
- Double-Check and Adjust: Periodically check the alignment and level of the tiles as you work your way across the floor. Make any necessary adjustments to maintain a uniform and straight tile installation.
Laying the first tile properly is crucial for a well-aligned and balanced tile installation. Take your time and double-check the alignment and level as you continue working. With the first tile in place, you can now proceed with spreading the tile adhesive and installing the remaining tiles.
Before laying tile on a wood floor, make sure the wood subfloor is sturdy and in good condition. Use a cement backer board to provide a stable surface for the tile and prevent cracking.
Spreading Tile Adhesive
Once the first tile is laid, it’s time to spread the tile adhesive and continue with the tile installation process. Follow these steps to properly spread the tile adhesive:
- Work in Small Sections: It’s best to work in small sections at a time to ensure that the adhesive doesn’t dry out before the tiles are placed. Start by spreading adhesive on an area that can be covered with tiles within a reasonable timeframe.
- Use a Notched Trowel: Apply tile adhesive to the wood floor using a notched trowel. The size of the notches on the trowel should match the recommended adhesive coverage for your specific tile.
- Hold the Trowel at a 45-Degree Angle: Hold the notched trowel at a 45-degree angle to the floor and use it to spread the adhesive. Apply even pressure to create ridges or grooves in the adhesive. This texture allows for proper tile adhesion.
- Spread Adhesive in One Direction: Spread the adhesive in one direction, following the layout pattern and reference lines. This ensures that the adhesive is evenly distributed and creates a consistent base for the tiles.
- Avoid Overlapping Adhesive: Avoid overlapping the adhesive or applying too much adhesive at once. This can create an uneven surface and may cause the tiles to sit too high or unevenly on the floor.
- Work in Stages: As you spread the adhesive, work in stages and focus on one small section at a time. This allows you to place the tiles onto the adhesive while it is still workable.
- Smooth Out the Adhesive: Once the adhesive is spread, use the flat edge of the trowel or a straightedge to smooth out the ridges and create a flat, even surface. This will ensure that the tiles adhere properly and prevent any unevenness.
Properly spreading the tile adhesive is essential for a strong and durable bond between the tiles and the wood floor. Take your time and work in small sections, following the recommended techniques and using the right tools. With the adhesive in place, you can now proceed with installing the remaining tiles in your desired layout pattern.
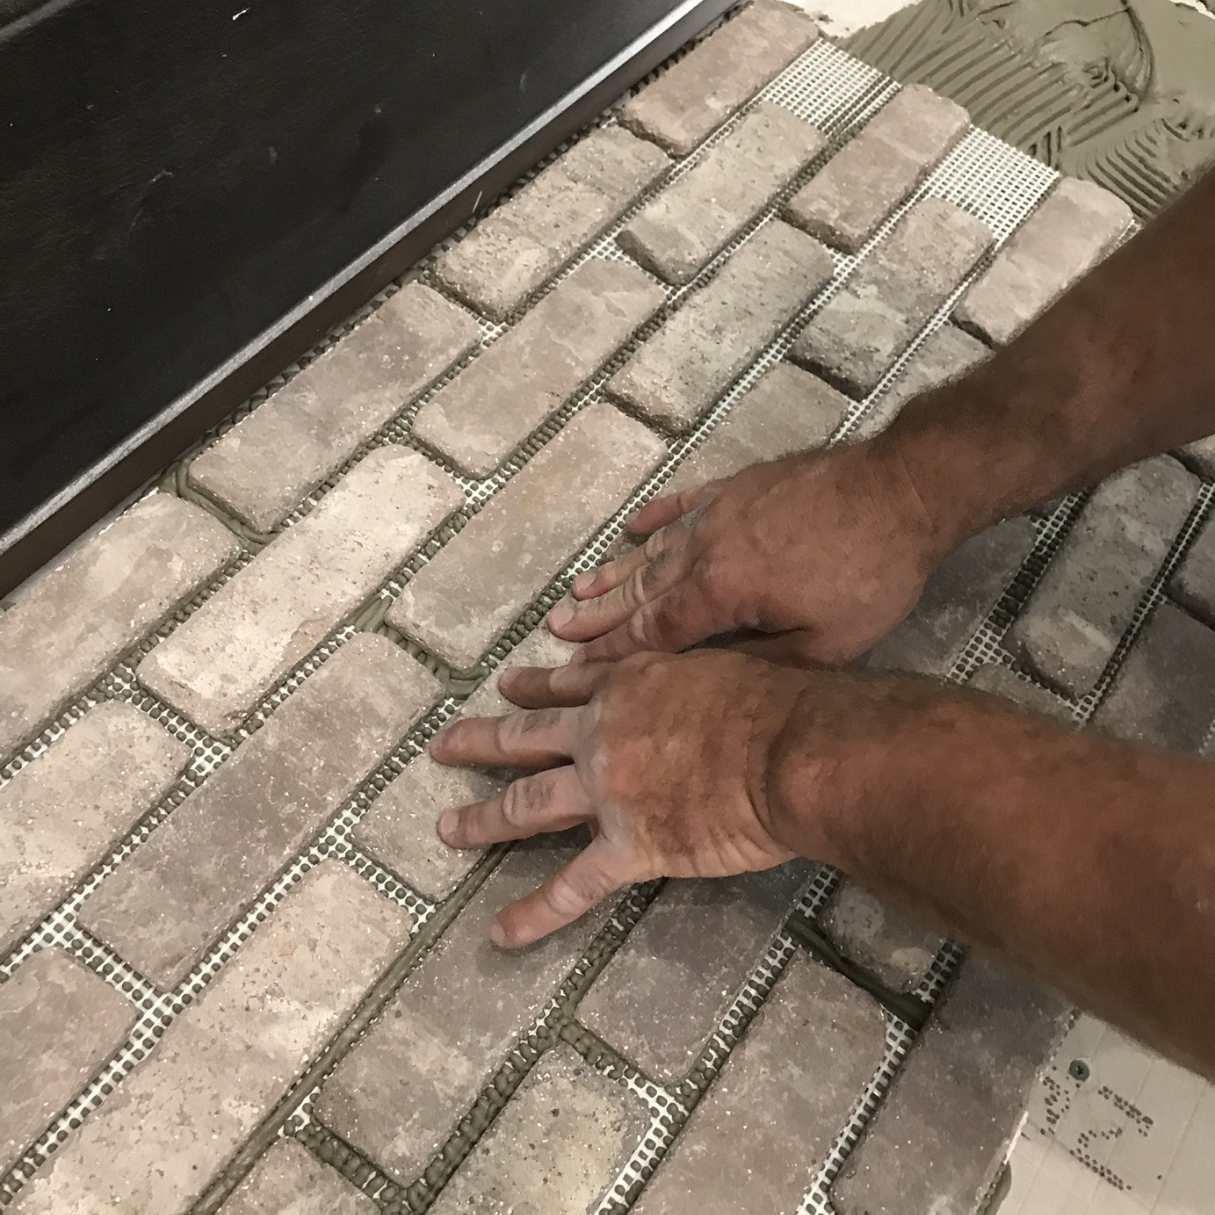
Installing Remaining Tiles
Now that the first tile is set and the adhesive is spread, you can continue with the installation of the remaining tiles. Follow these steps to install the remaining tiles:
- Apply Adhesive and Set Spacers: Spread tile adhesive in the next small section using the same process as before. Ensure that the adhesive is evenly distributed and create ridges or grooves with the notched trowel. Place tile spacers around the perimeters of the section to maintain consistent spacing.
- Place the Tiles: Carefully place the tiles on the adhesive within the designated section. Press each tile down firmly to ensure it adheres to the adhesive and sits level with the adjacent tiles. Use a twisting motion to help fully embed the tile into the adhesive.
- Check Alignment: As you lay each tile, periodically check the alignment and level using a level or straightedge. Adjust the tile if necessary to achieve a uniform and visually appealing installation.
- Continue the Process: Repeat the process of applying adhesive, setting spacers, placing tiles, and checking alignment as you work your way across the floor. Work in small sections, ensuring that the adhesive remains workable.
- Trim Tiles: If you come across areas where the full tiles won’t fit, such as along walls or obstacles, you may need to trim the tiles to fit. Use a tile cutter or wet saw to make precise cuts as needed. Take measurements carefully and ensure the trimmed tiles fit securely in place.
- Remove Excess Adhesive: As you install the tiles, periodically remove any excess adhesive that may squeeze up between the tiles. Use a damp cloth or sponge to clean any excess adhesive before it dries.
- Check the Grout Line: After installing a few rows of tiles, periodically check the spacing and alignment of the grout lines. Make any necessary adjustments to maintain consistency and ensure a pleasing visual result.
By following these steps, you can successfully install the remaining tiles and create a seamless and visually stunning tiled wood floor. Take your time, pay attention to detail, and ensure that the tiles are properly aligned and level as you work your way across the floor.
Read more: How To Lay Mosaic Floor Tile
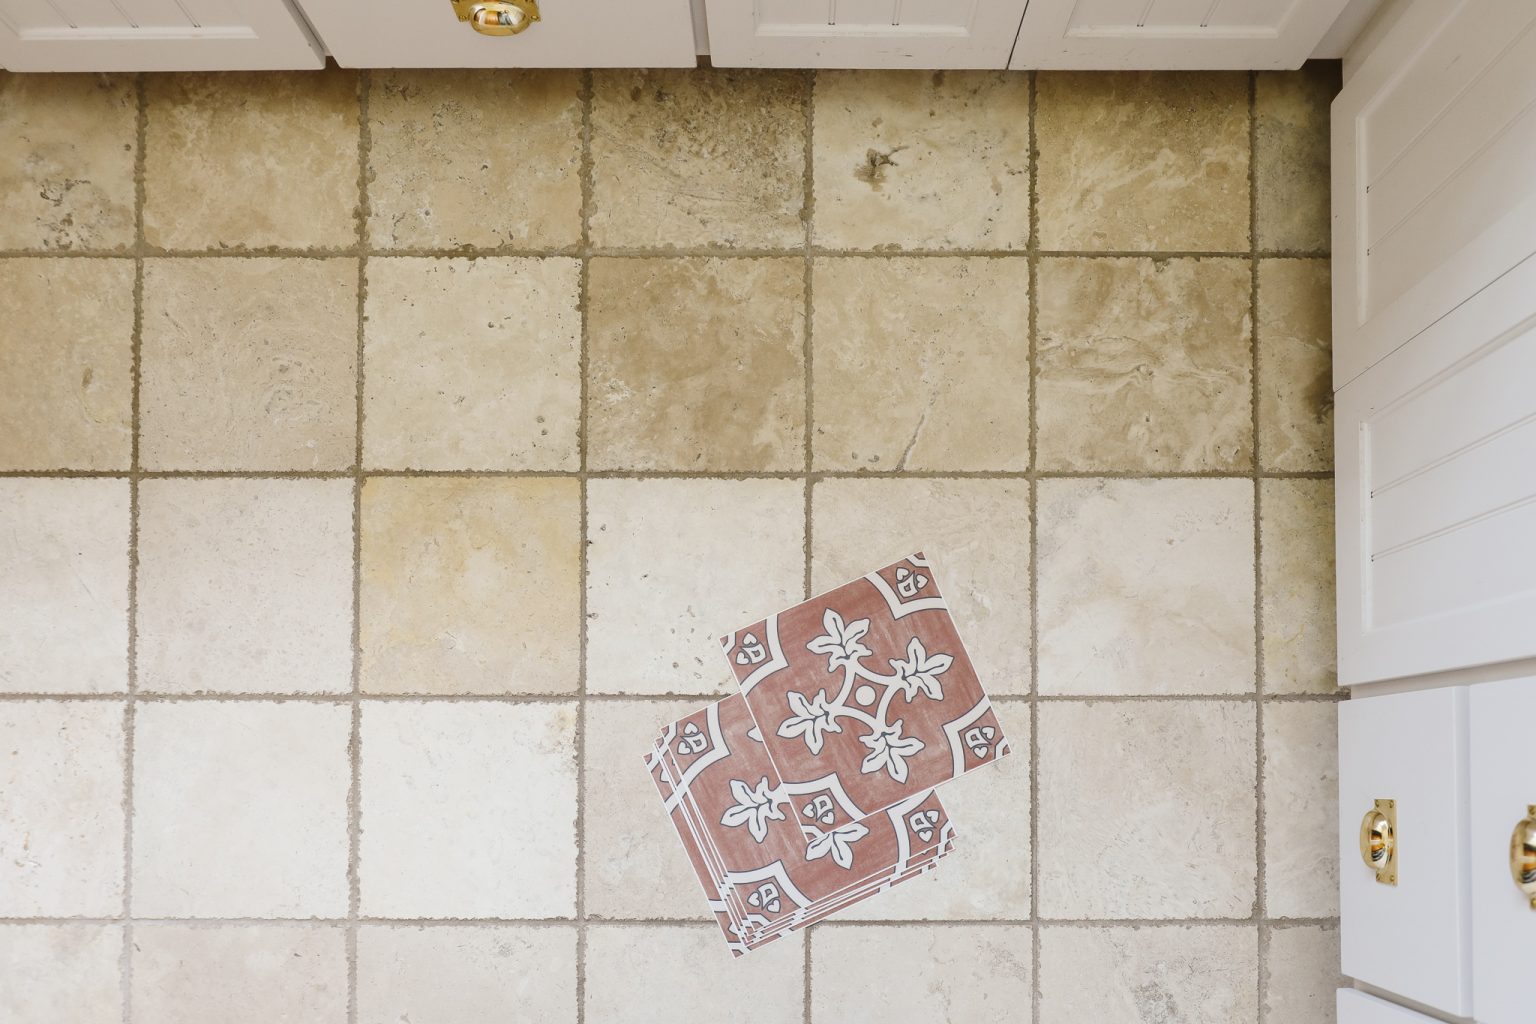
Cutting Tiles to Fit
When tiling a wood floor, it’s common to encounter areas where full tiles won’t fit. These areas may include corners, edges, or around obstacles such as cabinets or door frames. To ensure a professional-looking installation, you’ll need to cut the tiles to fit these spaces. Follow these steps to cut tiles to fit:
- Measure the Tile: Take precise measurements of the area where the tile needs to be cut. Use a measuring tape to determine the exact dimensions and mark them on the back of the tile.
- Mark the Cut Line: Use a straightedge or a square to draw a straight line on the tile’s surface that corresponds to the measurements taken. This line will serve as a guide for the cutting tool.
- Choose the Right Cutting Tool: Depending on the type of tile you are working with, you’ll need the appropriate cutting tool. Options include a tile cutter, a wet saw, or a handheld tile nipper. Consult with a professional or the manufacturer’s instructions to determine the best tool for your specific tile.
- Use the Cutting Tool: Follow the manufacturer’s instructions for using the chosen cutting tool. For a tile cutter, align the marked line with the cutting wheel, then apply pressure to score the tile along the line. For a wet saw, slowly feed the tile into the saw blade, following the marked line. If using a handheld tile nipper, gradually nibble away at the tile along the line.
- Test the Fit: After cutting the tile, test the fit to ensure it matches the desired space. Place the cut tile into position and make any necessary adjustments for a precise fit.
- Smooth the Edges: The cut edges of the tile may be sharp or rough. Use a tile file or sandpaper to smooth the edges and remove any sharpness or imperfections.
- Continue the Installation: Once the tile is cut and fits properly, continue with the tile installation process, carefully placing the cut tile into position. Ensure that it aligns seamlessly with the surrounding tiles and maintain consistent spacing with the use of tile spacers.
Remember to take your time and exercise caution when cutting tiles. Wear appropriate safety gear such as gloves and protective eyewear, and follow all safety instructions provided by the manufacturer. By cutting the tiles to fit, you can achieve a professional-looking tile installation, even in challenging areas.
Allowing Tiles to Set and Dry
After successfully laying the tiles, it’s important to allow them to set and dry properly. This process is essential for the tiles to bond firmly to the wood floor and ensure a long-lasting installation. Follow these steps to allow the tiles to set and dry:
- Clean Up Excess Adhesive: Before allowing the tiles to set, make sure to clean up any excess adhesive that may have squeezed up between the tiles. Use a damp cloth or sponge to remove any adhesive remnants from the tile surfaces.
- Resist Walking on Tiles: Avoid walking on the newly installed tiles for at least 24 to 48 hours, or as recommended by the tile adhesive manufacturer. Walking on the tiles too soon can disrupt the setting process and compromise the bond between the tiles and the wood floor.
- Maintain Proper Room Temperature: During the setting and drying process, it’s important to maintain a moderate room temperature. Extreme temperature fluctuations can affect the integrity of the adhesive and lead to tile failure. Aim for a comfortable temperature range of around 70°F (21°C).
- Allow Sufficient Drying Time: The drying time for the adhesive can vary based on factors such as humidity, ventilation, and the specific type of adhesive used. Refer to the manufacturer’s instructions for the recommended drying time. Typically, you should allow the tiles to set and dry for at least 48 to 72 hours before proceeding to the next step.
- Monitor Humidity and Ventilation: Adequate ventilation is important to ensure proper drying of the adhesive. If necessary, open windows or use fans to promote air circulation. However, avoid excessive air movement, as it may cause the adhesive to dry too quickly, leading to poor bonding.
- Avoid Wetting the Tile Surface: During the setting and drying period, it’s crucial to avoid wetting the tile surface. This includes avoiding any cleaning or maintenance activities that involve water. Moisture can negatively affect the curing process of the adhesive and compromise the adhesive bond.
- Check Adhesive Cure Time: After the recommended drying period, check the adhesive manufacturer’s instructions for the recommended cure time. The cure time is the duration required for the adhesive to reach its full strength. Avoid heavy foot traffic or placing heavy objects on the tiles until the adhesive has fully cured.
By allowing sufficient time for the tiles to set and dry, you are ensuring a solid and durable tile installation. Following these steps will help promote proper adhesive bonding and enhance the overall longevity of your newly tiled wood floor.
Grouting the Tile
Grouting is the final step in the tile installation process that not only enhances the aesthetics of the floor but also provides stability and protection to the tiles. Follow these steps to properly grout the tile:
- Clean the Tile Surface: Before applying the grout, ensure that the tile surface is clean and free of any debris or adhesive residue. Use a damp cloth or sponge to wipe down the tiles, removing any loose particles.
- Mix the Grout: Follow the manufacturer’s instructions for mixing the grout. Typically, you’ll combine the grout powder with water in a bucket, stirring until you achieve a smooth, paste-like consistency. Allow the grout to rest for a few minutes before proceeding.
- Apply the Grout: Using a grout float, scoop up a generous amount of grout and spread it diagonally across the tile surface, holding the float at a 45-degree angle. Push the grout into the spaces between the tiles, ensuring full coverage and filling all the gaps.
- Remove Excess Grout: After applying the grout, hold the grout float at an almost flat angle and scrape off the excess grout from the tile surface. Be careful not to remove too much grout from the gaps. It’s better to remove the excess gradually to avoid disturbing the grout lines.
- Clean the Tile Surface: Once you’ve removed the excess grout, use a slightly damp sponge to gently wipe the tile surface in a circular motion. This will remove any grout haze and ensure a neat and clean finish. Rinse the sponge frequently to avoid smearing the grout on the tiles.
- Final Cleanup: After the initial cleaning, continue to dampen the sponge and wipe down the tile surface multiple times to remove any remaining grout residue. Be gentle to avoid disturbing the freshly applied grout lines.
- Cure and Seal the Grout: Allow the grout to cure for the recommended time specified by the manufacturer, typically 24 to 48 hours. After the curing period, consider applying a grout sealer to protect the grout from stains and moisture. Follow the sealer manufacturer’s instructions for application and drying time.
By following these steps, you can achieve a professionally grouted tile floor. Properly applied grout not only enhances the overall appearance of the tiles but also provides stability and protection. Take your time with the grouting process, and ensure thorough cleaning to achieve a beautiful and long-lasting result.
Cleaning and Finishing the Project
Once the grout has cured and the tile installation is complete, it’s time to clean up and put the finishing touches on your project. Follow these steps to properly clean and finish your newly tiled wood floor:
- Remove Grout Haze: After the grout has fully cured, you may notice a hazy residue on the tile surface. Use a grout haze remover or a mixture of water and vinegar to gently clean the tiles and remove any grout haze. Follow the manufacturer’s instructions for application and use a soft sponge or cloth to avoid scratching the tiles.
- Clean the Entire Floor: Give the entire floor a thorough cleaning. Sweep or vacuum up any loose debris and use a mop or a soft cloth dampened with a mild detergent solution to clean the tiles. Avoid using abrasive cleaners that could damage the tile surface or grout lines.
- Restore the Shine: Depending on the type of tile you have installed, you may want to restore its natural shine. Use a suitable tile cleaner or a recommended polishing product to bring back the luster of the tiles. Follow the instructions provided with the product for the best results.
- Inspect for Imperfections: Take the time to inspect the tile installation for any imperfections or areas that may require touch-ups. Look for any loose tiles, uneven grout lines, or areas that may need resealing. Address any issues promptly to ensure the longevity and beauty of your tiled wood floor.
- Replace Baseboards and Molding: If you removed the baseboards or molding during the tile installation, now is the time to reinstall them. Use a pry bar or a putty knife to gently attach the baseboards or molding back in place, ensuring they are securely and neatly affixed.
- Place Furniture and Decor: Once your tiled wood floor is clean and dry, carefully place your furniture and decorative items back into the room. Use furniture pads or protective coasters to prevent scratching or damaging the tiles.
- Maintain and Care: To keep your newly tiled wood floor looking its best, follow proper maintenance and care practices. Use a soft broom or vacuum regularly to remove loose dirt and dust. Clean up spills promptly to prevent staining, and consider reapplying grout sealer periodically to maintain its protective properties.
By following these steps, you can complete the cleaning and finishing process, leaving you with a beautiful and professionally finished tiled wood floor. Take pride in your work and enjoy the durability and beauty that tiled flooring brings to your space.
Read more: How To Lay A Ceramic Tile Floor
Conclusion
Congratulations on successfully completing your tile installation on a wood floor! You’ve transformed your space with a durable and visually appealing flooring option. By following the step-by-step process outlined in this article, you have learned how to properly prepare the wood floor, apply primer, measure and plan the tile layout, mix tile adhesive, lay the first tile, spread adhesive, install the remaining tiles, cut tiles to fit, allow tiles to set and dry, grout the tile, and clean and finish the project.
Remember, attention to detail and careful execution are key to achieving a professional-looking tile installation. By taking the time to properly prep the wood floor, select the right materials, and follow the recommended techniques, you can ensure a long-lasting and visually pleasing result.
It’s important to note that each tile installation project is unique, and it’s always advisable to consult the manufacturer’s instructions and guidelines specific to the materials you are working with. Additionally, if you encounter any challenges or are unsure about certain steps, don’t hesitate to seek guidance from a professional or an experienced tile installer.
Now that your tile installation is complete, enjoy your new floor and take pride in the hard work and careful attention you put into it. With proper maintenance and care, your tiled wood floor will continue to enhance the beauty and functionality of your space for years to come.
Now that you've mastered laying tiles on a wood floor, why not tackle another DIY project? Our next guide walks you through how to hang a towel bar on ceramic tile. It's packed with practical advice to ensure your additions not only look great but are sturdy too. Whether sprucing up the bathroom or planning a full renovation, these skills are invaluable. Ready to give your space a fresh, functional upgrade? Check out our detailed tutorial.
Frequently Asked Questions about How To Lay Tile On Wood Floor
Was this page helpful?
At Storables.com, we guarantee accurate and reliable information. Our content, validated by Expert Board Contributors, is crafted following stringent Editorial Policies. We're committed to providing you with well-researched, expert-backed insights for all your informational needs.


0 thoughts on “How To Lay Tile On Wood Floor”