
Articles
How To Replace Rotted Wood Siding
Modified: August 31, 2024
Learn how to replace rotted wood siding with our detailed articles. Increase your home's curb appeal and protect it from further damage.
(Many of the links in this article redirect to a specific reviewed product. Your purchase of these products through affiliate links helps to generate commission for Storables.com, at no extra cost. Learn more)
Introduction
Welcome to our comprehensive guide on replacing rotted wood siding. Over time, the exterior siding of a house can become damaged due to exposure to the elements, pest infestation, or simply wear and tear. Rotted wood siding not only looks unsightly, but it can also compromise the structural integrity of your home and lead to further damage if left untreated.
In this article, we will walk you through the step-by-step process of identifying and assessing rotted wood siding, gathering the necessary materials and tools, removing the damaged siding, preparing the replacement siding, installing it correctly, and ensuring a seamless finish. By following these instructions and taking the time to complete the project properly, you can restore the appearance and durability of your home’s exterior.
Before we dive into the specifics, it’s important to note that replacing rotted wood siding can be a labor-intensive task that requires some basic woodworking skills. If you are not confident in your abilities, or if the damage is extensive, it may be wise to consult a professional for assistance.
Now, let’s begin the process of replacing your rotted wood siding and giving your home a fresh look and renewed protection!
Key Takeaways:
- Properly assessing and addressing rotted wood siding is crucial for maintaining a home’s structural integrity and aesthetic appeal. Take the time to gather materials, remove damaged siding, and install replacements for a durable and visually pleasing repair.
- Attention to detail and safety are paramount when replacing rotted wood siding. From assessing damage to sealing and painting, following each step meticulously ensures a long-lasting and protective exterior for your home.
Read more: How To Replace A Rotted Fence Post
Step 1: Assess the Damage
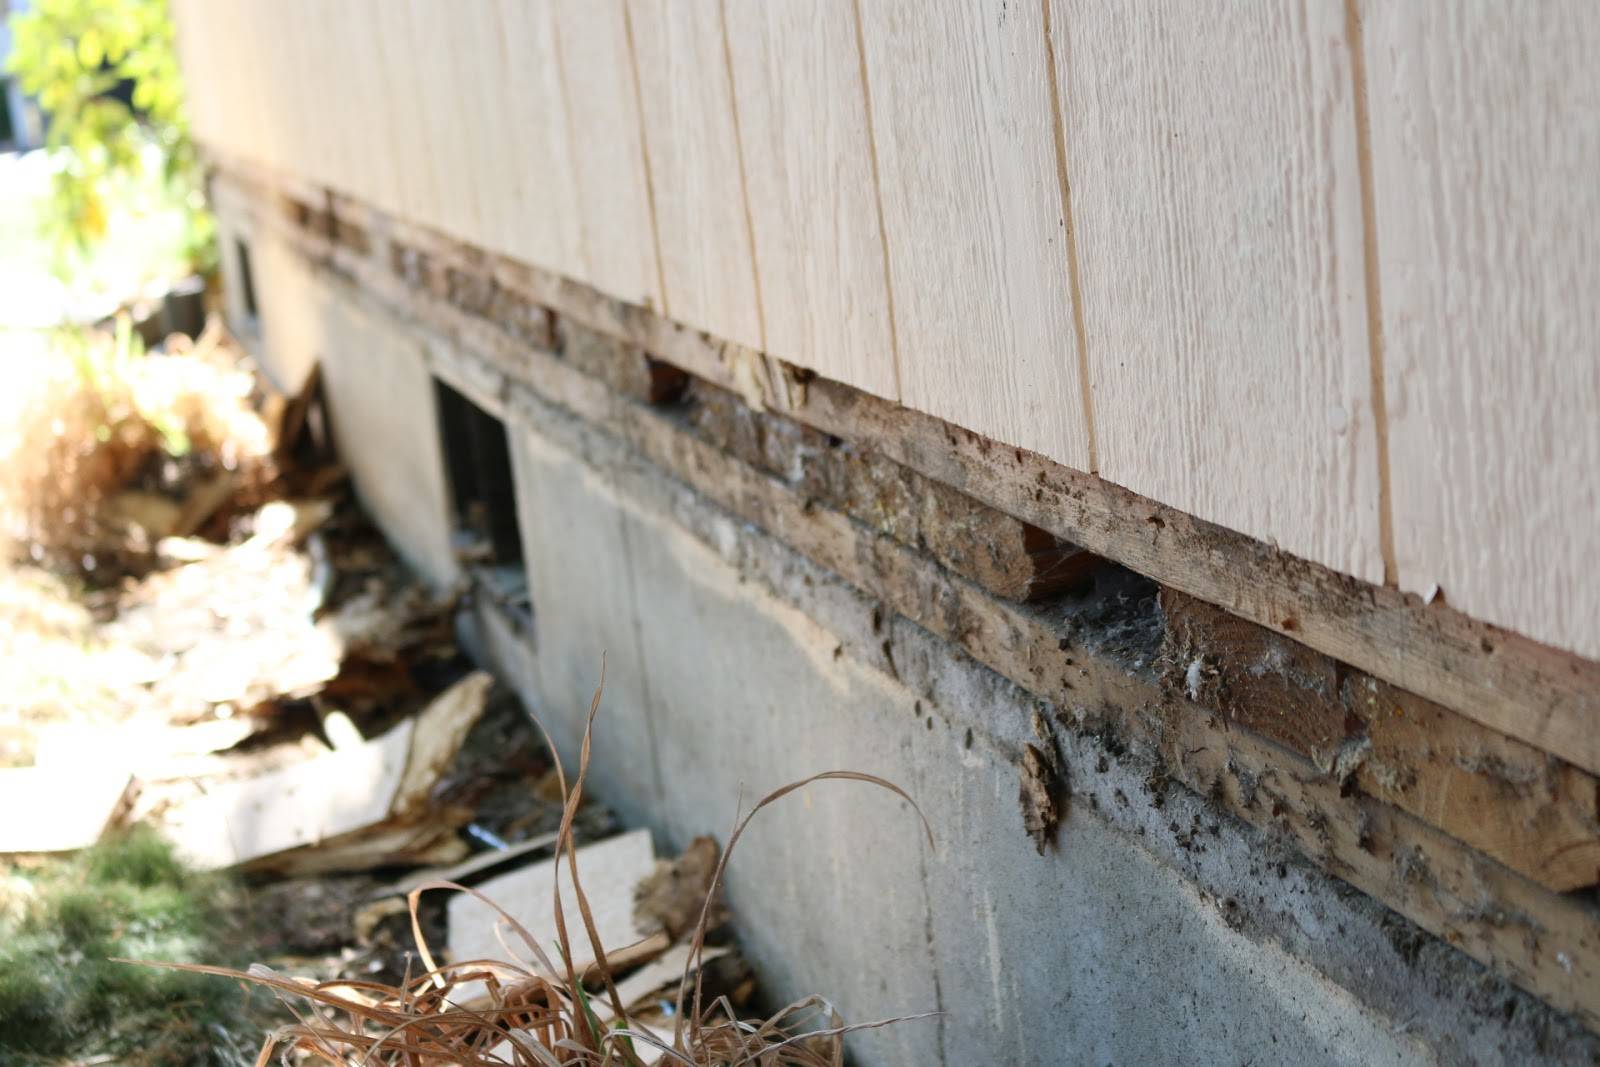
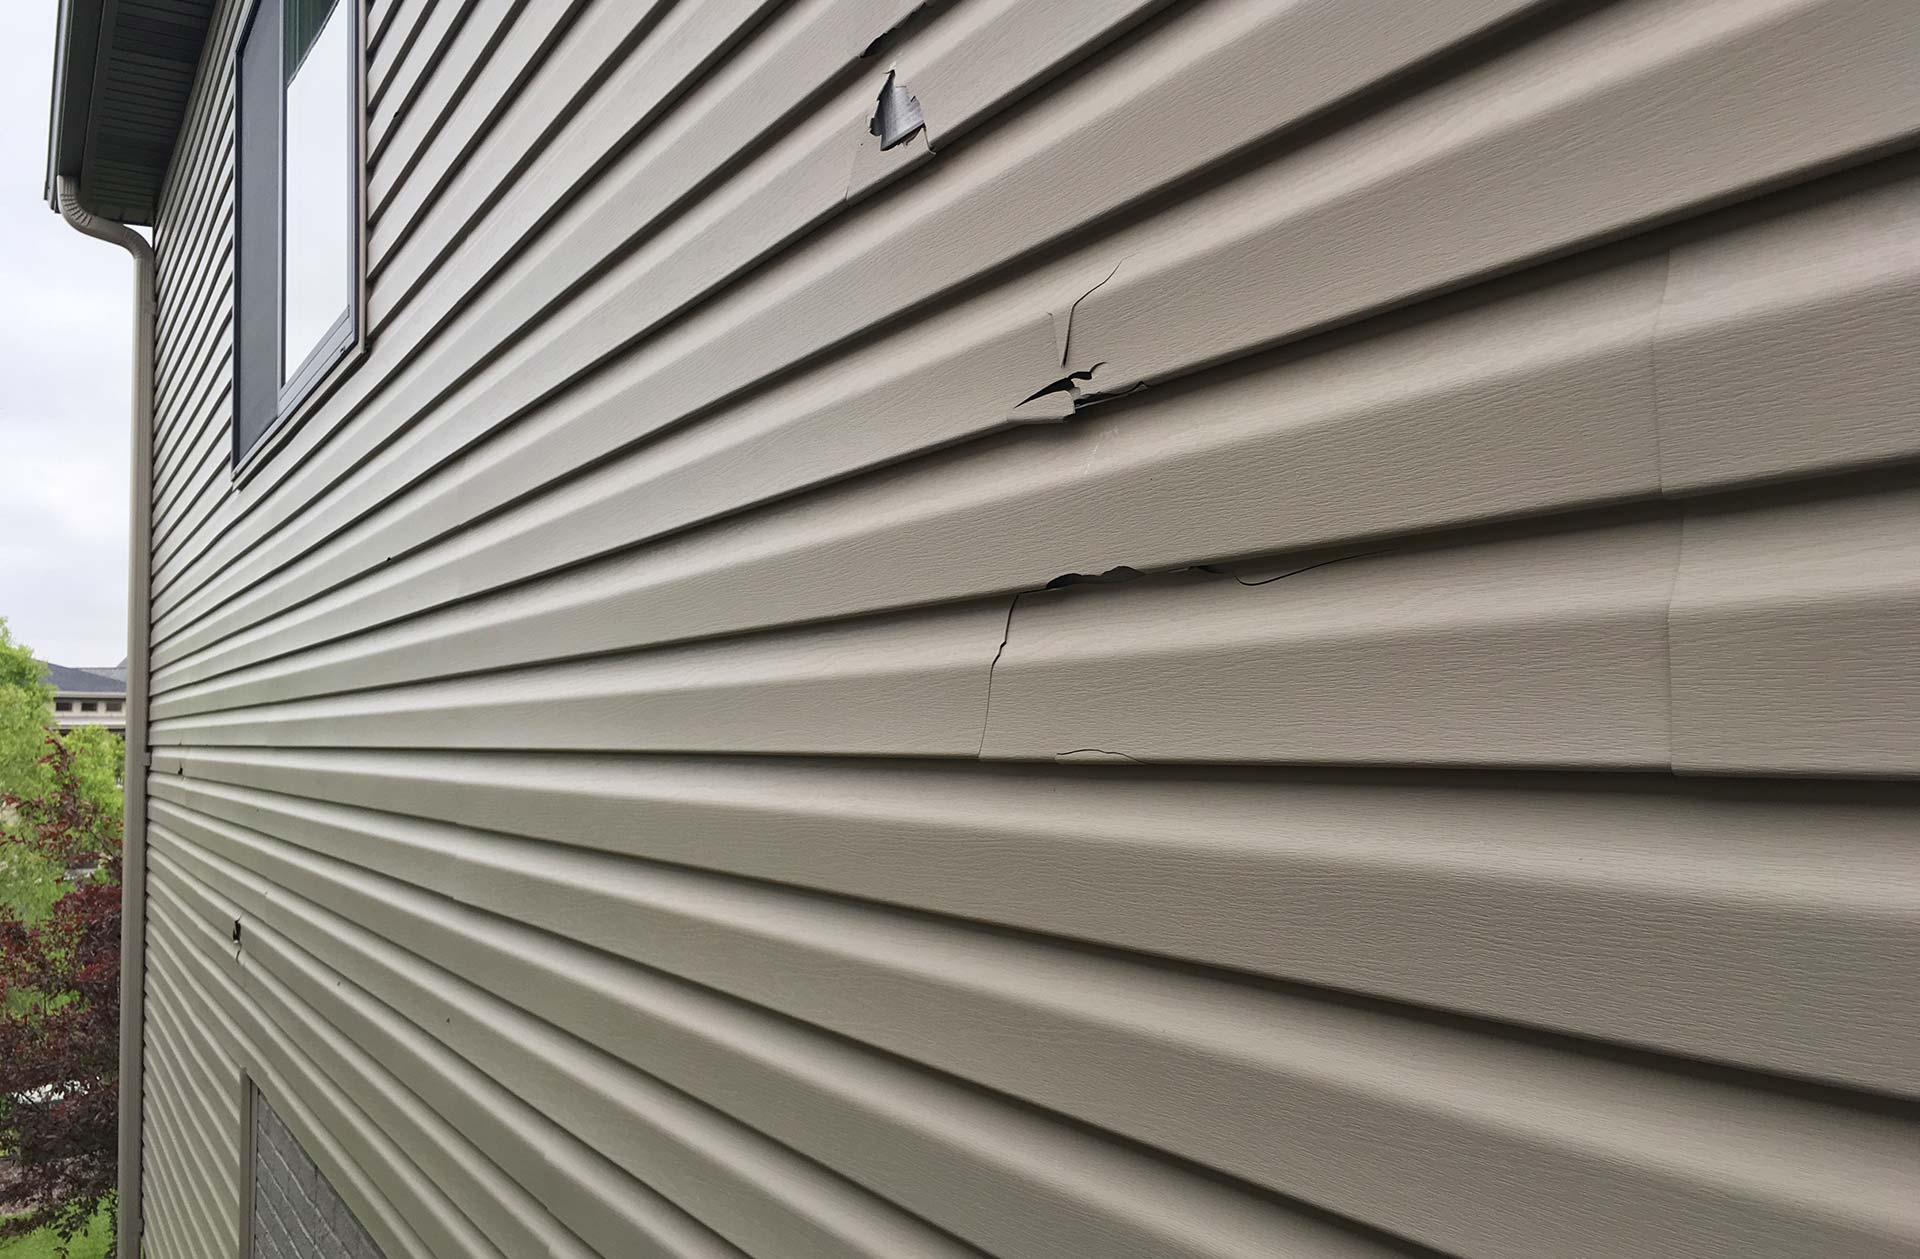
The first step in replacing rotted wood siding is to thoroughly assess the extent of the damage. This will help you determine the scope of the project and make necessary preparations.
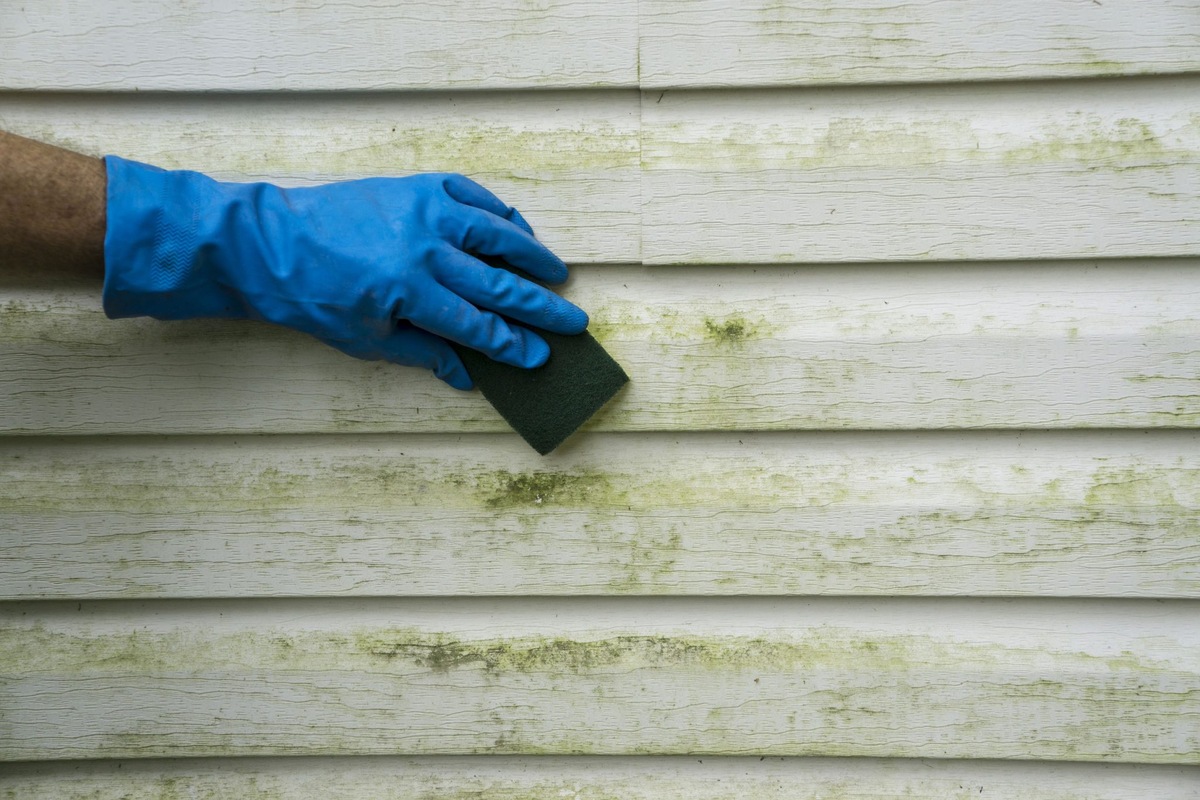
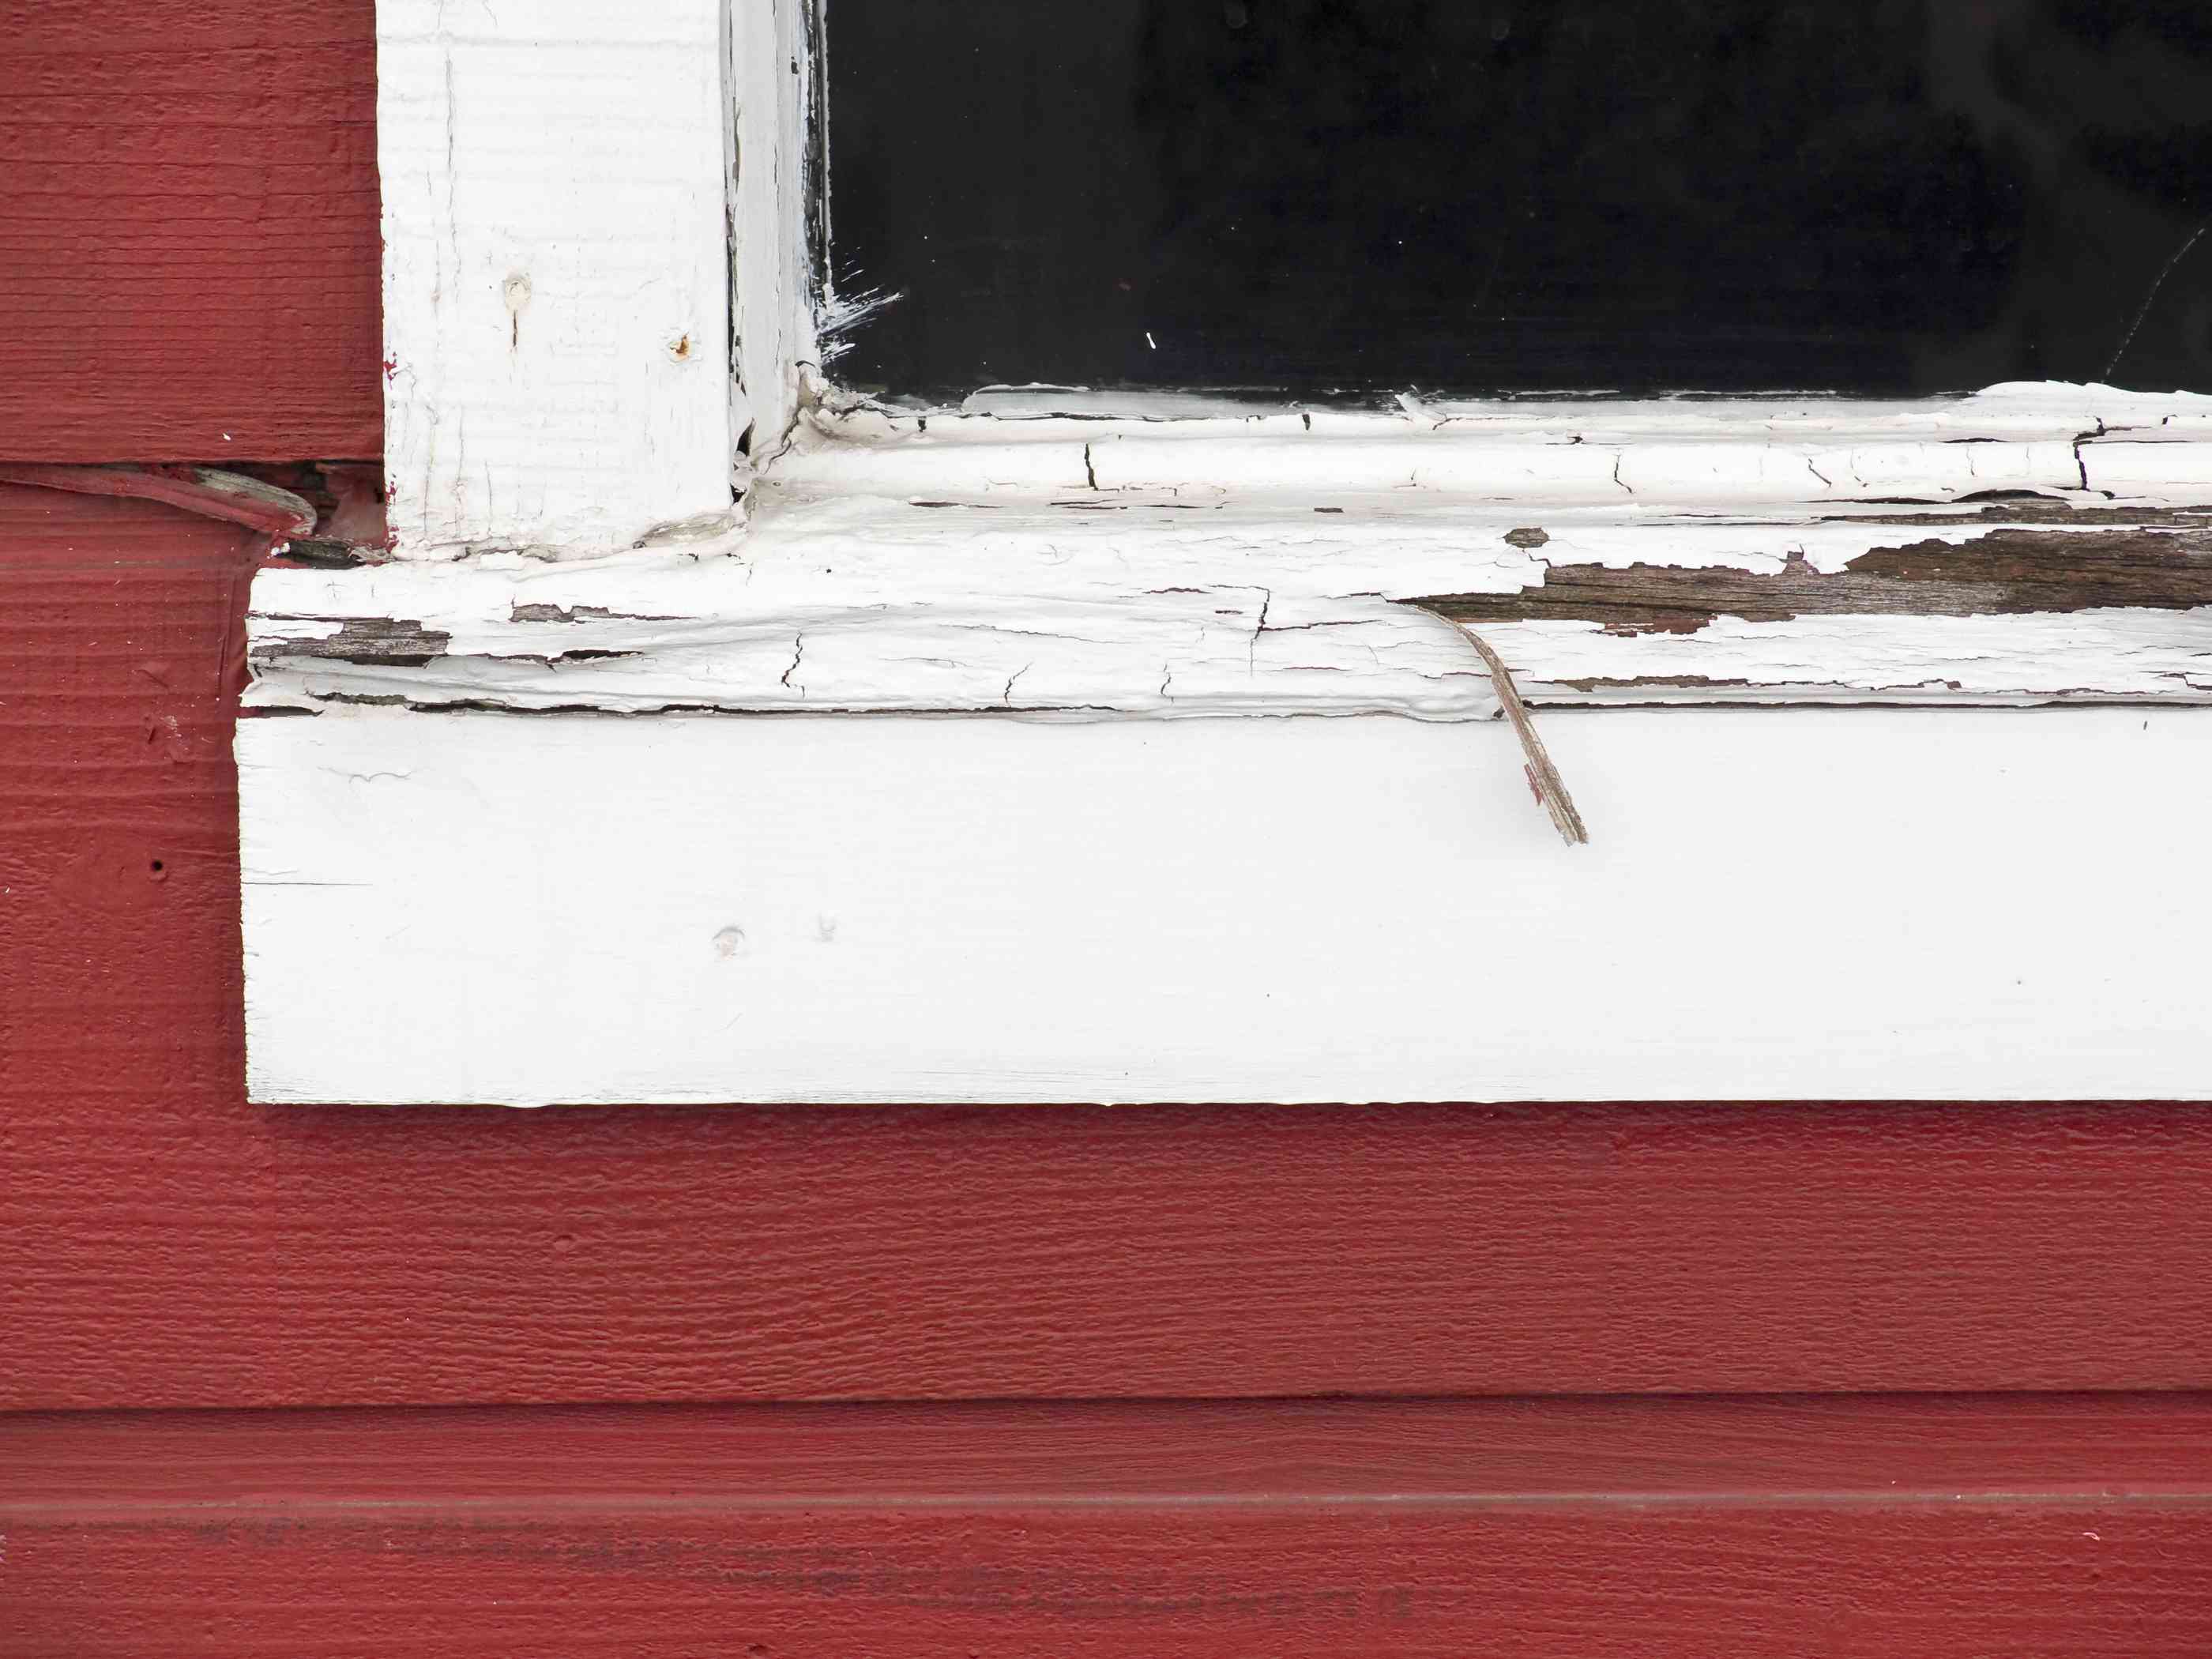
Begin by examining the exterior of your home, paying close attention to the siding. Look for signs of rot, such as discoloration, soft spots, or areas that are crumbling or falling apart. Use a screwdriver to gently probe the wood, as this can reveal hidden decay.
Next, identify the source of the rot. Common causes include improper installation, water seepage, termite or insect infestation, or prolonged exposure to moisture. Understanding the underlying cause will help you prevent future damage and ensure a long-lasting repair.
Take note of the size and location of the rotted areas. Are they confined to a specific section of siding, or are they spread across multiple areas? This will determine the amount of replacement siding you will need to purchase.
Lastly, determine if any underlying structural damage has occurred. Rotted wood can compromise the stability of the wall beneath the siding. Look for signs of sagging, shifting, or other structural issues. If you suspect significant damage, it’s best to consult a professional contractor for a thorough assessment.
Once you have assessed the damage and gathered all the necessary information, you can proceed to the next step: gathering the materials and tools needed for the project.
Step 2: Gather Materials and Tools
Now that you have assessed the damage and are ready to tackle the task of replacing rotted wood siding, it’s time to gather the materials and tools you’ll need for the project.
Here is a list of the items you’ll typically need:
- Replacement siding boards: Measure the dimensions of the rotted areas and purchase enough siding boards to cover them. Make sure to choose siding that matches the existing style and material of your home.
- Utility knife: This will come in handy for cutting and trimming the siding.
- Pry bar: Use a pry bar to gently remove the damaged siding from the wall.
- Hammer: A sturdy hammer will be necessary for securing the new siding in place.
- Nails: Get galvanized nails that are long enough to securely attach the siding to the wall.
- Nail punch: This tool helps you sink nails below the surface of the wood for a neat and seamless finish.
- Caulk: Choose a high-quality exterior caulk that is designed to withstand the elements and prevent water seepage.
- Paint and primer: If you plan to paint the new siding, make sure to have the appropriate paint and primer on hand.
- Safety gear: Don’t forget to prioritize your safety. Wear goggles, gloves, and a dust mask to protect yourself from debris and dust during the project.
Before you begin the repair, make sure you have all the necessary tools and materials readily available. This will save you time and frustration during the process and ensure a smoother workflow.
With your materials and tools in hand, you’re now ready to move on to the next step: removing the rotted wood siding.
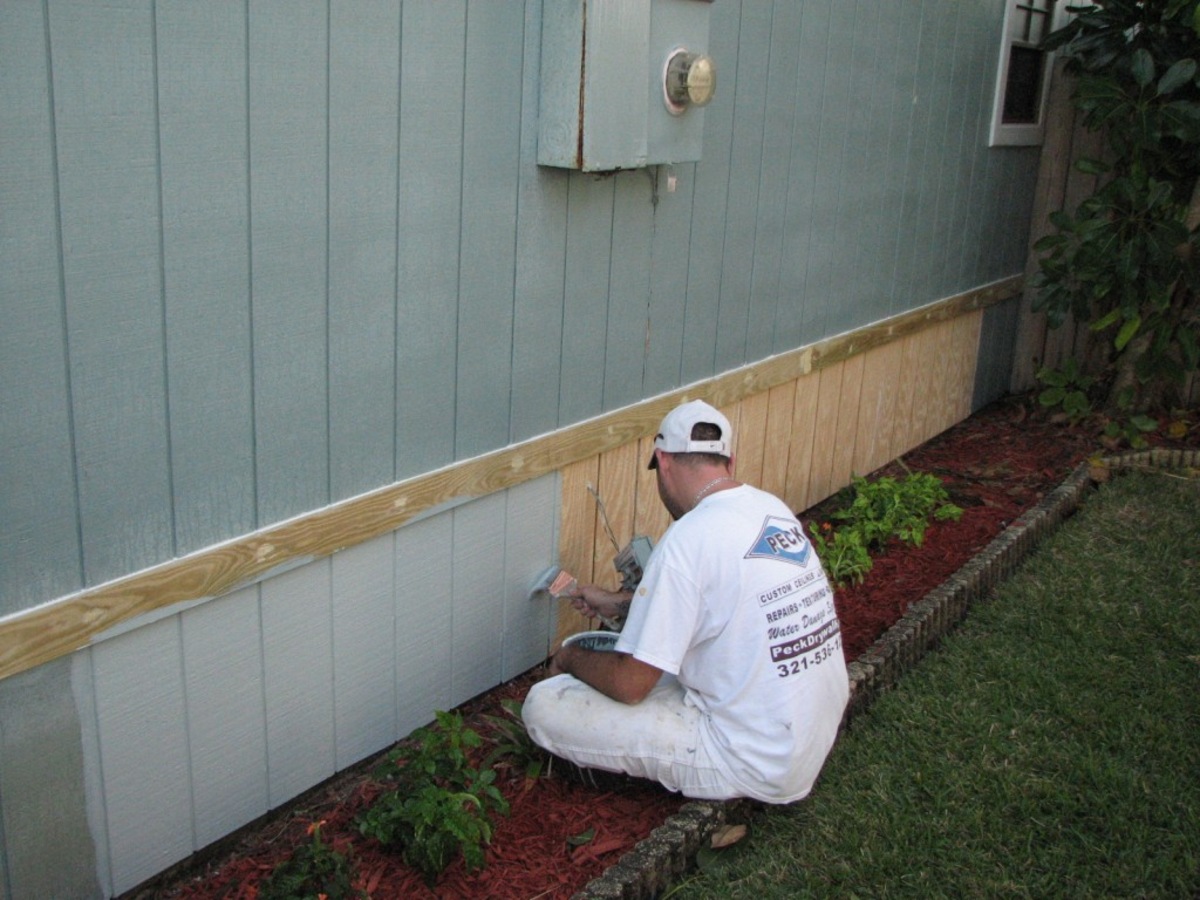
Step 3: Remove the Rotted Wood Siding
With your materials and tools gathered, it’s time to remove the rotted wood siding. This step is crucial to prepare the area for the installation of new siding.
Follow these steps to remove the rotted wood siding:
- Start at the bottom: Begin by removing the siding from the bottom up. This will prevent any water or debris from seeping in behind the remaining siding as you work.
- Use a pry bar: Gently insert a pry bar under the bottom edge of the rotted siding board. Apply pressure to loosen it from the wall.
- Carefully remove the siding: Once the siding is loosened, use your hands or the pry bar to carefully pull it away from the wall. Be cautious not to damage the surrounding siding or trim.
- Inspect the underlying wall: As you remove the rotted siding, take a close look at the wall beneath. If you notice any signs of damage or decay, it is crucial to address these issues before installing the new siding.
- Continue removing the remaining siding: Repeat the process for each rotted section, working your way up the wall until all damaged siding has been removed.
- Clean the area: Once all the rotted siding is removed, take the time to clean the exposed area. Remove any loose debris or dirt, ensuring a clean surface for the installation of the new siding.
Remember to take your time when removing the rotted wood siding to avoid unnecessary damage. Properly removing the old siding will provide a clean and stable surface for the replacement process.
With the damaged siding removed, it’s time to move on to the next step: preparing the replacement siding.
When replacing rotted wood siding, be sure to thoroughly inspect the area for any underlying damage or moisture issues before installing the new siding. This will help prevent future rot and ensure a long-lasting repair.
Step 4: Prepare the Replacement Siding
Now that you have removed the rotted wood siding, it’s time to prepare the replacement siding. Properly preparing the siding will ensure a seamless installation and a professional-looking finish.
Follow these steps to prepare the replacement siding:
- Measure and cut the siding: Measure the dimensions of the area that needs to be replaced and cut the replacement siding boards accordingly. Use a utility knife or a saw to make precise cuts.
- Prime the siding (if necessary): If you plan to paint the replacement siding, it is recommended to prime it before installation. Apply a coat of primer to all sides of the boards and allow it to dry completely.
- Apply caulk (optional): If there are any gaps or cracks in the surrounding areas, it’s a good idea to apply a bead of caulk to provide additional protection against water infiltration.
- Check for proper fit: Before moving forward, hold the replacement siding boards up to the area where they will be installed to ensure they fit properly and align with the existing siding. Make any necessary adjustments before proceeding.
By taking the time to prepare the replacement siding, you are setting yourself up for a smoother and more efficient installation process. Properly measured and cut boards, primed surfaces, and well-fitted pieces will result in a visually pleasing and long-lasting repair.
With the replacement siding prepared, you are now ready to move on to the next step: installing the new siding.
Read more: How To Replace Rotted Porch Railing
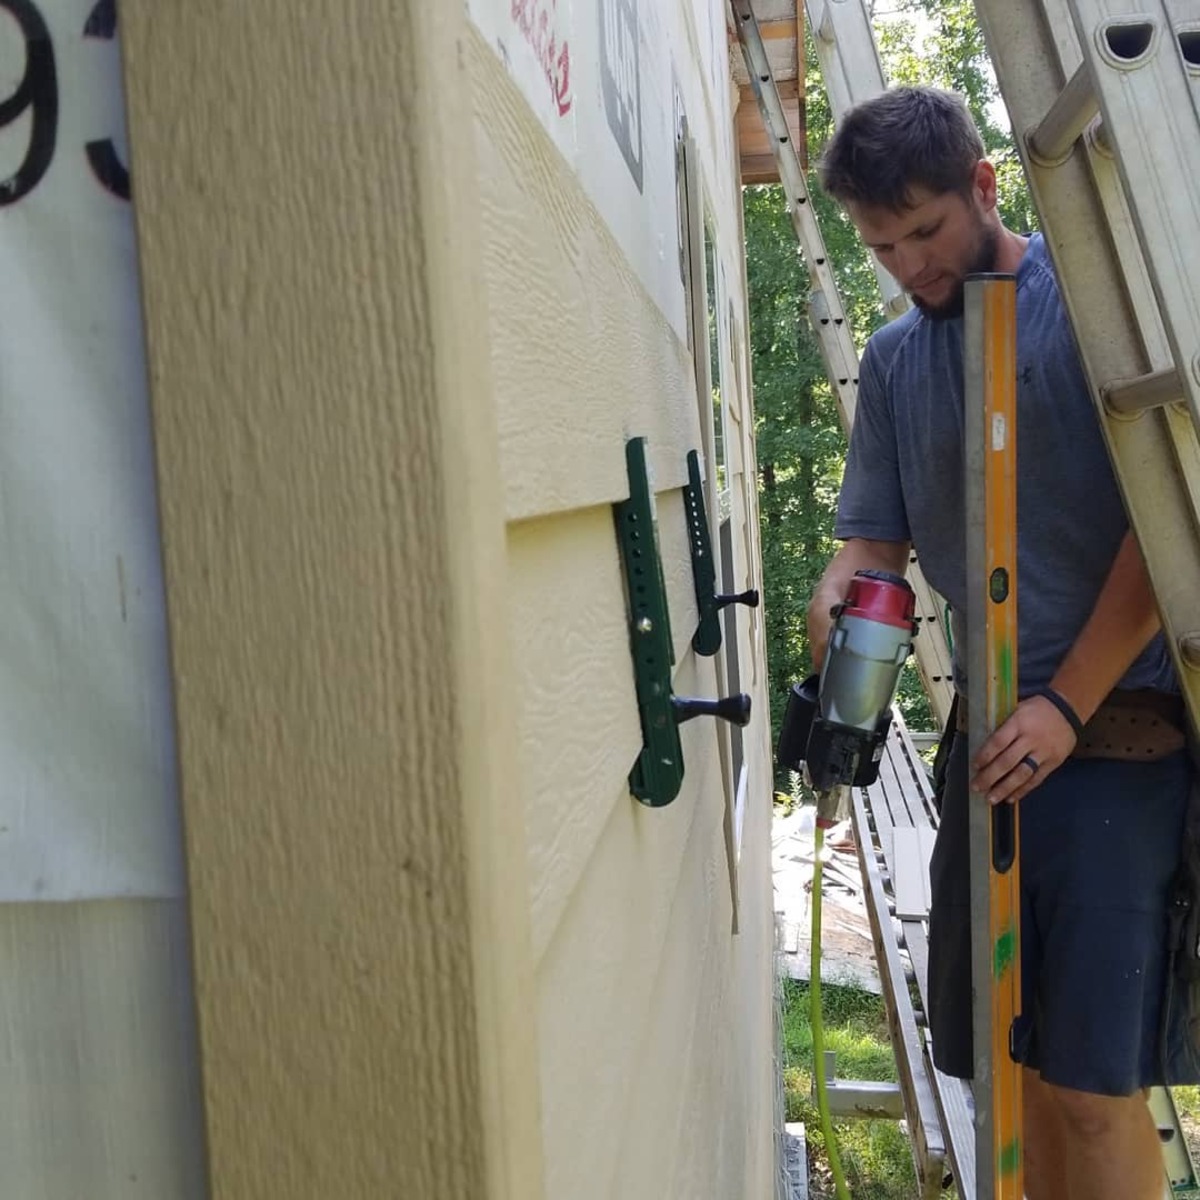
Step 5: Install the Replacement Siding
With the rotted wood siding removed and the replacement siding prepared, it’s time to move on to the installation phase. This step will bring your repair project one step closer to completion.
Follow these steps to install the replacement siding:
- Start at the bottom: Begin at the bottom of the area you are replacing, as this will ensure a proper overlap with the existing siding. Leave a small gap between the bottom edge of the new siding and the surface beneath it, allowing for proper expansion and contraction.
- Align and secure the siding: Hold the replacement siding board up against the wall, aligning it with the surrounding siding. Use galvanized nails to secure the board in place, placing the nails through the top edge of the siding. Remember to leave a small gap between each board to allow for natural movement.
- Sink the nails: Use a nail punch to gently sink the nails below the surface of the wood. This will create a smooth and flush appearance, ensuring a professional finish.
- Continue the installation: Repeat the process for each replacement siding board, working your way up the wall until all damaged areas have been covered. Take care to maintain a consistent and level installation.
- Check for proper fit and alignment: As you install each piece, periodically step back and visually inspect the work. Ensure that the new siding aligns with the existing siding and that the overall appearance is seamless.
It’s important to take your time during the installation process to ensure a precise and accurate placement of the replacement siding. A well-installed siding board will not only enhance the visual appeal of your home but also provide long-term durability and protection.
With the replacement siding now installed, you’re almost finished. The final step is to seal and paint the siding to complete the repair.
Step 6: Seal and Paint the Siding
With the replacement siding installed, it’s time to seal and paint the siding to provide added protection and a polished finish. This step will help prolong the lifespan of the siding and enhance the overall appearance of your home.
Follow these steps to seal and paint the siding:
- Inspect for gaps and cracks: Before sealing the siding, carefully inspect the area for any remaining gaps or cracks. Use a high-quality exterior caulk to seal these areas, ensuring a watertight and weather-resistant surface.
- Apply primer (if necessary): If you plan to paint the replacement siding, apply a coat of primer to ensure proper adhesion of the paint. Be sure to choose a primer suitable for the type of siding you are working with.
- Choose the paint color: Select a paint color that complements the existing siding and matches your desired aesthetic. Consider factors such as the architecture of your home, the surrounding landscape, and any homeowner association regulations.
- Apply the paint: Using a paint roller or brush, apply an even coat of paint to the replacement siding. Follow the manufacturer’s instructions regarding application and drying times. Wait for the first coat to dry before applying additional coats if necessary.
- Touch up the surrounding area: Once the replacement siding has been painted, inspect the surrounding siding for any imperfections or areas that may need touch-up painting. Be mindful of maintaining a consistent color and finish throughout.
Sealing and painting the replacement siding not only enhances the visual appeal of your home but also provides a layer of protection against the elements. The sealing and painting process seals any remaining gaps and cracks, preventing moisture from seeping behind the siding and potentially causing further damage.
Once the paint has dried, step back and admire your completed repair. You have successfully replaced the rotted wood siding, restoring the beauty and integrity of your home’s exterior.
As a final note, be sure to follow the specific instructions provided by the manufacturers of the siding, caulk, primer, and paint you have chosen. This will ensure optimal results and a lasting finish.
Congratulations on completing the process of replacing rotted wood siding! Your efforts will not only improve the aesthetics of your home but also protect it for years to come.
If you have any remaining concerns or questions, it may be helpful to consult with a professional for guidance and assistance.
Thank you for following this comprehensive guide, and best of luck with your home improvement project!
Conclusion
Replacing rotted wood siding is an essential maintenance task to ensure the longevity and aesthetics of your home’s exterior. By following the steps outlined in this guide, you can successfully tackle this project and restore the beauty and integrity of your home.
Remember to start by assessing the damage, gathering the necessary materials and tools, and carefully removing the rotted wood siding. Take the time to prepare the replacement siding, ensuring proper measurements and priming if necessary.
Next, proceed with the installation of the new siding, focusing on alignment and secure attachment. Finally, seal any gaps or cracks and apply a fresh coat of paint to complete the repair and provide added protection.
Throughout the process, it is essential to prioritize safety and attention to detail. If you’re unsure or uncomfortable with any step, it’s advisable to seek professional assistance.
By following these steps, your home will regain its visual appeal, structural integrity, and protection against the elements, preventing further damage and potentially costly repairs in the future.
Thank you for utilizing this comprehensive guide on replacing rotted wood siding. We hope it has provided you with valuable insights and guidance for your home improvement project. Good luck, and enjoy your renewed and beautiful home exterior!
Frequently Asked Questions about How To Replace Rotted Wood Siding
Was this page helpful?
At Storables.com, we guarantee accurate and reliable information. Our content, validated by Expert Board Contributors, is crafted following stringent Editorial Policies. We're committed to providing you with well-researched, expert-backed insights for all your informational needs.


0 thoughts on “How To Replace Rotted Wood Siding”