Articles
How To Repair Wooden Window Blinds
Modified: January 6, 2024
Learn the best techniques and tips for repairing wooden window blinds with our informative articles. Whether it's fixing slats or replacing cords, we've got you covered!
(Many of the links in this article redirect to a specific reviewed product. Your purchase of these products through affiliate links helps to generate commission for Storables.com, at no extra cost. Learn more)
Introduction
Welcome to our comprehensive guide on how to repair wooden window blinds. Wooden blinds are not only functional but also add a touch of elegance to any room. However, over time, they can become damaged or worn out, requiring repair to restore their beauty and functionality.
In this article, we will walk you through the step-by-step process of assessing the damage, gathering the necessary materials, and performing various repairs on your wooden window blinds. Whether you have broken slats, worn-out cords, bent blinds, or simply want to refinish or repaint them, we have you covered.
While the thought of repairing your blinds may seem daunting at first, with the right guidance and a few simple tools, you can easily tackle most common issues and extend the lifespan of your wooden blinds. So, let’s get started and bring your blinds back to their former glory!
Key Takeaways:
- Revive your wooden window blinds by assessing damage, gathering materials, and following step-by-step repair processes. Restore functionality and aesthetics with ease and confidence.
- From fixing loose slats to refinishing, this guide equips you with the knowledge to repair and rejuvenate your wooden window blinds. Enjoy the satisfaction of restoring your blinds to their former glory.
Assessing the Damage
Before diving into the repair process, it’s crucial to assess the extent of the damage to your wooden window blinds. Take a close look at the blinds and identify any visible issues such as broken slats, worn-out cords, bent or misaligned blinds, or chipped paint. Understanding the specific repairs needed will help you gather the right materials and plan your repairs effectively.
Start by inspecting the individual slats of the blinds. Look for any cracks, splits, or breaks in the wood. If you come across any damaged slats, it’s important to determine whether they can be repaired or if they need to be replaced entirely. In some cases, a small crack can be fixed using wood glue, while larger or multiple breaks may require a full replacement.
Next, check the cords or strings that control the movement of the blinds. Over time, these cords can become frayed or worn out, making it difficult to open or close the blinds. Examine the cords for any signs of damage or weakness, and note if they need to be replaced.
Another common issue with wooden window blinds is bent or misaligned slats. This can happen due to accidental bumps or prolonged exposure to humidity. Take a close look at the alignment of the slats and check for any noticeable bending or misalignment. If the slats are not parallel or if they are sitting at odd angles, they will need to be fixed to ensure smooth operation.
Lastly, consider the overall condition of the blinds. Are they in need of refinishing or repainting? Look for any signs of chipped or faded paint and assess whether a touch-up or complete refinishing is necessary to restore their appearance.
By thoroughly assessing the damage to your wooden window blinds, you’ll have a clear idea of what repairs are required and can proceed to gather the necessary materials for the job.
Gathering the Materials
Once you have assessed the damage to your wooden window blinds, it’s time to gather the materials needed for the repair process. Having the right tools and supplies at hand will make the repair process smoother and more efficient. Here’s a list of the essential materials you may need:
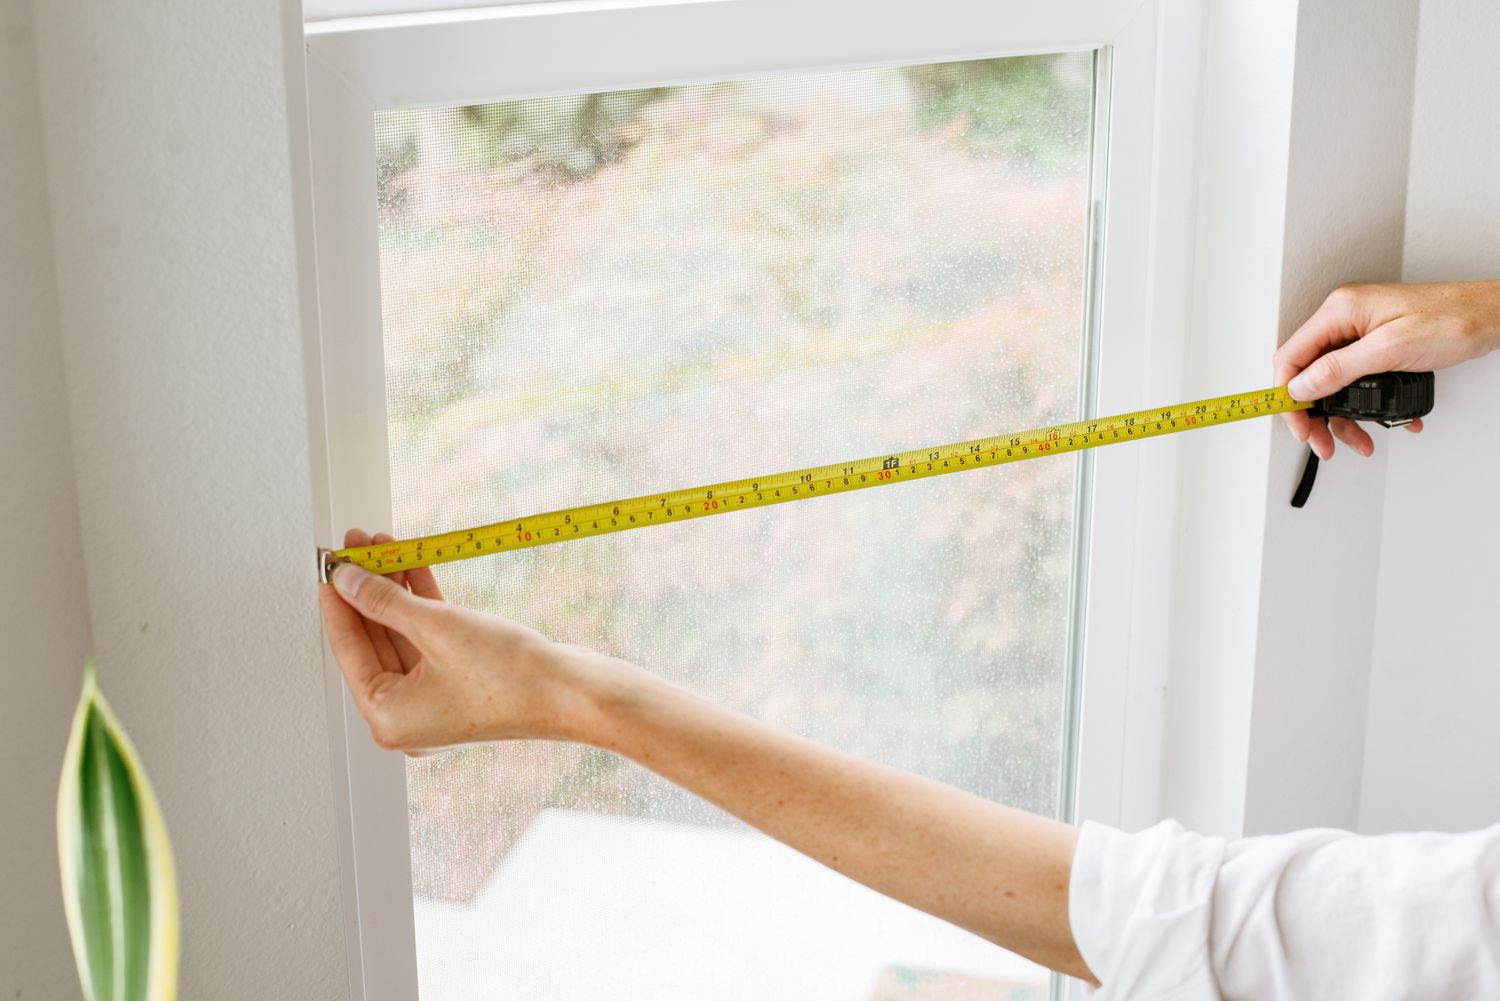
- Replacement slats: If you have broken or severely damaged slats, you may need to purchase replacement slats that match the existing ones. Measure the length and width of the existing slats to ensure you get the correct size.
- Wood glue: This adhesive is useful for repairing minor cracks or splits in the wooden slats. Make sure to choose a high-quality wood glue that dries clear and is suitable for your specific type of wood.
- Cord or string: If the cords or strings controlling the blinds’ movement are frayed or worn out, you’ll need to replace them. Measure the length of the existing cords and purchase replacements that match the color and thickness.
- Screwdriver: Depending on the type of blinds, you may need a screwdriver to remove any screws or brackets holding the blinds in place. Check the style of your blinds and ensure you have the appropriate screwdriver on hand.
- Paint or stain: If you plan to refinish or repaint the blinds, gather the necessary paint or stain in the desired color. Consider using a paintbrush or foam brush for application.
- Sanding materials: Sandpaper or a sanding block will be helpful if you need to smooth out any rough edges, remove old paint or stain, or prepare the surface for refinishing.
- Protective equipment: Depending on the repairs you’ll be undertaking, it may be necessary to wear gloves, safety goggles, or a dust mask to protect yourself from any potential hazards.
Additionally, have a clean and well-lit workspace to ensure you can perform the repairs effectively. Clear any obstacles from around the blinds to provide ample room to work. Having all the necessary materials gathered and ready will make the repair process more efficient, allowing you to restore your wooden window blinds with ease.
Removing the Blinds from the Window
Before you can begin repairing your wooden window blinds, you’ll need to remove them from the window. This step is important to ensure easy access and prevent any damage to the blinds or surrounding areas during the repair process. Follow these steps to safely remove the blinds:
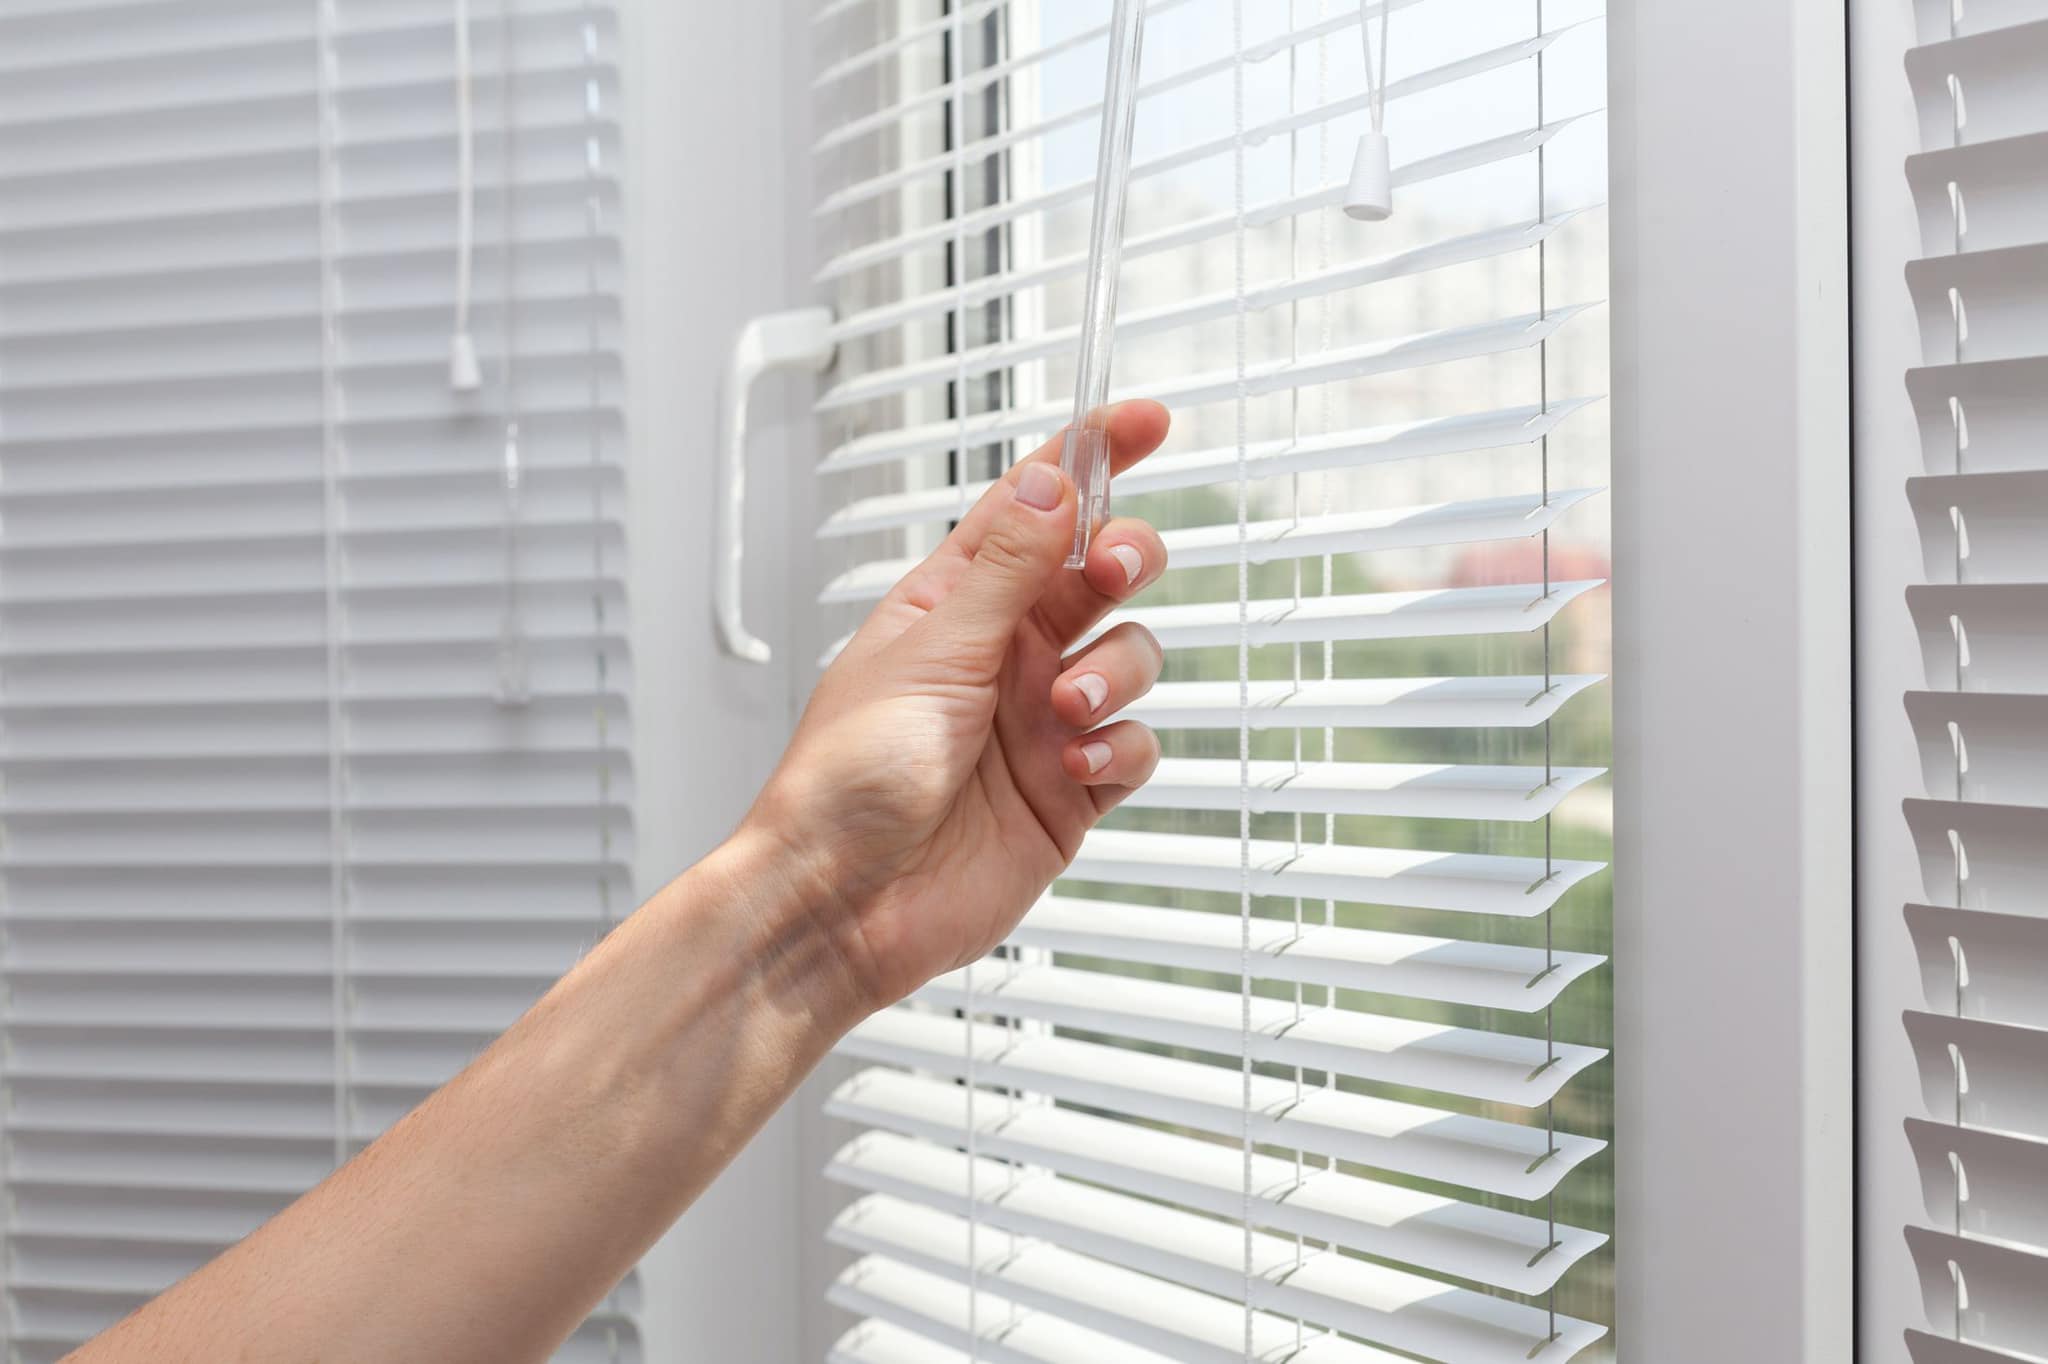
- Open the blinds: Use the control cord or wand to fully open the blinds, allowing maximum access to the window and blinds.
- Secure the blinds: If your blinds have a cord lock mechanism, engage it to keep the blinds in an open position and prevent them from falling or closing unexpectedly while you work.
- Determine the mounting type: Wooden blinds can be mounted inside or outside the window frame. Based on the mounting type, you’ll need to identify the appropriate removal method.
- Inside mount: If the blinds are mounted inside the window frame, locate the mounting brackets on the top corners of the frame. Most brackets will have a latch or release mechanism that allows you to disengage them. Use a screwdriver to loosen the screws or open the latches and carefully remove the blinds from the brackets.
- Outside mount: For blinds mounted outside the window frame, locate the mounting brackets on either side of the frame. Again, use a screwdriver to remove any screws securing the brackets in place, and gently slide the blinds out of the brackets.
- Label or note the sequence: To make the reinstallation process easier, you can label or note the sequence of the blinds before removing them. This will help you remember the correct order when reinstalling them.
- Store the blinds safely: Once you have removed the blinds, place them in a safe and clean area where they won’t get damaged. Avoid stacking heavy objects on top of them to prevent warping or bending.
By carefully removing the blinds from the window, you’ll be able to work on them more comfortably and effectively. Remember to handle the blinds with care to avoid any accidental damage. With the blinds safely removed, you can move on to the next steps of the repair process.
Repairing Loose or Broken Slats
Loose or broken slats can greatly impact the functionality and aesthetics of your wooden window blinds. Fortunately, repairing them is a relatively simple process. Here’s how you can fix loose or broken slats:
- Remove the damaged slat: If you have a broken slat, carefully remove it from the blind assembly. This may involve unthreading cords or removing any clips or fasteners that hold the slat in place. Set the damaged slat aside.
- Assess the damage: Evaluate whether the slat can be repaired or if it needs to be replaced entirely. Minor cracks or splits can often be fixed using wood glue, while larger or multiple breaks may necessitate a replacement.
- Repair minor cracks: If the slat has a small crack or split, apply a small amount of wood glue along the damaged area. Use your fingers or a small brush to spread the glue evenly and press the crack together. Wipe away any excess glue with a damp cloth. Allow the glue to dry as per the manufacturer’s instructions.
- Replace the slat: If the slat is beyond repair or if you prefer to replace it, measure the length and width of the existing slats. Purchase a replacement slat that matches the size and color of the original. Insert the replacement slat into the blind assembly, making sure it aligns properly with the other slats.
- Reattach cords or fasteners: If you had to remove cords or fasteners to access the damaged slat, rethread or reattach them to secure the replacement slat in place. Ensure that the cords are properly aligned to ensure smooth opening and closing of the blinds.
- Test the repair: Once the repair is complete, test the blinds by opening and closing them to ensure that the repaired or replaced slat functions properly and is in line with the other slats.
- Repeat if necessary: If you have multiple loose or broken slats, follow the same repair process for each one until all the damaged slats are fixed.
By repairing loose or broken slats, you can restore the structural integrity and appearance of your wooden window blinds. Take your time and follow the steps carefully to ensure a successful repair. With the slats now in good shape, you’re ready to move on to the next repair task.
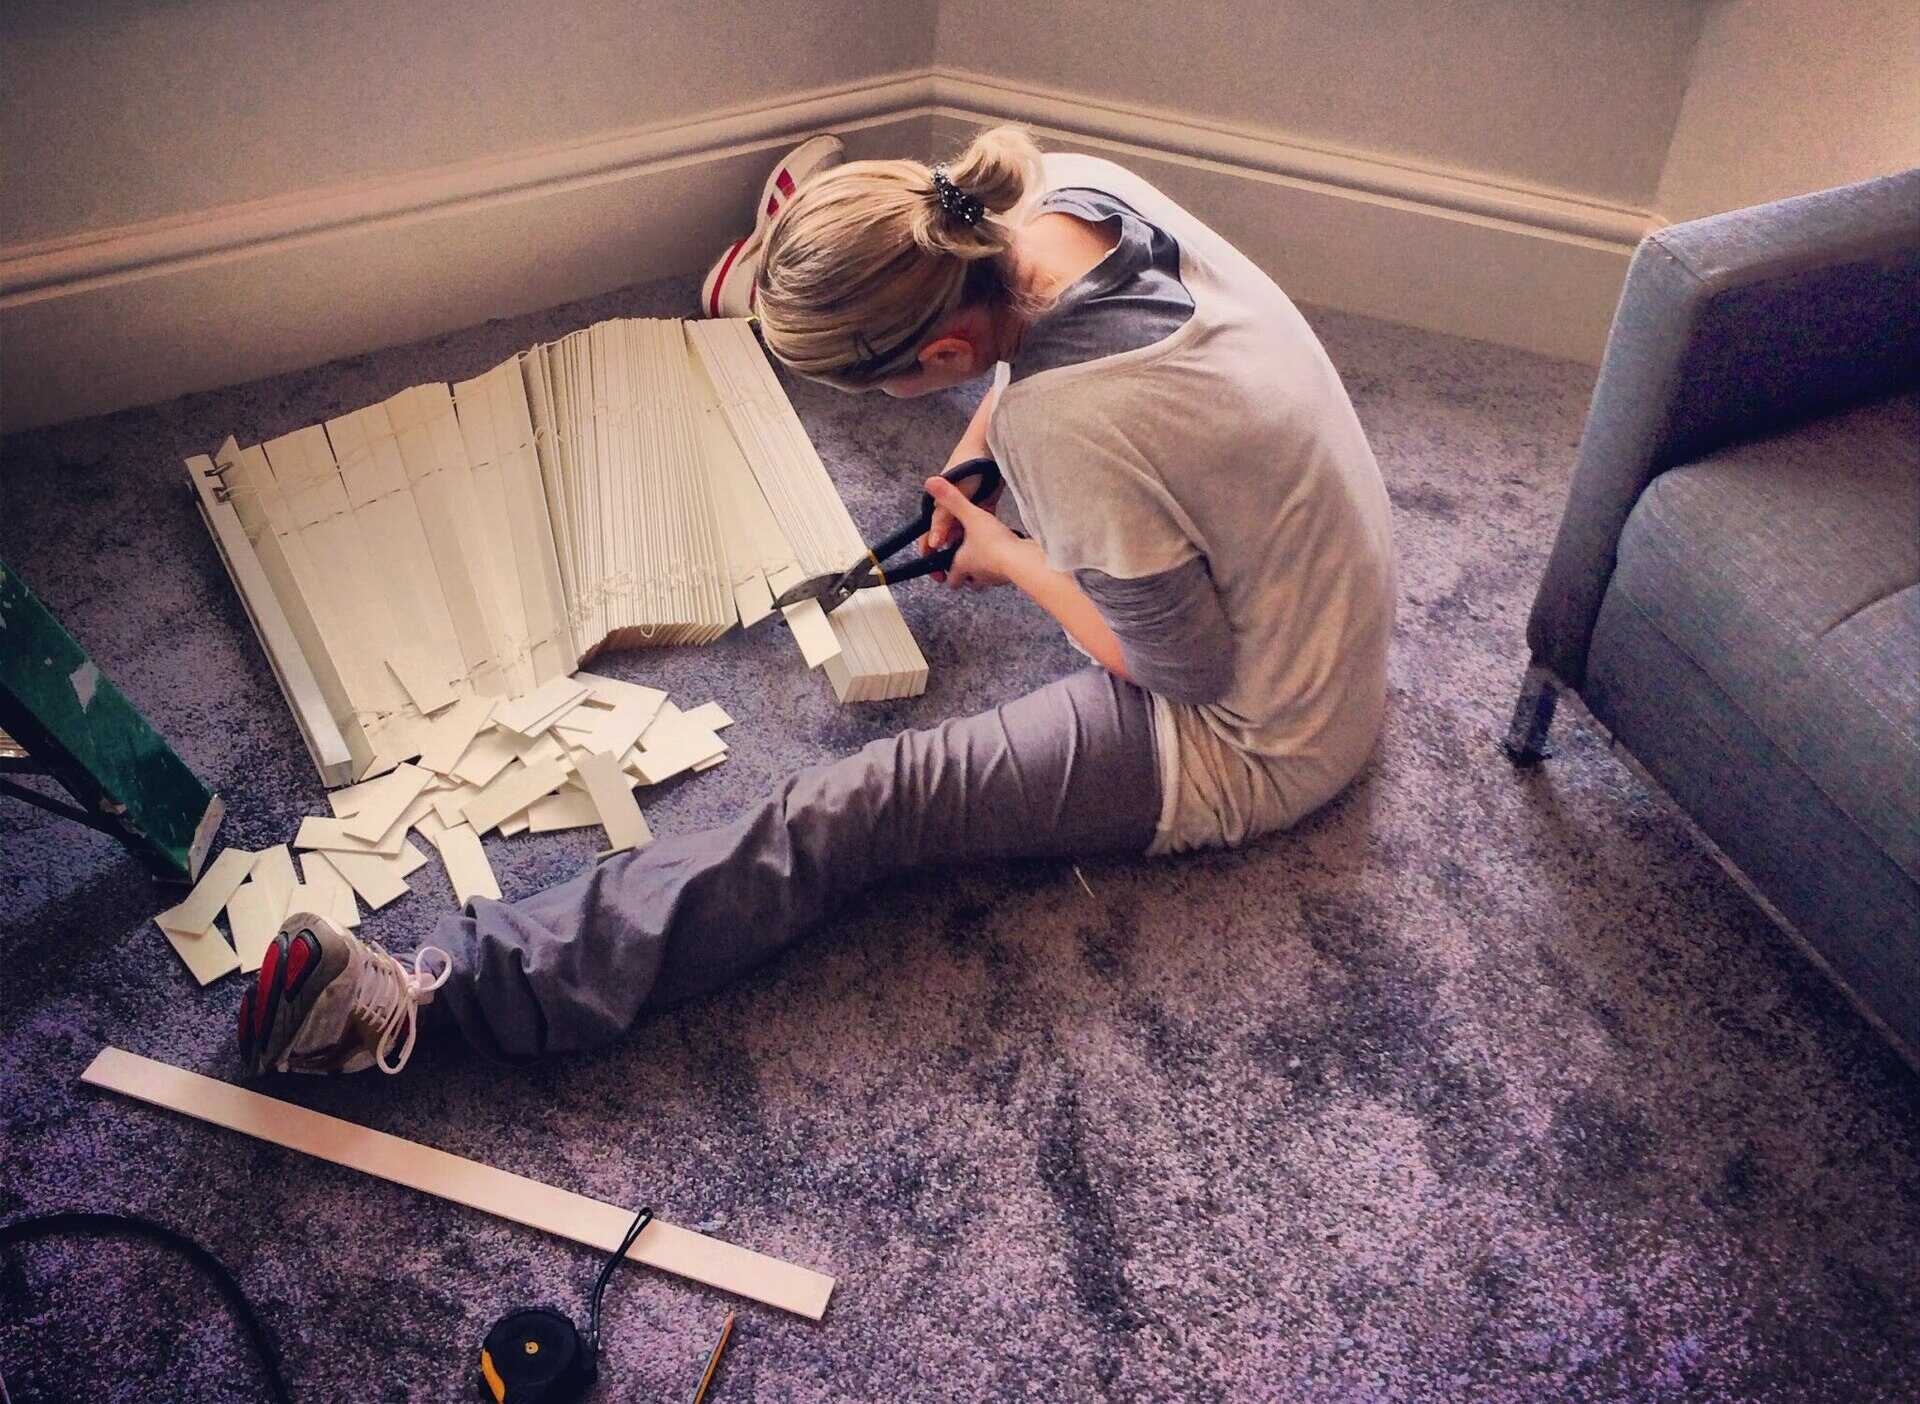
To repair wooden window blinds, start by removing any damaged slats and replacing them with new ones. Use a small screwdriver to remove the old slats and then insert the new ones by sliding them into place.
Read also: 14 Superior Wooden Window Blinds for 2024
Replacing Worn Out or Damaged Cords
Over time, the cords or strings that control the movement of your wooden window blinds can become worn out or damaged. If you’re experiencing difficulty in opening or closing the blinds smoothly, it may be necessary to replace the cords. Follow these steps to replace worn out or damaged cords:
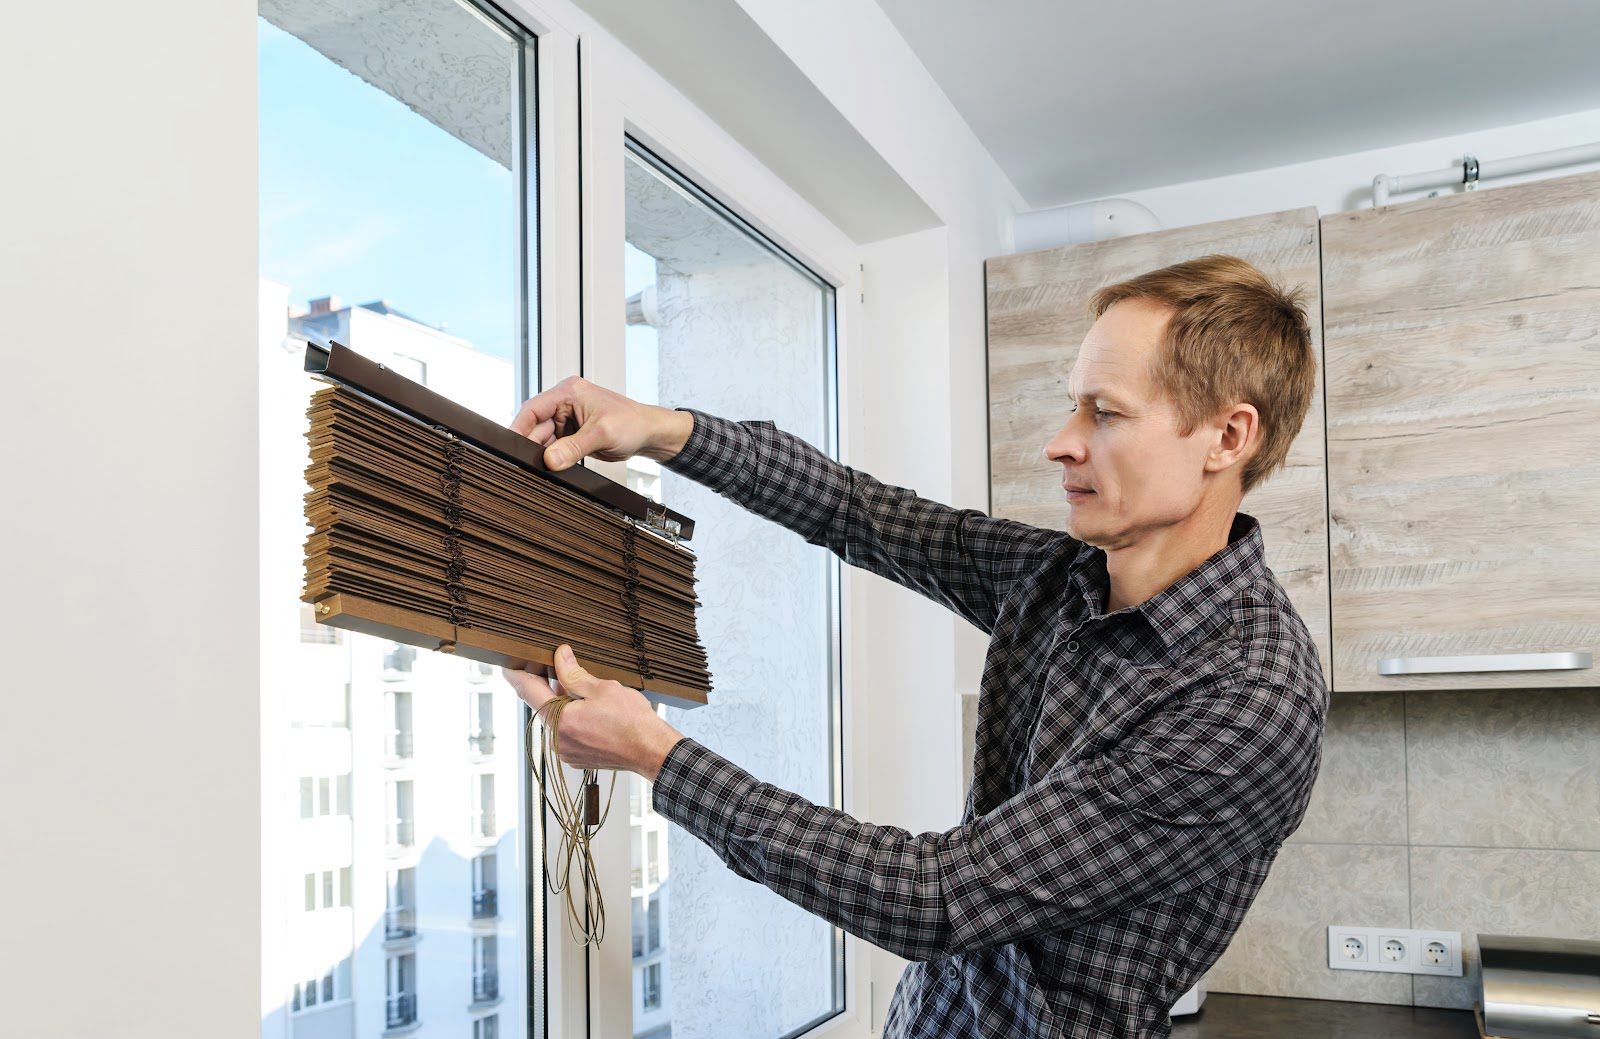
- Remove the blinds: Before replacing the cords, it’s important to remove the blinds from the window following the steps outlined earlier. This will provide easier access to the cord mechanisms.
- Identify the cord mechanism: Take a close look at the mechanism that controls the cords. This could be a cord lock, a cord drum, or a wand control system.
- Remove the old cords: Carefully detach the old cords from the cord mechanism. Depending on the type of mechanism, you may need to untie knots, unthread the cords, or release any attachments holding them in place.
- Measure and cut the new cords: Use the old cords as a guide to measure and cut the new cords to the appropriate length. It’s better to have the new cords slightly longer than necessary, as you can always trim them later.
- Thread the new cords: Start threading the new cords through the appropriate holes or mechanisms, following the same path as the old cords. Take care to ensure the cords are properly aligned, as this will affect the smooth operation of the blinds.
- Tie knots or attach new cord ends: Once the cords are threaded, tie secure knots at the ends or attach new cord ends provided with the replacement cords. This will prevent the cords from slipping back through the mechanisms.
- Test the cords: With the new cords in place, carefully test the blinds by opening and closing them to ensure the cords are properly functioning. Make any necessary adjustments to the cord length or alignment.
- Reinstall the blinds: Once you’re satisfied with the cord replacement, reattach the blinds to the window following the steps outlined earlier.
By replacing worn out or damaged cords, you can ensure smooth operation and longevity of your wooden window blinds. Taking the time to install new cords correctly will save you from future inconvenience and frustration when adjusting your blinds.
Fixing Bent or Misaligned Blinds
Bent or misaligned blinds not only affect the appearance of your wooden window blinds but can also hinder their functionality. Fortunately, you can easily fix this issue and restore the proper alignment of the blinds. Here’s how:
- Open the blinds: Fully open the blinds to provide maximum access to the slats.
- Identify the misaligned slats: Take a closer look at the blinds and identify the slats that are bent or misaligned. This will help you focus your efforts on the specific areas that need adjustment.
- Apply gentle pressure: For slats that are slightly misaligned, apply gentle pressure with your hands to straighten them. Start from the bottom of the blinds and work your way up, carefully nudging the slats into the correct position.
- Use a hairdryer: For more stubborn or severely bent slats, you can use a hairdryer to apply heat to the affected area. Set the hairdryer to a medium setting and hold it a few inches away from the slats. Move the hairdryer back and forth to evenly distribute the heat. As the slats warm up, use your hands to gently straighten them.
- Place weights: If the slats are not holding their shape, you can place small weights or heavy objects on the bent slats. This will help them regain their original position over time.
- Adjust the ladder strings: The ladder strings on the blinds are responsible for keeping the slats properly aligned. If the slats are misaligned due to loose or sagging ladder strings, you’ll need to tighten them. Locate the ladder strings on both sides of the blinds and adjust the tension by pulling them tighter. This will bring the slats into a more aligned position.
- Test the blinds: After making the necessary adjustments, test the blinds by opening and closing them to ensure the slats are properly aligned and the blinds operate smoothly.
By following these steps, you can fix bent or misaligned slats in your wooden window blinds, restoring their appearance and functionality. Take care when applying pressure or using heat, as excessive force or heat can damage the blinds. If you’re unsure or the problem persists, consult a professional for further assistance.
Refinishing or Repainting the Blinds
If your wooden window blinds have chipped paint, faded stain, or you simply want to change their look, refinishing or repainting them can give them a fresh and updated appearance. Here’s how you can refinish or repaint your wooden blinds:
- Remove the blinds: To work on the blinds more comfortably, remove them from the window following the steps we discussed earlier.
- Clean the blinds: Before refinishing or repainting, it’s essential to clean the blinds thoroughly. Use a microfiber cloth or a gentle cleaner to remove any dust, dirt, or grime from the surface. Let the blinds dry completely before proceeding.
- Choose your refinishing or repainting method: Decide whether you want to refinish the blinds by stripping off the old finish or paint, or if you prefer to directly repaint over the existing finish. Refinishing will provide a more natural-looking result, while repainting allows for more customization.
- Refinishing: If you choose to refinish the blinds, you’ll need to strip the existing finish off the wood. Follow the instructions on a quality wood stripper and use a brush or cloth to apply the stripper evenly on the blinds. Allow it to sit for the recommended time, then use a scraper or fine-grit sandpaper to remove the old finish. Clean off any residue and let the blinds dry completely before applying the new finish or stain.
- Repainting: If you decide to repaint the blinds, start by lightly sanding the surface to create a smooth and even base. Wipe away any dust with a damp cloth. Apply a primer to help the paint adhere better to the wood. Once the primer is dry, use a brush or a foam roller to apply your chosen paint color evenly. Allow the paint to dry between coats, and apply as many coats as needed for the desired finish.
- Apply a protective finish: To protect the newly refinished or repainted blinds, apply a clear topcoat or sealant. Choose a finish that is compatible with your chosen paint or stain. Apply the topcoat according to the manufacturer’s instructions, ensuring a smooth and even application. Let the topcoat dry completely before handling or reinstalling the blinds.
- Reinstall the blinds: Once the finish is dry and the blinds are fully cured, reinstall them back into the window following the steps we discussed earlier.
Refinishing or repainting your wooden window blinds can give them a new lease on life and transform the look of your space. Take your time during the process to achieve a professional and lasting finish. With the blinds back in place, you can enjoy the refreshed and rejuvenated appearance they bring to your windows.
Reinstalling the Blinds
With your wooden window blinds repaired, refinished, or repainted, it’s time to reinstall them back onto your window. Properly reinstalling the blinds will ensure they fit snugly and operate smoothly. Follow these steps to reinstall your blinds:
- Prepare the window: Before reinstalling the blinds, clean the window frame and remove any dust or debris that may interfere with the installation.
- Inside mount: If your blinds are mounted inside the window frame, align the brackets at the top corners of the frame. Hold the brackets firmly in place and insert the blinds into the brackets. Check that the blinds are level and centered within the window frame.
- Outside mount: For blinds mounted outside the window frame, position the brackets on the wall or window frame where you want the blinds to be installed. Use a level to ensure they are straight and mark the screw holes. Secure the brackets in place, making sure they are aligned properly.
- Attach the blinds to the brackets: With the brackets in place, attach the blinds by sliding them into the brackets or following the manufacturer’s instructions for your specific blind style. Ensure the blinds are securely held in place by the brackets.
- Test the blinds: Open and close the blinds to ensure they operate smoothly and are properly aligned. Adjust the blinds if necessary to ensure they hang evenly and move without obstruction.
- Check for any touch-ups: Inspect the blinds and the surrounding area for any marks, smudges, or paint chips that may have occurred during the installation process. Touch up the paint or finish as needed to restore a seamless and finished appearance.
By following these steps, you can reinstall your wooden window blinds with ease and confidence. Take your time to ensure the blinds are properly aligned and securely attached to the brackets. Once the blinds are back in place, step back and admire the refreshed and functional addition they bring to your windows.
Read more: How To Install Wooden Blinds
Conclusion
Repairing your wooden window blinds can help restore their functionality and enhance the aesthetics of your living space. Whether you’re dealing with loose slats, worn-out cords, bent blinds, or simply want to refinish or repaint them, this comprehensive guide has equipped you with the knowledge and steps to tackle these repairs effectively.
Assessing the damage is a crucial first step, allowing you to identify the specific issues that need attention. From there, gathering the necessary materials ensures you have everything you need at hand for a smooth repair process.
Removing the blinds from the window provides easy access, allowing you to work on them comfortably and without any risk of damage to the blinds or surrounding areas. Repairing loose or broken slats ensures the structural integrity of the blinds, while replacing worn-out or damaged cords guarantees smooth operation.
Fixing bent or misaligned blinds restores their appearance and ensures they operate correctly. Additionally, refinishing or repainting the blinds allows you to customize the style to match your taste and decor.
Finally, reinstalling the blinds properly ensures they fit snugly and operate smoothly once again, providing you with functional and visually appealing window coverings.
By following the step-by-step instructions outlined in this guide, you have the ability to revive your wooden window blinds and extend their lifespan. Take your time, pay attention to detail, and enjoy the satisfaction of restoring your blinds to their former glory.
Remember, if you are unsure or uncomfortable with any aspect of the repair process, it’s always a good idea to consult a professional who can offer expert guidance and assistance.
Now, armed with this knowledge, go ahead and embark on your journey to repair and rejuvenate your wooden window blinds!
Frequently Asked Questions about How To Repair Wooden Window Blinds
Was this page helpful?
At Storables.com, we guarantee accurate and reliable information. Our content, validated by Expert Board Contributors, is crafted following stringent Editorial Policies. We're committed to providing you with well-researched, expert-backed insights for all your informational needs.