Home>Articles>How To Replace Extension Spring On Garage Door
Articles
How To Replace Extension Spring On Garage Door
Modified: January 6, 2024
Learn how to replace extension springs on your garage door with this informative and step-by-step article. Discover expert tips and ensure a smooth and safe replacement process.
(Many of the links in this article redirect to a specific reviewed product. Your purchase of these products through affiliate links helps to generate commission for Storables.com, at no extra cost. Learn more)
Introduction
Replacing the extension spring on a garage door is a task that many homeowners may encounter at some point. Extension springs are an essential component of a garage door’s operation, providing the necessary tension to lift and lower the door smoothly. Over time, these springs can wear out or break, requiring replacement to ensure the safe and efficient functioning of the garage door.
In this article, we will guide you through the process of replacing the extension spring on your garage door. Whether you are a seasoned DIY enthusiast or a beginner looking to take on a new project, we will provide you with step-by-step instructions to make the process as simple and straightforward as possible.
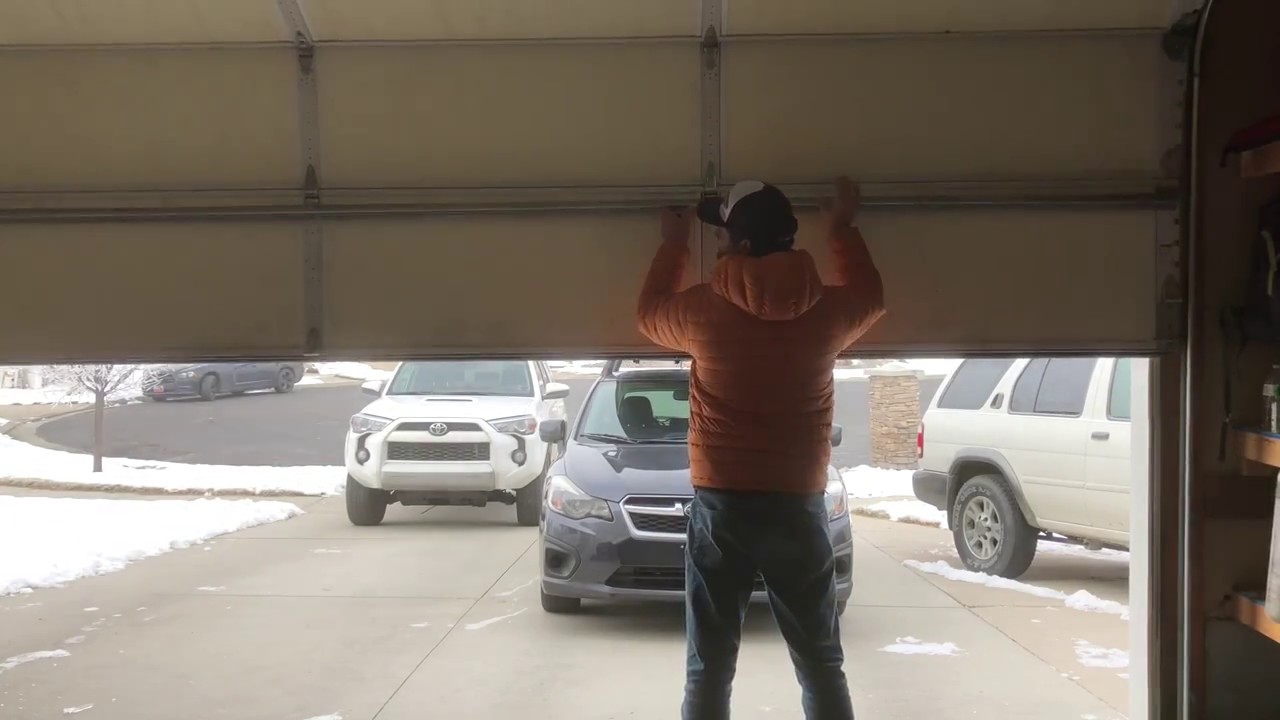
Before diving into the steps, it’s important to note that working with garage door springs can be dangerous. These springs are under high tension and can cause severe injuries if not handled correctly. If you are not comfortable or experienced with this type of maintenance, it is highly recommended to seek professional assistance. Safety should always be the top priority when dealing with any home improvement task.
Now, let’s gather the necessary tools and materials to begin the process of replacing the extension spring on your garage door.
Key Takeaways:
- Ensure safety first and gather necessary tools before replacing a garage door extension spring. Follow step-by-step instructions and test the functionality to ensure a successful and safe replacement process.
- Replacing a garage door extension spring requires caution and attention to detail. Properly release tension, install new springs, and test the door’s functionality for a smooth and safe operation.
Read more: How To Replace Garage Door Spring
Step 1: Gather Necessary Tools and Materials
Before you begin replacing the extension spring on your garage door, it’s essential to gather all the necessary tools and materials. Having everything prepared in advance will make the process smoother and prevent any unnecessary interruptions. Here’s a list of items you’ll need:
- Protective Gear – Safety should always be a priority when working with garage door springs. Make sure to wear safety glasses, gloves, and appropriate clothing to protect yourself from any potential injuries.
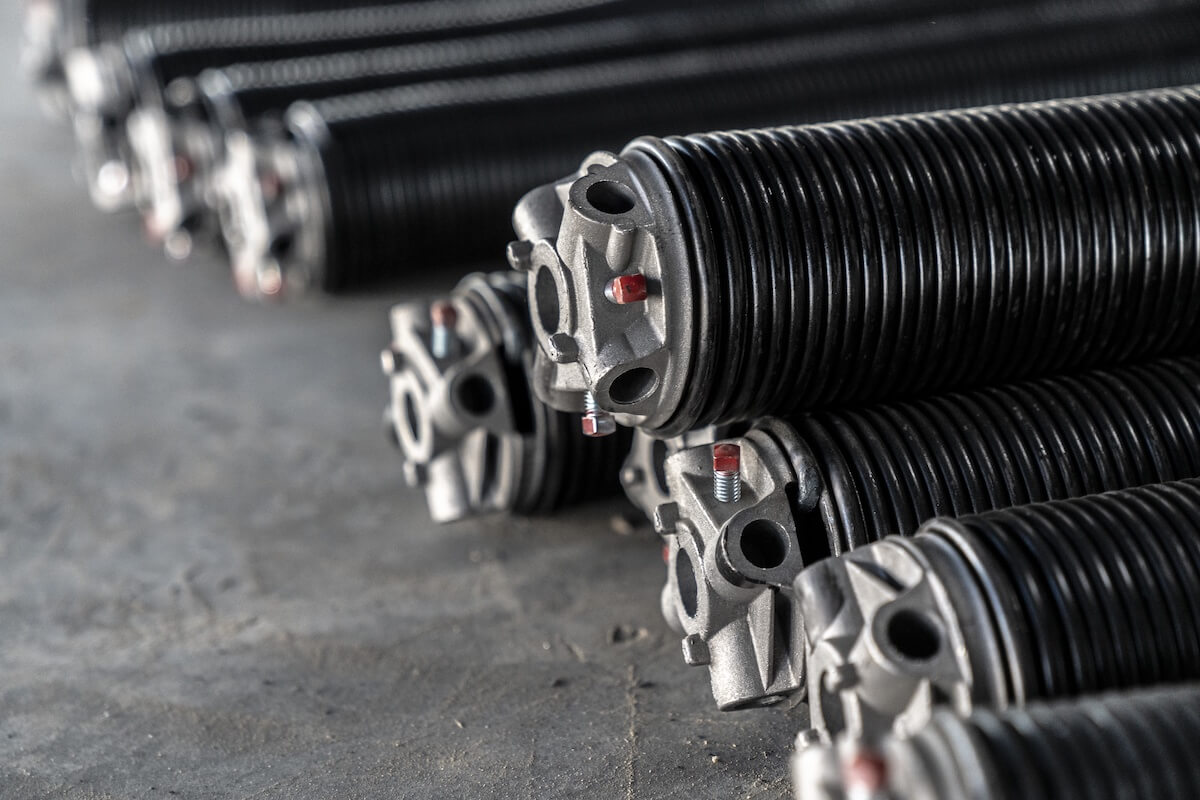
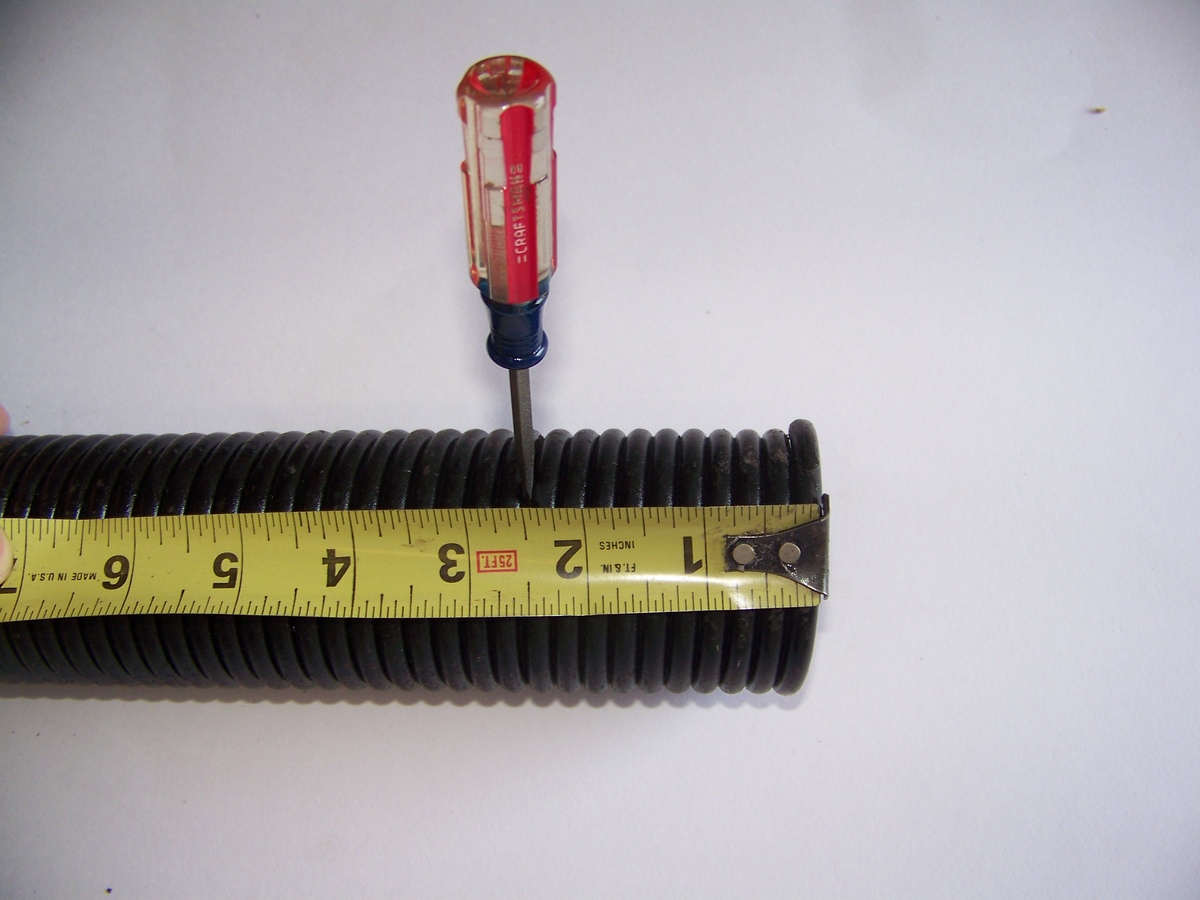
- Replacement Extension Springs – Measure your old springs or consult the manufacturer’s specifications to ensure you purchase the correct size and type of replacement springs.
- Wrench or Socket Set – You’ll need a wrench or socket set to loosen and tighten bolts during the process.
- Adjustable Wrench – An adjustable wrench will come in handy for loosening and tightening nuts and bolts of various sizes.
- Clamps – Clamps will help you secure the garage door in place while working on the springs.
- Pliers – Pliers will be useful for gripping and manipulating small parts during the replacement process.
- Ladder – A sturdy ladder will allow you to reach the garage door springs safely.
- Tape Measure – You’ll need a tape measure to accurately measure the length and size of the extension springs.
- Safety Cable – Optional, but highly recommended for added safety. A safety cable will prevent the extension springs from causing damage or injury if they were to break.
- Replacement Cables – If your existing cables are worn or damaged, it’s a good idea to replace them along with the extension springs.
Ensure that you have all the necessary tools and materials before proceeding with the garage door spring replacement. This will save you time and frustration during the process. Once you have everything ready, you can move on to the next step – disconnecting the garage door opener.
Step 2: Disconnect the Garage Door Opener
Before attempting to replace the extension spring on your garage door, it’s crucial to disconnect the garage door opener. This step is important to prevent any accidental activation of the opener while working on the springs. Follow these steps:
- Locate the power source – The power source for your garage door opener is usually a wall-mounted electrical outlet. Locate the outlet and unplug the opener from the power source.
- Disable the opener – To ensure that the garage door opener cannot be activated accidentally, disable it by either unplugging the power cord from the back of the opener or by turning off the circuit breaker dedicated to the garage door opener.
- Engage the manual release – Most garage door openers have a manual release mechanism that allows you to disconnect the opener from the door. Locate the manual release handle, usually a red cord or lever, and pull it down to disengage the opener from the door. This will allow you to operate the door manually.
- Test the manual operation – Gently lift and lower the garage door a few times to ensure that it moves smoothly and is fully disconnected from the opener. This step is essential to ensure your safety while working on the extension spring replacement.
By disconnecting the garage door opener, you eliminate the risk of accidentally activating the opener while replacing the extension spring. This step ensures your safety and allows you to focus on the task at hand. Once you have successfully disconnected the opener, it’s time to release the tension from the extension springs, which we’ll cover in the next step.
Step 3: Release Tension from the Extension Springs
Before removing the old extension springs, it’s crucial to release the tension they hold. Releasing the tension is necessary to ensure the safe removal of the springs without causing any damage or injury. Follow these steps:
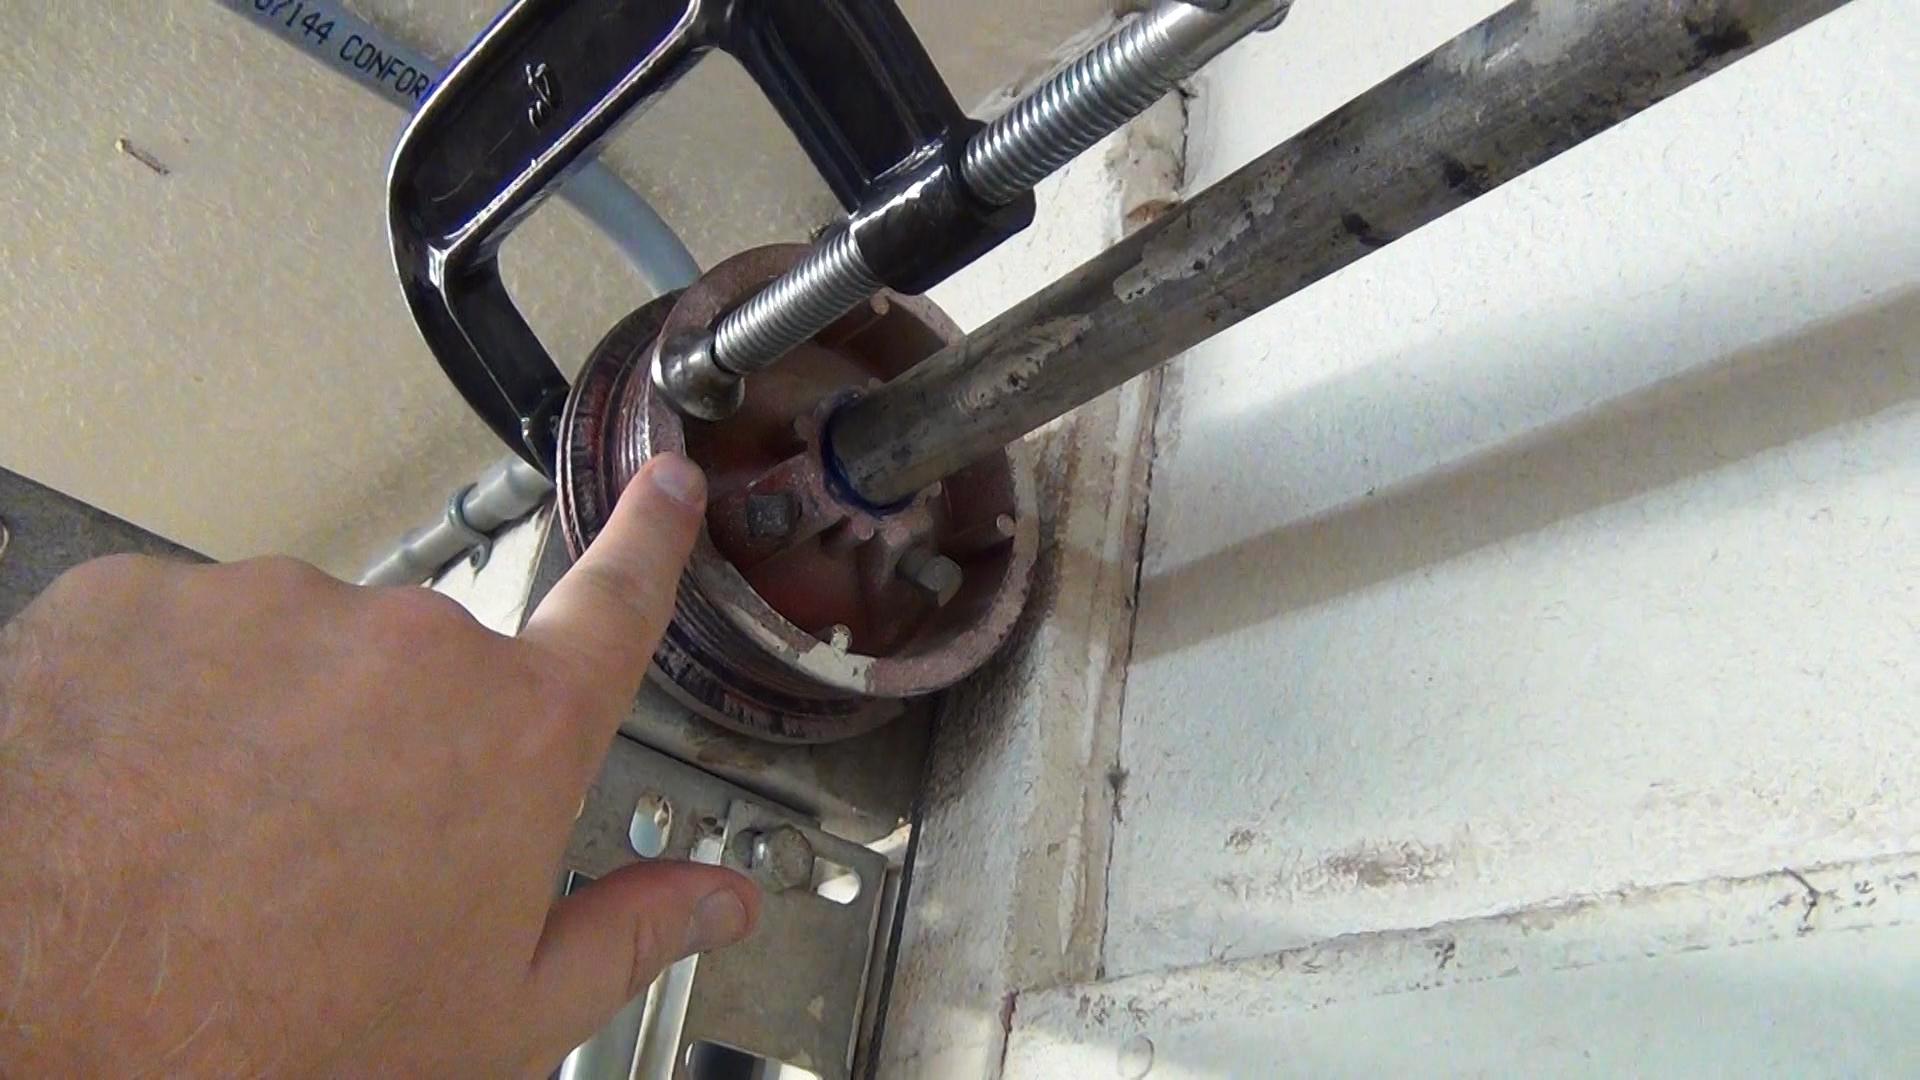
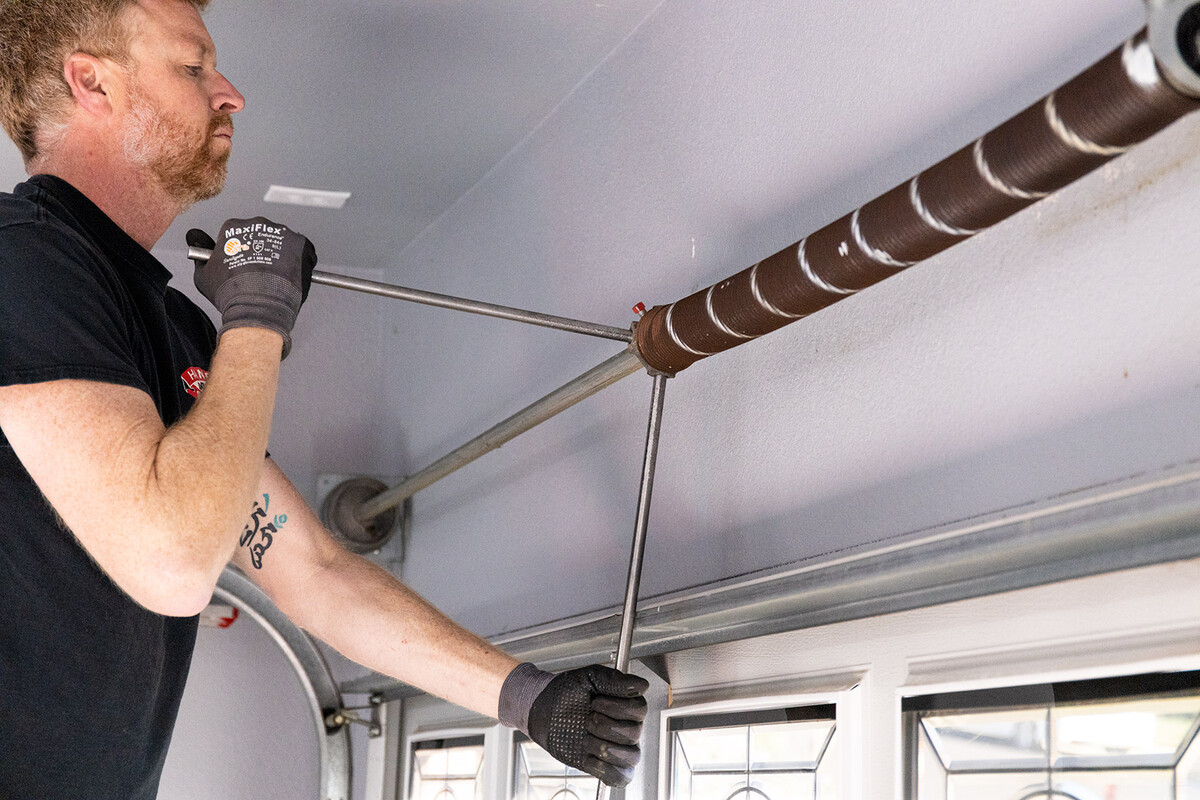
- Position the ladder – Place a sturdy ladder underneath the garage door track, ensuring it is stable and secure.
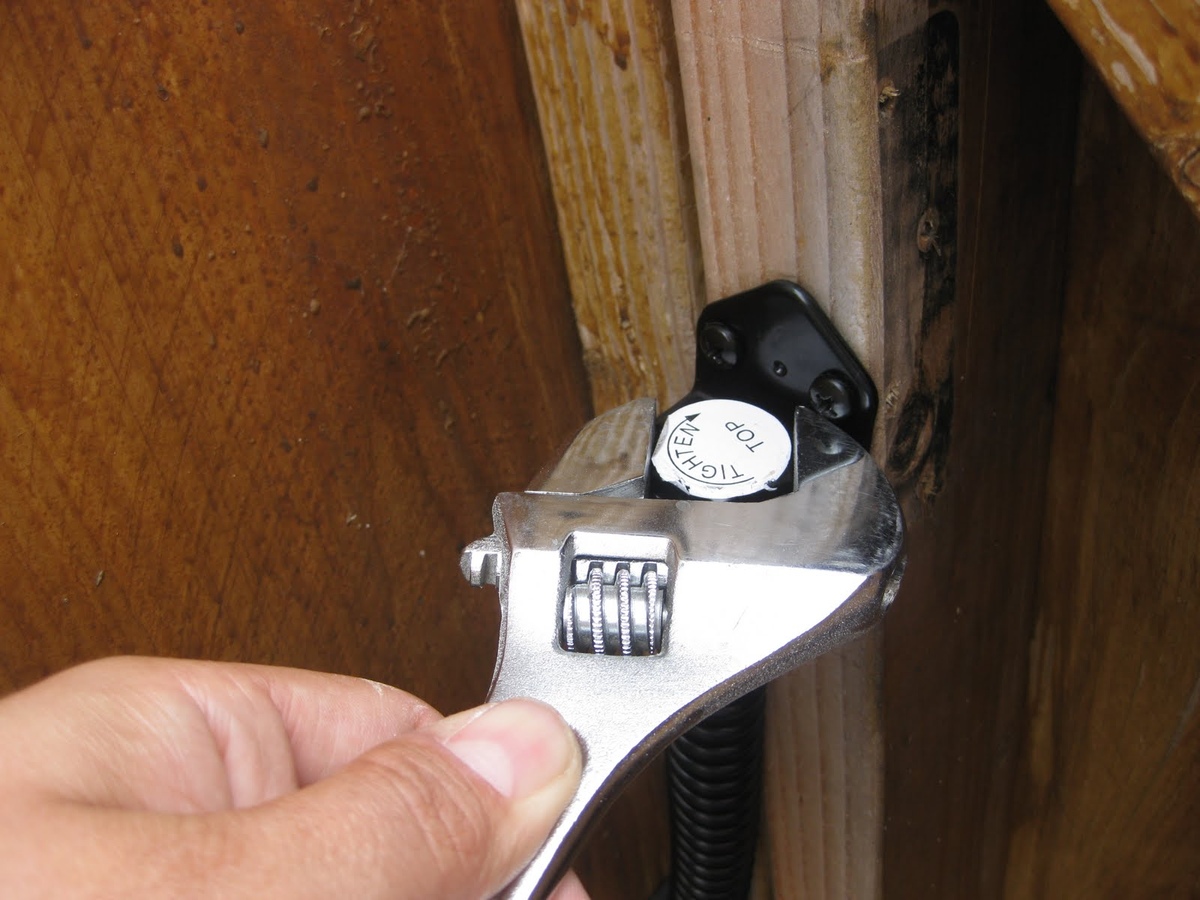
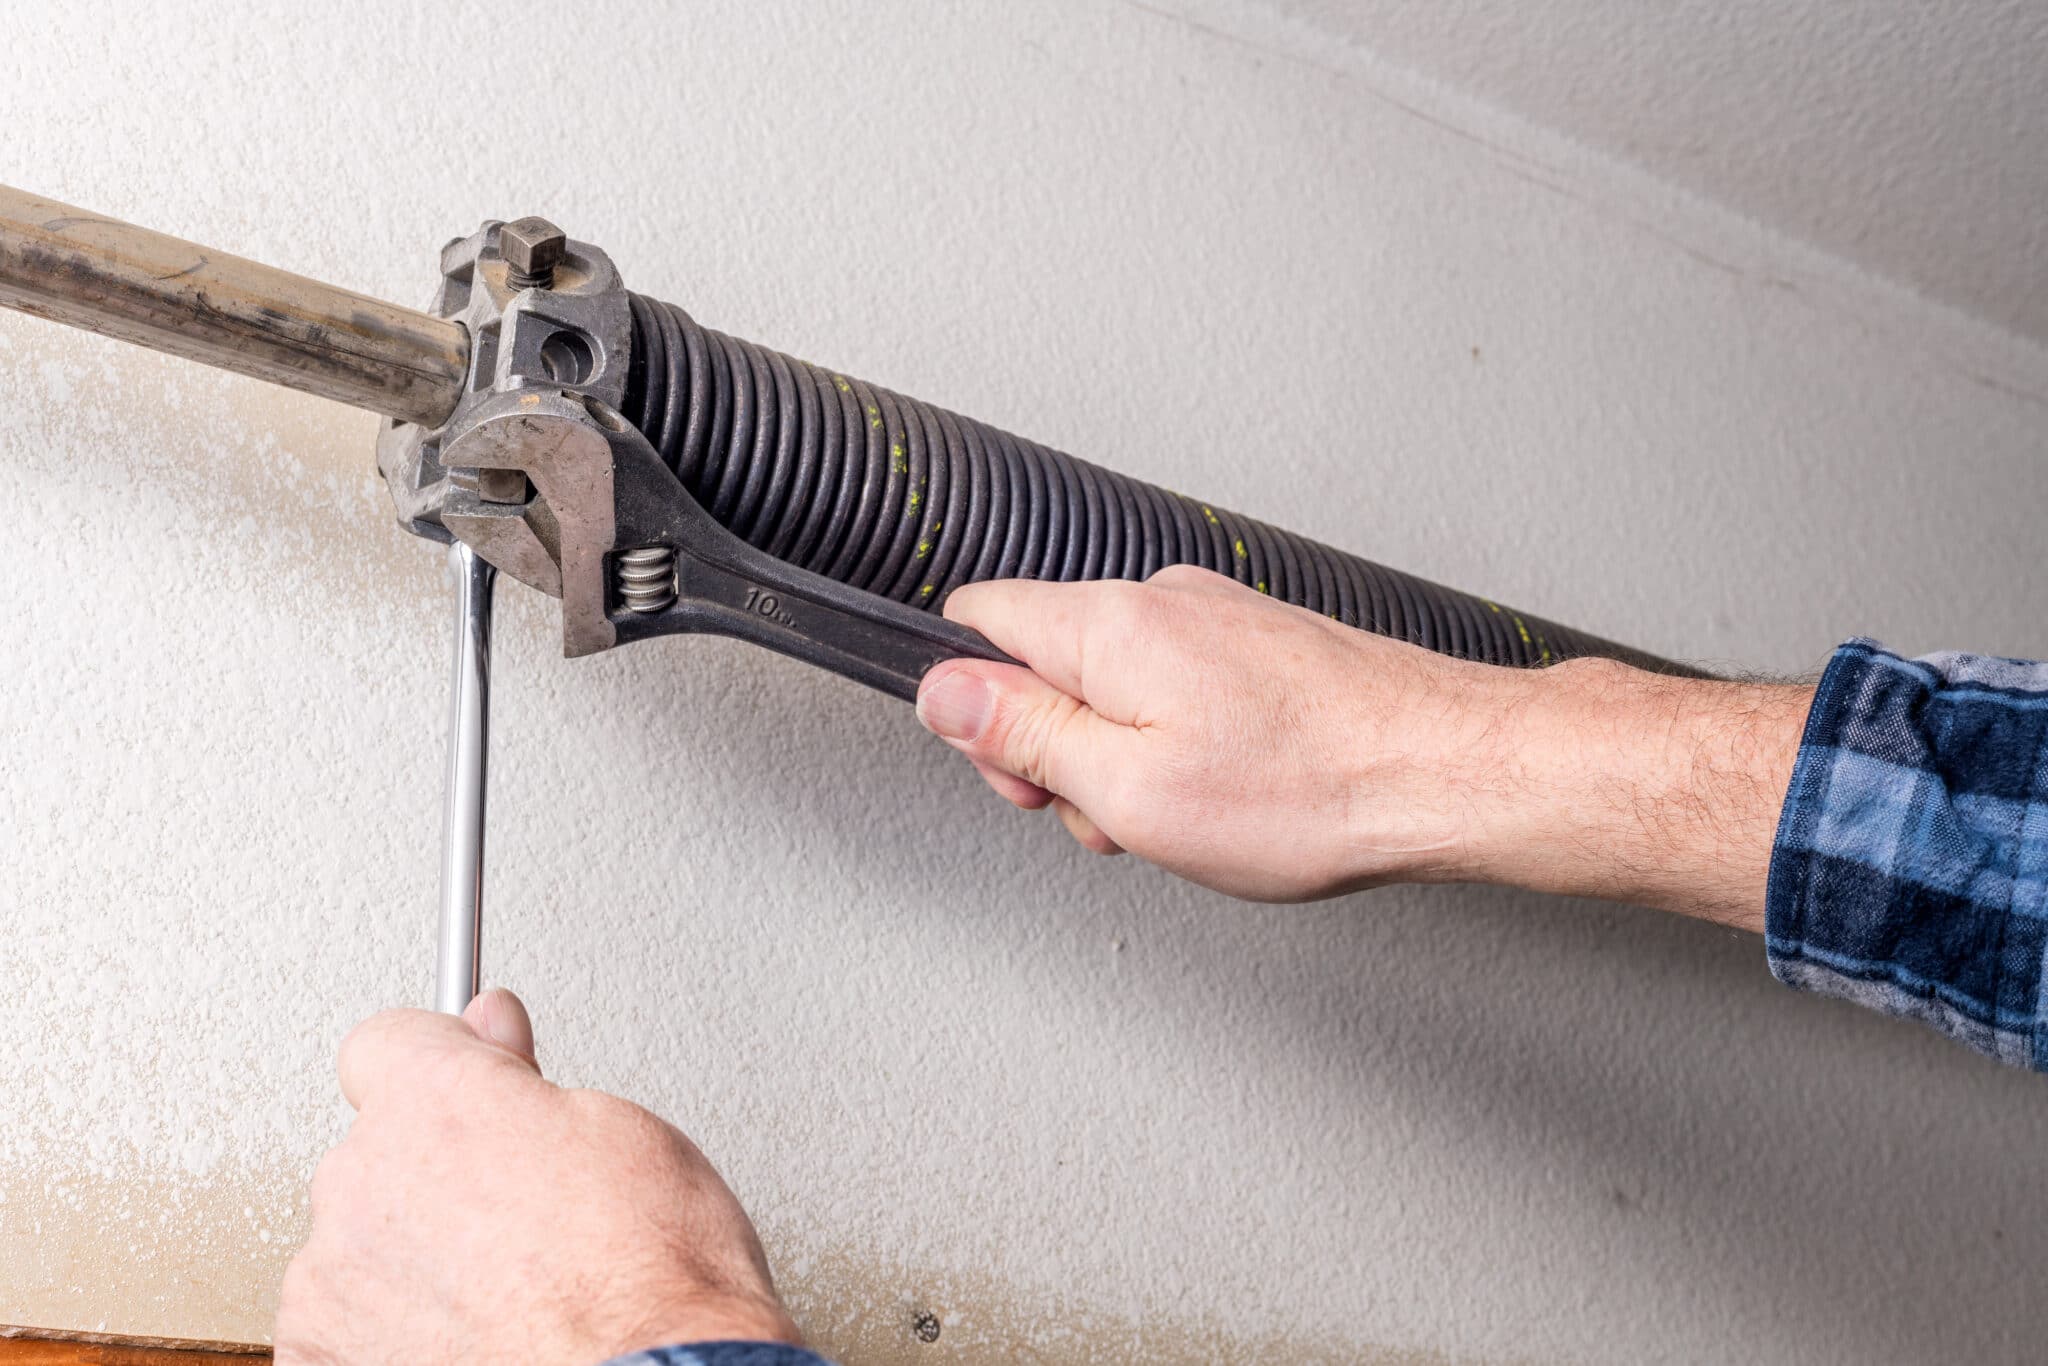
- Locate the tension adjustment nut – On each side of the garage door, you will find a tension adjustment nut near the end of the spring. This nut determines the level of tension applied to the spring.
- Release the tension – Using an adjustable wrench, rotate the tension adjustment nut counterclockwise to release the tension on the spring. Do this slowly and with caution, as the spring may suddenly release tension once the nut is loosened.
- Repeat for the other side – Move to the other side of the garage door and follow the same steps to release the tension from the second extension spring.
- Test the tension – Gently lift the garage door manually to test if the tension has been released. The door should lift smoothly and without resistance. If you still feel tension or the door is difficult to lift, go back and ensure that the tension adjustment nuts have been loosened sufficiently.
Releasing the tension from the extension springs ensures that you can safely proceed with removing the old springs. It is crucial to exercise caution during this step as sudden releases of tension can cause injury or damage. Once you are confident that the tension has been released, you can move on to the next step – removing the old extension springs.
Step 4: Remove the Old Extension Springs
With the tension released from the extension springs, it’s time to remove the old springs from your garage door. Follow these steps to safely remove the springs:
- Secure the garage door – Place clamps on the tracks near the bottom of the garage door to prevent it from accidentally falling or moving while you work on removing the springs.
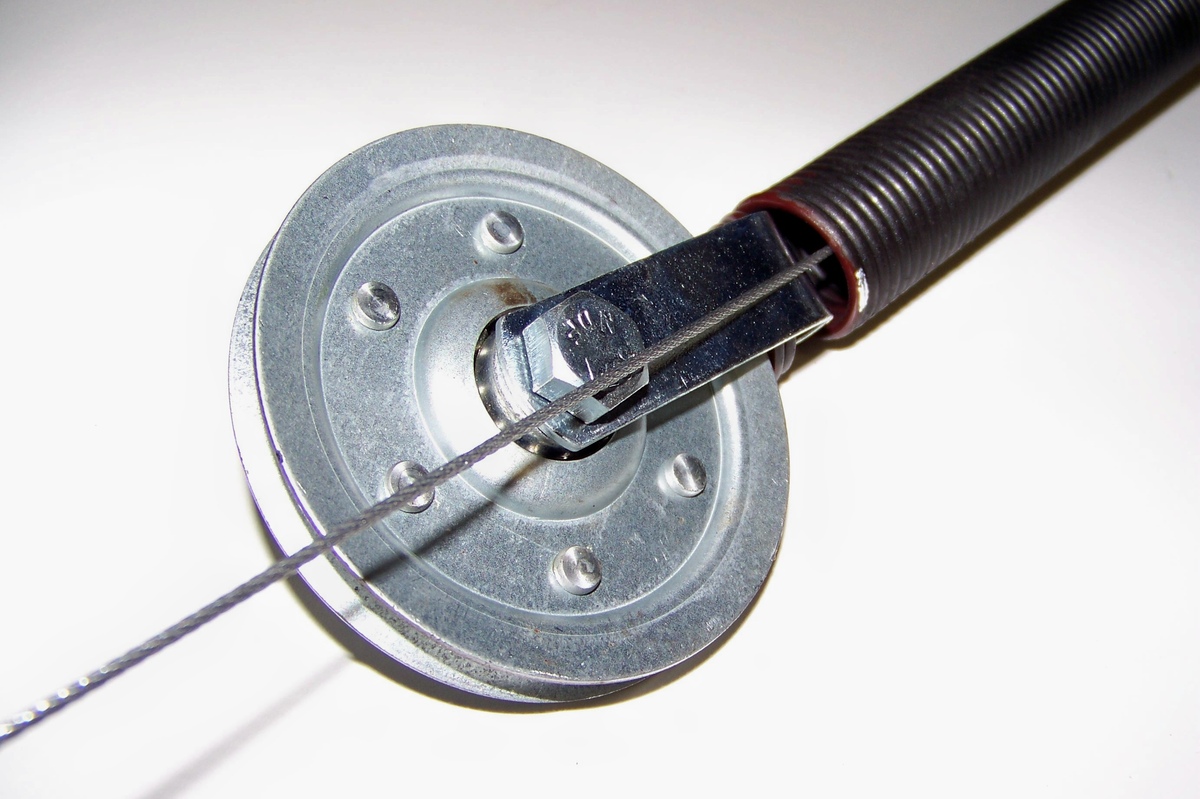
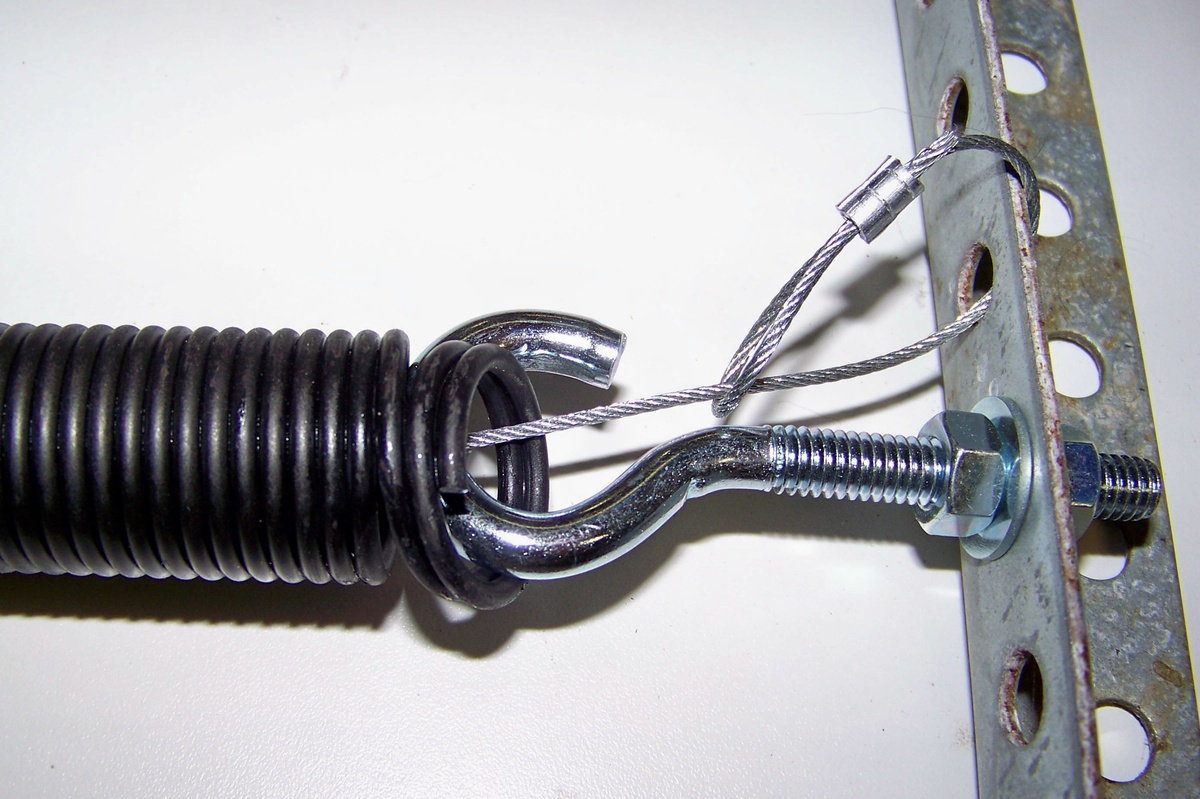
- Identify the spring attachment points – The extension springs are typically attached to the garage door track or brackets with bolts or clips. Locate the attachment points on both sides of the door.
- Remove the spring from the attachment points – Use a wrench or socket set to loosen and remove the bolts or clips securing the springs to the attachment points. Carefully detach the springs from the door, ensuring not to let them snap back or cause any sudden movements.
- Remove the safety cables – If your old extension springs were equipped with safety cables, detach them from the brackets or loops that hold them in place.
- Set aside the old springs – Once you have removed the extension springs and safety cables, set them aside in a safe location to prevent any accidents or injuries.
Make sure to handle the old extension springs with care, as they can still be under some residual tension. It is recommended to wear gloves during this step to protect your hands from any potential injury. Remember to keep track of any bolts, clips, or other hardware that was removed, as you may need them when installing the new springs.
Now that the old extension springs have been removed, it’s time to move on to the next step – installing the new extension springs.
When replacing an extension spring on a garage door, always release the tension from the old spring before attempting to remove it. This will prevent any potential accidents or injuries.
Read more: How To Replace A Broken Garage Door Spring
Step 5: Install the New Extension Springs
Now that you have successfully removed the old extension springs from your garage door, it’s time to install the new ones. Follow these steps to safely and correctly install the new extension springs:
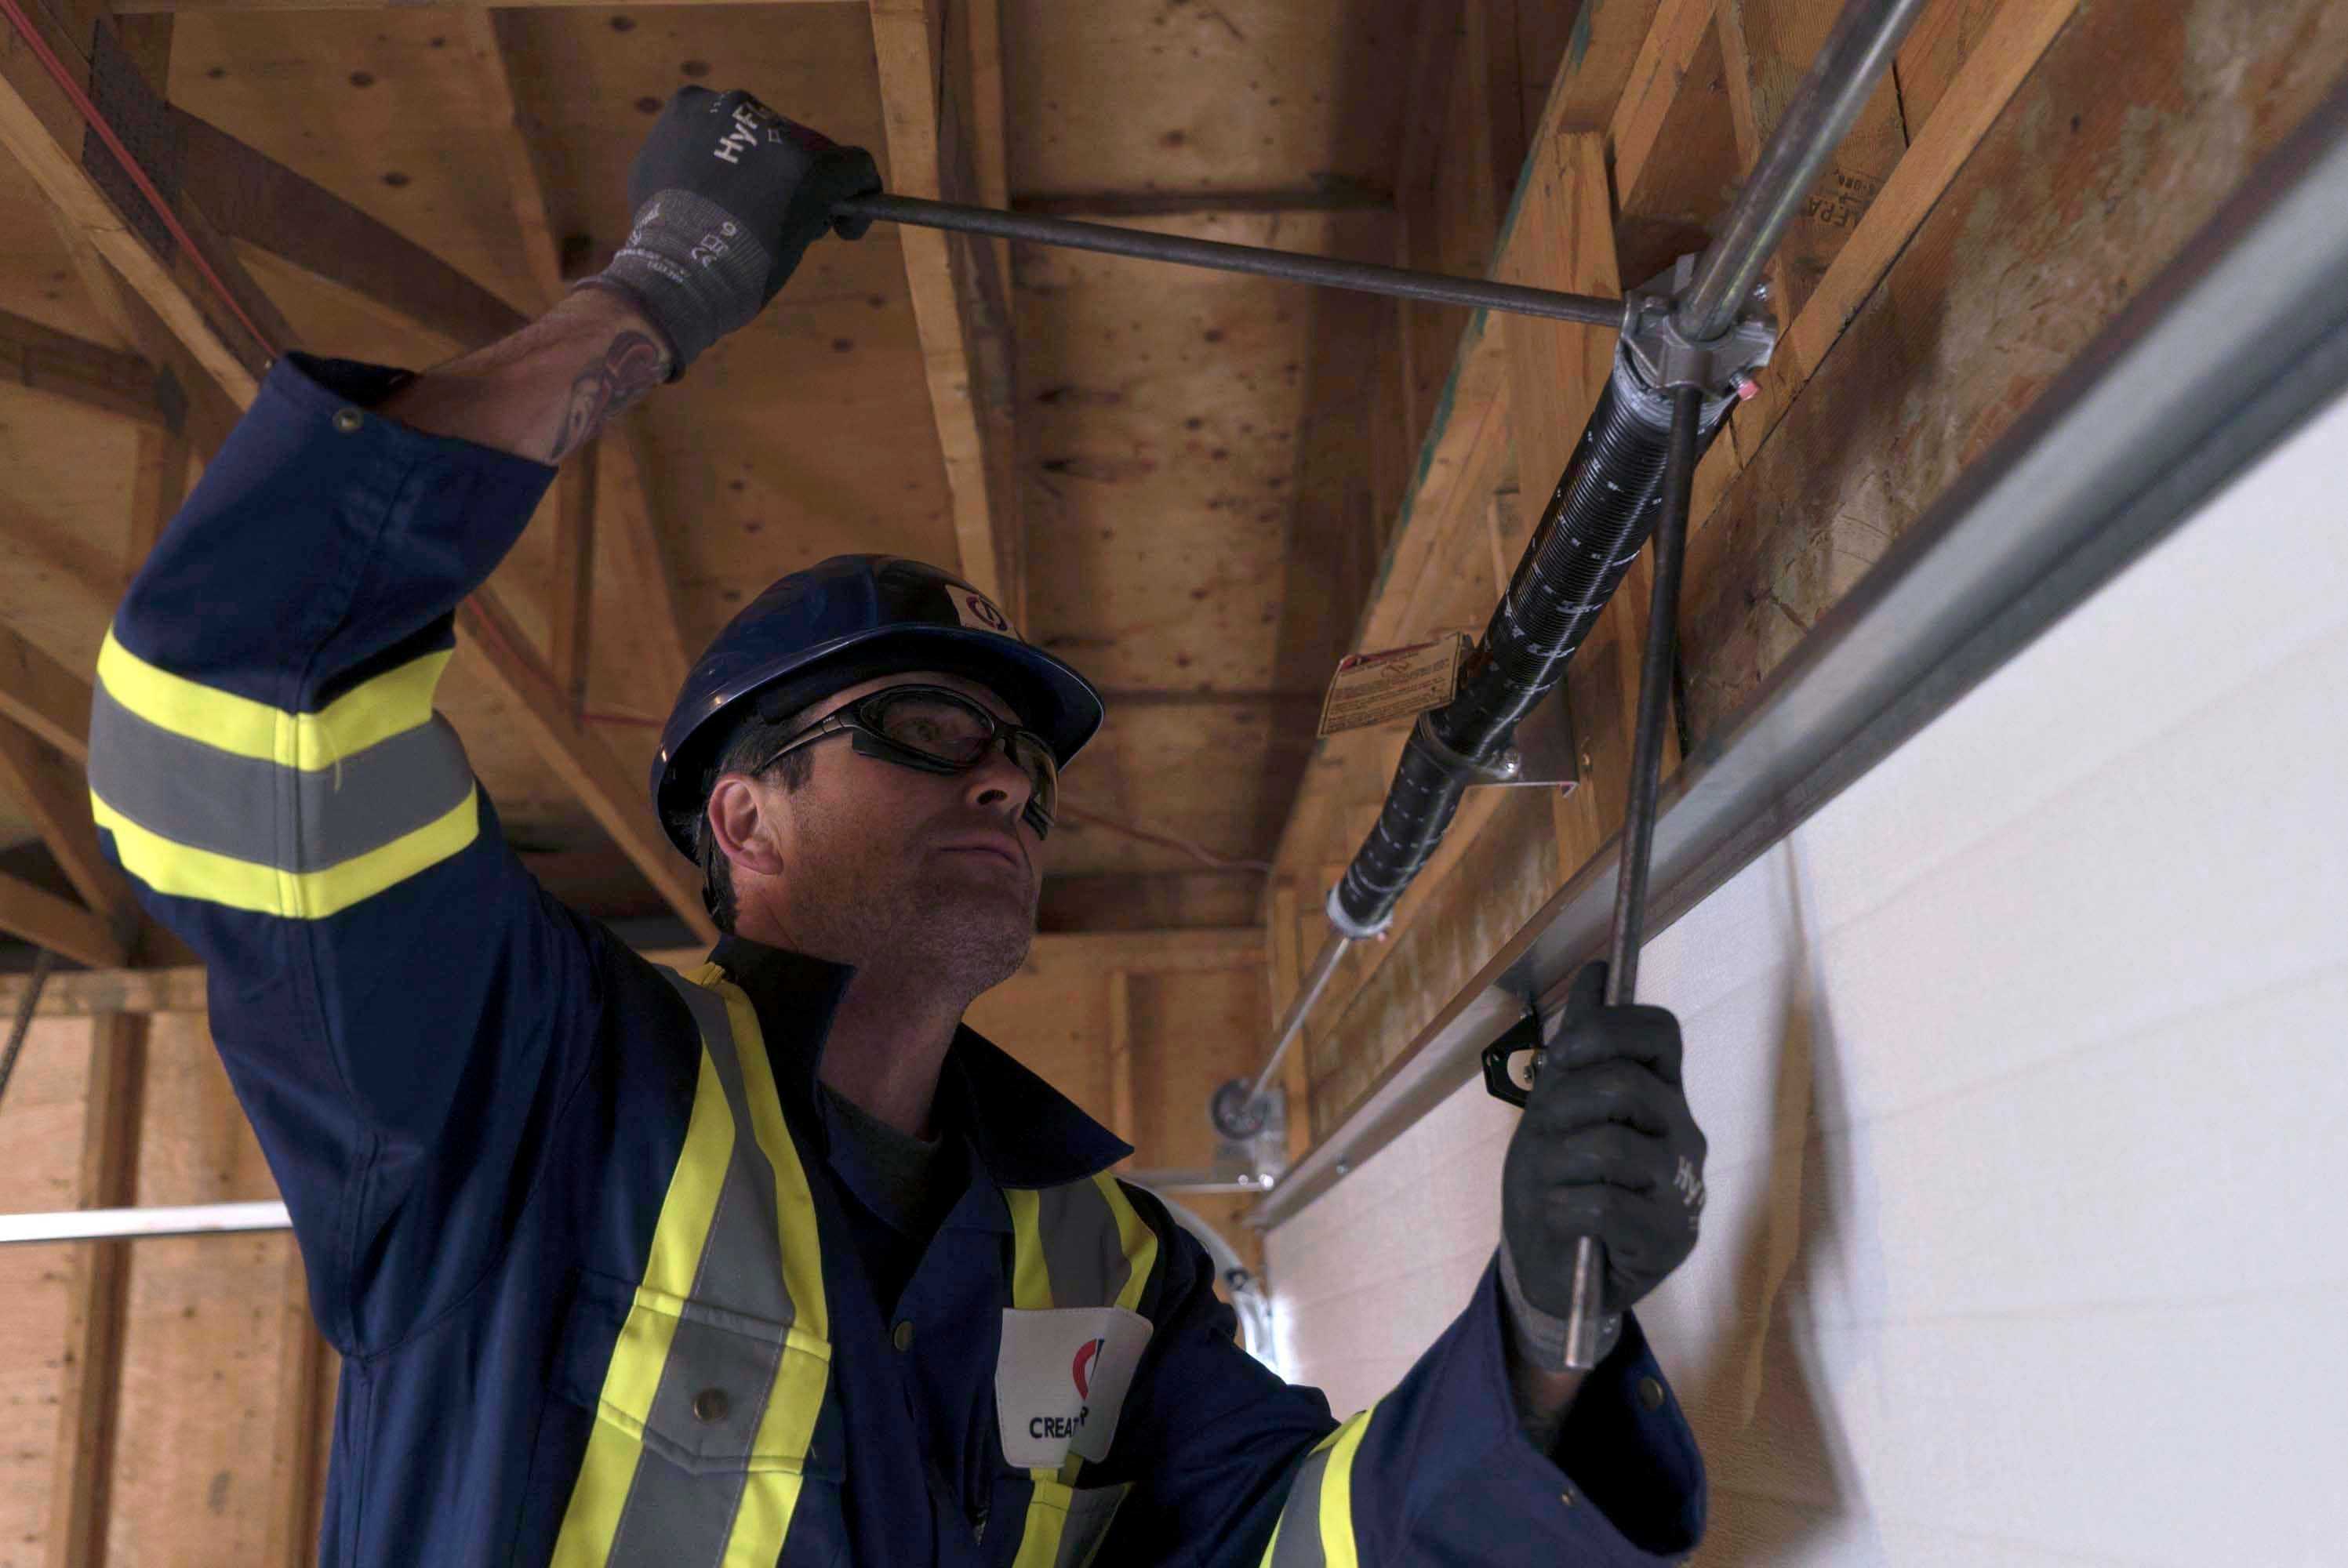
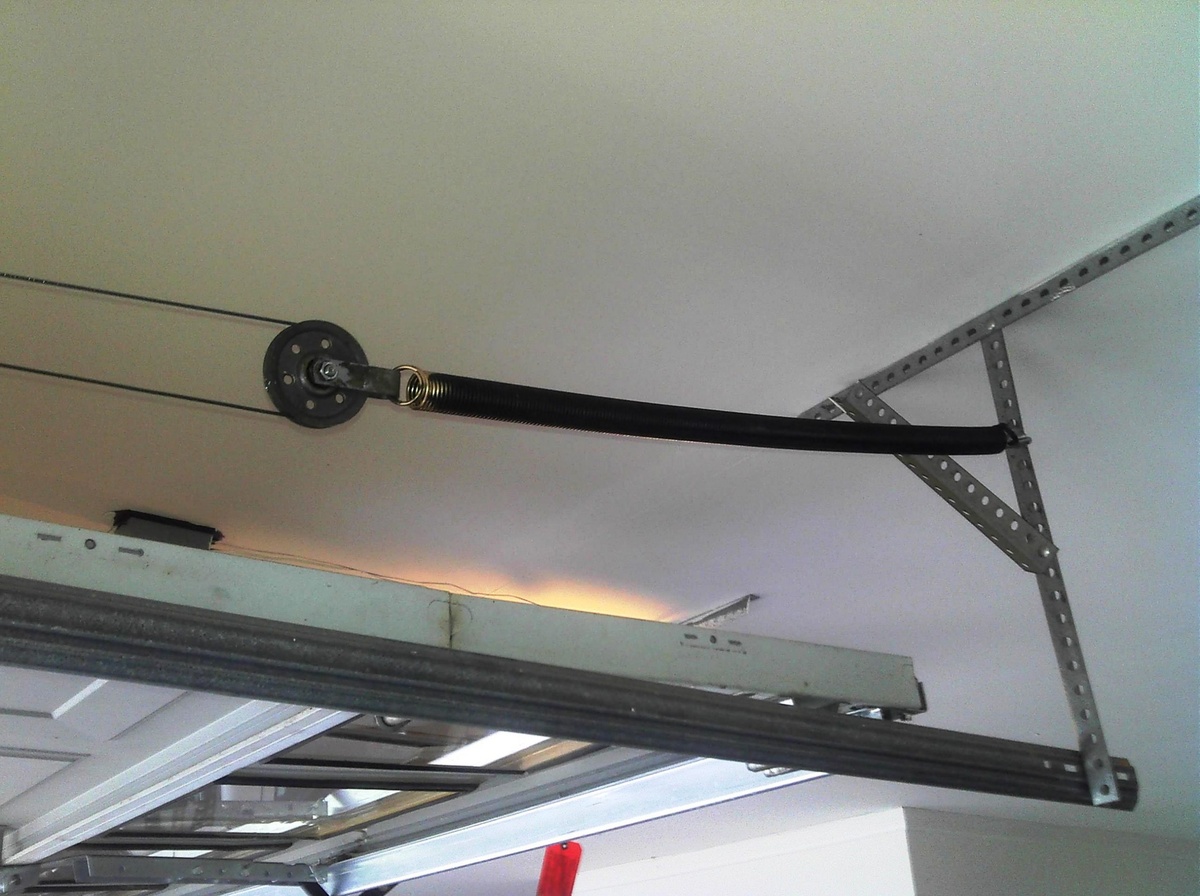
- Ensure the correct positioning – Start by positioning the new extension springs on their respective sides of the garage door. Make sure they are properly aligned and in the correct position.
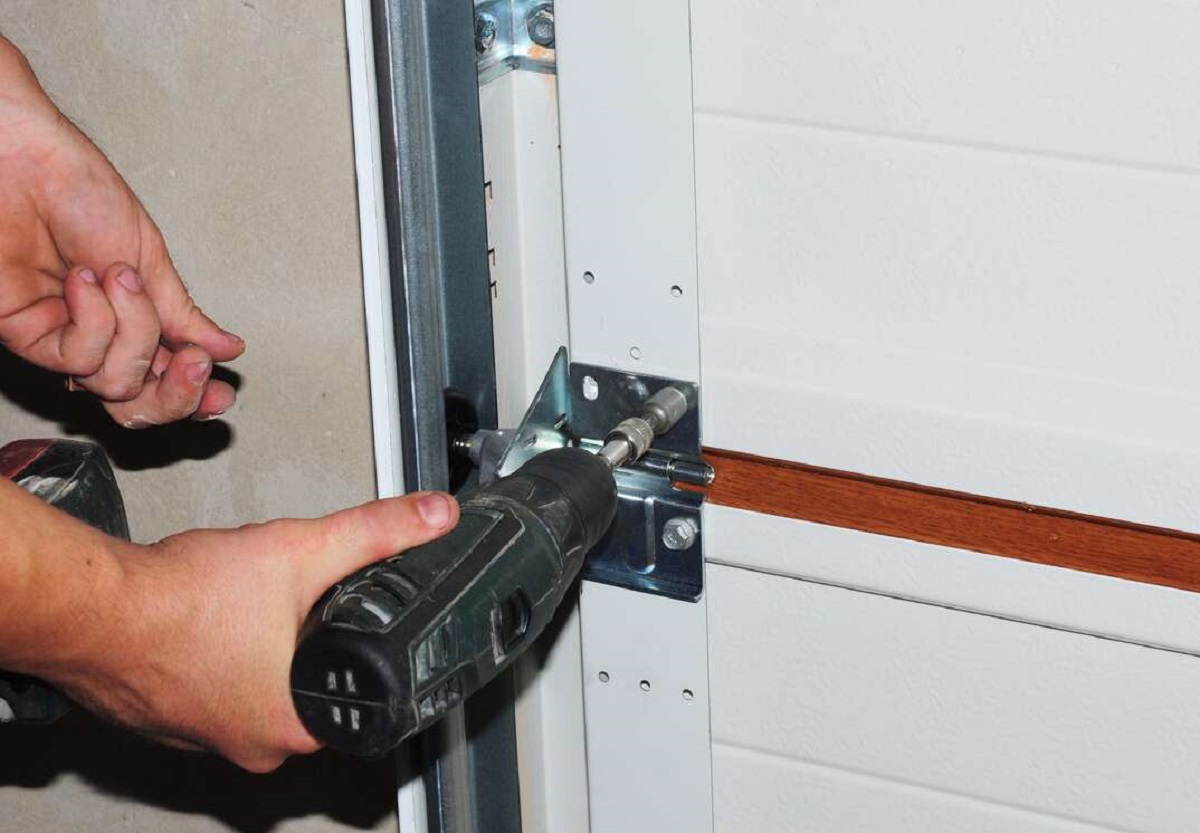
- Attach the springs to the door – Use a wrench or socket set to secure the springs to the attachment points on the garage door. Make sure they are firmly attached and properly aligned.
- Install safety cables (if applicable) – If your new extension springs came with safety cables, attach them to the brackets or loops, following the manufacturer’s instructions. Safety cables provide an added layer of security in case the springs were to break.
- Tighten the tension adjustment nut – Using an adjustable wrench, carefully tighten the tension adjustment nut on each extension spring. Gradually increase the tension until it matches the level of tension previously set by the old springs. Be cautious not to overtighten, as it can put unnecessary strain on the springs.
- Perform a tension test – Gently lift the garage door manually to test the tension of the new extension springs. The door should lift smoothly and without resistance, and stay in place when released. If you notice any issues with the tension, adjust the tension adjustment nuts accordingly until you achieve the desired balance.
It’s crucial to ensure that the new extension springs are properly installed and adjusted to maintain the safe and efficient operation of your garage door. Take your time during this step to ensure everything is correctly aligned and tensioned.
Once you are satisfied with the installation and the tension of the new extension springs, you can proceed to the next step – reattaching the garage door opener.
Step 6: Reattach the Garage Door Opener
After successfully installing the new extension springs on your garage door, it’s time to reattach the garage door opener. Follow these steps to ensure a smooth and proper reattachment:
- Engage the manual release – Before reattaching the opener, make sure the manual release handle is disengaged. This will allow the opener to connect with the door.
- Position the opener – Align the garage door opener with the attachment bracket located on the top section of the garage door.
- Secure the opener – Using the appropriate screws or bolts, attach the opener securely to the attachment bracket.
- Reconnect the power supply – Plug in the garage door opener to the electrical outlet or turn on the dedicated circuit breaker to restore power to the opener.
- Test the opener – Activate the garage door opener using the wall-mounted control panel or remote control. Ensure that the opener operates smoothly and the door opens and closes without any issues.
It’s important to test the garage door opener to ensure that it is working correctly after reattachment. Pay attention to any strange noises or malfunctions, as these may indicate further adjustments or maintenance are needed.
With the garage door opener successfully reattached, it’s time to move on to the final step – testing the functionality of the garage door.
Step 7: Test the Garage Door
Now that you have completed the process of replacing the extension spring on your garage door and reattached the opener, it’s important to thoroughly test the functionality of the door. Follow these steps to ensure that your garage door is operating properly:
- Clear the area – Make sure the area around the garage door is clear of any obstructions or debris that could interfere with its movement.
- Activate the opener – Using the control panel or remote control, activate the garage door opener to open the door. Observe the door as it lifts and ensure that it moves smoothly and without any jerking or shaking.
- Check for balance – Once the door is open, it should remain securely in place without drifting back down or shooting up. If the door is not balanced, you may need to adjust the tension of the extension springs or consult a professional for further assistance.
- Close the door – Use the control panel or remote control to close the garage door. Again, observe its movement and ensure that it closes smoothly and without any unusual noises or resistance.
- Test safety features – Most modern garage doors are equipped with safety features such as automatic reversal and photoelectric sensors. Test these safety features by placing an object in the path of the closing door. It should reverse its direction upon contact with the object or when the sensors are obstructed.
By thoroughly testing the functionality of your garage door, you can ensure that the replacement of the extension spring was successful. If you notice any issues or abnormalities during the testing process, it may be necessary to make further adjustments or seek professional assistance to rectify the problem.
Congratulations! You have successfully replaced the extension spring on your garage door and tested its functionality. Regular maintenance and periodic inspections of the springs will help to prolong the lifespan of your garage door and ensure its safe operation.
If you have any concerns or are unsure about any step of the process, it is always recommended to consult with a professional garage door technician for assistance.
Conclusion
Replacing the extension spring on your garage door is a task that can seem daunting, but with the right tools, materials, and instructions, it can be accomplished successfully. By following the step-by-step guide outlined in this article, you have learned how to safely and efficiently replace the old extension spring with a new one.
Remember, working with garage door springs can be dangerous, and safety should always be a top priority. If you are unsure or uncomfortable with handling the springs, it is highly recommended to seek professional assistance from a trained technician.
Throughout the process, we emphasized the importance of proper alignment, tension adjustment, and testing. These steps are crucial to ensure the garage door operates smoothly and safely. A well-maintained garage door not only enhances the security of your home but also improves its curb appeal.
Periodic inspection and maintenance of your garage door springs are essential to prolong their lifespan and prevent unexpected issues. If you notice any signs of wear, damage, or instability, it is important to address them promptly to avoid further complications.
We hope this comprehensive guide has equipped you with the knowledge and confidence to replace the extension spring on your garage door. By following the steps outlined in this article, you can successfully complete this task and enjoy the benefits of a properly functioning garage door.
Remember, if at any point you feel unsure or encounter difficulties, it is always advisable to consult with a professional garage door technician. Their expertise and experience can help ensure the job is done correctly and safely.
Thank you for taking the time to read this article. We wish you the best of luck in your garage door spring replacement journey!
Frequently Asked Questions about How To Replace Extension Spring On Garage Door
Was this page helpful?
At Storables.com, we guarantee accurate and reliable information. Our content, validated by Expert Board Contributors, is crafted following stringent Editorial Policies. We're committed to providing you with well-researched, expert-backed insights for all your informational needs.
0 thoughts on “How To Replace Extension Spring On Garage Door”