Articles
How To Replace A Garage Door Torsion Spring
Modified: February 23, 2024
Learn how to replace a garage door torsion spring with step-by-step instructions and expert tips. Read our informative articles on garage door maintenance and repair.
(Many of the links in this article redirect to a specific reviewed product. Your purchase of these products through affiliate links helps to generate commission for Storables.com, at no extra cost. Learn more)
Introduction
Replacing a garage door torsion spring is a task that requires careful attention and proper technique. A worn-out or broken torsion spring can compromise the functionality and safety of your garage door. Therefore, it is essential to understand the process of replacing the torsion spring correctly.
In this article, we will guide you through the step-by-step process of replacing a garage door torsion spring. We will provide you with the necessary safety precautions, tools, and materials needed to complete the job successfully.
It is important to note that working with garage door springs can be dangerous if not handled properly. We strongly recommend consulting a professional if you are not confident in your abilities or do not have prior experience with garage door repairs. Safety should always be the top priority.
Now, let’s dive into the process of replacing a garage door torsion spring, ensuring that your garage door functions smoothly and securely for years to come.
Key Takeaways:
- Prioritize safety precautions, proper tools, and accurate measurements when replacing a garage door torsion spring to ensure smooth and safe operation. Consult a professional if unsure about the process.
- Thoroughly test the garage door after replacing the torsion spring to ensure proper functionality, balance, and safety features. Regular maintenance and inspections are essential for long-term performance.
Read more: How To Measure Garage Door Torsion Spring
Safety Precautions
When it comes to replacing a garage door torsion spring, safety should be your utmost priority. Garage door springs are under high tension and can cause serious injury or even death if mishandled. Therefore, it is crucial to follow these safety precautions:
- Wear Protective Gear: Before starting any work on your garage door, make sure you are wearing proper protective gear, including safety glasses, gloves, and sturdy footwear. This will protect you from any potential accidents or injuries.
- Disconnect Power: To ensure your safety, disconnect the power supply to the garage door opener. This will prevent the door from accidentally opening or closing while you are working on it.
- Secure the Door: Before working on the torsion spring, secure the garage door in the fully open position using vice grips or clamps. This will prevent the door from unexpectedly falling or closing during the replacement process.
- Release Tension Gradually: When dealing with the old torsion spring, it is essential to release the tension gradually. Sudden release of tension can result in the spring unwinding rapidly and causing harm. Use winding bars and follow the specific instructions for releasing tension provided by the manufacturer.
- Use Proper Tools: Ensure that you have the correct tools for the job, such as winding bars, vise grips, and a sturdy ladder. Using the wrong tools can result in accidents or damage to the garage door.
- Call a Professional if Unsure: If you are unsure about any aspect of the torsion spring replacement process, it is best to call a professional garage door technician. They have the expertise and experience to handle the job safely and efficiently.
By following these precautions, you can minimize the risk of accidents and ensure a safe working environment throughout the process of replacing a garage door torsion spring.
Tools and Materials Needed
Before you begin the process of replacing a garage door torsion spring, it is important to gather all the necessary tools and materials. This will ensure that you have everything you need on hand to complete the job efficiently. Here is a list of the tools and materials you will need:
- Winding Bars: These are essential for releasing and winding the tension on the torsion spring. You will need two winding bars of the appropriate size for your specific spring.
- Vise Grips: Vise grips are used to secure the garage door in the open position to prevent it from accidentally closing during the replacement process.
- Socket Wrench: A socket wrench will be needed to loosen and remove the bolts that hold the old torsion spring in place.
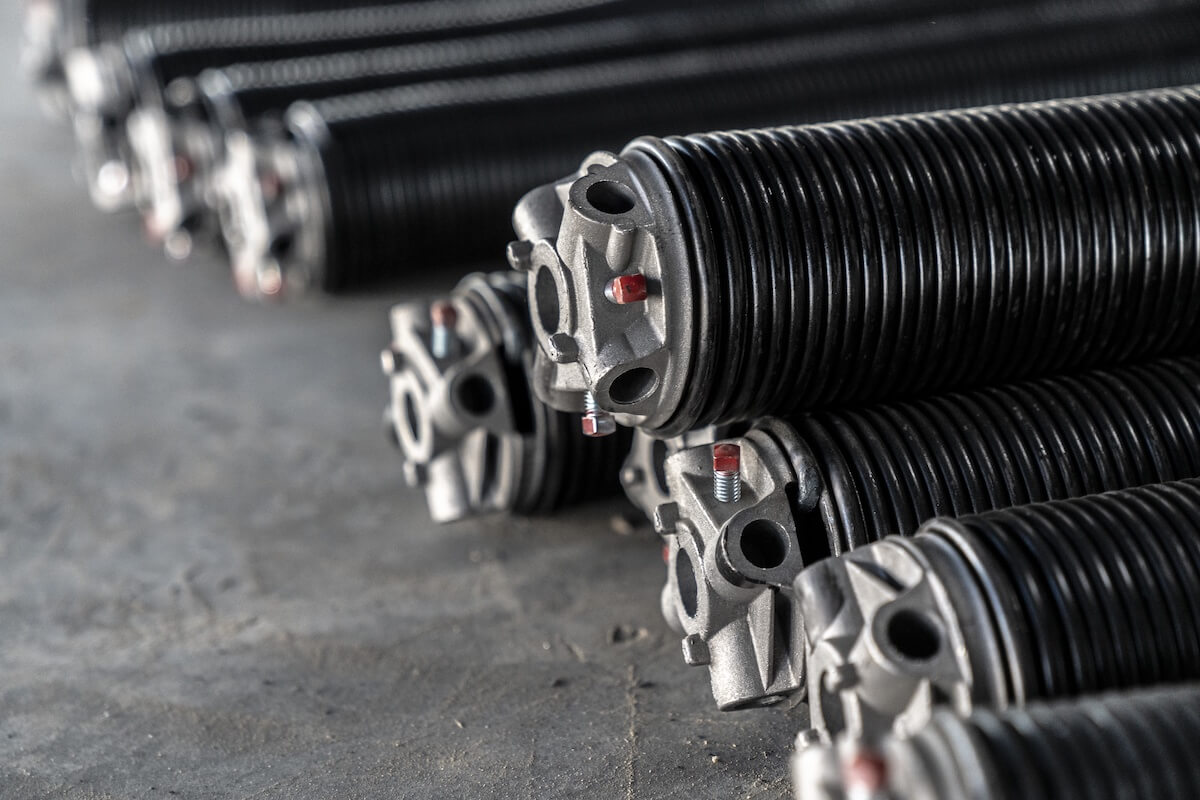
- Replacement Torsion Spring: Make sure to accurately measure the dimensions of the old torsion spring and order a replacement that matches those measurements.
- Safety Glasses: Safety glasses are crucial for protecting your eyes from any debris or spring fragments that may be released during the replacement process.
- Gloves: Wearing gloves will provide added protection and grip while working with the torsion spring and other tools.
- Sturdy Ladder: A sturdy ladder will be needed to reach the torsion spring and safely work on the garage door.
- Tape Measure: Use a tape measure to accurately measure the dimensions of the old torsion spring.
- Marking Pen or Tape: This is used to mark the winding cones and help determine the number of turns when installing the new torsion spring.
It is crucial to have all the necessary tools and materials in advance to avoid any delays or interruptions during the torsion spring replacement process.
Step 1: Disconnecting the Garage Door
Before you can begin replacing the garage door torsion spring, you need to disconnect the door from the opener and secure it in the open position.
Follow these steps to disconnect the garage door:
- Turn off the Power: Locate the power supply for your garage door opener and switch it off to prevent any accidental movements of the door while you work.
- Locate the Emergency Release Cord: The emergency release cord is usually red and hangs from the garage door opener track. Pull down on this cord to disconnect the opener from the door.
- Lift the Garage Door: Lift the garage door manually, using either your hands or the assistance of another person. Lift the door until it is fully open.
- Secure the Garage Door: Once the door is fully open, use vise grips or clamps to secure it in place. Attach the vise grips or clamps to the tracks on each side of the door. This will prevent the door from closing unexpectedly while you work on the torsion spring.
- Disconnect the Emergency Release Cord: Once the garage door is securely held in the open position, disconnect the emergency release cord from the garage door opener track.
With the garage door now disconnected and secured, you can proceed to the next step of measuring and ordering the new torsion spring.
Step 2: Measuring and Ordering the New Torsion Spring
Accurately measuring the dimensions of the old torsion spring is crucial to ensure you order the correct replacement. Here’s how to measure and order the new torsion spring:
- Measure the Wire Size: Use a caliper or a micrometer to measure the diameter of the wire used in the old torsion spring. The wire size is typically expressed in gauge, so make sure to note down the measurement in gauge units.
- Measure the Inside Diameter: Measure the inside diameter of the torsion spring, including the coils. Take the measurement from one end of the spring to the other, across the innermost edge of the coils.
- Measure the Length: Measure the overall length of the torsion spring, including the coils. Be sure to measure from one end of the spring to the other, excluding any end fittings or cones.
- Count the Number of Coils: Count the number of coils in the torsion spring. Make sure to count the complete coils, including the one at each end.
- Find a Reliable Supplier: Search for a reputable supplier that specializes in garage door torsion springs. Ensure that they offer the exact specifications you need based on your measurements.
- Place an Order: Once you have the accurate measurements, place an order for the replacement torsion spring with the supplier. Provide them with the wire size, inside diameter, overall length, and number of coils.
It’s important to take precise measurements and order the correct torsion spring to ensure smooth operation and proper balance of your garage door. Once you have ordered the replacement, you can move on to the next step of releasing the tension from the old torsion spring.
Read more: How To Replace Garage Door Spring
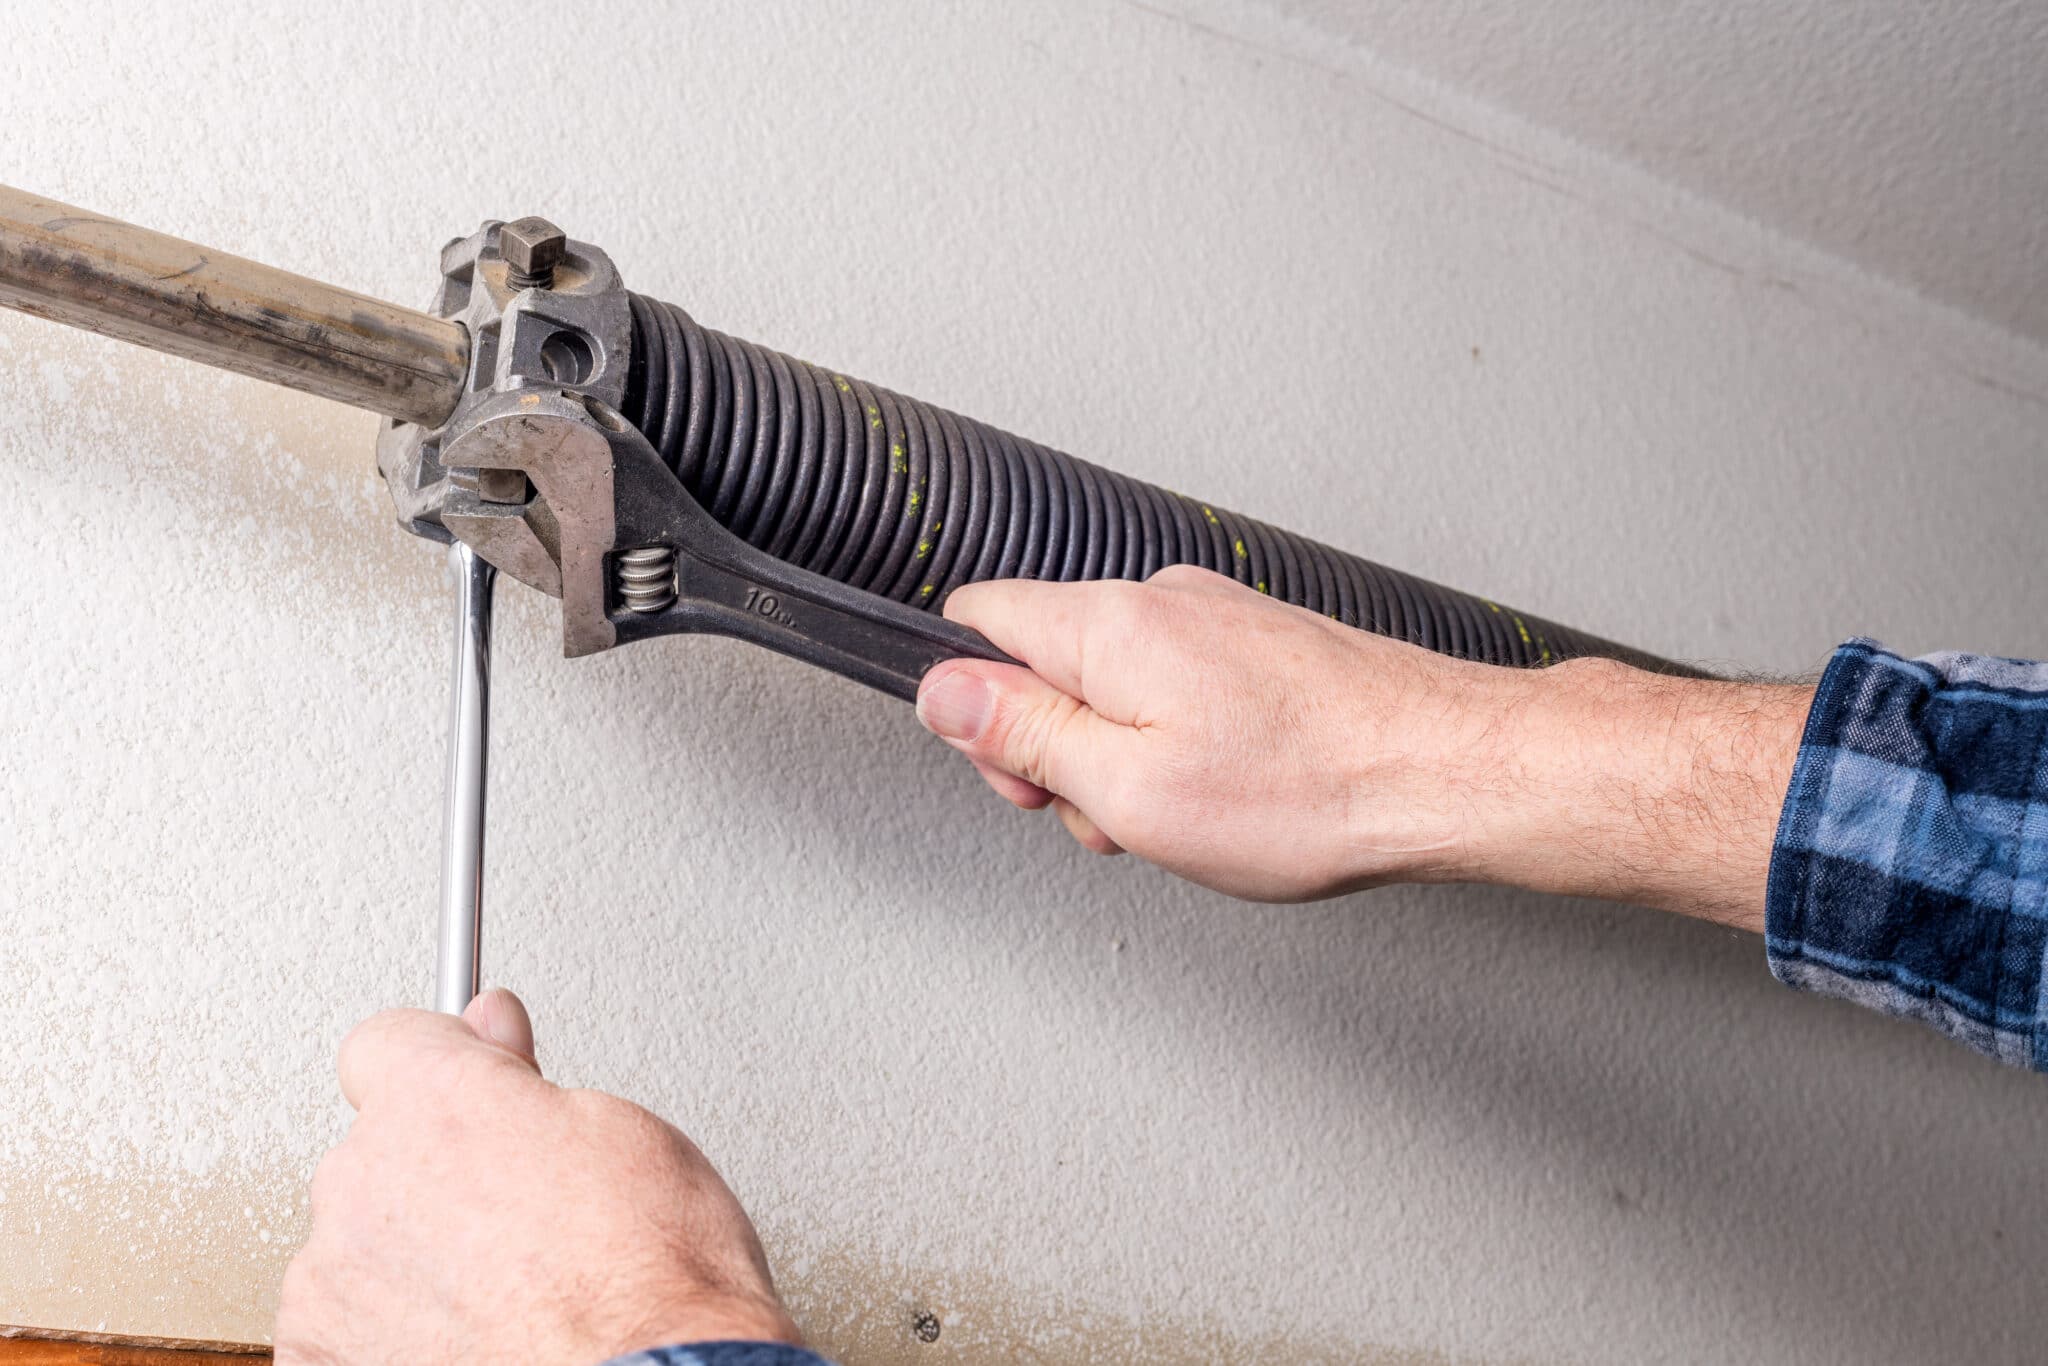
Step 3: Releasing Tension from the Old Torsion Spring
Before you can remove the old torsion spring, it is crucial to release the tension from it. Releasing the tension ensures a safer and easier removal process. Follow these steps to release the tension:
- Ensure Safety Precautions: Put on your safety glasses and gloves before proceeding.
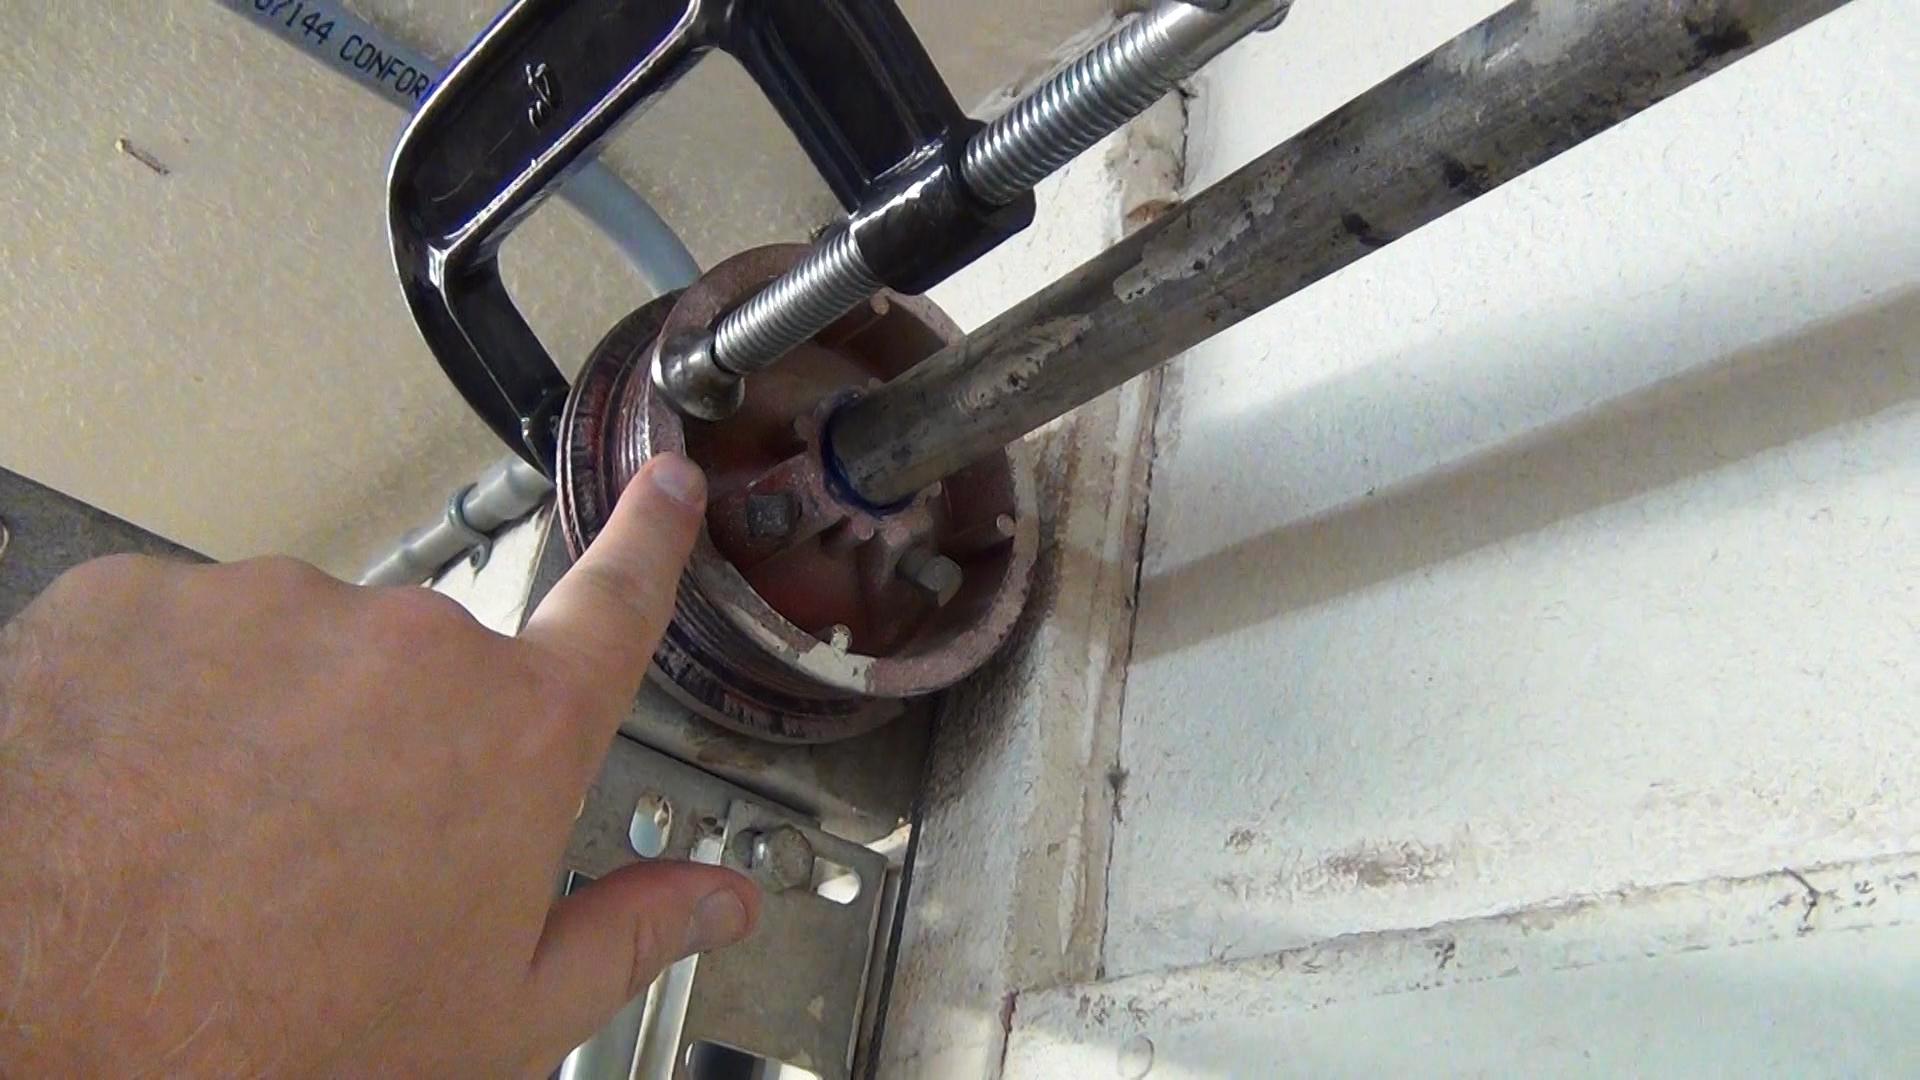
- Identify the Winding Cone: Locate the winding cone at one end of the torsion spring. It is typically a stationary cone with two setscrews.
- Insert Winding Bars: Insert a winding bar into one of the holes on the winding cone. Make sure the winding bar is securely inserted.
- Hold the Bar Firmly: Hold the winding bar firmly to prevent it from slipping out of the winding cone during the tension release process.
- Slowly Release Tension: Carefully rotate the winding cone counterclockwise to release tension from the torsion spring. Make small, gradual rotations, being cautious of the spring’s movement.
- Repeat on the Other Side: Repeat the same process on the other end of the torsion spring, using another winding bar in the corresponding hole of the opposite winding cone.
- Continue Releasing Tension: Alternate between the two winding cones, releasing tension in small increments until the spring is fully relaxed.
- Check for Tension Release: To confirm that the tension has been released, carefully lift the garage door slightly to see if it remains stable in the open position. If so, the tension has been successfully released.
By following these steps, you can release the tension from the old torsion spring and ensure a safer removal process. Once the tension is released, you can proceed to the next step of removing the old torsion spring.
When replacing a garage door torsion spring, always release the tension from the old spring before attempting to remove it. This will prevent any potential accidents or injuries.
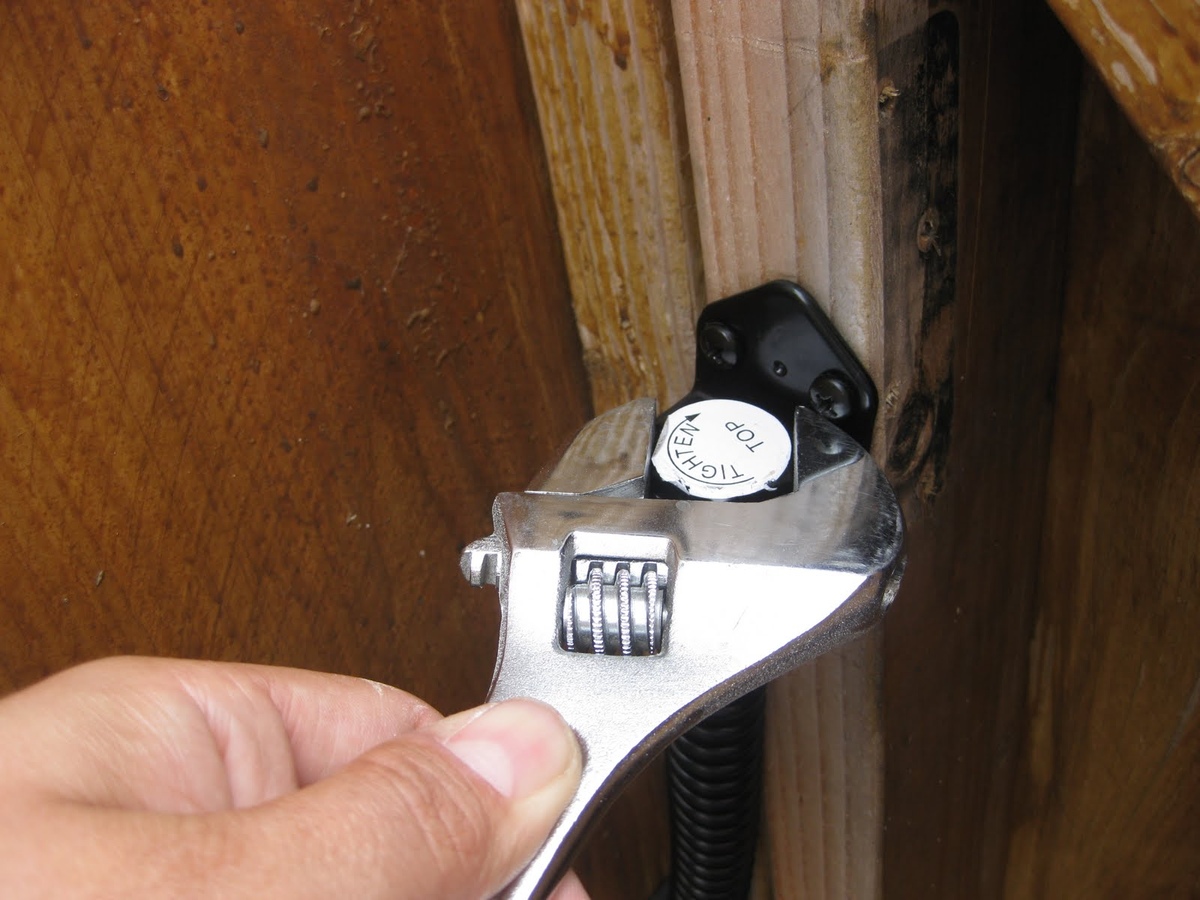
Step 4: Removing the Old Torsion Spring
Now that you have released the tension from the old torsion spring, you can proceed with removing it from your garage door. Follow these steps to safely remove the old torsion spring:
- Secure the Door: Double-check that the garage door is securely clamped or held in the open position using vise grips or clamps. This ensures that the door does not fall or unexpectedly close while you work.
- Loosen the Set Screws: Locate the set screws on the winding cones of the torsion spring. Use a socket wrench to carefully loosen the set screws. Make sure to keep a firm grip on the winding bar as you loosen the screws to prevent it from spinning.
- Remove the Set Screws: Once the set screws are loose, remove them completely from the winding cones. Be sure to keep them in a safe place where they won’t get lost or misplaced.
- Slide the Torsion Spring Off: With the set screws removed, slide the torsion spring off the torsion tube. Be cautious as you do this, as the spring may still have some residual tension, even though it has been released.
- Dispose of the Old Torsion Spring: Safely dispose of the old torsion spring. Check with your local regulations or waste management facilities for the proper disposal methods for metal springs.
Once the old torsion spring has been removed, make sure to inspect the torsion tube and other components for any signs of wear or damage. If any parts need to be replaced, it is recommended to do so before progressing to the next step of installing the new torsion spring.
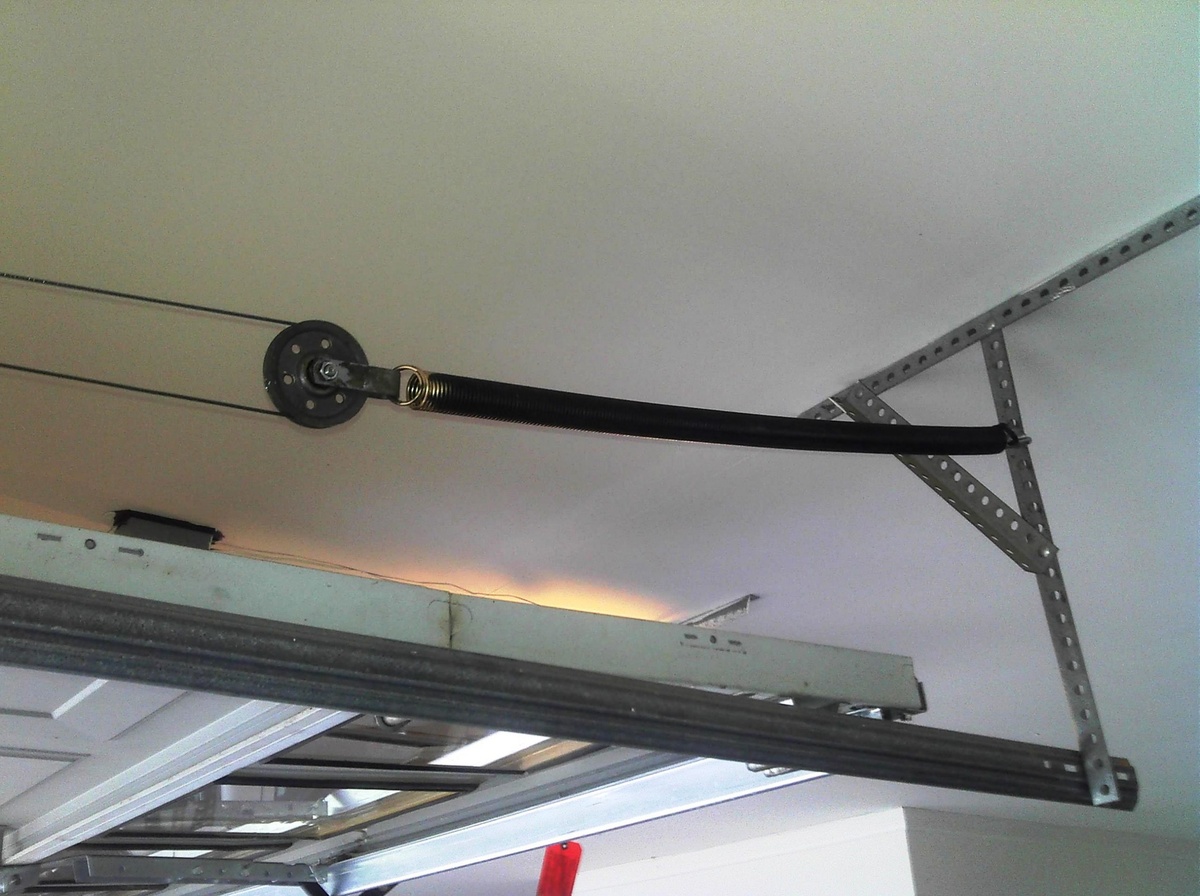
Step 5: Installing the New Torsion Spring
With the old torsion spring removed, it’s now time to install the new torsion spring onto your garage door. Follow these steps to install the new torsion spring:
- Prepare the Torsion Tube: Clean and lubricate the torsion tube to ensure smooth movement of the new torsion spring. Remove any dirt, debris, or old lubricant from the tube.
- Slide the New Torsion Spring onto the Tube: Position the new torsion spring onto the torsion tube, making sure it is centered and properly aligned with the markings or paint on the tube that indicate the correct installation point.
- Align the Winding Cone Holes: Position the winding cones at each end of the torsion spring so that the holes in the cones align with the holes in the torsion tube. This will allow the winding bars to be inserted for tensioning the spring later on.
- Secure the Winding Cones: Use a socket wrench to tighten the set screws on the winding cones. Make sure the cones are securely fastened to the torsion tube, but avoid overtightening.
- Ensure Proper Tension: It is important to apply the correct tension to the torsion spring. Refer to the manufacturer’s instructions or consult a professional to determine the appropriate number of turns or tension for your specific garage door and spring setup.
- Note the Number of Turns: Use a marking pen or tape to mark the position of the winding cones on the torsion tube. This will help you keep track of the number of turns applied to the spring.
At this stage, the new torsion spring should be securely installed on your garage door. However, it’s important to proceed with caution and ensure the spring is under the appropriate tension before moving on to the next step of winding the torsion spring.
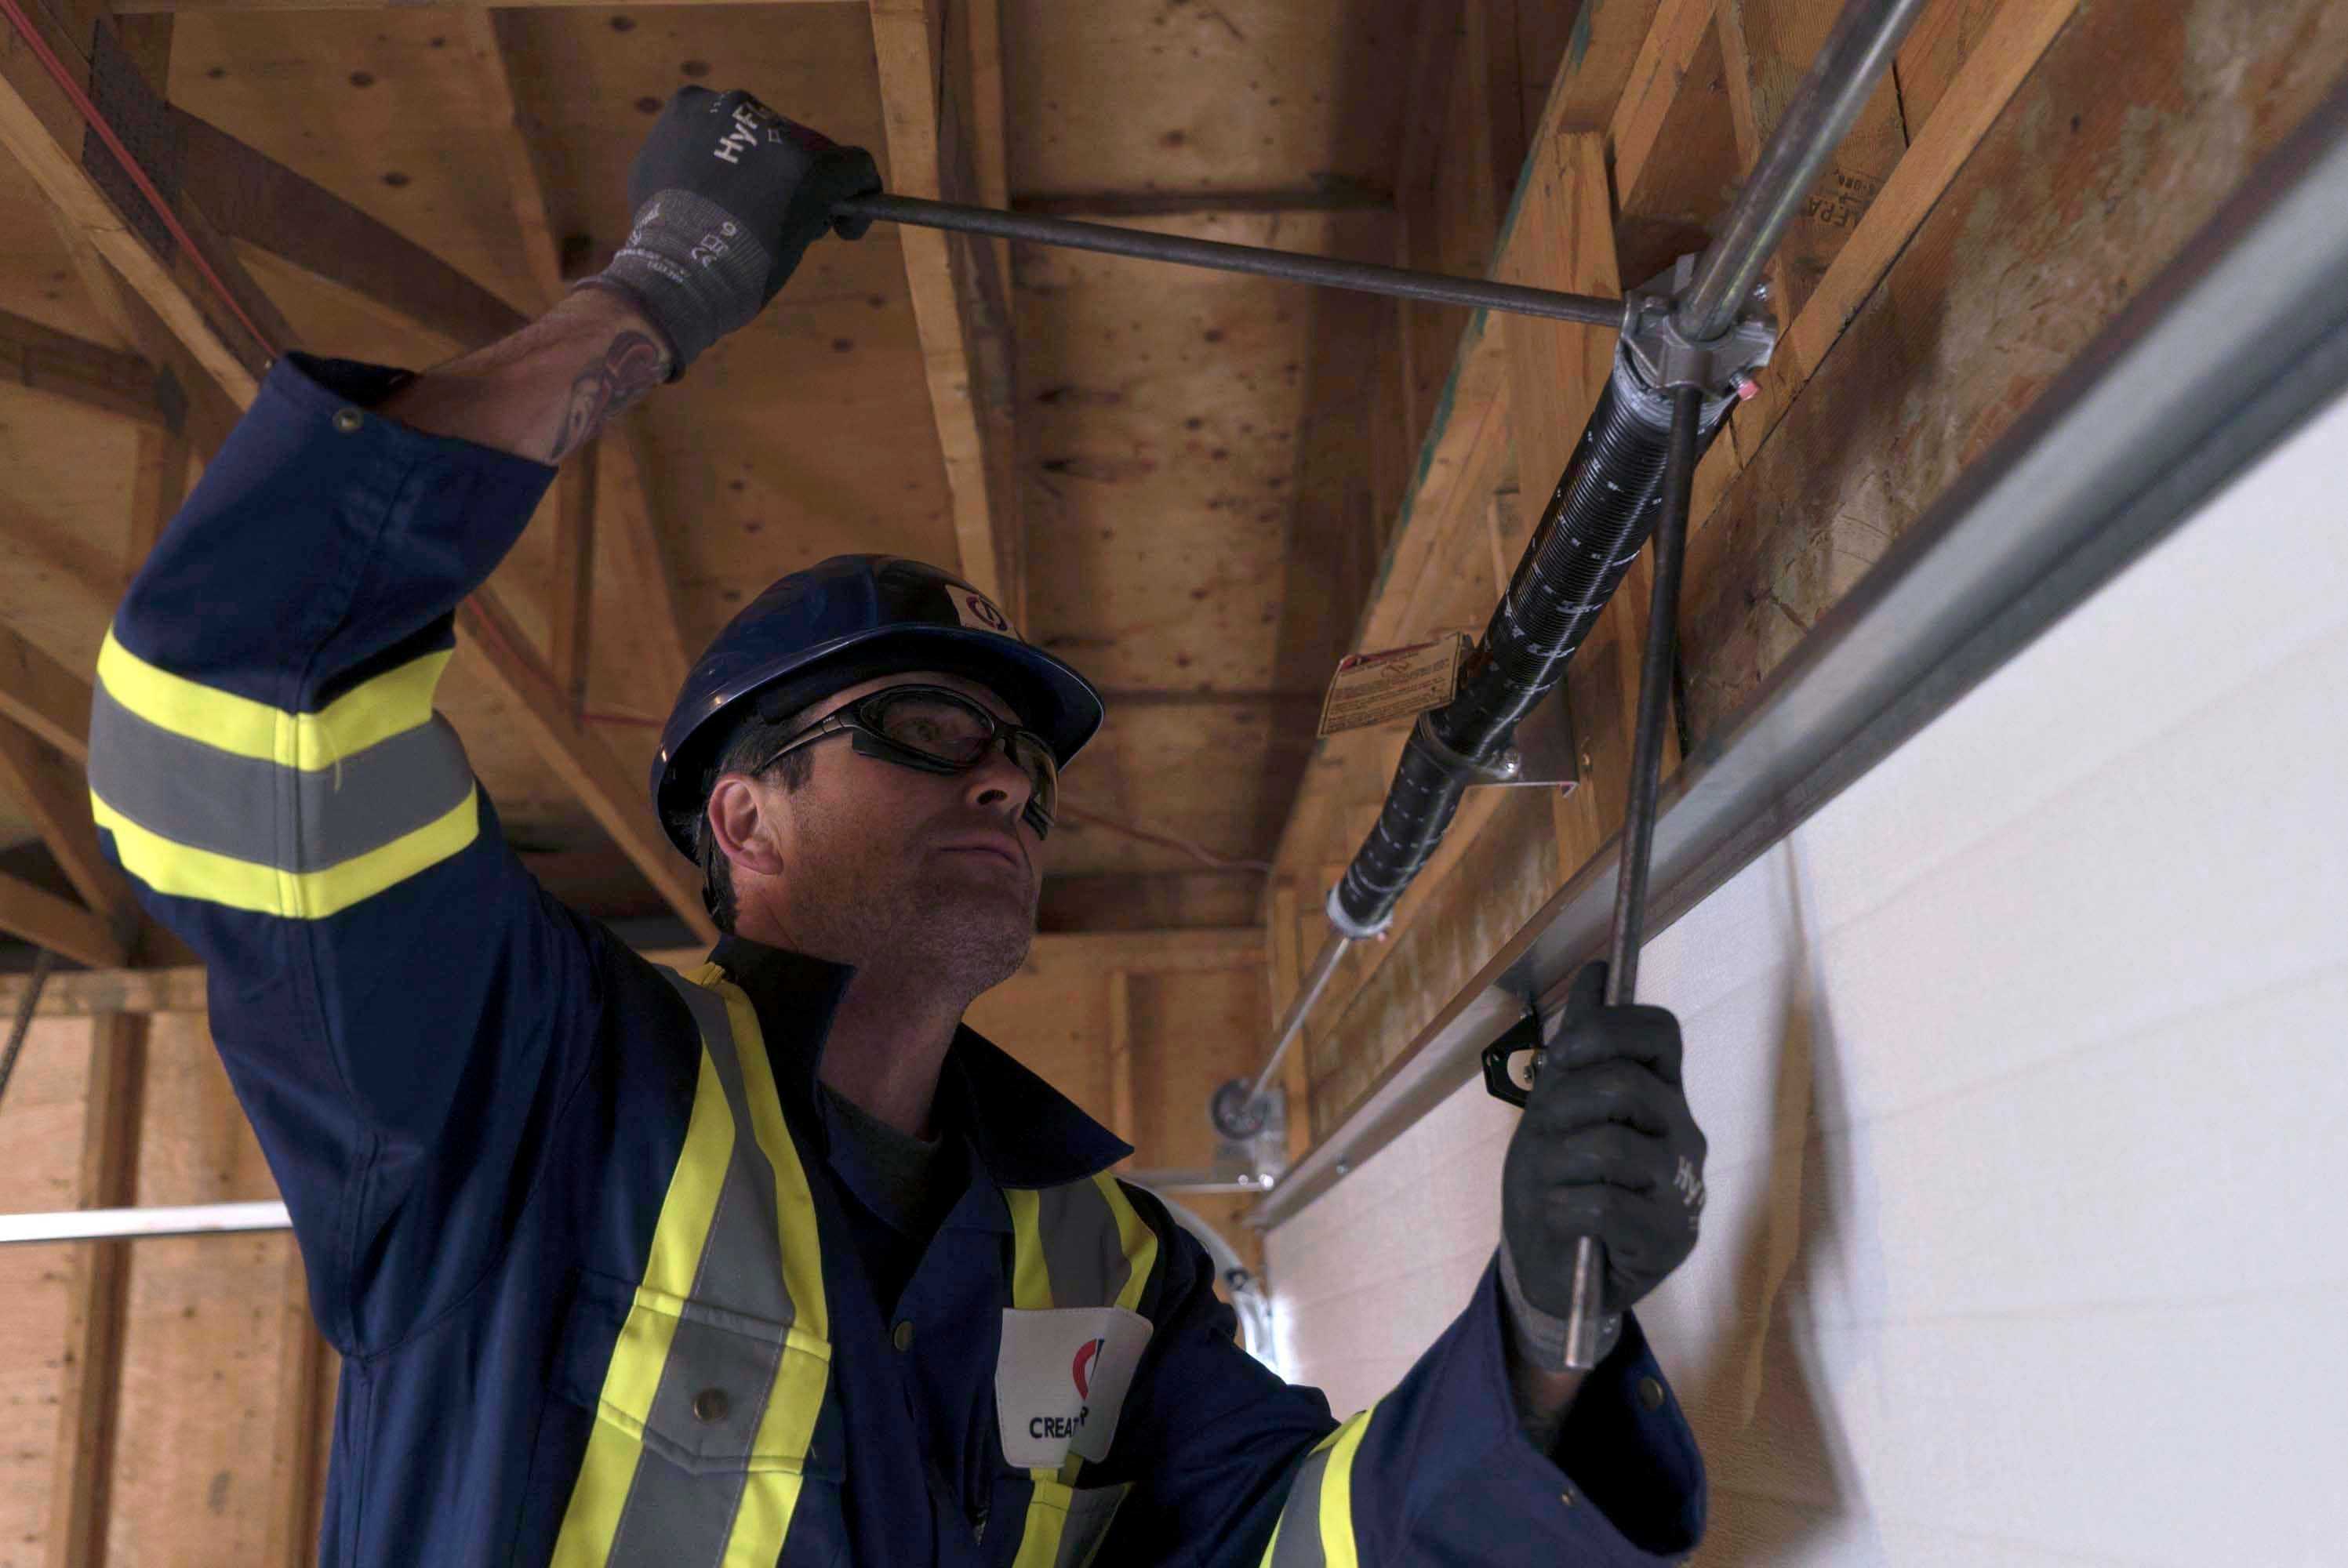
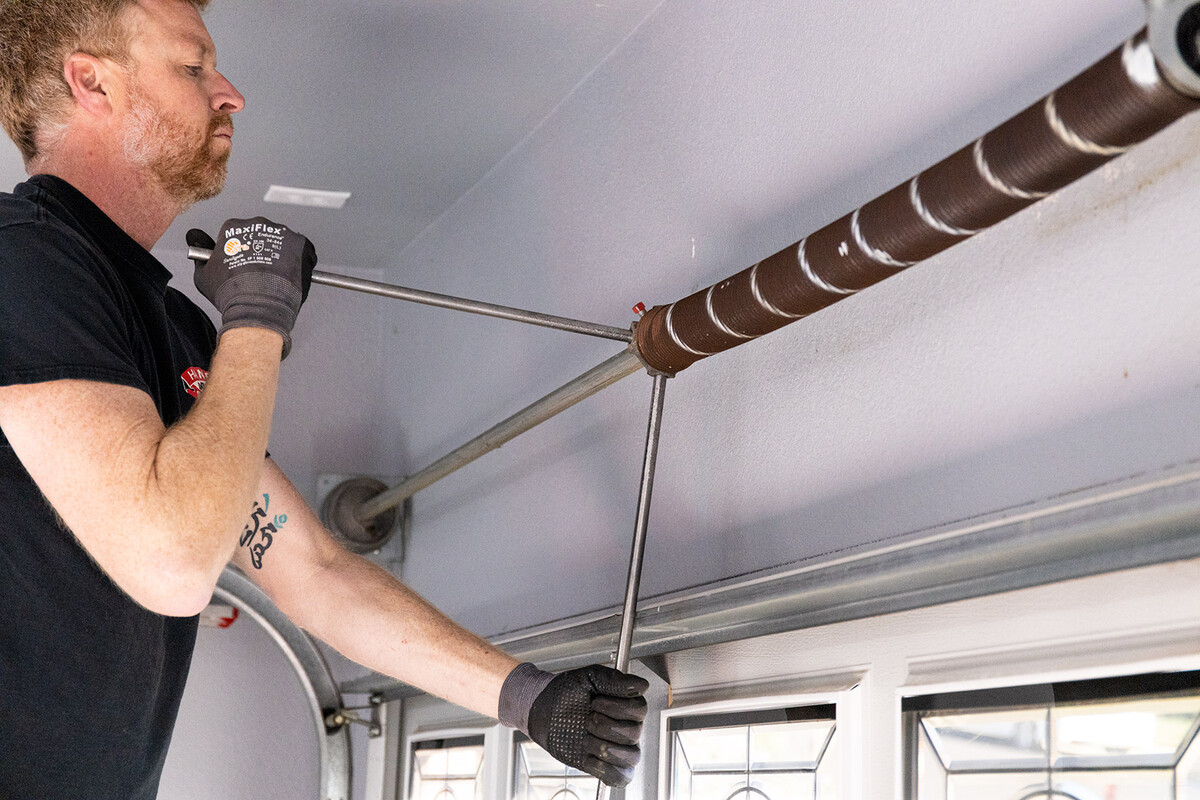
Step 6: Winding the New Torsion Spring
After installing the new torsion spring, it’s time to apply the correct tension by winding the spring. This step requires precision and caution, as improper winding can result in an unbalanced garage door and potential safety hazards. Follow these steps to properly wind the new torsion spring:
- Safety Precautions: Ensure you have your safety glasses and gloves on before proceeding.
- Insert Winding Bars: Insert a winding bar into the hole of one of the winding cones. Make sure the bar is securely inserted and held in place.
- Apply Tension: Begin winding the torsion spring by turning the winding cone in a clockwise direction. Apply the appropriate number of turns as recommended by the manufacturer or a professional technician. Take note of the number of turns as you wind the spring.
- Repeat on the Other Side: Repeat the same process on the other side of the torsion spring, inserting a winding bar into the corresponding hole of the second winding cone.
- Balance the Tension: As you wind the torsion spring, it’s important to keep the tension balanced. Make sure you apply an equal number of turns to each side of the spring to ensure proper tension distribution.
- Check Tension: Once the required number of turns has been applied, check the tension of the torsion spring. The door should stay in place when lifted slightly and not move too easily or feel too heavy. If there are any concerns about the tension, consult a professional.
- Mark the Tension: Once the desired tension is achieved, mark the position of the winding cones on the torsion tube using a marking pen or tape. This will help you identify any adjustments or maintenance needed in the future.
Properly winding the torsion spring ensures the garage door operates smoothly and safely. Take your time and exercise caution during this step to ensure accurate tension application.
Read more: How To Replace A Broken Garage Door Spring
Step 7: Reconnecting the Garage Door
Now that you have wound the new torsion spring and achieved the proper tension, it’s time to reconnect the garage door to the opener. Follow these steps to safely reconnect the garage door:
- Ensure Safety Precautions: Double-check that you are wearing your safety glasses and gloves.
- Remove the Clamps or Vise Grips: Carefully remove the clamps or vise grips that were holding the garage door in the open position. Make sure to do this slowly and ensure the door remains stable.
- Lower the Garage Door: Slowly lower the garage door until it is in a closed position. You may need the assistance of another person to do this safely.
- Reconnect the Emergency Release Cord: Locate the emergency release cord and reconnect it to the garage door opener track. Ensure it is securely attached.
- Activate the Garage Door Opener: Turn on the power to the garage door opener and activate it using the remote or wall switch. This will reconnect the door to the opener.
- Test the Functionality: Test the functionality of the garage door by opening and closing it a few times. Listen for any unusual sounds or obstructions and ensure it operates smoothly.
By following these steps, you can safely and effectively reconnect the garage door to the opener. Take the time to ensure everything is working properly before finishing the process of replacing the torsion spring.
Step 8: Testing the Garage Door
After completing the replacement of the torsion spring and reconnecting the garage door to the opener, it’s essential to thoroughly test the door to ensure its proper functionality. Follow these steps to test the garage door:
- Operate the Garage Door: Use the remote or wall switch to open and close the garage door multiple times. Pay attention to any unusual noises, jerky movements, or hesitations.
- Check for Balance: Observe the garage door as it opens and closes. It should move smoothly and remain balanced at all points of the opening and closing process. An unbalanced door may indicate improper tension in the torsion spring.
- Inspect the Hardware: Take a close look at the hinges, rollers, and other hardware components of the garage door. Ensure that they are secure and properly aligned. Make any necessary adjustments or tighten any loose hardware.
- Listen for Strange Sounds: Listen for any unusual grinding, scraping, or squeaking sounds during the operation of the garage door. These sounds may indicate potential issues that need to be addressed.
- Test the Auto-Reverse Mechanism: Place an obstruction in the path of the garage door and activate the door to close. The door should automatically reverse when it comes into contact with the obstruction. If it doesn’t, the auto-reverse mechanism may need to be adjusted or serviced.
- Perform a Safety Test: Test the safety features of the garage door by placing a cinder block or piece of wood under the door. Attempt to close the door using the wall switch or remote. The door should automatically reverse if it detects an obstruction.
- Repeat the Tests: Repeat the tests several times to ensure consistent results. If you notice any issues or abnormalities during the testing process, consult a professional for further inspection and assistance.
Regular testing and maintenance of your garage door are important to keep it in good working condition and ensure the safety of you and your family. By following these testing steps, you can ensure that the replacement of the torsion spring has been successful and that your garage door is functioning properly.
Conclusion
Replacing a garage door torsion spring is a task that requires careful attention, proper technique, and a focus on safety. By following the step-by-step process outlined in this article, you can successfully replace a garage door torsion spring and ensure the smooth and safe operation of your garage door.
Throughout the process, it is crucial to prioritize safety precautions, such as wearing protective gear, disconnecting the power supply, and securing the garage door in the open position. Working with garage door springs can be dangerous, so if you are unsure or uncomfortable with performing the replacement yourself, it is always recommended to seek the assistance of a professional technician.
We have discussed the tools and materials needed for the job, including winding bars, vise grips, socket wrench, and the replacement torsion spring. Accurate measurement and ordering of the new torsion spring are essential to ensure a proper fit.
The step-by-step process covered in this article includes disconnecting the garage door, releasing tension from the old torsion spring, removing the old spring, installing the new torsion spring, winding the new spring with the correct tension, and reconnecting the garage door to the opener. Finally, testing the garage door ensures its functionality and safety.
Remember, regular maintenance of your garage door, including inspections and lubrication, can help prevent future issues and extend the lifespan of your garage door and its components.
Overall, replacing a garage door torsion spring requires careful attention to detail and adherence to safety guidelines. By following the instructions provided in this article and exercising caution throughout the process, you can successfully replace a garage door torsion spring and enjoy a properly functioning and safe garage door for years to come.
Frequently Asked Questions about How To Replace A Garage Door Torsion Spring
Was this page helpful?
At Storables.com, we guarantee accurate and reliable information. Our content, validated by Expert Board Contributors, is crafted following stringent Editorial Policies. We're committed to providing you with well-researched, expert-backed insights for all your informational needs.
0 thoughts on “How To Replace A Garage Door Torsion Spring”