Articles
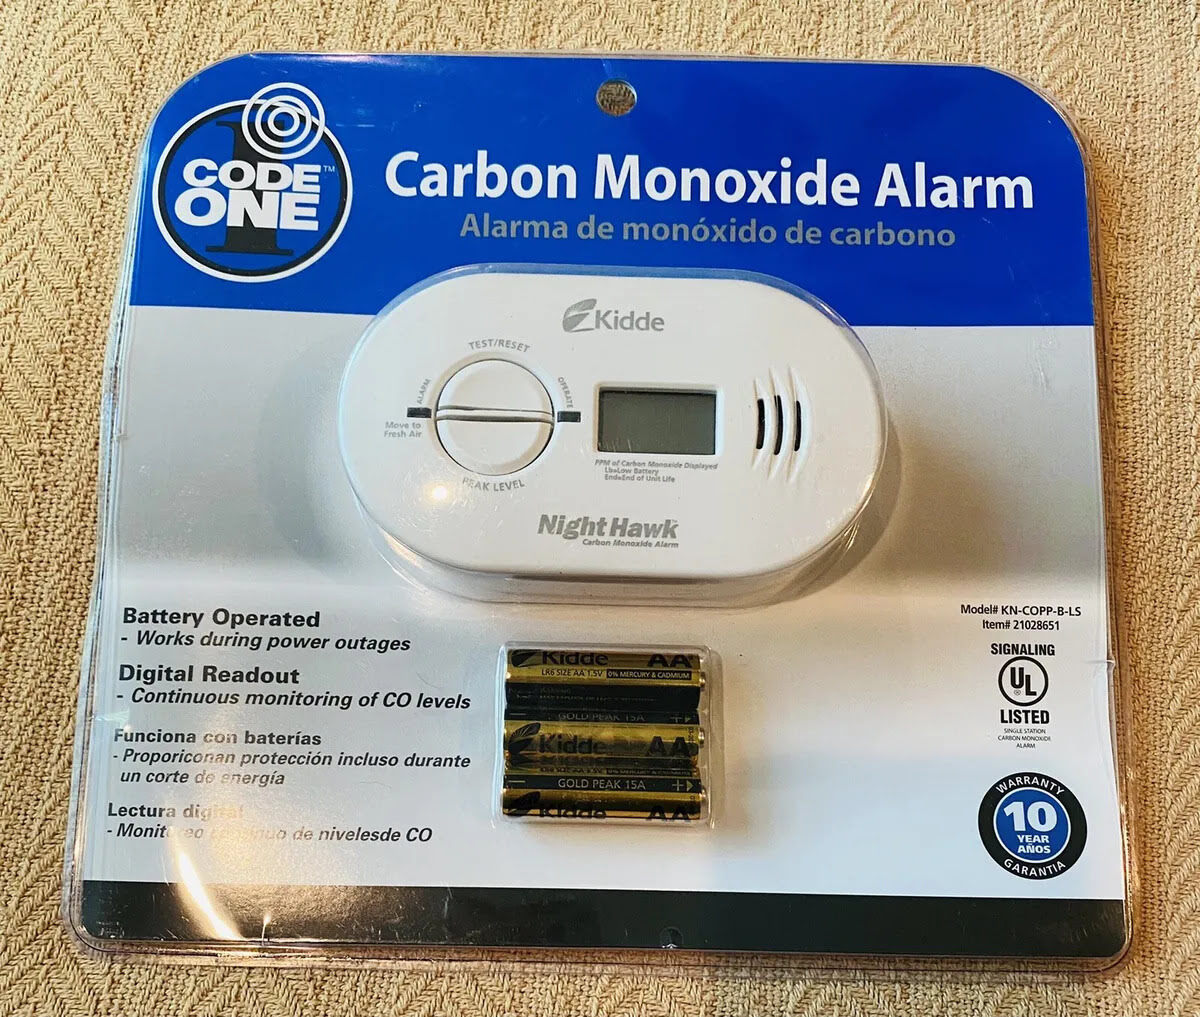
How To Reset A Kidde Carbon Monoxide Detector
Modified: August 20, 2024
Learn how to reset a Kidde carbon monoxide detector in a few simple steps. Check out our detailed article for helpful instructions and troubleshooting tips.
(Many of the links in this article redirect to a specific reviewed product. Your purchase of these products through affiliate links helps to generate commission for Storables.com, at no extra cost. Learn more)
Introduction
Welcome to the guide on how to reset a Kidde carbon monoxide detector. Carbon monoxide (CO) is a colorless, odorless, and tasteless gas that can be extremely dangerous when present in high levels. Therefore, it is crucial to have a functioning carbon monoxide detector in your home to protect yourself and your loved ones from this silent killer.
Kidde is a well-known brand that manufactures reliable and easy-to-use carbon monoxide detectors. However, like any electronic device, these detectors may experience occasional glitches or false alarms. In such cases, resetting the detector can help resolve the issue and ensure its proper functioning.
In this article, we will walk you through the step-by-step process of resetting a Kidde carbon monoxide detector. Whether you are experiencing an alarm malfunction or just want to perform routine maintenance, this guide will provide you with the necessary instructions to reset your detector and restore its optimal performance.
Please note that different models of Kidde carbon monoxide detectors may have slightly different reset procedures. Therefore, it is always recommended to refer to the user manual specific to your model for accurate instructions. However, the general steps outlined in this article can serve as a helpful guide for most Kidde carbon monoxide detectors.
Before we dive into the reset process, it is important to emphasize that if your carbon monoxide detector is constantly going off, indicating a high level of carbon monoxide in your home, you should immediately evacuate the premises and call emergency services. Resetting the detector should only be done when there is no immediate danger or when instructed to do so by the manufacturer or a professional technician.
Now that you understand the importance of carbon monoxide detection and the precautions to take in case of an emergency, let’s move on to the step-by-step instructions to reset your Kidde carbon monoxide detector.
Key Takeaways:
- Regularly test and reset your Kidde carbon monoxide detector to ensure it functions properly and provides reliable protection against this silent killer. Prioritize safety by following the manufacturer’s instructions and staying proactive in maintenance.
- Familiarize yourself with the reset process for your specific Kidde carbon monoxide detector model and conduct routine testing to safeguard your household from the dangers of carbon monoxide. Stay vigilant, stay safe!
Read more: How To Test A Kidde Carbon Monoxide Detector
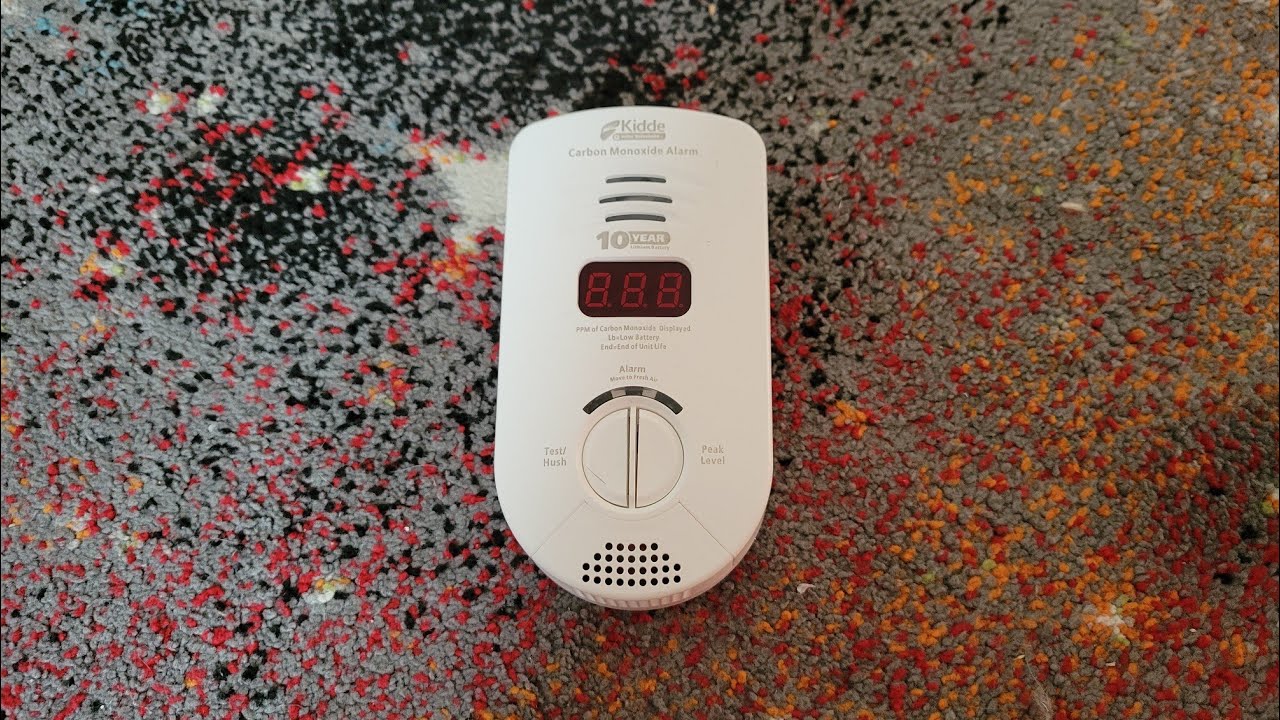
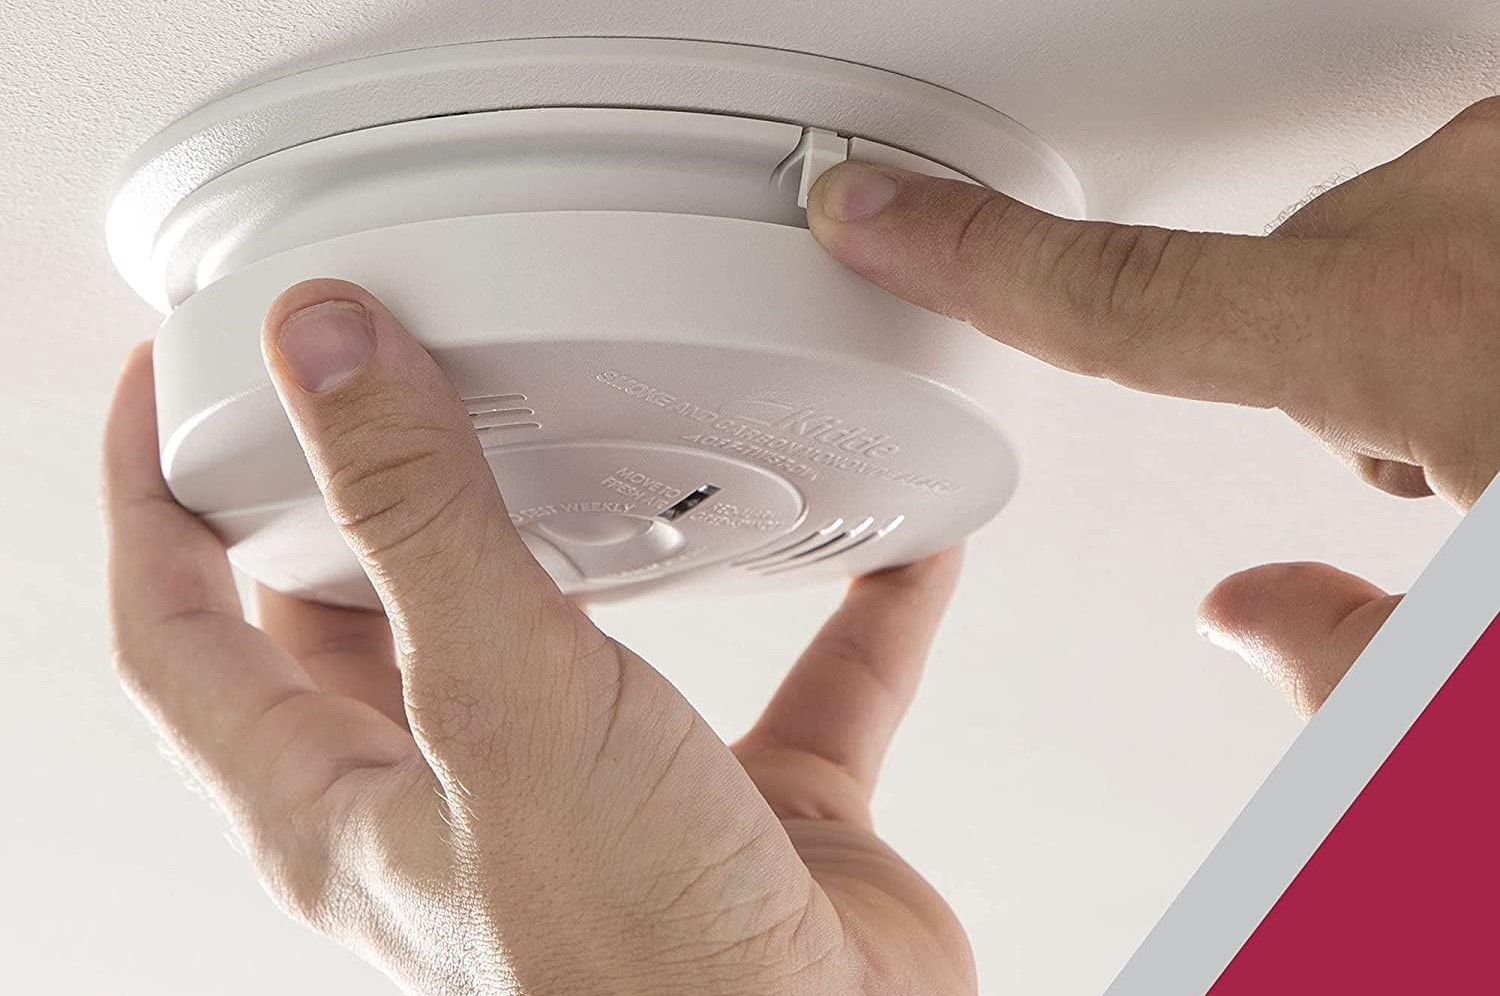
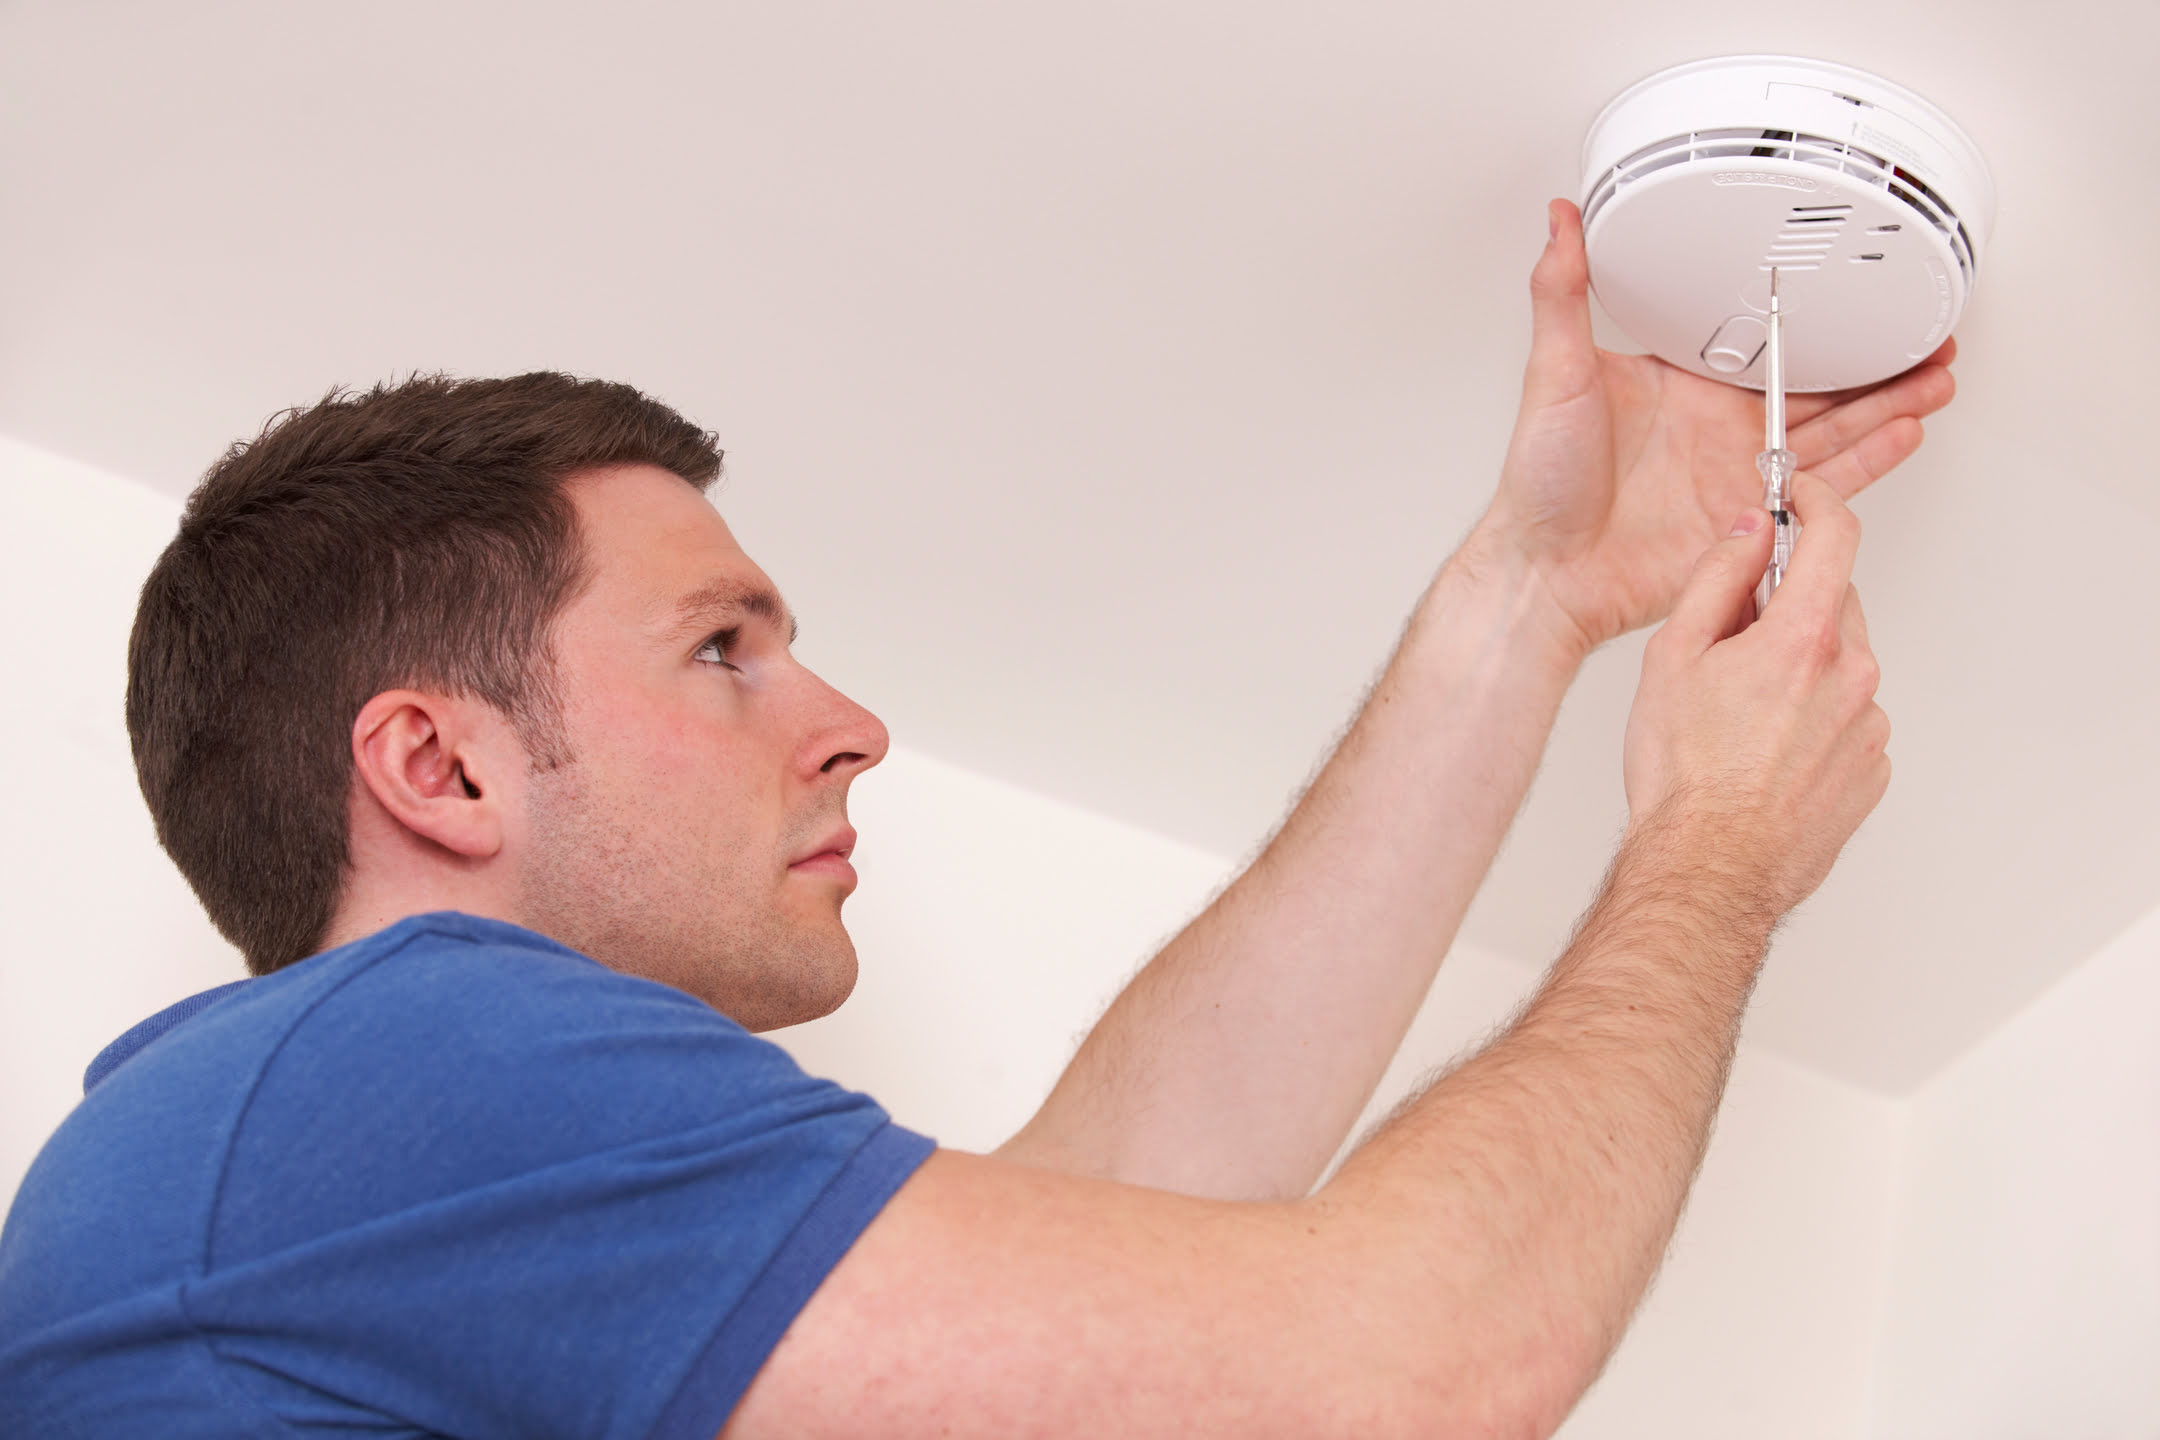
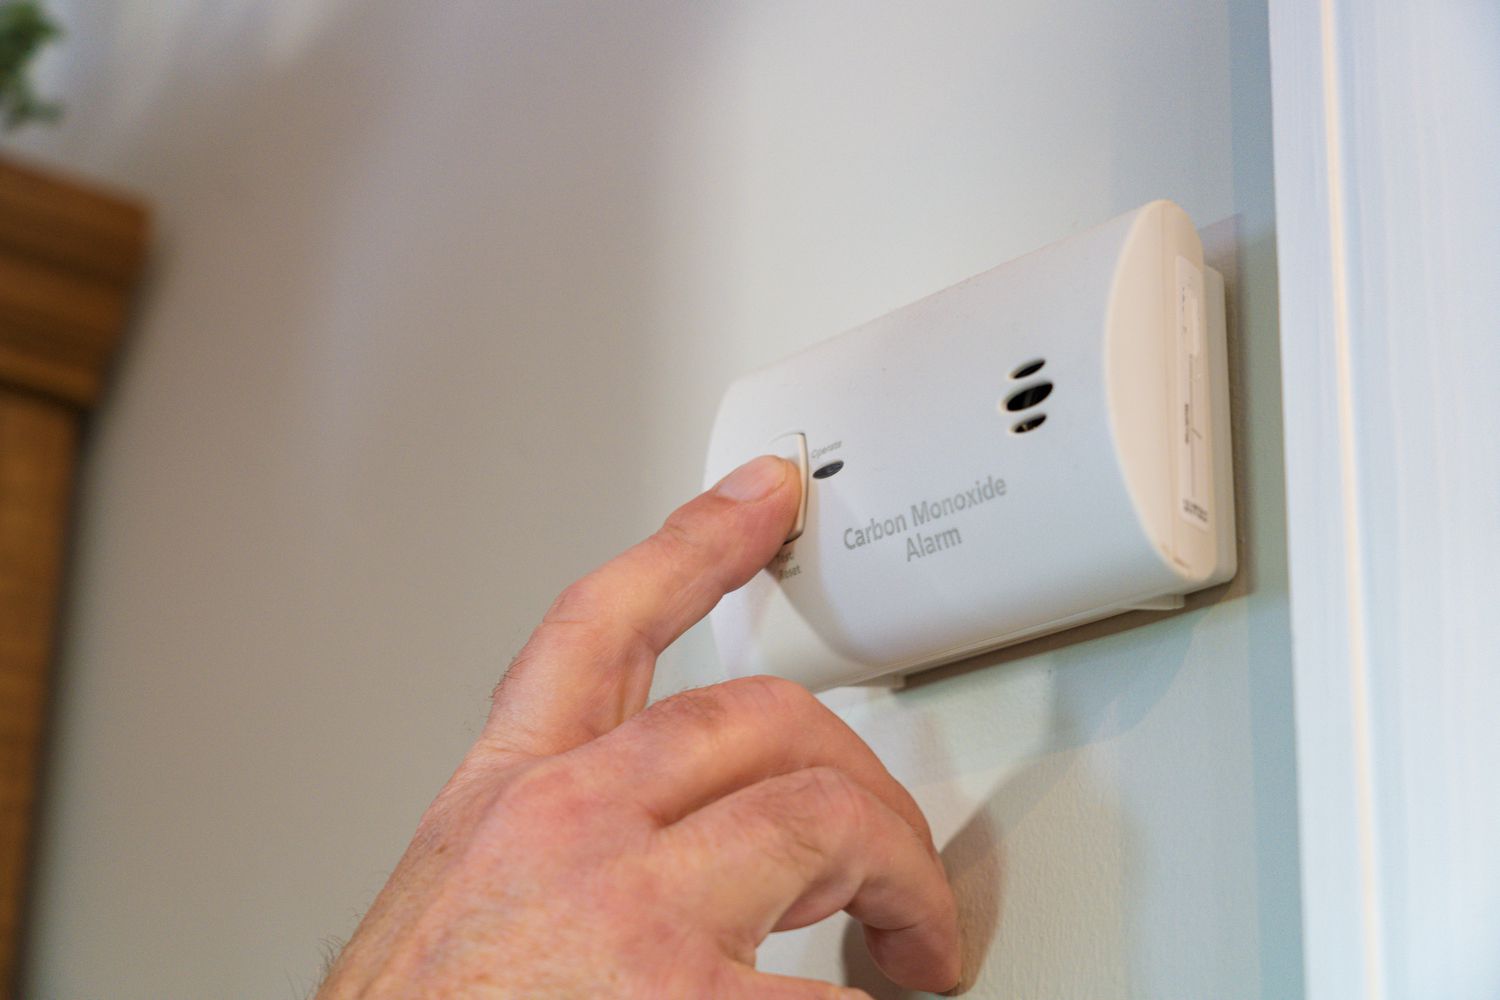
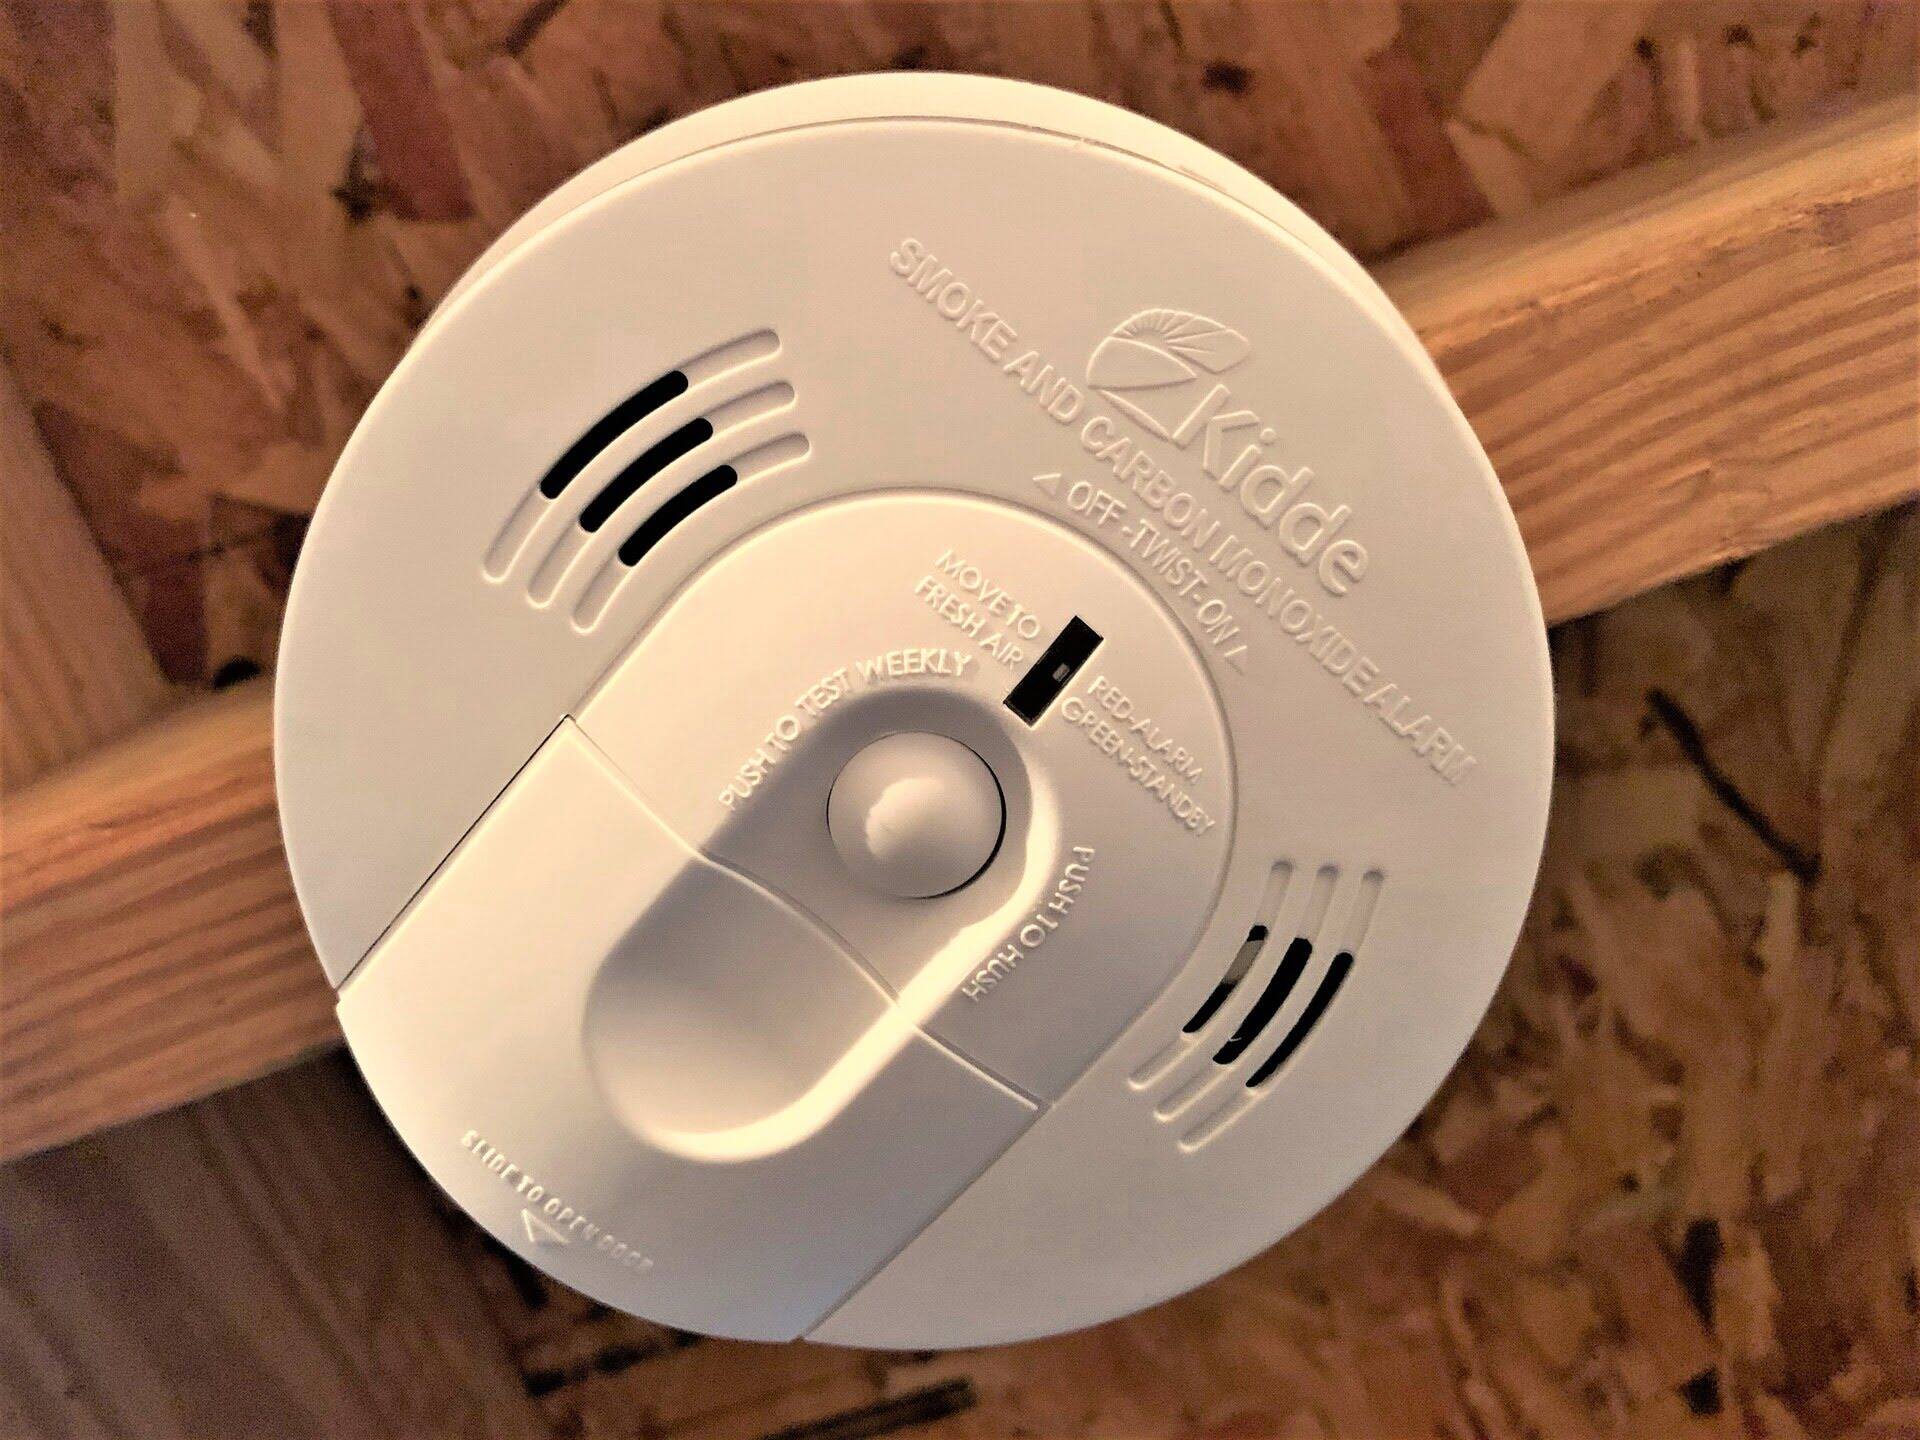
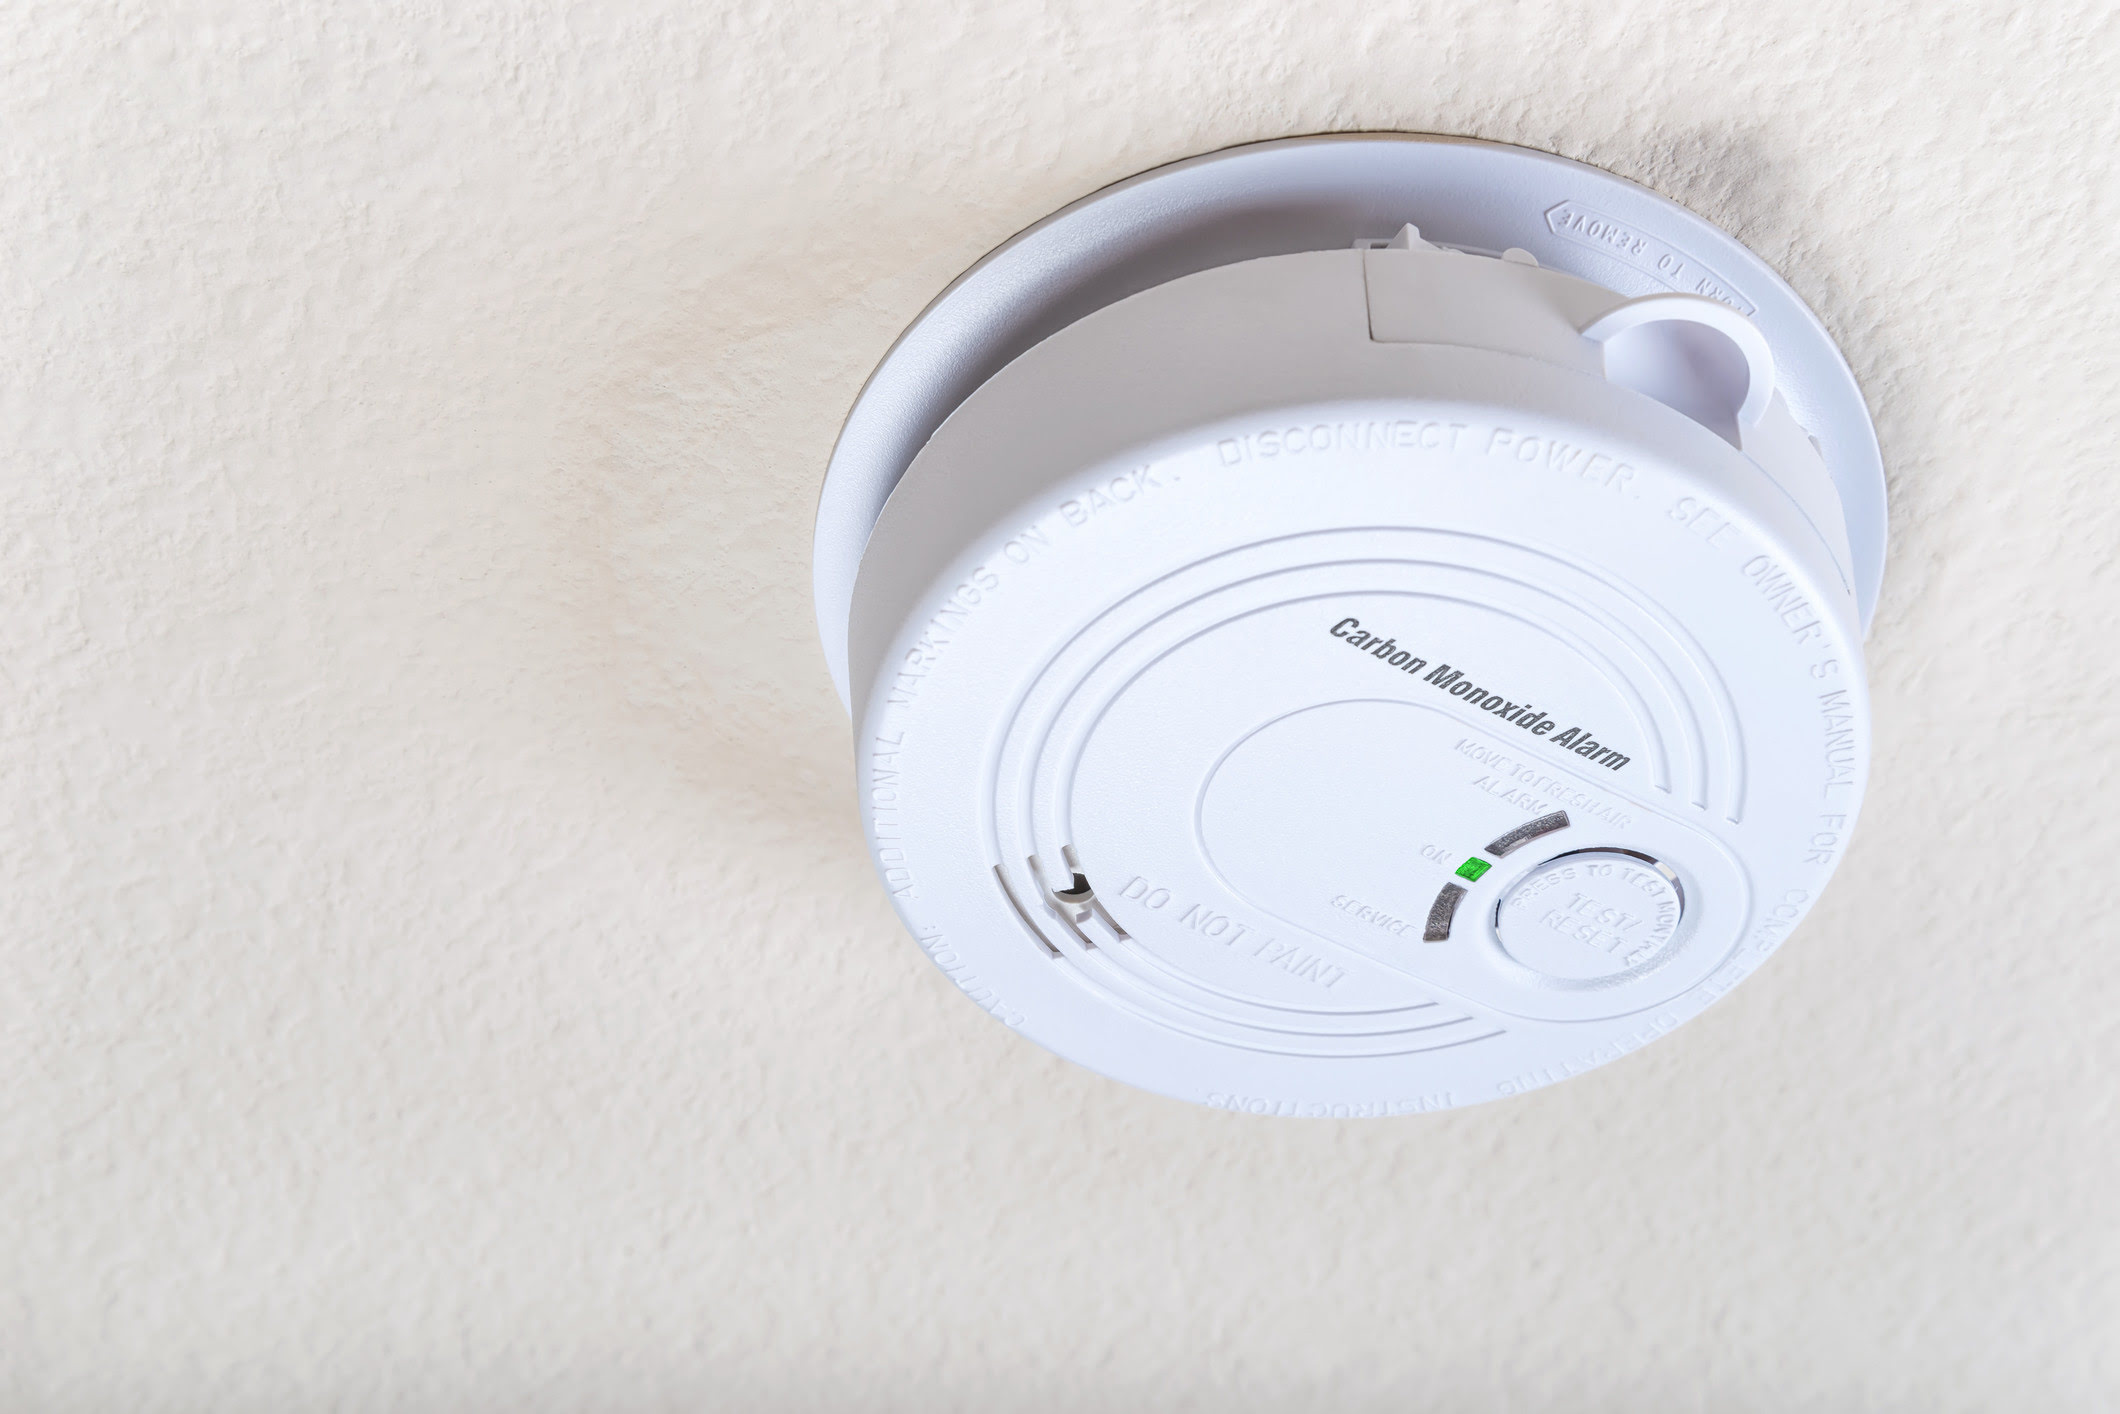
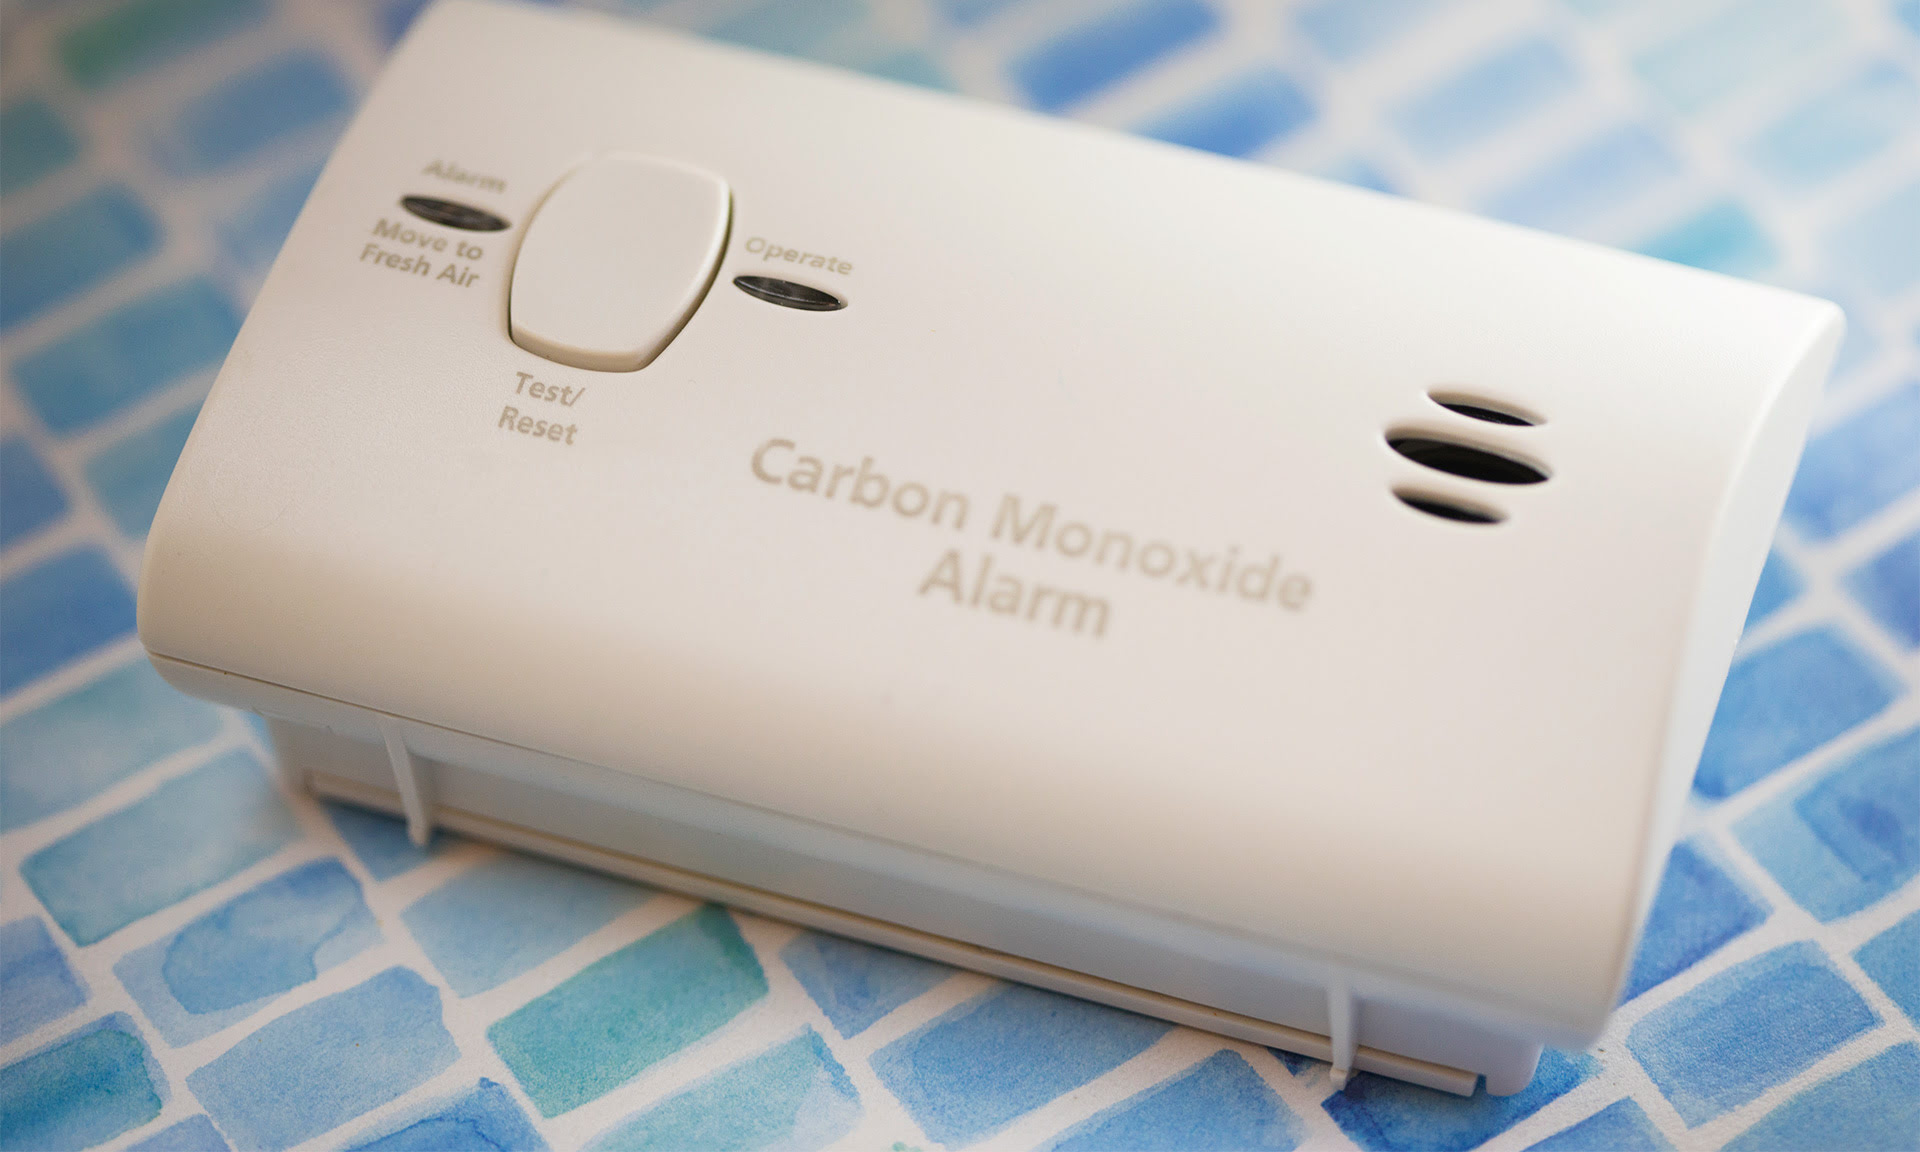
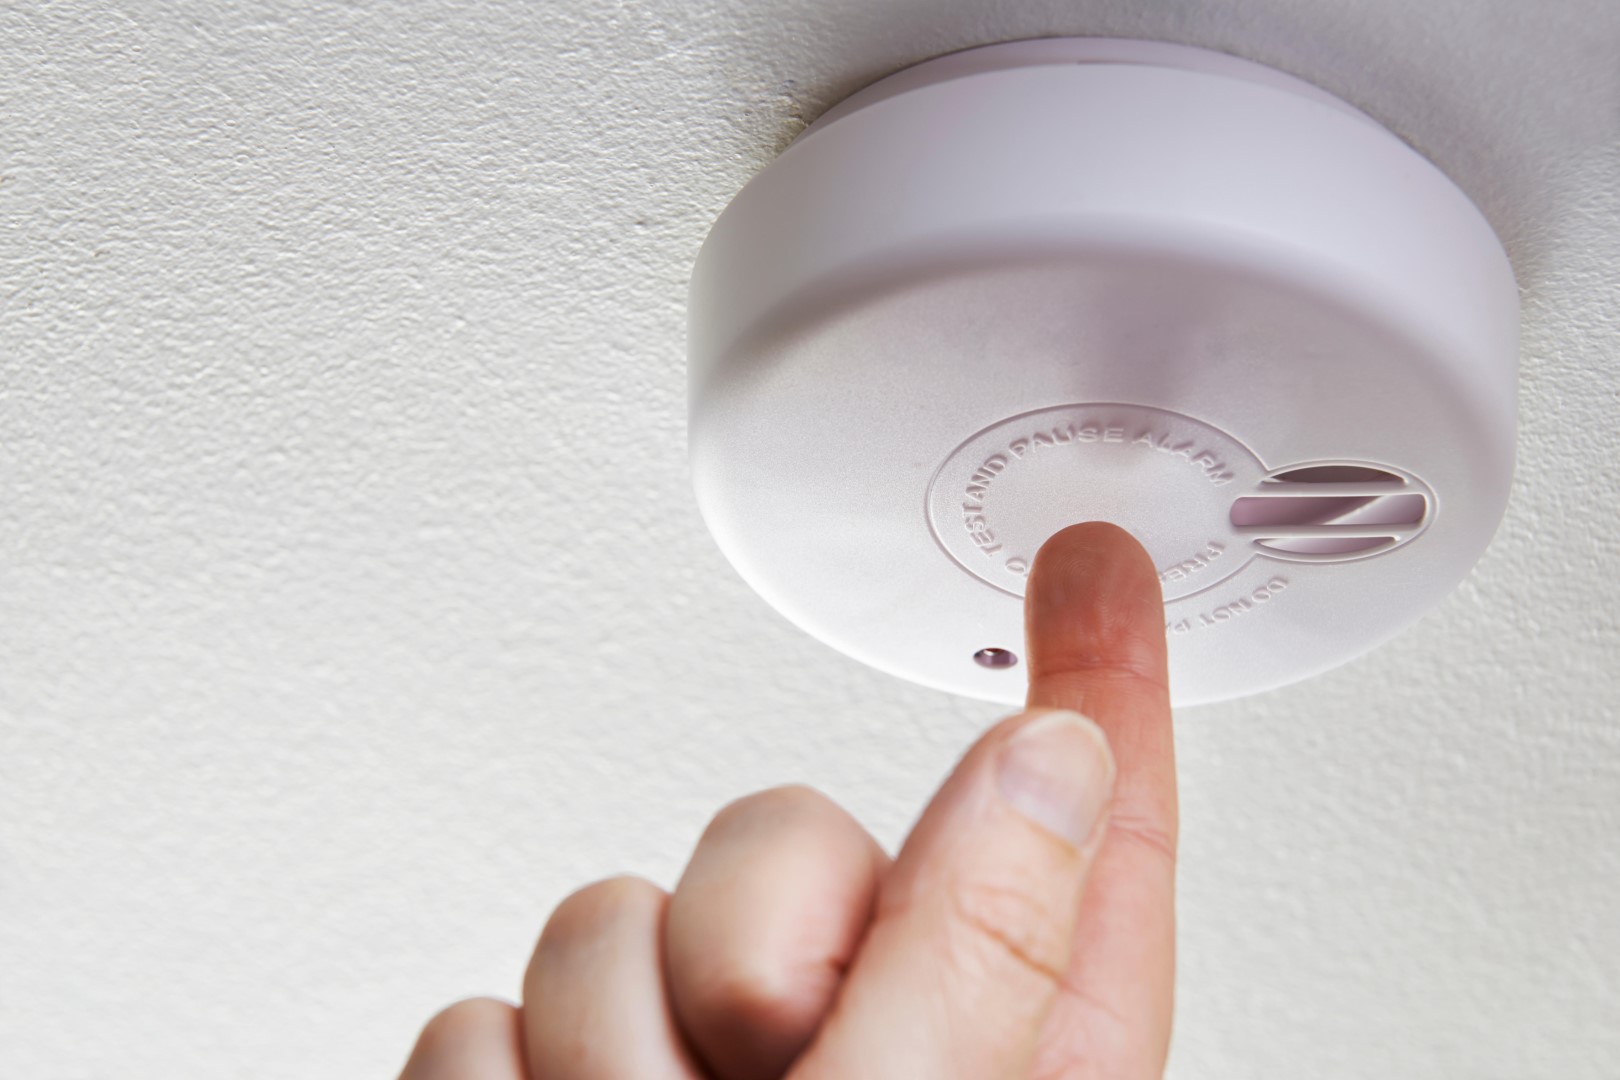
Step 1: Locate the Reset Button
The first step in resetting your Kidde carbon monoxide detector is to locate the reset button. The location of the reset button may vary depending on the model of your detector, but it is typically found on the front or side of the device.
Look for a small button labeled “Reset” or a small hole labeled “Reset” with the button inside. Some models may require you to remove the detector from its mounting bracket to access the reset button. Refer to your user manual or the labeling on your device to pinpoint the exact location of the reset button.
Once you have located the reset button, ensure that you have easy access to it. Make sure your detector is not obstructed by any objects or decorations that could interfere with the reset process. Clearing the area around the detector will make it easier for you to press the reset button.
Remember, the reset button is specifically designed for the purpose of resetting the detector and should not be confused with other buttons or functions on the device. If you are unsure whether you have found the correct button, refer to the user manual or contact Kidde customer support for clarification.
Once you have identified the reset button and ensured easy access to it, you are ready to proceed to the next step of the reset process.
Step 2: Press and Hold the Reset Button
Now that you have located the reset button on your Kidde carbon monoxide detector, it’s time to move on to the next step: pressing and holding the reset button.
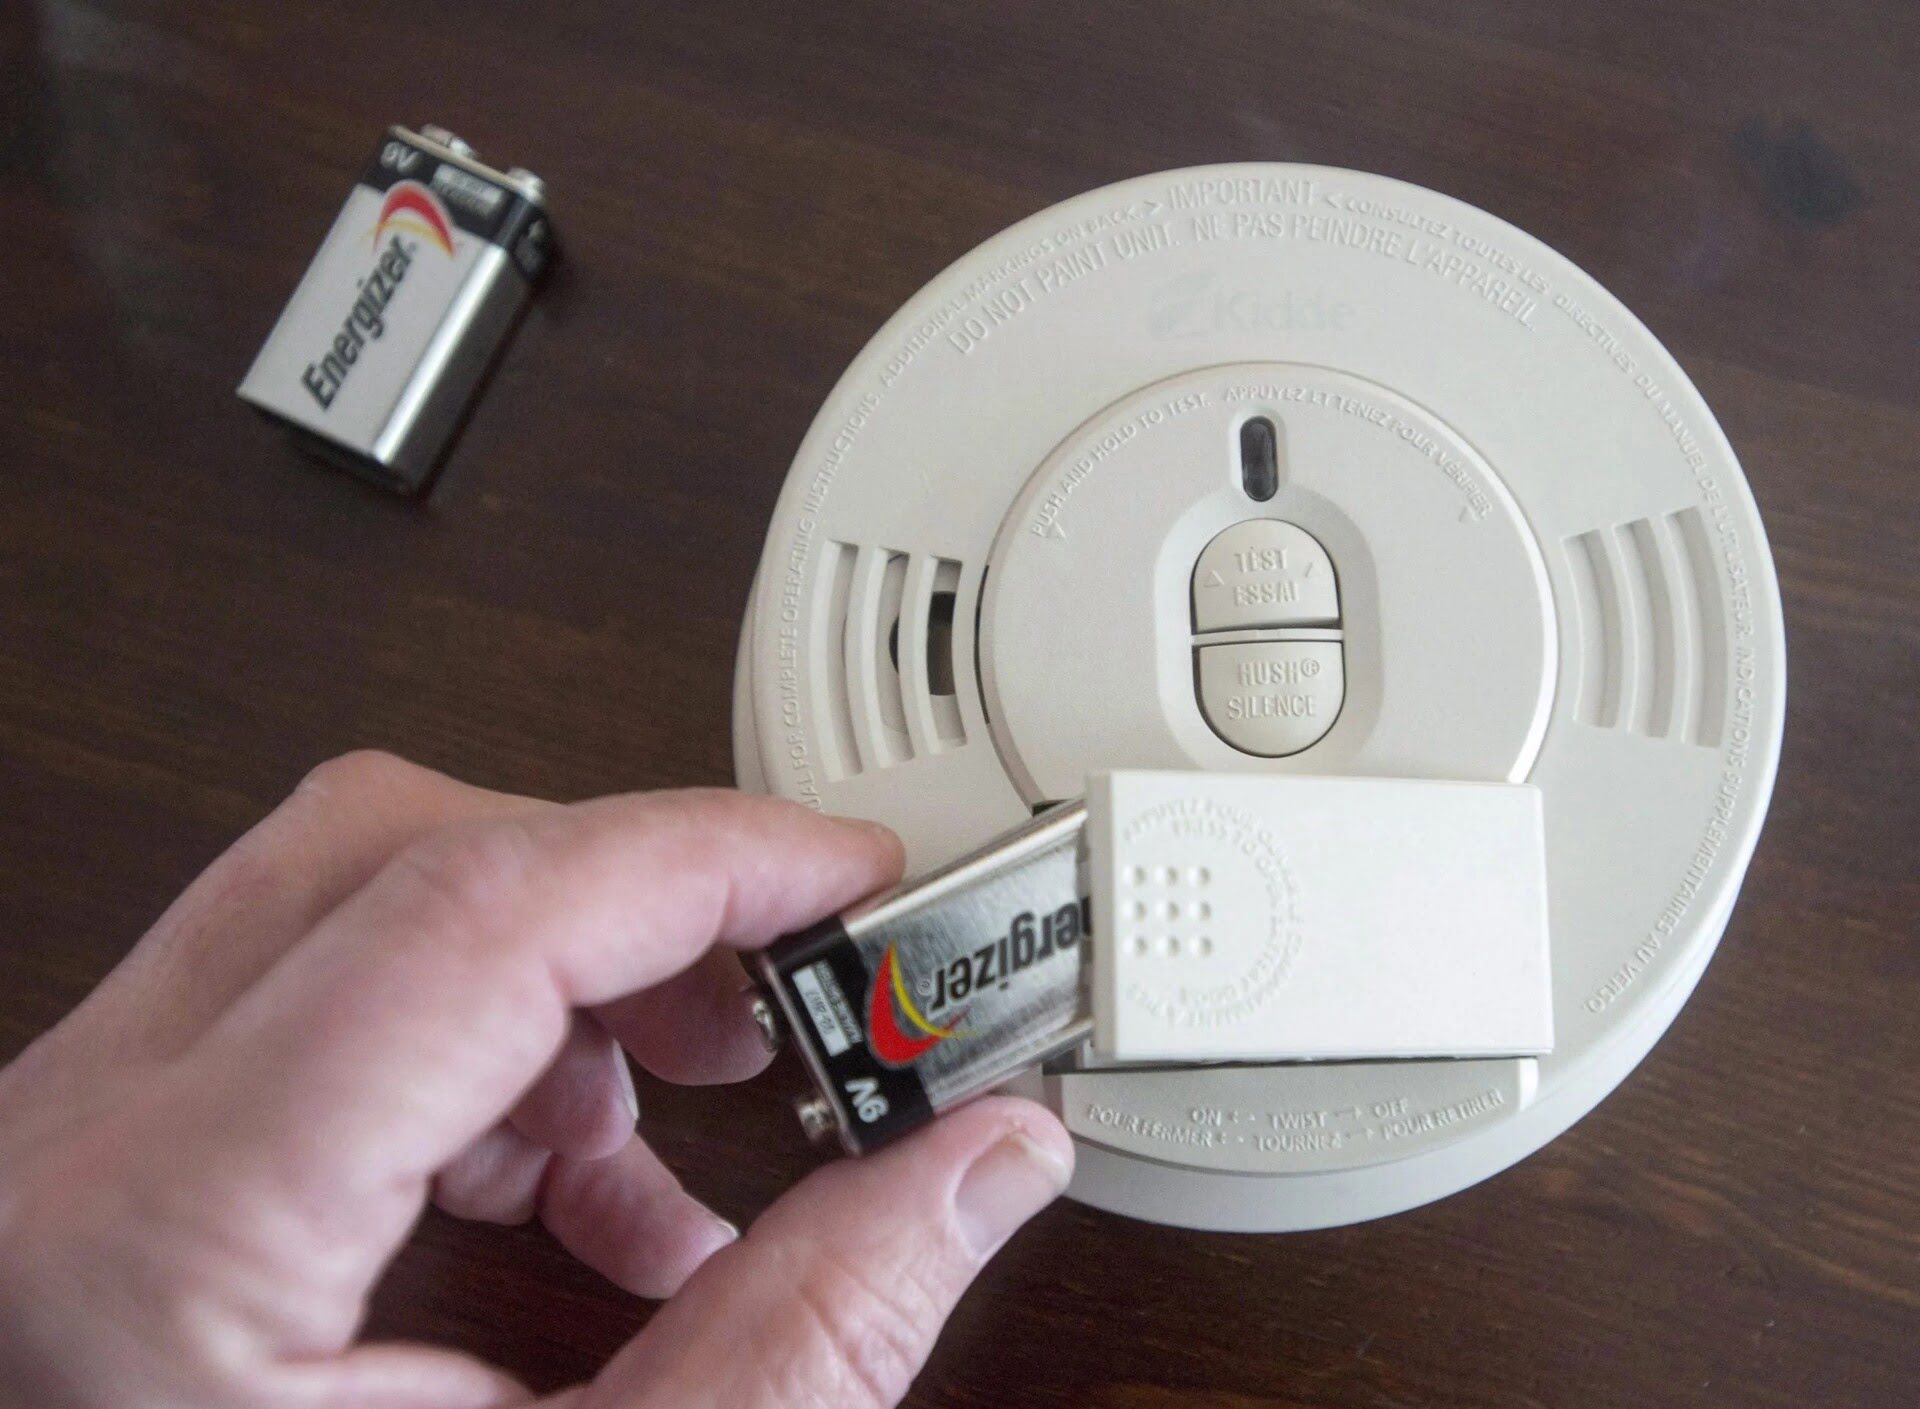
To initiate the reset process, firmly press and hold the reset button using a small, pointed object such as a pen or a paperclip. Apply steady pressure to ensure that the button is fully depressed and held down.
It’s important to note that the duration for which you need to hold down the reset button may vary depending on the specific model of your Kidde carbon monoxide detector. Some models may require you to hold the reset button for a few seconds, while others may require a longer duration.
Refer to your user manual or the instructions provided by Kidde for the recommended duration of holding down the reset button. If you are unable to find the specific instructions, a general rule of thumb is to hold the button down for about 10-15 seconds or until you see signs of the detector resetting.
While holding down the reset button, you may notice some visual indicators on the detector, such as lights flashing or the screen momentarily turning off and then back on. These are normal indications that the reset process is in progress.
It’s important to be patient and continue holding the reset button until the reset process is completed. During this time, it’s crucial not to release the button prematurely, as it may interrupt the reset sequence and require you to start the process again.
Once you have held down the reset button for the recommended duration, you can then proceed to the next step of the reset process.
To reset a Kidde carbon monoxide detector, press and hold the “Test/Reset” button until the alarm sounds and the unit resets. Make sure to check the user manual for specific instructions.
Step 3: Wait for the Alarm to Reset
After pressing and holding the reset button on your Kidde carbon monoxide detector, you will now need to wait for the alarm to reset. This step is crucial to ensure that the detector is properly calibrated and ready to resume its normal functioning.
The duration for which you need to wait for the alarm to reset may vary depending on the specific model of your Kidde carbon monoxide detector. Some models may reset within a few seconds, while others may take up to a minute or longer.
During this time, it’s important to avoid touching or tampering with the detector. Allow it to complete the reset process without any interference. Avoid pressing any other buttons or making adjustments to the detector’s settings while it is resetting.
You may notice some visual or audible indications that the alarm is resetting. For instance, the lights on the detector may change color or sequence, or you may hear a beep or chime indicating that the reset process is in progress.
Be patient and give the detector ample time to reset. The length of this waiting period will depend on the manufacturer’s specifications and the complexity of the reset process for your specific model.
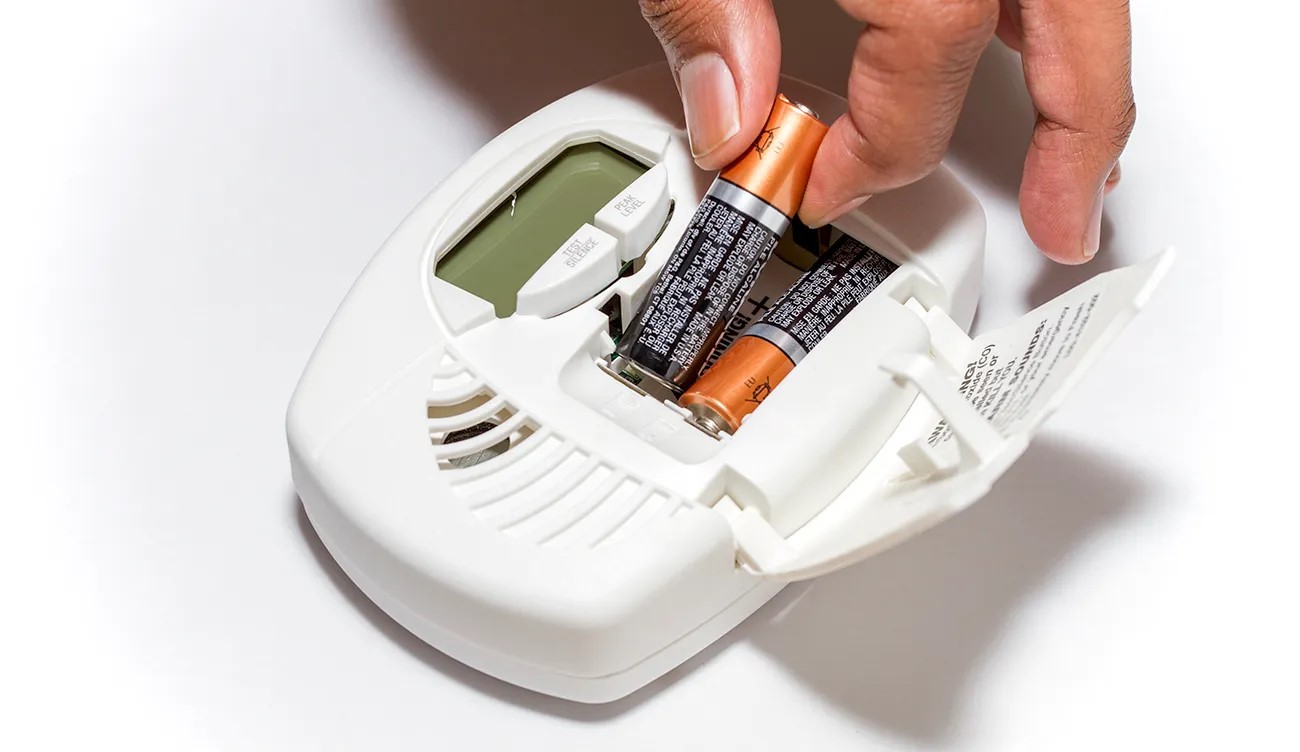
While waiting for the alarm to reset, it’s a good time to visually inspect the detector for any signs of damage or wear. Check the batteries, if applicable, to ensure they are properly installed and have sufficient charge. If you notice any issues with the detector’s physical condition, contact Kidde customer support for further assistance.
Once the reset process is complete and the detector has finished resetting, you can proceed to the final step: testing the detector to ensure it is functioning correctly.
Step 4: Test the Detector
Now that you have successfully reset your Kidde carbon monoxide detector, it’s important to test it to ensure that it is functioning properly. Regular testing of your detector is essential to ensure early detection of any potential carbon monoxide leaks.
To test your Kidde carbon monoxide detector, follow these steps:
- Locate the “Test” button on the detector. This button is typically labeled as “Test” or depicted by a symbol of a bell or alarm.
- Press and hold the “Test” button for a few seconds. This will simulate the presence of carbon monoxide and trigger the alarm for testing purposes.
- Observe the detector to ensure that it activates the alarm. You should hear a loud and distinct alarm sound, indicating that the detector is working correctly.
- Pay attention to any visual indicators on the detector, such as LED lights or a digital display, to confirm that the alarm is activated and functioning as expected.
- If the alarm does not sound or you notice any issues during the testing process, refer to the user manual or contact Kidde customer support for troubleshooting guidance.
- Once you are satisfied that the detector is functioning correctly, reset the alarm by pressing the reset button again or following the specific instructions provided by Kidde.
It’s important to note that testing your detector should be done on a regular basis as part of your home maintenance routine. The frequency of testing may vary depending on the recommendations provided by Kidde or the relevant authorities in your area.
In addition to regular testing, it’s also crucial to replace the batteries or the entire detector as per the manufacturer’s instructions or when the detector reaches the end of its lifespan. Regular maintenance and replacement of your Kidde carbon monoxide detector will ensure that it continues to provide accurate and reliable protection against carbon monoxide exposure.
With the completion of the testing process, you have successfully reset and tested your Kidde carbon monoxide detector. Congratulations on taking the necessary steps to ensure the safety of you and your loved ones from the dangers of carbon monoxide.
Remember to read and familiarize yourself with the instructions provided by Kidde for your specific model to ensure you follow the correct procedures for resetting and testing your carbon monoxide detector.
Conclusion
Ensuring the proper functioning of your Kidde carbon monoxide detector is essential for the safety and well-being of your household. By following the step-by-step instructions outlined in this guide, you now have the knowledge to reset and test your detector effectively.
Remember, the reset button is typically located on the front or side of the detector, and you must press and hold it for the recommended duration. Allow the alarm to reset and then proceed to test it using the dedicated “Test” button. Regular testing, along with proper maintenance and battery replacement, will help optimize the performance of your detector.
It is crucial to prioritize the safety of your household by being proactive in carbon monoxide detection and prevention. Carbon monoxide is an odorless and invisible gas that can be life-threatening when its levels are too high. Understanding how to reset and test your Kidde carbon monoxide detector ensures that it is functioning correctly and reacting to any potential danger.
Remember to consult your user manual or contact Kidde customer support for specific instructions related to your model. It is essential to regularly check for any updates or recommendations provided by the manufacturer to ensure the ongoing accuracy and reliability of your detector.
By following the guidelines in this article, you are taking a significant step towards safeguarding your household from the risks associated with carbon monoxide. Stay vigilant, test your detector regularly, and be proactive in maintaining a safe environment for yourself and your loved ones.
Thank you for reading this comprehensive guide on resetting a Kidde carbon monoxide detector. Stay safe!
Frequently Asked Questions about How To Reset A Kidde Carbon Monoxide Detector
Was this page helpful?
At Storables.com, we guarantee accurate and reliable information. Our content, validated by Expert Board Contributors, is crafted following stringent Editorial Policies. We're committed to providing you with well-researched, expert-backed insights for all your informational needs.


0 thoughts on “How To Reset A Kidde Carbon Monoxide Detector”