Articles
How To Reset A Refrigerator
Modified: March 20, 2024
Learn how to reset a refrigerator with these helpful articles. Whether you need to fix a malfunction or optimize performance, our guides have you covered.
(Many of the links in this article redirect to a specific reviewed product. Your purchase of these products through affiliate links helps to generate commission for Storables.com, at no extra cost. Learn more)
Introduction
Welcome to our comprehensive guide on how to reset a refrigerator! Whether you’ve noticed your fridge not cooling properly or it’s displaying error messages, performing a reset can often resolve the issue and get your refrigerator back to working optimally. In this article, we will take you through the steps necessary to reset your refrigerator, ensuring that you follow the proper safety precautions and guidelines throughout the process.
Refrigerators are essential appliances in our daily lives, keeping our food fresh and preserving its quality. However, like any other electronic device, they can experience technical glitches or be affected by power outages that may require a reset. Knowing how to properly reset your refrigerator can save you from having to call a technician and potentially save you money.
Before proceeding with the reset, it is crucial to understand the need for it. Various issues can arise in refrigerators, such as inconsistent cooling, frost build-up, or alarming error codes on the display. These problems can stem from power surges, improper temperature settings, or simply a temporary glitch in the refrigerator’s system.
Resetting a refrigerator essentially involves turning it off, unplugging it from the power source, and allowing it to reset its internal systems. This process can help resolve minor issues and restore the refrigerator’s normal functioning. It is important to mention that this guide is meant for standard refrigerators; if you have a more complex or specialized model, it is recommended to consult the manufacturer’s manual for specific reset instructions.
Before we dive into the step-by-step process of resetting a refrigerator, let’s discuss some safety precautions that you should keep in mind to ensure a smooth and risk-free reset.
Key Takeaways:
- Resetting your refrigerator is a simple yet essential process that can resolve common issues like temperature fluctuations and error codes. Following safety precautions and thorough cleaning ensures a successful reset.
- Understanding the need for a refrigerator reset, from power surges to temperature-related problems, empowers you to maintain optimal performance and preserve your food items effectively. Regular maintenance and proper resetting techniques are key to a well-functioning refrigerator.
Read more: How To Reset A Ge Refrigerator
Understanding the Need to Reset a Refrigerator
Refrigerators play a vital role in our everyday lives, keeping our food fresh and our beverages cool. However, there are instances where our refrigerators may start behaving abnormally, such as not maintaining the desired temperature or producing unusual noises. In such cases, a reset might be necessary to resolve these issues and restore the appliance’s proper functioning.
One common reason to reset a refrigerator is a power surge or outage. These electrical disturbances can disrupt the normal functioning of the appliance, leading to various performance issues. Resetting the refrigerator helps it recalibrate and recover from these disruptions, allowing it to resume its regular operation.
Another reason to reset a refrigerator is to address temperature-related problems. If you’ve noticed that your refrigerator is not cooling as it should or if the freezer is not freezing properly, resetting the appliance can help reset the temperature controls and restore the cooling functionality. This is particularly useful if you’ve recently made changes to the refrigerator’s temperature settings or if you’ve accidentally pressed the wrong buttons.
Furthermore, error codes on the refrigerator’s digital display can also indicate the need for a reset. These error codes are designed to alert users to any potential issues or malfunctions in the appliance. While some error codes require specific troubleshooting steps, a reset can often clear out temporary glitches and eliminate the error code. If the error persists after the reset, it is advisable to consult the manufacturer’s manual or contact customer support.
It’s important to note that not all refrigerator issues can be resolved with a simple reset. In some cases, mechanical or electrical problems may require professional assistance. If you’ve attempted a reset and the issues persist or worsen, it’s best to contact a certified technician to diagnose and repair the problem.
By understanding the need to reset a refrigerator, you can determine whether it is an appropriate solution for the issues you’re experiencing. Now that we’ve established the reasons behind a reset, let’s dive into the safety precautions you should follow before proceeding with the reset process.
Safety Precautions
Before resetting your refrigerator, it is essential to prioritize your safety and follow proper precautions. Here are some guidelines to ensure a safe reset:
- Unplug the Refrigerator: Before starting the reset process, always unplug the refrigerator from the power source. This reduces the risk of electric shock or accidental activation of the appliance.
- Wear Protective Gear: It is advisable to wear protective gloves to avoid any injuries while handling the interior components of the refrigerator. Additionally, wearing safety goggles can protect your eyes from any debris that may be dislodged during the reset process.
- Empty the Refrigerator: Remove all food items, beverages, and other perishable items from the refrigerator. This will prevent any spoilage during the reset process and make it easier to clean the interior of the appliance.
- Remove Adjustable Shelves and Drawers: Take out any adjustable shelves, drawers, or bins from the refrigerator. This will give you better access to the interior and make the cleaning process more thorough.
- Clean the Interior: Utilize a mild detergent or cleaning solution to wipe down the interior surfaces of the refrigerator. Pay attention to areas prone to spillage or residue buildup. Ensure that all surfaces are completely dry before proceeding with the reset process.
- Reset the Temperature Controls: Once the refrigerator is cleaned and dry, locate the temperature controls. Depending on the model, these controls might be located inside the fridge or on the exterior panel. Consult the manufacturer’s manual to understand the specific procedure for resetting the temperature controls.
- Reassemble the Shelves and Drawers: After successfully resetting the temperature controls, reassemble the adjustable shelves, drawers, and bins back into their respective positions. Make sure they are securely in place to avoid any accidents or spills.
- Plug in the Refrigerator: Once all the necessary steps have been completed, plug the refrigerator back into the power source. Ensure that the power cord is properly connected and there are no signs of damage or fraying.
- Set the Desired Temperature: Adjust the temperature settings according to your preference. Optimal temperature settings for a refrigerator are typically between 35 to 38 degrees Fahrenheit (2 to 3 degrees Celsius) for the refrigerator compartment and 0 degrees Fahrenheit (-18 degrees Celsius) for the freezer compartment.
- Allow the Refrigerator to Cool: After plugging in the refrigerator and setting the desired temperature, give it some time to cool down before placing any food items back inside. This will allow the appliance to stabilize and ensure proper cooling.
Following these safety precautions is crucial to protecting yourself and ensuring a successful reset of your refrigerator. Now that we have covered the necessary precautions, let’s proceed with the step-by-step process of resetting your refrigerator.
Step 1: Unplug the Refrigerator
The first step in resetting your refrigerator is to ensure that it is disconnected from the power source. This step is crucial for your safety and prevents any electrical mishaps during the reset process.
To unplug your refrigerator, locate the power cord at the back of the appliance or on the side, depending on the model. Gently pull the plug from the electrical outlet, ensuring a clean disconnect. Avoid using excessive force or yanking the cord, as this can potentially damage the cord or outlet.
By unplugging the refrigerator, you eliminate the risk of electric shock while working on the resetting process. It also allows the internal systems of the appliance to fully power down, preparing it for a complete reset.
During this step, take note of the condition of the power cord. Check for any frayed or damaged sections and replace the cord if necessary. A damaged power cord can pose a fire hazard, so it is essential to address any issues before plugging the refrigerator back in.
Once you have successfully unplugged the refrigerator, securely coil the power cord and place it away from any moisture or heat sources. This prevents any potential damage to the cord and ensures a tidy workspace for the reset process.
Now that the refrigerator is safely disconnected from the power source, we can move on to the next step: emptying the refrigerator of its contents.
Step 2: Empty the Refrigerator
Now that the refrigerator is safely unplugged, it’s time to empty its contents. Removing all the food items, beverages, and other perishable items from the refrigerator is essential for two main reasons:
- Preventing Spoilage: During the reset process, the refrigerator will be powered off, and its cooling function will be temporarily disabled. Leaving food items inside the refrigerator during this time can lead to spoilage and unpleasant odors. By emptying the refrigerator, you can avoid any potential food waste or contamination.
- Easier Cleaning: Emptying the refrigerator makes it easier to clean the interior surfaces and ensures a thorough reset process. Removing all the items allows you to reach every nook and cranny, ensuring that there is no residue or debris left behind.
Start by taking out all the food items and placing them in a cooler or another refrigeration source to keep them fresh during the reset process. Sort through the items and check for any expired or spoiled food that needs to be discarded. This is also a good opportunity to organize and clean any containers or shelves that have accumulated dirt or spills.
As you empty the refrigerator, make sure to carefully handle any fragile or delicate items to avoid breakage. Take note of any items that may require special care or attention, such as medications or items with specific temperature requirements.
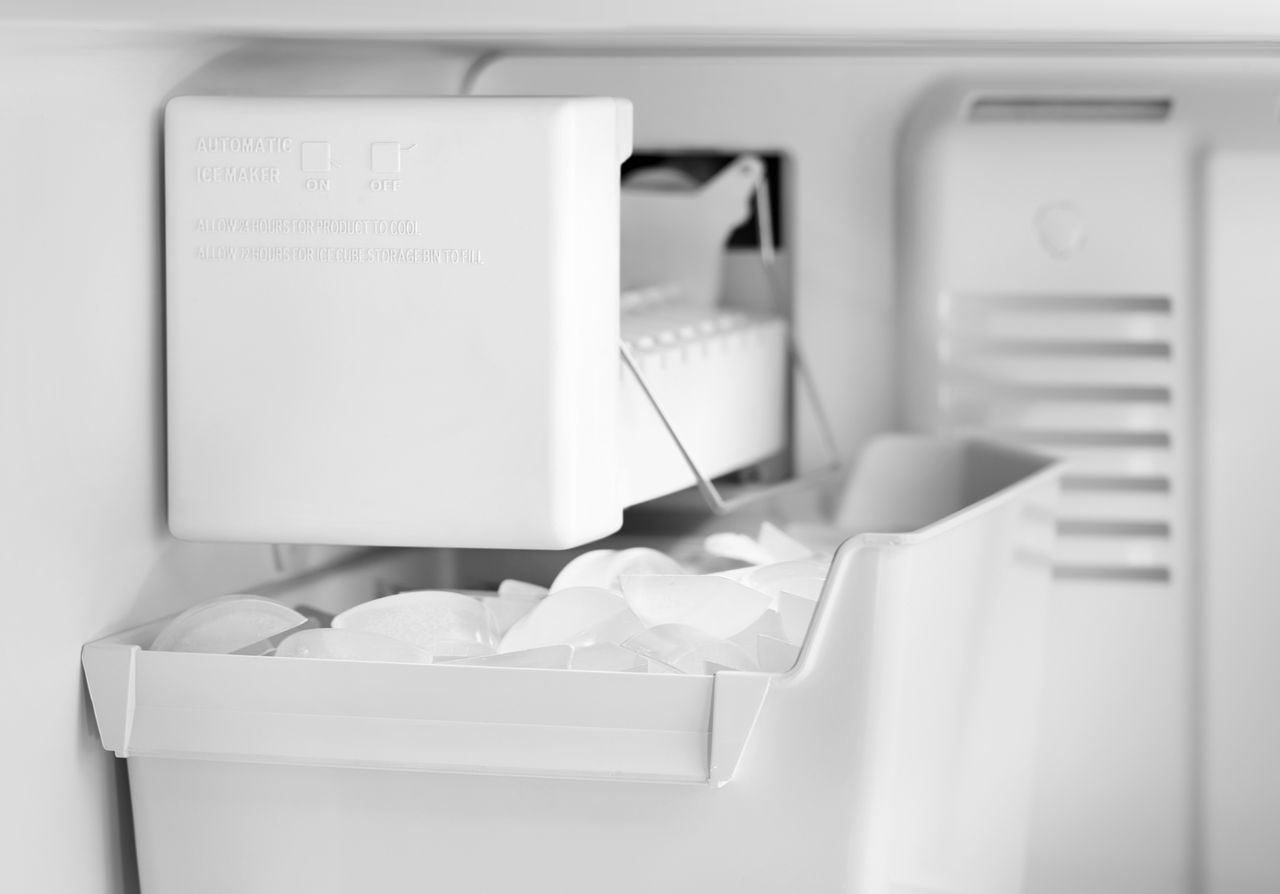
If your refrigerator has a separate freezer compartment, don’t forget to empty that as well. Transfer any frozen items to a cooler or freezer to ensure they remain frozen while you complete the reset process.
By emptying the refrigerator, you create a clean slate for the reset and ensure that no food is left behind to spoil. Now that the refrigerator is free of its contents, we can move on to the next step: removing adjustable shelves and drawers.
Read more: How To Reset A Kenmore Refrigerator
Step 3: Remove Adjustable Shelves and Drawers
In this step, we will focus on removing the adjustable shelves and drawers from your refrigerator. This allows for easier access to the interior and ensures a more thorough cleaning during the reset process.
Start by assessing your refrigerator and identifying any adjustable shelves or drawers that can be removed. Most refrigerators have shelves that can be lifted or tilted to allow for flexible storage options. Similarly, drawers and bins can usually be pulled out for easy cleaning.
Begin by emptying these shelves and drawers of any remaining items. You may want to take this opportunity to clean and organize them separately as well.
To remove the shelves, gently lift them up and tilt them at an angle. This will disengage them from the tracks or support brackets. Take note of the orientation and arrangement of the shelves, so you can easily reassemble them later.
For drawers and bins, check for any release buttons, levers, or tabs that may be securing them in place. Depress or release these mechanisms as instructed by the manufacturer to slide the drawer out smoothly.
Place the shelves and drawers in a safe location, away from any potential damage or interference. Take care to handle them gently to avoid any breakage or damage.
With the shelves and drawers removed, you now have better access to the interior of the refrigerator for deep cleaning. This allows you to reach all the corners and surfaces, eliminating any hidden dirt or spills.
Once you have successfully removed the adjustable shelves and drawers, it’s time to move on to the next step: cleaning the interior of the refrigerator.
Step 4: Clean the Interior
With the adjustable shelves and drawers removed, it’s time to focus on cleaning the interior of your refrigerator. This step is essential to ensure a hygienic and fresh environment for your food storage.
Start by gathering your cleaning supplies. You’ll need a mild detergent, warm water, microfiber cloths or sponges, and a non-abrasive scrub brush or toothbrush for hard-to-reach areas.
Dilute the mild detergent in warm water according to the manufacturer’s instructions. Avoid using harsh chemicals, as they can leave behind residues or damage the refrigerator’s surfaces.
Begin by wiping down the interior walls, starting from the top and working your way down. Pay close attention to any spills, stains, or residue buildup. Use the microfiber cloth or sponge to gently scrub away any dirt or grime.
Next, move on to the shelves, drawers, and bins that you removed earlier. Clean each piece thoroughly, making sure to remove any food particles or spills that may have accumulated. Rinse them with warm water and dry them completely before reassembling them back into the refrigerator.
Don’t forget to clean the seals or gaskets around the refrigerator door as well. Use a damp cloth to wipe away any debris or sticky residue. Ensure that the seals are clean and free from any obstructions for proper sealing when the refrigerator is closed.
If there are any stubborn stains or odors present, you can try using a mixture of baking soda and water as a natural deodorizer and stain remover. Apply the mixture to the affected area and let it sit for a few minutes before gently scrubbing it away.
Lastly, ensure that all surfaces are thoroughly dry before proceeding to the next step. Moisture can lead to mold or mildew growth, so take the time to wipe down the interior with a dry cloth or allow it to air dry naturally.
By cleaning the interior of your refrigerator, you create a fresh and sanitary environment for your food items. With step 4 complete, we can now move on to the next step: resetting the temperature controls.
Unplug the refrigerator for at least 5 minutes to reset it. This can help resolve issues with the cooling system and other malfunctions.
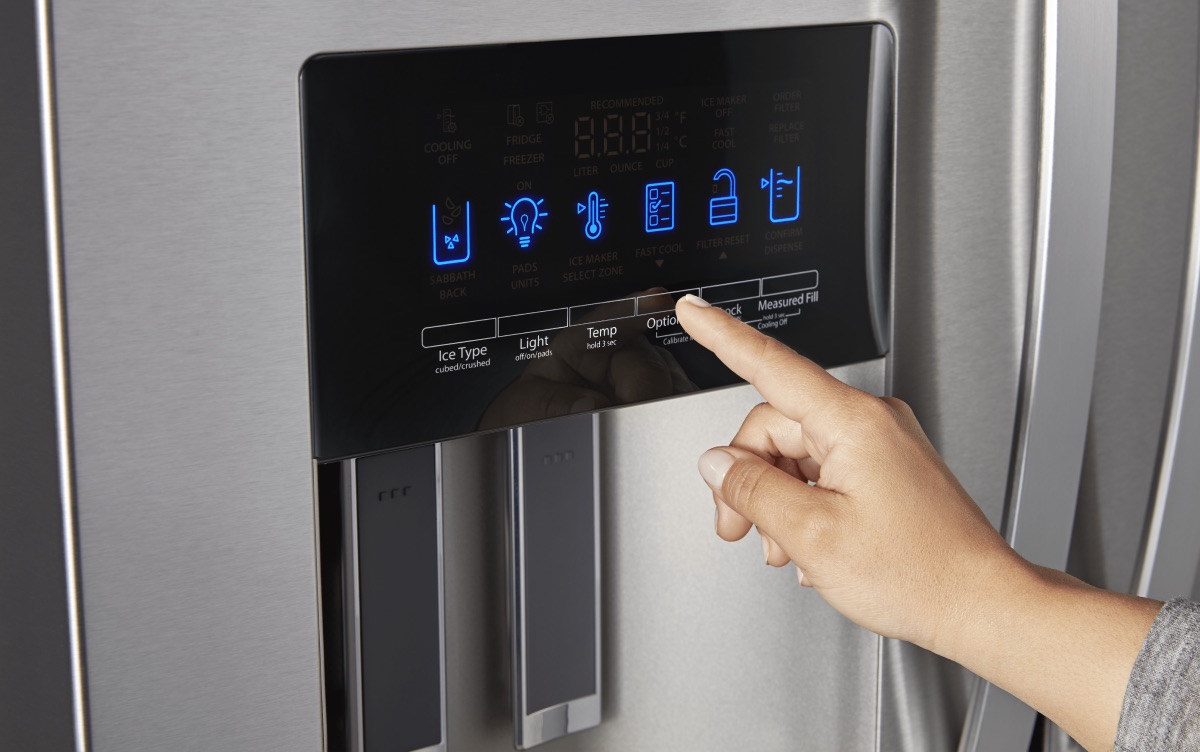
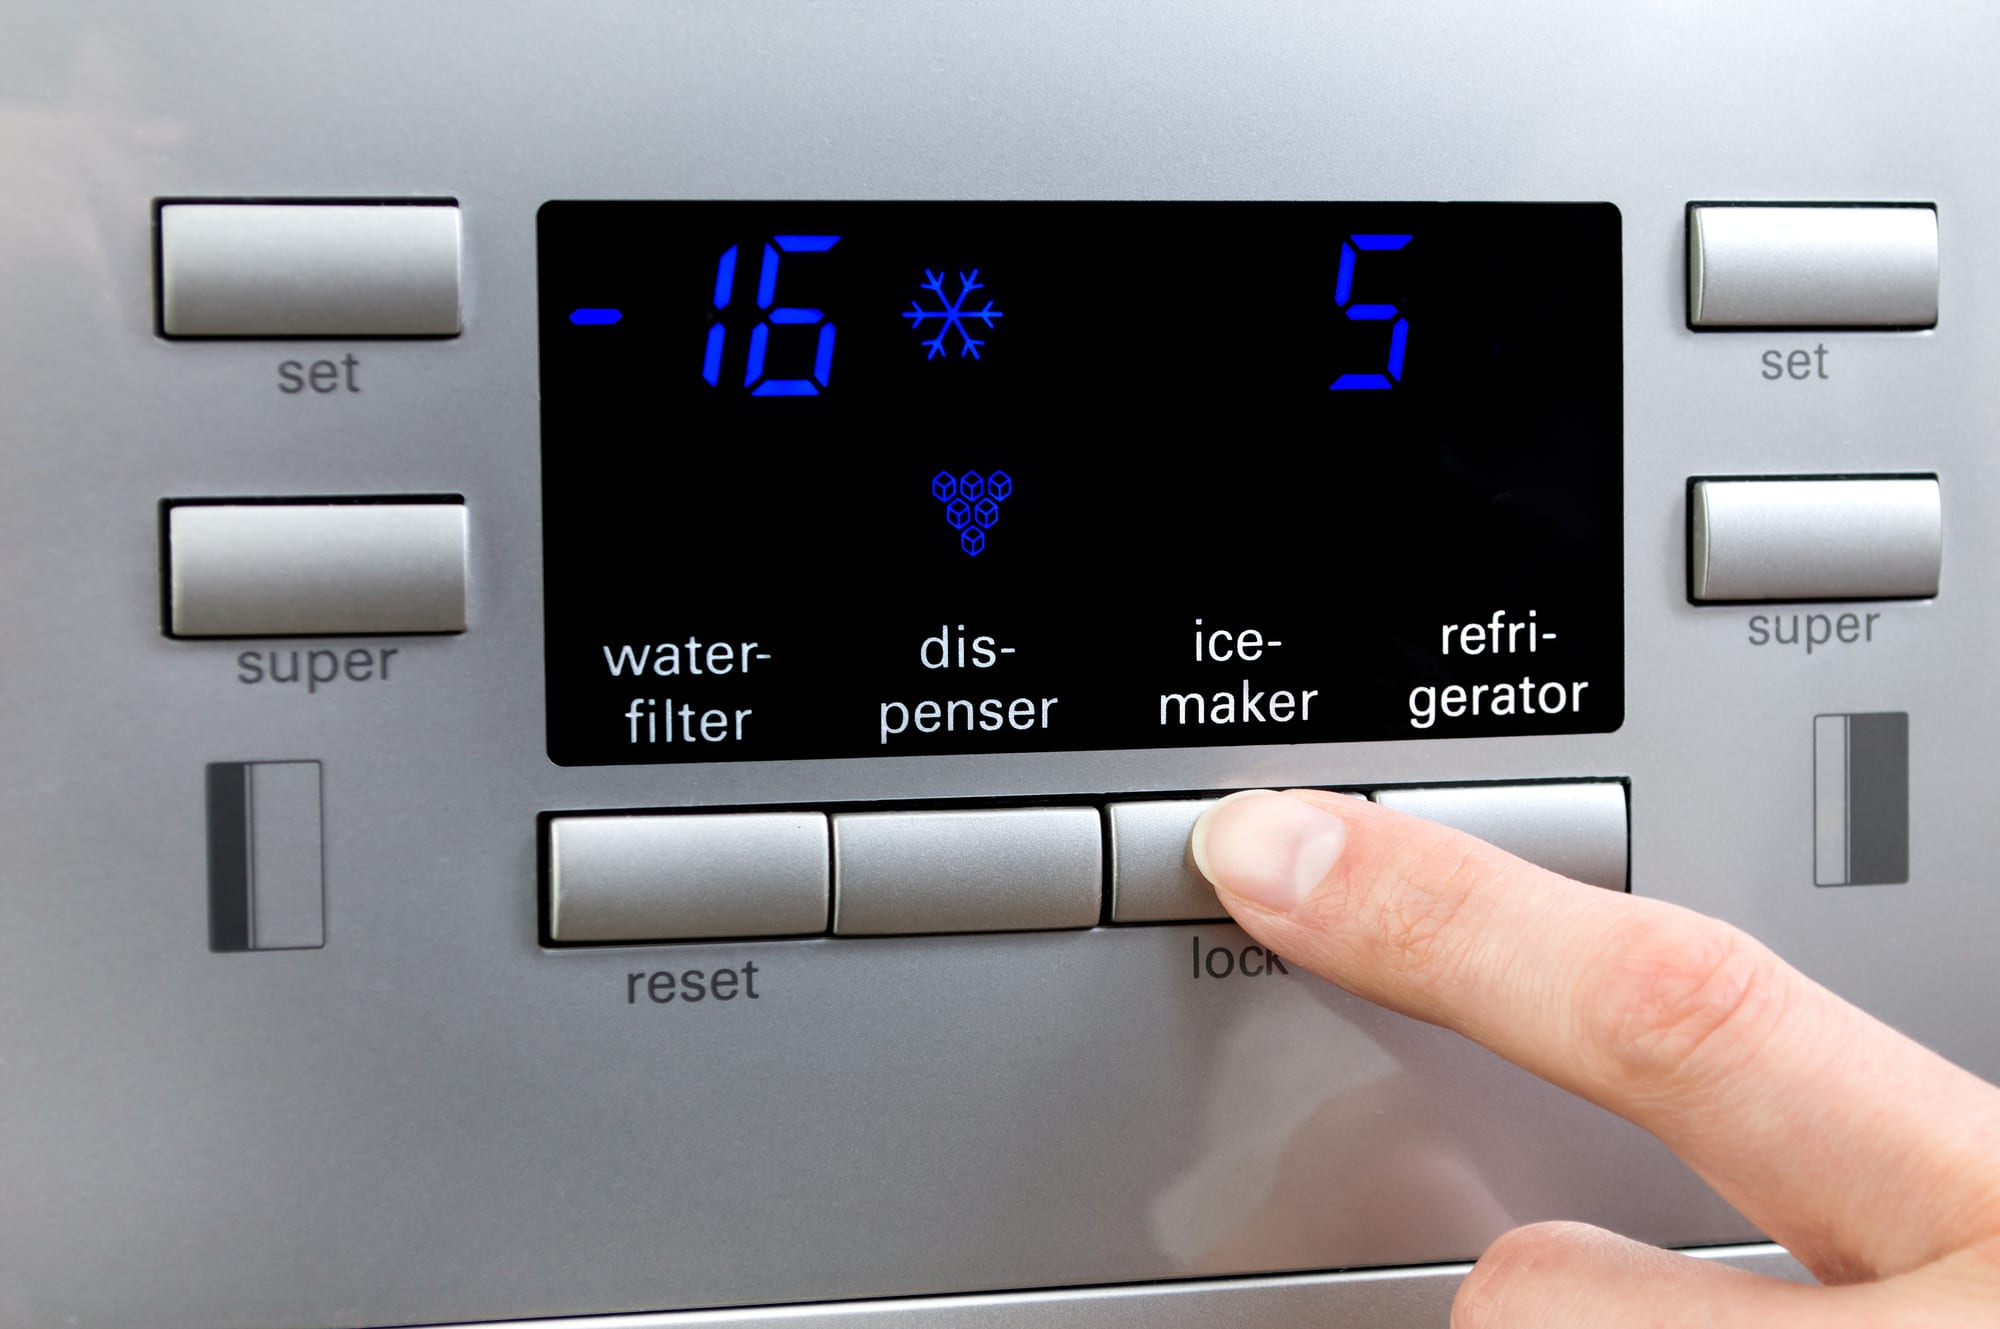
Step 5: Reset the Temperature Controls
In this step, we will focus on resetting the temperature controls of your refrigerator. This ensures that the appliance is set to the desired temperature and allows for proper cooling and preservation of your food items.
The location and method for resetting the temperature controls may vary depending on the model of your refrigerator. Consult the manufacturer’s manual to find specific instructions for your appliance. Here are some general guidelines to follow:
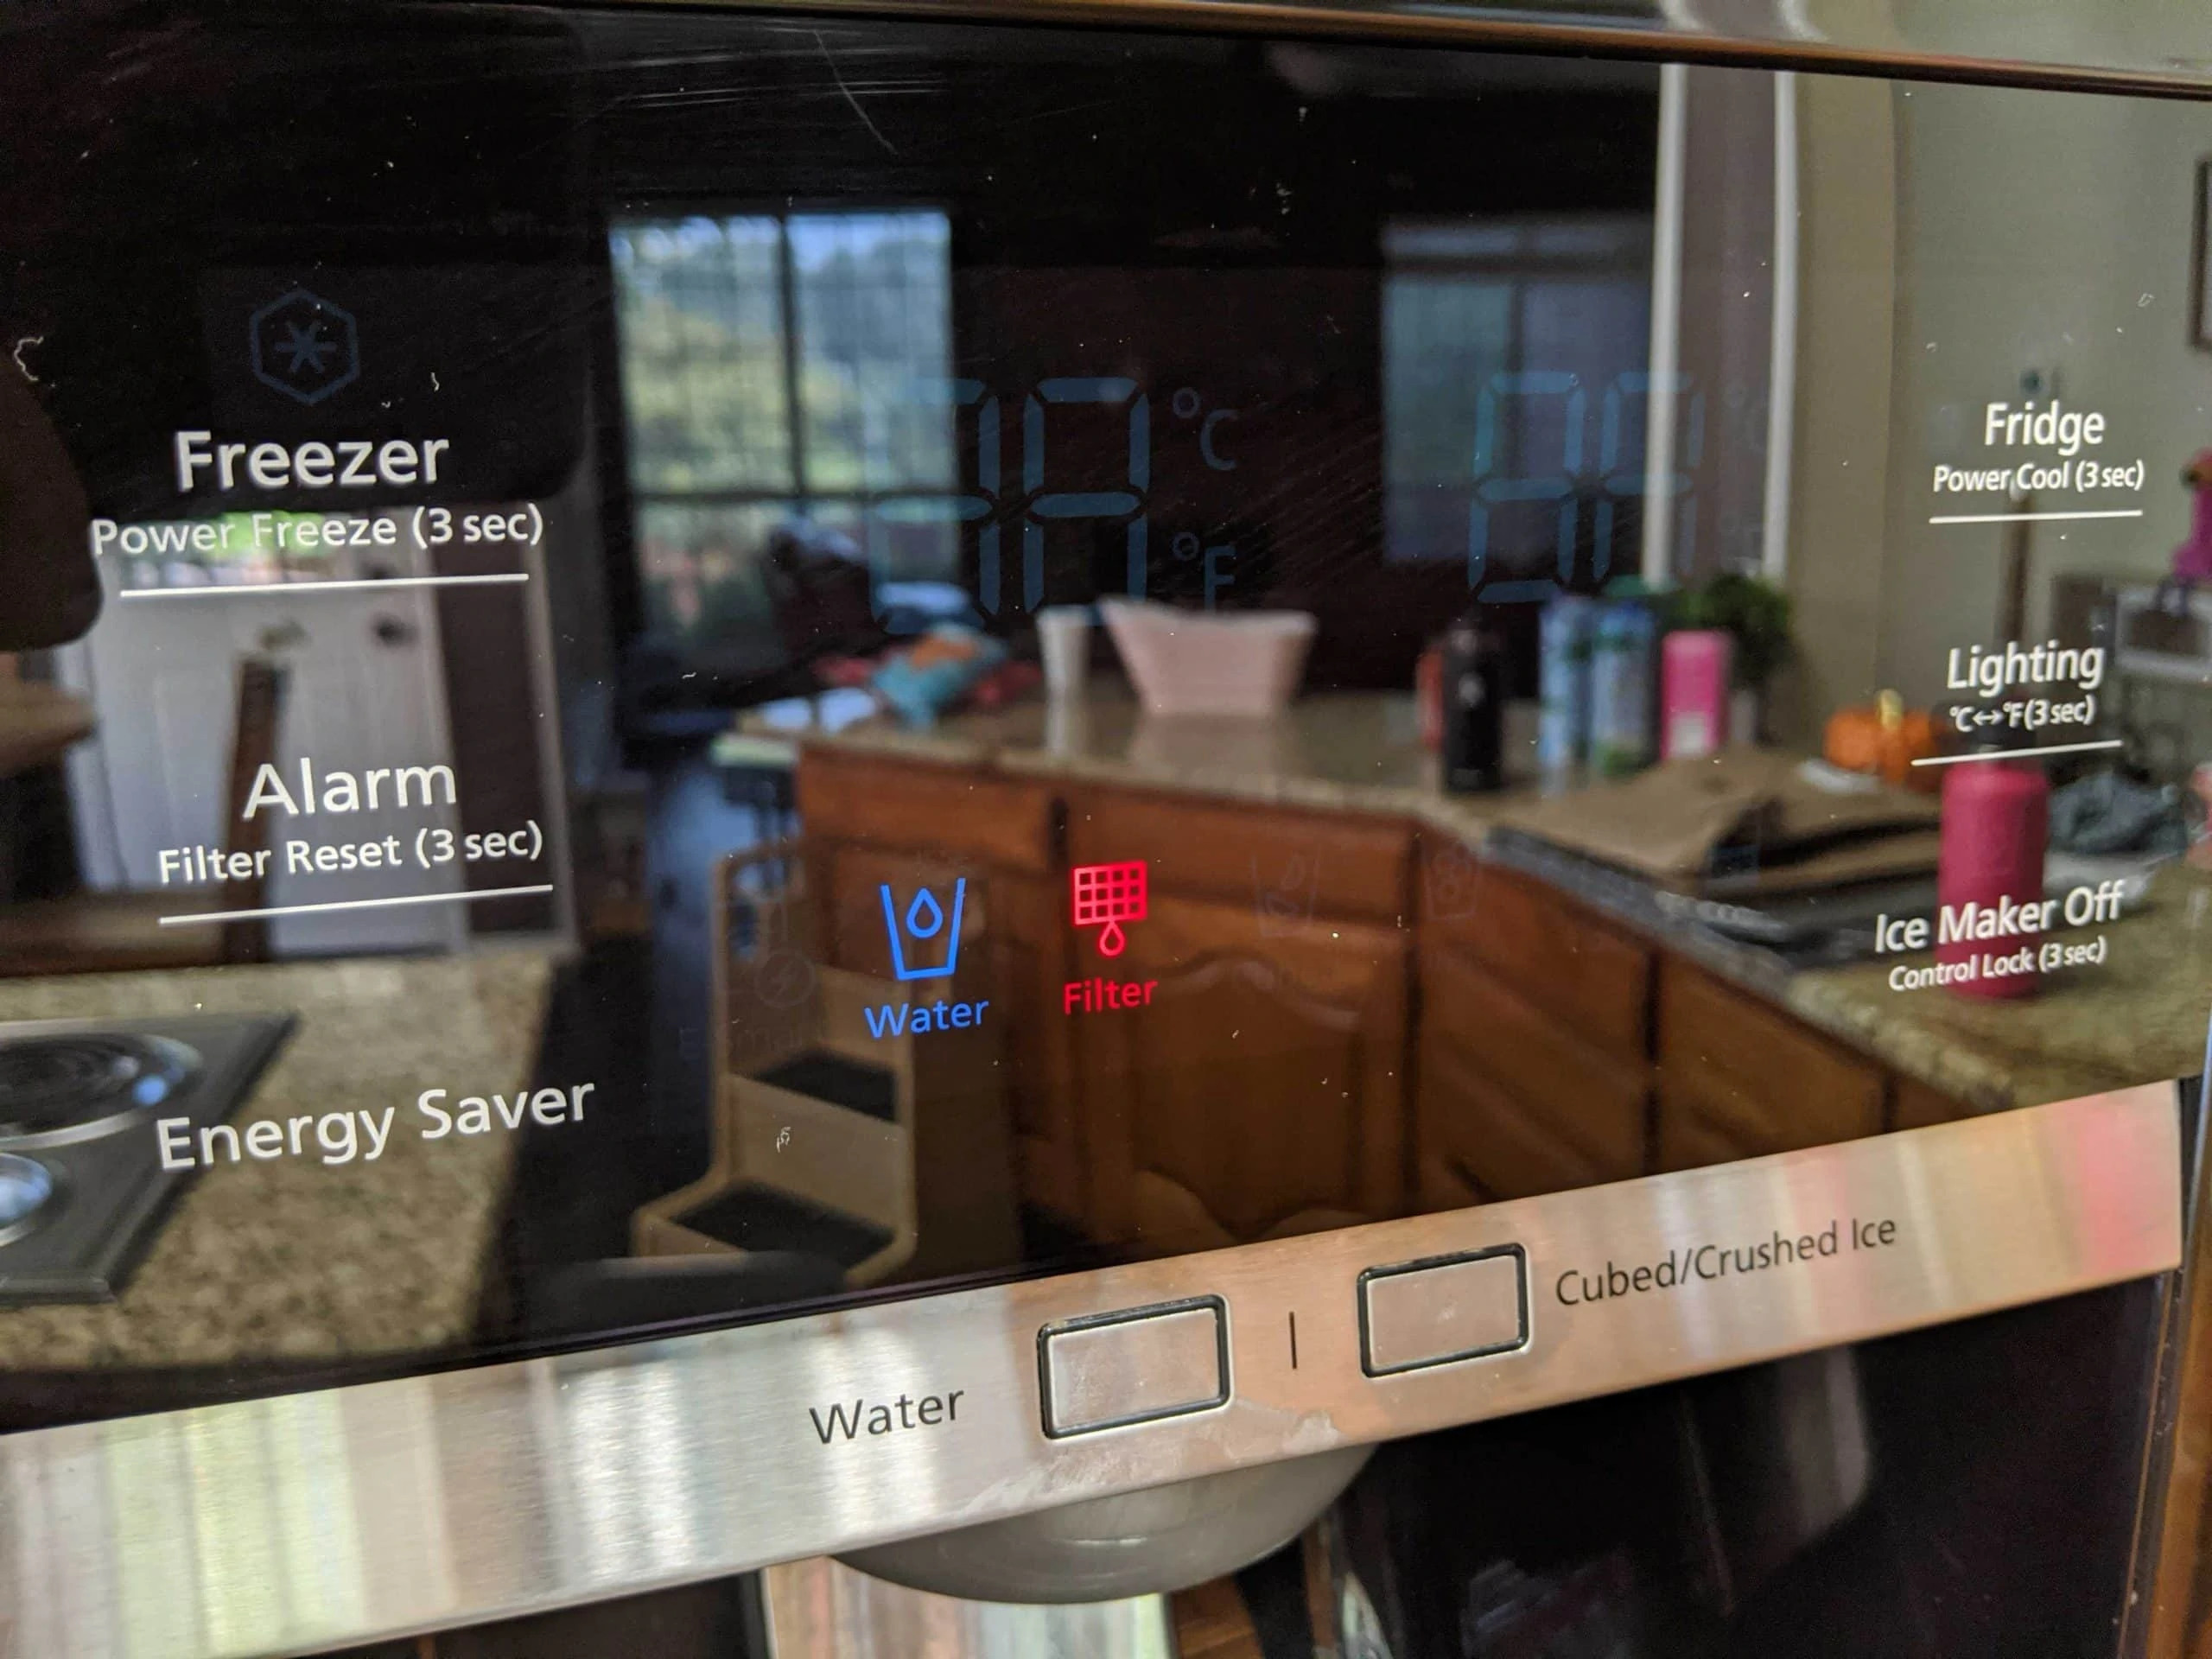
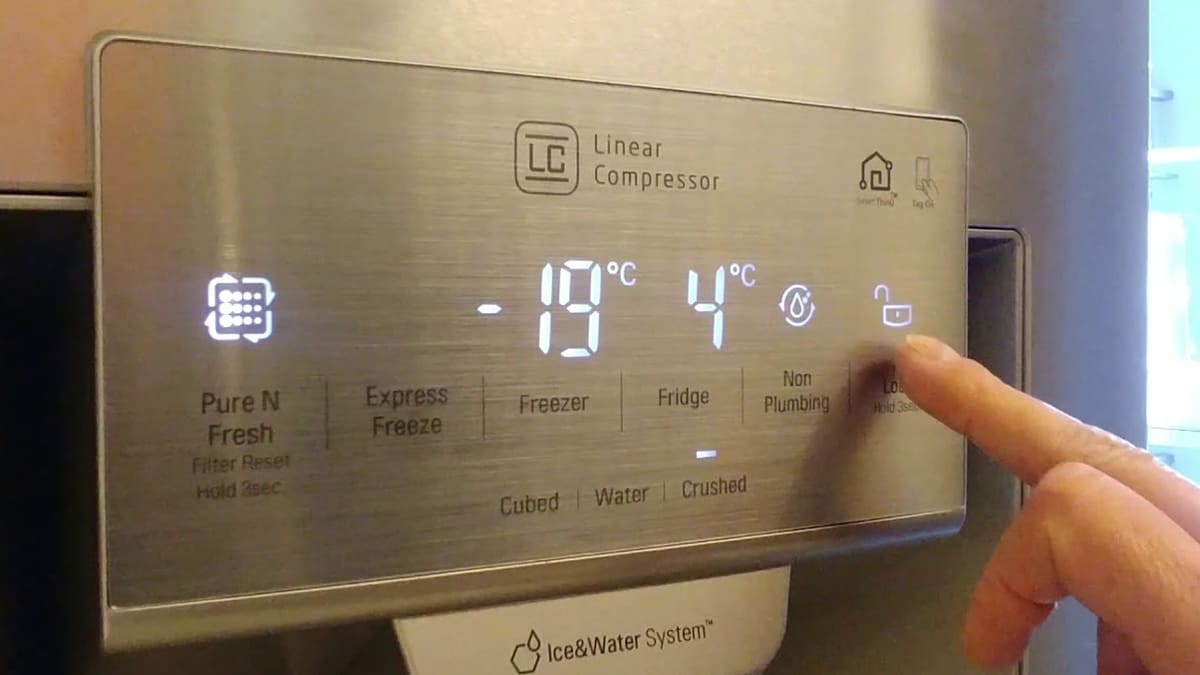
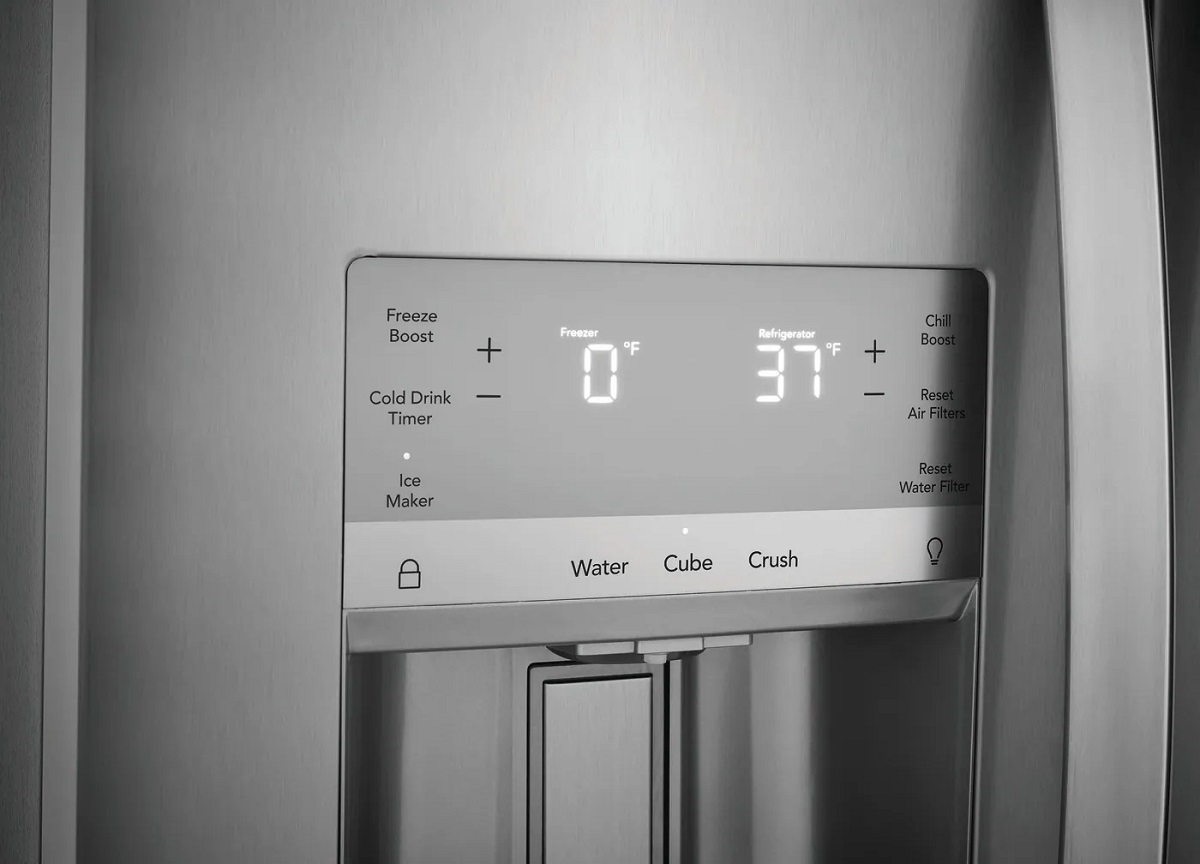
- Locate the Temperature Controls: The temperature controls are usually located either inside the refrigerator compartment or on an exterior panel. Look for buttons or dials labeled with temperature settings for both the refrigerator and freezer compartments.
- Understand the Temperature Labels: Different models may use various labels to indicate temperature settings. Some examples include numbers or settings ranging from “1-9,” “Colder-Warmer,” or actual temperature values in Fahrenheit or Celsius. Understand how your refrigerator’s temperature controls are labeled to ensure accurate adjustment.
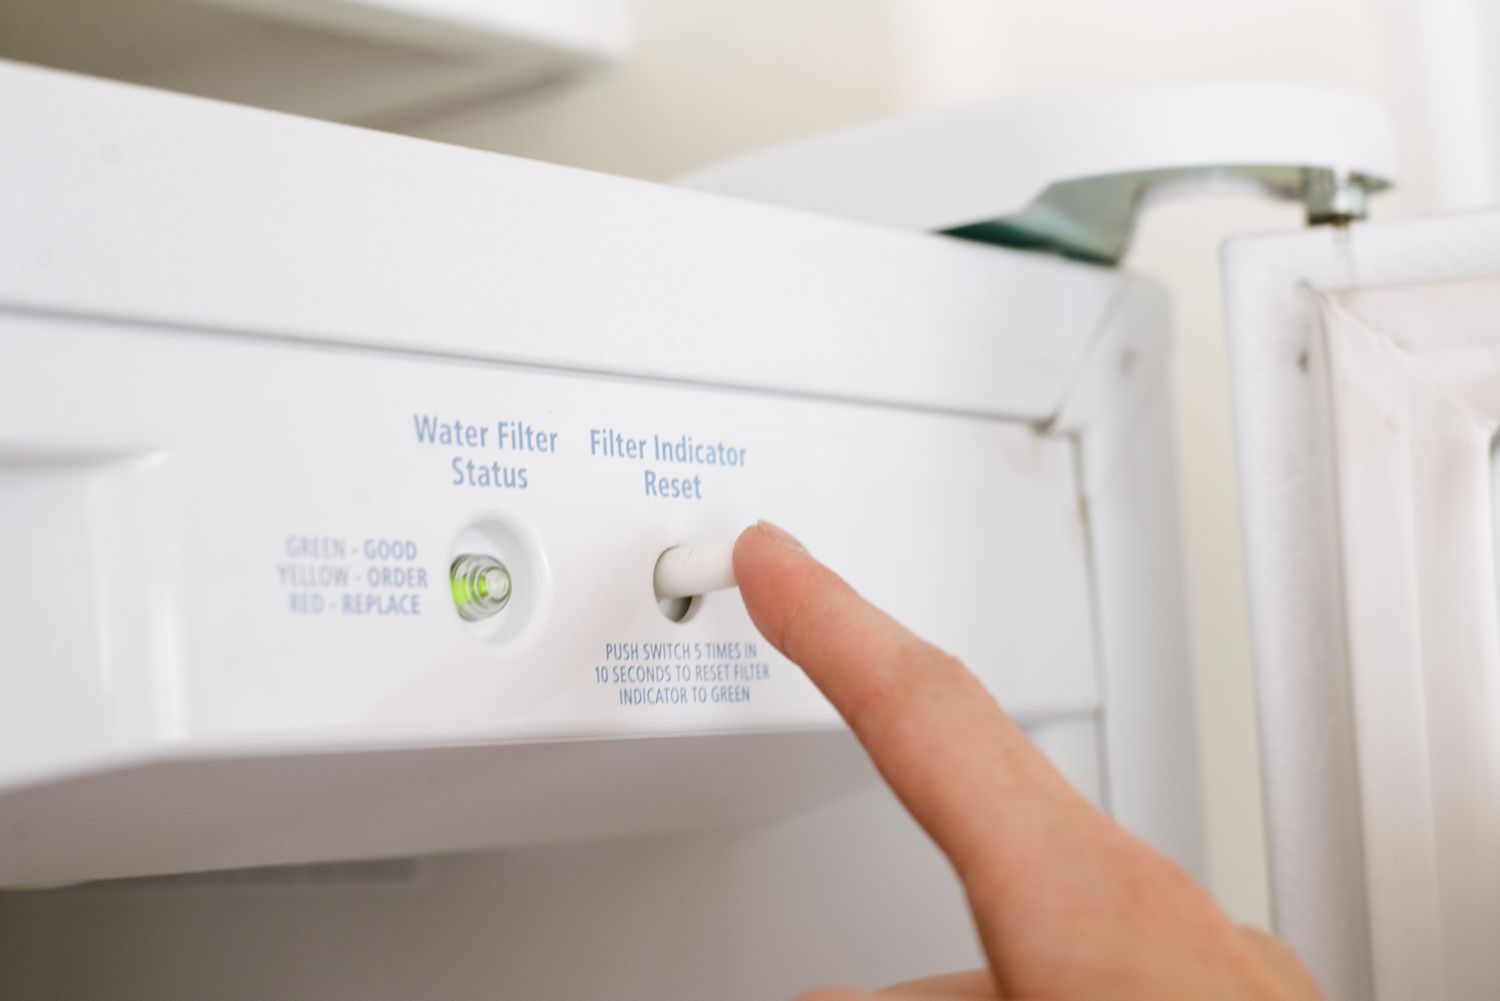
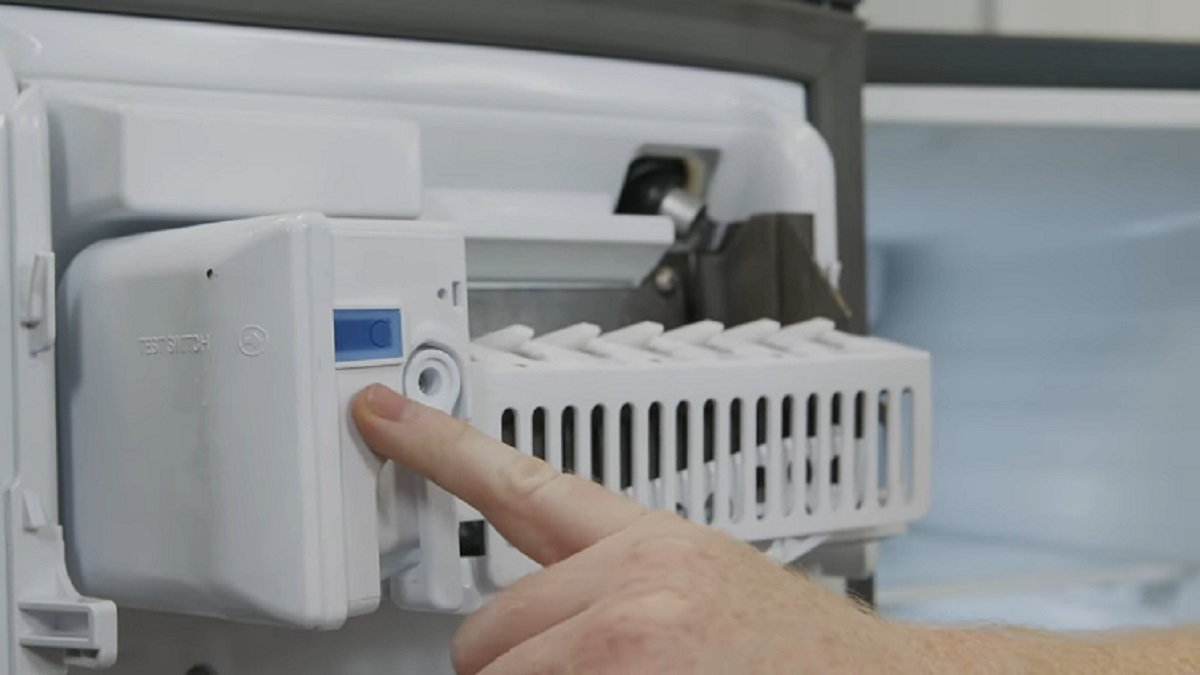
- Reset to Default Settings: To perform a reset, first ensure that the refrigerator is unplugged and the interior is clean. Locate the reset button or option and press and hold it for a few seconds. This action will revert the temperature controls to the default settings.
- Adjust the Settings: After resetting to the default settings, you can now adjust the temperature settings according to your preference. Consult food storage guidelines to determine the recommended temperature ranges for your refrigerator and freezer compartments. Typically, the refrigerator compartment should be set between 35 to 38 degrees Fahrenheit (2 to 3 degrees Celsius), while the freezer should be set at 0 degrees Fahrenheit (-18 degrees Celsius).
- Confirm the Changes: Once you’ve adjusted the temperature settings, ensure that the changes are reflected on the display or control panel. Some refrigerators may require you to press a specific button or confirm the changes to save the new settings.
It’s important to note that resetting the temperature controls may not directly resolve an underlying issue with the refrigerator. If you still encounter temperature-related problems or error messages after the reset, it’s advisable to consult the manufacturer’s manual or seek professional assistance.
With step 5 completed, we are now ready to move on to the next step: reassembling the shelves and drawers.
Step 6: Reassemble the Shelves and Drawers
After cleaning the interior of your refrigerator and resetting the temperature controls, it’s time to reassemble the adjustable shelves and drawers. Properly placing these components back into the refrigerator ensures proper organization and functionality.
To reassemble the shelves and drawers, follow these steps:
- Assess the Orientation: Before putting the shelves and drawers back in, take a moment to remember their original orientation and arrangement. This will help you ensure that they fit properly and align with the tracks or support brackets.
- Position the Shelves: Begin by placing the shelves back into their designated slots. Tilt them at a slight angle, aligning them with the tracks or brackets, and gently lower them into place. Make sure they are secure and properly seated.
- Insert the Drawers: For drawers and bins, slide them back into their respective compartments. Check for any release buttons or mechanisms to ensure a smooth insertion. Push them in until they are fully engaged and properly aligned.
- Test the Movement: Once all the shelves and drawers are back in place, test their movement to ensure they glide smoothly and securely. Make sure they can be easily opened and closed without any obstructions or misalignments.
- Arrange the Contents: After reassembling the shelves and drawers, you can start arranging the food items back into the refrigerator. Take this opportunity to organize products and maximize space utilization. Group similar items together and place frequently accessed items in easily reachable locations.
Remember to handle the shelves and drawers with care to avoid any damage or breakage. Avoid overloading the refrigerator with heavy items, as this can lead to instability or potential damage to the shelves or interior surfaces.
By properly reassembling the shelves and drawers, you ensure an organized and functional refrigerator interior. With step 6 complete, we can now move on to the next step: plugging in the refrigerator.
Read more: How To Reset A Frigidaire Refrigerator
Step 7: Plug in the Refrigerator
Now that you have reassembled the shelves and drawers of your refrigerator, it’s time to plug it back into the power source. This will restore the electrical connection and allow the appliance to start functioning again.
Follow these steps to plug in your refrigerator:
- Locate the Power Cord: Locate the power cord at the back of the refrigerator or on the side, depending on the model. Check for any damages or frayed sections on the cord. If you notice any issues, it is essential to replace the cord before proceeding.
- Align the Plug: Align the plug with the electrical outlet, ensuring that it matches the outlet’s shape and size. Push the plug firmly into the outlet until it is fully inserted.
- Ensure a Stable Connection: Make sure the power cord is securely connected to both the refrigerator and the electrical outlet. Avoid placing stress or tension on the cord that could potentially disconnect it.
- Check the Power Source: Ensure that the electrical outlet you are using is functioning correctly. Test it by plugging in another appliance or using a voltage tester if necessary. If you encounter any issues with the power source, consult an electrician to resolve the problem.
Once you have successfully plugged in the refrigerator, you may hear a click or slight humming sound as the appliance powers on. This is normal and indicates that the refrigerator is receiving electricity.
Take a moment to visually inspect the area around the plug and cord to ensure that there are no potential hazards, such as water or obstructions, which could cause damage or pose a safety risk.
With the refrigerator plugged in, we are ready to move on to the next step: setting the desired temperature.
Step 8: Set the Desired Temperature
Now that your refrigerator is plugged in and powered on, it’s time to set the desired temperature for both the refrigerator and freezer compartments. This step ensures that your food remains fresh and properly preserved.
Follow these guidelines to set the desired temperature:
- Locate the Temperature Controls: Refer to your refrigerator’s manufacturer manual to find the location of the temperature controls. They are typically located either inside the refrigerator compartment or on an exterior panel.
- Understand the Temperature Settings: Different models have different temperature control mechanisms. Some use numerical settings, while others may use labels such as “colder” or “warmer.” Make sure to familiarize yourself with the specific temperature settings on your appliance.
- Adjust the Temperature Settings: Use the temperature control buttons or dials to adjust the settings based on your preference. The optimal temperature range for a refrigerator is typically between 35 to 38 degrees Fahrenheit (2 to 3 degrees Celsius), while the freezer should be set at 0 degrees Fahrenheit (-18 degrees Celsius).
- Monitor Internal Thermometers: Some refrigerators have built-in thermometers that display the current temperature inside the compartments. Use these readings as a guide when adjusting the temperature controls to ensure optimal cooling.
It’s important to note that it may take a few hours for your refrigerator to reach the set temperature after adjusting the controls. During this time, avoid opening the refrigerator door frequently, as it can affect the cooling process and cause temperature fluctuations.
Consult the manufacturer’s manual for any specific instructions or recommendations regarding temperature settings for your particular model. Different brands and models may have unique features or settings to maximize energy efficiency and food preservation.
Now that you have set the desired temperatures for your refrigerator and freezer compartments, we can move on to the final step: allowing the refrigerator to cool before restocking it with food.
Step 9: Allow the Refrigerator to Cool
After setting the desired temperature for your refrigerator and freezer compartments, it’s important to allow the appliance to cool down before restocking it with food. This step ensures that the refrigerator operates efficiently and maintains the proper temperature for food storage.
Here are some essential guidelines to follow:
- Give it Time: Depending on the model and the ambient temperature, it may take a few hours for the refrigerator to reach the desired temperature. Be patient and allow the appliance sufficient time to cool down completely before adding perishable items.
- Avoid Overloading: While waiting for the refrigerator to cool, resist the temptation to load it with a large amount of food. Overloading the refrigerator can hinder the cooling process and compromise its ability to maintain the desired temperature. Gradually introduce items to the refrigerator as it reaches the optimal cooling level.
- Monitor the Temperature: During the cooling period, periodically monitor the temperature inside the refrigerator using a thermometer. This will help ensure that the appliance is reaching and maintaining the desired temperature range.
- Close the Door: It’s crucial to keep the refrigerator door closed as much as possible during the cooling process. Opening the door frequently can allow warm air to enter, causing temperature fluctuations and prolonging the cooling time.
Once the refrigerator has reached the desired temperature and has maintained it consistently for a few hours, it is ready to be stocked with food items. Ensure that perishable items are properly stored and organized within the compartments to maximize freshness and prevent cross-contamination.
Remember to regularly check and adjust the temperature settings as needed to maintain optimal cooling conditions. Additionally, perform routine maintenance tasks such as cleaning the coils, replacing water filters, and defrosting the freezer, as recommended by the manufacturer.
Congratulations! By following these steps, you have successfully reset your refrigerator and ensured its proper functioning. Enjoy the benefits of a clean and well-cooled appliance for your food storage needs.
If you encounter any persistent issues with your refrigerator, it is advisable to consult the manufacturer’s manual or contact a professional technician for further assistance.
Conclusion
Resetting a refrigerator is a simple yet crucial process that can help resolve common issues and restore optimal functionality. By following the step-by-step guide provided in this article, you can confidently reset your refrigerator and ensure a clean and well-performing appliance for your food storage needs.
We started by understanding the need to reset a refrigerator, addressing common issues such as power surges, temperature-related problems, and error codes. Safety precautions were emphasized to ensure a risk-free reset process, such as wearing protective gear, unplugging the refrigerator, and properly handling its components.
Then, we walked through each step of the reset process. We started by emptying the contents of the refrigerator, followed by removing adjustable shelves and drawers. Cleaning the interior thoroughly was an important step to eliminate any residue or dirt. Resetting the temperature controls allowed for personalized temperature settings and resolving temperature-related issues.
After reassembling the shelves and drawers, we safely plugged in the refrigerator and set the desired temperature for both the refrigerator and freezer compartments. The final step, allowing the refrigerator to cool, ensures proper cooling and food preservation before restocking with perishable items.
Remember, while resetting your refrigerator can resolve minor issues, persistent or more complex problems may require professional assistance. Always refer to the manufacturer’s manual for specific instructions tailored to your refrigerator model.
By following these guidelines and understanding the needs of your refrigerator, you can maintain its optimal performance, prolong its lifespan, and enjoy the benefits of fresh and properly preserved food items. Take the time to regularly clean and maintain your refrigerator to ensure its efficient and reliable operation.
Thank you for reading our comprehensive guide on how to reset a refrigerator. We hope it has been helpful in addressing your refrigerator-related concerns. Enjoy the convenience and peace of mind that comes with a well-functioning refrigerator!
Frequently Asked Questions about How To Reset A Refrigerator
Was this page helpful?
At Storables.com, we guarantee accurate and reliable information. Our content, validated by Expert Board Contributors, is crafted following stringent Editorial Policies. We're committed to providing you with well-researched, expert-backed insights for all your informational needs.


0 thoughts on “How To Reset A Refrigerator”