
Articles
How To See Red Laser Level In Daylight
Modified: October 27, 2024
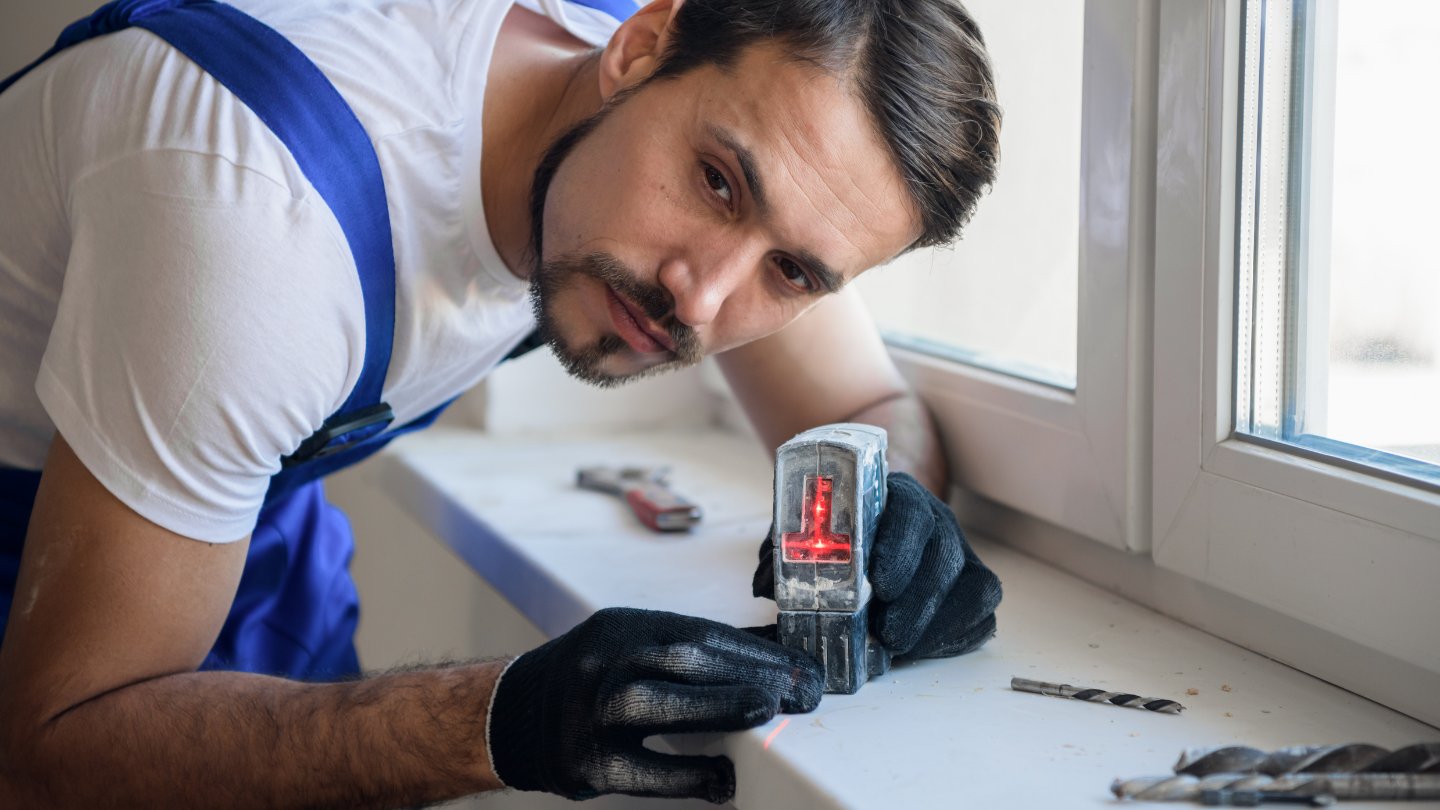
Looking for articles on how to see a red laser level in daylight? Find expert tips and techniques to make your laser level visible in any lighting conditions.
(Many of the links in this article redirect to a specific reviewed product. Your purchase of these products through affiliate links helps to generate commission for Storables.com, at no extra cost. Learn more)
Introduction
Welcome to a comprehensive guide on how to see red laser levels in daylight. Red laser levels are incredibly handy tools for a variety of applications, including construction, surveying, and home improvement projects. They help ensure precise alignment and accurate measurements, making them indispensable for professionals and DIY enthusiasts alike. However, one common challenge that arises when working with red laser levels is visibility in daylight conditions.
In this article, we will explore the reasons why red laser levels can be difficult to see in daylight and provide practical tips on how to enhance their visibility. So, whether you are using a red laser level for marking alignment points, measuring heights, or performing any other task that requires visibility in outdoor conditions, this guide will equip you with the knowledge and techniques needed to overcome this challenge.
Key Takeaways:
- Overcoming the challenges of seeing red laser levels in daylight requires strategic positioning, brightness adjustment, and the use of specialized accessories. By implementing these techniques, you can ensure clear visibility for accurate alignments and measurements in outdoor environments.
- Creating contrast with target surfaces and minimizing ambient light interference are essential for enhancing the visibility of red laser levels in daylight. These practical strategies enable clear and visible laser beams, improving accuracy and efficiency in outdoor projects.
Understanding the Challenges of Seeing Red Laser Levels in Daylight
Seeing red laser levels in daylight can be a daunting task due to several factors. The primary challenge lies in the nature of red light itself. The wavelength of red light is longer compared to other colors, making it more susceptible to scattering by particles and molecules in the atmosphere. This scattering effect causes the red laser beam to appear less intense and less visible, particularly in bright daylight conditions.
Another factor that contributes to the difficulty of seeing red laser levels in daylight is the overwhelming presence of ambient light. Sunlight, especially during the peak hours of the day, can overpower the red laser beam, rendering it barely visible or completely invisible to the naked eye. This is because our eyes are more sensitive to the full spectrum of sunlight, and the concentrated red light emitted by the laser level can easily get drowned out.
Furthermore, reflections and glare from surrounding surfaces can further diminish the visibility of red laser levels in daylight. When the laser beam hits a shiny or reflective surface, it can scatter or bounce off in different directions, reducing its overall visibility. This can be particularly challenging when working in outdoor environments where there are many reflective surfaces, such as glass windows, polished metal, or water bodies.
Knowing the challenges and limitations when it comes to seeing red laser levels in daylight is crucial in finding effective solutions. By understanding these factors, we can implement practical strategies to enhance the visibility of red laser levels, ensuring accurate alignment and measurements even in bright outdoor conditions.
Importance of Using Red Laser Levels
Red laser levels have become an essential tool in various industries and applications for good reason. They offer several benefits that make them invaluable for professionals and DIY enthusiasts alike.
Firstly, red laser levels provide precise and accurate alignment. Whether you’re installing shelves, cabinets, or tiles, having a perfectly level surface is crucial. Red laser levels project a straight and highly visible laser line, allowing you to easily determine if a surface is level or plumb. This ensures that your installations are accurate and aesthetically pleasing.
Secondly, red laser levels save time and effort. Unlike traditional methods that require the use of spirit levels, plumb bobs, or string lines, red laser levels provide a convenient and efficient way to achieve precise alignment. With a red laser level, you can quickly set up and adjust your measurements, reducing the time spent on manual leveling and aligning tasks.
Furthermore, red laser levels offer versatility and adaptability. They can be used in a variety of applications, both indoors and outdoors. From construction sites and engineering projects to home improvement tasks and DIY projects, red laser levels are flexible tools that can assist with a wide range of alignment and measurement needs.
Red laser levels also support accuracy and consistency across different stages of a project. When working on large-scale projects, maintaining consistent levels and alignments is essential for seamless transitions between different areas. Red laser levels provide a reliable reference point, ensuring that measurements and alignments remain consistent throughout the project, resulting in professional and high-quality outcomes.
Lastly, red laser levels promote safety and precision. By providing a highly visible laser line, red laser levels reduce the margin for error when aligning objects or structures. This helps prevent accidents, ensuring that installations and constructions are secure and stable.
Overall, using red laser levels improves efficiency, accuracy, and safety in various applications. Whether you’re a professional tradesperson or a DIY enthusiast, having a red laser level in your toolbox is a worthwhile investment that can greatly enhance the quality and precision of your work.
Tips for Enhancing Visibility of Red Laser Levels in Daylight
While seeing red laser levels in daylight can be challenging, there are several tips and techniques you can employ to enhance their visibility. By implementing these strategies, you can ensure that the red laser beam remains visible and clear, even in bright outdoor conditions.
1. Positioning the Red Laser Level
The positioning of the red laser level plays a crucial role in maximizing its visibility. Place the laser level on a stable surface or mount it on a tripod to ensure that it remains steady and aligned. Adjust the height of the laser level so that the laser beam is projected at eye level, making it easier to see. Additionally, consider positioning the laser level in a shaded area or using a portable shade if possible to reduce the impact of direct sunlight.
2. Adjusting the Laser Level’s Brightness
Most red laser levels come with brightness adjustment settings. In bright daylight conditions, increasing the brightness of the laser beam can greatly improve its visibility. Refer to the user manual of your specific laser level model to understand how to adjust the brightness and optimize it for outdoor use. Keep in mind that the highest brightness setting may consume more battery power, so always carry extra batteries or ensure a power source is nearby.
3. Utilizing Laser Glasses or Filters
Specialized laser glasses or filters can be used to enhance the visibility of the red laser beam. These glasses or filters are designed to filter out unwanted light frequencies, allowing the red laser beam to stand out more prominently. Make sure to choose glasses or filters specifically designed for red lasers to ensure optimal visibility and protection.
4. Creating Contrast with Target Surfaces
Increasing the contrast between the red laser beam and the target surface can improve visibility. Choose target surfaces with a contrasting color to the laser beam. For example, if the laser beam is red, using a white or light-colored background can make the beam more visible. Alternatively, use target markers or adhesive targets that have high visibility colors, such as yellow or orange, to create a clear contrast with the red laser beam.
5. Minimizing Ambient Light Interference
Reducing the interference caused by ambient light can significantly enhance the visibility of the red laser level. Try to position yourself and the laser level in a way that minimizes direct sunlight. Consider working in the early morning or late afternoon when the angle of the sun is lower, resulting in reduced glare and shadows. Additionally, use shade structures or umbrellas to create a shaded area around the work area, providing better visibility of the laser beam.
Implementing these tips and techniques will help you enhance the visibility of red laser levels in daylight conditions. By strategically positioning the laser level, adjusting its brightness, utilizing laser glasses or filters, creating contrast with target surfaces, and minimizing ambient light interference, you can ensure that the red laser beam remains clear and easily visible, allowing for accurate alignment and measurements in outdoor environments.
Read more: How To Level A Laser Level Tripod
Positioning the Red Laser Level
Proper positioning of the red laser level is essential to maximize its visibility in daylight conditions. By placing the laser level in the right position, you can ensure that the laser beam is projected effectively and remains visible even in bright outdoor environments.
Here are some key considerations when positioning your red laser level:
1. Stability:
Ensure that the red laser level is placed on a stable surface or mounted securely on a tripod. This will prevent any vibrations or movements that can cause the laser beam to waver or become blurry, compromising its visibility. A stable base is crucial for accurate readings and precise alignments.
2. Height and Angle:
Adjust the height of the red laser level so that the laser beam is projected at eye level. This makes it easier to see the beam without straining your neck or eyes. Positioning the laser level too high or too low can make it difficult to perceive the beam clearly. Additionally, consider the angle at which the laser level is tilted. Ensuring that the laser beam is projected perpendicular to the surface you are working on will provide a straight and accurate reference line.
3. Shaded Area:
Whenever possible, position the red laser level in a shaded area to minimize the impact of direct sunlight. Direct sunlight can overpower the red laser beam and make it difficult to see. Look for a spot with natural shade, such as under a tree or next to a building. If a shaded area is not available, you can bring your own shade by using a portable shade structure or an umbrella to create a shadow around the work area.
4. Distance from Target Surface:
The distance between the red laser level and the target surface can impact visibility. Make sure that the laser level is positioned at an appropriate distance from the surface you are working on. If the laser level is too close, the laser beam may appear too bright and overpowering, making it more challenging to see. Conversely, if the laser level is too far, the beam may become too dim and less visible. Experiment with different distances to find the optimal position that provides a clear and easily visible laser beam.
By considering these positioning factors, you can maximize the visibility of the red laser beam and ensure accurate alignments and measurements in daylight conditions. Remember to stabilize the laser level, adjust its height and angle, find a shaded area, and determine the appropriate distance from the target surface. These steps will help you position your red laser level effectively, allowing you to work with confidence and precision in outdoor environments.
Adjusting the Laser Level’s Brightness
One effective way to enhance the visibility of a red laser level in daylight is to adjust its brightness settings. Most modern laser level models come equipped with brightness adjustment features, allowing you to optimize the intensity and visibility of the laser beam. By adjusting the laser level’s brightness, you can make the red laser beam more prominent and easily visible even in bright outdoor conditions.
Here are some tips on how to adjust the brightness of your laser level:
1. Refer to the User Manual:
Every laser level model is different, so it’s important to refer to the user manual that comes with your specific laser level. The manual should provide detailed instructions on how to adjust the brightness settings. It will outline the specific buttons or controls you need to use and explain the different brightness settings available.
2. Find the Brightness Adjustment Controls:
Locate the brightness adjustment controls on your laser level. These controls are usually accessible on the laser level’s control panel or through a menu system on a digital laser level. It may be in the form of a button or a dial, depending on the design of your laser level.
Read more: How To Work A Water Level Or Laser Level
3. Experiment with Different Brightness Settings:
Once you have located the brightness adjustment controls, start by experimenting with different settings to find the optimal brightness for your specific working conditions. Begin with the default or medium brightness setting and observe the visibility of the red laser beam. If the laser beam is still not clearly visible, gradually increase the brightness to a higher setting until you achieve the desired visibility. Take note that the highest brightness setting may consume more battery power, so it’s essential to have extra batteries on hand or ensure a power source is available.
4. Avoid Overpowering the Laser Beam:
While it’s important to increase the brightness to enhance visibility, be cautious not to overpower the laser beam. If the laser beam appears too bright or intense, it can be challenging to focus on and may cause discomfort to your eyes. Find the right balance where the laser beam is bright enough to be easily seen without causing any strain or discomfort.
5. Maintain Safety Measures:
While adjusting the brightness of your laser level, make sure to follow all safety precautions outlined in the user manual. Avoid pointing the laser beam directly at your eyes or others’ eyes. Always wear appropriate eye protection, such as laser glasses or goggles, especially when working with higher brightness settings.
Keep in mind that the optimal brightness setting may vary depending on the lighting conditions and the specific application you are working on. Regularly check and adjust the brightness as needed throughout your project to ensure continuous visibility of the red laser beam.
By adjusting the brightness of your laser level, you can significantly enhance the visibility of the red laser beam in daylight conditions. This allows for more accurate alignments and measurements, ultimately improving the efficiency and precision of your work in outdoor environments.
Utilizing Laser Glasses or Filters
When it comes to enhancing the visibility of a red laser level in daylight, one effective strategy is to utilize laser glasses or filters. These specialized accessories are designed to filter out unwanted light frequencies, allowing the red laser beam to stand out more prominently. By using laser glasses or filters, you can optimize the visibility of the laser beam and overcome the challenges posed by bright outdoor conditions.
Here’s how you can effectively utilize laser glasses or filters with your red laser level:
Read more: How Dangerous Is Laser Level
1. Select the Right Laser Glasses or Filters:
Ensure that you choose laser glasses or filters specifically designed for red lasers. Different laser glasses and filters are designed to filter out specific wavelengths of light, so it’s important to use ones that are compatible with the particular wavelength of your red laser level. Check the specifications provided by the manufacturer to ensure that the glasses or filters you choose are suitable for use with your specific laser level model.
2. Wear Laser Glasses:
Laser glasses are specially designed eyewear that enhances the contrast and visibility of red laser beams. They filter out other light frequencies, allowing the red laser beam to appear brighter and more easily distinguishable. When using a red laser level outdoors, put on the laser glasses for maximum visibility. This will help you clearly see the laser beam even in bright daylight conditions.
3. Attach Laser Filters:
If your red laser level provides the option to attach filters, ensure that you have the appropriate filters for your laser level. These filters are placed directly over the laser emitter, allowing only the specific wavelength of red light to pass through while reducing interference from other light sources. Follow the instructions provided by the manufacturer to correctly attach the filters to your laser level.
4. Consider Different Filter Options:
Depending on your specific needs and working conditions, you may have different filter options available. Some filters are designed to enhance the visibility of the laser beam in specific situations, such as high ambient light or long distances. Explore the options provided by the manufacturer or consult with a specialist to determine the most suitable filters for your working environment.
Read more: How To Repair Laser Level
5. Prioritize Safety:
Ensure that the laser glasses or filters you use prioritize safety. Look for glasses or filters that meet safety standards and provide adequate protection against laser radiation. Always follow the safety guidelines provided by the manufacturer, ensuring that you and others in the vicinity are wearing appropriate eye protection when using a red laser level.
By utilizing laser glasses or filters, you can significantly improve the visibility of the red laser beam in daylight conditions. These accessories filter out unwanted light frequencies, allowing the red laser beam to stand out prominently. Whether you choose to wear laser glasses or attach filters to your red laser level, the result is enhanced visibility and improved accuracy in alignment and measurement tasks in bright outdoor environments.
Creating Contrast with Target Surfaces
Creating contrast between the red laser beam and the target surfaces is a useful technique for enhancing the visibility of a red laser level in daylight conditions. By selecting target surfaces with contrasting colors or using specific materials, you can make the laser beam more visible and ensure accurate alignment and measurements. Here are some tips on creating contrast with target surfaces:
1. Choose Light-Colored Surfaces:
Opt for target surfaces with light or white colors as they provide a high contrast against the red laser beam. The bright color of the surface enhances the visibility of the laser line and makes it easier to see, even in bright daylight conditions. Light-colored walls, boards, or sheets of white material are suitable options for creating contrast with the red laser beam.
2. Consider Using Reflective Targets:
Reflective targets are specially designed materials that reflect the laser beam, making it appear brighter and more visible. These targets often consist of adhesive strips or stickers with a reflective surface. Attach these targets to the surface you are working on, and the laser beam will be redirected back towards you, increasing its visibility. This technique is particularly useful when working on surfaces that are not naturally reflective, such as wood or concrete.
Read more: How To Use A Laser Level
3. Utilize Target Markers:
Target markers are objects or devices that you can place at specific points to serve as reference points for alignment. These markers can be brightly colored, such as fluorescent or neon markers, to create contrast with the red laser beam. By positioning these markers strategically, you can enhance the visibility of the laser beam and improve accuracy in alignment tasks.
4. Incorporate Contrasting Patterns or Materials:
Using contrasting patterns or materials on the target surface can also enhance the visibility of the red laser beam. For example, you can use adhesive tapes or paint to create contrasting lines or shapes on a surface to intersect with the laser beam. This creates a distinct pattern that stands out against the laser line, making it more visible and facilitating precise alignment.
5. Avoid Reflective Surfaces:
Avoid working on surfaces that are highly reflective, such as glass, mirrors, or polished metal. These surfaces can cause the laser beam to scatter or bounce off in various directions, reducing its visibility and accuracy. If you need to work on reflective surfaces, consider using target markers or creating contrast with non-reflective materials to counterbalance the effect of reflections.
Creating contrast with target surfaces is an effective technique for enhancing the visibility of red laser levels in daylight conditions. By choosing light-colored surfaces, utilizing reflective targets or markers, incorporating contrasting patterns or materials, and avoiding reflective surfaces, you can ensure better visibility of the red laser beam. These techniques enable accurate alignment and measurements, even in outdoor environments with ample daylight.
Minimizing Ambient Light Interference
Minimizing ambient light interference is crucial for enhancing the visibility of a red laser level in daylight conditions. Ambient light, especially sunlight, can overpower the red laser beam and make it difficult to see. By implementing strategies to reduce the impact of ambient light, you can ensure a clear and visible laser beam for accurate alignments and measurements. Here are some effective ways to minimize ambient light interference:
Read more: How To Choose A Laser Level
1. Positioning:
Position yourself and the red laser level in a way that minimizes direct sunlight. Find a shaded area, such as under a tree or on the side of a building, to reduce the amount of sunlight reaching the laser beam. This can significantly improve visibility by reducing the contrast between the intense sunlight and the red laser beam.
2. Time of Day:
Consider working during specific times of the day when the angle and intensity of sunlight are lower. Early mornings or late afternoons generally have less intense sunlight, resulting in reduced glare and shadows. By working during these periods, you can minimize the interference caused by direct sunlight and improve the visibility of the red laser beam.
3. Shade Structures:
If a natural shaded area is not available, create your own shade using portable shade structures, umbrellas, or canopies. These structures can block out the direct sunlight, providing a shaded area for you to work in. Position the shade structure strategically to cover both yourself and the red laser level, ensuring that the laser beam remains visible and clear of any interfering light.
4. Laser Glasses and Filters:
As mentioned earlier, laser glasses and filters can be beneficial for minimizing ambient light interference. These accessories are designed to filter out unwanted light frequencies, enhancing the visibility of the red laser beam. By wearing laser glasses or attaching filters to your laser level, you can protect your eyes and optimize the visibility of the laser beam even in bright daylight conditions.
Read more: How To Use A Self Leveling Laser Level
5. Direct the Beam Away from Sunlight:
Position the red laser level in such a way that the laser beam is directed away from direct sunlight. By avoiding the laser beam’s path intersecting with bright sunlight, you can eliminate or reduce the interference caused by the intense light. Assess the surroundings and adjust the position of the laser level accordingly to minimize the impact of sunlight on the laser beam.
By taking these measures to minimize ambient light interference, you can significantly enhance the visibility of red laser levels in daylight conditions. Properly positioning yourself and the laser level, working during optimal times of the day, utilizing shade structures, using laser glasses or filters, and directing the beam away from sunlight are effective strategies to ensure a clear and visible laser beam for successful alignment and measurement tasks in outdoor environments.
Conclusion
Enhancing the visibility of red laser levels in daylight conditions can be a challenging task due to factors such as the scattering of red light, the presence of ambient light, and reflections from surrounding surfaces. However, by implementing practical strategies, you can overcome these challenges and ensure a clear and visible red laser beam for accurate alignments and measurements.
Positioning the red laser level correctly is crucial. Stabilize the laser level on a steady surface and adjust its height and angle to optimize visibility. Placing the laser level in a shaded area or using shade structures can also minimize the impact of direct sunlight, improving visibility in bright outdoor conditions.
Additionally, adjusting the laser level’s brightness setting is important. Increase the brightness to enhance the intensity of the laser beam, maximizing its visibility. Refer to the user manual for the specific instructions on adjusting the brightness setting of your laser level model, and find the right balance that ensures visibility without overpowering the beam.
Utilizing laser glasses or filters specifically designed for red lasers can enhance the visibility of the laser beam by filtering out unwanted light frequencies. These accessories make the laser beam stand out prominently and are a convenient way to optimize visibility in bright daylight conditions.
Creating contrast between the red laser beam and the target surfaces improves visibility. Choose light-colored surfaces or attach reflective targets to create a clear contrast. Avoid working on highly reflective surfaces to minimize interference from reflections that can hinder visibility.
Lastly, minimizing ambient light interference is essential. Position yourself and the laser level in a way that reduces direct sunlight. Consider the time of day when sunlight is less intense and use shade structures to create a shaded area for improved visibility.
By following these tips and techniques, you can maximize the visibility of red laser levels in daylight, improving accuracy and efficiency in alignment and measurement tasks. Remember to prioritize safety by wearing appropriate eye protection and following the manufacturer’s guidelines.
In conclusion, with the right strategies and techniques, you can overcome the challenges of seeing red laser levels in daylight and ensure optimal visibility for precise and successful projects in any outdoor environment.
Frequently Asked Questions about How To See Red Laser Level In Daylight
Was this page helpful?
At Storables.com, we guarantee accurate and reliable information. Our content, validated by Expert Board Contributors, is crafted following stringent Editorial Policies. We're committed to providing you with well-researched, expert-backed insights for all your informational needs.

0 thoughts on “How To See Red Laser Level In Daylight”