
Articles
How To Use A Self Leveling Laser Level
Modified: August 26, 2024
Learn how to use a self leveling laser level effectively with these helpful articles. From set up to troubleshooting, find expert advice and tips.
(Many of the links in this article redirect to a specific reviewed product. Your purchase of these products through affiliate links helps to generate commission for Storables.com, at no extra cost. Learn more)
Introduction
Welcome to the wonderful world of self-leveling laser levels! These incredible tools have revolutionized the way we measure and align objects, making our lives much easier. Whether you are a professional contractor or a DIY enthusiast, a self-leveling laser level will become your best friend in no time.
In this article, we will guide you through the process of using a self-leveling laser level effectively. You will learn the necessary steps to set up the device, calibrate it, and utilize it for various measurements and alignments. By the end of this article, you will be equipped with the knowledge and confidence to tackle any project with ease.
But first, let’s take a closer look at what exactly a self-leveling laser level is and how it works.
Key Takeaways:
- Self-leveling laser levels simplify measurements and alignments in construction and DIY projects. Understanding setup, calibration, and troubleshooting ensures precise results and efficient project completion.
- Proper use of self-leveling laser levels enhances accuracy, saves time, and elevates project outcomes. Selecting the right tool, determining desired height, and making adjustments are key to success.
Read more: How To Use A Laser Level
Understanding Self-Leveling Laser Levels
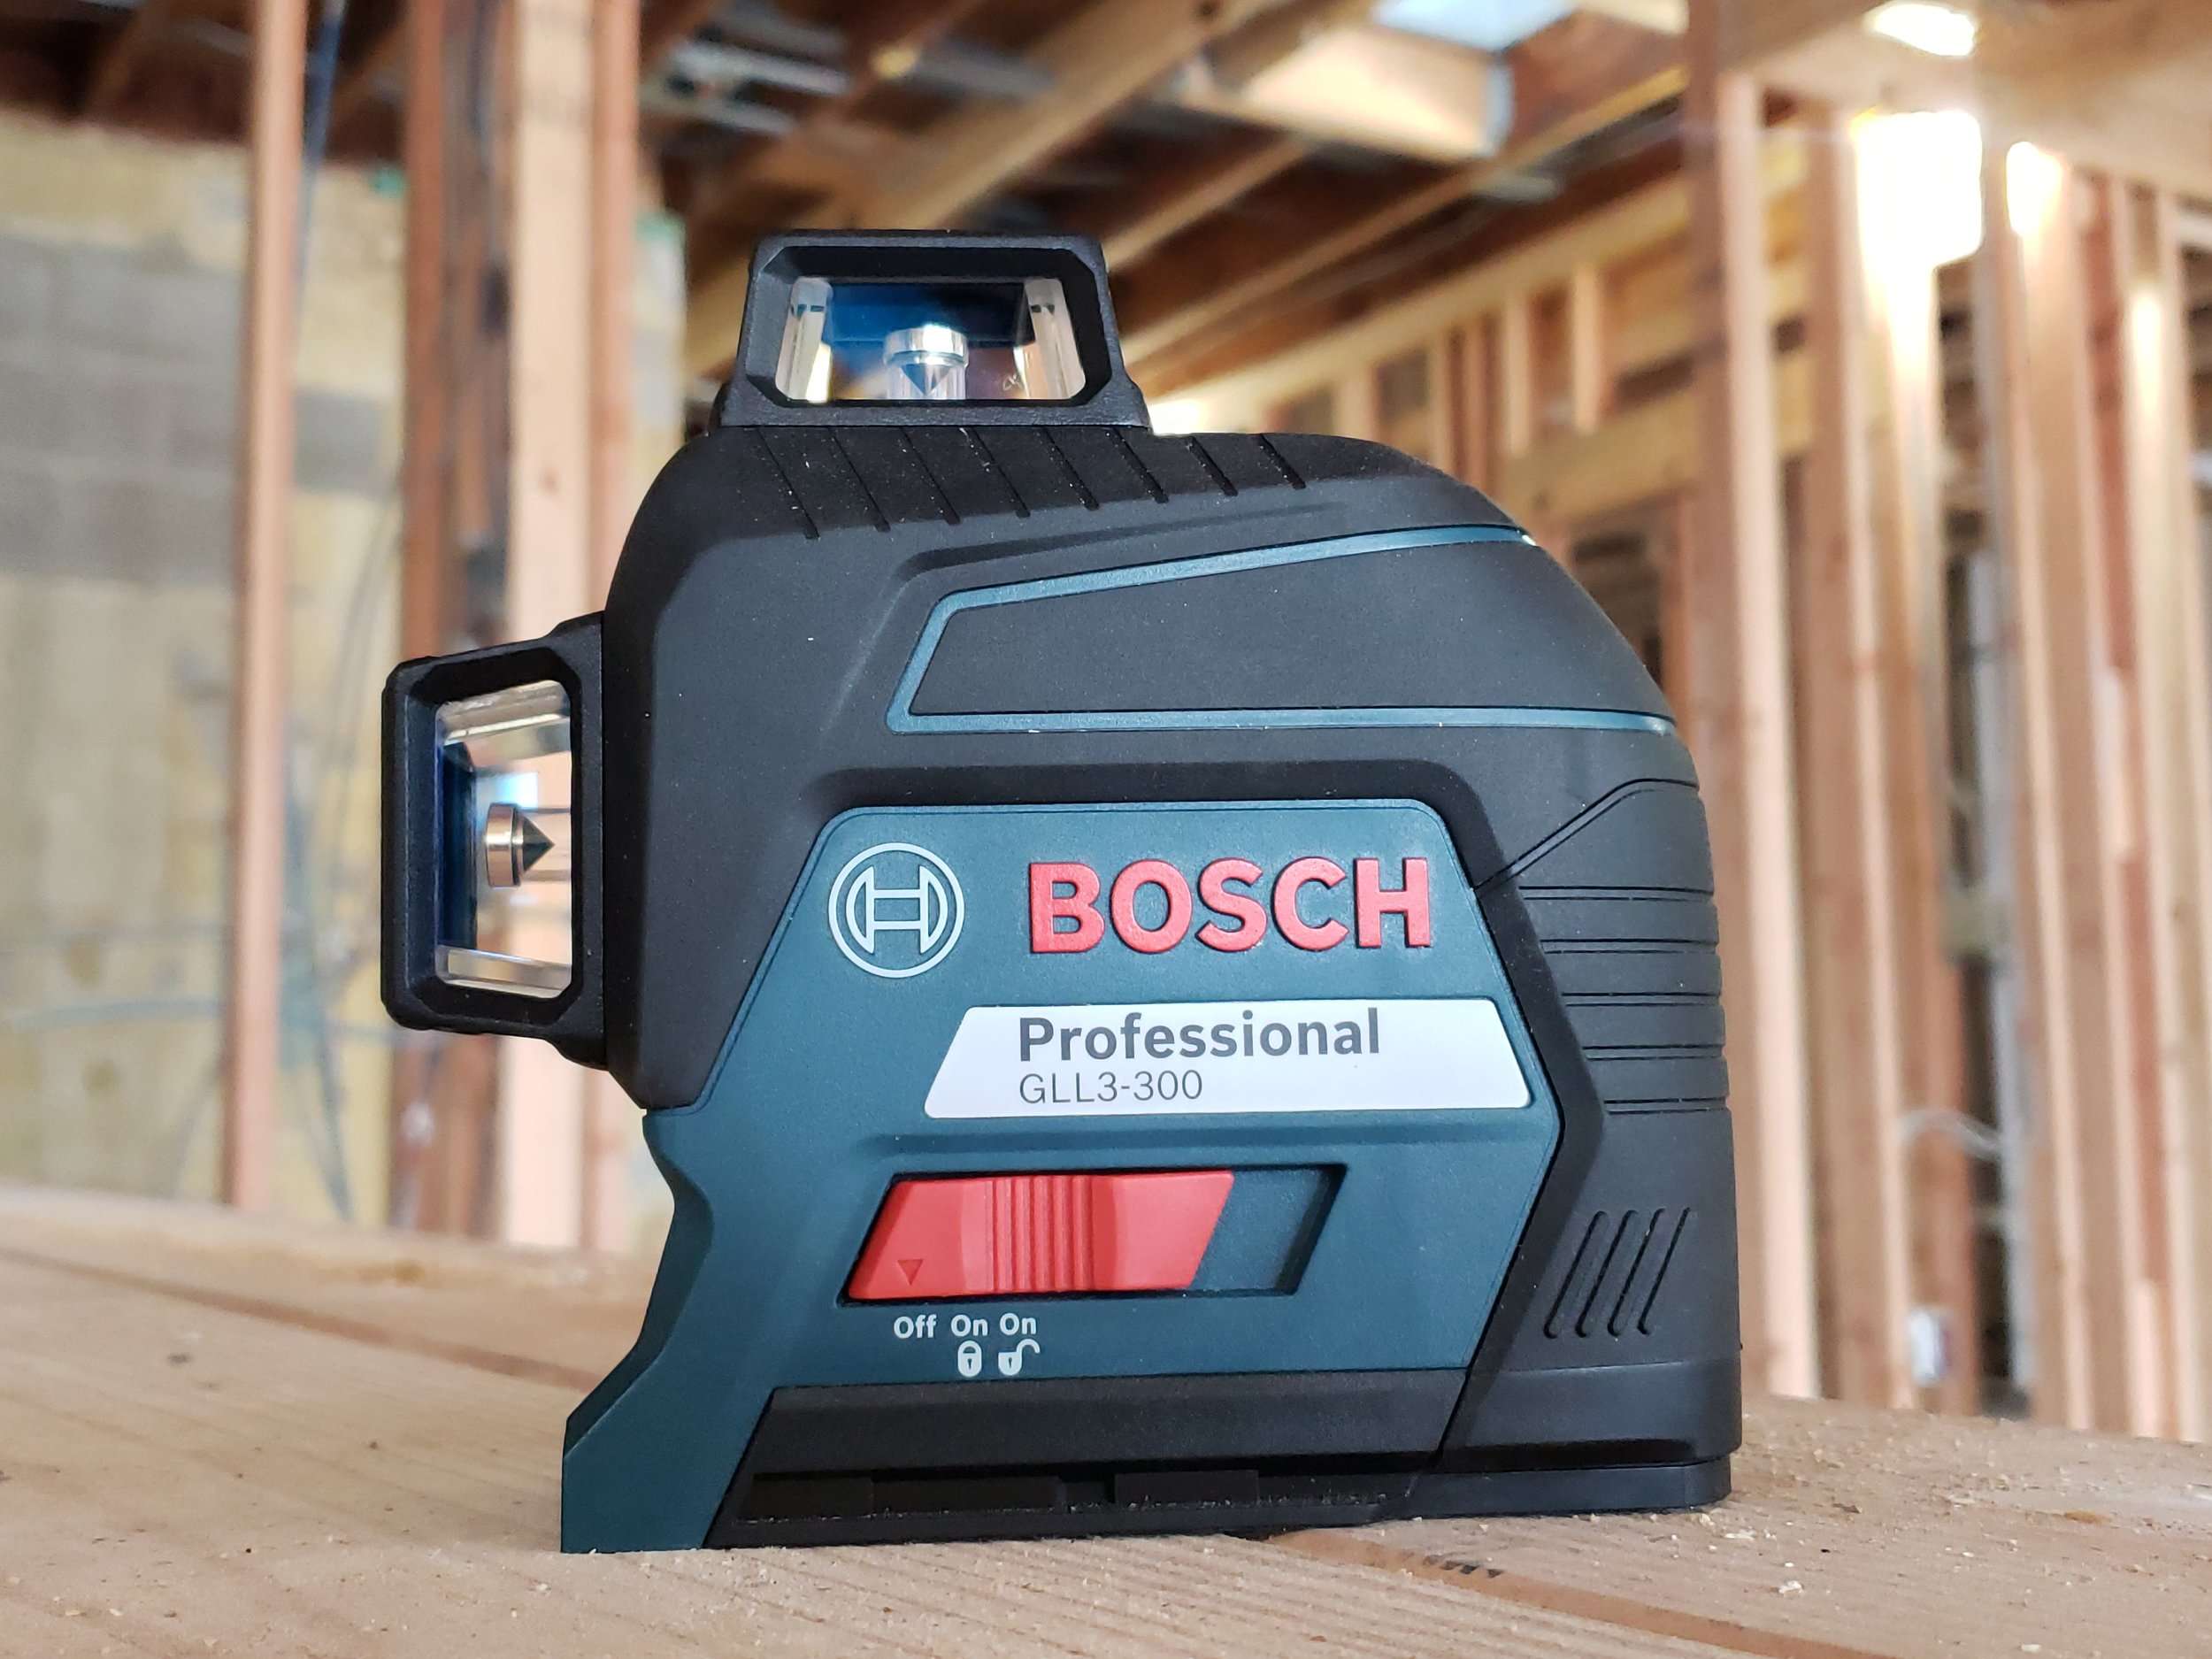
A self-leveling laser level is a versatile tool designed to provide accurate measurements and alignments. It utilizes a laser beam to project a reference line or a dot onto the desired surface. The device is equipped with an internal pendulum system that automatically levels itself when placed on a flat and stable base.
Self-leveling laser levels come in different types, including line lasers, dot lasers, and rotary lasers. Line lasers project a straight horizontal or vertical line, dot lasers emit a single dot, and rotary lasers create a 360-degree laser beam for comprehensive coverage.
These tools are invaluable in a wide range of applications, such as construction, carpentry, plumbing, electrical work, and even interior decoration. With their high precision and ease of use, self-leveling laser levels eliminate the guesswork and ensure accurate measurements every time.
Now that you have a basic understanding of self-leveling laser levels, let’s dive into the practical steps of using one.
Key Takeaways:
- Self-leveling laser levels simplify measurements and alignments in construction and DIY projects. Understanding setup, calibration, and troubleshooting ensures precise results and efficient project completion.
- Proper use of self-leveling laser levels enhances accuracy, saves time, and elevates project outcomes. Selecting the right tool, determining desired height, and making adjustments are key to success.
Read more: How To Use A Laser Level
Understanding Self-Leveling Laser Levels
A self-leveling laser level is a versatile tool that has become a staple in the construction, carpentry, and DIY industries. These sophisticated devices are designed to project laser beams to create level reference lines or points on various surfaces. They are widely used for tasks such as aligning walls, installing drop ceilings, setting up shelves, and many other projects that require precise measurements and alignments.
Self-leveling laser levels are equipped with an internal pendulum system that automatically adjusts the device to ensure that the laser beam remains level. This self-leveling feature eliminates the need for manual leveling, making the setup process quick and easy. The laser beams emitted by these tools are highly visible and can be seen even in bright daylight or from a distance, making them ideal for both indoor and outdoor applications.
There are different types of self-leveling laser levels available, each designed for specific tasks. Line lasers emit straight horizontal, vertical, or angled lines, perfect for aligning walls, cabinets, and tiles. Dot lasers project one or multiple dots, making them useful for tasks such as hanging pictures or setting up light fixtures. Rotary lasers, on the other hand, emit a 360-degree laser beam, allowing for precise measurements and alignments over large distances.
One of the key advantages of self-leveling laser levels is their high accuracy. They can typically provide measurements with an accuracy of around 1/16th of an inch over 100 feet. This level of precision ensures that your projects are aligned correctly, saving you time, effort, and potential rework.
Most self-leveling laser levels come with additional features that enhance their usability and versatility. For example, some models have a pulse mode that allows the laser beam to be detected by a receiver, enabling their use in bright sunlight or over long distances. Others offer adjustable brightness settings, multiple beam options, or the ability to set slopes or angles. These features provide greater flexibility and convenience, depending on the specific requirements of your project.
It is important to note that self-leveling laser levels require a stable and flat surface to ensure accurate readings. Some models include a built-in tripod mount, while others can be attached to a tripod or mounted on a bracket for stability. Ensuring the device is securely positioned will prevent any potential measurement errors and allow for consistent and reliable results.
In summary, self-leveling laser levels are powerful tools that simplify and streamline a variety of construction and DIY tasks. With their self-leveling capability, precise measurements, and user-friendly features, these devices are a must-have for any serious DIYer or professional tradesperson. Now that you understand the basics of self-leveling laser levels, let’s delve into the steps involved in using them effectively.
Step 1: Set up the Self Leveling Laser Level
Setting up a self-leveling laser level properly is essential to ensure accurate measurements and alignments. Follow these steps to set up your self-leveling laser level:
- Choose a Stable Surface: Start by selecting a stable surface on which to place your self-leveling laser level. This can be a tripod, a mounting bracket, or any other secure platform. Ensure that the surface is level and capable of supporting the weight of the laser level.
- Attach the Laser Level: If your self-leveling laser level has a built-in tripod mount, simply attach it to the tripod head. If not, use a mounting bracket or any other suitable attachment method to secure the laser level to the chosen surface. Ensure that the laser level is securely fastened to prevent any movement during operation.
- Activate the Self-Leveling Mode: Most self-leveling laser levels have a self-leveling mode that needs to be activated. This can typically be done by turning the device on and allowing it a few seconds to self-level and stabilize. Refer to the manufacturer’s instructions for specific details on how to activate the self-leveling mode for your particular laser level.
- Check the Level: Once the self-leveling mode is activated, check if the laser level is indicating a level position. Look for a bubble vial or electronic level on the device itself, which will typically indicate whether the laser level is properly leveled.
- Adjust if Necessary: If the laser level indicates that it is not level, make adjustments as needed using the leveling screws or knobs on the device. Gradually adjust the screws or knobs until the bubble vial or electronic level shows that the laser level is leveled correctly.
- Verify Stability: After adjusting the laser level, ensure that it remains stable and level. Gently tap or nudge the laser level to check if it returns to its level position. If it does not, readjust it until it remains stable and leveled.
- Verify Reference Line or Point: Before proceeding with measurements or alignments, verify that the laser beam is projecting the correct reference line or point. Ensure that the laser beam is clear and visible on the desired surface.
By following these steps, you will have successfully set up your self-leveling laser level, and it will be ready to be used for various measurements and alignments. Remember to refer to the manufacturer’s instructions for any specific details or considerations unique to your laser level model.
Step 2: Calibrate the Self Leveling Laser Level
Calibrating your self-leveling laser level is crucial to ensure accurate and reliable measurements. Here’s a step-by-step guide on how to calibrate your self-leveling laser level:
- Find a Stable Reference Point: Start by identifying a stable reference point in the area where you will be using your self-leveling laser level. This could be a wall, a corner, or any other fixed object that will serve as a benchmark for calibration.
- Set up the Laser Level: Place the self-leveling laser level on a stable surface, such as a tripod or mounting bracket, in close proximity to the reference point. Make sure that the laser level is relatively level and secure.
- Activate the Self-Leveling Mode: Turn on the self-leveling laser level and allow it to self-level and stabilize. This may take a few seconds, depending on the model and manufacturer’s instructions.
- Align the Laser Beam with the Reference Point: Rotate the laser level until the laser beam aligns with the stable reference point. This can be done by manually adjusting the position of the laser level or by using any provided alignment features or mechanisms on the device.
- Verify the Alignment: Check the alignment of the laser beam with the reference point from different angles and positions. Confirm that the laser beam consistently aligns with the reference point to ensure accuracy.
- Make Fine Adjustments: If necessary, make small adjustments to fine-tune the alignment of the laser level. Use the leveling screws or knobs on the device to make precise adjustments until the laser beam aligns perfectly with the reference point.
- Recheck Calibration: Once you have made the necessary adjustments, recheck the calibration by verifying that the laser beam still aligns accurately with the reference point. Repeat this process if any significant changes or repositioning of the laser level are made.
It is important to note that calibration requirements may vary depending on the specific laser level model and manufacturer’s instructions. Some self-leveling laser levels may require additional calibration steps, such as checking the vertical and horizontal leveling capabilities separately. Always refer to the manufacturer’s guidelines for proper calibration procedures specific to your laser level.
Regular calibration of your self-leveling laser level will ensure that it provides accurate and reliable measurements during your projects. By following these steps, you can confidently calibrate your self-leveling laser level and achieve precise results every time.
When using a self-leveling laser level, always ensure that the device is placed on a stable surface and that the leveling mechanism is activated before use to ensure accurate and precise measurements.
Read more: How To Use Laser Level Outside
Step 3: Determine the Desired Height or Alignment
Before using your self-leveling laser level for measurements or alignments, it is essential to determine the desired height or alignment of the reference line or point. Here are the steps to help you determine the desired height or alignment:
- Identify the Measurement or Alignment Task: Determine the specific task you need to accomplish using the self-leveling laser level. This could be aligning cabinets, installing countertops, or setting up shelves, for example.
- Measure and Mark Reference Points: Use a measuring tape or a ruler to measure the desired height, length, or distance for your task. Mark these measurements on the surfaces where you will be aligning or installing objects. These marks will serve as reference points for your self-leveling laser level.
- Consider the Project Requirements: Take into account any project-specific requirements, such as the slope or angle at which you need to align or position the object. This will help you determine the appropriate height or alignment for the reference line or point generated by the self-leveling laser level.
- Plan for Multiple Reference Points: For certain tasks, you may need to establish multiple reference points along the surface. This will allow you to create straight lines, right angles, or parallel alignments using the self-leveling laser level.
- Visualize the Desired Outcome: Envision how you want the final result to look once the objects are aligned or installed. This visual representation will guide you in determining the desired height or alignment that the self-leveling laser level needs to replicate.
Keep in mind that the specific requirements for determining the desired height or alignment will vary depending on your project. It’s crucial to carefully assess the task at hand and plan accordingly to achieve the desired outcome.
Taking the time to accurately determine the desired height or alignment will allow you to use your self-leveling laser level more effectively, ensuring that your measurements and alignments are precise and meet your project’s requirements.
Step 4: Adjust the Self Leveling Laser Level
Once you have set up and calibrated your self-leveling laser level, it’s time to make any necessary adjustments to ensure optimal accuracy and performance. Here’s a step-by-step guide on how to adjust your self-leveling laser level:
- Check the Leveling Accuracy: Begin by verifying the accuracy of the self-leveling feature of your laser level. Place the laser level on a stable surface and observe if it quickly and accurately levels itself. If there are any issues with the self-leveling mechanism, consult the manufacturer’s instructions for troubleshooting steps or contact customer support.
- Adjust the Laser Leveling Range: Some self-leveling laser levels allow you to adjust the range at which the laser will self-level. This can be useful if you are working on an uneven surface or need more flexibility in the leveling range. Refer to the user manual of your laser level to learn how to adjust the leveling range and make the necessary changes.
- Fine-Tune the Leveling: If your self-leveling laser level does not automatically level perfectly, you may need to make manual adjustments. Most laser levels have leveling screws or knobs that can be used to fine-tune the leveling. Gradually adjust these screws or knobs until the laser beam aligns correctly and remains stable.
- Ensure Secure Mounting: Double-check that your self-leveling laser level is securely mounted and free from any movement or vibrations during operation. Loose attachments or unstable surfaces can affect the accuracy of the laser level. Make sure all screws and clamps are tightened properly to maintain a stable mounting.
- Verify the Reference Line or Point: Once you have made the necessary adjustments, confirm that the laser beam is projecting the desired reference line or point accurately. Examine the alignment of the laser beam with the reference marks or surfaces to ensure that it meets your requirements. Make any further adjustments if needed.
- Take Measurements and Alignments: With your self-leveling laser level properly adjusted, you are now ready to use it for measurements and alignments. Follow the manufacturer’s instructions for guidelines on using the laser level for specific tasks. Remember to maintain a stable setup, check the laser beam’s visibility, and ensure proper safety precautions.
Regularly checking and adjusting your self-leveling laser level will help maintain its accuracy and reliable performance. It’s important to take the time to fine-tune the level, confirm the reference line or point, and ensure that the device is securely mounted. By paying attention to these details, you can maximize the effectiveness of your self-leveling laser level and achieve precise results in your projects.
Step 5: Use the Self Leveling Laser Level for Measurements
Now that your self-leveling laser level is set up, calibrated, and adjusted, it’s time to put it to work for measurements and alignments. Here’s a step-by-step guide on how to use your self-leveling laser level effectively:
- Identify the Measurement or Alignment Task: Determine the specific measurement or alignment task that you need to accomplish using the self-leveling laser level. It could be aligning objects, marking layout lines, or measuring heights or distances.
- Position the Laser Level: Place your self-leveling laser level in a stable position, making sure it is securely mounted or placed on a tripod or bracket. Position it in a way that the laser beam can project onto the desired surfaces or points.
- Activate the Laser Beam: Turn on the self-leveling laser level and activate the laser beam. Some laser levels have additional settings for line thickness, pulse mode, or other features, depending on the model. Adjust the settings accordingly to meet the requirements of your task.
- Project the Reference Line or Point: Observe the laser beam projection and ensure that it aligns with the reference marks or surfaces you have identified. Use the laser level’s built-in mechanisms, such as rotation or angling, to create the desired reference line or point.
- Take Accurate Measurements: Once the reference line or point is projected, use a measuring tape or ruler to take precise measurements based on the laser level’s alignment. This ensures accuracy and consistency in your measurements.
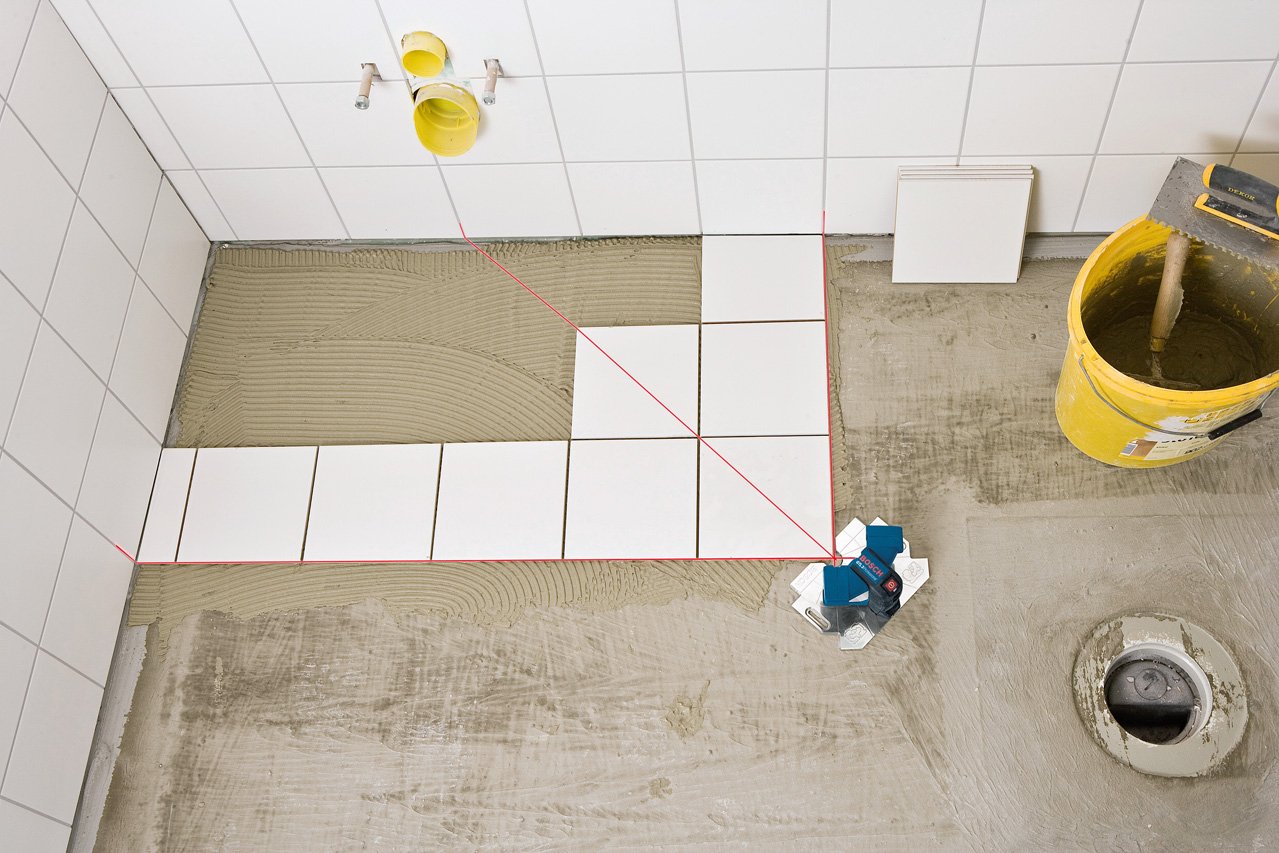
- Align or Position Objects: Use the reference line or point generated by the self-leveling laser level to align or position objects accurately. This can include aligning cabinets, hanging pictures, installing tiles, or ensuring levelness of surfaces.
- Check for Levelness: Verify the levelness of your work by using a bubble level or other measuring tools. This will allow you to confirm that objects or surfaces are perfectly aligned according to your project requirements.
- Make Adjustments if Required: If any adjustments or fine-tuning are needed, refer back to Step 4 to recalibrate or readjust the self-leveling laser level accordingly. This will help maintain accuracy throughout your project.
Throughout the measurement and alignment process, take necessary safety precautions, such as wearing protective eyewear and ensuring a clear working area. It’s also important to clean and store your self-leveling laser level properly after use to maintain its performance.
By following these steps, you can utilize your self-leveling laser level to achieve precise measurements and alignments. The laser beam projection provides a clear visual reference, making your tasks more efficient and accurate.
Step 6: Troubleshooting Common Issues
While self-leveling laser levels are designed to be user-friendly and reliable, you may encounter some common issues during their use. Here are some troubleshooting steps to help you address these problems:
- Accuracy Issues: If you notice inaccuracies in the readings or alignments of your self-leveling laser level, check if the device is placed on a stable and level surface. Ensure that the self-leveling feature is activated and functioning correctly. If the problem persists, consult the manufacturer’s instructions or contact customer support for further assistance.
- Laser Beam Visibility: If the laser beam is not clearly visible or appears dim, try adjusting the brightness settings of your self-leveling laser level. Some models offer multiple brightness levels to accommodate different working conditions. Additionally, clean the laser lens and ensure that the laser level is not placed in direct sunlight or obstructed by any objects.
- Battery Life: If your self-leveling laser level is running out of battery quickly or not holding a charge, check the battery compartment for any corrosion or debris. Clean the battery contacts if necessary. Use fresh, high-quality batteries recommended by the manufacturer. If the issue persists, consider replacing the rechargeable battery if applicable or consult customer support for further assistance.
- Mounting Stability: If your self-leveling laser level is not staying securely mounted or keeps shifting during use, double-check the mounting mechanism or tripod attachment. Ensure that all screws or clamps are tightened securely. If necessary, consider using an alternative mounting method or a more stable surface to eliminate any movement or vibrations.
- Temperature and Environmental Conditions: Extreme temperature changes or harsh environmental conditions can affect the performance of a self-leveling laser level. Check the manufacturer’s specifications for the recommended operating temperature range and use the device within those limits. Avoid exposing the laser level to excessive moisture, dust, or direct sunlight, as these can impact its accuracy and reliability.
- Calibration and Maintenance: Regular calibration and maintenance are essential to keep your self-leveling laser level in optimal condition. Follow the manufacturer’s guidelines for recommended calibration intervals and procedures. Clean the device regularly, especially the laser lens and leveling mechanism, to remove any dust or debris that may affect its performance.
Remember, troubleshooting steps may vary depending on the specific model and manufacturer of your self-leveling laser level. Always consult the user manual or contact customer support for detailed troubleshooting instructions if you encounter persistent issues or concerns.
By addressing and troubleshooting common issues promptly, you can ensure that your self-leveling laser level continues to deliver accurate measurements and alignments, making your projects more efficient and successful.
Read more: How To Use A Laser Level For Backsplash
Conclusion
Self-leveling laser levels are incredibly useful tools that have simplified and enhanced the accuracy of measurements and alignments in various industries. By following the steps outlined in this guide, you can effectively set up, calibrate, and use your self-leveling laser level to achieve precise results in your projects.
Understanding the basics of self-leveling laser levels, including their different types and features, is essential for selecting the right tool for your specific tasks. Learning how to properly set up and calibrate the laser level ensures accurate readings and alignments.
Once your self-leveling laser level is ready for use, determining the desired height or alignment gives you a clear reference point for your measurements and alignments. Adjustments may be necessary to fine-tune the level and ensure optimal accuracy. Troubleshooting common issues, such as accuracy problems or visibility of the laser beam, helps overcome potential obstacles during your work.
By using the self-leveling laser level properly, you can streamline your projects, save time and effort, and achieve professional-grade results. Always prioritize safety, follow the manufacturer’s instructions, and maintain your laser level to prolong its lifespan and functionality.
Whether you are a professional contractor, a DIY enthusiast, or someone who values precision in their projects, a self-leveling laser level is an indispensable tool. Incorporate it into your toolbox and experience the difference it can make in your measurements and alignments.
So why wait? Start using your self-leveling laser level today and take your projects to new levels of accuracy and efficiency.
Frequently Asked Questions about How To Use A Self Leveling Laser Level
Was this page helpful?
At Storables.com, we guarantee accurate and reliable information. Our content, validated by Expert Board Contributors, is crafted following stringent Editorial Policies. We're committed to providing you with well-researched, expert-backed insights for all your informational needs.


0 thoughts on “How To Use A Self Leveling Laser Level”