
Articles
How To Set Up A Laser Level
Modified: October 27, 2024
Learn how to set up a laser level properly with our step-by-step articles. Get accurate and precise measurements for your construction projects.
(Many of the links in this article redirect to a specific reviewed product. Your purchase of these products through affiliate links helps to generate commission for Storables.com, at no extra cost. Learn more)
Introduction
A laser level is a versatile and essential tool for anyone involved in construction, home improvement, or DIY projects. It allows you to accurately measure, align, and level surfaces with ease. Whether you’re hanging pictures, installing shelves, or building walls, a laser level can greatly simplify the task and help you achieve professional results.
In this article, we will guide you through the process of setting up a laser level. From gathering the necessary tools and materials to fine-tuning the leveling adjustment, we will cover each step in detail to ensure a successful setup. So let’s get started and learn how to set up a laser level like a pro!
Before we begin, it’s important to note that laser levels come in various types, including line lasers, cross-line lasers, and rotary lasers. Each type has specific applications and features, so make sure to choose the right laser level for your needs.
Key Takeaways:
- Setting up a laser level involves gathering the right tools, choosing the ideal location, and fine-tuning the leveling adjustment. This ensures accurate measurements and precise alignments for various projects, from home improvement to construction.
- Securing the laser level in place is crucial for stability and reliable performance. By following the step-by-step guide, anyone can confidently set up a laser level and achieve professional results in their projects.
Read more: How To Level A Laser Level Tripod
Step 1: Gather the Necessary Tools and Materials
Before you start setting up your laser level, gather all the tools and materials you’ll need for the process. Having everything prepared beforehand will help streamline the setup and ensure that you have everything you need to complete the task.
Here’s a list of the essential tools and materials you’ll need:
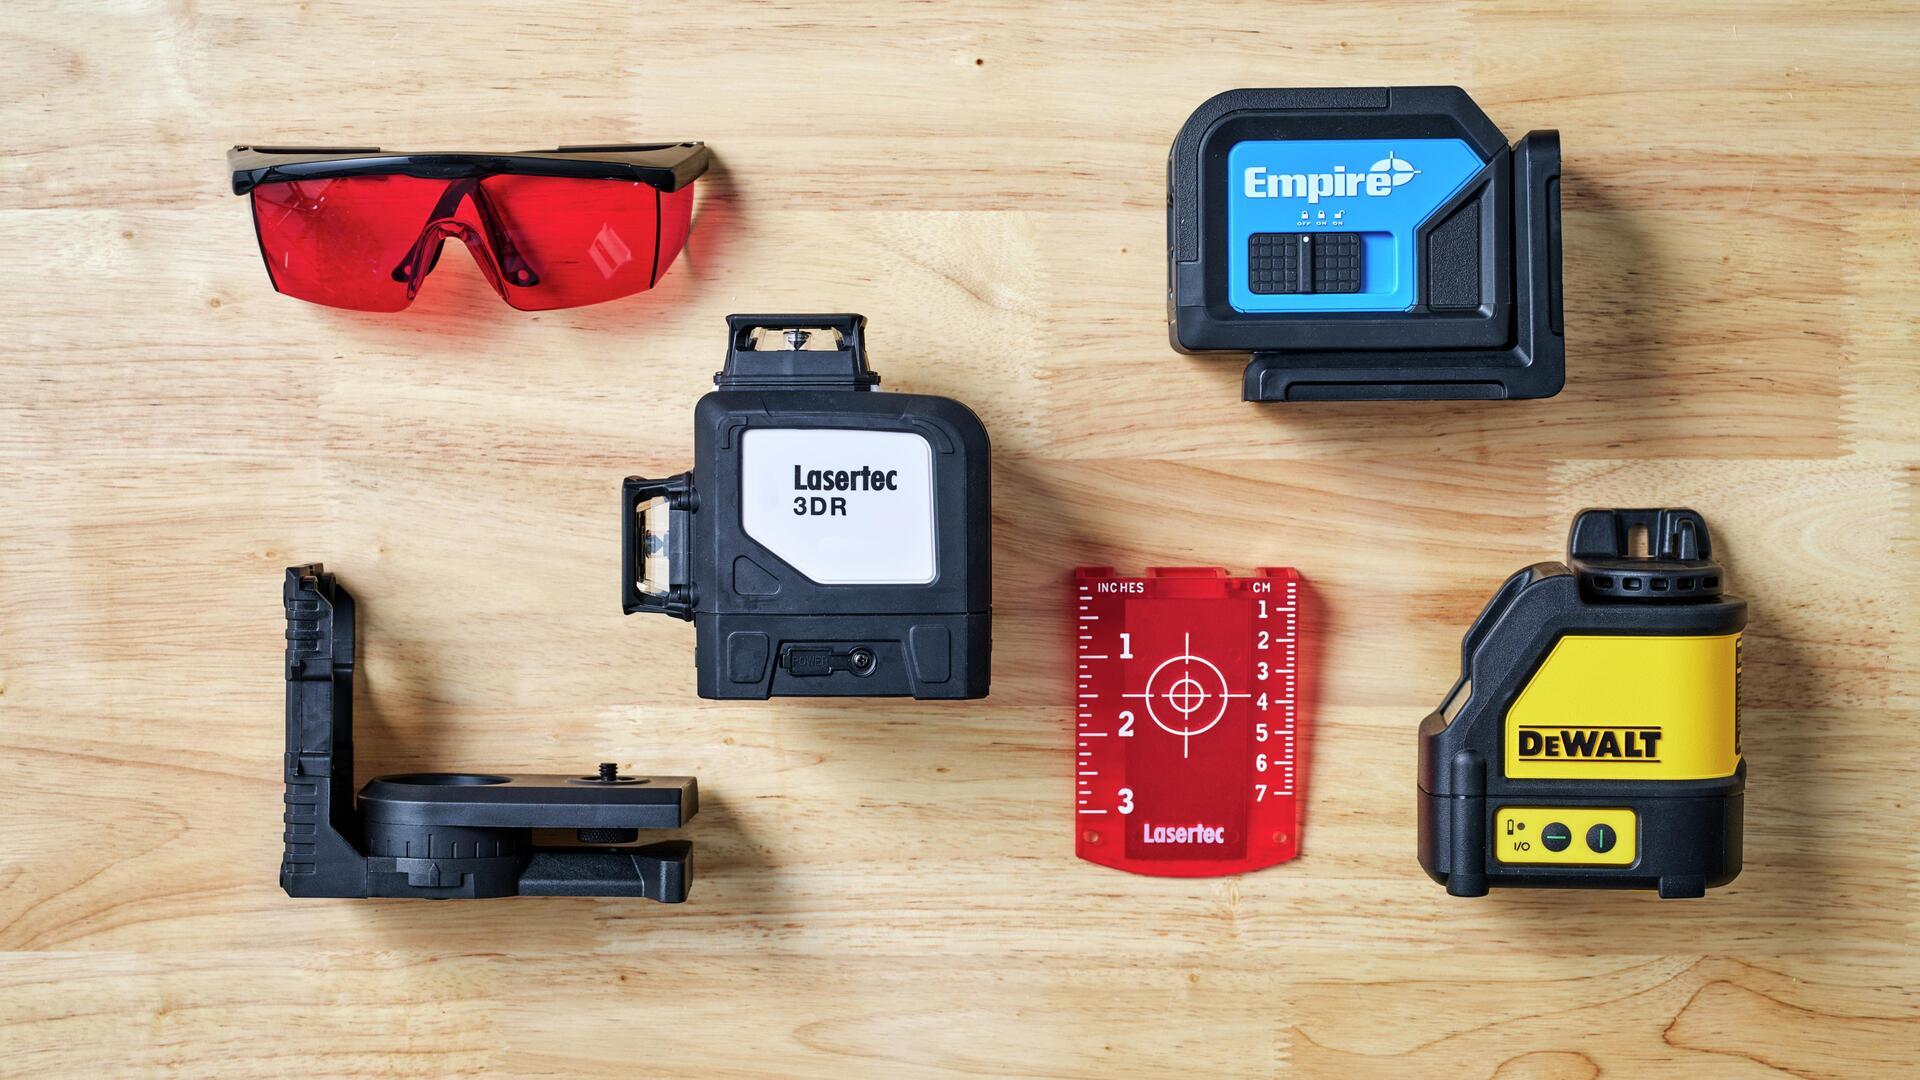
- Laser level: This is the main tool you’ll be setting up. Make sure it’s fully charged or has fresh batteries.
- Mounting bracket or tripod: Depending on the type of laser level you have, you’ll need a mounting bracket or tripod to secure it in place.
- Measuring tape: Use a measuring tape to measure and mark the desired location for setup.
- Pencil or marker: This will be used to make precise marks on the surface where you’ll be mounting the laser level.
- Safety goggles: Laser levels emit strong laser beams, so it’s important to protect your eyes with safety goggles during the setup process.
- Spirit level or bubble level: This will be used to ensure that the laser level is properly aligned and leveled.
- Optional accessories: Depending on your specific needs, you may also need additional accessories such as a target card, a receiver, or a laser detector.
Once you have gathered all the necessary tools and materials, you’re ready to move on to the next step of the setup process. Make sure to double-check that you have everything you need before proceeding.
Step 2: Choose the Right Location for Setup
Choosing the right location for setting up your laser level is crucial to ensure accurate measurements and alignment. The location should be suitable for the task at hand and provide a stable surface for mounting the laser level.
Here are some factors to consider when selecting the location:
- Level surface: Find a surface that is as level as possible to ensure accurate readings from the laser level. If the surface is uneven, use shims or adjustable legs on the tripod to achieve levelness.
- Line of sight: Make sure the laser beam will have a clear line of sight to the desired target location. Avoid obstructions such as walls, furniture, or other objects that may block the laser’s path.
- Distance: Consider the distance between the laser level and the target area. Some laser levels have a limited range, so ensure that the location allows the laser beam to reach the desired distance.
- Ambient light: Take into account the level of ambient light in the room or outdoor environment. Excessive bright light can make it difficult to see the laser beam, so choose a location with moderate lighting conditions.
- Accessibility: Ensure that the location is easily accessible and allows you to move around freely to adjust and fine-tune the laser level as needed.
Once you have considered these factors, use a measuring tape and a pencil or marker to mark the exact location where you will mount the laser level. This will serve as a guide during the setup process.
By carefully choosing the right location for setup, you set the foundation for accurate measurements and alignment, making the rest of the process smoother and more efficient.
Step 3: Prepare the Laser Level
Before you can mount and use your laser level, it’s important to prepare it properly. This step will ensure that the laser level is in good condition, fully functional, and ready for accurate measurements.
Follow these steps to prepare your laser level:
- Check the power source: If your laser level is battery-powered, ensure that the batteries are fully charged or replace them with fresh batteries. For rechargeable laser levels, make sure the unit is fully charged.
- Clean the laser lens: Use a soft, lint-free cloth to clean the laser lens. Dust or debris on the lens can obstruct the laser beam and affect the accuracy of the measurements.
- Inspect for damage: Carefully examine the laser level for any signs of damage, such as cracked casing or broken parts. If you notice any issues, contact the manufacturer for repairs or replacement.
- Calibrate if necessary: Depending on the type and model of your laser level, it may require calibration to ensure accurate measurements. Refer to the manufacturer’s instructions for specific calibration procedures.
- Turn off any visible lasers: Some laser levels have visible laser beams that can be distracting during setup. If your laser level has this feature, turn off the visible lasers before proceeding.
- Refer to the user manual: Familiarize yourself with the specific features, settings, and functionalities of your laser level by referring to the user manual. This will help you make the most of its capabilities during setup and use.
By taking the time to properly prepare your laser level, you ensure that it is in optimal condition and ready to deliver accurate measurements. This will contribute to the success of your setup and the overall quality of your project.
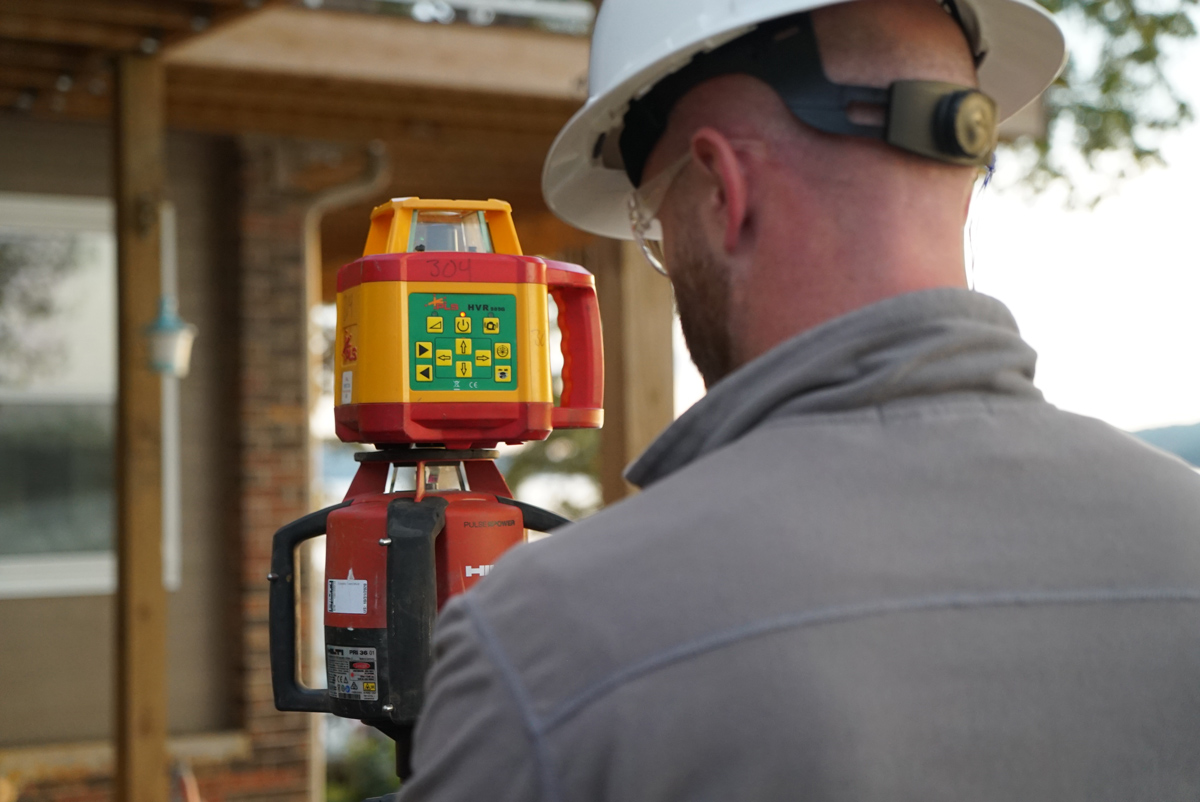
Step 4: Mount the Laser Level
Once you have prepared your laser level, it’s time to mount it securely in the desired location. Mounting the laser level properly will ensure stability and accuracy throughout the setup process. The method of mounting will depend on the type of laser level you have and the available mounting options.
Follow these steps to mount your laser level:
- Attach the mounting bracket or tripod: If your laser level comes with a mounting bracket or tripod, attach it securely. Make sure the mounting bracket is positioned correctly and tightened to prevent any movement.
- Place the laser level on the mounting bracket or tripod: Carefully set the laser level onto the mounting bracket or tripod, ensuring that it rests securely and is level. Some laser levels may have a locking mechanism to hold it in place.
- Adjust the position: Position the laser level so that the laser beam is aligned with the target area or reference point. Use the built-in leveling bubble or spirit level to ensure the laser level is level and aligned correctly.
- Tighten the mounting screws: Once the laser level is positioned correctly, tighten the mounting screws or clamps to secure it in place. Make sure it is firmly fixed and does not wobble or move during operation.
- Double-check the alignment: Verify that the laser beam is still properly aligned and aimed at the desired location. Adjust the position if necessary to achieve the desired alignment.
It’s important to note that if you’re using a tripod, ensure the legs are extended to the desired height and locked securely. This ensures stability and prevents any accidental movement during operation.
By following these steps and mounting the laser level securely, you lay the foundation for accurate and precise measurements throughout your project.
Read more: How To Work A Water Level Or Laser Level
Step 5: Adjust the Leveling Bubble
Once you have mounted your laser level, it’s essential to adjust the leveling bubble to ensure accurate measurements. The leveling bubble is a built-in feature that helps you determine if the laser level is perfectly level.
Follow these steps to adjust the leveling bubble:
- Activate the leveling feature: Refer to your laser level’s user manual to activate the leveling feature. This may involve pressing a button or selecting a specific mode.
- Observe the leveling bubble: Look at the leveling bubble, usually located on the side or top of the laser level. The bubble should be centered between the markers. If it’s not level, adjust the laser level until the bubble is centered.
- Use the leveling screws: Some laser levels have leveling screws that allow you to make small adjustments. These screws are usually located near the base or on the mounting bracket. Turn the screws clockwise or counterclockwise to level the laser. Use a spirit level or bubble level to verify the accuracy of the leveling.
- Check the leveling bubble again: After making adjustments, observe the leveling bubble once more to ensure it is centered. Repeat the leveling process if necessary to achieve optimal leveling.
Leveling the laser level is crucial for accurate measurements. It ensures that the laser beam is perfectly horizontal or vertical, depending on your specific needs. A properly leveled laser level will provide reliable reference points and help you achieve precise alignment for your project.
Take the time to adjust the leveling bubble, as it is a crucial step in setting up your laser level for success.
When setting up a laser level, always ensure that the device is placed on a stable surface to prevent any movement or vibrations that could affect the accuracy of the laser.
Step 6: Turn on the Laser Level
With the laser level properly mounted and the leveling bubble adjusted, it’s time to turn on the laser level and activate the laser beam. This step will allow you to see the laser beam and use it as a reference point for measurements and alignment.
Follow these steps to turn on the laser level:
- Locate the power button: Find the power button on your laser level. It is typically marked with a power symbol or an illuminated icon.
- Press the power button: Press and hold the power button for a few seconds to turn on the laser level. Some models may have a separate button to activate the laser beam.
- Wait for the laser beam to activate: After turning on the laser level, wait for a few seconds for the laser beam to activate. Depending on the model, you may see a visible red or green laser beam.
- Verify the laser beam: Look for the laser beam projected by the laser level. It should be clear and well-defined. If the laser beam appears dim or fuzzy, check the batteries or power source and ensure they are properly connected.
Always exercise caution when working with a laser level. Avoid pointing the laser beam directly into your eyes or others’ eyes. If necessary, use safety goggles to protect your eyes from the laser beam.
Once the laser level is turned on and the laser beam is activated, you’re ready to proceed with the alignment process in the next step.
Remember to follow the manufacturer’s instructions for your specific laser level model to ensure proper usage and avoid any potential hazards.
Step 7: Align the Laser Level
Alignment is a crucial step in setting up your laser level accurately. Aligning the laser level ensures that the laser beam is directed precisely where you need it, whether it’s horizontal, vertical, or at a specific angle.
Follow these steps to align your laser level:
- Select the desired alignment: Determine whether you need a horizontal, vertical, or angled alignment for your project. Most laser levels have a mode switch or button that allows you to choose the desired alignment.
- Align the laser level manually: If your laser level does not have automated self-leveling, you may need to manually adjust the laser level. Use the leveling screws or adjustments on the mounting bracket to align the laser beam accurately.
- Use reference points: Identify reference points on the walls, floor, or ceiling to align the laser level. These can be existing marks or measurements that you want the laser beam to align with.
- Rotate or pivot the laser level: Rotate or pivot the laser level until the laser beam aligns with the desired reference points. Use the fine adjustment controls if available to achieve precise alignment.
- Double-check the alignment: After aligning the laser level, verify the alignment by checking additional reference points. Make adjustments as needed to ensure the laser beam is aligned accurately throughout the desired area.
Remember to be patient and take your time during the alignment process. Small adjustments can make a significant difference in the accuracy of the laser level’s alignment.
If your laser level has a self-leveling feature, the process may be automated once activated. In this case, the laser level will automatically adjust its position to become level or plumb.
By carefully aligning your laser level, you ensure that the laser beam projects accurately and serves as a reliable reference point for your project.
Step 8: Fine-Tune the Leveling Adjustment
After aligning the laser level, it’s important to fine-tune the leveling adjustment to ensure optimal accuracy. Fine-tuning the leveling adjustment allows you to make small adjustments to ensure that the laser beam remains precisely aligned throughout the duration of your project.
Follow these steps to fine-tune the leveling adjustment:
- Observe the leveling indicator: Look at the leveling indicator on your laser level. It could be a bubble level or a digital display that indicates the levelness of the laser beam.
- Make minor adjustments: Use the leveling screws or controls to make minor adjustments to the laser level. Turn the screws or make adjustments as needed to bring the bubble level or digital display into perfect alignment.
- Check the alignment again: After making adjustments, verify the alignment by checking the reference points and ensuring that the laser beam remains accurately aligned. Make further adjustments if necessary.
- Repeat the process if needed: If the laser level drifts or loses alignment while in use, repeat the fine-tuning process to bring it back into accurate alignment.
Fine-tuning the leveling adjustment is particularly important if you are working on a project that requires high precision, such as installing tiles or creating level surfaces for construction purposes.
Remember to have patience during this process and make small adjustments to avoid overcompensating. Taking the time to fine-tune the leveling adjustment will ensure that your laser level provides reliable and accurate measurements throughout your project.
Read more: How Dangerous Is Laser Level
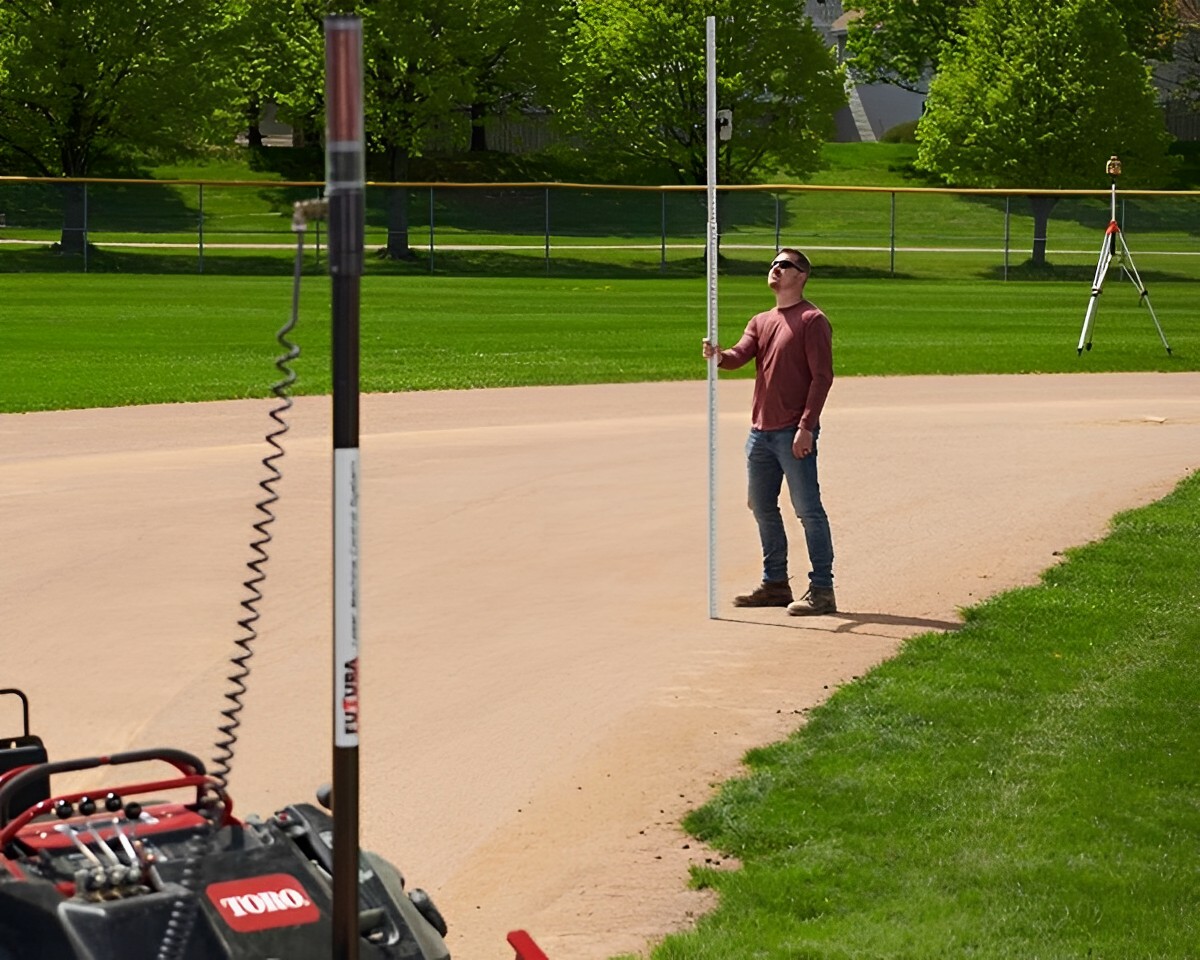
Step 9: Test the Accuracy of the Laser Level
Testing the accuracy of your laser level is an important step to ensure that it is providing reliable measurements and alignment. By performing a simple accuracy test, you can verify the precision of your laser level before proceeding with your project.
Follow these steps to test the accuracy of your laser level:
- Select a reference point: Choose a reference point on a wall, floor, or ceiling where you want to test the accuracy of your laser level. This could be an existing mark or a measured point.
- Place a measuring tape: Using a measuring tape, mark the exact location of the reference point with a pencil or tape. This will serve as a guide for comparing the measurements.
- Turn on the laser level: Activate the laser beam of your laser level and position it to align with the reference point. Ensure that the laser beam is hitting the marked spot accurately.
- Measure the distance: Use a measuring tape to measure the distance between the laser beam and the marked reference point. Compare this measurement to the intended distance to determine any deviations.
- Repeat the test: Perform the same accuracy test from different points and angles to ensure consistent results. Take multiple measurements and compare them for consistency.
If your laser level is accurate, the measured distances should match the intended distances, with minimal to no deviations. However, if you notice significant discrepancies, it may indicate a calibration or alignment issue that needs to be addressed.
Performing an accuracy test will give you confidence in the reliability of your laser level and ensure that you achieve precise measurements throughout your project.
Step 10: Securely Fasten the Laser Level
Once you have completed the setup and testing process for your laser level, it is important to securely fasten it in place. Properly securing the laser level ensures that it remains stable and maintains its accuracy throughout your project.
Follow these steps to securely fasten your laser level:
- Double-check the mounting: Ensure that the mounting bracket or tripod is securely attached to the laser level and that all mounting screws or clamps are tightened. A loose mount can cause the laser level to move or shift during use.
- Confirm the stability: Verify that the laser level does not wobble or move when lightly touched. If there is any instability, adjust the mounting or tighten the mounting screws or legs.
- Secure the cords: If your laser level is corded, carefully secure the power cord to prevent it from becoming a trip hazard or getting tangled during use. Use cable ties or cord clips to keep the cord neat and out of the way.
- Check for obstructions: Make sure there are no objects, such as furniture or equipment, near the laser level that could accidentally bump or interfere with its position. Clear the surrounding area to create a safe and unobstructed workspace.
- Verify the stability: Give the laser level a gentle shake to test its stability. It should remain firmly in place without any movement or noise. If there is any sign of instability, recheck the mounting and make any necessary adjustments.
By securely fastening your laser level, you reduce the risk of it shifting or becoming misaligned during use. This ensures that you can rely on accurate measurements throughout your project.
Once you have completed this final step, you can confidently begin using your laser level for a wide range of applications, from hanging shelves to installing tiles to framing construction projects. Enjoy the added precision and ease that your laser level brings to your projects!
Conclusion
Setting up a laser level is an essential skill for anyone involved in construction, home improvement, or DIY projects. By following the step-by-step guide outlined in this article, you can ensure a successful and accurate setup of your laser level.
Starting with gathering the necessary tools and materials, choosing the right location, and preparing the laser level, you create the foundation for a seamless setup process. Mounting the laser level securely, adjusting the leveling bubble, and turning on the laser beam are crucial steps that ensure proper functionality and alignment.
Aligning the laser level, fine-tuning the leveling adjustment, and testing its accuracy guarantee reliable measurements for your project. Finally, securely fastening the laser level in place ensures stability throughout the entire project duration.
Whether you’re hanging pictures, installing shelves, or constructing walls, a laser level becomes an indispensable tool that simplifies the task and delivers professional results. With accurate measurements, precise alignments, and ease of use, a laser level becomes an asset in your toolkit.
Remember to always read and follow the manufacturer’s instructions for your specific laser level model to ensure optimal usage and safety. Regularly check and maintain your laser level to keep it in good working condition for future projects.
Now that you have the knowledge and understanding of how to set up a laser level, go ahead and confidently tackle your next project with precision and efficiency!
Frequently Asked Questions about How To Set Up A Laser Level
Was this page helpful?
At Storables.com, we guarantee accurate and reliable information. Our content, validated by Expert Board Contributors, is crafted following stringent Editorial Policies. We're committed to providing you with well-researched, expert-backed insights for all your informational needs.


0 thoughts on “How To Set Up A Laser Level”