Articles
How To Start Whirlpool Dryer
Modified: October 19, 2024
Learn how to start your Whirlpool dryer with our informative articles. Find step-by-step instructions and troubleshooting tips for seamless operation.
(Many of the links in this article redirect to a specific reviewed product. Your purchase of these products through affiliate links helps to generate commission for Storables.com, at no extra cost. Learn more)
Introduction
Welcome to this comprehensive guide on how to start your Whirlpool dryer. Whirlpool dryers are known for their efficiency, durability, and advanced features that make laundry a breeze. Whether you have just purchased a new Whirlpool dryer or need to learn how to start using an existing one, this article will provide you with step-by-step instructions on getting your dryer up and running.
Before we dive into the details, it’s important to note that safety should always be a top priority when working with any electrical appliance. Make sure to read and understand the manufacturer’s instructions and take proper precautions while handling your Whirlpool dryer.
In this guide, we will cover the required tools and materials, unpacking and inspecting the dryer, preparing the dryer location, connecting the dryer vent, installing the power cord, leveling the dryer, and testing the dryer before using it.
By following the instructions outlined in this guide, you’ll be able to start your Whirlpool dryer safely and efficiently. So, let’s get started!
Key Takeaways:
- Prioritize safety by reading the manual, turning off power, wearing protective gear, and ensuring a stable dryer. Prepare the location, connect the vent and power cord, level the dryer, and test before use.
- Gather tools, unpack and inspect the dryer, prepare the location, connect the vent, install the power cord, level the dryer, and test it for efficient and safe operation.
Read more: How To Start Whirlpool Washer
Safety Precautions
Before you begin the process of starting your Whirlpool dryer, it’s important to take some safety precautions to ensure your well-being and the proper functioning of the appliance. Here are some guidelines to follow:
- Read the Manual: Familiarize yourself with the user manual provided by Whirlpool. It contains essential safety information, guidelines, and specific instructions for your particular dryer model. Keep the manual handy throughout the process.
- Turn off the Power: Before starting any work on your dryer, make sure to disconnect the power supply. Unplug the dryer from the power outlet or turn off the circuit breaker connected to it. This will prevent any accidents or electrical shocks.
- Protective Gear: Wear appropriate protective gear, such as gloves and safety glasses, to protect your hands and eyes from potential hazards during the installation process.
- Clear the Area: Ensure that the area where you will be working on the dryer is clear of any obstructions or clutter. This will minimize the risk of accidents and allow for a smooth installation process.
- Secure the Dryer: When working on the dryer, make sure it is stable and securely placed on a level surface. A wobbly or unstable dryer can be dangerous and lead to accidents. If needed, use a leveling tool to ensure that the appliance is sitting evenly.
- Professional Help: If you are unsure about any aspect of the installation process or encounter any difficulties, it’s always recommended to seek professional assistance. A certified technician will have the necessary knowledge and expertise to handle the installation safely and efficiently.
By following these safety precautions, you can minimize the risk of accidents and ensure that the installation process of your Whirlpool dryer is carried out smoothly. Remember, safety should always be the top priority when working with electrical appliances.
Step 1: Gather the Required Tools and Materials
Before you begin installing and starting your Whirlpool dryer, it is essential to gather the necessary tools and materials. This will ensure that you have everything you need to complete the installation process smoothly. Here are the tools and materials you will need:
- Whirlpool Dryer Manual: Keep the user manual provided by Whirlpool handy throughout the installation process. It contains important information and specific instructions for your particular dryer model.
- Measuring Tape: A measuring tape will come in handy for accurately measuring the available space and ensuring that the dryer fits properly.
- Screwdriver: You may need a screwdriver to remove any packaging materials, secure the dryer’s legs, or attach the power cord.
- Adjustable Wrench: An adjustable wrench will be useful for tightening any loose connections, such as the dryer vent or the power cord.
- Level: Using a level, you can ensure that your dryer is properly aligned and leveled to prevent any shaking or imbalance during operation.
- Dryer Vent Kit: If your dryer needs to be vented to the outside, you will need a dryer vent kit that includes the necessary duct, clamps, and connectors.
- Power Cord: Check if your dryer requires a power cord and make sure you have the appropriate cord that matches your electrical outlet.
- Extension Cord (if needed): If your electrical outlet is not within reach of the dryer’s location, you may need an extension cord to connect the dryer to the power supply.
Double-check that you have all the necessary tools and materials before starting the installation process to avoid any delays or interruptions. Having everything readily available will help streamline the process and ensure a successful installation of your Whirlpool dryer.
Step 2: Unpack and Inspect the Dryer
Once you have gathered all the required tools and materials, it’s time to unpack and inspect your Whirlpool dryer. It’s important to carefully inspect the appliance for any damage or missing parts before proceeding with the installation. Here’s how to unpack and inspect your dryer:
- Unpack the Dryer: Remove any packaging materials, such as tape, foam, or cardboard, from the dryer. Be gentle when handling the appliance to avoid causing any damage.
- Inspect for Damage: Carefully examine the dryer for any visible damage, dents, or scratches. If you notice any significant damage, contact the retailer or Whirlpool customer service for further assistance.
- Check for Missing Parts: Compare the contents of the dryer package with the parts list mentioned in the user manual. Ensure that all the components, including hoses, cords, and accessories, are included.
- Remove Transit Bolts: Some dryers come with transit bolts installed to secure the drum during transportation. Refer to the user manual for instructions on how to remove these bolts before installation. Failure to remove the transit bolts can cause damage to the dryer during operation.
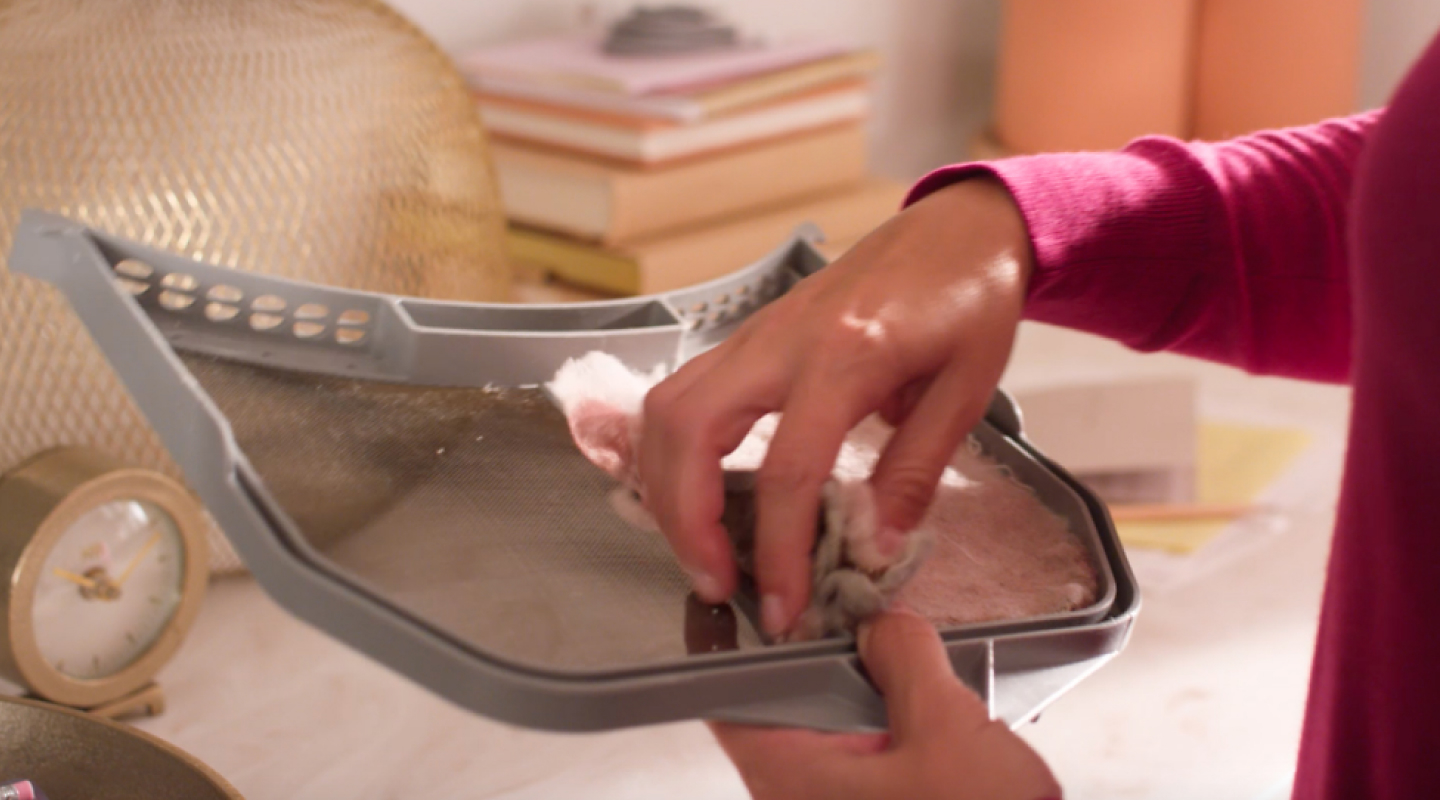
- Clean the Dryer Interior: Take a moment to clean the interior of the dryer using a soft cloth. Remove any dust, lint, or debris that may have accumulated during transit.
By carefully unpacking and inspecting your Whirlpool dryer, you can ensure that it is in good condition and ready for installation. If you encounter any issues or have concerns about the dryer’s condition, reach out to the retailer or Whirlpool customer service for guidance.
Step 3: Prepare the Dryer Location
Before proceeding with the installation of your Whirlpool dryer, it is important to properly prepare the designated location. By ensuring the area is suitable for the appliance, you can enhance its performance and prevent any potential hazards. Here are the steps to prepare the dryer location:
- Select a Suitable Location: Choose a well-ventilated area with sufficient space for the dryer. Ensure that there is clearance around the appliance for smooth airflow and easy access for maintenance.
- Check for Level Surface: It is crucial to place the dryer on a level surface to avoid excessive vibration and noise. Use a level tool to ensure the surface is even. If needed, adjust the dryer’s legs to make it stable and level.
- Provide Adequate Ventilation: Proper ventilation is essential for the efficient operation of your dryer. Ensure that the location allows for the installation of a vent to exhaust the hot air and moisture outside. If necessary, consult a professional to help with the installation of a vent system.
- Keep Away from Flammable Materials: Avoid placing the dryer near flammable substances such as gasoline, solvents, or cleaning agents. This will reduce the risk of fire hazards.
- Clear Obstructions: Remove any obstructions or objects near the dryer that could impede its proper functioning. This includes items like clothing, rugs, or curtains.
- Ensure Proper Power Outlet: Check that there is a suitable power outlet nearby to connect the dryer. Verify that the voltage and type of outlet match those required by your specific dryer model.
By following these steps, you can create an ideal location for your Whirlpool dryer. A properly prepared area will contribute to the longevity and optimal performance of the appliance. Once the location is ready, you can proceed to the next steps of the installation process.
Make sure the dryer is plugged in and the door is closed. Select the desired drying cycle and press the start button to begin the drying process.
Read more: How To Start Whirlpool Dishwasher
Step 4: Connect the Dryer Vent
Connecting the dryer vent is an important step in the installation of your Whirlpool dryer. The vent allows hot air and moisture to be expelled from the dryer, preventing potential damage and ensuring efficient drying. Here’s how to connect the dryer vent:
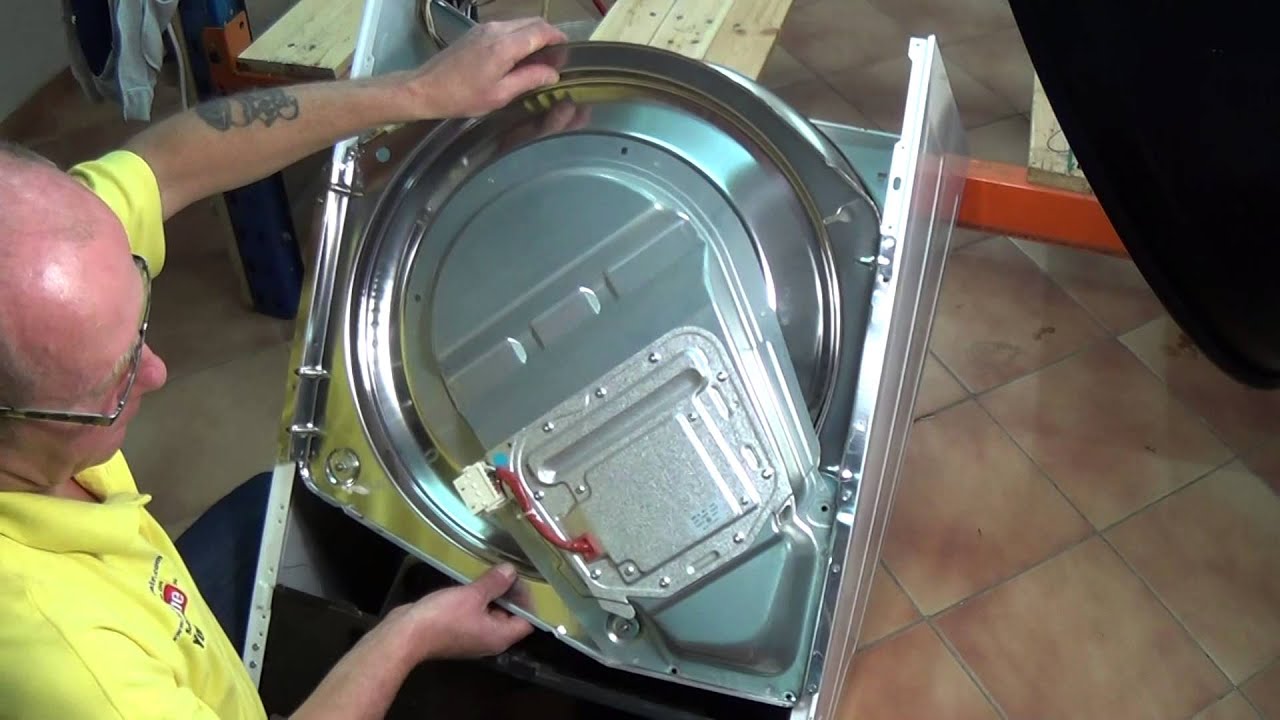
- Locate the Dryer Vent Opening: Locate the dryer vent opening on the back of your Whirlpool dryer. It is typically a round or rectangular opening covered by a flap or grille.
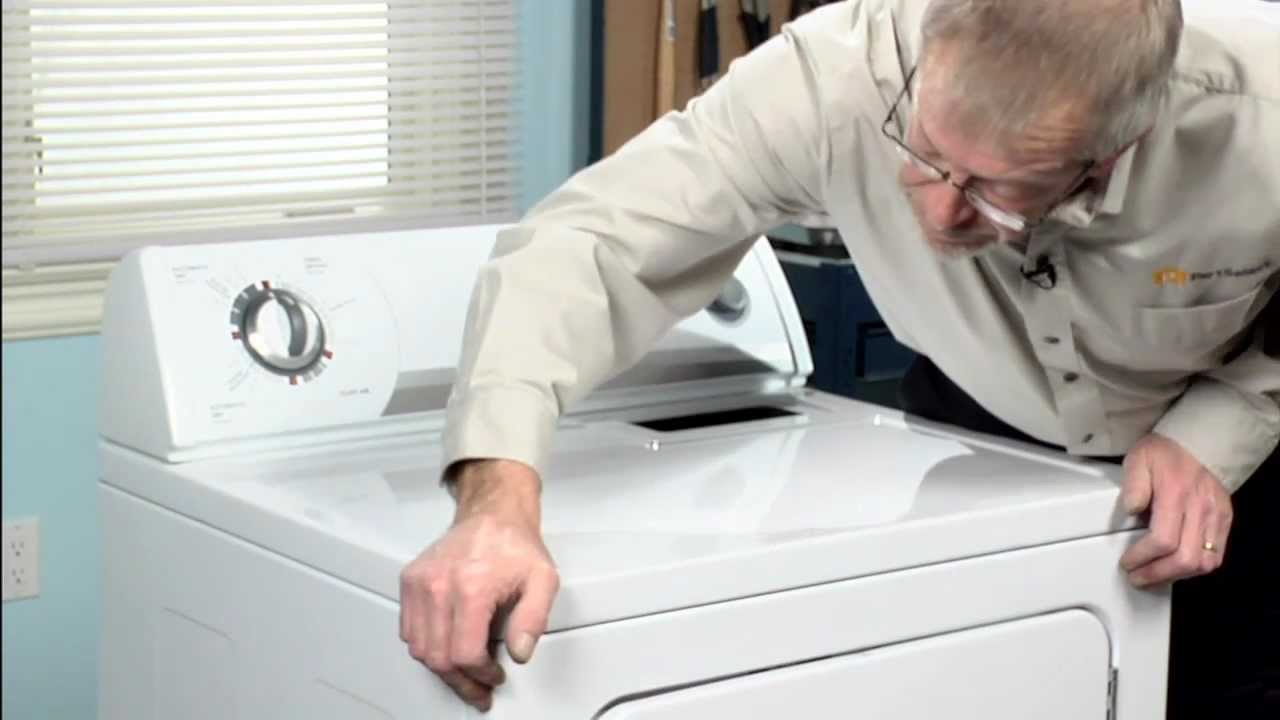
- Position the Dryer: Move the dryer slightly away from the wall or the designated location to provide access to the vent opening and facilitate the connection process.
- Choose the Venting Option: Depending on your setup, you may have different venting options, such as venting the dryer through a wall or through a ceiling. Follow the manufacturer’s instructions and select the appropriate venting route for your particular configuration.
- Attach the Vent Hose: Connect one end of the vent hose to the dryer vent opening and secure it in place using a clamp or duct tape. Make sure the connection is tight to prevent any air leaks.
- Connect the Other End: Position the other end of the vent hose to the designated vent exit, such as an exterior wall vent or a vent pipe. Secure the connection using a clamp or appropriate fasteners.
- Test for Proper Connection: Once the dryer vent is connected, carefully move the dryer back into its original position. Ensure that the vent hose is not kinked, bent, or crushed and that there are no obstructions that could impede the airflow.
Properly connecting the dryer vent will enable your Whirlpool dryer to function efficiently and prevent the buildup of hot air and moisture in your laundry area. It is vital to follow the recommended venting instructions provided by the manufacturer to ensure optimal performance and safe operation.
Step 5: Install the Power Cord
Installing the power cord is a crucial step in setting up your Whirlpool dryer for operation. This allows the dryer to be connected to a power source and ensures proper functioning. Follow these steps to install the power cord:
- Choose the Correct Power Cord: Before starting, make sure you have the correct power cord that matches the electrical outlet in your home. Refer to the dryer’s user manual or consult with a professional if you are unsure.
- Unplug the Dryer: Ensure that the dryer is disconnected from the power source and there is no power running to the appliance.
- Locate the Terminal Block: On the back of the dryer, you will find a terminal block where the power cord needs to be connected. It usually consists of three or four metal prongs or screw terminals.
- Prepare the Power Cord: If needed, strip the insulation off the end of the power cord wires to expose the copper strands. Make sure to follow the manufacturer’s instructions for stripping the wires.
- Connect the Wires to the Terminal Block: Match the wires from the power cord to the corresponding terminals on the block. Typically, the center wire is neutral, the left wire is hot, and the right wire is also hot (if you have a four-wire cord). Loosen the screws on the block, insert the wires, and tighten the screws to secure the connection.
- Secure the Strain Relief: Use the provided strain relief clamp to secure the power cord and prevent any tension on the connections. This will protect the wires and ensure a stable installation.
- Double-Check the Connections: Once you have installed the power cord, double-check that all the connections are secure and tight. Ensure that there are no loose wires or exposed copper strands.
It is crucial to follow the manufacturer’s instructions and guidelines for installing the power cord to ensure safe and proper operation of your Whirlpool dryer. If you are unsure or uncomfortable with the installation process, it is recommended to consult a professional electrician for assistance.
Step 6: Level the Dryer
Leveling the dryer is an important step to ensure its stability and proper operation. If the dryer is not level, it can cause excessive vibration, noise, and potential damage. Here’s how to level your Whirlpool dryer:
- Prepare a Leveling Tool: Use a leveling tool, such as a carpenter’s level or a smartphone app with a built-in level, to determine the dryer’s current level.
- Access the Dryer’s Legs: Locate the adjustable legs at the bottom of the dryer. These legs can be adjusted to raise or lower the dryer and level it on uneven surfaces.
- Check the Dryer’s Level: Place the leveling tool on top of the dryer, in different directions, to check if it is sitting level. If the bubble indicator is not centered, adjustments are needed.
- Adjust the Legs: To level the dryer, turn the legs clockwise to raise the dryer or counterclockwise to lower it. Make small adjustments and check the level again until the bubble indicator is centered.
- Verify Stability: Once the dryer is leveled, gently push it from different sides to ensure stability. It should not wobble or move easily. If it does, readjust the legs until the dryer is solidly in place.
Leveling your Whirlpool dryer will promote optimal performance, prevent unnecessary wear and tear, and reduce the risk of accidents caused by an unstable appliance. It is recommended to periodically check and readjust the level, especially if you move or relocate the dryer.
Note: If you are unsure about the leveling process or encounter any difficulties, it is advisable to consult the dryer’s user manual or seek professional assistance.
Step 7: Test the Dryer
After completing the installation process for your Whirlpool dryer, it’s time to perform a test to ensure that the appliance is functioning properly. By testing the dryer, you can identify any potential issues and make necessary adjustments before regular use. Follow these steps to test your Whirlpool dryer:
- Connect the Dryer to Power: Plug the power cord into a suitable electrical outlet. Ensure that it is securely connected and that the outlet is providing the correct voltage.
- Select a Test Load: Place a small load of laundry, such as a few towels or clothes, into the dryer drum. Avoid overloading the dryer to allow for proper airflow and efficient drying.
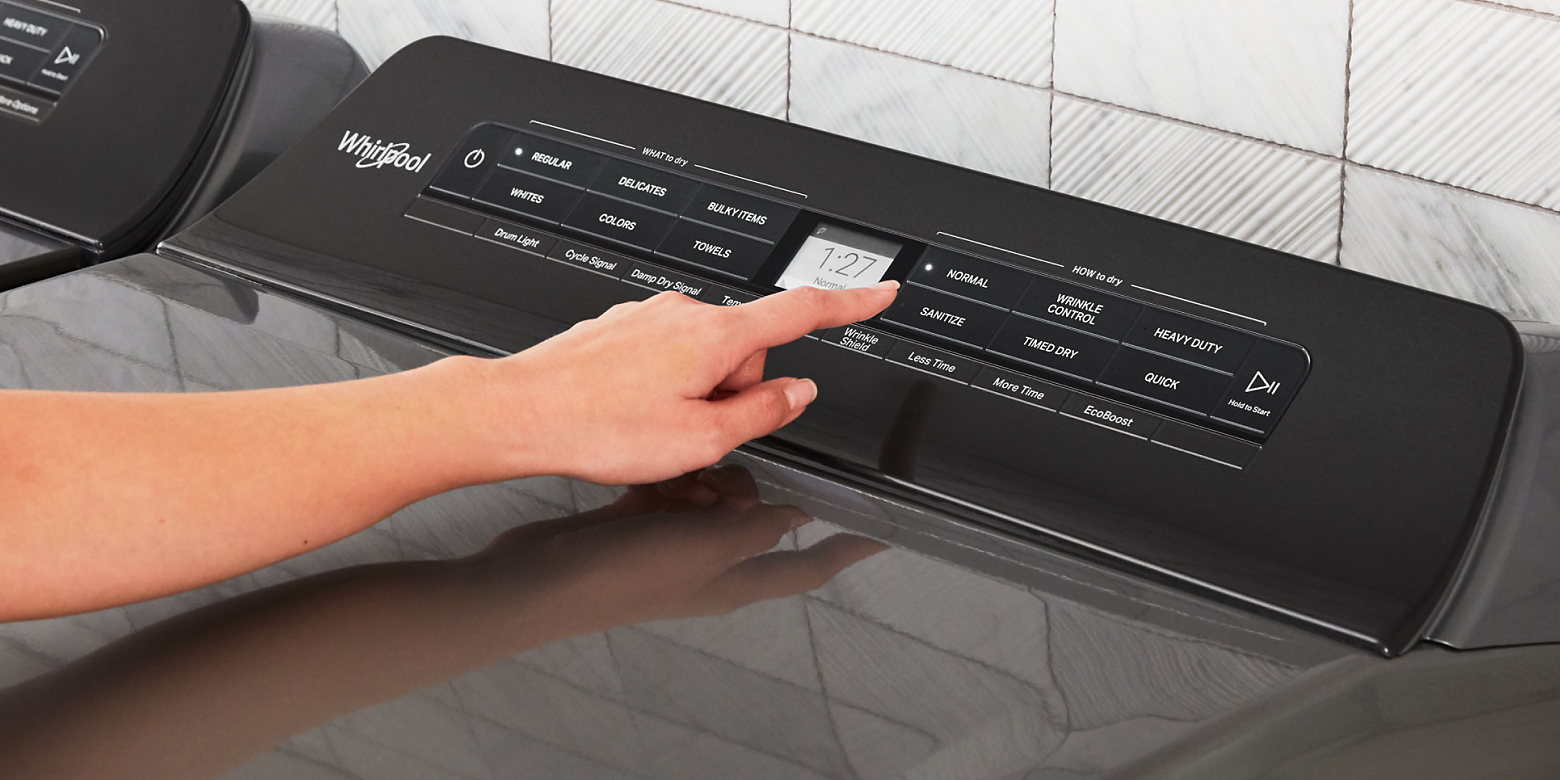
- Set the Controls: Adjust the dryer’s settings according to your desired drying preferences. This may include selecting the appropriate heat level, fabric type, and drying duration using the control panel or knobs.
- Start the Dryer: Once you have set the controls, press the start button or turn the knob to start the dryer. Observe the appliance to ensure that it begins operating smoothly.
- Monitor the Drying Process: As the dryer operates, closely monitor the drying process to check for any issues. Pay attention to the noise level, vibration, and any unusual smells or sounds that may indicate a problem.
- Check the Dryness of the Load: Once the drying cycle is complete, check the dryness of the test load. Ensure that the clothes or towels are dried to your satisfaction. If they are still damp, review the settings and make necessary adjustments.
- Inspect for Any Issues: Take a final look at the dryer’s interior and exterior for any signs of malfunction or damage. This includes checking for any error codes displayed on the control panel or any leakage from the appliance.
By thoroughly testing your Whirlpool dryer, you can ensure that it is functioning as expected and address any potential issues promptly. If you encounter any problems during the testing process or have any concerns, refer to the user manual or contact Whirlpool’s customer support for assistance.
Once you are satisfied with the dryer’s performance and no issues are detected, congratulations! You can now confidently begin using your Whirlpool dryer for all your laundry needs.
Read more: How To Start A Whirlpool Washing Machine
Conclusion
Congratulations on successfully completing the installation and testing process for your Whirlpool dryer! By following the comprehensive steps outlined in this guide, you have set up your dryer for optimal performance and safe operation. Here’s a recap of the steps covered:
- Gather the Required Tools and Materials
- Unpack and Inspect the Dryer
- Prepare the Dryer Location
- Connect the Dryer Vent
- Install the Power Cord
- Level the Dryer
- Test the Dryer
Remember, safety should always be a top priority during the installation process. Take necessary precautions, follow the manufacturer’s instructions, and seek professional help if needed. Additionally, periodically inspect and maintain your Whirlpool dryer to ensure its longevity and optimal performance.
With your Whirlpool dryer properly installed and tested, you can now enjoy the convenience of efficient laundry drying. Make sure to refer to the user manual for further guidance on using different functions and features of your specific dryer model.
If you have any further questions or encounter any issues, refer to the user manual or reach out to Whirlpool’s customer support for assistance. They will have the necessary expertise to address your concerns.
Thank you for choosing Whirlpool, and we hope that your new dryer brings you many years of efficient and reliable service!
Frequently Asked Questions about How To Start Whirlpool Dryer
Was this page helpful?
At Storables.com, we guarantee accurate and reliable information. Our content, validated by Expert Board Contributors, is crafted following stringent Editorial Policies. We're committed to providing you with well-researched, expert-backed insights for all your informational needs.

0 thoughts on “How To Start Whirlpool Dryer”