Home>Home Maintenance>How To Clean A Whirlpool Dryer Vent
Home Maintenance
How To Clean A Whirlpool Dryer Vent
Modified: March 6, 2024
Learn how to properly clean the dryer vent of your Whirlpool appliance with our helpful home maintenance guide. Keep your dryer running efficiently and prevent potential fire hazards.
(Many of the links in this article redirect to a specific reviewed product. Your purchase of these products through affiliate links helps to generate commission for Storables.com, at no extra cost. Learn more)
Introduction
Keeping your Whirlpool dryer vent clean is essential for optimal performance and safety. Over time, lint and debris can accumulate in the vent pipe, restricting airflow, and increasing the risk of a fire hazard. Regularly cleaning your dryer vent will not only improve the efficiency of your dryer but also help prevent potential dryer fires.
In this article, we will guide you through the step-by-step process of cleaning your Whirlpool dryer vent. By following these instructions and taking necessary safety precautions, you can ensure a clean and well-maintained dryer vent that will keep your Whirlpool dryer running smoothly for years to come.
Key Takeaways:
- Regularly cleaning your Whirlpool dryer vent improves efficiency, prevents fire hazards, and extends the lifespan of your appliance. Follow safety precautions and use the right tools for a smooth cleaning process.
- Unplugging the dryer, locating the vent, removing and cleaning the vent cover, and testing the airflow are crucial steps in cleaning your Whirlpool dryer vent. Prioritize safety, gather the necessary tools, and enjoy a well-maintained dryer vent for years to come.
Read more: How To Clean A Whirlpool Dryer
Safety Precautions
Before you begin cleaning your Whirlpool dryer vent, it’s important to take the necessary safety precautions to protect yourself and your home. Here are some safety guidelines to follow:
- Always unplug the dryer from the power source before starting any maintenance or cleaning tasks. This will help prevent any electrical accidents.
- Wear protective gloves to protect your hands from sharp edges and debris.
- Ensure that the dryer is cool before attempting to clean the vent. The metal components of the dryer can become hot during operation and pose a burn hazard.
- Use caution when working with sharp tools or when climbing ladders. Make sure the area around the dryer is clear and free from obstacles.
- If you’re unsure about any aspect of the cleaning process, consult the manufacturer’s guidelines or contact a professional technician.
- If at any point during the cleaning process you notice any damage to the vent pipe or suspect a blockage beyond your capabilities, it’s best to seek professional help.
By adhering to these safety precautions, you can minimize the risk of accidents and ensure a safe cleaning process for your Whirlpool dryer vent.
Tools and Materials Needed
Before you begin cleaning your Whirlpool dryer vent, gather the following tools and materials:
- Phillips screwdriver or a drill with a Phillips screwdriver bit
- Vent brush or vacuum cleaner with a long hose attachment
- Broom or vacuum cleaner for cleaning the area around the dryer
- Gloves to protect your hands
- Ladder or step stool, if needed
- Stiff bristle brush for stubborn lint and debris
- Lint trap brush or vacuum attachment
- Flashlight to help see inside the vent pipe
- Duct tape or zip ties for securing the vent cover
Having these tools and materials readily available will make the cleaning process more efficient and effective. It’s important to use tools specifically designed for dryer vent cleaning to avoid any damage to the vent components.
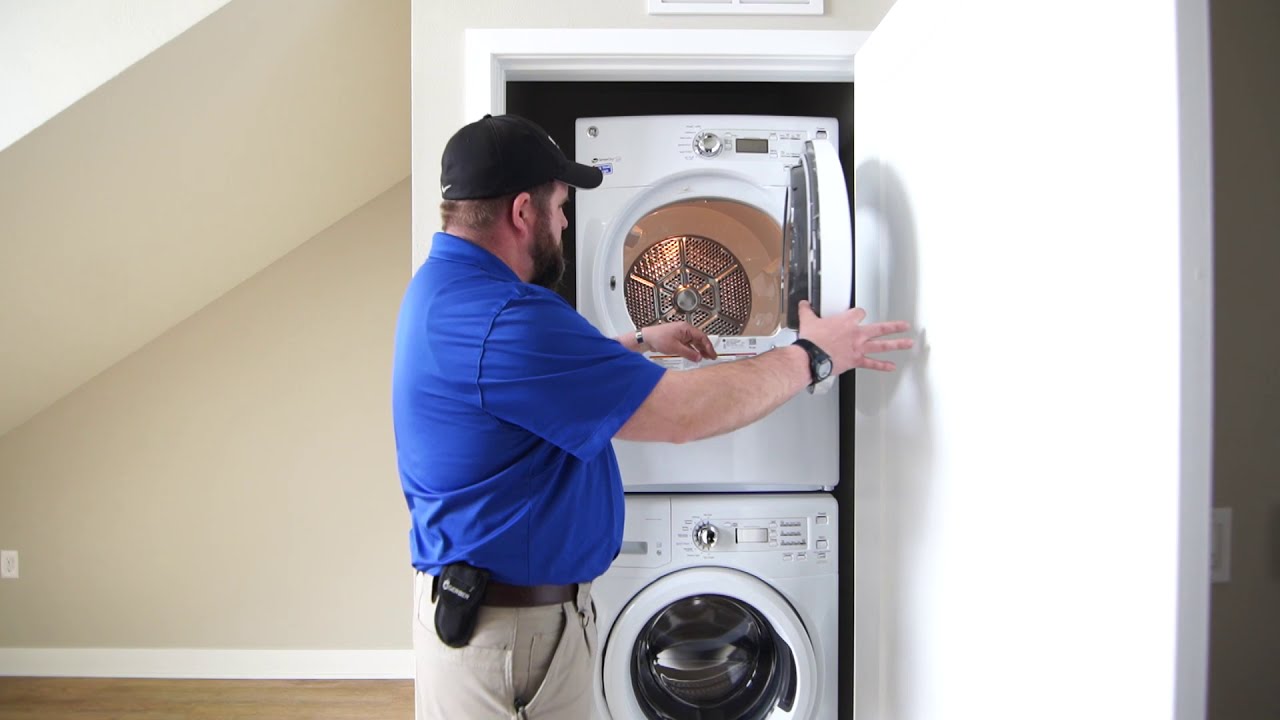
Step 1: Unplug the Dryer
Before you start cleaning your Whirlpool dryer vent, it is important to ensure the dryer is unplugged from the power source. This is a crucial safety precaution to prevent any electrical accidents or injuries during the cleaning process.
Locate the power cord of your Whirlpool dryer and unplug it from the wall outlet. It’s a good idea to double-check that the dryer is completely disconnected from the power source by trying to turn it on. If it remains off, you can proceed with the next steps.
Unplugging the dryer will eliminate any electrical risks and give you peace of mind as you work on cleaning the vent.
Additionally, taking this step will allow you to move and access the dryer more easily, making the cleaning process more convenient and efficient.
Once you have successfully unplugged the dryer, you can proceed with the next steps to clean your Whirlpool dryer vent.
Step 2: Locate the Dryer Vent
Before you can start cleaning the dryer vent, you need to locate its position. The dryer vent is the duct or pipe that connects the dryer to an exterior vent hood. It is responsible for expelling hot air, lint, and moisture from the dryer to the outside.
In most cases, the dryer vent is located on the back of the dryer. Look for a metal or plastic vent cover with slits or a mesh screen. You may also find it on the side of the dryer or on the ceiling, depending on the venting configuration.
If you are unsure about the location of the dryer vent, consult the manufacturer’s manual or look for any indication or signage provided by the builder or previous homeowners. You can also use a flashlight to help you locate the vent more easily.
Once you have located the dryer vent, make sure there are no obstacles or obstructions blocking the airflow. Clear away any items, lint, or debris that may be in the way. It’s important to have a clear path for efficient airflow during the cleaning process.
Now that you have located the dryer vent and ensured unobstructed access, you’re ready to move on to the next step of cleaning the Whirlpool dryer vent.
Read more: Who Cleans Dryer Vent
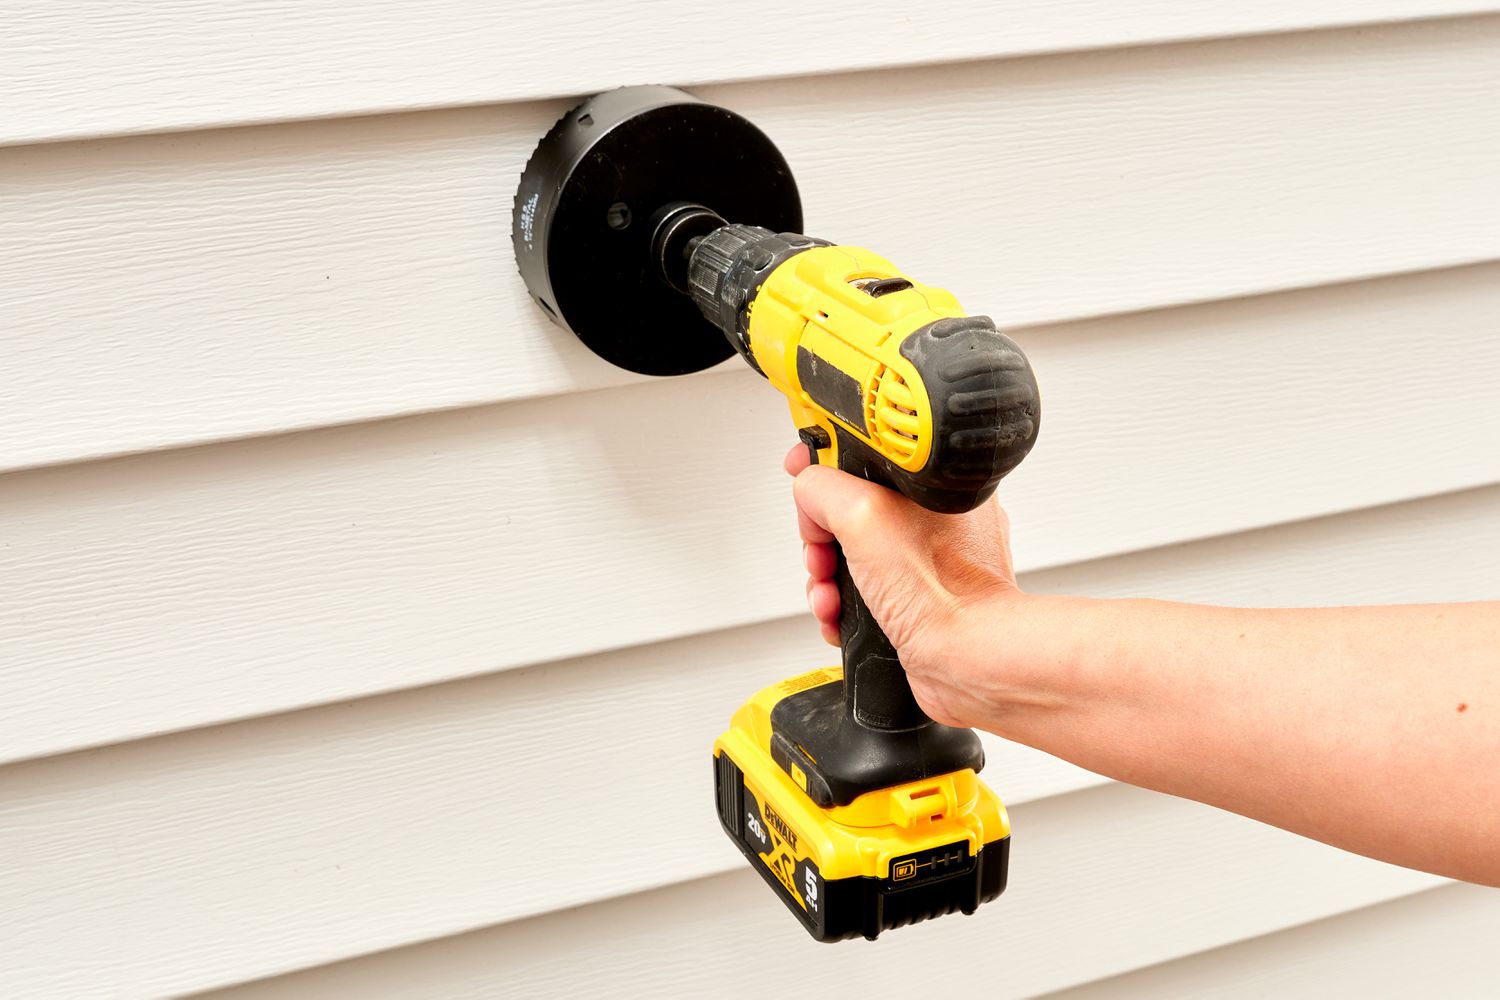
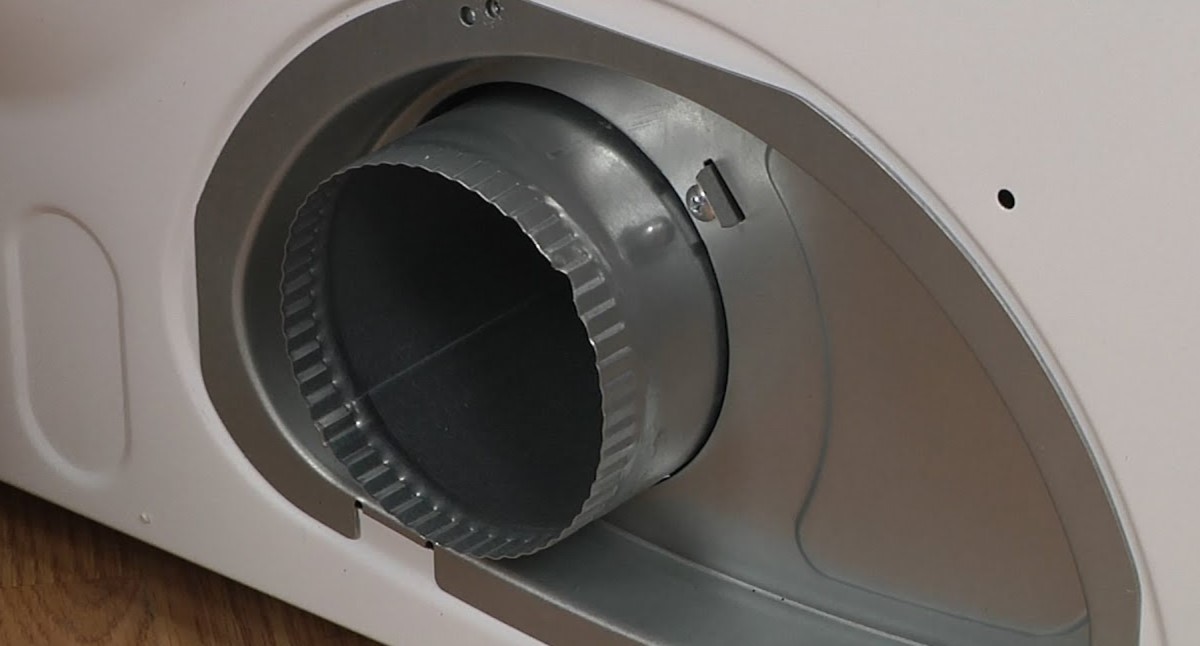
Step 3: Remove the Dryer Vent Cover
With the dryer vent located, it’s time to remove the vent cover to gain access to the interior of the vent pipe. Removing the vent cover will allow you to clean the accumulated lint and debris more effectively.
Here’s how to remove the dryer vent cover:
- Using a Phillips screwdriver or a drill with a Phillips screwdriver bit, remove the screws that secure the vent cover in place. Most dryer vent covers are attached with screws, but some may have tabs or clips that you can release.
- Set the screws aside in a safe place so you don’t lose them.
- If the vent cover is held in place with tabs or clips, gently pry it open using a flathead screwdriver or your fingers.
- Once you have loosened the vent cover, gently pull it away from the wall or ceiling to remove it completely.
During this step, be cautious not to damage the vent cover or the surrounding area. Some vent covers may be fragile, so handle them with care.
After removing the vent cover, you will have clear access to the interior of the dryer vent pipe. This will allow you to remove any lint or debris that has built up over time. The next step will cover how to clean the dryer vent cover.
Regularly clean the lint trap and vent to prevent a fire hazard. Use a vacuum or dryer vent brush to remove built-up lint and debris. Check for any blockages and ensure proper airflow.
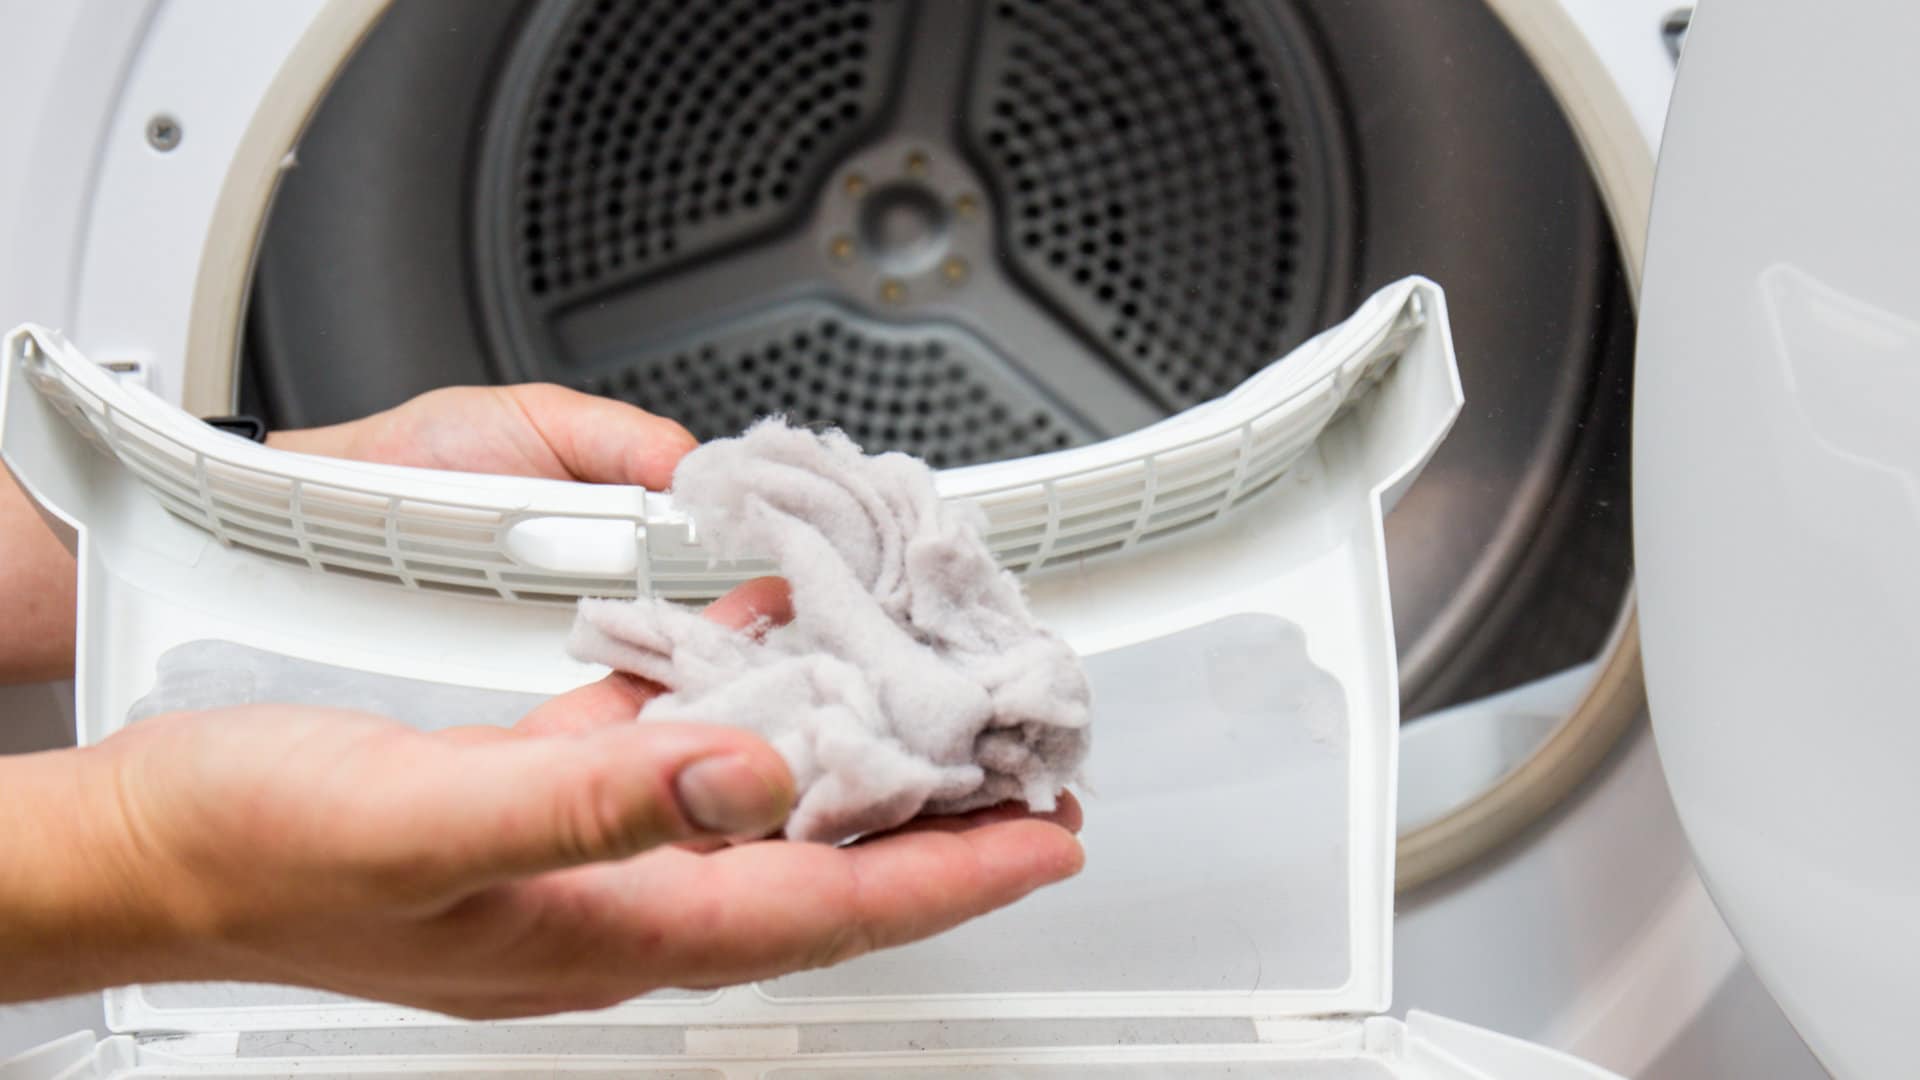
Step 4: Clean the Dryer Vent Cover
Now that you have removed the dryer vent cover, it’s time to clean it thoroughly. The vent cover can accumulate lint, dust, and other debris, which can obstruct the airflow and reduce the efficiency of your dryer.
Follow these steps to clean the dryer vent cover:
- Inspect the vent cover for any visible lint or debris. Use your fingers or a soft brush to remove any loose particles.
- If the vent cover is particularly dirty, you can wash it with warm, soapy water. Use a sponge or cloth to scrub away dirt and grime gently.
- Rinse the vent cover thoroughly with clean water to remove any soap residue.
- Inspect the screws or clips that attach the vent cover to the wall or ceiling. If they are dirty or rusty, clean them with a wire brush or replace them if necessary.
- Allow the vent cover to air dry completely before reattaching it to the vent pipe.
Cleaning the dryer vent cover will help improve the overall airflow and prevent any obstructions. It’s important to keep the vent cover clean to ensure optimal performance and reduce the risk of lint buildup and potential fire hazards.
Once the vent cover is clean and dry, you can move on to the next step to clean the dryer vent pipe.
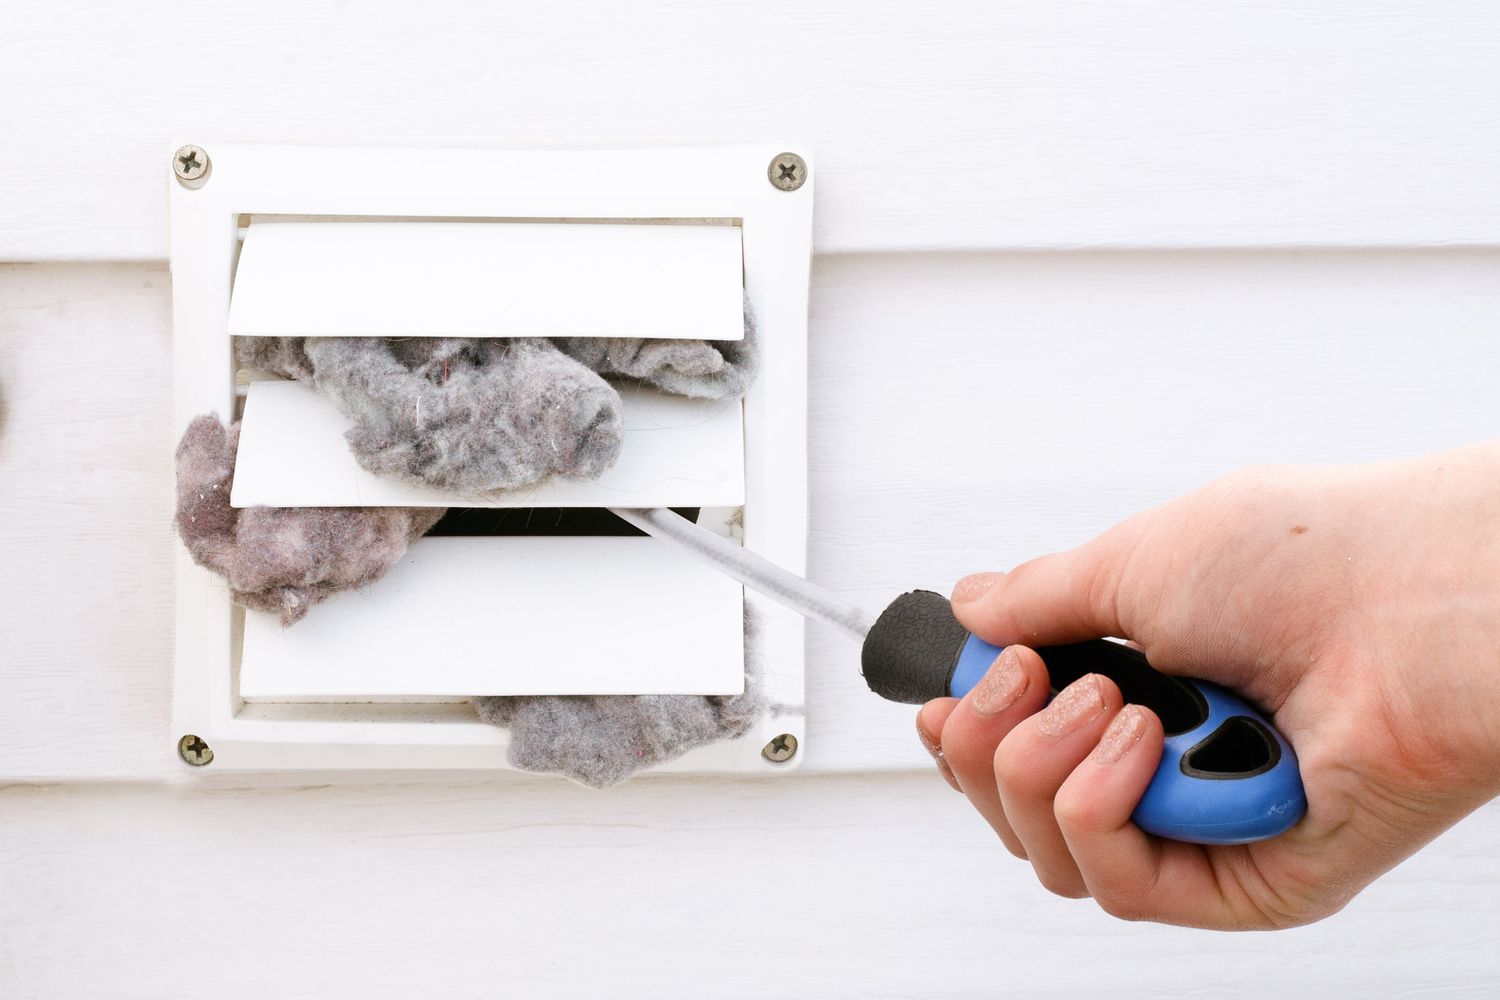
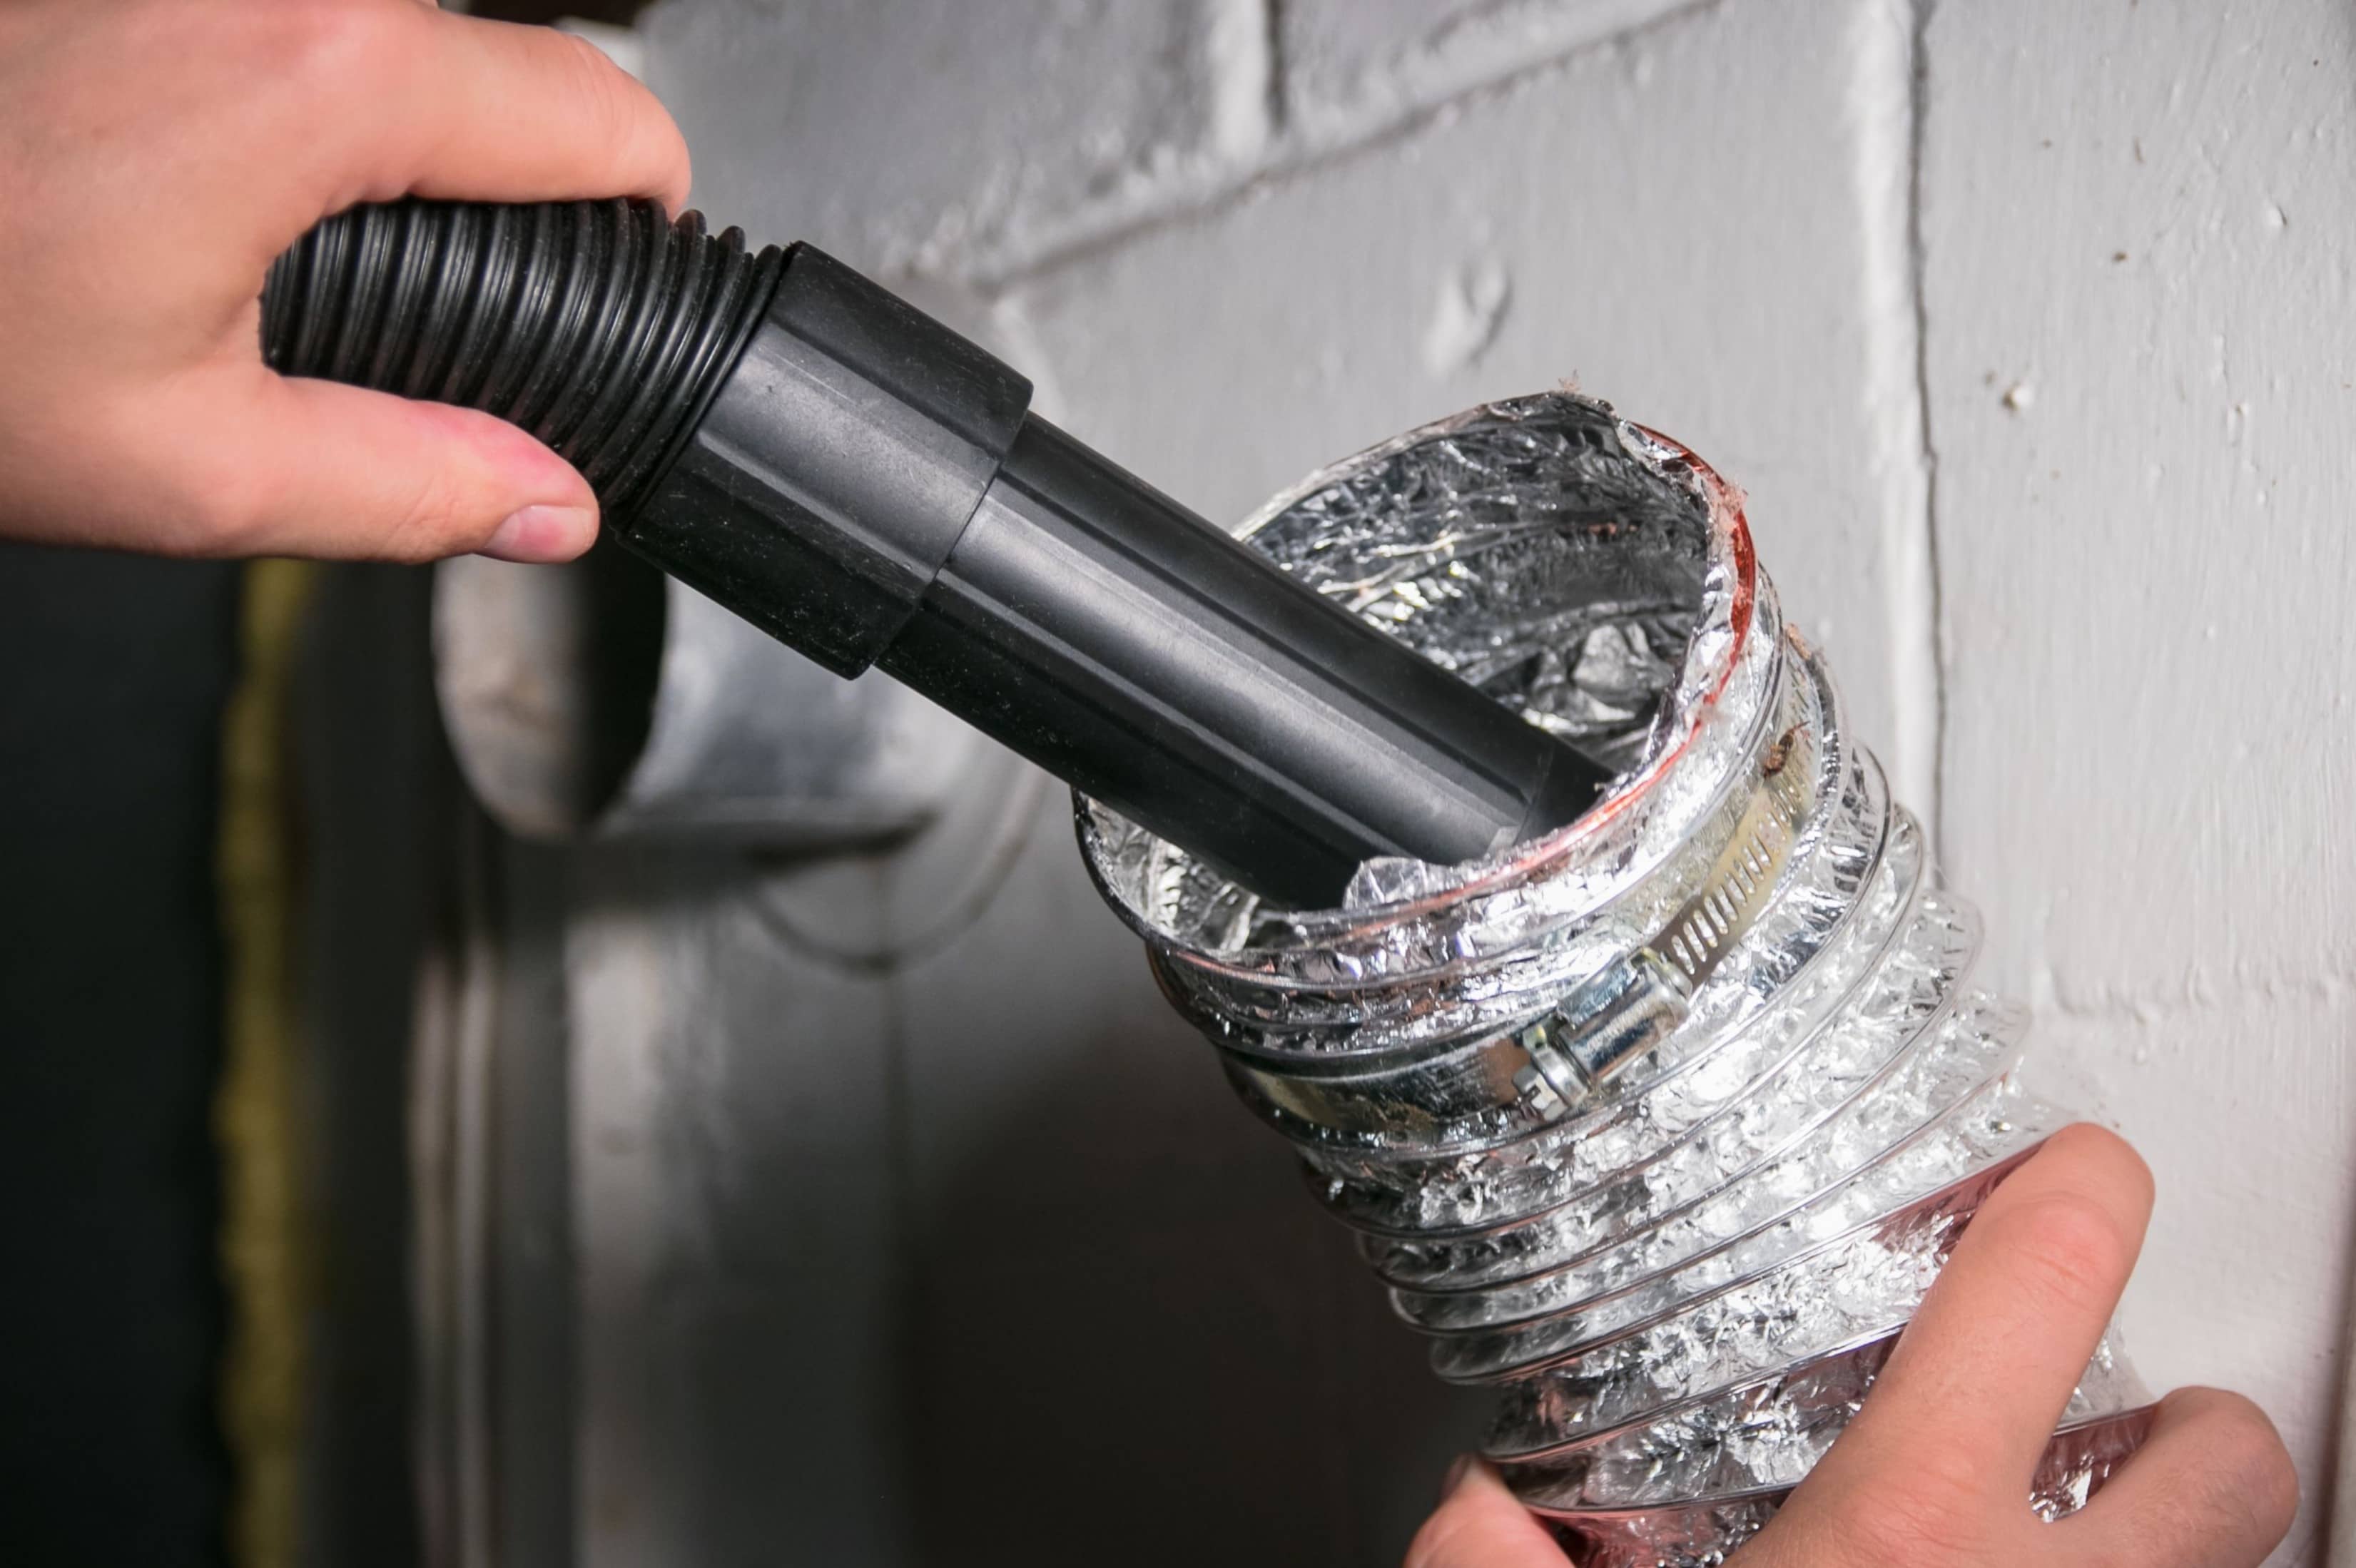
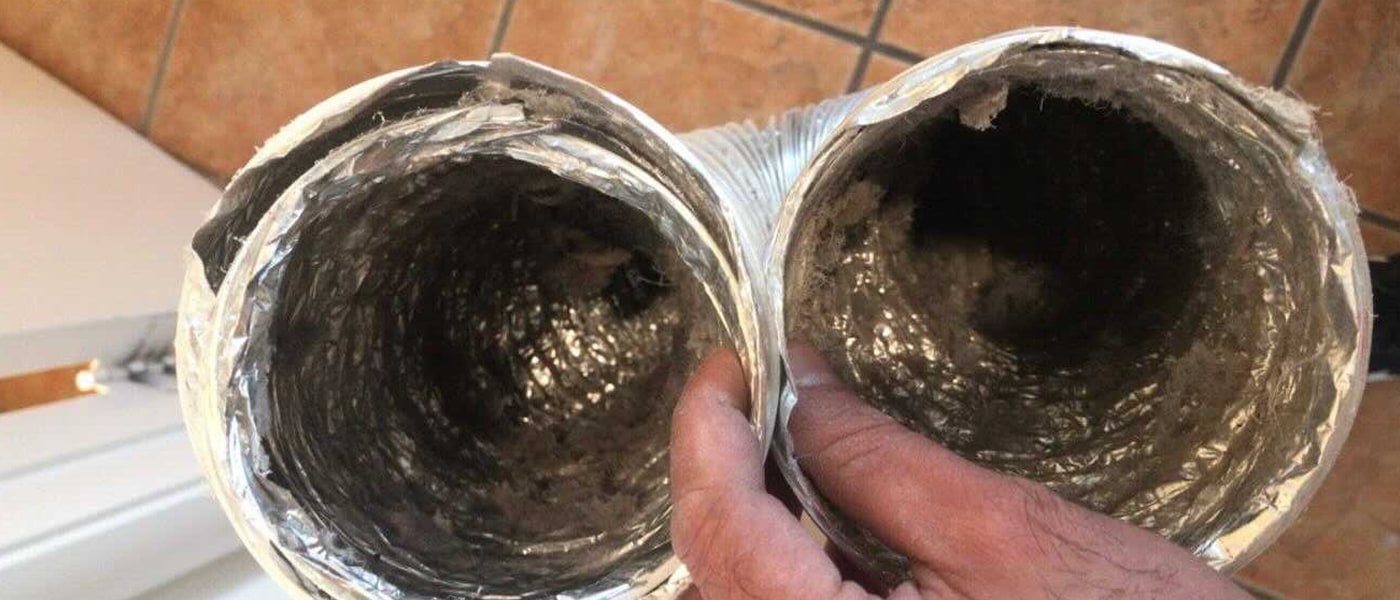
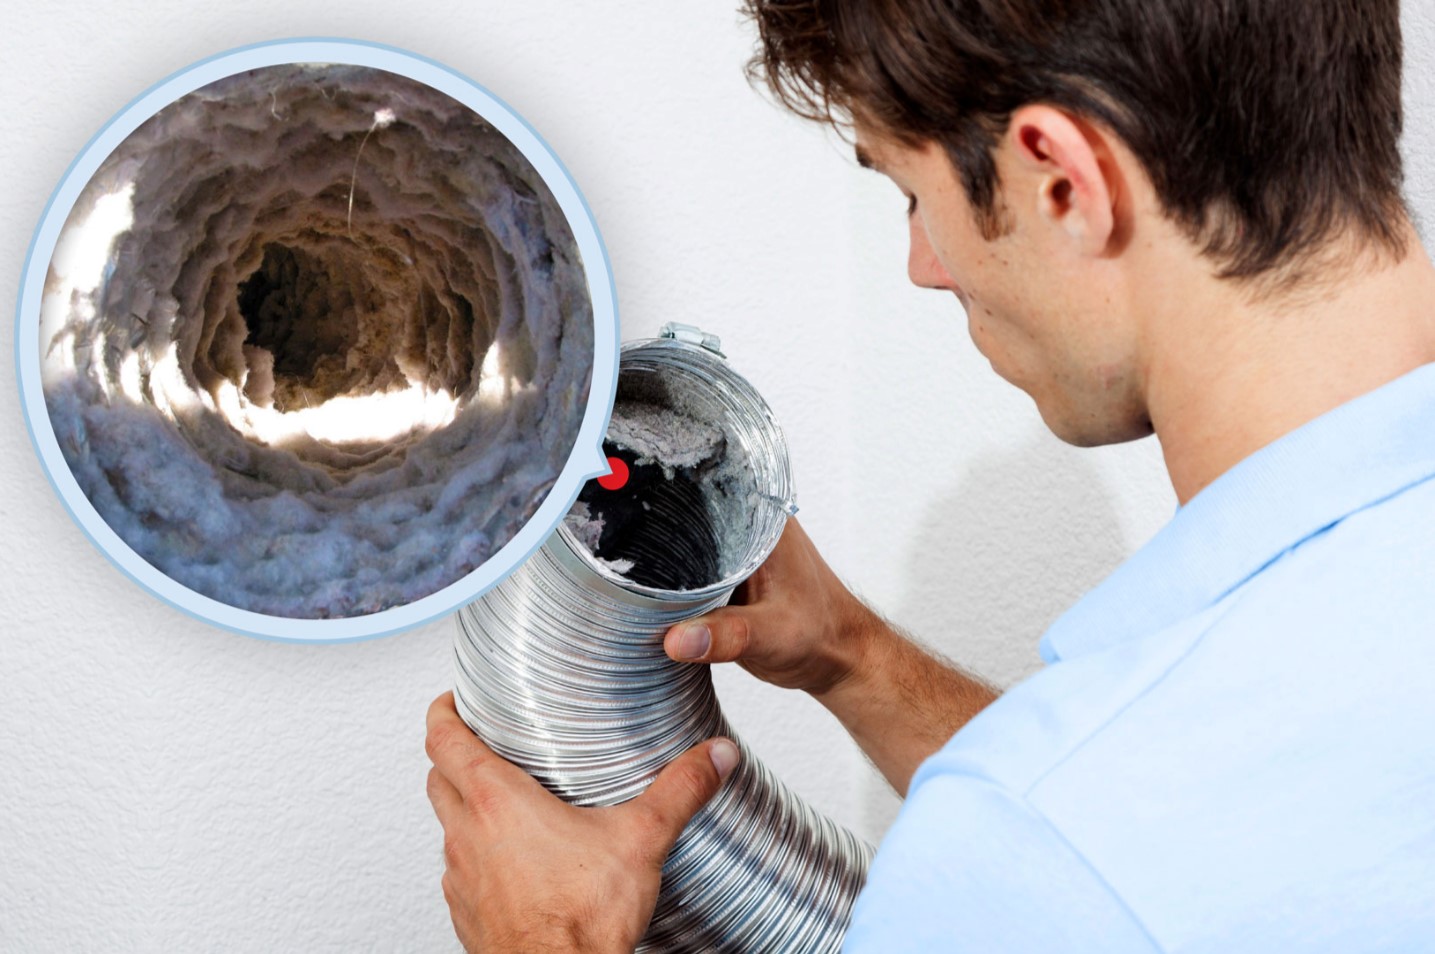
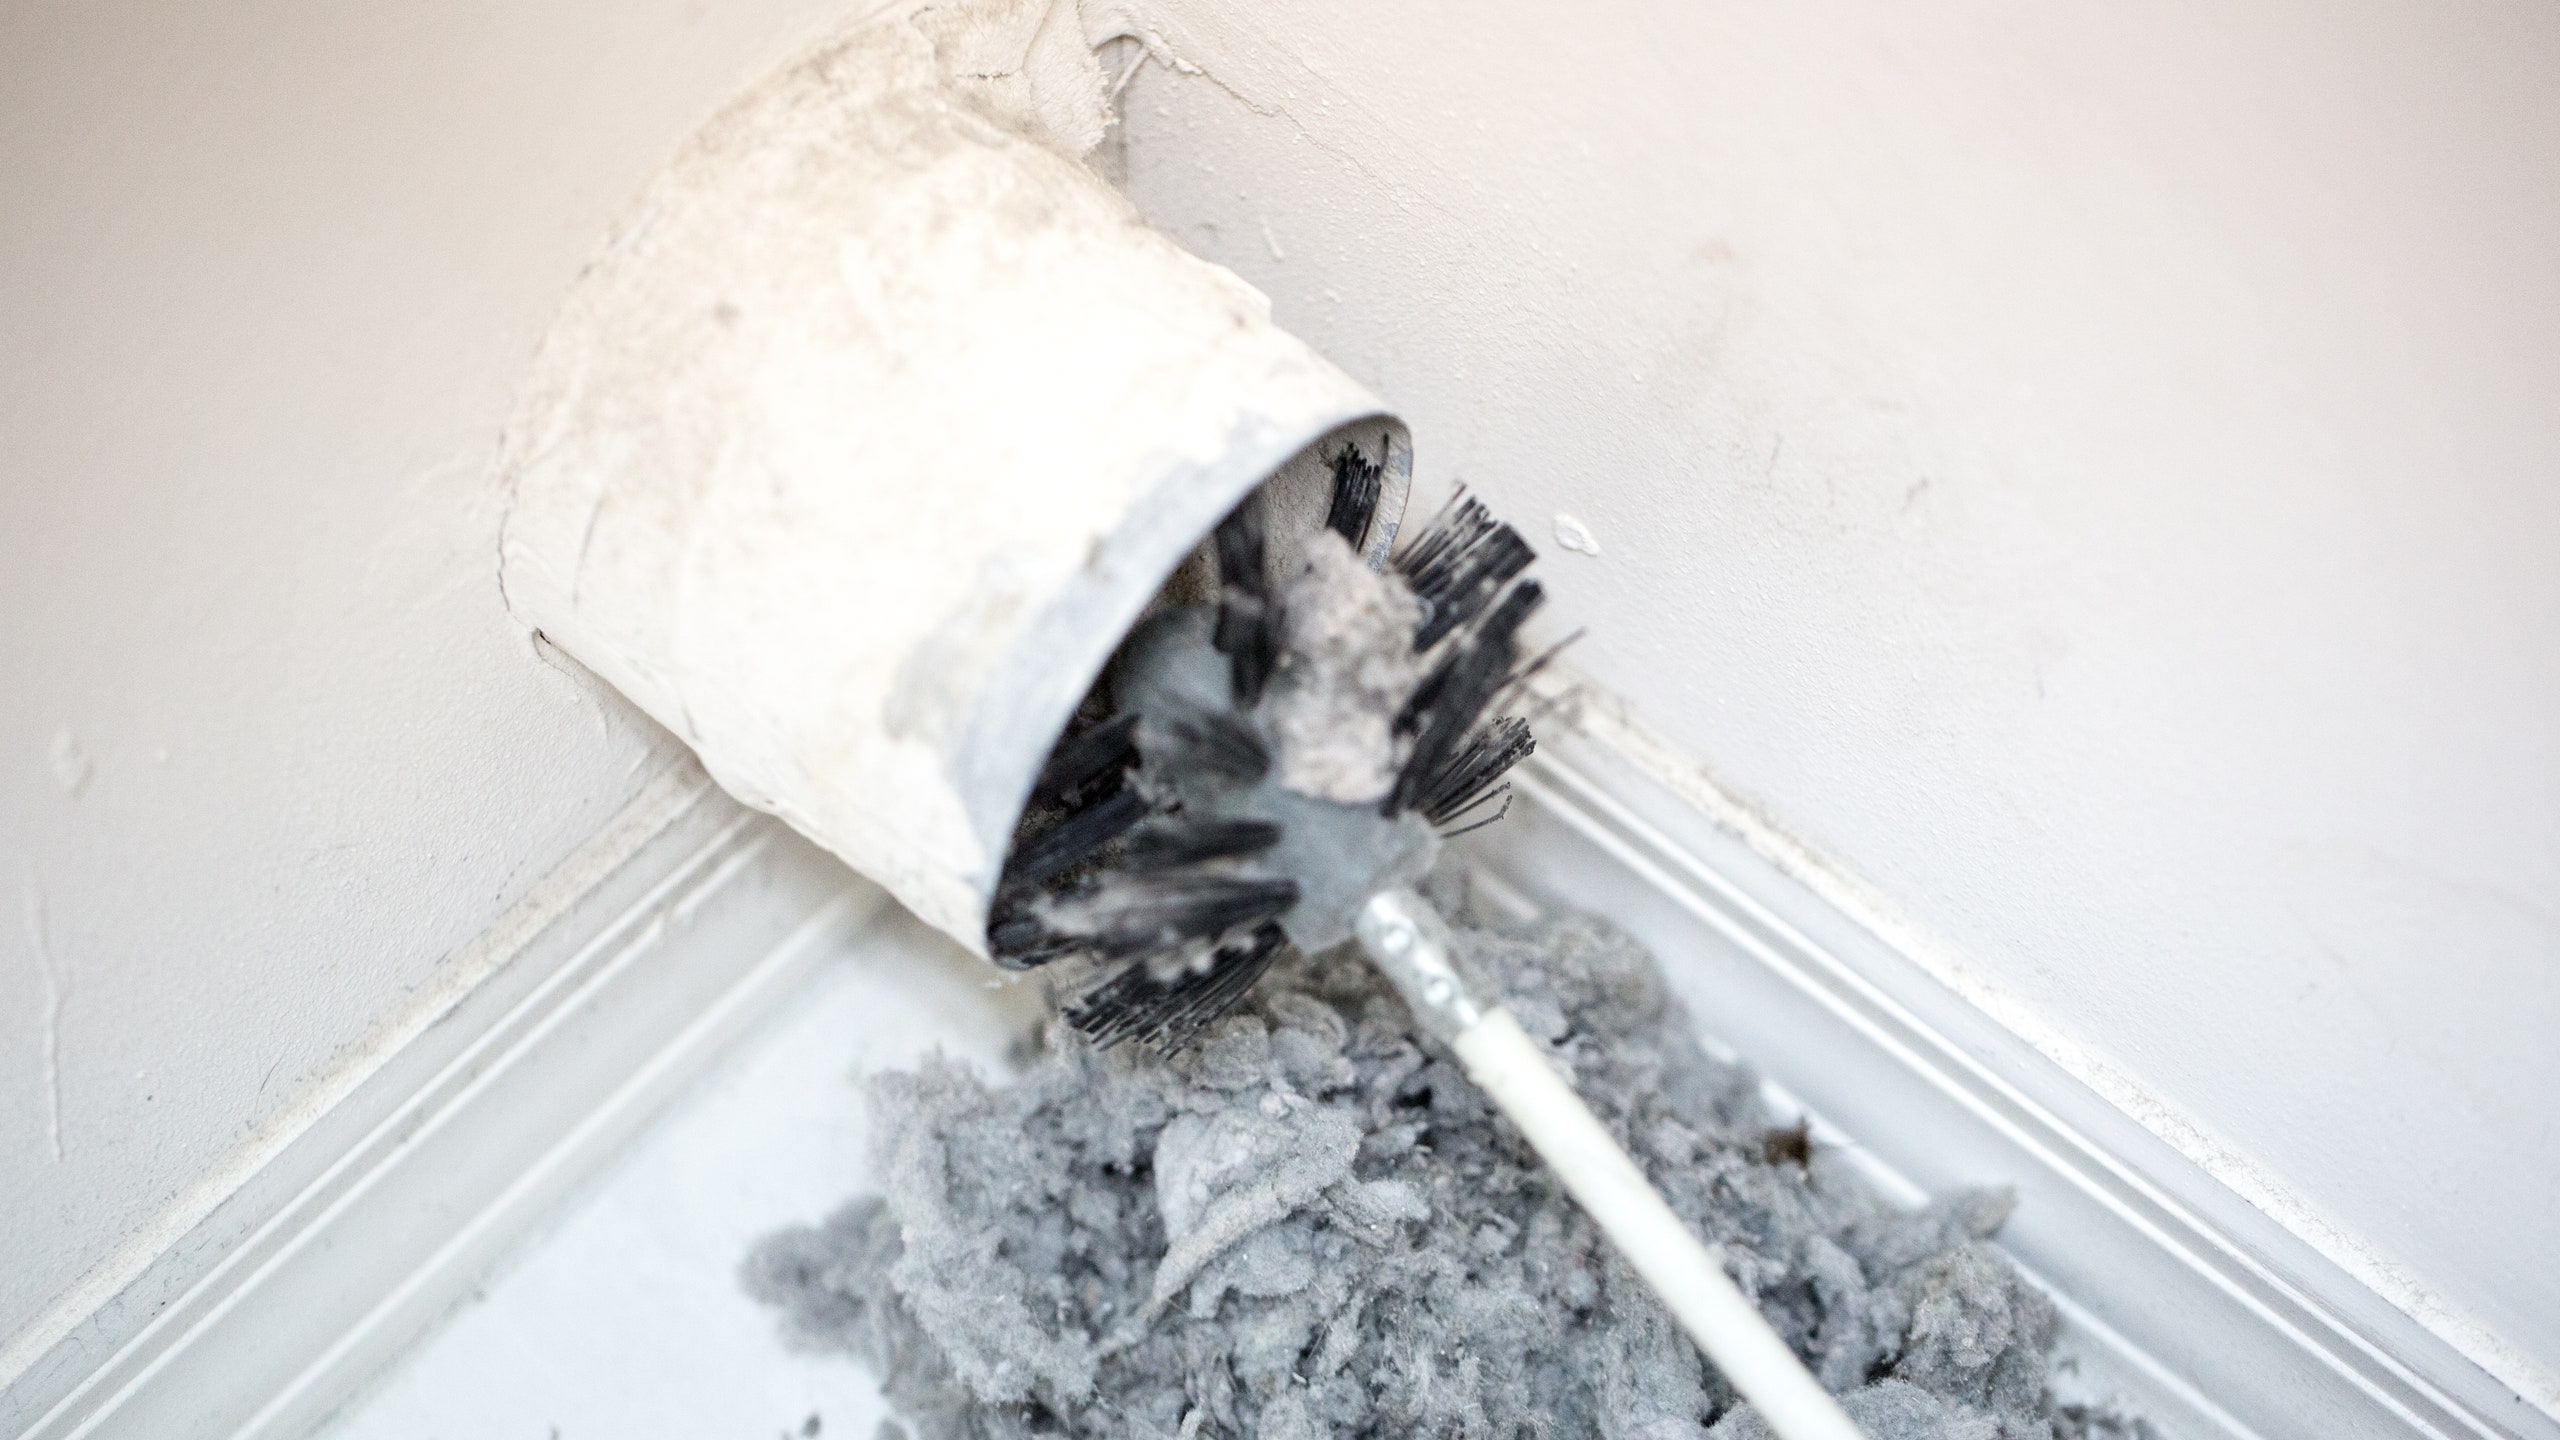
Step 5: Clean the Dryer Vent Pipe
After cleaning the dryer vent cover, it’s time to tackle the interior of the vent pipe. Over time, lint and debris can accumulate inside the vent pipe, obstructing the airflow and reducing the efficiency of your dryer. Cleaning the vent pipe is essential for proper ventilation and fire prevention.
Follow these steps to clean the dryer vent pipe:
- Attach a vent brush or a vacuum cleaner with a long hose attachment to a sturdy pole or rod.
- Insert the brush or hose attachment into the vent pipe from the outside of your home. Gently push it in, being careful not to damage the vent pipe.
- Move the brush or hose attachment back and forth inside the vent pipe, scrubbing away any lint or debris. If you encounter any resistance, continue to move the brush or hose attachment until it becomes easier to move through the pipe.
- Continue cleaning the entire length of the vent pipe, including any bends or curves. This will ensure that the entire vent pipe is free from blockages.
- Once you have finished brushing or vacuuming the vent pipe, remove the brush or hose attachment from the pipe.
- Inspect the brush or hose attachment for any lint or debris. Clean or replace it if necessary.
It’s important to note that for longer vent pipes or complex venting systems, it may be necessary to hire a professional dryer vent cleaning service to ensure a thorough cleaning.
By cleaning the dryer vent pipe, you improve the overall airflow and reduce the risk of lint buildup and potential fire hazards. With a clean vent pipe, your Whirlpool dryer will work more efficiently and effectively in drying your laundry.
After cleaning the vent pipe, you are ready to move on to the next step of reattaching the dryer vent cover.
Step 6: Reattach the Dryer Vent Cover
After cleaning the dryer vent pipe, it’s time to reattach the dryer vent cover. The vent cover helps to protect the vent pipe from outside elements while allowing proper airflow to expel hot air and moisture from the dryer.
Follow these steps to reattach the dryer vent cover:
- Position the vent cover against the wall or ceiling, aligning it with the opening of the vent pipe.
- If the vent cover has screws, insert them into the screw holes and use a Phillips screwdriver or a drill with a Phillips screwdriver bit to secure the vent cover in place. Alternatively, if the vent cover has tabs or clips, press them into their corresponding slots until they lock into place.
- Ensure that the vent cover is firmly attached and there are no gaps around the edges.
- If applicable, use duct tape or zip ties to further secure the vent cover to the vent pipe. This will provide added stability and prevent any potential loosening over time.
Once the vent cover is securely reattached, give it a gentle tug to ensure it is stable. It should not easily come off or wiggle.
Reattaching the dryer vent cover helps to maintain proper ventilation and prevent any elements from entering the vent pipe. This step ensures the integrity of the venting system and contributes to efficient drying performance.
After reattaching the dryer vent cover, you are almost done. The next step involves plugging in the dryer before testing the vent airflow.
Read more: How To Clean The Inside Of A Dryer Vent
Step 7: Plug In the Dryer
After reattaching the dryer vent cover, it’s time to plug in the dryer and prepare it for testing. This step will allow you to confirm that the vent is properly cleaned and the dryer is functioning correctly.
Follow these steps to plug in the dryer:
- Locate the power cord of your Whirlpool dryer.
- Insert the power cord plug into the corresponding wall outlet.
- Ensure that the plug is securely inserted and that there are no loose connections.
- Confirm that the dryer is receiving power by checking if the control panel lights up or if you hear the sound of the dryer turning on.
Once the dryer is plugged in and receiving power, allow it to run for a few minutes to ensure that it is functioning correctly. Listen for any unusual noises or vibrations that may indicate a problem with the dryer.
During this period, inspect the vent cover from the outside to confirm that there is airflow coming out of the vent. You should feel warm air being expelled with a steady flow. If you notice weak airflow or no airflow at all, it may indicate a blockage that needs further attention or professional assistance.
By plugging in the dryer and monitoring its function, you can validate that the cleaning process has been successful and that the dryer vent is working properly. This step completes the cleaning and testing of the dryer vent.
Step 8: Test the Dryer Vent
After cleaning the dryer vent and plugging in the dryer, it’s essential to perform a final test to ensure that the vent is functioning optimally. Testing the dryer vent will help verify that the airflow is strong and unrestricted, ensuring the safe and efficient operation of your Whirlpool dryer.
Follow these steps to test the dryer vent:
- Run a drying cycle on your Whirlpool dryer with a load of laundry as you normally would.
- Pay attention to the drying time and the performance of the dryer. If the clothes are drying more efficiently and in less time than before, it indicates that the vent is clear and the airflow has improved.
- While the dryer is running, go outside to the area where the vent cover is located.
- Feel the airflow coming out of the vent. It should be strong and steady, indicating that the vent is clear of obstructions.
- If you notice weak airflow or no airflow at all, it may indicate a blockage or an issue with the vent system. In such cases, it is advisable to seek professional assistance to inspect and address any problems.
By testing the dryer vent, you can confirm that the cleaning process has successfully improved the airflow and efficiency of your Whirlpool dryer. It is recommended to perform this test periodically to ensure ongoing maintenance and prevent lint buildup.
Congratulations! You have now completed the process of cleaning and testing your Whirlpool dryer vent. Regular maintenance and cleaning will help keep your dryer running smoothly, reduce the risk of fire hazards, and promote energy efficiency.
Ensure to follow the manufacturer’s guidelines and consult a professional if you encounter any difficulties or have concerns about maintaining your Whirlpool dryer vent.
Conclusion
Cleaning your Whirlpool dryer vent is an essential home maintenance task that should not be overlooked. By regularly cleaning the vent, you can improve the efficiency of your dryer, prevent lint buildup, and reduce the risk of a fire hazard.
In this article, we have provided you with a step-by-step guide on how to clean a Whirlpool dryer vent. From unplugging the dryer and locating the vent to removing the vent cover, cleaning the vent pipe, and reattaching the vent cover, we have covered each step in detail.
Throughout the cleaning process, it’s crucial to prioritize safety precautions. Always unplug the dryer before any maintenance tasks, wear protective gloves, and exercise caution when working with tools or climbing ladders.
Remember to gather the necessary tools and materials, such as a vent brush or vacuum cleaner with a long hose attachment, a Phillips screwdriver, gloves, and a ladder if needed.
After cleaning the vent cover, vent pipe, and reattaching the vent cover, plug in the dryer and perform a final vent test. This ensures that the vent is functioning properly and provides efficient airflow.
Regularly cleaning your Whirlpool dryer vent not only enhances the performance of your dryer but also promotes safety and prolongs the lifespan of the appliance.
By following the steps outlined in this guide and maintaining a regular cleaning schedule, you can enjoy the benefits of a well-maintained dryer vent for years to come.
Remember to consult the manufacturer’s guidelines or seek professional assistance if you encounter any difficulties or have concerns about your specific Whirlpool dryer vent system.
Take the time to prioritize this important home maintenance task and enjoy the peace of mind that comes with a clean and well-functioning Whirlpool dryer vent.
Frequently Asked Questions about How To Clean A Whirlpool Dryer Vent
Was this page helpful?
At Storables.com, we guarantee accurate and reliable information. Our content, validated by Expert Board Contributors, is crafted following stringent Editorial Policies. We're committed to providing you with well-researched, expert-backed insights for all your informational needs.