Articles
How To Start Whirlpool Washer
Modified: January 6, 2024
Learn how to start your Whirlpool washer with these informative articles. Find step-by-step guides and troubleshooting tips to get your laundry routine up and running smoothly.
(Many of the links in this article redirect to a specific reviewed product. Your purchase of these products through affiliate links helps to generate commission for Storables.com, at no extra cost. Learn more)
Introduction
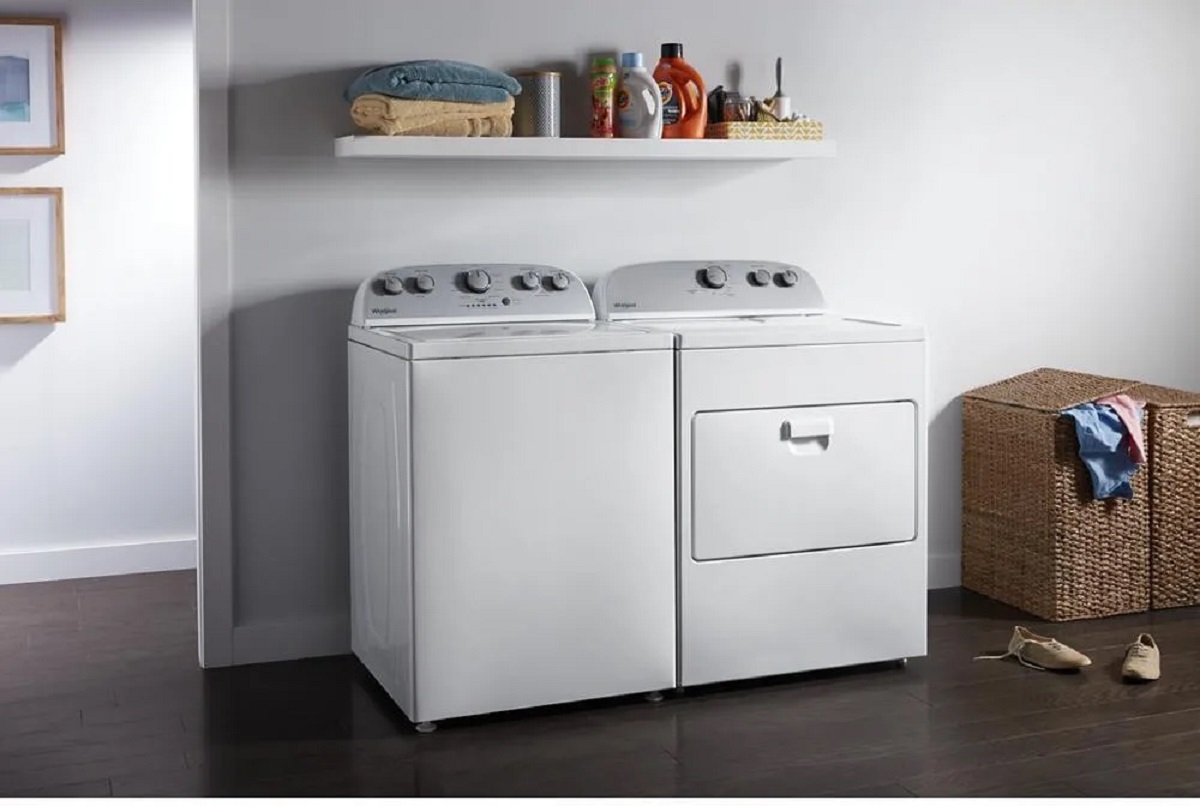
Welcome to the world of modern laundry appliances! With advancements in technology, doing laundry has become more efficient and convenient. One popular and reliable brand in the market is Whirlpool. Whirlpool washers are known for their durability, performance, and user-friendly features.
If you’ve recently purchased a Whirlpool washer or are considering buying one, this article will guide you on how to start using it. We’ll provide you with step-by-step instructions to ensure a successful and effective washing experience.
Before we dive into the details, it’s important to note that different models of Whirlpool washers may have slight variations in their controls and settings. However, the basic steps and principles remain the same. Always refer to the user manual that comes with your specific model for any specific instructions or features unique to your washer.
Now, let’s get started with the process of using your Whirlpool washer.
Key Takeaways:
- Master the art of using your Whirlpool washer for efficient and effective laundry cycles. From preparation to finishing, follow the steps outlined to ensure clean and fresh results every time.
- Ensure optimal cleaning and garment care by properly loading, setting the wash cycle, and monitoring your Whirlpool washer. Stay attentive, follow guidelines, and enjoy the convenience it brings to your laundry routine.
Read more: How To Start Whirlpool Dishwasher
Step 1: Preparation
Before you begin using your Whirlpool washer, it’s important to ensure that you have everything you need for a successful wash cycle. Here’s what you need to do:
- Gather your laundry: Collect the clothes and other items that you want to wash. Separate them according to color and fabric type, if necessary.
- Check the pockets: Before loading your laundry into the washer, make sure to empty all pockets to avoid any damage or mess during the wash cycle.
- Inspect the garments: Take a quick look at your clothes and check for any stains or heavily soiled areas. Pre-treat them if necessary using appropriate stain removers.
- Sort the laundry: Sort your laundry based on the care labels and recommended washing instructions. Separate delicate items, like lingerie or woolens, from heavily soiled items, like towels or jeans.
- Check your washer: Ensure that your Whirlpool washer is clean and in good working condition. Remove any leftover detergent or debris from the previous wash, and check for any loose or damaged parts.
- Connect the power: Plug in your washer into a grounded electrical outlet. Make sure the power cord is properly connected and not damaged.
- Connect the water supply: If your washer requires a direct water connection, make sure the inlet hoses are properly attached to the water source. Check for any leaks or kinks in the hoses.
By following these preparation steps, you’ll ensure that your laundry is ready to go and that your Whirlpool washer is in optimal condition for a successful wash cycle.
Step 2: Loading the Laundry
Now that you’ve completed the preparation steps, it’s time to load your laundry into the Whirlpool washer. Properly loading the laundry ensures efficient cleaning and prevents any potential damage to your clothes. Here’s how to do it:
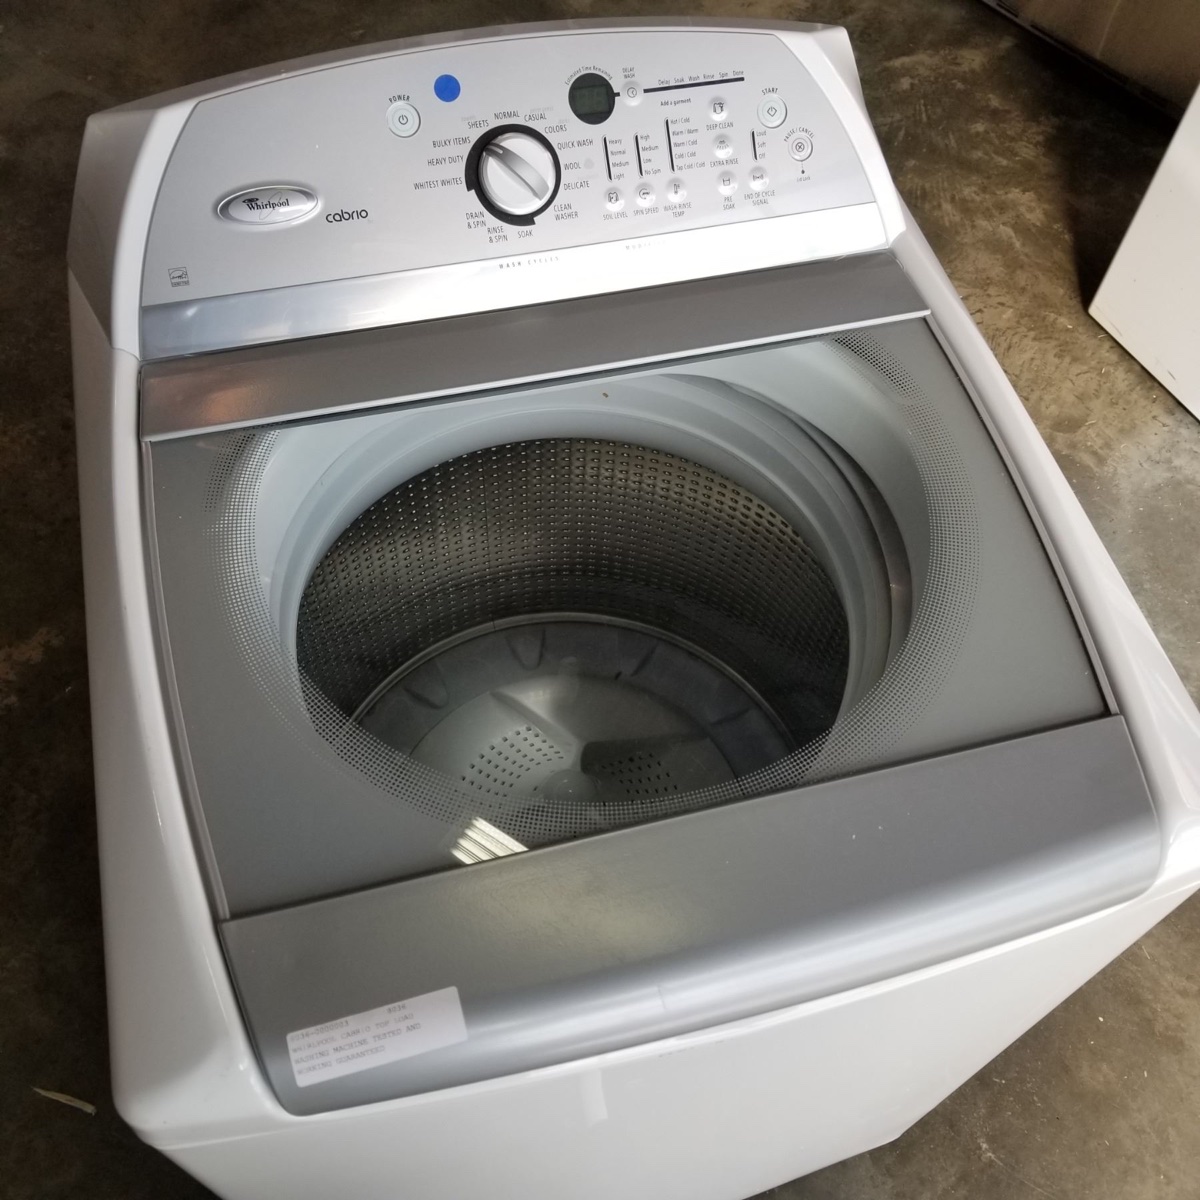
- Open the washer lid or door: Depending on the model of your Whirlpool washer, you’ll either have a top-loading washer or a front-loading washer. Open the lid or door accordingly.
- Add laundry: Start by adding the largest and heaviest items, like bedsheets or towels, at the bottom. This helps with balancing the load during the wash cycle. Then, add the rest of your laundry, making sure not to overload the washer.
- Distribute the clothes evenly: Spread out the clothes evenly inside the washer drum, ensuring that there are no clumps or tangled garments. This promotes better cleaning and prevents excessive tangling.
- Close the lid or door: Once you’ve loaded the laundry, close the lid or door securely. Make sure it latches properly to prevent any water leakage during the wash cycle.
Remember, it’s important to avoid overloading the washer as this can impact its performance and result in subpar washing results. Refer to the user manual to determine the recommended load capacity for your specific Whirlpool washer model.
By loading your laundry correctly, you’ll ensure that the clothes are washed thoroughly and come out clean and fresh after the wash cycle.
Step 3: Setting the Wash Cycle
Once you’ve loaded your laundry into the Whirlpool washer, it’s time to set the wash cycle. Whirlpool washers offer a variety of wash cycle options to suit different types of fabrics and cleaning needs. Follow these steps to select the appropriate wash cycle:
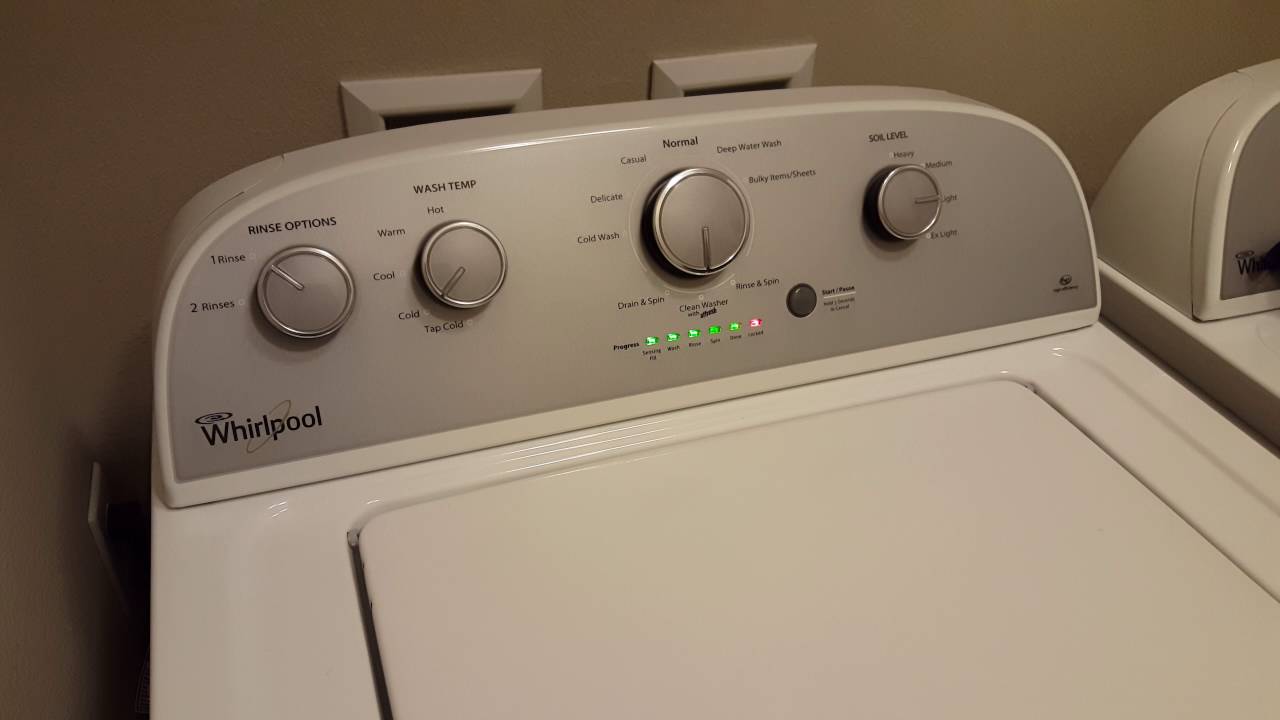
- Select the wash cycle: On the control panel of your Whirlpool washer, locate the cycle selector knob or buttons. Rotate the knob or press the buttons to browse through the available wash cycle options. Some common wash cycles include normal, delicate, quick wash, heavy duty, and eco-friendly.
- Choose additional options (if applicable): Depending on your model, there might be additional options to enhance the wash cycle. These can include options like extra rinse, pre-soak, stain removal, or steam. Select the options that are suitable for your laundry.
- Adjust the water temperature: Determine the appropriate water temperature for your load of laundry. Whirlpool washers typically offer options for hot, warm, cold, or tap cold water. Consider the fabric type and caring instructions to select the best temperature.
- Adjust the spin speed: If your washer allows it, adjust the spin speed according to the fabrics’ requirements. Higher spin speeds remove more water from the clothes, reducing drying time, but can be rougher on delicate items.
- Set any other desired settings: Depending on your specific model, there might be additional settings to choose from, such as soil level, delay start, or signal volume. Adjust these settings as per your preferences and needs.
Take a moment to review your selected wash cycle, options, and settings on the control panel. Make sure they align with the type of laundry you are washing to achieve optimal cleaning and garment care.
Remember, the instructions for setting the wash cycle may vary slightly based on your washer model. Always refer to the user manual for specific guidelines and options available on your Whirlpool washer.
Step 4: Adding Detergent and Fabric Softener
Now that you’ve set the wash cycle on your Whirlpool washer, it’s time to add detergent and fabric softener. These products play a vital role in cleaning and refreshing your laundry. Here’s how to add them:
- Locate the detergent dispenser: Whirlpool washers typically have a detergent dispenser compartment located near the control panel. This compartment is designed to hold the detergent and fabric softener.
- Add the detergent: Determine the appropriate amount of detergent based on the load size and follow the detergent manufacturer’s instructions. Pour the recommended amount of detergent into the designated compartment of the dispenser.
- Add fabric softener (optional): If you prefer to use fabric softener, locate the fabric softener compartment within the dispenser. Pour the recommended amount of fabric softener into the designated compartment.
- Close the detergent dispenser: Once you’ve added the detergent and fabric softener (if using), close the detergent dispenser compartment securely. Ensure that it is fully closed to prevent any leakage during the wash cycle.
It’s important to note that certain Whirlpool washer models might have different detergent dispenser configurations. Some washers have separate compartments for prewash, main wash, and fabric softener, while others have a single compartment for all. Refer to your user manual to understand the specific dispenser setup on your washer.
Using the appropriate amount of detergent and fabric softener ensures effective cleaning and softening of your laundry. Avoid using excessive amounts as it can lead to residue buildup and poor rinsing.
Now that the detergent and fabric softener are added, your Whirlpool washer is ready to start the wash cycle and provide you with fresh and clean laundry.
Make sure the washer is plugged in and the water supply is turned on. Load the clothes, add detergent, and select the desired cycle. Close the lid and press the start button to begin the wash cycle.
Read more: How To Start Whirlpool Dryer
Step 5: Starting the Washer
With your laundry loaded, the wash cycle set, and the detergent and fabric softener added, it’s time to start your Whirlpool washer. Follow these steps to begin the wash cycle:
- Double-check the settings: Take a final look at the wash cycle settings, water temperature, spin speed, and any additional options you’ve chosen. Make sure everything is as desired before starting the washer.
- Close the washer lid or door: If you have a top-loading washer, lower the lid until it clicks into place. For a front-loading washer, gently close the door until it fully seals.
- Turn on the washer: Locate the power button on the control panel and press it to start the washer. Depending on your model, you may need to press a “Start” button or rotate the cycle selector knob to begin the wash cycle.
- Observe the washer: Once the washer is started, you’ll hear the sound of water filling the drum and the machine motor running. Take a moment to ensure that the washer is operating smoothly and there are no unusual noises or vibrations.
It’s important to note that Whirlpool washers have built-in safety features that prevent the washer from starting if the lid or door is not securely closed. This ensures user safety and avoids any potential accidents.
Now that the washer is running, you can sit back and relax while your Whirlpool washer works its magic to clean your laundry.
Step 6: Monitoring the Wash Cycle
While your Whirlpool washer is running the wash cycle, it’s important to keep an eye on its progress and make any necessary adjustments. Here’s how to monitor the wash cycle:
- Stay nearby: For safety and convenience, it’s best to be in close proximity to the washer while it’s running. This allows you to monitor the cycle and address any issues that may arise.
- Observe the timer: Whirlpool washers usually have a digital display that shows the countdown timer or the remaining time of the wash cycle. Keep an eye on the timer to estimate how long the cycle will take.
- Listen for any unusual sounds: While the washer is running, it’s normal to hear the sound of water sloshing, the motor running, and occasional clicking or humming noises. However, if you notice any loud, repetitive, or unusual sounds, it’s recommended to stop the cycle and investigate the issue.
- Check for leaks: Periodically check the area around the washer for any signs of water leakage. If you spot any leaks, immediately stop the cycle and address the issue before continuing.
- Adjust the cycle (if needed): If you realize that the current cycle or settings are not suitable for your laundry, some Whirlpool washers allow you to make adjustments during the wash cycle. Refer to your user manual for specific instructions on how to modify the cycle mid-way.
It’s important to note that the duration of the wash cycle can vary depending on the selected settings and the load size. Some cycles may take as little as 30 minutes, while others can last up to an hour or more. Refer to the user manual for estimated cycle durations for your specific model.
Remember, never leave your washer unattended for long periods, especially if you’re running the washer for the first time or experimenting with new settings. Staying near the washer allows you to quickly address any issues and ensure a safe and effective wash cycle.
By actively monitoring the wash cycle, you can ensure that your laundry is being properly cleaned and address any unexpected issues that arise along the way.
Step 7: Finishing the Wash Cycle
As the wash cycle nears its end, you’ll need to take a few final steps to properly finish the cycle and prepare your laundry for drying. Here’s what to do:
- Wait for the cycle to complete: Keep an eye on the timer or the display to know when the wash cycle is expected to finish. Avoid opening the washer lid or door until the cycle is complete.
- Unplug the washer (if applicable): If your Whirlpool washer doesn’t have an automatic shut-off feature, unplug the machine from the power outlet once the cycle is complete. This helps conserve energy and prevents any electrical hazards.
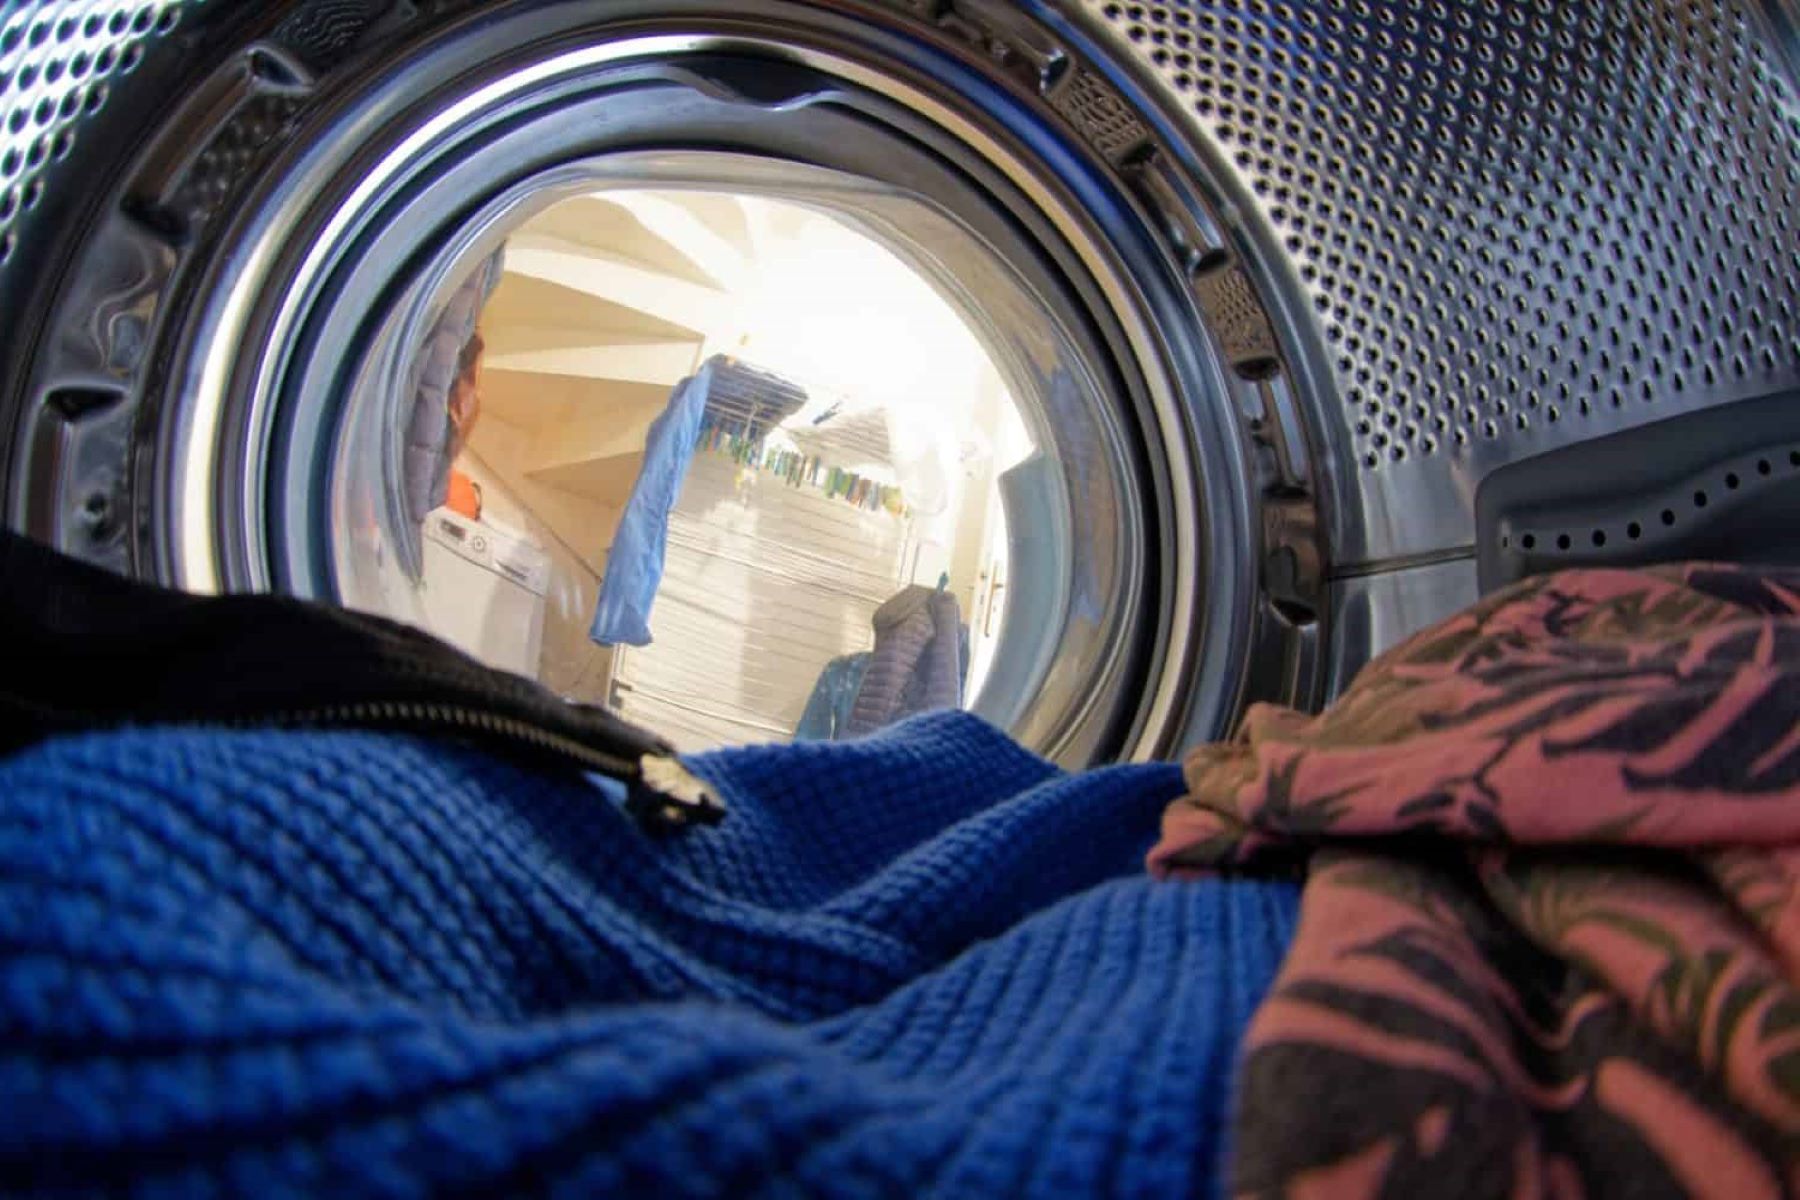
- Open the washer lid or door: Once the cycle is complete, you can safely open the lid or door of your washer. Take a moment to appreciate the freshly cleaned laundry inside.
- Remove the laundry promptly: Remove the laundry from the washer as soon as possible after the cycle ends. Leaving wet clothes sitting in the washer for too long can result in mildew or unpleasant odors.
- Inspect the laundry: Before transferring the clothes to the dryer or air-drying, quickly inspect them for any stains or areas that might need special attention. Address any remaining stains or marks as necessary.
- Clean the washer: After removing the laundry, take a moment to clean the washer drum, detergent dispenser, and any other accessible parts. This helps maintain the cleanliness and performance of your Whirlpool washer.
Remember, always follow the specific guidelines for cleaning and maintenance outlined in your Whirlpool washer’s user manual. Regular cleaning and maintenance contribute to the longevity and efficiency of the machine.
Now that the wash cycle is complete and your laundry is ready for the next step, you can proceed with drying your clothes through your preferred method, whether it’s using a dryer or air-drying.
Congratulations! You’ve successfully completed the wash cycle on your Whirlpool washer, and your laundry is fresh, clean, and ready to be enjoyed.
Conclusion
Using your Whirlpool washer to wash your laundry is a straightforward and efficient process that delivers clean and fresh results. By following the steps outlined in this article, you can confidently and effectively utilize your Whirlpool washer for a successful wash cycle.
We started with the preparation phase, ensuring that you have everything you need and that your washer is in good working condition. Then, we moved on to loading the laundry, distributing it evenly inside the washer drum.
Setting the wash cycle is the next step, where you select the appropriate cycle, adjust the water temperature and spin speed, and choose any additional options. Adding the right amount of detergent and fabric softener is crucial for effective cleaning and enhancing garment care.
Once everything is set, starting the washer and closely monitoring the wash cycle allows you to identify any issues and make adjustments if needed. Lastly, finishing the wash cycle involves safely opening the washer, removing the laundry promptly, and cleaning the washer itself.
By following these steps, you can ensure that your Whirlpool washer operates efficiently, providing you with clean and fresh laundry every time. Always refer to the user manual for your specific washer model to understand any unique features or instructions.
Now that you’ve mastered the art of using your Whirlpool washer, it’s time to enjoy the convenience and benefits it brings to your laundry routine. Sit back, relax, and let your Whirlpool washer take care of your dirty laundry, making your life easier and your clothes cleaner.
Frequently Asked Questions about How To Start Whirlpool Washer
Was this page helpful?
At Storables.com, we guarantee accurate and reliable information. Our content, validated by Expert Board Contributors, is crafted following stringent Editorial Policies. We're committed to providing you with well-researched, expert-backed insights for all your informational needs.


0 thoughts on “How To Start Whirlpool Washer”