Articles
How To Store Cat Urine Sample
Modified: August 16, 2024
Learn how to properly store a cat urine sample for testing with our informative articles. Get accurate results by following our step-by-step guide.
(Many of the links in this article redirect to a specific reviewed product. Your purchase of these products through affiliate links helps to generate commission for Storables.com, at no extra cost. Learn more)
Introduction
Welcome to the world of cat ownership! As a responsible cat owner, it’s important to keep an eye on your feline friend’s health. One way to do this is by periodically collecting a urine sample for analysis. This may sound like a daunting task, but with the right supplies and a little guidance, you can easily store a cat urine sample for future testing.
Why would you need to store a cat urine sample, you might ask? Well, there are several reasons. Firstly, if your cat has been showing any signs of urinary tract issues such as frequent urination, blood in the urine, or difficulty urinating, your veterinarian may request a urine sample for diagnostic purposes. Additionally, storing a urine sample can be helpful for baseline testing or monitoring a pre-existing condition. By having a urine sample readily available, you can save time and ensure prompt medical attention when needed.
To successfully store a cat urine sample, you will need a few supplies. It’s important to gather these items in advance so that the process goes smoothly. Here’s what you’ll need:
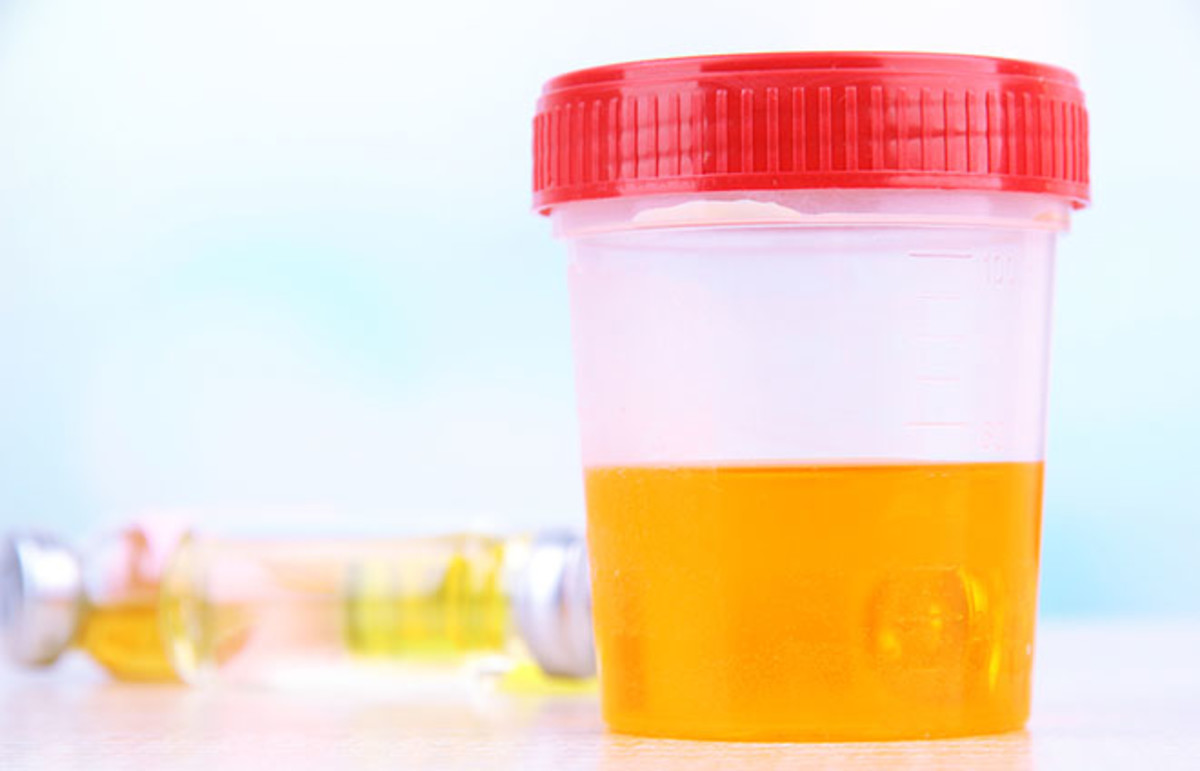
- A clean, sterile container with a tight-fitting lid
- Gloves
- A clean, dry cloth or disposable pet litter
- A small tray or plastic sheet
- A label or marker for identification
With these supplies at hand, you’re ready to proceed with storing the cat urine sample. In the following steps, we’ll guide you through the process.
Key Takeaways:
- Storing a cat urine sample is crucial for diagnosing urinary issues, monitoring chronic conditions, and saving time at the vet. Proper preparation, collection, and storage are essential for accurate test results.
- Patience, observation, and proper hygiene are key to successfully collecting and storing a cat urine sample. Positive reinforcement and following veterinary instructions ensure a stress-free process.
Read more: How To Store Urine Sample
Why Store a Cat Urine Sample?
Storing a cat urine sample can be highly beneficial for both the cat owner and the veterinarian. It provides valuable information about the cat’s urinary health and aids in diagnosing potential issues. Here are a few reasons why storing a cat urine sample is important:
1. Diagnostic Purposes
When a cat exhibits symptoms of a urinary tract infection (UTI) or other urinary issues, collecting a urine sample is often required. By storing the urine sample, veterinarians can conduct a thorough analysis to identify any abnormalities, such as the presence of bacteria, crystals, or blood. This information helps in determining the appropriate treatment plan for the cat.
2. Monitoring Chronic Conditions
Cats with chronic urinary conditions, such as feline lower urinary tract disease (FLUTD) or kidney disease, require ongoing monitoring. By storing urine samples over time, veterinarians can track changes in urinary parameters, such as pH levels or the presence of certain substances. This monitoring helps to gauge the effectiveness of the treatment plan and make necessary adjustments if needed.
3. Baseline Testing
Storing a cat urine sample when the cat is healthy and asymptomatic allows veterinarians to establish baseline values for various urine parameters. This baseline can then be used for comparison in future tests, helping to identify any deviations from the norm. Baseline testing is especially useful when a cat is at risk for certain urinary issues due to breed predisposition or previous urinary health problems.
Read more: How To Store Dog Urine Sample
4. Convenience and Time-Saving
Having a stored cat urine sample can save both the veterinarian and the cat owner valuable time. Instead of waiting for the cat to produce a sample at the veterinary clinic, the stored sample can be used for diagnostic purposes right away. This is particularly beneficial in cases where immediate testing is necessary due to the severity of the cat’s symptoms.
5. Multiple Cats in the Household
If you have multiple cats in your household, storing urine samples can be advantageous. It’s not always easy to determine which cat is experiencing urinary problems, especially if the symptoms are subtle. By collecting and storing individual urine samples from each cat, you can provide the veterinarian with accurate information for a proper diagnosis.
Remember, always consult with your veterinarian for guidance on when and how to store a cat urine sample. They can provide specific instructions based on your cat’s unique needs and health condition. By storing a cat urine sample, you’re taking an active role in your cat’s health and well-being.
Supplies Needed
Before you start collecting and storing a cat urine sample, it’s important to gather all the necessary supplies. Having everything prepared in advance will make the process much smoother. Here are the supplies you’ll need:
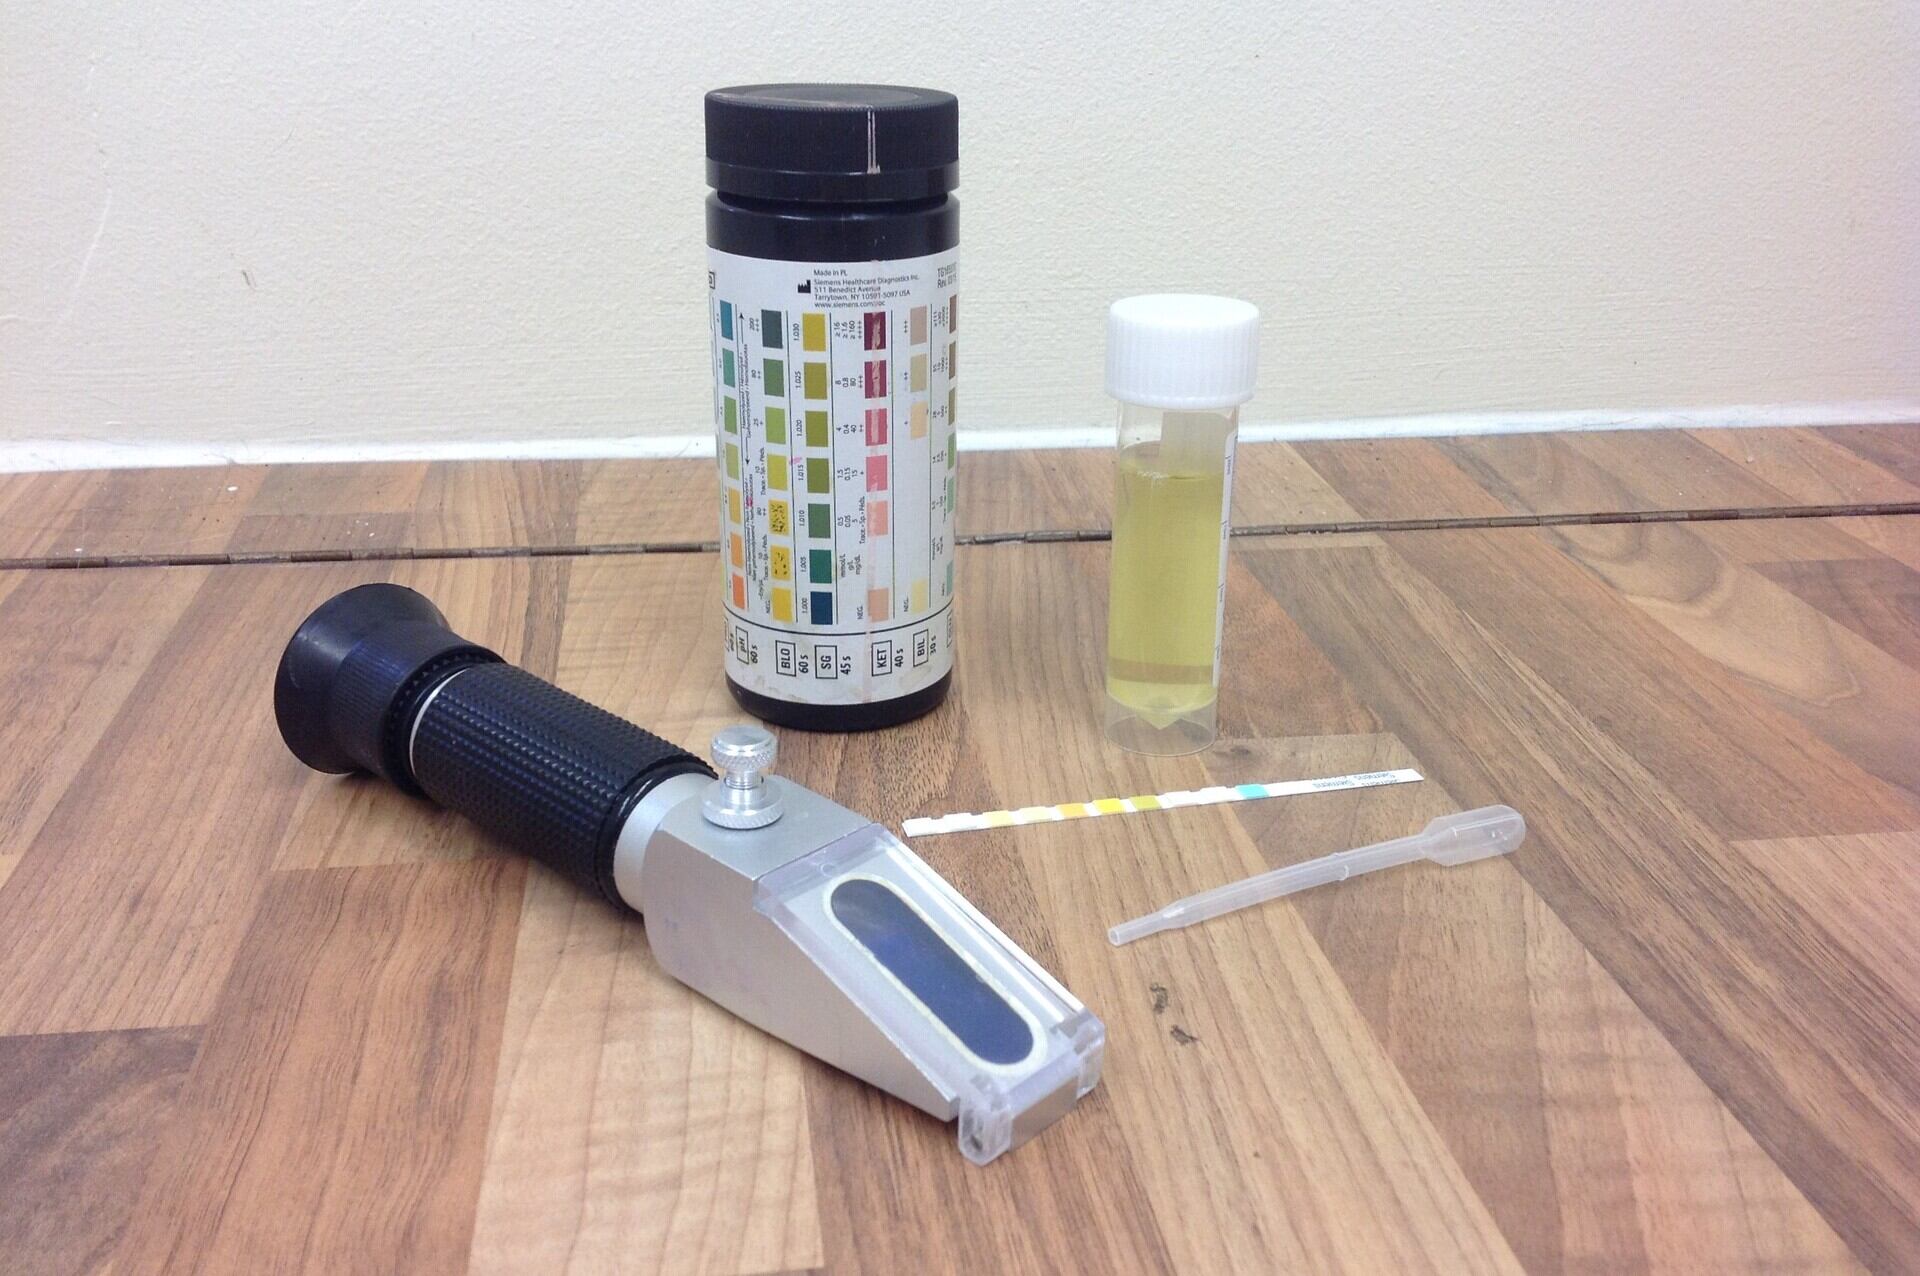
1. A Clean, Sterile Container with a Tight-Fitting Lid
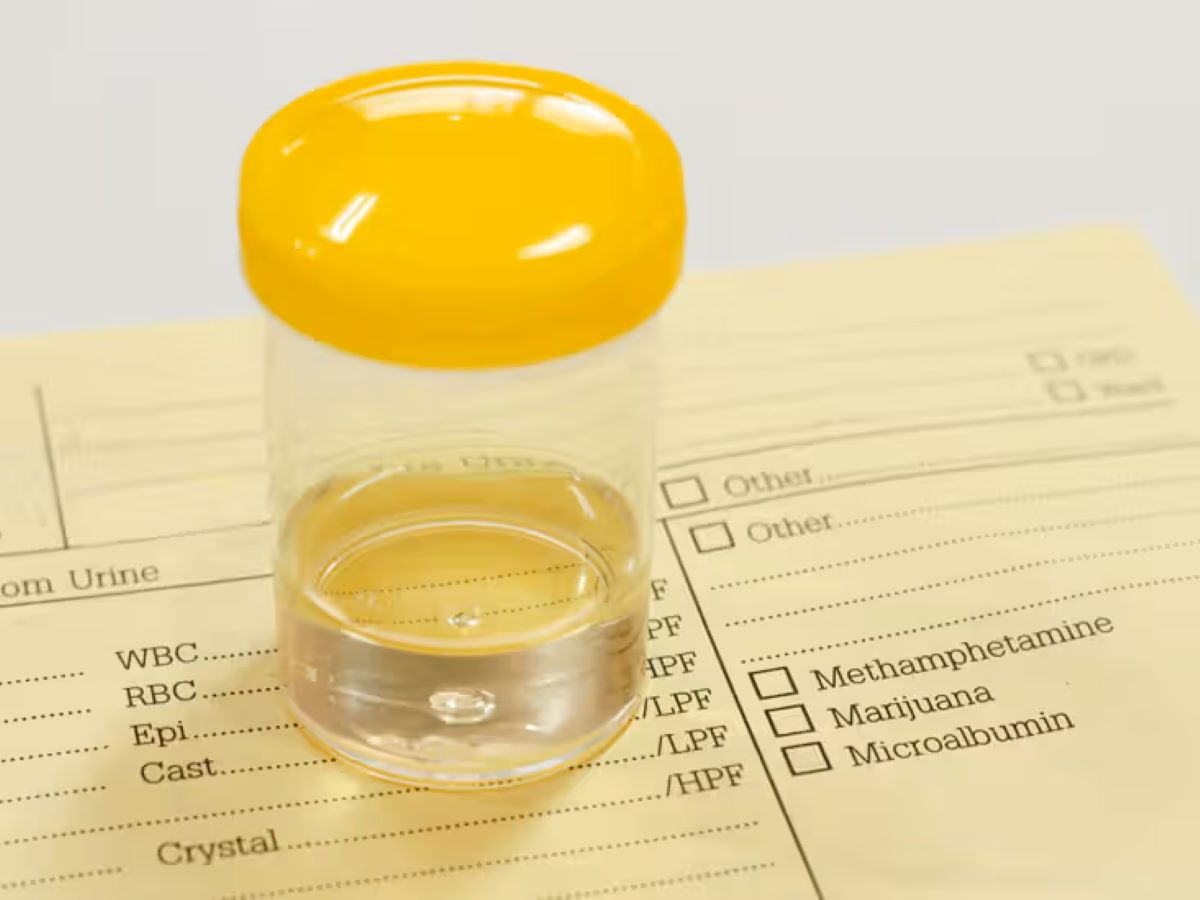
You’ll need a container to store the urine sample. It should be clean and sterile to ensure accurate test results. A plastic or glass container with a tight-fitting lid is ideal. Make sure it’s large enough to hold the urine without overflowing, but not too big to avoid unnecessary waste. You can purchase sterile sample containers from your veterinarian or use a clean, disposable container such as a small plastic cup or jar.
Read more: How To Store A Urine Sample Overnight
2. Gloves
Wearing disposable gloves during the collection process is important for hygiene and to avoid contaminating the sample. Latex or nitrile gloves work well for this purpose. Remember to put on a fresh pair of gloves for each sample collection.
3. A Clean, Dry Cloth or Disposable Pet Litter
If you’re collecting a urine sample directly from your cat’s litter box, having a clean, dry cloth or disposable pet litter is essential. This will absorb the urine and make it easier to transfer it into the sample container.
4. A Small Tray or Plastic Sheet
To collect urine through free-catch method, you’ll need a small tray or a plastic sheet. This will help you collect the urine without it spreading all over the floor or other surfaces. Be sure to clean the tray or plastic sheet thoroughly before each use.
5. A Label or Marker for Identification
Properly labeling the sample container is crucial for accurate identification. Use a label or marker to note the date and time of the sample collection as well as the cat’s name. This will prevent any mix-ups and ensure that the sample stays organized if you need to store multiple samples.
By gathering these supplies beforehand, you’ll be well-prepared to collect and store a cat urine sample. Remember to always follow your veterinarian’s instructions for sample collection and storage to ensure accurate results.
Read more: How To Store Urine Sample For Vet
Step 1: Preparing the Container
Before you begin the process of collecting and storing a cat urine sample, it’s crucial to properly prepare the container that will hold the sample. This ensures that the container is clean, sterile, and suitable for accurate testing. Follow these steps to prepare the container:
1. Wash Your Hands
Start by washing your hands thoroughly with soap and water. This helps to minimize the risk of contamination and maintains good hygiene throughout the process.
2. Choose a Suitable Container
Select a container that is clean, sterile, and has a tight-fitting lid. Ideally, it should be made of plastic or glass to prevent any interaction or contamination with the urine sample. You can purchase sterile sample containers from your veterinarian, or use a clean, disposable container such as a small plastic cup or jar. Make sure the container is large enough to hold an adequate amount of urine for testing, but not too large to avoid unnecessary waste.
3. Clean the Container
Thoroughly clean the container with hot, soapy water. Rinse it well to remove any soap residue. To ensure sterilization, you can soak the container in a mixture of one part bleach to nine parts water for 10-15 minutes, and then rinse it thoroughly with water. Alternatively, you can use a commercial sterilizing solution specifically designed for medical equipment and containers.
Read more: How To Store Cat Stool Sample For Vet
4. Air-Dry or Use Sterile Gauze
Allow the container to air-dry completely or use sterile gauze to dry it. Avoid using towels or tissue, as they may introduce lint or fibers into the container. It’s important to make sure the container is completely dry before collecting the urine sample to prevent dilution or contamination of the sample.
5. Recap and Store Properly
Once the container is dry, securely close the lid to maintain the sterility of the container. If you’re using a disposable container with a lid, make sure it is tightly sealed to prevent any leakage. Store the container in a clean, dry place until the urine sample is collected and ready to be transferred.
By following these steps to prepare the container, you ensure that the urine sample remains uncontaminated and suitable for testing. Now that the container is ready, you can proceed to collect the cat urine sample in the next steps.
Step 2: Collecting the Urine Sample
Collecting a urine sample from your cat may seem like a challenging task, but with patience and the right approach, it can be done successfully. Follow these steps to collect a cat urine sample:
1. Choose the Collection Method
There are a few different methods you can use to collect a urine sample from your cat:
- Free-catch method: Place a clean tray or plastic sheet under your cat’s litter box. When your cat urinates, the urine will be collected in the tray or on the plastic sheet.
- Non-absorbent litter method: Replace your cat’s regular litter with non-absorbent litter pellets or plastic beads. These allow the urine to pass through and collect in a tray or on a plastic sheet underneath.
- Specially designed collection device: Some veterinary clinics provide special non-absorbent litter or collection devices that can be placed in the litter box to collect the urine sample.
- Manual expression: In some cases, your veterinarian may need a urine sample directly from the bladder. This method should only be done by a professional to avoid injury or discomfort to the cat.
Choose the method that works best for you and your cat based on their behavior and comfort level. It’s important to use a clean tray or plastic sheet for any of these methods to prevent contamination.
Read more: How To Store Dna Samples
2. Timing is Key
Observe your cat’s behavior and try to anticipate when they usually use the litter box. It’s best to collect the urine sample when the bladder is likely to be full, such as in the morning or after your cat has been resting for a while.
3. Monitor your Cat
Keep a close eye on your cat and wait for them to use the litter box. It may be helpful to confine your cat to a smaller area or a room with the litter box to increase the chances of successful collection.
4. Collect the Sample
Once your cat urinates, use a clean, dry cloth or a clean container to carefully collect the urine. If using the free-catch or non-absorbent litter method, you can use a sterile syringe or a small cup to scoop the urine from the tray or plastic sheet. Be gentle and try not to spill or contaminate the sample.
5. Transfer the Sample
Once you have collected the urine sample, promptly transfer it into the prepared container. Do this carefully to avoid any spillage. If using a syringe, remove the needle and gently inject the urine into the container. If using a cup, slowly pour the urine into the container. Fill the container to the recommended level indicated by the veterinarian or the container manufacturer.
Remember to handle the urine sample with care and avoid touching the inside of the container or the sample itself. This helps to maintain the integrity of the sample and ensures accurate test results.
With the urine sample collected and transferred, you’re now ready to proceed to the next step and store the sample for future testing.
Read more: How To Remove Cat Urine Smell From A Carpet
Step 3: Transferring the Sample into the Container
Now that you have successfully collected a urine sample from your cat, it’s important to transfer the sample into the prepared container. Properly transferring the urine ensures that it remains uncontaminated and suitable for future testing. Follow these steps to transfer the sample:
1. Use Sterile Technique
Before transferring the urine sample, make sure you are practicing good hygiene and using sterile techniques. It’s essential to avoid any contamination that could affect the accuracy of the test results.
2. Open the Container
Open the lid of the clean, sterile container that you prepared earlier. Set it on a clean, stable surface, ensuring that it is easily accessible for transferring the urine.
3. Pour or Inject the Urine
If you collected the urine sample using a cup or similar container, carefully pour the urine into the container. Ensure that you don’t spill any urine outside of the container. If you used a syringe, gently insert the syringe into the container’s opening and slowly push the plunger to inject the urine, ensuring there are no air bubbles.
Read more: How To Store Dog Poop Sample
4. Fill to the Recommended Level
Fill the container with enough urine to reach the recommended level indicated by your veterinarian or the container manufacturer. They will specify the required amount for accurate testing. Avoid overfilling the container, as it could cause leakage or dilution of the sample.
5. Seal the Container Securely
Once you have transferred the urine sample into the container and reached the recommended level, securely seal the lid. Ensure it is tightly closed to prevent any leakage or contamination. Double-check that the lid is properly sealed and won’t come loose during storage or transport.
6. Clean the Outside of the Container (If Necessary)
If any urine has spilled on the outside of the container during the transfer process, clean it gently using a clean, damp cloth or paper towel. Avoid using any chemical cleaners or substances that could contaminate the sample.
By following these steps, you can transfer the collected urine sample into the container safely and in a way that maintains the integrity of the sample. Now that the sample is securely stored, you can move on to the next step and label it for proper identification.
Step 4: Labeling and Storing the Sample
After transferring the cat urine sample into the container, it’s important to label and store it properly. Proper labeling ensures accurate identification of the sample, while appropriate storage conditions maintain the integrity of the sample for future testing. Follow these steps to label and store the sample:
Read more: How To Store A Dog Stool Sample
1. Label the Container
Using a label or a marker, clearly write essential information on the container. Include the date and time of the sample collection, as well as the name or identification of the cat from which the urine sample was taken. Accurate labeling is crucial to avoid any mix-ups or confusion regarding the sample’s origin.
2. Additional Information
If there are specific instructions provided by your veterinarian for sample storage or any additional details related to the sample, make sure to note them on the label as well. This may include special handling instructions or specific tests requested by your veterinarian.
3. Store in a Cool, Dark Place
Store the labeled container in a cool, dark place to preserve the integrity of the urine sample. Excessive heat and exposure to light can alter the composition of the sample, potentially affecting the accuracy of the test results. A refrigerator is an ideal location for storage, as it provides a controlled and consistent temperature. However, always check with your veterinarian to confirm the recommended storage conditions for the specific tests that will be performed.
4. Follow Storage Guidelines
Follow any storage guidelines provided by your veterinarian or the laboratory where the sample will be tested. This may include specific temperature requirements or the duration for which the stored sample remains valid for testing.
Read more: How To Store A Poop Sample For The Vet
5. Transporting the Sample
If you need to transport the urine sample to the veterinary clinic or laboratory, ensure proper packaging and protection to prevent leakage or breakage. Place the securely sealed container inside a sealed plastic bag to contain any potential spills. Keep the sample as upright as possible during transport, and avoid extreme temperature changes.
6. Testing Timeframe
It’s important to note that there may be a certain timeframe within which the urine sample should be tested. Some tests require fresh samples, while others may have specific time limitations for accurate results. Check with your veterinarian to determine the appropriate timeframe for testing the stored urine sample.
By properly labeling and storing the urine sample, you ensure that it remains intact and suitable for future testing. This allows for accurate diagnosis and monitoring of your cat’s health. Always communicate with your veterinarian to follow their guidelines and instructions for sample storage and testing.
Tips and Precautions
When it comes to collecting and storing a cat urine sample, there are some helpful tips and precautions to keep in mind. These will ensure a successful process and accurate test results. Here are some important tips and precautions:
1. Be Patient and Observant
Collecting a urine sample from a cat can take time and patience. Be observant of your cat’s behavior and take note of when they usually use the litter box. Patience is key to successfully collect the sample without causing stress to your cat.
Read more: How To Store Dog Fecal Sample
2. Use Positive Reinforcement
To make the collection process more comfortable for your cat, you can use positive reinforcement techniques. Reward them with treats or praise after they use the litter box. This positive association can help reduce any anxiety or resistance during future sample collections.
3. Handle the Sample Carefully
To maintain the integrity of the urine sample, handle it with care. Avoid touching the inside of the container or the sample itself. Any contaminants can interfere with the test results. If you accidentally touch the sample or the container, it’s best to collect a new sample to ensure accuracy.
4. Follow Veterinary Instructions
Always follow the specific instructions provided by your veterinarian for collecting, storing, and transporting the urine sample. They may have specific requirements or recommendations based on the tests being conducted. Clear communication with your veterinarian will ensure accurate results.
5. Keep the Sample Cool
Proper storage is crucial to maintain the quality and integrity of the urine sample. Store the sample in a cool place, such as a refrigerator, to prevent degradation of the urine components. However, avoid freezing the sample, as it can alter the composition and affect the accuracy of the test results.
Read more: How To Store Dog Feces Sample
6. Use Fresh Containers
When collecting and storing multiple samples, use fresh containers for each sample. Reusing containers can lead to cross-contamination, affecting the accuracy of the test results. It’s best to have a supply of clean, sterile containers on hand for each collection.
7. Follow Proper Hygiene Practices
Maintaining good hygiene during the sample collection process is essential. Wash your hands thoroughly before and after handling the urine sample. Dispose of gloves and any used materials properly to prevent any spread of bacteria or contamination.
8. Consult a Professional
If you’re unsure about the collection process or need assistance, don’t hesitate to consult a veterinary professional. They can provide guidance and demonstrate the proper techniques for collecting and storing a cat urine sample.
By following these tips and precautions, you can ensure a successful and accurate collection and storage of a cat urine sample. Remember, regular monitoring of your cat’s urinary health is essential for their overall well-being.
Conclusion
Congratulations! You have learned how to successfully collect and store a cat urine sample. This knowledge will empower you to take an active role in your cat’s healthcare by providing valuable information to your veterinarian for diagnostic purposes and monitoring their urinary health. Here’s a recap of the key steps:
- Prepare a clean, sterile container with a tight-fitting lid.
- Select the appropriate method to collect the urine sample.
- Transfer the urine sample into the prepared container.
- Label the container with essential information.
- Store the sample in a cool, dark place, following veterinary guidelines.
Remember, patience and observation are key when collecting a urine sample from your cat. Positive reinforcement and gentle handling can help make the process less stressful for both you and your cat. Always follow your veterinarian’s instructions and consult them with any questions or concerns.
By storing a cat urine sample, you can save time and ensure prompt medical attention when needed. This is especially important in cases of urinary tract issues and chronic conditions that require ongoing monitoring. Additionally, a stored urine sample can provide valuable baseline data and aid in detecting any deviations from the norm.
Proper labeling and storage of the urine sample are crucial to maintain its integrity for future testing. Be sure to handle the sample with care, use fresh containers, and follow proper hygiene practices to avoid any contamination or inaccuracies in test results.
By taking these steps and being proactive in your cat’s healthcare, you are providing them with the best possible care. Regular monitoring of their urinary health can help prevent and detect potential issues, ensuring a happier and healthier life for your beloved feline companion.
Remember, if you have any concerns or questions about your cat’s urinary health, consult with your veterinarian. They are the best resource for guidance and advice specific to your cat’s needs and can provide personalized recommendations.
Frequently Asked Questions about How To Store Cat Urine Sample
Was this page helpful?
At Storables.com, we guarantee accurate and reliable information. Our content, validated by Expert Board Contributors, is crafted following stringent Editorial Policies. We're committed to providing you with well-researched, expert-backed insights for all your informational needs.
0 thoughts on “How To Store Cat Urine Sample”