Articles
How To Store Dahlia Bulbs For The Winter
Modified: January 5, 2024
Discover the best way to store your dahlia bulbs during the winter season with our helpful articles.
(Many of the links in this article redirect to a specific reviewed product. Your purchase of these products through affiliate links helps to generate commission for Storables.com, at no extra cost. Learn more)
Introduction
Welcome to the ultimate guide on how to store dahlia bulbs for the winter season. Dahlias are stunning flowers that grace our gardens with vibrant colors and intricate blooms. As the colder months approach, it’s essential to provide proper care and storage for these delicate bulbs to ensure their survival and health for the following spring.
Dahlia bulbs are generally tender and susceptible to frost damage, which is why it’s crucial to follow the correct storage procedures. By storing your dahlia bulbs correctly, you can enjoy these beautiful flowers year after year and even propagate new plants from the bulbs.
In this article, we’ll cover step-by-step instructions on how to store dahlia bulbs effectively. From digging up the bulbs to preparing the storage medium and finding the ideal location, we’ll guide you through the entire process. Let’s dive in and learn how to preserve your dahlia bulbs during the winter months!
Key Takeaways:
- Properly storing dahlia bulbs involves digging them up, cleaning, inspecting, and storing in a suitable container with the right storage medium. Regular checks during winter and careful replanting in spring ensure vibrant blooms.
- Storing and replanting dahlia bulbs not only preserves their beauty but also allows for propagation and sharing with fellow gardening enthusiasts. Follow the steps for a successful dahlia garden revival in spring.
Read more: How To Store Dahlias For Winter
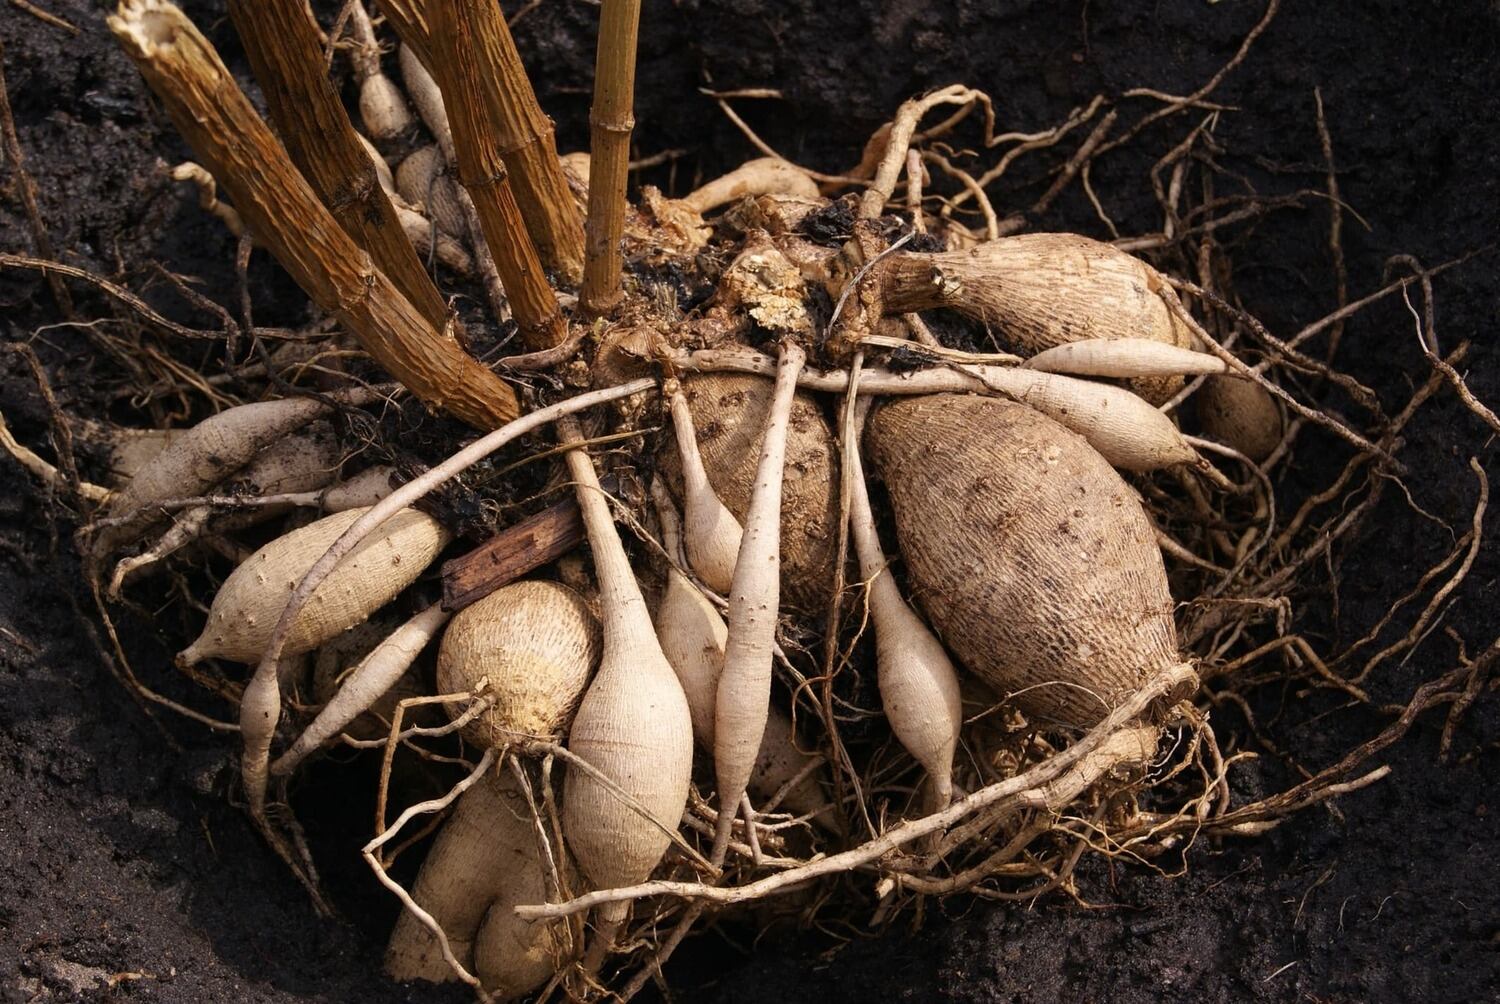
Step 1: Digging Up Dahlia Bulbs
Before the first frost sets in, it’s crucial to dig up your dahlia bulbs from the ground to prepare them for winter storage. This process allows you to evaluate the condition of the bulbs and remove any damaged or diseased ones.
Start by cutting back the foliage of your dahlia plants to a few inches above the ground. This will make it easier to access the bulbs without damaging them. Use a garden fork or shovel to carefully loosen the soil around the base of the plant. Gently lift the clump of dahlia bulbs from the ground, being careful not to harm the bulbs or their fragile tubers.
To separate the individual bulbs, gently shake off excess soil or rinse them with water to remove any dirt. Avoid using excessive force as this may damage the bulbs. Additionally, handle the bulbs carefully to prevent bruising or crushing.
Inspect each bulb, discarding any that show signs of rot, disease, or significant damage. Healthy dahlia bulbs will have firm and plump tubers with no signs of decay. Removing damaged bulbs helps prevent the spread of disease and ensures that you only store healthy bulbs for the winter.
Once you have inspected and separated the bulbs, it’s time to move on to the next step: cleaning and drying the bulbs.
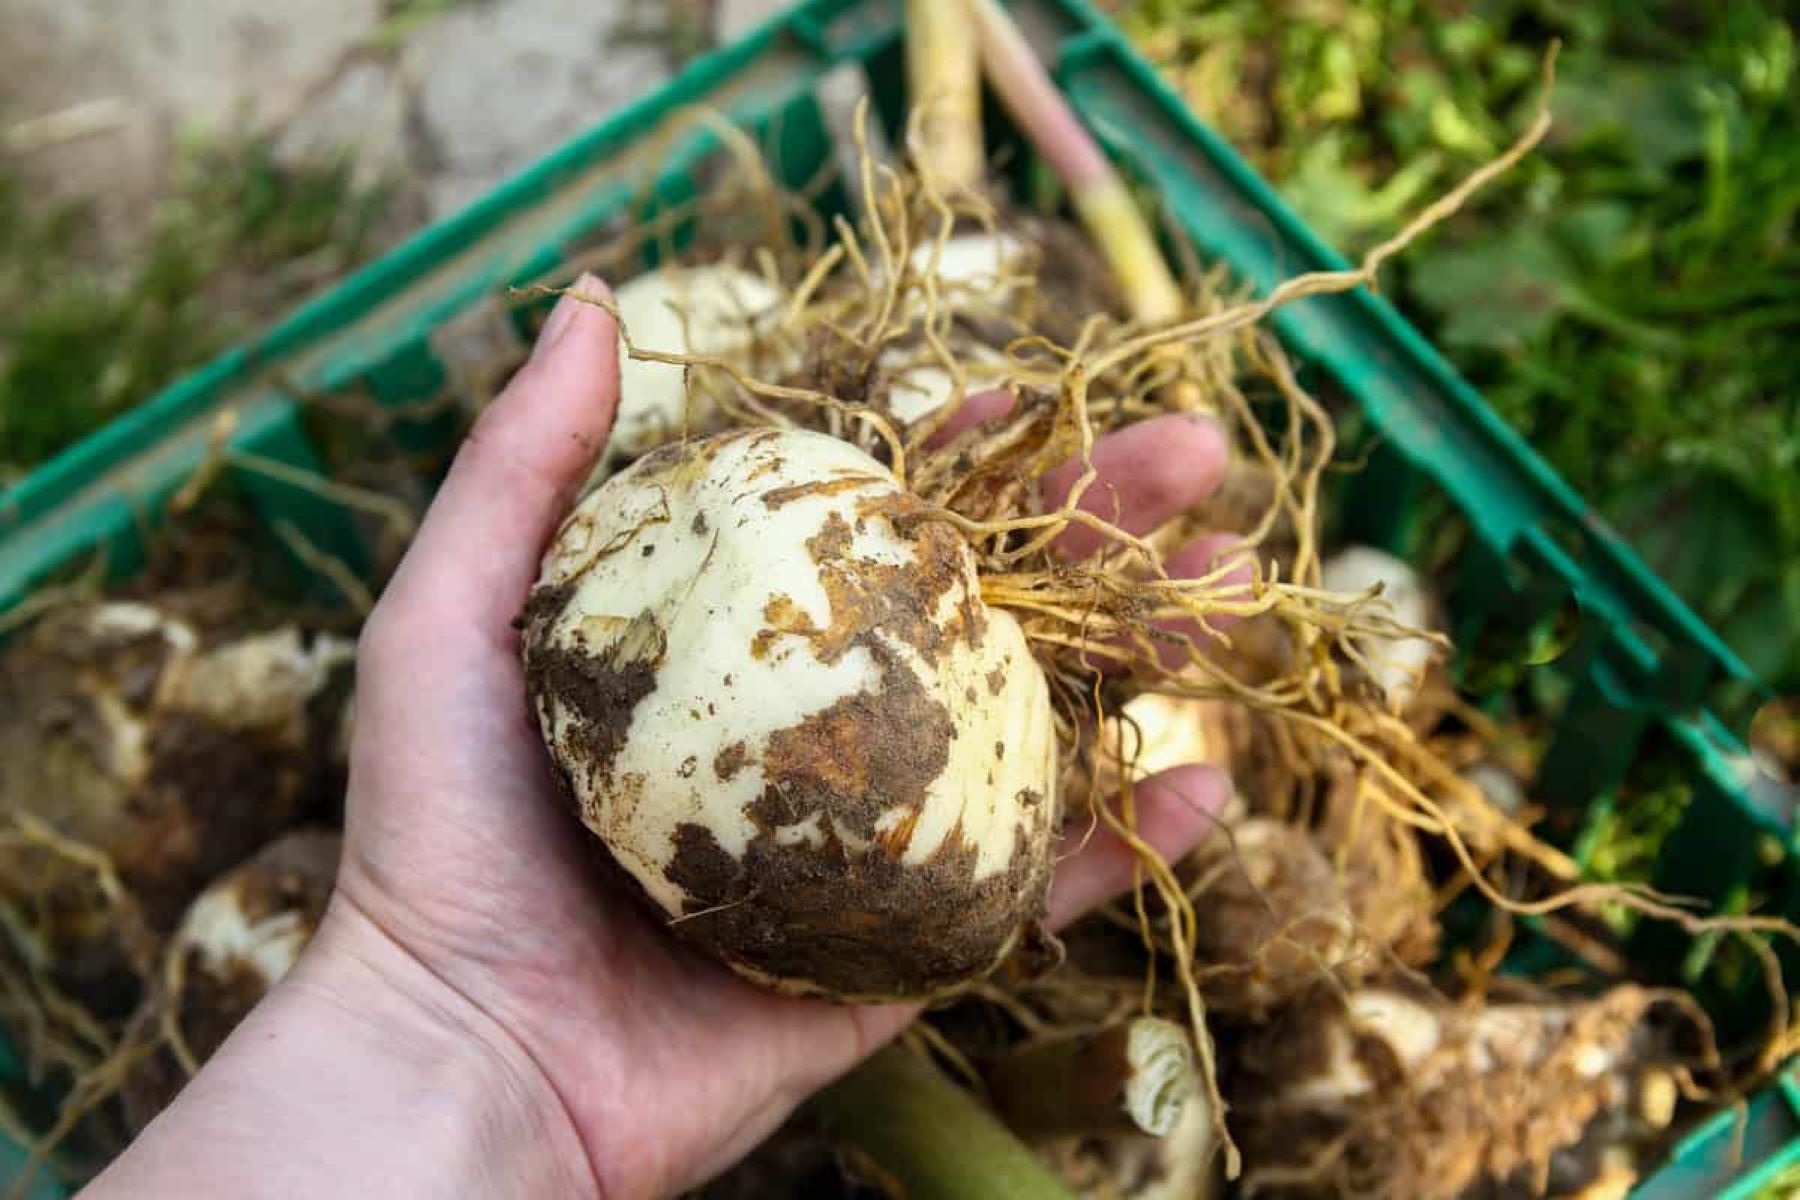
Step 2: Cleaning and Drying the Bulbs
After you have dug up the dahlia bulbs and inspected them for damage or disease, it’s important to clean and dry them thoroughly before storing them for the winter. This process helps to prevent the growth of mold or rot during storage.
Start by gently removing any remaining soil or debris from the bulbs. You can use a soft brush or your hands to loosen and brush off the dirt. Be careful not to scrub the bulbs too aggressively, as this may damage the delicate skin.
Next, fill a bucket or container with lukewarm water and soak the bulbs for about 15-20 minutes. This will help to loosen any stubborn dirt and ensure a thorough cleaning. Swirl the bulbs gently in the water to remove any remaining debris.
Once the bulbs have been soaked, rinse them under running water to remove any residue or dirt. Avoid using harsh chemicals or detergents, as this can damage the bulbs. Stick to plain water for cleaning.
After rinsing, lay the bulbs out on a clean towel or newspaper in a cool, well-ventilated area. Allow them to air dry for several days, turning them occasionally to ensure even drying. It’s essential to make sure the bulbs are completely dry before moving on to the next step.
During the drying process, check the bulbs for any signs of softness or rot. Discard any bulbs that appear damaged or compromised. It’s better to store only healthy bulbs to ensure successful growth in the next growing season.
Once the bulbs are thoroughly dried, you can proceed to the next step: inspecting them for any damage or disease.
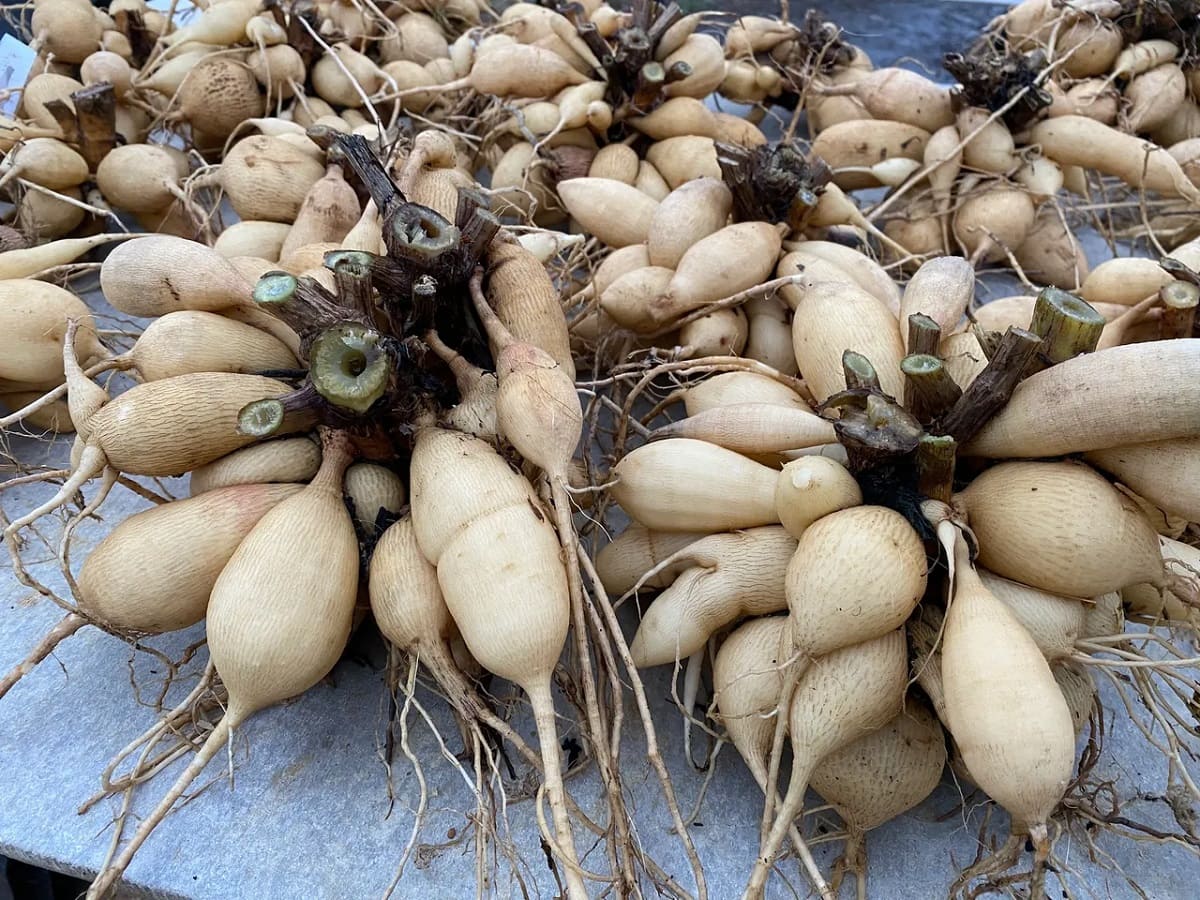
Step 3: Inspecting for Damage or Disease
Inspecting your dahlia bulbs for damage or disease is an essential step in ensuring their long-term storage success. By identifying and removing any compromised bulbs, you can prevent the spread of disease and maximize the chances of healthy growth in the next growing season.
Take each dried bulb individually and examine it closely. Look for any signs of softness, mold, discoloration, or decay. Soft or mushy spots indicate rot, while mold or discoloration may be signs of fungal or bacterial infection.
If you come across any bulbs with obvious signs of damage or disease, it is best to discard them immediately. Removing these potentially harmful bulbs will help protect the rest of the stored bulbs from infection and ensure the overall health of your dahlia collection.
However, sometimes it may be challenging to determine if a bulb is damaged or infected solely by visual inspection. In such cases, you can gently squeeze the bulb. Healthy bulbs should feel firm and have no give. If a bulb feels squishy or soft, it is likely compromised and should be discarded.
It’s important to note that even with proper storage and care, some bulbs may still develop issues over time. Regular inspection and early detection of any problems will help you maintain the health of your dahlia bulbs and prevent potential spread.
Once you have inspected and sorted the bulbs, the next step is to label them for easy identification during storage and future planting.
Step 4: Labeling the Bulbs
Labeling your dahlia bulbs may seem like a simple step, but it is crucial for keeping track of different varieties and ensuring proper planting in the future. By labeling each bulb, you can easily identify them when it comes time to replant or share with other gardening enthusiasts.
Start by gathering some small plant tags or waterproof markers. These can be purchased at garden centers or online. Alternatively, you can make your own labels using durable materials such as plastic or metal.
On each label, write down important information such as the name of the dahlia variety, the color of the blooms, and any other specific details that will help you identify the bulb later on. Be as specific as possible to avoid confusion when replanting.
Attach the label securely to each bulb. You can do this by tying it with a string or using a waterproof adhesive. Make sure the label is visible and won’t easily get detached during storage.
If you have multiple bulbs of the same variety, it’s helpful to group them together and label the container to indicate the specific variety or color. This will make it easier to locate and organize your bulbs when the time comes to plant them again.
Labeling your bulbs is a small but important step that will save you time and effort down the line. With your bulbs properly labeled, you can confidently store them knowing that you’ll be able to identify and enjoy their unique beauty in the future.
Now that you have labeled your dahlia bulbs, it’s time to choose the right storage container to keep them safe during the winter months.
Read more: How To Store Elephant Ear Bulbs For Winter
Step 5: Choosing a Storage Container
Choosing the right storage container for your dahlia bulbs is essential to maintain their health and prevent damage during the winter months. The container you select should provide adequate protection against temperature fluctuations, moisture, and potential pests.
When it comes to storage containers, there are a few options to consider:
- Plastic Containers: Plastic containers with tight-fitting lids are a popular choice for storing dahlia bulbs. Look for containers that are durable, waterproof, and have airtight seals. This will help maintain a stable environment for the bulbs and minimize the risk of moisture buildup.
- Cardboard Boxes: If you prefer using cardboard boxes, make sure they are clean, dry, and in good condition. Line the inside of the box with plastic or aluminum foil to provide an extra layer of protection and prevent moisture from seeping in.
- Metal Containers: Metal containers, such as tin or aluminum boxes, can also be used for storing dahlia bulbs. These containers offer good insulation and protection against moisture. However, ensure that the container is rust-resistant and doesn’t have any sharp edges that can damage the bulbs.
Regardless of the container type you choose, make sure it is large enough to accommodate all your dahlia bulbs without overcrowding them. The bulbs should have enough space to breathe and minimize the chances of rot or mold development.
Prioritize using clean containers that have been thoroughly washed and sanitized to prevent any potential contaminants. Avoid using containers that previously stored chemicals or other substances that may harm the bulbs.
Remember, the goal is to provide a secure and stable environment for your dahlia bulbs, so choose a storage container that meets these criteria. After selecting the right container, you can proceed to the next step: preparing the storage medium.
After digging up dahlia bulbs in the fall, clean off excess soil and let them dry for a few days. Store in a cool, dry place in peat moss or vermiculite to prevent rot. Check periodically for any signs of mold or rot.
Step 6: Preparing the Storage Medium
Preparing the storage medium for your dahlia bulbs is crucial to creating a suitable environment that will promote their longevity and ensure their well-being during the winter season. The storage medium serves as a protective layer around the bulbs, helping to maintain moisture levels and protect them from extreme temperatures.
One commonly used storage medium for dahlia bulbs is dry peat moss or vermiculite. These materials provide insulation, retain moisture, and prevent the bulbs from drying out or freezing. They also help to prevent the growth of mold or rot.
To prepare the storage medium:
- Start by moistening the peat moss or vermiculite with water. It should be damp but not soaking wet. This will ensure that the bulbs have a suitable level of moisture during storage without being excessively damp.
- In a clean container, layer a thin bed of the moistened peat moss or vermiculite.
- Place the dahlia bulbs on top of the medium, making sure they are not touching each other. This will prevent any potential spread of disease or damage if one bulb becomes infected.
- Once all the bulbs are in place, cover them gently with more of the storage medium. Ensure that each bulb is completely surrounded by the peat moss or vermiculite, leaving no gaps.
- Continue layering the bulbs and storage medium until all the bulbs are properly covered.
It’s important to note that the storage medium should provide enough protection without overwhelming the bulbs. You want to create a balanced environment that allows for proper air circulation and moisture control.
Additionally, make sure the storage medium is evenly distributed throughout the container to maintain a stable environment. This allows for consistent moisture levels and ensures that no bulbs are left exposed or vulnerable.
Now that you have prepared the storage medium, it’s time to place the dahlia bulbs in the container for winter storage.
Step 7: Storing Dahlia Bulbs in the Container
Now that you have prepared the storage medium, it’s time to carefully place your dahlia bulbs in the container for winter storage. Properly arranging the bulbs in the container will help prevent any damage and ensure they stay in good condition until it’s time to replant them in the spring.
Here’s how to store your dahlia bulbs in the container:
- Place a layer of the prepared storage medium at the bottom of the container. This will provide a cushioning layer and help maintain moisture levels.
- Arrange the dahlia bulbs on top of the storage medium, making sure they are positioned upright and not touching each other. Be gentle when handling the bulbs to avoid bruising or causing damage.
- If you have multiple layers of bulbs, separate each layer with additional storage medium to prevent them from pressing against each other.
- Continue layering the bulbs and storage medium until all the bulbs are securely in place. Fill the container up to a few inches below the rim, leaving some space for air circulation.
- Once all the bulbs are arranged, cover them with a final layer of the storage medium to ensure they are fully surrounded and protected.
It’s important to avoid overcrowding the container, as this can lead to moisture buildup and increased risk of mold or rot. Providing enough space for air circulation will contribute to the overall health of the bulbs during storage.
As you arrange the bulbs, take a moment to double-check the labels to ensure they are clearly visible. This will save you time and effort when it comes time to replant the dahlia bulbs in the spring.
Once the bulbs are securely stored in the container, it’s time to find an appropriate location to store them for the winter months.
Step 8: Placing the Container in a Cool, Dark Location
After you have stored the dahlia bulbs in the container, it’s crucial to find the right location for their winter storage. Creating the optimal environment for the bulbs during this period is key to their survival and successful growth in the following spring.
When selecting a storage location, keep the following factors in mind:
- Temperature: Dahlia bulbs need to be stored in a cool environment to prevent them from rotting or sprouting prematurely. Aim for a temperature range of 40-50°F (4-10°C). Avoid storing the bulbs in areas that are prone to extreme temperature fluctuations, such as near heaters or drafts.
- Light: Dahlia bulbs should be stored in a dark location, as exposure to light can stimulate growth. Look for a spot that is shielded from natural or artificial light sources, such as a basement or closet. Covering the container with a dark cloth or bag can further block out any potential light.
- Humidity: It’s important to maintain a moderate level of humidity in the storage environment, as excessive dryness can cause the bulbs to shrivel and overly moist conditions can lead to rot. Avoid areas that are excessively dry or prone to high humidity levels.
With these factors in mind, consider the following options for storing your dahlia bulbs:
- Basement: If you have a basement that meets the requirements of coolness, darkness, and moderate humidity, it can be an ideal location for storing your dahlia bulbs.
- Closet: A dark and cool closet can also serve as a suitable storage space for your bulbs. Ensure that the closet remains dry and well-ventilated to prevent the buildup of moisture.
- Garage: If your garage maintains a consistent and cool temperature during the winter months, it can be a convenient storage location. However, make sure to protect the bulbs from potential temperature fluctuations and moisture.
Once you have identified the appropriate location, place the container of dahlia bulbs in the chosen spot. Make sure the storage environment remains consistent throughout the winter season. Avoid moving the container once it is in place, as unnecessary handling can disturb the bulbs.
Now that your dahlia bulbs are safely stored, it’s important to periodically check on them during the winter months.
Read more: How To Store Caladium Bulbs Over Winter
Step 9: Checking on the Bulbs Periodically
While your dahlia bulbs are in winter storage, it’s essential to check on them periodically to ensure they are in good condition and to address any potential issues promptly. Regular inspections will help you catch and resolve any problems early on, increasing the chances of successful growth and blooming in the next growing season.
Here are some key points to consider when checking on your stored dahlia bulbs:
- Moisture Levels: Check the moisture levels in the storage medium. The bulbs should feel slightly moist but not wet. If the storage medium feels dry, you can lightly mist it with water to add some moisture. On the other hand, if it feels excessively wet, you may need to adjust the ventilation or drainage to prevent rot.
- Rot or Decay: Inspect the bulbs for any signs of rot, decay, or mold. If you notice any soft or dark areas on the bulbs, immediately remove and discard them to prevent the spread of disease. Ensure good air circulation and proper moisture control to minimize the risk of rot.
- Pests: Check for any signs of pests, such as insects or rodents, that may have found their way into the storage container. These pests can cause damage to the bulbs, so it’s important to address any infestations promptly. Consider using organic pest control methods if necessary.
- Labeling: Verify that the labels on the bulbs are still intact and readable. Over time, labels can become faded or detached. Reattach or rewrite labels as needed to ensure you can identify each bulb correctly.
- Temperature and Light: Monitor the storage environment to ensure that the temperature remains within the recommended range. Avoid exposing the bulbs to excessive heat or light, as this can lead to premature sprouting. Adjust the storage location if necessary to maintain optimal conditions.
By regularly checking on your stored dahlia bulbs and addressing any issues that arise, you can ensure their health and maximize their chances of thriving when you replant them in the spring.
With the winter months passing, it will soon be time to replant your stored dahlia bulbs and enjoy their beautiful blooms once again.
Step 10: Replanting Dahlia Bulbs in Spring
As the winter months come to an end and the weather begins to warm up, it’s time to prepare for the exciting process of replanting your stored dahlia bulbs. By following a few simple steps, you can ensure a successful transition from winter storage to a thriving dahlia garden in the spring.
Here’s how to replant your dahlia bulbs:
- Timing: Wait until the last frost has passed and the soil has warmed up before replanting your dahlia bulbs. This is typically in the early to mid-spring, depending on your location and climate.
- Site Selection: Choose a location in your garden that receives full sun or partial shade. The spot should have well-drained soil to prevent waterlogged conditions that can lead to bulb rot.
- Soil Preparation: Prepare the soil by loosening it with a garden fork or tiller. Remove any weeds, rocks, or debris from the planting area. Consider adding organic matter, such as compost or well-rotted manure, to improve soil fertility and drainage.
- Planting Depth: Dig a hole that is deep enough to accommodate the bulb. The general rule of thumb is to plant the bulb at a depth equal to 2-3 times its size. This ensures proper root development and moisture access.
- Planting: Place the dahlia bulb in the hole with the sprout facing upwards. Gently cover the bulb with soil, ensuring that the top of the bulb is just slightly below the soil level. Firmly press the soil around the bulb without compacting it too tightly.
- Spacing: Leave adequate spacing between each planted dahlia bulb, typically around 12-18 inches apart. This allows for proper airflow and prevents overcrowding as the plants grow.
- Watering: Give the newly planted bulbs a thorough watering to settle the soil and promote root establishment. Afterward, maintain regular watering to keep the soil moist but not waterlogged. Dahlia plants generally require about 1-2 inches of water per week.
- Mulching: Apply a layer of organic mulch, such as straw or wood chips, around the base of the dahlia plants. Mulching helps conserve soil moisture, suppresses weed growth, and regulates soil temperature.
- Care and Maintenance: Throughout the growing season, provide proper care for your dahlia plants. This includes regular watering, fertilizing, and supporting the plants with stakes or cages as they grow taller. Remove any dead or fading blooms to encourage continuous flowering.
- Enjoy the Blooms: With proper care and maintenance, your replanted dahlia bulbs should produce stunning blooms throughout the summer and into the fall. Enjoy the beauty of your dahlia garden and share the joy with others.
By following these replanting steps and providing the necessary care, you can witness the beauty and magnificence of your dahlia bulbs as they thrive in the new growing season.
Congratulations! You have completed the process of storing and replanting your dahlia bulbs. Enjoy the rewards of your efforts and the vibrant blooms that these stunning flowers will bring to your garden.
Conclusion
Congratulations on successfully learning and executing the process of storing dahlia bulbs for the winter season! By following these steps, you have taken the necessary precautions to protect your bulbs and ensure their healthy growth in the upcoming spring. Properly digging up the bulbs, cleaning and inspecting them, and storing them in a suitable container with the right storage medium are critical to their survival.
Remember to periodically check on your stored bulbs during the winter months, maintaining optimal conditions of temperature, darkness, and moisture. By diligently monitoring their well-being, you can address any issues promptly and increase the chances of successful growth in the next growing season.
In the spring, when the frost has passed and the weather warms up, it’s time to replant your dahlia bulbs. Enjoy the process of selecting an ideal planting site, preparing the soil, and placing the bulbs at the appropriate depth. With proper care, regular watering, and proper maintenance, your replanted dahlia bulbs will reward you with their stunning blooms throughout the growing season.
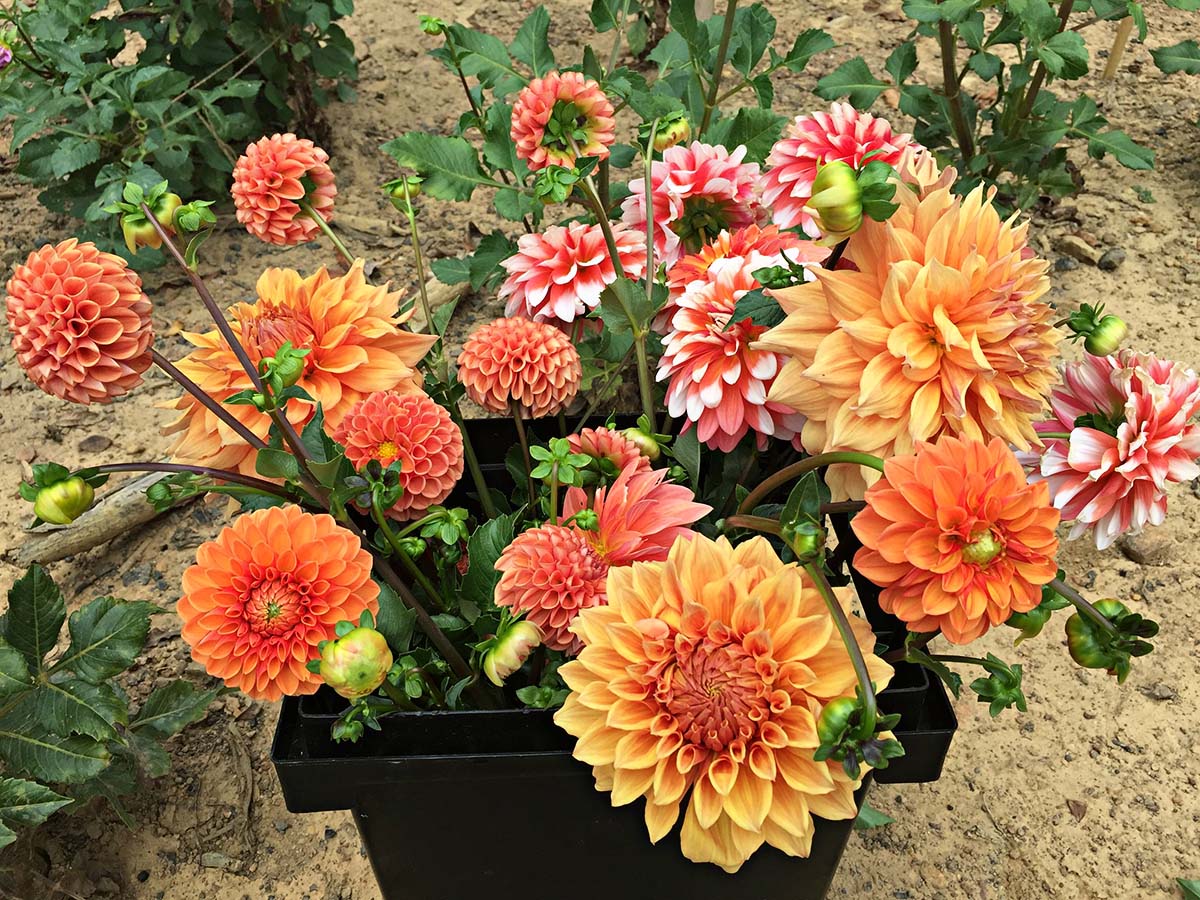
Storing and replanting dahlia bulbs not only allows you to preserve and propagate these beautiful flowers but also allows you to share their splendor with others. Whether you choose to showcase them in your own garden or gift them to fellow gardening enthusiasts, the vibrancy and variety of dahlia blooms are sure to captivate anyone who lays eyes on them.
Thank you for joining us on this comprehensive journey of how to store dahlia bulbs. We hope this guide has provided you with valuable insights and practical tips to ensure the success and longevity of your dahlia collection. Enjoy the rewards of your hard work and the breathtaking beauty that dahlia bulbs bring to your garden!
Frequently Asked Questions about How To Store Dahlia Bulbs For The Winter
Was this page helpful?
At Storables.com, we guarantee accurate and reliable information. Our content, validated by Expert Board Contributors, is crafted following stringent Editorial Policies. We're committed to providing you with well-researched, expert-backed insights for all your informational needs.


0 thoughts on “How To Store Dahlia Bulbs For The Winter”