
Articles
How To Store Dehydrated Apples
Modified: August 24, 2024
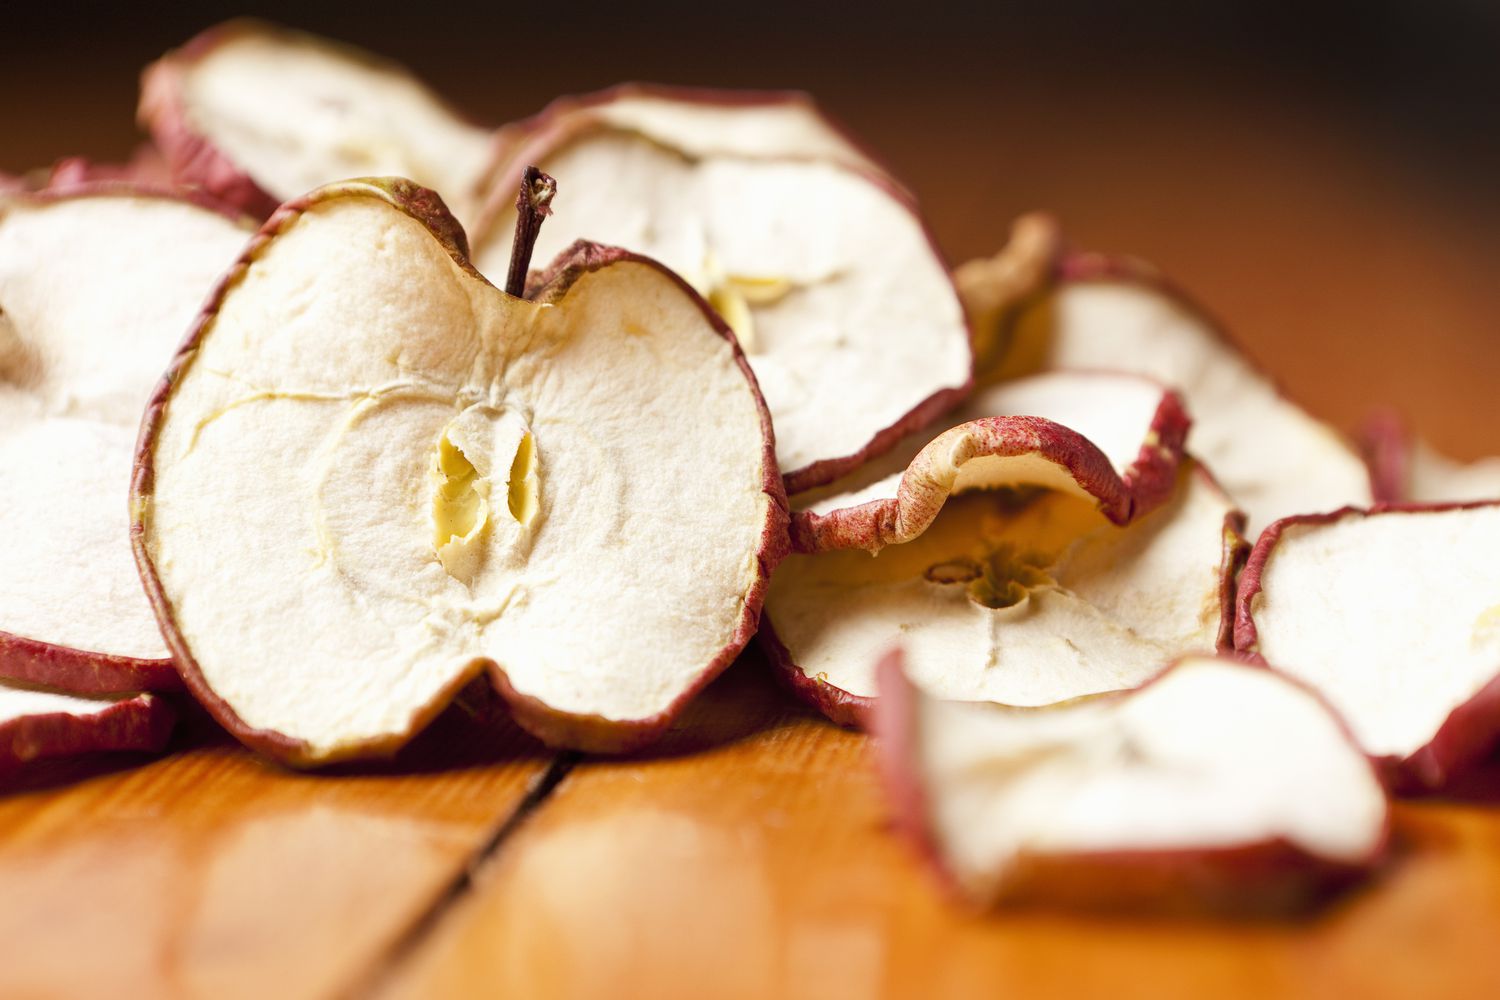
Learn the best techniques for storing dehydrated apples in this informative article. Discover tips on proper storage methods to preserve their freshness and flavor for longer.
(Many of the links in this article redirect to a specific reviewed product. Your purchase of these products through affiliate links helps to generate commission for Storables.com, at no extra cost. Learn more)
Introduction
Welcome to our comprehensive guide on storing dehydrated apples! If you’ve recently invested in a food dehydrator or simply have an abundance of apples on hand, dehydrating them is a fantastic way to preserve their flavor and nutritional value for an extended period of time. Dehydrated apples make for a convenient and healthy snack, adding a burst of sweetness to your day.
In this article, we will explore the benefits of dehydrated apples, provide step-by-step instructions on how to prepare apples for dehydration, discuss different methods for dehydrating apples, and offer tips and tricks on proper storage techniques. By the end of this guide, you’ll have all the knowledge you need to successfully store your dehydrated apples and enjoy them for months to come.
So, let’s dive in and discover the wonderful world of dehydrated apples!
Key Takeaways:
- Dehydrated apples offer extended shelf life, convenience, and retained nutritional value. Proper preparation, dehydration, and storage techniques ensure long-lasting freshness and delicious flavor for a variety of culinary applications.
- Rehydrating dehydrated apples is a simple process that restores their natural sweetness and juiciness. Whether enjoyed as a snack or incorporated into recipes, rehydrated apples provide versatile and flavorful options for consumption.
Read more: How To Make Apple Chips In A Dehydrator
Benefits of Dehydrated Apples
Dehydrated apples offer a multitude of benefits, both in terms of taste and nutrition. Here are some of the key advantages of incorporating dehydrated apples into your diet:
1. Longer Shelf Life
One of the primary benefits of dehydrating apples is the extended shelf life it provides. By removing the moisture from the fruit, you inhibit the growth of bacteria and mold, allowing the apples to stay fresh for months or even years when stored properly.
2. Convenient Snack
Dehydrated apples make for a quick and convenient snack. They are lightweight, portable, and don’t require refrigeration, making them an excellent choice for on-the-go snacking or packing in lunchboxes.
3. Nutritional Value
Dehydrated apples retain most of their nutritional value despite the dehydration process. They are a great source of dietary fiber, vitamins A and C, and antioxidants. Incorporating dehydrated apples into your diet can help boost your immune system and support overall health.
4. Versatile Ingredient
Dehydrated apples can be used in a variety of culinary applications. They can be rehydrated for use in baking recipes, added to oatmeal or cereal for extra flavor and texture, blended into smoothies or granola bars, or enjoyed on their own as a tasty snack.
5. Reduced Waste
By dehydrating apples, you can reduce food waste. If you have a surplus of apples that are starting to get overly ripe, dehydrating them is a great way to salvage them and prevent them from ending up in the compost bin.
With their long shelf life, convenience, and versatile nature, dehydrated apples are an excellent addition to any pantry. Now that we’ve explored the benefits, let’s move on to the next section and learn how to prepare apples for dehydration.
How to Prepare Apples for Dehydration
Before diving into the process of dehydrating apples, it’s important to properly prepare them to ensure optimal results. Follow these steps to prepare your apples for dehydration:
1. Choose Appropriate Apples
When selecting apples for dehydration, choose firm and ripe ones. Avoid using apples that are overly soft or bruised, as they may not dehydrate evenly or have the best flavor.
2. Wash and Peel
Start by washing the apples thoroughly under running water to remove any dirt or residue. If desired, you can choose to peel the apples. While the peel contains additional nutrients and fiber, some people prefer the texture and appearance of peeled apples in their dehydrated form.
3. Remove the Core
Using a corer or a sharp knife, remove the core and seeds from the apples. You can do this by cutting the apple in halves or quarters and then cutting out the center. This step is essential as the apple core won’t dehydrate properly and can affect the overall quality of the dehydrated apples.
4. Slice the Apples
Once the apples are peeled and cored, slice them into uniform thickness. Aim for slices that are around ¼ to ⅜ inch thick. Uniform thickness ensures even drying and prevents some slices from becoming overly dry or others from retaining too much moisture.
5. Treat the Apple Slices
To prevent browning, you can treat the apple slices with a solution of lemon juice and water. Mix one part lemon juice with three parts water and soak the apple slices in the mixture for a few minutes. The citric acid in the lemon juice helps to preserve the color of the apples.
6. Drain and Pat Dry
After treating the apple slices, drain them from the lemon juice solution and pat them dry with a clean paper towel. Removing excess moisture will help in the dehydration process and prevent the apples from sticking together.
With the apples properly prepared, it’s time to move on to the various methods of dehydrating them. The next section will explore these methods in detail, so you can choose the one that suits you best.
Methods for Dehydrating Apples
Once you have prepared your apples, there are several methods you can use to dehydrate them. Each method offers a slightly different approach and outcome, so choose the one that best fits your needs.
1. Oven Drying
If you don’t have a food dehydrator, you can use your oven to dehydrate apples. Preheat your oven to its lowest temperature, usually around 140°F (60°C). Place the apple slices on a baking sheet lined with parchment paper and leave the oven door slightly open to allow moisture to escape. Bake for several hours, checking periodically for desired doneness.
2. Food Dehydrator
A food dehydrator is an excellent tool for dehydrating apples. Follow the manufacturer’s instructions for your specific dehydrator model. Generally, spread the apple slices evenly on the dehydrator trays, leaving space for air circulation. Set the temperature to around 135°F (57°C) and let the dehydrator do its job for several hours, rotating the trays occasionally for even drying.
3. Sun Drying
If you live in a hot and dry climate, you can take advantage of the sun’s natural heat and energy. Place the apple slices on a clean and dry surface, such as a wire mesh or food-grade drying rack. Ensure the apples are protected from pests and dust. Leave them in a sunny and well-ventilated area for several days, flipping them occasionally until they are fully dehydrated.
4. Microwave Drying
If you’re short on time and want to expedite the process, you can use a microwave to dehydrate apples. Place the apple slices on a microwave-safe plate or microwave-safe drying rack. Microwave on low power in short bursts, checking and flipping the slices every minute or so until they are dry and crispy. Be careful not to overcook them, as they can become chewy instead of crispy.
Regardless of the method you choose, keep in mind that the time needed for dehydration may vary depending on the thickness of the slices, humidity levels, and the method itself. It’s important to check the apples periodically to prevent under or over-drying.
Now that you know different methods for dehydrating apples, let’s explore the next crucial step: properly storing your dehydrated apples for long-lasting freshness.
Storing Dehydrated Apples
Proper storage is essential for maintaining the flavor, texture, and nutritional value of your dehydrated apples. Follow these guidelines to ensure your dehydrated apples stay fresh and delicious for an extended period:
Choosing the Right Storage Containers
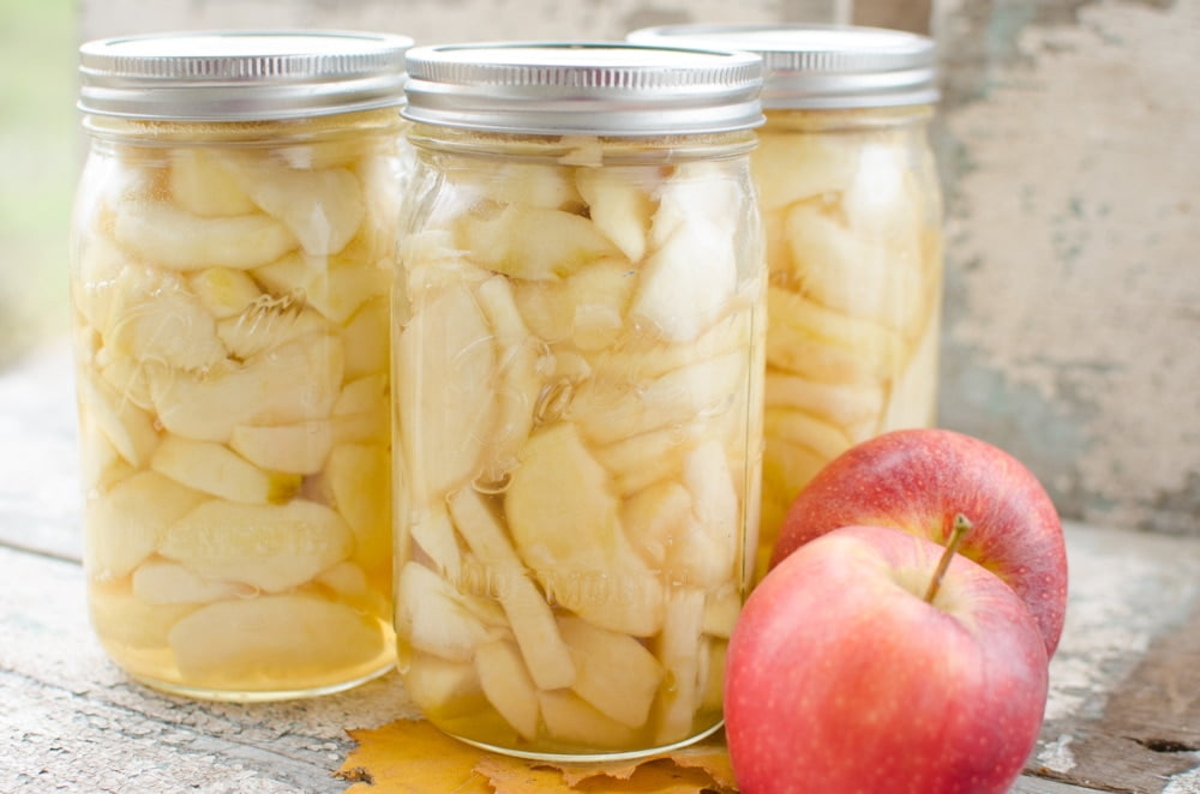
When selecting storage containers for your dehydrated apples, opt for airtight containers that provide protection from moisture, light, and pests. Glass jars with tight-fitting lids, food-grade plastic containers, or resealable bags are all suitable options. Make sure the containers are clean and dry before filling them with your dehydrated apples.
Tips for Properly Storing Dehydrated Apples
- Remove as much air as possible from the containers to prevent oxidation and moisture absorption.
- Label the containers with the date of dehydration to keep track of freshness.
- Store the containers in a cool, dry, and dark place. Avoid exposing them to direct sunlight or high humidity, as this can cause the apples to lose their crispness and flavor.
- Ensure the storage area is free from strong odors, as dehydrated apples can absorb odors easily.
Checking for Moisture Content
Even though you have dehydrated your apples, there might still be residual moisture present. To check for moisture content, place a few apple slices in a closed container for 24 hours. If you notice any condensation, the apples need further drying. Return them to the dehydrator or oven for a little longer until no moisture is present.
Long-term Storage Options
If you want to store your dehydrated apples for an extended period, consider vacuum-sealing them using a vacuum sealer or oxygen absorbers. This method removes air from the packaging, significantly extending the shelf life of your apples.
By following these storing tips, your dehydrated apples can last for six months to a year, depending on the storage conditions and how well they were dehydrated.
Now that you’ve learned how to prepare, dehydrate, and store your apples, let’s explore how to rehydrate them when you’re ready to enjoy their delicious flavor again.
Read more: How Long To Dry Apple Slices In A Dehydrator
Choosing the Right Storage Containers
The choice of storage containers for your dehydrated apples can greatly impact their shelf life and quality. Here are some tips to help you choose the right containers for storing your dehydrated apples:
Airtight Containers
Opt for containers that are airtight and provide a proper seal. Airtight containers prevent air and moisture from entering, which helps maintain the freshness and crispness of the dehydrated apples. This is crucial in preventing the apples from reabsorbing moisture and becoming chewy or spoiled.
Glass Jars
Glass jars with tight-fitting lids are an excellent choice for storing dehydrated apples. They are non-reactive and won’t leach any harmful chemicals into the apples. Glass jars also offer the advantage of being transparent, allowing you to easily see the contents without opening the container.
Food-Grade Plastic Containers
If you prefer plastic containers, make sure to choose food-grade, BPA-free containers. Look for containers with secure lids that create a tight seal. These containers should be sturdy enough to withstand pressure, preventing breakage or deformation during storage.
Resealable Bags
Resealable bags with airtight closures are a convenient option for storing dehydrated apples. Choose high-quality, food-grade bags that are thick enough to protect the apples from air and moisture. Make sure to press out as much air as possible before sealing to maximize freshness.
Container Sizes
Consider the volume of dehydrated apples you plan to store and choose containers that are appropriately sized. Using smaller containers for individual or smaller portions can help minimize air exposure each time you open the containers. This helps preserve the quality of the remaining apples.
Labeling and Organization
Don’t forget to label your containers with the date of dehydration. This allows you to keep track of freshness and consume the oldest batches first. Additionally, consider organizing your storage area so that you can easily locate your dehydrated apples when needed.
By choosing the right storage containers, you can protect the flavor, texture, and nutritional value of your dehydrated apples for an extended period. Now that we’ve covered storing dehydrated apples, let’s move on to some tips for properly storing them to ensure long-lasting quality.
Store dehydrated apples in an airtight container or resealable bag in a cool, dark place to maintain their freshness and flavor. Adding a desiccant packet can help absorb any remaining moisture.
Tips for Properly Storing Dehydrated Apples
Proper storage techniques are crucial to maintain the freshness, taste, and quality of your dehydrated apples. Here are some important tips to follow when storing your dehydrated apples:
1. Remove Excess Air
Air exposure can lead to moisture absorption and oxidation, which can affect the texture and flavor of the apples. When filling your storage containers, try to remove as much air as possible before sealing. This can be done by pressing the apples down and ensuring a tight seal on the container.
2. Seal the Storage Containers Properly
Ensure that your storage containers have airtight seals to prevent air, moisture, and pests from entering. Check the lids or closures of your containers to make sure they are in good condition and not damaged. Replace any damaged or worn-out seals or lids to maintain the integrity of the storage environment.
3. Store in a Cool, Dry, and Dark Place
Dehydrated apples should be stored in a cool, dry, and dark place. Exposing them to light and heat can cause the apples to lose their flavor, become stale, or spoil more quickly. Choose a storage area away from direct sunlight, and monitor the temperature and humidity levels to ensure they remain within optimal range for long-term storage.
4. Avoid Strong Odors
Dehydrated apples have a tendency to absorb odors. Keep them away from strong-smelling substances or environments, as they can easily take on unwanted flavors. Store the apples separately from strong-smelling spices, herbs, or other aromatic foods to preserve their natural taste and aroma.
5. Rotate Your Stock
To ensure you consume your dehydrated apples before they lose their peak quality, establish a system of rotation. Use the “first in, first out” principle by placing the newly dehydrated apples behind the older ones. This way, you’ll always reach for the oldest batch first and minimize the risk of any apples going to waste.
6. Regularly Check for Moisture or Mold
Periodically check your stored dehydrated apples for any signs of moisture, mold, or spoilage. Even with proper preparation and storage, there is still a small chance of moisture retention. If you notice any signs of moisture or mold, discard the affected apples to prevent contamination of the rest.
7. Consider Vacuum Sealing
If you have the means to vacuum seal your dehydrated apples, it can greatly extend their shelf life. Vacuum sealing removes excess air, reducing the risk of oxidation and moisture absorption. This method is particularly effective for long-term storage or if you plan to keep your dehydrated apples for an extended period.
By following these tips, you can ensure that your dehydrated apples remain fresh, flavorful, and ready to enjoy for months or even years to come. Now that you know how to properly store your dehydrated apples, let’s move on to checking their moisture content to guarantee optimal storage conditions.
Checking for Moisture Content
After dehydrating your apples and storing them, it’s important to periodically check for any remaining moisture. Even with thorough drying, there is always a possibility of some residual moisture, which can lead to spoilage and decreased shelf life. Here’s how you can check the moisture content of your dehydrated apples:
1. Select a Sample
Choose a small sample of dehydrated apple slices from your stored batch. Try to select slices from different areas of your container to get an accurate representation of the moisture content.
2. Place the Sample in a Closed Container
Transfer the selected apple slices to a small, sealed container. Ideally, use a clear container with an airtight lid to make it easier to monitor any changes in moisture levels.
3. Observe for Condensation
Leave the container undisturbed in a cool, dry place for around 24 hours. After the specified time has passed, carefully open the container and inspect the apple slices for any signs of condensation. Condensation indicates the presence of moisture and should be addressed promptly.
4. Further Drying, If Necessary
If you notice any condensation or signs of moisture on the apple slices, they need further drying to remove the excess moisture. Remove the affected slices from the container and return them to the dehydrator or oven for additional drying time. Monitor the slices closely to prevent over-drying.
5. Re-test the Moisture Content
After re-drying the apple slices, repeat the process by returning them to the sealed container for another 24 hours. Check for condensation once more. If there is no condensation present after this second test, it indicates that the moisture content has been successfully reduced, and the apples are ready for storage.
Regularly checking the moisture content of your dehydrated apples ensures that they are properly dried and free from excess moisture. This step is vital in maintaining their quality and preventing the growth of mold or spoilage. By taking the time to check for moisture, you can confidently enjoy your dehydrated apples knowing they have been properly prepared and stored.
Now that you know how to check the moisture content, let’s move on to explore long-term storage options for your dehydrated apples.
Long-term Storage Options
If you are planning to store your dehydrated apples for an extended period, there are a few long-term storage options to consider. These options help to extend the shelf life of your dehydrated apples and ensure that they remain fresh and flavorful for as long as possible. Here are some effective long-term storage methods:
Vacuum Sealing
Vacuum sealing is a popular method for long-term storage of dehydrated foods. Using a vacuum sealer, remove the air from the storage bags or containers to create an airtight seal. This process prevents oxidation, moisture absorption, and the growth of microorganisms, leading to a longer shelf life. Vacuum-sealed dehydrated apples can last for years when stored in a cool, dark place.
Oxygen Absorbers
Another method to consider is the use of oxygen absorbers. These small packets contain iron oxide, which absorbs the oxygen inside the storage container. Since oxygen can contribute to the deterioration of food quality, removing it helps to maintain the flavor and texture of the dehydrated apples. Place the oxygen absorber inside the container or bag before sealing it tightly to maximize effectiveness.
Freezing
While freezing dehydrated apples is not as common as the other methods, it can still be an option for long-term storage. Place the dehydrated apple slices in an airtight freezer bag or container. Make sure to remove as much air as possible before sealing. Freezing can help preserve the quality of the apples for a longer period, although the texture may become slightly softer upon thawing.
Cold Storage
If you have access to a cool, dark cellar or basement, cold storage can be an effective method. Select a sturdy, airtight container to store the dehydrated apples and place it in the cool storage area. The cool temperature helps slow down the aging process and prolongs the shelf life of the apples.
Regardless of the method you choose, it is essential to ensure that your dehydrated apples are properly dried and stored in airtight containers or bags. This protects them from moisture, air, light, and pests, maintaining their quality over time.
Remember to regularly check your stored dehydrated apples for any signs of spoilage or moisture absorption. Discard any apples that show signs of mold or become rancid.
Now that you have learned about different long-term storage options, let’s move on to explore how to rehydrate your dehydrated apples when you’re ready to enjoy their natural sweetness again.
Read more: How To Store Apple
Rehydrating Dehydrated Apples
Rehydrating your dehydrated apples is a simple process that brings them back to their original texture and juiciness. Whether you want to incorporate them into recipes or enjoy them as a snack, rehydrating can restore the natural sweetness and flavor of your dehydrated apples. Here’s how to rehydrate them:
Option 1: Water Soak
- Place the desired amount of dehydrated apple slices in a bowl or container.
- Cover the slices with warm water. The water should be enough to fully submerge the slices.
- Allow the apples to soak for about 30 minutes to 1 hour, or until they have absorbed enough water to reach the desired texture.
- Once rehydrated, drain any excess water and pat the slices dry with a paper towel if necessary.
Option 2: Liquid Infusion
- If you want to infuse additional flavor into your rehydrated apples, you can use liquids like fruit juice, apple cider, or even tea.
- Place the dehydrated apple slices in a heatproof container.
- Heat the desired liquid in a saucepan until it reaches a gentle simmer.
- Pour the hot liquid over the apple slices, making sure they are fully submerged.
- Cover the container and let the apples soak for about 15-20 minutes, or until they have absorbed the desired amount of liquid.
- Drain any excess liquid and pat the slices dry with a paper towel if needed.
Option 3: Cooking or Baking
If you are using your rehydrated apples in a recipe that requires additional cooking or baking, you can add the dehydrated slices directly to the cooking process. The heat and moisture from the recipe will rehydrate the apples as they cook, resulting in beautifully plumped and tender slices.
Using Rehydrated Apples
Once your dehydrated apples are rehydrated, you can enjoy them in various ways:
- Snack on them as is, straight from the bowl.
- Add them to oatmeal, cereal, or yogurt for natural sweetness and texture.
- Incorporate them into baked goods, such as pies, cakes, muffins, or cookies, for a burst of fruity flavor.
- Blend rehydrated apples into smoothies or sauces for a hint of sweetness.
Rehydrated apples should be stored in the refrigerator and consumed within a few days. If you have any leftovers, make sure to store them in an airtight container to maintain their moisture and prevent spoilage.
Congratulations! You now have the knowledge to rehydrate your dehydrated apples and enjoy them in a variety of delicious ways. Before we conclude, let’s recap the important points we covered in this comprehensive guide.
Conclusion
Congratulations! You have reached the end of our comprehensive guide on storing dehydrated apples. By following the steps and tips outlined in this article, you now have the knowledge to successfully prepare, dehydrate, and store your apples for long-lasting freshness and flavor.
We explored the benefits of dehydrated apples, noting their longer shelf life, convenience as a snack, and retained nutritional value. We then learned how to prepare apples for dehydration by washing, peeling, coring, slicing, and treating them to prevent browning.
Next, we discussed the different methods for dehydrating apples, including oven drying, using a food dehydrator, sun drying, and microwave drying. Each method offers its own advantages and allows you to choose the one that fits your preferences and available resources.
We emphasized the importance of choosing the right storage containers, such as airtight glass jars, food-grade plastic containers, or resealable bags, to protect your dehydrated apples from moisture, light, and pests. Additionally, we provided valuable tips on properly storing your dehydrated apples, checking for moisture content, and exploring long-term storage options.
Furthermore, we covered the simple process of rehydrating dehydrated apples, including water soaking, liquid infusion, or incorporating them directly into cooked or baked dishes. These rehydration methods allow you to bring back the natural texture and juiciness of the apples, making them versatile for a variety of recipes and snacking options.
Lastly, we would like to remind you to regularly check your stored dehydrated apples for signs of moisture, mold, or spoilage. Proper storage and monitoring ensure the quality and safety of your dehydrated apples over time.
We hope this guide has provided you with valuable insights and practical knowledge on how to store dehydrated apples. Remember, with the right preparation, storage, and rehydration techniques, you can enjoy the delightful taste and nutritional benefits of apples throughout the year.
Thank you for joining us on this journey into the world of dehydrated apples. Happy storing and rehydrating!
Frequently Asked Questions about How To Store Dehydrated Apples
Was this page helpful?
At Storables.com, we guarantee accurate and reliable information. Our content, validated by Expert Board Contributors, is crafted following stringent Editorial Policies. We're committed to providing you with well-researched, expert-backed insights for all your informational needs.





0 thoughts on “How To Store Dehydrated Apples”