Articles
How To Store Homemade Broth
Modified: February 24, 2024
Learn how to store homemade broth for long-lasting freshness and flavor. Read our informative articles for tips and tricks on proper storage techniques and preservation methods.
(Many of the links in this article redirect to a specific reviewed product. Your purchase of these products through affiliate links helps to generate commission for Storables.com, at no extra cost. Learn more)
Introduction
Welcome to the world of homemade broth! Whether you’re a seasoned home cook or just starting out, making your own broth can elevate your meals to a whole new level of flavor. But what do you do when you have leftover broth that you want to store for future use? In this article, we will explore the different methods of storing homemade broth so that it stays fresh and delicious until you’re ready to use it.
Storing homemade broth is a convenient way to have a flavorful base for soups, stews, sauces, and more readily available in your kitchen. Not only does it save you time and money, but it also allows you to control the ingredients and flavors of your broth. No more relying on store-bought options with artificial additives or excessive salt content.
Choosing the right method and containers for storing your homemade broth is crucial to maintaining its quality and extending its shelf life. Improper storage can lead to spoilage or loss of flavor, ultimately rendering your hard work in preparing the broth futile. So let’s dive into the various storage options and explore their pros and cons.
Key Takeaways:
- Store homemade broth in airtight containers, label with date and type, and utilize various methods like refrigeration, freezing, canning, or ice cube trays for long-lasting, flavorful broth that enhances your culinary creations.
- Reduce food waste, save time and money, and customize flavors by storing homemade broth. Properly label, organize, and creatively use stored broth to elevate your cooking with convenience and delicious homemade flavors.
Read more: How To Store Homemade Vegetable Broth
Why Store Homemade Broth?
Homemade broth is a labor of love that requires time, effort, and quality ingredients. So why should you bother with storing it instead of just making it fresh every time you need it? Well, there are several compelling reasons to store your homemade broth.
First and foremost, storing homemade broth allows you to make large batches and have it readily available whenever you need it. This saves you time in the long run, especially if you often use broth as a base for soups, stews, or sauces. Instead of starting from scratch every time, you can simply thaw or reheat the stored broth and build upon its rich flavors.
Another benefit of storing homemade broth is that it helps reduce food waste. Sometimes, we end up making more broth than we actually need for a particular recipe. By storing the leftovers, we can prevent it from going to waste and put it to good use later on. It’s a sustainable practice that aligns with the principles of reducing food waste and being mindful of our ecological footprint.
Moreover, by storing homemade broth, you have control over the ingredients and flavors. Store-bought broth often contains artificial additives, excessive sodium, and preservatives that can compromise the taste and quality of your dishes. When you make your own broth, you can customize it to your liking, adjust the seasoning, and experiment with different flavors to suit your recipes.
Lastly, storing homemade broth allows you to save money. Buying pre-packaged broth can be costly, especially if you regularly incorporate it into your cooking. Making your own broth is not only more cost-effective, but it also allows you to use ingredients that you already have on hand, utilizing every bit of flavor and nutrients.
Now that we understand the benefits of storing homemade broth, let’s explore the different methods of storage so that you can preserve its freshness and flavor for longer periods.
Choosing the Right Containers
When it comes to storing homemade broth, choosing the right containers is key. The containers you use should be able to preserve the flavor, prevent freezer burn, and maintain the integrity of the broth until you’re ready to use it. Here are a few options to consider:
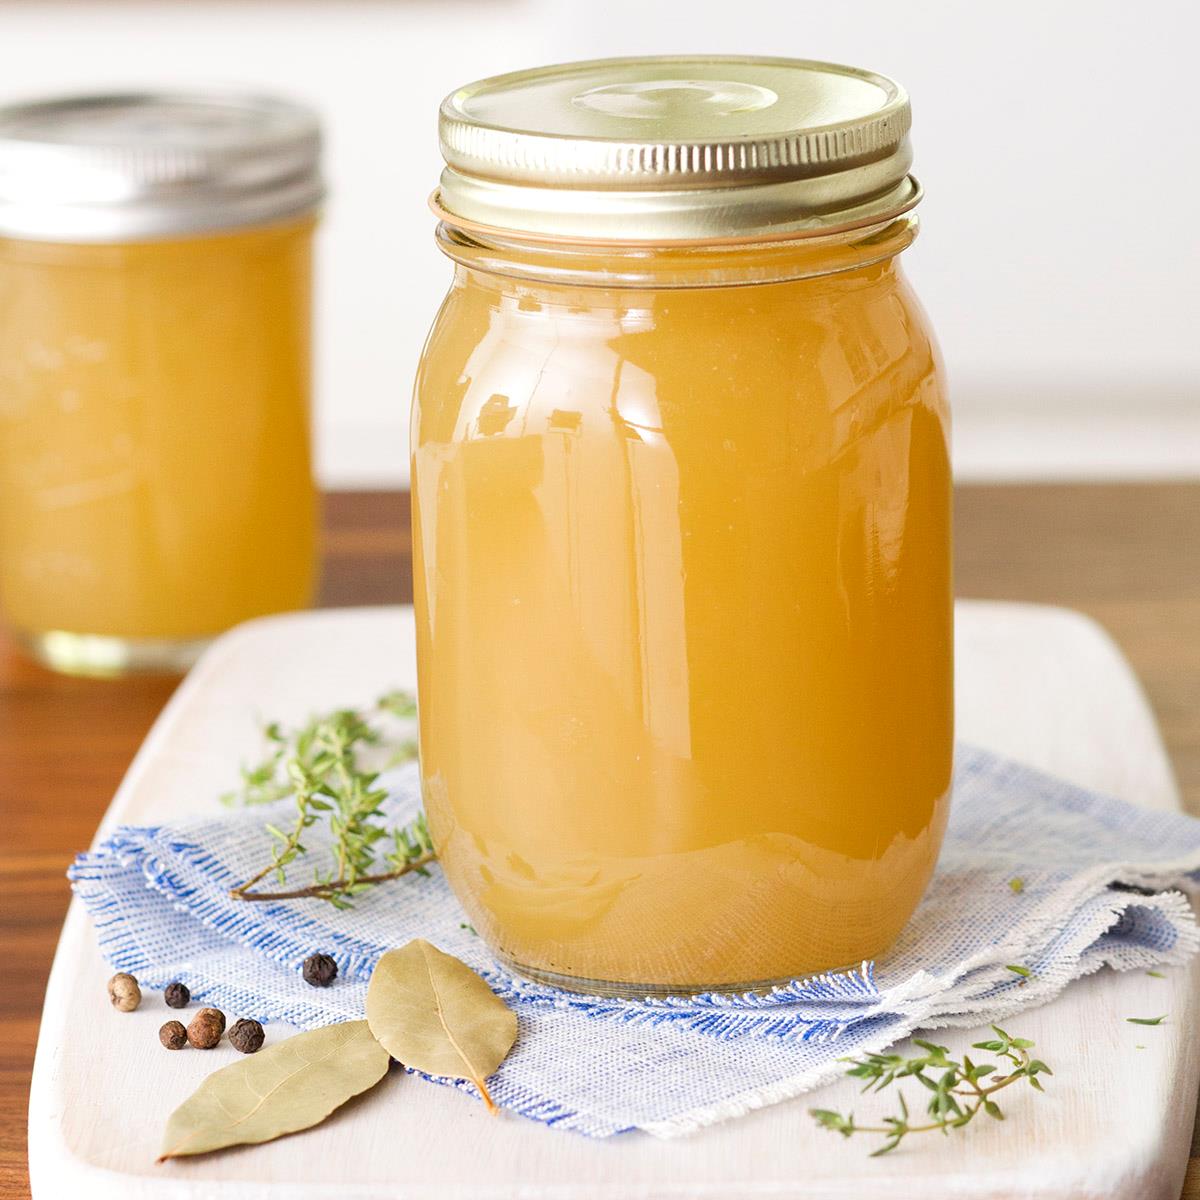
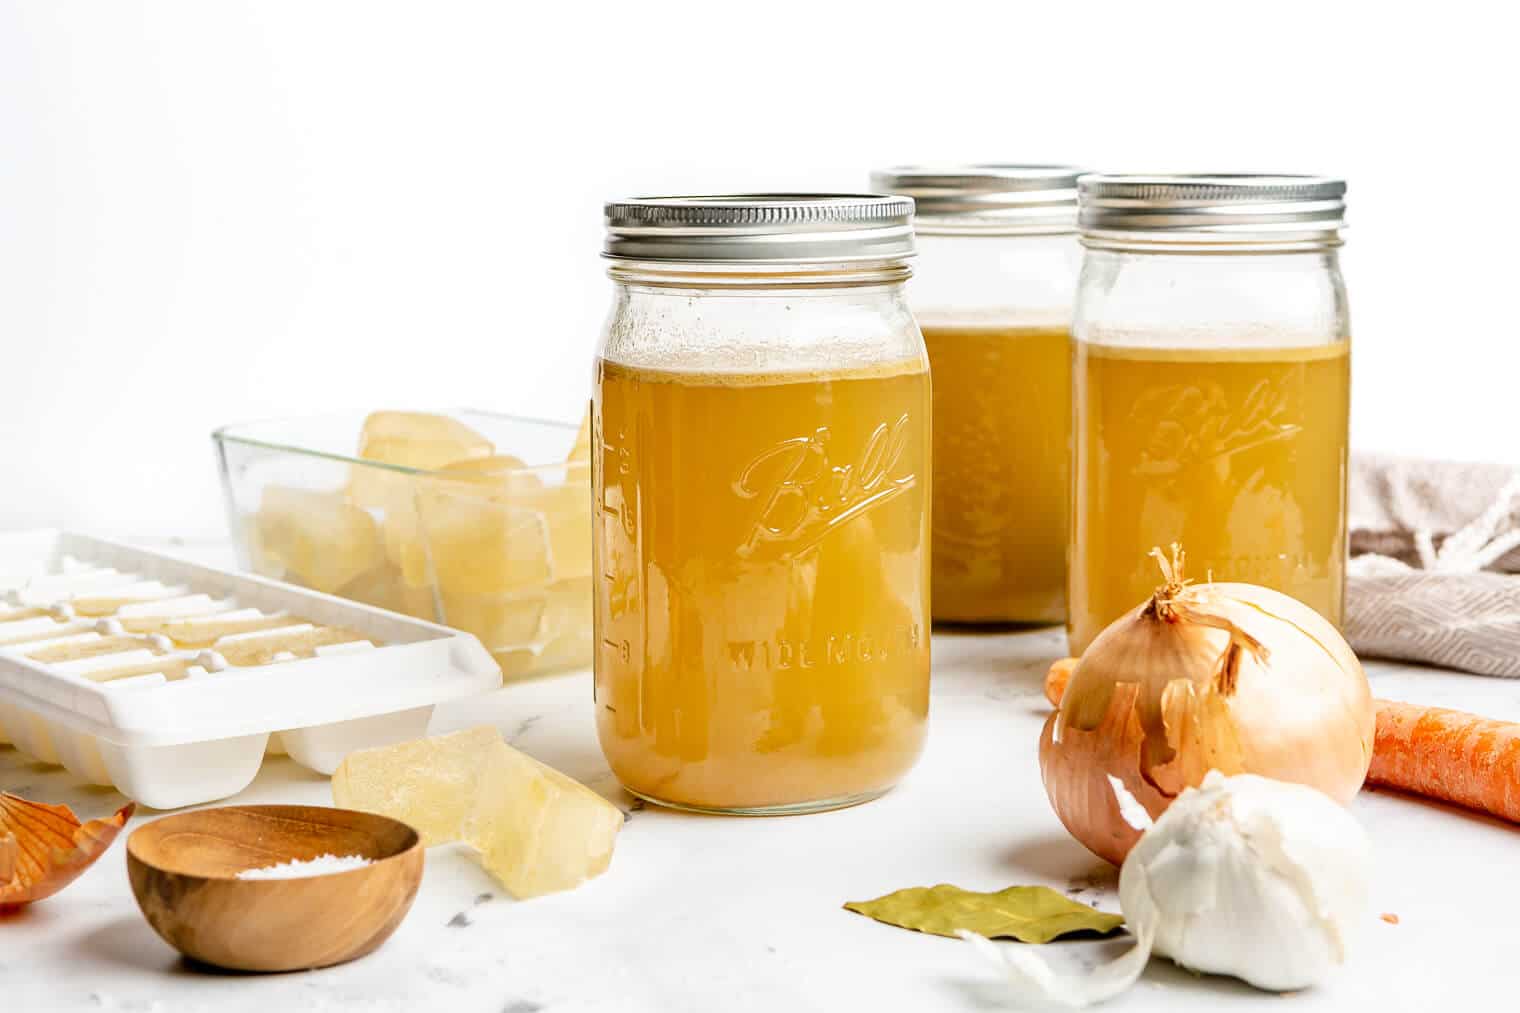
- Glass Jars: Glass jars are a popular choice for storing homemade broth. They are non-reactive and do not leach any harmful substances into the broth. Make sure to choose jars with airtight lids to maintain freshness. Mason jars or recycled glass jars with tight-fitting lids work well.
- Plastic Freezer Bags: Freezer bags are convenient for storing broth, especially if you want to freeze it in a flat, space-saving manner. Look for heavy-duty freezer bags that are leak-proof and BPA-free. It’s a good idea to double-bag the broth to prevent any potential leakage.
- Plastic Containers: If you prefer to use plastic containers, opt for BPA-free, food-grade containers that have a tight seal. Make sure they are suitable for freezing and reheating. Plastic containers with snap-on or screw-on lids are ideal for storing broth.
- Silicone Freezer Trays: Silicone freezer trays are a great option if you prefer portioning your broth into smaller servings. These trays allow you to freeze the broth in individual portions, making it easy to thaw only what you need. Look for trays that are made of food-grade silicone and are freezer-safe.
When choosing containers, consider the size based on your needs. It’s often helpful to portion the broth into smaller containers or ice cube trays, so you can thaw or use only a portion at a time without wasting any.
Regardless of the container you choose, make sure it is clean and completely dry before storing the broth. Moisture can lead to freezer burn or freezer odors, affecting the quality of the broth. Labeling the containers with the date and contents is also crucial for easy identification later on.
Now that we’ve looked at container options, let’s explore how to prepare homemade broth for storage.
Preparing Homemade Broth for Storage
Before you store homemade broth, there are a few key steps to take to ensure its quality and longevity. These steps will help preserve the flavor and prevent any potential issues that may arise during storage. Here’s how to prepare your homemade broth for storage:
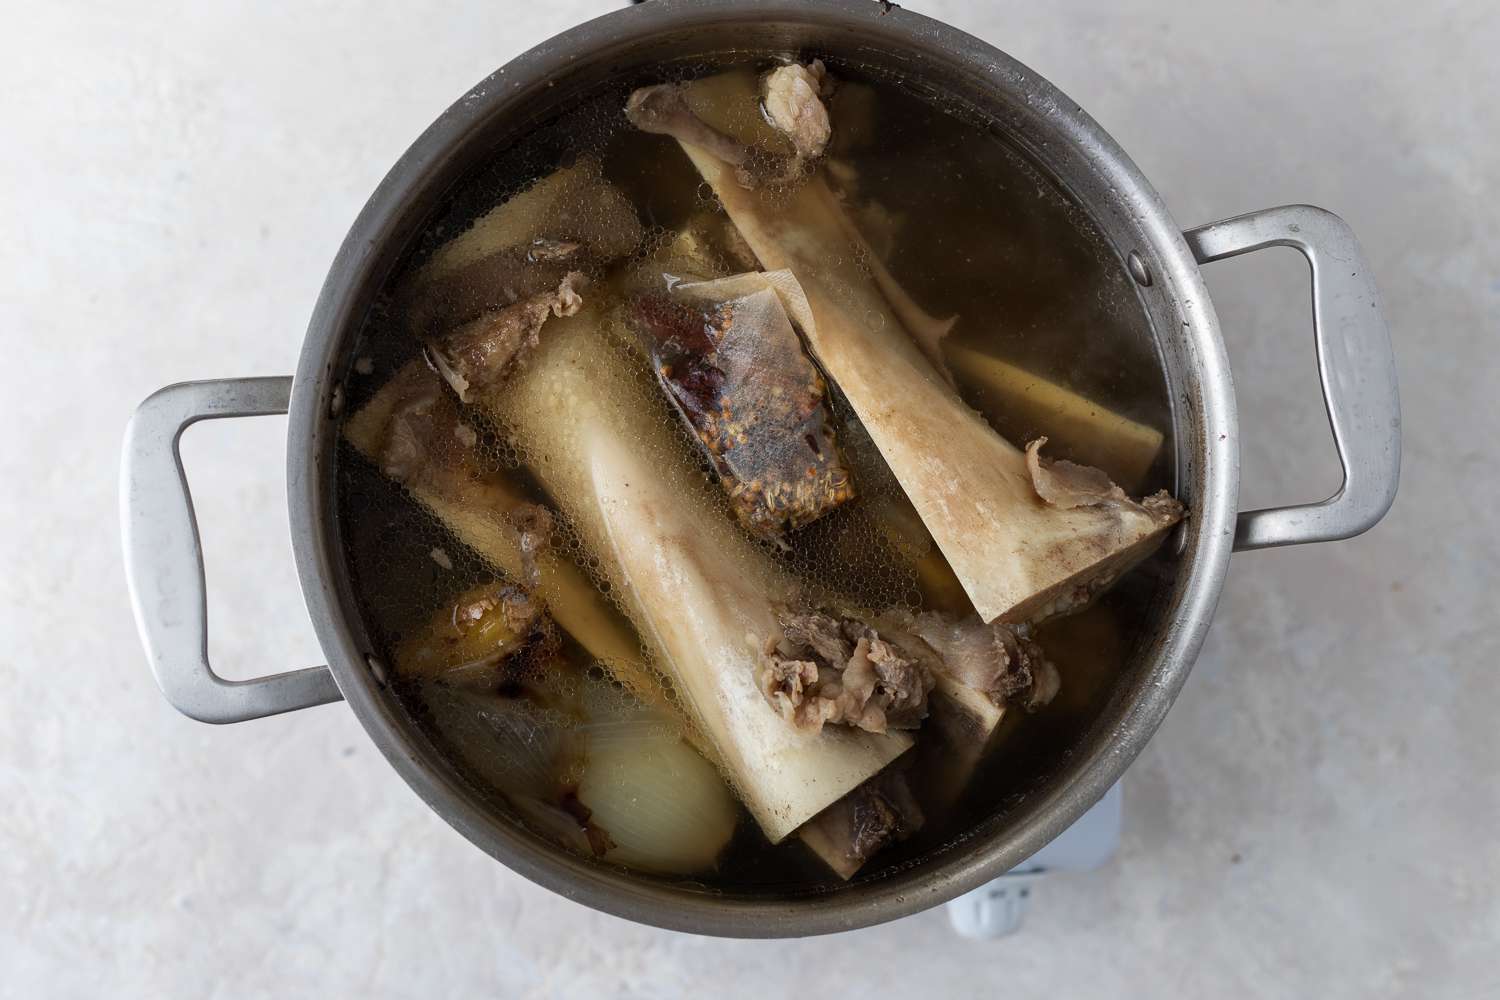
1. Strain and Cool: Once the broth is done simmering and has infused with all the flavors, strain it to remove any solids, such as bones, herbs, or vegetables. This step helps achieve a clear and smooth broth. Allow the broth to cool to room temperature before transferring it to storage containers.
2. Degrease: If your broth has a layer of fat on top, you may want to skim it off. This step is optional, as fat can add flavor to your dishes. However, removing excess fat can prevent the broth from becoming greasy when reheated.
3. Portion: Decide on the portion sizes that suit your needs. You can either store the broth in larger containers or divide it into smaller portions that can be easily heated and used in recipes. Portioning the broth allows you to thaw only what you need without wasting any.
4. Cool Completely: It’s crucial to cool the broth completely before storing it in the refrigerator or freezer. Placing hot broth in the refrigerator or freezer can raise the temperature and potentially spoil other chilled or frozen items. Allow the broth to cool at room temperature for 1-2 hours before transferring it to the desired storage containers.
5. Label and Date: To keep track of the broth’s freshness, always label each container with the date of preparation. Additionally, if you have different types of broth (e.g., chicken, beef, vegetable), be sure to indicate the type on the label as well. This will make it easier to identify and use the right broth when needed.
By following these simple steps, you can ensure that your homemade broth is well-prepared for storage. In the next sections, we will explore the different methods of storing broth, including refrigeration, freezing, canning, and using ice cube trays.
Refrigerating Homemade Broth
If you plan to use your homemade broth within a few days, refrigeration is a suitable storage method. Refrigerating broth keeps it readily accessible for immediate use while maintaining its freshness. Here are the steps to properly store homemade broth in the refrigerator:
1. Cool Completely: Before refrigerating, make sure your homemade broth has cooled completely at room temperature. Placing hot broth in the refrigerator can increase the temperature of the fridge and potentially affect the quality and safety of other perishable items.
2. Transfer to Airtight Containers: Once the broth has cooled, transfer it to clean, airtight containers. Glass jars or plastic containers with tight-fitting lids work well for this purpose. It’s best to use shallow containers to facilitate faster cooling and to ensure the broth is evenly chilled.
3. Label and Date: Don’t forget to label each container with the date of preparation. This will help you keep track of its freshness and ensure you use it within the recommended time frame.
4. Refrigerate Properly: Place the containers of broth on a shelf in your refrigerator, away from potential cross-contamination with other raw or cooked foods. It’s best to store it on a lower shelf where the temperature is colder and more consistent.
Homemade broth stored in the refrigerator is typically good for about 3-4 days. However, always rely on your senses to determine if it is safe to consume. If you notice any off odors, color changes, or signs of spoilage, discard the broth.
Refrigerated broth is perfect for quick and easy use in recipes throughout the week. It can be added to soups, stews, gravies, or used as a flavorful cooking liquid for grains or vegetables.
If you’re not planning to use the broth within the recommended time frame, it’s best to freeze or can it for longer-term storage. In the following sections, we will explore these methods in detail.
Read more: How To Store Homemade Chicken Broth
Freezing Homemade Broth
If you want to store homemade broth for an extended period, freezing is an excellent method that allows you to preserve its freshness and flavors. Freezing is a convenient way to keep your broth ready for future use. Here’s how to freeze homemade broth:
1. Cool Completely: Allow your homemade broth to cool completely at room temperature. It’s important not to put hot broth directly into the freezer, as it can raise the temperature and affect the quality of other frozen items.
2. Choose Freezer-Safe Containers: Select freezer-safe containers that are made of glass, plastic, or silicone. Ensure that the containers are airtight and able to withstand freezing temperatures without cracking or breaking. Consider using individual portion-sized containers or ice cube trays for easy thawing and portioning.
3. Fill and Leave Space for Expansion: Fill each container with the homemade broth, leaving an inch of space at the top. Liquids expand when frozen, so leaving room for expansion prevents the containers from cracking or bursting.
4. Seal and Label: Securely seal the containers to prevent any air or moisture from entering and causing freezer burn. Label each container with the date of preparation and indicate the type of broth if you have multiple varieties. This will help you keep track of its freshness and easily identify it when needed.
5. Freezing: Place the properly sealed containers of broth in the freezer. It’s recommended to place them on a flat surface, such as a baking sheet, for the initial freezing process. Once the broth is frozen solid, you can rearrange them to maximize space in your freezer.
Homemade broth can be stored in the freezer for up to 4-6 months. However, for the best quality and flavor, it’s recommended to use it within 3 months. Remember to use your senses to assess the quality of the broth before using it. If you notice any signs of freezer burn or off flavors, it’s best to discard the broth.
To thaw frozen broth, transfer the desired amount to the refrigerator and let it thaw overnight. If you need the broth more quickly, place the sealed container in a bowl of cold water or use the defrost function on your microwave. Once thawed, the broth can be used in various recipes just like freshly made broth.
Freezing homemade broth is a convenient method that allows you to store larger quantities and have it readily available for soups, stews, sauces, and more. However, if you prefer an alternative to freezing, you can consider canning the broth, which we’ll explore in the next section.
Store homemade broth in airtight containers or freezer bags to prevent freezer burn. Label with the date and use within 3-4 months for best quality.
Canning Homemade Broth
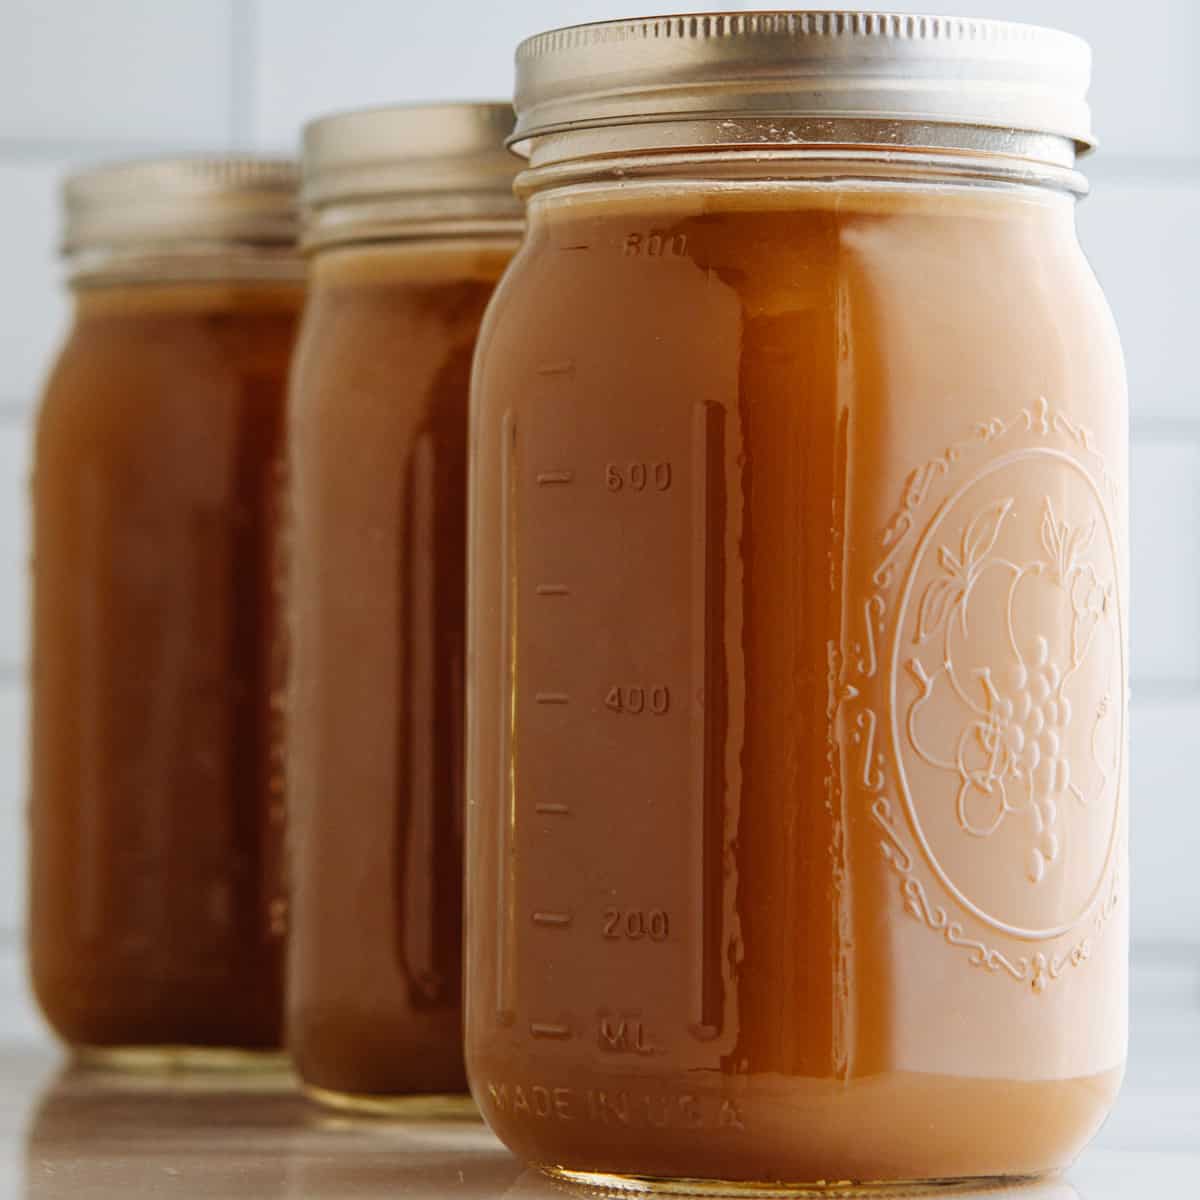
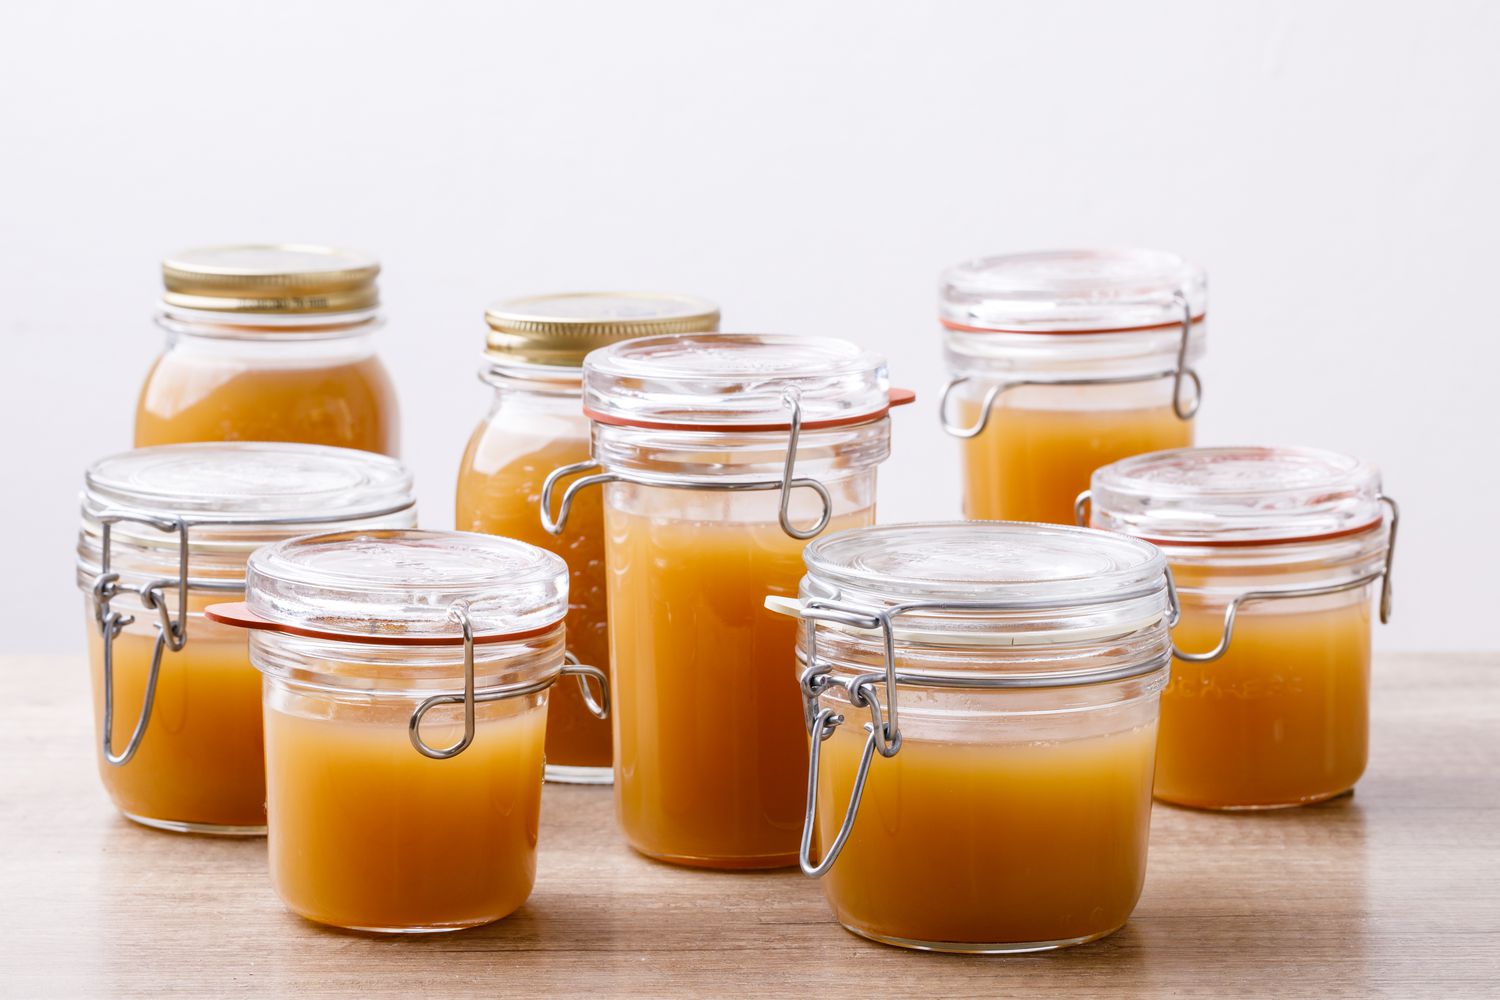
If you’re looking for a long-term storage solution for your homemade broth that doesn’t require freezer space, canning is a great option. Canning allows you to preserve the broth in jars at room temperature, ensuring its safety and shelf life. Here’s how to can homemade broth:
1. Prepare Your Equipment: To begin the canning process, gather all the necessary equipment, including canning jars, lids, bands, a canning pot, a jar lifter, a ladle, and a canning funnel. Ensure that all your equipment is clean and in good working condition.
2. Sterilize Your Jars and Lids: Before filling your jars with the homemade broth, sterilize them by either running them through a dishwasher cycle or placing them in a large pot of boiling water for 10 minutes. Also, place your lids in a small bowl of hot water to soften the sealing compound.
3. Fill the Jars: Ladle the cooled homemade broth into the sterilized jars, leaving about 1 inch of headspace. This headspace is necessary for expansion during the canning process.
4. Remove Air Bubbles and Seal: After filling the jars, use a non-metallic utensil, such as a chopstick, to remove any air bubbles by gently stirring the broth. Wipe the rims of the jars with a clean, damp cloth to ensure a proper seal. Place the lids on the jars and secure them with the bands, tightening just until fingertip tight.
5. Process in a Canning Pot: Place the filled and sealed jars in a canning pot filled with enough water to cover the jars by at least 1 inch. Bring the water to a boil and process the jars according to the recommended processing time for your altitude and the type of broth being canned. Typically, processing times range between 10-25 minutes.
6. Remove and Cool: After the processing time is complete, carefully remove the jars from the canning pot using a jar lifter and place them on a clean towel or cooling rack. Allow the jars to cool undisturbed for 12-24 hours. During this time, you may hear the lids “pop,” indicating a successful seal.
7. Check Seals and Store: Once the jars have cooled, check the seals by pressing down on the center of each lid. If the lid does not move or make a popping sound, the jar is properly sealed. Label each jar with the date and the type of broth. Store the sealed jars in a cool, dark place, such as a pantry or cupboard.
Canned homemade broth can have a shelf life of up to one year, although it’s recommended to use it within 6-8 months for the best quality. It’s important to inspect each jar before use. If you notice any signs of spoilage, such as a bulging lid, off odors, or mold, discard the broth immediately.
Canning your homemade broth provides a space-efficient storage solution that doesn’t require freezer space. It allows you to keep a supply of flavorful broth on hand for your favorite recipes whenever you need it. However, if canning doesn’t suit your needs, storing broth in ice cube trays can be a convenient alternative, which we’ll explore next.
Storing Broth in Ice Cube Trays
If you prefer a more versatile and portion-controlled method of storing homemade broth, using ice cube trays is an excellent option. Storing broth in ice cube trays allows you to easily thaw and measure out small amounts of broth as needed. Here’s how to store homemade broth in ice cube trays:
1. Choose Suitable Ice Cube Trays: Look for ice cube trays made of food-grade silicone or plastic. Silicone trays are recommended as they are flexible, making it easier to remove the frozen broth cubes. Ensure that the ice cube trays are clean and free from any odors or residue.
2. Cool the Broth: Allow your homemade broth to cool completely at room temperature. It’s important not to pour hot broth directly into the ice cube trays, as it can cause warping or damage to the trays.
3. Pour Broth into the Trays: Carefully pour the cooled broth into the individual compartments of the ice cube tray. Leave a small gap at the top to allow for expansion during freezing. Be cautious not to overfill the compartments to avoid spillage when moving the trays to the freezer.
4. Freeze the Broth: Place the filled ice cube trays in the freezer and let the broth freeze completely. This may take a few hours or overnight depending on the temperature of your freezer.
5. Remove and Store Cubes: Once the broth cubes are frozen solid, remove the ice cube trays from the freezer. Pop out the cubes by gently twisting the trays or using a silicone mold release spray, if necessary. Transfer the broth cubes to freezer-safe resealable bags or containers for long-term storage.
6. Label and Date: Don’t forget to label the storage bags or containers with the date and type of broth for easy identification. This will help you keep track of its freshness and ensure you use the broth within a reasonable timeframe.
Storing broth in ice cube trays allows for quick and convenient thawing. When you need to use broth in a recipe, simply take out the desired number of cubes and thaw them in a microwave-safe bowl or a small saucepan on the stovetop. The broth cubes melt quickly, providing you with the exact amount of broth needed for your recipe.
This method is particularly useful when you need small quantities of broth for sauces, gravies, or when sautéing vegetables. It also allows you to easily control the portion sizes of broth, preventing waste or having to thaw more than necessary.
Now that you have learned about different methods of storing homemade broth, it’s important to consider a few tips for labeling and organizing your stored broth. We’ll dive into this in the next section.
Tips for Labeling and Organizing Stored Broth
When it comes to storing homemade broth, proper labeling and organization are key to maintaining order in your kitchen and ensuring that you can easily locate and use the broth when needed. Here are some helpful tips for labeling and organizing your stored broth:
1. Label with Essential Information: When labeling your stored broth, include important information such as the type of broth (e.g., chicken, beef, vegetable), the date of preparation, and any additional seasonings or ingredients used. This information will help you identify the specific broth you need and keep track of its freshness.
2. Use Waterproof Labels: Opt for waterproof labels or write directly on the containers with a permanent marker. This ensures that the labels won’t smudge or become illegible over time, especially when exposed to moisture from thawing or condensation.
3. Organize by Type and Date: If you have multiple types of broth stored, consider grouping them together and organizing them by type. This makes it easier to locate the specific broth you need for a particular recipe. Additionally, arrange the broth containers in chronological order based on the date of preparation to help you prioritize the use of older broth.
4. Utilize Storage Bins or Trays: To keep your stored broth neat and organized, consider using storage bins or trays in your refrigerator, freezer, or pantry. These containers can help keep the broth containers upright, prevent them from tipping over, and maximize the use of available space.
5. Stack or Store Vertically: Depending on the type of containers you use for storing broth, you can either stack them on top of each other or store them vertically. If using stackable containers, ensure that the lids are securely closed to prevent any leaks or spills. If storing vertically, make sure the containers are stable and won’t topple over.
6. Maintain an Inventory List: Keeping an inventory list of your stored broth can be helpful, especially if you have a large amount or various types of broth. This list can help you keep track of the quantities, types, and dates of the stored broth, making it easier to plan your meals and ensure everything is used within the recommended timeframe.
By following these labeling and organizing tips, you’ll have a well-organized stash of homemade broth that is easily accessible whenever you need it. Utilize these strategies to streamline your cooking process and make the most of your stored broth.
Now that you have learned how to store and organize your homemade broth, let’s explore the process of reheating and using the stored broth in your culinary creations.
Read more: How To Store Homemade Bone Broth
Reheating and Using Stored Broth
Once you’ve stored your homemade broth using one of the aforementioned methods, the next step is reheating and utilizing it in your cooking. Here are some guidelines on how to efficiently reheat and use your stored broth:
1. Thawing Frozen Broth: If you’ve stored your broth in the freezer, you’ll need to thaw it before using it. The easiest way to thaw frozen broth is by transferring the desired amount to a microwave-safe bowl and using the defrost setting or low power level in the microwave. Alternatively, you can thaw the broth in the refrigerator overnight. Avoid thawing at room temperature to mitigate the risk of bacterial growth.
2. Reheating: Whether you’ve stored your broth in the refrigerator or freezer, you’ll need to reheat it before using it in recipes. Pour the thawed or refrigerated broth into a saucepan or stockpot and heat it over medium heat until it reaches a gentle simmer. Stir occasionally to ensure even heating. Be sure not to bring the broth to a rolling boil, as it may alter the flavors and compromise its quality.
3. Adjust Seasonings: Taste the reheated broth and adjust the seasonings as needed. You may find that the stored broth requires a touch of salt, herbs, or spices to enhance the flavors, especially if it has been seasoned conservatively during its initial preparation. Experiment with different seasonings to elevate the taste to your liking.
4. Use as a Base: Homemade broth is a versatile ingredient that can serve as the base for various dishes. It adds depth and richness to soups, stews, and sauces. Use it as a flavorful liquid in cooking grains like rice or quinoa, or in braising vegetables, meats, or poultry. The possibilities are endless, so let your creativity shine.
5. Portion Control: When using stored broth, it’s helpful to consider portion control. If your stored broth is in large containers or ice cube trays, calculate the equivalent amount needed for your recipe and thaw or heat only what is necessary. This prevents waste and allows you to make the most of your homemade broth stash.
6. Combine Different Broths: If you have multiple types of broth stored, consider mixing them to create unique flavor profiles. Combining chicken broth with beef broth, or vegetable broth with mushroom broth, can add depth and complexity to your culinary creations. Feel free to experiment and discover new flavor combinations.
By following these tips, you can confidently reheat and use your stored homemade broth in a variety of recipes. Whether you’re making comforting soups, hearty stews, or flavorful sauces, your homemade broth will add a delicious touch to your dishes.
Now that you’re familiar with the process of reheating and using stored broth, let’s wrap up and summarize the information we’ve covered.
Conclusion
Congratulations! You are now equipped with the knowledge of how to store and utilize your homemade broth effectively. By choosing the right containers, preparing the broth for storage, and using various methods like refrigeration, freezing, canning, or storing in ice cube trays, you can maximize the longevity of your broth while maintaining its freshness and flavor.
Storing homemade broth brings several benefits. It saves you time and money by allowing you to have a ready-to-use base for soups, stews, sauces, and more. It also reduces food waste, as you can store leftover broth instead of letting it go to waste. Additionally, by making your own broth, you have control over the ingredients, flavors, and customization options, ensuring a personalized touch in your cooking. Lastly, storing homemade broth can be a cost-effective alternative to store-bought options that are often packed with additives and excessive sodium.
Remember, when storing your broth, proper labeling and organization play a crucial role. Use waterproof labels to ensure they remain intact, organize by type and date, and utilize storage containers or trays to keep everything tidy and easily accessible. Keeping an inventory list can also help you stay organized and plan your meals effectively.
Whether you choose to reheat and use your stored broth in traditional soups and stews or get creative with it in various other recipes, the possibilities are endless. Adjust the seasonings, experiment with different combinations, and enjoy the delicious homemade flavors.
So, the next time you find yourself with excess homemade broth on hand, don’t let it go to waste. Store it appropriately and savor the convenience and culinary delights it brings to your cooking adventures.
Happy cooking and enjoy your homemade broth!
Frequently Asked Questions about How To Store Homemade Broth
Was this page helpful?
At Storables.com, we guarantee accurate and reliable information. Our content, validated by Expert Board Contributors, is crafted following stringent Editorial Policies. We're committed to providing you with well-researched, expert-backed insights for all your informational needs.


0 thoughts on “How To Store Homemade Broth”