Articles
How To Store Homemade Jam Without Canning
Modified: August 17, 2024
Learn how to store your homemade jam without the need for canning. Read our expert articles on preserving your delicious jam for long-lasting enjoyment.
(Many of the links in this article redirect to a specific reviewed product. Your purchase of these products through affiliate links helps to generate commission for Storables.com, at no extra cost. Learn more)
Introduction
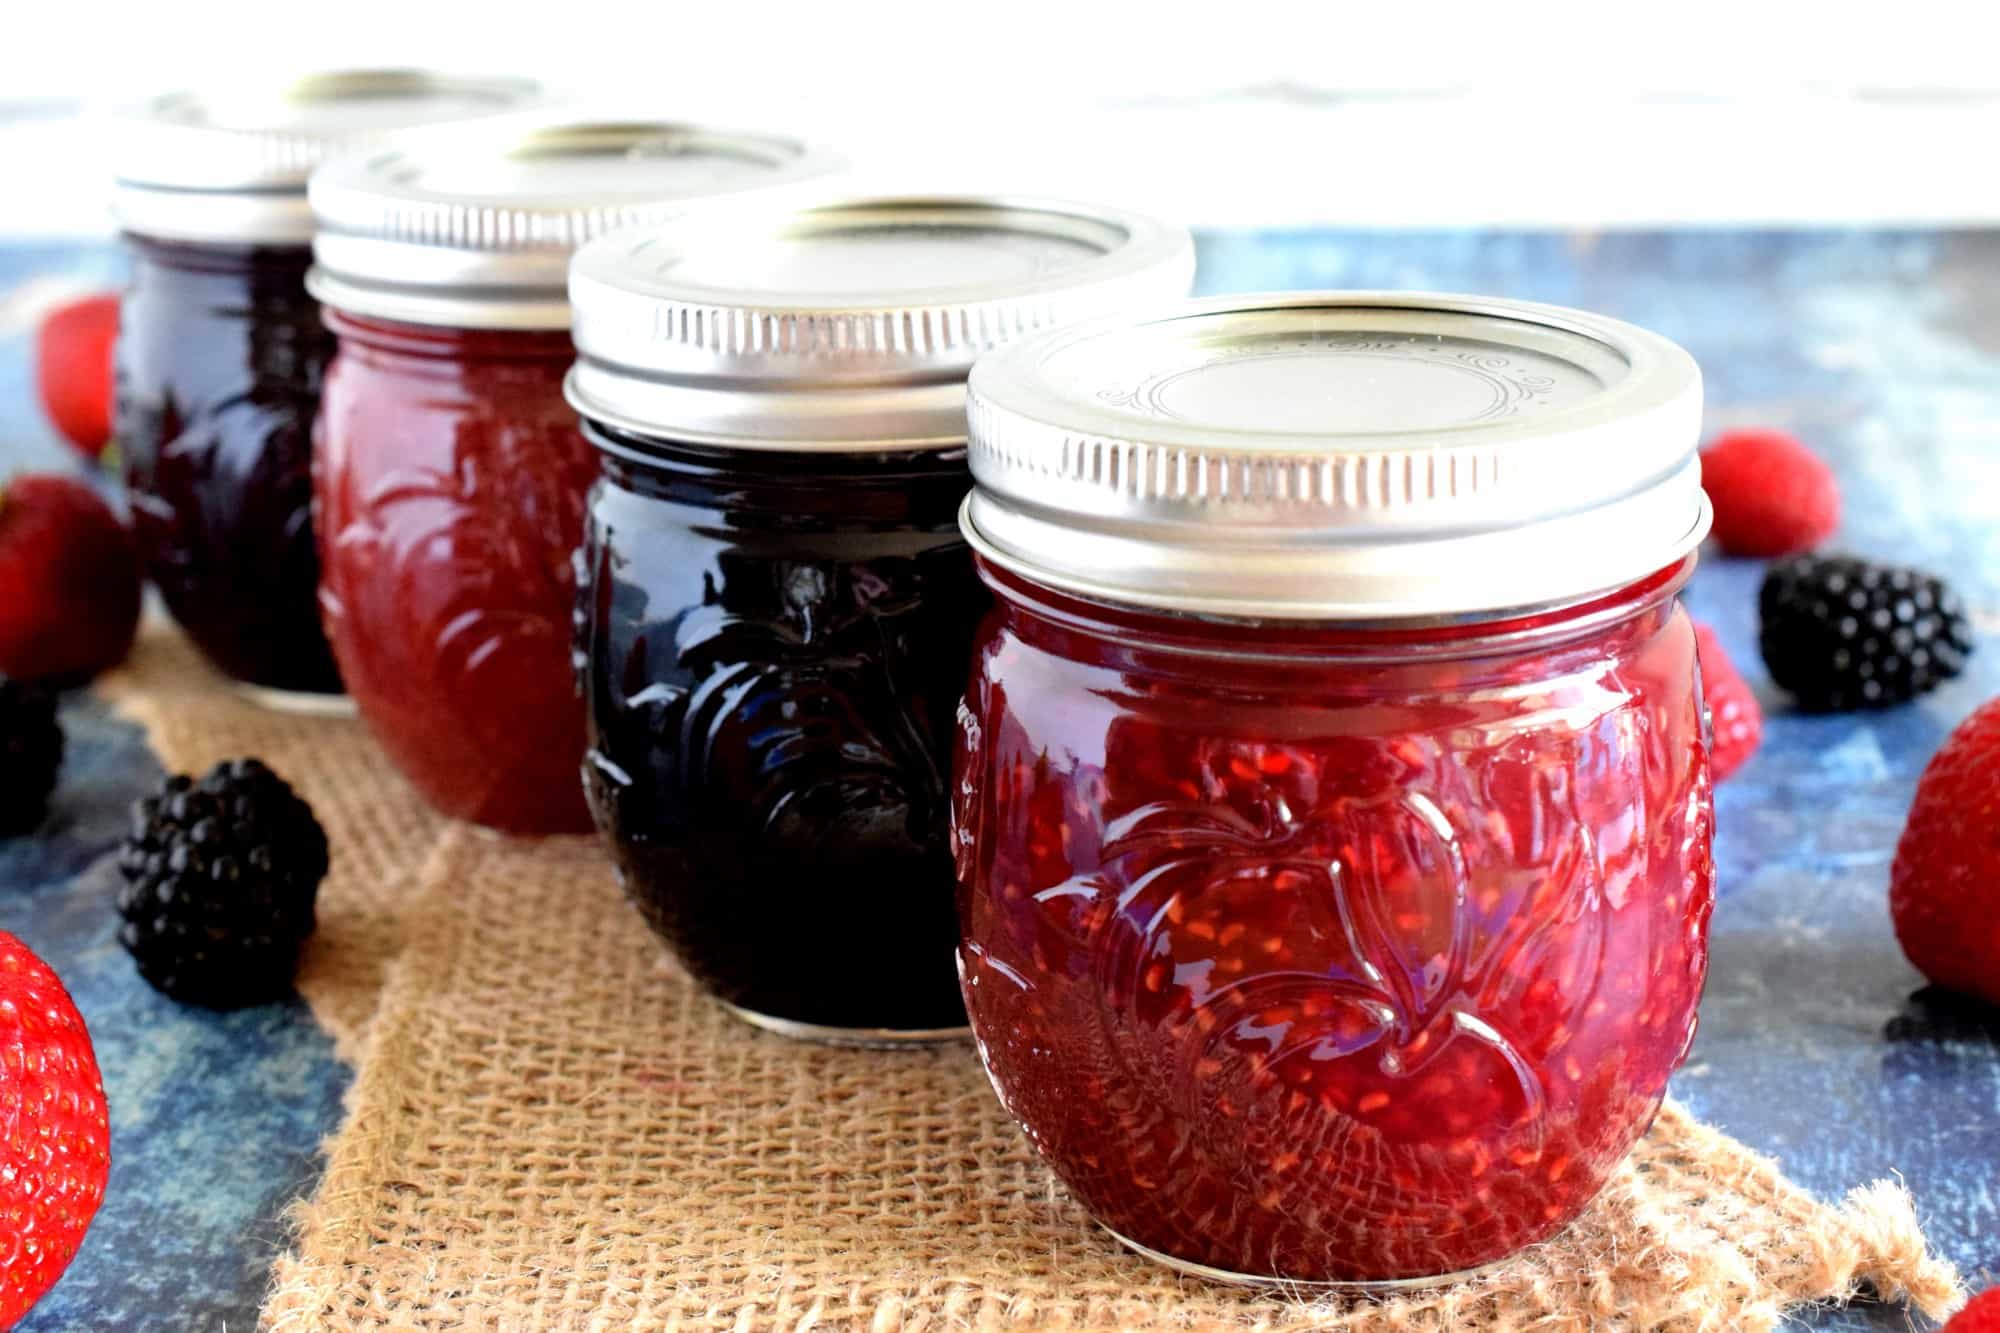
Homemade jams are a delightful way to preserve the flavors of fresh fruits and enjoy them long after their peak season. While traditional canning methods are commonly used to store homemade jam, there are alternative methods that can be just as effective and easier to implement. In this article, we will explore different ways to store homemade jam without the need for canning.
There are several reasons why you may want to store homemade jam without using the traditional canning method. Firstly, canning requires specialized equipment, such as canning jars, seals, and pressure cookers, which may not be readily available or convenient for everyone. Secondly, canning can be time-consuming and requires careful attention to achieve the proper seal and sterilization. Lastly, some people prefer to avoid the high temperatures involved in the canning process, as it can potentially affect the taste and quality of the jam.
Fortunately, there are alternative storage methods that can help you preserve your homemade jam while maintaining its flavor and quality. Whether you prefer to store your jam in the freezer, refrigerator, or in other creative ways, we’ve got you covered. Let’s dive into the various methods to store homemade jam without canning.
Key Takeaways:
- Enjoy the convenience and flexibility of storing homemade jam without canning. From freezer storage to lacto-fermentation, explore various methods to preserve the vibrant flavors of fresh fruits and savor homemade goodness year-round.
- Embrace alternative storage methods to keep homemade jam fresh and flavorful. Whether freezing, refrigerating, vacuum sealing, or preserving in sugar syrup, discover creative ways to extend the shelf life of your jam and enjoy its deliciousness in diverse culinary creations.
Read more: How To Store Canning Lids
Why Store Homemade Jam Without Canning?
While traditional canning methods have their merits, there are several reasons why you might want to explore alternative ways to store your homemade jam:
1. Convenience:
Storing homemade jam without canning is a more convenient option for many people. The traditional canning process requires specific equipment, including jars, lids, and a pressure cooker. Not everyone has access to these items or wants to invest in them. By utilizing alternative storage methods, you can save time and effort while still preserving your delicious homemade jam.
2. Time-saving:
Canning can be a time-consuming process. It involves sterilizing the jars, preparing the fruit, cooking the jam, and then canning and sealing the jars. Alternative storage methods often require less preparation time, allowing you to enjoy your homemade jam sooner.
3. Retaining freshness:
Traditional canning involves high heat processing, which can alter the texture and flavor of the jam. Storing homemade jam without canning allows you to preserve its freshness and maintain its original taste. By using alternative methods, you can capture the vibrant flavors of the fresh fruits used in your jam.
Read more: How To Store Canning Rings
4. Flexibility:
When you store homemade jam without canning, you have more flexibility in terms of batch sizes and flavor combinations. With traditional canning, you typically need to process a large batch of jam at once, which may limit your experimentation with different flavors and fruit combinations. Alternative storage methods allow you to make smaller batches and try out various flavor combinations to suit your preferences.
5. Accessibility:
Canning equipment may not be readily available to everyone. Many people who live in small apartments or have limited kitchen space may not have the necessary equipment or storage space for canning jars. By exploring alternative storage methods, you can still enjoy the benefits of homemade jam without the need for specialized equipment.
Overall, storing homemade jam without canning is a convenient and flexible approach that allows you to preserve the freshness and flavors of your homemade creations. Whether you are short on time, lack canning equipment, or simply want to try new flavor combinations, these alternative storage methods offer a practical solution for enjoying your homemade jam.
Preparation and Safety Tips
When storing homemade jam without canning, it’s important to follow certain preparation and safety tips to ensure the longevity and quality of your preserved jam:
1. Use quality ingredients:
Start with fresh, high-quality fruits for your homemade jam. The flavor and texture of your jam will greatly depend on the quality of the ingredients used. Choose ripe fruits that are free from bruising or blemishes.
Read more: How To Store Bacon Jam
2. Properly clean and sterilize your jars:
Before storing your jam, make sure your jars and lids are clean and sterile. Wash them thoroughly with warm soapy water, rinse well, and then immerse them in boiling water for a few minutes. This process helps eliminate any bacteria or impurities that could affect the shelf life of your jam.
3. Ensure proper sealing:
When using alternative storage methods, such as freezer storage or vacuum sealing, make sure the jars or containers you use have a tight seal. This helps prevent air from entering and preserves the freshness of your jam. Check for any cracks or imperfections in the containers before use.
4. Label and date your jars:
Properly labeling your jars with the type of jam, date of preparation, and any additional notes can help you keep track of your inventory and ensure you consume the jam within a suitable time frame. Use waterproof labels or markers to avoid smudging.
5. Store in the right conditions:
Different storage methods require specific conditions. If you’re freezing your jam, use freezer-safe containers and store them in a freezer set at 0°F (-18°C) or lower. For refrigerator storage, keep your jam in airtight containers and store them at a consistent temperature between 32°F (0°C) and 40°F (4.4°C). Follow the recommended guidelines for vacuum sealing or preserving in sugar syrup if you choose those methods.
Read more: How To Store Empty Canning Jars
6. Follow recommended storage times:
While homemade jam can last for several months when stored properly, it’s important to keep track of the recommended storage times for each method. Freezer storage typically allows for longer preservation, while refrigerator storage may have a shorter shelf life. It’s recommended to consume lacto-fermented jam within a few weeks. Always check for signs of spoilage before consuming.
By following these preparation and safety tips, you can ensure that your homemade jam stays fresh, flavorful, and safe to consume. Enjoy the fruits of your labor long after their peak season, and savor the deliciousness of homemade jam in various creative ways.
Method 1: Freezer Storage
Freezer storage is a simple and effective way to store homemade jam without the need for canning. This method preserves the freshness and flavors of the jam while extending its shelf life. Here’s how you can store your homemade jam in the freezer:
1. Prepare your jam:
Follow your favorite homemade jam recipe and prepare your jam as usual. Cook it to the desired consistency and taste. Remember to stir occasionally to prevent scorching.
2. Cool the jam:
Allow the jam to cool completely before transferring it to freezer-safe containers. This will prevent condensation and ice crystals from forming and affecting the texture of the jam.
Read more: How To Store Jam Once Opened
3. Choose suitable containers:
Opt for containers that are specifically designed for freezer storage. These containers should be airtight and able to withstand freezing temperatures. Glass jars with tight-fitting lids or plastic containers with secure seals work well for this purpose.
4. Fill the containers:
Spoon the cooled jam into the containers, leaving a small amount of headspace at the top to allow for expansion during freezing. Make sure to leave enough room to seal the containers tightly.
5. Label and date:
Label each container with the type of jam and the date of preparation. This will help you keep track of your inventory and ensure that you consume the jam within a suitable time frame.
6. Freezing process:
Place the filled containers in the freezer, making sure they are arranged in a way that allows for air circulation. Avoid overcrowding the freezer to ensure optimal freezing. Leave the jam to freeze for at least 24 hours or until it becomes solid.
Read more: How To Store Homemade Boba
7. Thawing and consumption:
When you’re ready to enjoy your homemade jam, simply remove a container from the freezer and transfer it to the refrigerator. Allow the jam to thaw slowly in the refrigerator overnight. Once thawed, it can be stored in the refrigerator for several weeks and enjoyed as desired.
Freezer storage is a convenient method that allows you to preserve the flavors and quality of your homemade jam for an extended period of time. Whether you’re making large batches or smaller portions, storing your jam in the freezer ensures that you can savor the taste of homemade goodness long after the fruit season has passed.
Method 2: Refrigerator Storage
If you prefer to store your homemade jam in a more accessible and ready-to-use manner, refrigerator storage is a great option. This method allows you to keep your jam fresh and easily accessible in the refrigerator for a shorter period. Follow these steps to store your homemade jam in the fridge:
1. Prepare your jam:
Follow your favorite homemade jam recipe and cook it to the desired consistency and taste. Stir the jam occasionally to prevent scorching and ensure it reaches the proper thickness.
2. Cool the jam:
Allow the jam to cool completely before transferring it to containers for refrigerator storage. This will prevent condensation from forming inside the containers and affecting the quality of the jam.
Read more: How To Store Homemade Pies
3. Select suitable containers:
Choose clean and airtight containers for storing your jam in the refrigerator. Glass jars with tight-fitting lids or plastic containers with secure seals work well for this purpose. Make sure the containers are food safe and will not react with acidic ingredients.
4. Fill the containers:
Spoon the cooled jam into the containers, leaving a little bit of space at the top to allow for expansion. Ensure the containers are filled to a suitable level, with enough room to tightly seal the lids.
5. Label and date:
Label each container with the type of jam and the date it was prepared. This will help you keep track of different flavors and ensure you consume the jam within a reasonable time frame.
6. Store in the refrigerator:
Place the filled and sealed containers of jam in the refrigerator. Make sure they are stored at a consistent temperature between 32°F (0°C) and 40°F (4.4°C). This range keeps the jam fresh and safe to consume.
Read more: How To Store Homemade Soup
7. Shelf life and consumption:
Refrigerator storage allows you to keep your homemade jam fresh for a shorter period, typically a few weeks to a month. It’s important to check the jam regularly for any signs of spoilage, such as mold growth or off smells. If you notice any spoilage, discard the jam immediately.
Refrigerator storage provides a convenient and accessible way to enjoy your homemade jam over a shorter period. Whether you’re spreading it on toast, dolloping it on pancakes, or using it in baked goods, refrigerated jam is ready to enhance your favorite dishes with its sweet and fruity flavors.
Method 3: Vacuum Sealing
Vacuum sealing is an effective method for storing homemade jam without canning. It removes air from the storage container, creating a vacuum seal that helps preserve the freshness and flavor of the jam. Follow these steps to vacuum seal your homemade jam:
1. Prepare your jam:
Start by cooking your homemade jam to the desired consistency and taste. Allow it to cool completely before proceeding with the vacuum sealing process.
2. Choose suitable containers:
Select vacuum-sealable bags or jars that are designed for food storage. These containers should be free of cracks or damages to ensure a proper seal. Ensure that the containers are clean and dry before use.
Read more: How To Store Homemade Slime
3. Fill the containers:
Spoon the cooled jam into the vacuum-sealable bags or jars. Leave a small amount of headspace to allow for expansion during storage. Ensure that no liquid spills over the rims of the containers, as this can interfere with the vacuum sealing process.
4. Seal the containers:
If using vacuum-sealable bags, carefully place the filled bags into a vacuum sealer machine, following the manufacturer’s instructions. The machine will remove the air from the bags and seal them tightly. If using vacuum-sealable jars, use a vacuum pump to remove the air from the jars and secure the jar lids tightly.
5. Label and date:
It’s essential to label each vacuum-sealed container with the type of jam and the date it was prepared. This helps you keep track of your inventory and ensures that you use the jam within a reasonable time frame.
6. Storage and shelf life:
Store the vacuum-sealed containers of jam in a cool, dry, and dark place, such as a pantry or cupboard. The vacuum-sealed jars or bags can help preserve the freshness and flavors of the jam for several months. However, it’s important to regularly check for any signs of spoilage, including mold growth or unusual odors. If any spoilage is detected, discard the jam immediately.
Read more: How To Store Homemade Sauerkraut
7. Opening and consumption:
To open a vacuum-sealed container, carefully break the seal by prying open the lid or cutting open the bag. Once opened, the jam should be stored in the refrigerator and consumed within a few weeks.
Vacuum sealing is an excellent method for preserving the flavors and quality of homemade jam without the need for canning. It provides a long shelf life and keeps the jam fresh and delicious until you’re ready to enjoy it on your favorite breads, pastries, or as a flavorful topping for desserts.
Method 4: Preserving in Sugar Syrup
Preserving homemade jam in a sugar syrup is a traditional method that can help extend its shelf life and enhance its flavor. The sugar syrup acts as a natural preservative, providing a sweet and syrupy base for the jam. Here’s how you can preserve your homemade jam in sugar syrup:
1. Prepare your jam:
Cook your homemade jam according to your preferred recipe, ensuring it reaches the desired consistency and flavor. Allow the jam to cool slightly before proceeding.
2. Prepare the sugar syrup:
In a separate saucepan, prepare a sugar syrup by combining equal parts water and sugar. For example, if you use 1 cup of water, add 1 cup of sugar. Heat the mixture until the sugar dissolves completely, stirring occasionally.
Read more: How To Store Homemade Pesto
3. Add the jam to the syrup:
Pour the prepared jam into the sugar syrup while it is still warm. Stir gently to combine the jam with the syrup, ensuring an even distribution.
4. Sterilize the jars:
Before filling the jars with the jam and syrup mixture, sterilize them by placing them in boiling water for a few minutes. This step helps ensure the jars are clean and free from bacteria.
5. Fill the jars:
Using a ladle or funnel, fill the sterilized jars with the jam and sugar syrup mixture. Leave a small amount of headspace at the top to allow for expansion during storage. Wipe the rims of the jars with a clean, damp cloth to remove any spills or stickiness.
6. Seal the jars:
Place the sterilized lids on the filled jars and tighten them securely. This creates a sealed environment that helps preserve the jam and syrup mixture.
Read more: How To Store Homemade Vinaigrette
7. Store and shelf life:
Store the sealed jars of jam in a cool, dark place, such as a pantry or cupboard. The sugar syrup acts as a natural preservative, extending the shelf life of the jam. Properly stored, the preserved jam can last for several months.
8. Consumption:
To enjoy the preserved jam, simply open a jar and spoon out the desired amount. Refrigerate any opened jars and consume the jam within a few weeks to maintain its freshness and flavor.
Preserving homemade jam in sugar syrup not only extends its shelf life but also enhances its taste by infusing it with a sweet and syrupy base. It’s a traditional method that allows you to enjoy the flavors of summer fruits throughout the year, whether spread on toast, mixed into yogurt, or used in various culinary creations.
Method 5: Lacto-fermentation
Lacto-fermentation is a unique and ancient method of preserving homemade jams that not only extends their shelf life but also adds a tangy and complex flavor profile. The process involves harnessing the power of beneficial bacteria to naturally ferment the fruits in a brine solution. Here’s how you can use lacto-fermentation to preserve your homemade jam:
1. Choose your fruits:
Select fresh and ripe fruits to make your homemade jam. Opt for fruits with natural pectin content, such as berries, plums, or apples, as they ferment well and help thicken the jam.
Read more: How To Store Homemade Bread
2. Prepare the fruit:
Wash and trim the fruits, removing any damaged or blemished parts. Cut the fruits into small pieces or mash them, depending on your preferred jam consistency. The smaller the fruit pieces, the faster the fermentation process.
3. Prepare the brine:
In a bowl, dissolve a tablespoon of non-iodized salt in a cup of filtered water to create a brine solution. The salt prevents the growth of harmful bacteria while allowing the beneficial lactobacillus bacteria to thrive.
4. Combine the fruit and brine:
Place the prepared fruits into a clean, sterilized jar, leaving some headspace at the top. Pour the brine solution over the fruit, ensuring it is fully submerged. It’s important to keep the fruit below the brine level to prevent spoilage.
5. Fermentation process:
Seal the jar with airtight fermentation lids or use a clean cloth secured with a rubber band to allow gases to escape. Place the jar in a cool, dark place, away from direct sunlight, and let it ferment for a few days to several weeks. The fermentation time depends on your desired level of tanginess and flavor complexity.
Read more: How To Store Homemade Ravioli
6. Check and taste the jam:
Check the fermenting jam regularly to ensure it is fully submerged in the brine and doesn’t exhibit signs of mold or spoilage. Taste the jam periodically to monitor the fermentation progress and determine when it reaches your preferred flavor profile.
7. Store and refrigeration:
Once the jam has reached the desired flavor, you can transfer it to smaller jars and store them in the refrigerator. The cold temperature slows down the fermentation process and helps retain the flavors. The lacto-fermented jam can last for several months in the refrigerator.
Lacto-fermentation adds a unique complexity to homemade jam, with a tangy and slightly sour flavor that pairs well with various dishes. Spread it on bread, swirl it into yogurt, or use it as a condiment to add a delightful twist to your culinary creations.
Conclusion
Preserving homemade jam without canning opens up a world of possibilities for storing and enjoying the flavors of fresh fruits throughout the year. Whether you choose to freeze your jam, store it in the refrigerator, vacuum seal it, preserve it in sugar syrup, or engage in the fascinating process of lacto-fermentation, each method offers its own unique benefits.
Freezer storage is a simple and convenient option that allows you to preserve the freshness and taste of your jam for an extended period. By following proper preparation and safety tips, you can enjoy your homemade jam straight from the freezer whenever you desire.
Refrigerator storage offers a shorter-term preservation method that keeps your jam easily accessible and ready to use. With minimal preparation and a suitable container, you can enjoy your homemade jam within arm’s reach for a few weeks to a month.
Vacuum sealing provides an excellent option for long-term storage, creating a sealed environment that preserves the freshness and quality of your homemade jam. By removing the air from the containers, you can enjoy your jam for several months while maintaining its vibrant flavors.
Preserving homemade jam in sugar syrup adds a touch of sweetness and acts as a natural preservative. This traditional method extends the shelf life of your jam while enhancing its taste and texture, making it an excellent choice for those who enjoy a syrupy base.
For those looking for a unique and tangy twist, lacto-fermentation offers a fascinating process that harnesses the power of beneficial bacteria to enhance the flavors of your jam. This fermentation method not only adds complexity to your jam but also introduces probiotics, making it a healthy and flavorful choice.
Choosing the right storage method for your homemade jam ultimately depends on your preferences, available resources, and desired shelf life. Whichever method you choose, following proper preparation and safety guidelines will ensure that your jam stays fresh, delicious, and safe to consume.
So, let your creativity soar and experiment with different storage methods to keep your homemade jam bursting with flavor. Whether you savor it on toast, use it in baking, or give it as a heartfelt gift, your preserved jam will continue to bring joy and delight long after its peak season.
Frequently Asked Questions about How To Store Homemade Jam Without Canning
Was this page helpful?
At Storables.com, we guarantee accurate and reliable information. Our content, validated by Expert Board Contributors, is crafted following stringent Editorial Policies. We're committed to providing you with well-researched, expert-backed insights for all your informational needs.
0 thoughts on “How To Store Homemade Jam Without Canning”