Articles
How To Store Homemade Pickles
Modified: August 23, 2024
Learn the best techniques for storing homemade pickles with our helpful articles. Keep your pickles fresh and flavorful for longer with our expert tips.
(Many of the links in this article redirect to a specific reviewed product. Your purchase of these products through affiliate links helps to generate commission for Storables.com, at no extra cost. Learn more)
Introduction
Welcome to the world of homemade pickles! There’s nothing quite like the satisfaction of creating your own pickled delights from scratch. Whether you’re a fan of tangy dill pickles, spicy jalapenos, or crunchy bread and butter pickles, making them at home allows you to customize the flavors to your liking and ensure that you’re using high-quality ingredients.
However, once you’ve invested your time and effort into making these delicious pickles, it’s crucial to store them properly to maintain their freshness and flavor. In this article, we will guide you through the process of storing homemade pickles to ensure they stay crispy, flavorful, and safe to eat for an extended period.
Before we dive into the details, let’s take a moment to understand why proper storage is important. Pickling is a preservation method that involves immersing vegetables or fruits in a solution, typically consisting of vinegar, water, salt, and various spices. This process not only adds immense flavor but also extends the shelf life of the produce.
By properly storing your homemade pickles, you can prolong their freshness and maintain their texture and taste. Improper storage can lead to spoilage, loss of crunchiness, and potential health risks. So, let’s make sure you’re equipped with the right knowledge to store your homemade pickles like a pro!
Key Takeaways:
- Master the art of homemade pickles with proper storage techniques, from choosing the right containers to sterilizing and packaging. Enjoy flavorful, safe, and long-lasting pickles with these expert tips.
- Elevate your pickling game with creative flavor experiments, fresh produce, and personalized presentation. Embrace the joy of homemade pickles and savor the rewards of your flavorful pickling adventures.
Read more: How To Store Fermented Pickles
Choosing the Right Container
The first step in storing homemade pickles is to choose the right container. The container you select plays a significant role in preserving the freshness and flavor of your pickles. Here are a few factors to consider when choosing the right container:
- Glass jars: Glass jars are often the preferred choice for storing pickles. They are non-reactive and do not absorb odors or flavors, ensuring that your pickles maintain their original taste. Mason jars with tight-fitting lids work well for storing pickles.
- Plastic containers: If you prefer using plastic containers, make sure they are food-grade and BPA-free. Look for containers with airtight lids to prevent air and moisture from entering.
- Size: Choose containers that are appropriate for the quantity of pickles you have. Leaving too much empty space in the container can lead to faster deterioration of the pickles.
- Wide-mouthed jars: Opt for jars with wide openings or mouths as they make it easier to pack and retrieve pickles from the container without damaging them.
- Airtightness: Ensure that the containers have airtight seals to prevent air circulation, which can cause spoilage. A rubber gasket or screw-on lids are effective in maintaining a tight seal.
Remember, the quality of the container directly affects the quality of your pickles. Avoid using containers made of materials such as aluminum, copper, or reactive plastics, as they can alter the taste and quality of the pickles.
Additionally, it is essential to thoroughly clean and sterilize the containers before using them to store your pickles. This helps prevent the growth of harmful bacteria and ensures the longevity of the pickles.
Now that you understand the importance of choosing the right container let’s move on to the next step – sterilizing the containers.
Sterilizing the Containers
Before you store your homemade pickles, it is crucial to sterilize the containers to ensure proper hygiene and prevent the growth of bacteria.
Here’s a step-by-step guide on how to sterilize your containers:
- Clean the containers: Start by washing the containers, lids, and any utensils that will come into contact with the pickles, such as tongs or ladles. Use hot water and dish soap to thoroughly clean them, removing any dirt or residue.
- Boiling method: One effective way to sterilize the containers is by boiling them. Place the containers and lids in a large pot and fill it with enough water to cover them. Bring the water to a rolling boil and let the containers boil for at least 10 minutes. This will kill any bacteria or microorganisms present on the surfaces.
- Oven method: Another sterilization method is using the oven. Preheat the oven to 275°F (135°C). Place the containers and lids on a baking sheet and put them in the oven for about 20 minutes. This high temperature will effectively sanitize the containers.
- Drying: Once the containers have been boiled or baked, remove them from the heat source and let them cool completely. Use a clean towel or drying rack to dry the containers and lids thoroughly.
It’s important to note that sterilization is not a one-time process. It should be done each time you reuse the containers for storing pickles or any other preserved foods. This ensures that any potential contaminants are eliminated, reducing the risk of spoilage.
By following these sterilization techniques, you can preserve the integrity of your homemade pickles and enjoy them for an extended period without worrying about any unwanted bacteria or mold growth. Now that our containers are clean and ready, it’s time to move on to preparing the pickles!
Preparing the Pickles
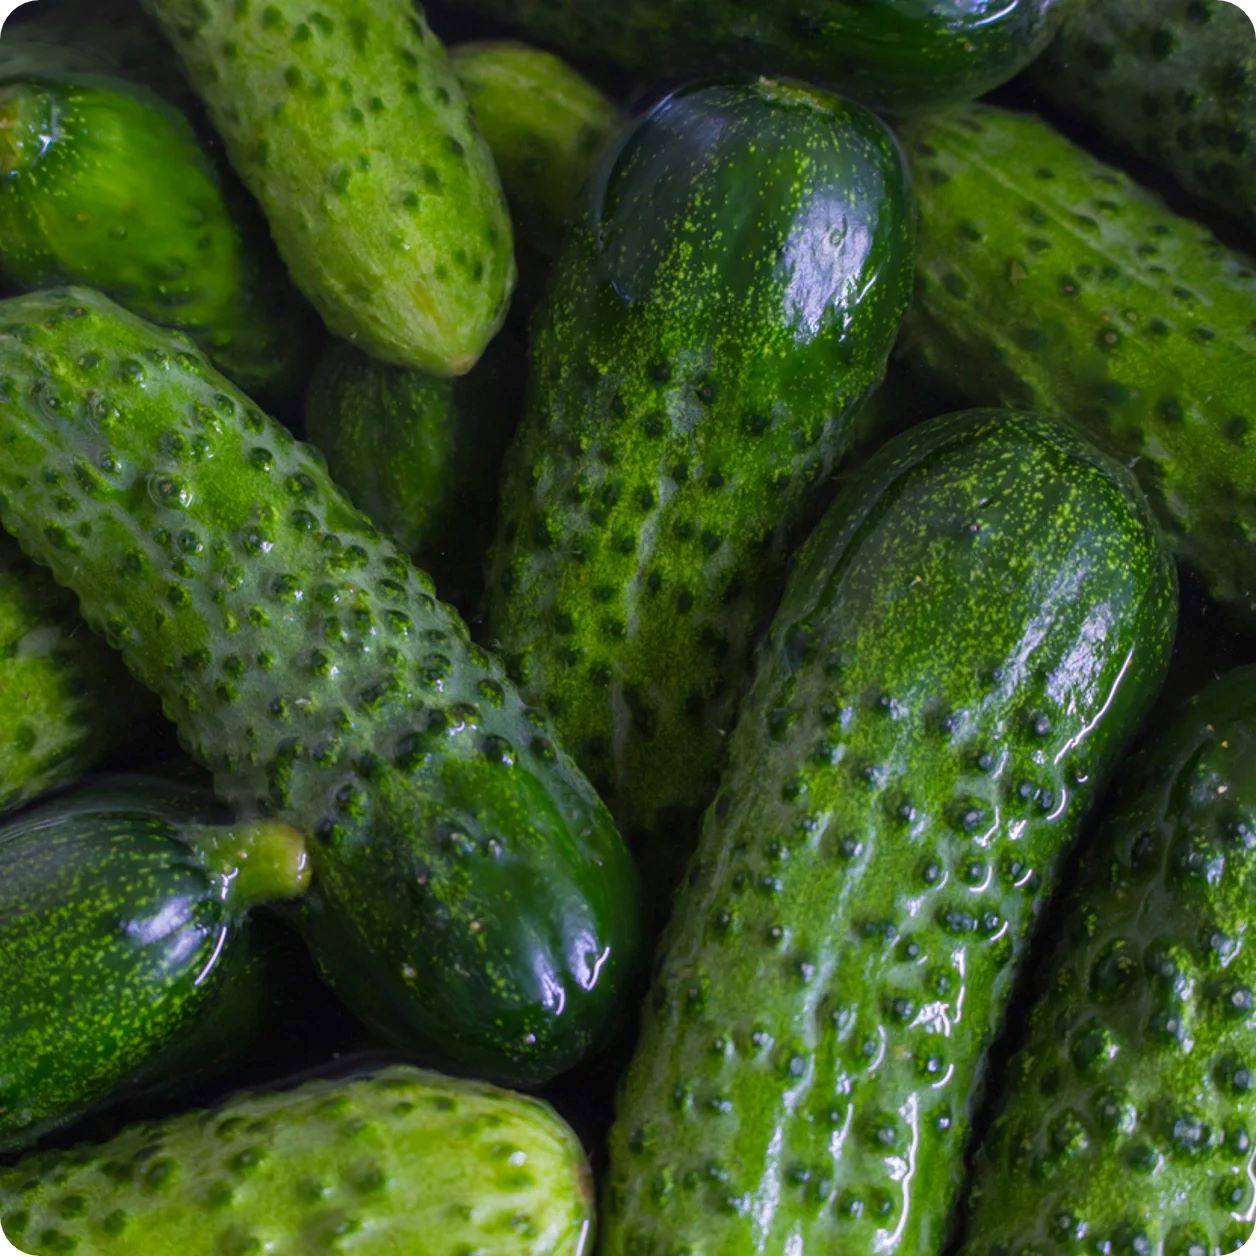
Preparing the pickles is the exciting part of the homemade pickling process. Whether you’re using cucumbers, jalapenos, carrots, or any other vegetable or fruit, the preparation steps remain similar. Here’s how to prepare your pickles:
- Wash the produce: Start by thoroughly washing the vegetables or fruits that you’ll be pickling. This removes any dirt or debris that may be present on the surface.
- Trim and slice: Next, trim off any stems, ends, or blemishes from the produce. Depending on your preference, slice, dice, or leave them whole. Keep in mind that the size and thickness of the pickles will affect their texture and how they absorb the brine.
- Remove excess moisture: Some vegetables, like cucumbers, tend to release excess moisture. To prevent soggy pickles, sprinkle the sliced or whole vegetables with salt and let them sit for about half an hour. Rinse the salt off and pat them dry with a clean towel to remove the excess moisture.
- Add flavorings: This step is optional, but it can enhance the taste of your pickles. Add spices, herbs, garlic, or other flavorful ingredients to the jars before packing them with the pickles. This allows the flavors to infuse into the pickles as they mature.
Take your time during the preparation process to ensure that the pickles are clean, fresh, and ready for pickling. Properly prepared pickles not only taste better but also have a longer shelf life when stored correctly. Now that your pickles are ready, let’s move on to making the brine solution.
Making the Brine Solution
The brine solution is a crucial element in pickling as it adds flavor, preserves the pickles, and enhances their texture. Here’s how to make a basic brine solution for your homemade pickles:
- Ingredients: The main ingredients for a brine solution are water, vinegar, salt, and sugar. The exact measurements will depend on your personal taste preferences and the specific recipe you’re using.
- Ratio: The general ratio for a brine solution is three parts water to one part vinegar. This provides the right balance of acidity and flavor. However, you can adjust the ratio based on how tangy or sour you want your pickles to be.
- Salt: Salt helps preserve the pickles and adds flavor. Typically, pickling salt or kosher salt is used because they do not contain additives that can affect the taste or appearance of the pickles. The amount of salt to add varies, but a good rule of thumb is about 1 tablespoon of salt per quart of brine.
- Sugar: Sugar can balance out the acidity and provide a touch of sweetness to the pickles. The amount of sugar to add depends on your personal preference. Start with around 1 teaspoon to 1 tablespoon per quart of brine and adjust to your liking.
- Boiling the brine: In a saucepan, combine the water, vinegar, salt, and sugar. Bring the mixture to a boil, stirring occasionally to dissolve the salt and sugar completely. Once it reaches a boil, remove it from the heat and let it cool slightly.
Now that you have prepared the brine solution, it’s time to combine it with the prepared pickles and package them in the containers. This is the crucial step that will ensure the pickles are properly preserved and ready for long-term storage. Let’s move on to packaging the pickles.
Read more: How To Store Pickled Radish
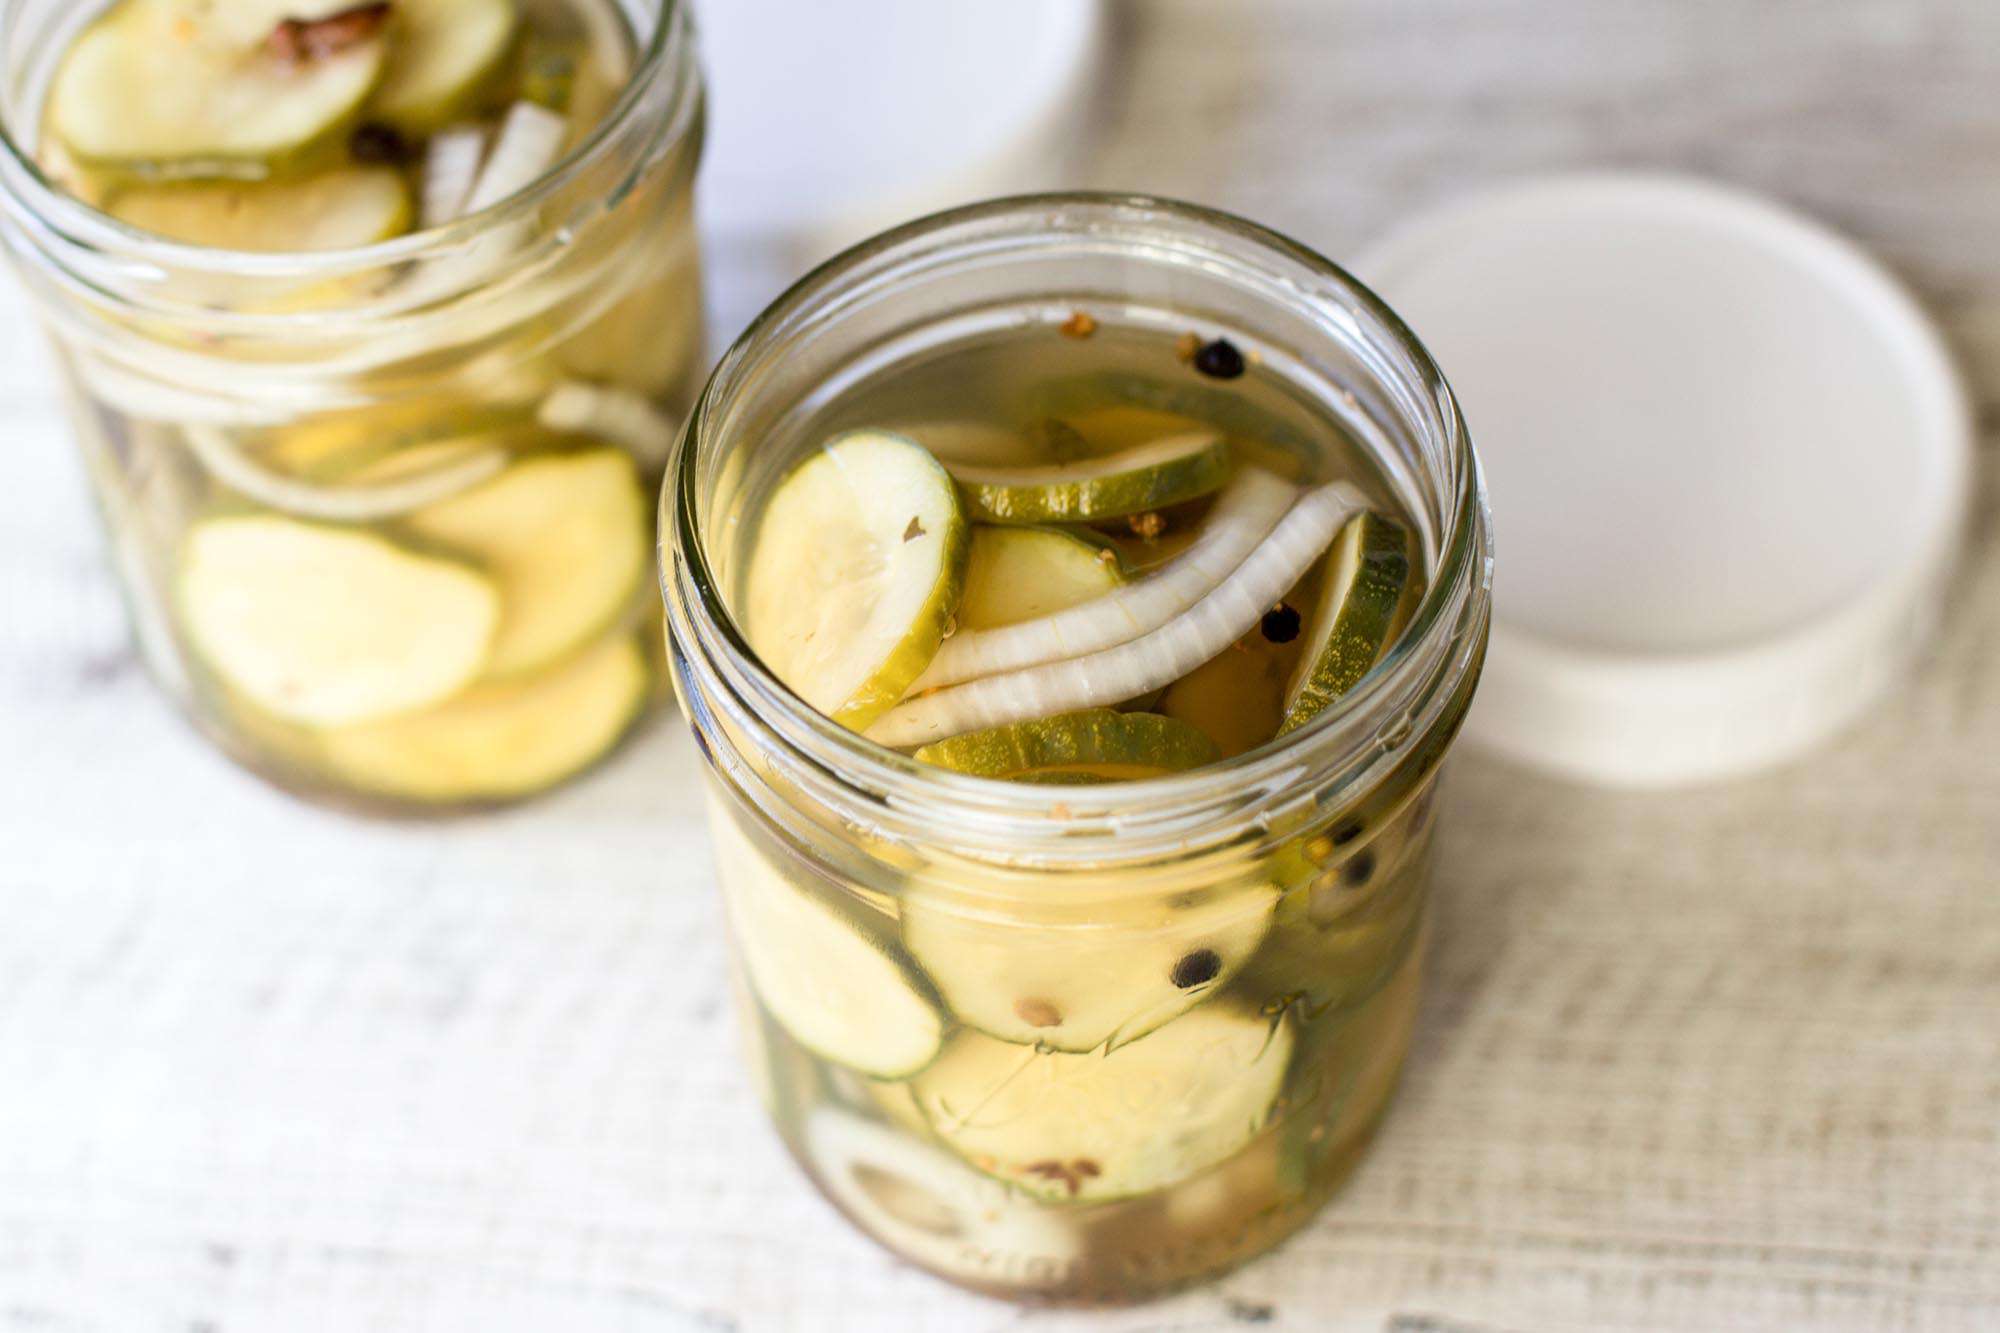
Packaging the Pickles
Now that you have your prepared pickles and brine solution, it’s time to package them together for storage. Packaging your pickles properly will ensure they stay fresh, flavorful, and safe to eat. Here’s how to package your pickles:
- Fill the containers: Pack the prepared pickles tightly into the sterilized containers. Leave some headspace at the top, around 1/2 inch or as per the recipe guidelines, to allow for expansion during the pickling process.
- Add the brine: Pour the cooled brine solution over the pickles, ensuring that they are fully submerged. The brine should cover the pickles completely to prevent spoilage and maintain their flavor. You may need to use a spoon or a clean utensil to push down on the pickles gently to remove any air bubbles.
- Seal the containers: Place the lids tightly on the containers, ensuring a proper seal. If using jars with screw-on lids, make sure they are securely tightened. This will prevent air from entering and bacteria from contaminating the pickles.
Remember to use non-reactive lids that won’t corrode or affect the taste of the pickles. Metal lids can be lined with a food-safe coating or sealed with a layer of cling film or wax paper to prevent direct contact with the brine.
At this point, you have successfully packaged your homemade pickles in their brine solution. However, there are a few vital steps to take before storing them. Let’s proceed to the next section to learn about properly sealing the jars and labeling them.
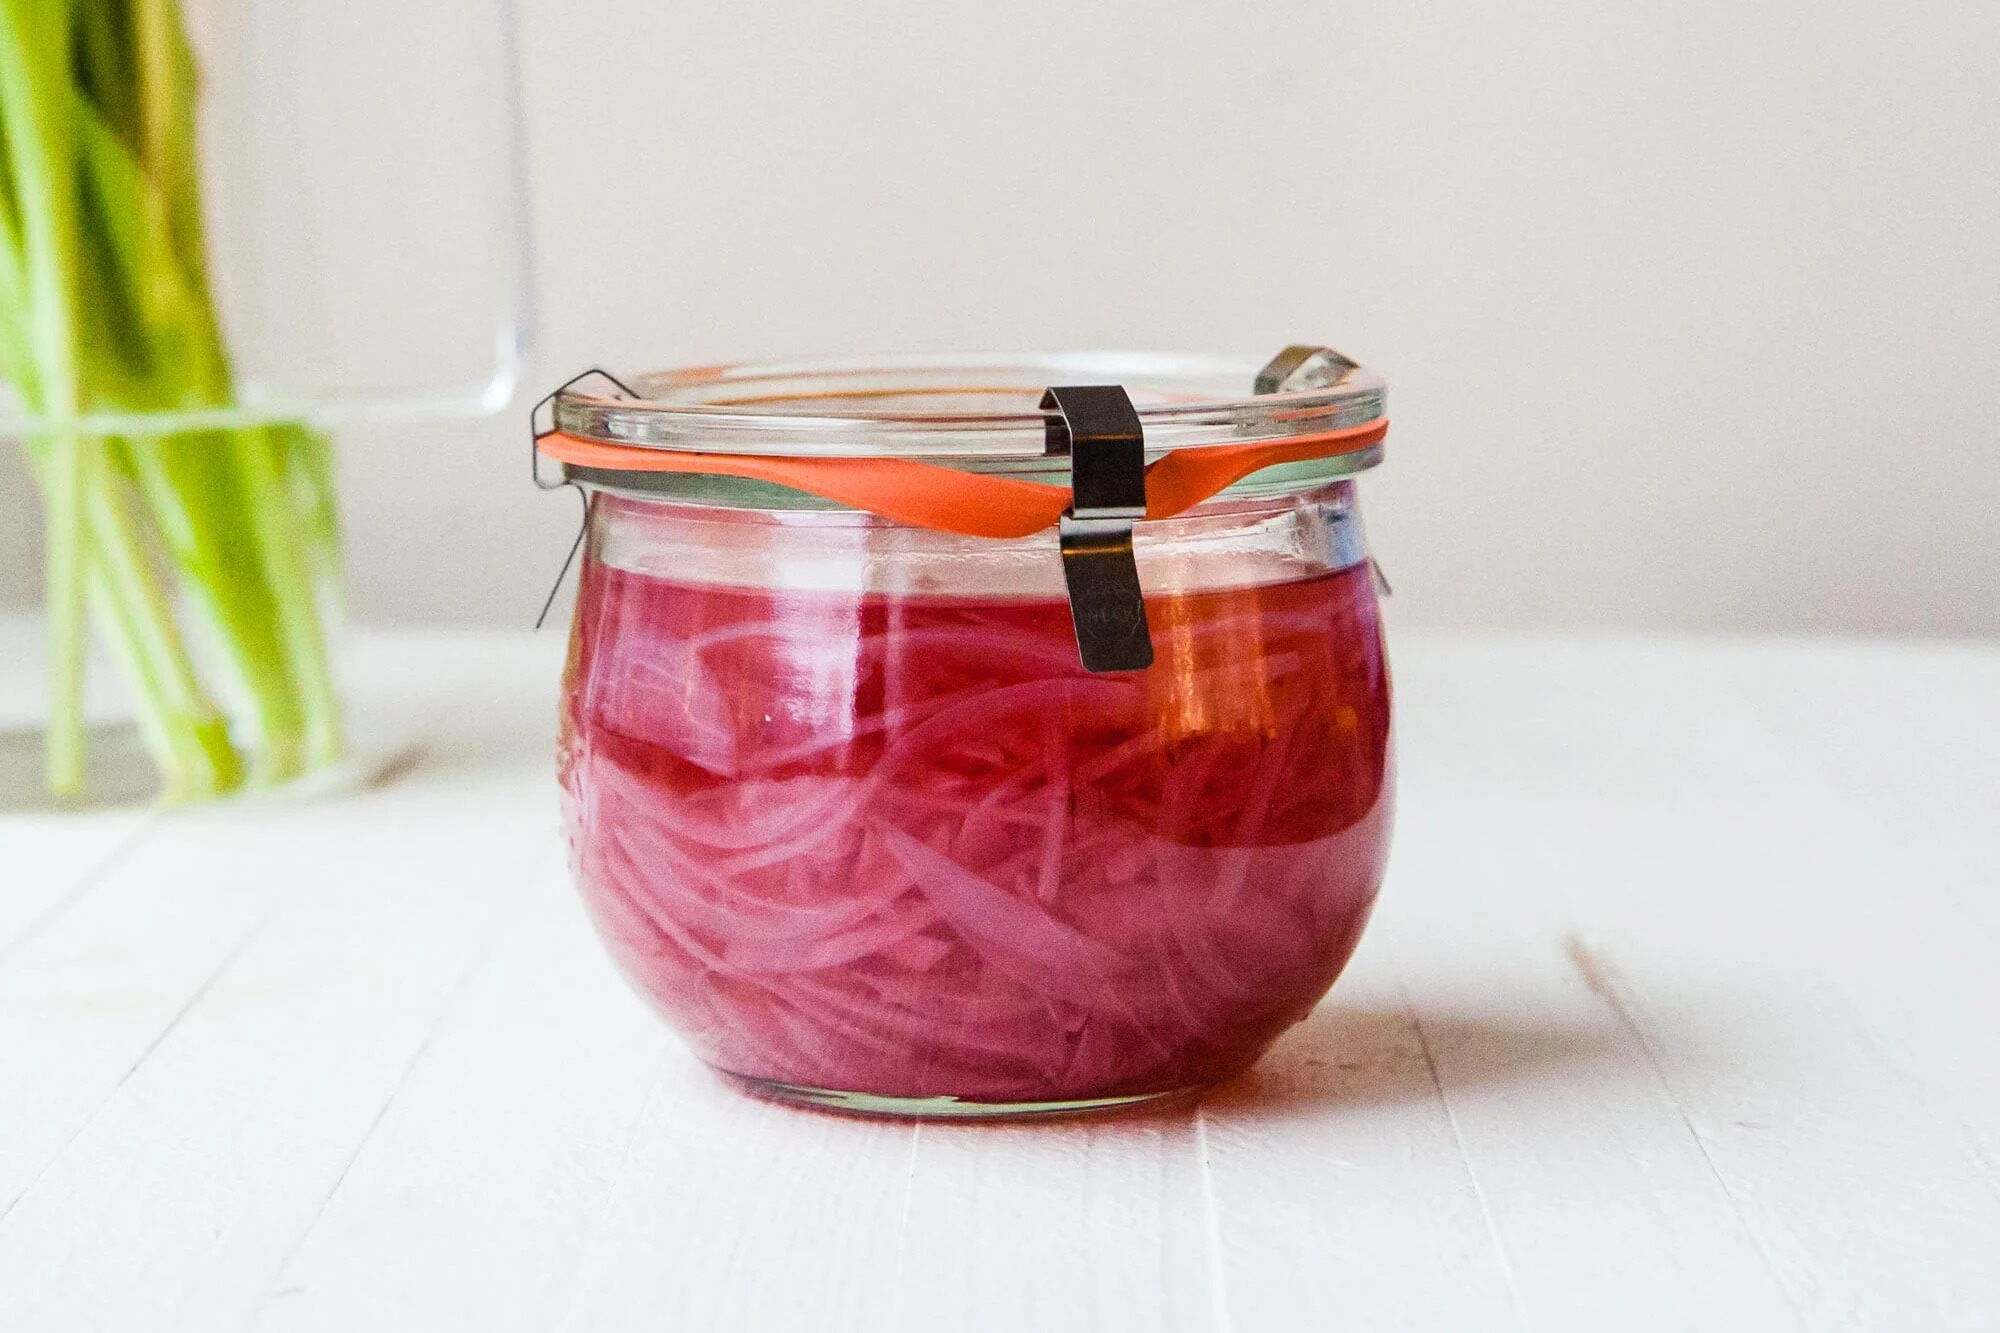
Storing the Pickles
Properly storing your homemade pickles is essential to maintain their freshness, flavor, and quality. The right storage conditions will help extend their shelf life and ensure that they remain safe to eat. Here are the steps for storing your pickles:
- Allow the pickles to mature: Before storing them, it’s recommended to let the pickles sit at room temperature for a period of time to allow the flavors to develop and the pickles to fully absorb the brine. The duration will vary based on the recipe and personal preference, but as a general guideline, aim for at least one to two weeks.
- Place the jars in the refrigerator: Once the pickles have matured, transfer the jars to the refrigerator for long-term storage. The cool temperature of the refrigerator helps slow down the fermentation process, preserving the crispness and flavor of the pickles. The pickles can be stored in the refrigerator for several months.
- Choose a cool location: When storing the pickles in the refrigerator, ensure that they are placed in a cool and consistent temperature area. Avoid storing them near the refrigerator’s door, as the temperature fluctuates more in that location.
- Arrange the jars properly: Place the jars upright in the refrigerator, taking care not to stack them or place heavy objects on top of them. Stacking jars can lead to breakage, while added weight can cause the lids to lose their seal.
- Keep the pickles away from light: Pickles can be sensitive to light, which can cause discoloration and affect their quality. Store them in a dark corner of the refrigerator or cover the jars with a cloth or towel to block out any light.
By following these steps, you can ensure that your homemade pickles remain fresh, crunchy, and full of flavor throughout their storage period. However, it’s important to check on the pickles regularly and follow some additional precautions to maintain their freshness. Let’s explore those in the next section.
Store homemade pickles in airtight glass jars in the refrigerator to maintain their crispness and flavor. Make sure the pickles are fully submerged in the brine to prevent spoilage.
Properly Sealing the Jars
One crucial step in storing homemade pickles is ensuring that the jars are properly sealed. A tight seal will prevent air from entering the jars and keep the pickles fresh and safe to consume. Here are some tips to properly seal the jars:
- Check the lids: Before sealing the jars, inspect the lids for any damage or defects. Make sure they are free from rust, dents, or deformations that may compromise the seal.
- Clean the rims: Wipe the rims of the jars with a clean, damp cloth to remove any residue or brine. This ensures a clean surface for the lids to create an airtight seal.
- Apply the lids: Place the lids on the jars and press them down firmly. Make sure they are centered on the rims. For screw-on lids, twist them until they are snug but not overly tight.
- Process for heat sealing (optional): If you prefer to heat seal your jars for added security, you can use a water bath canning method. Submerge the jars in boiling water for a recommended time based on the recipe and jar size. This process creates a vacuum seal as the jars cool down.
- Perform the “pop” test: After the jars have cooled, test the seal by pressing down on the center of the lids. If the lids are properly sealed, they should be firm and not move or make a popping sound. If any jars haven’t sealed properly, refrigerate them and consume them within a few weeks.
- Label and date the jars: To keep track of the storage duration, label each jar with the type of pickles and the date they were made. This helps ensure that you consume them within a reasonable time frame.
By following these steps, you can ensure that your jars are properly sealed and that your homemade pickles remain fresh and tasty for an extended period. Remember to store the sealed jars in the refrigerator as we discussed earlier.
Now that you have successfully sealed your jars, let’s move on to the next step: checking on the pickles regularly to ensure their quality and freshness.
Labeling and Dating the Jars
Labeling and dating your jars of homemade pickles is a crucial step in ensuring that you can easily keep track of their freshness and flavors. When you have multiple jars of pickles stored, labeling becomes essential for organization and consumption purposes. Here’s how to label and date your jars:
- Use adhesive labels: Choose adhesive labels that are suitable for use in refrigerated environments. Write the name of the pickles or the type of vegetable or fruit being pickled on the label. This makes it easier to identify the contents of the jar.
- Include the date: Write the date on the label to indicate when the pickles were made. It’s helpful to include the month and year, as well as any specific flavorings or variations you may have used.
- Place the label on the jar: Peel off the backing of the label and carefully affix it to the side or lid of the jar. Ensure that it is securely attached and easily visible.
- Consider additional information: If you’d like to include additional details, such as the recipe source or special instructions, you can write them on the label. This can be helpful for reference and future batches of pickles.
By labeling and dating your jars, you’ll have a clear overview of when each batch of pickles was made. This information allows you to keep track of their aging process and ensures that you consume them within a reasonable time frame.
Remember to store the labeled and dated jars in a cool part of your refrigerator to maintain their quality and flavors. Now that your jars are properly labeled, let’s move on to the next step: checking on the pickles regularly to ensure their freshness.
Read more: How To Store Pickled Eggs
Placing the Jars in the Refrigerator
Once your homemade pickles are properly sealed and labeled, it’s time to place the jars in the refrigerator for optimal storage. The refrigerator provides the cool temperature needed to keep the pickles fresh and safe to eat. Here are the steps for placing the jars in the refrigerator:
- Choose a suitable spot: Select a spot in your refrigerator where the jars can be stored undisturbed. It’s best to choose a location away from the door or areas that experience frequent temperature changes.
- Keep the jars upright: Place the jars upright in the chosen spot. Avoid stacking them on top of one another as this may lead to breakage or uneven cooling of the pickles. Leaving some space between the jars can also help with air circulation.
- Protect from light: While pickles in jars are shielded from direct light, it’s still a good practice to place the jars in a darker area of the refrigerator. This helps preserve the quality and flavor of the pickles for a longer period.
- Avoid frequent temperature changes: Fluctuating temperatures can affect the quality of your pickles. Try to minimize opening the refrigerator door unnecessarily or exposing the jars to room temperature for an extended period. Consistency in temperature helps maintain the crispness and flavors of the pickles.
- Check on the pickles regularly: While in storage, it’s important to periodically check on the pickles. Look for any signs of spoilage, such as mold growth, unusual odor, or sliminess. If any of these signs are present, discard the pickles immediately.
By following these steps, you can ensure that your homemade pickles are properly stored in the refrigerator. This helps preserve their fresh flavor and crispy texture for an extended period. Now that your pickles are safely in the refrigerator, let’s move on to the final step: checking on them regularly to ensure their quality.
Checking on the Pickles Regularly
When it comes to storing homemade pickles, it’s important to check on them regularly to ensure their quality and freshness. Regular inspections can help you catch any signs of spoilage early on so that you can discard them if necessary. Here’s how to check on your pickles:
- Visual inspection: Carefully examine the pickles for any visible signs of spoilage. Look for mold growth, mushiness, or any unusual changes in color or texture. If you notice any abnormalities, it’s best to err on the side of caution and discard the affected pickles.
- Sniff test: Give the jars a gentle sniff to detect any unusual or foul odors. Pickles should have a pleasant aroma, and any off-putting smells may indicate spoilage or fermentation gone wrong.
- Taste test: If everything looks and smells fine, you can conduct a taste test to ensure the pickles are still enjoyable. Take a small bite or sample a slice to check for any off flavors, excessive sourness, or overly soft texture. Trust your taste buds and use your judgment to determine if the pickles are still good to eat.
- Pay attention to expiration dates: It’s important to note the recommended expiration or “best by” date for your pickles. Even if they appear fine, it’s advisable to consume them within a reasonable timeframe to ensure their quality and safety.
- Take notes: Keep a record of your observations and make notes about the pickles’ taste, texture, and overall quality. This will help you track their aging process and make adjustments to your pickling methods for future batches.
Regularly checking on your pickles and being vigilant about their quality allows you to enjoy them at their best. Remember, if you have any doubts about the freshness or safety of the pickles, it’s better to be safe than sorry and discard them.
Now that you know how to check on your pickles regularly, let’s move on to some helpful tips and tricks to enhance your homemade pickling adventure.
Tips and Tricks
As you embark on your homemade pickling journey, here are some tips and tricks to enhance your pickling experience and create even more delicious pickles:
- Experiment with flavors: Don’t be afraid to get creative with your pickling recipes. Try different combinations of spices, herbs, and flavorings to customize the taste of your pickles. From adding garlic and dill to incorporating chili flakes or ginger, the possibilities are endless.
- Use fresh, high-quality produce: Select the freshest vegetables and fruits for pickling. The quality of the produce will greatly influence the final outcome of your pickles. Look for firm, unblemished produce to ensure optimal texture and flavor.
- Follow proper sterilization procedures: Make sure to thoroughly clean and sterilize your containers, lids, and utensils before pickling. This helps eliminate any potential contaminants and ensures the longevity of your pickles.
- Adjust salt and sugar levels: The amount of salt and sugar used in the brine can be adjusted according to your taste preferences. Feel free to experiment with different levels of saltiness and sweetness to find your ideal balance.
- Allow for enough pickling time: Patience is key when it comes to pickles. Allow the pickles to sit in the brine for the recommended time, or longer if you desire a stronger flavor. This waiting period allows the flavors to develop and the pickles to fully absorb the brine.
- Label and date your jars: Properly label and date your jars to keep track of the aging process and ensure you consume the pickles within a reasonable time frame. This also helps when sharing or gifting your homemade pickles to others.
- Get creative with presentation: Consider presenting your pickles in decorative jars or adding custom labels for a personalized touch. This can make your homemade pickles a delightful gift or a lovely addition to your own pantry.
- Explore different pickling methods: Besides traditional vinegar-based pickles, explore other pickling methods, such as fermenting or using alternative brine solutions like brine made from whey or fermented vegetable juices. These methods can add unique flavors and textures to your pickles.
Remember, pickling is a delightful culinary adventure, and these tips and tricks are meant to inspire you to explore and experiment with your homemade pickles. Enjoy the process and savor the rewards of creating your own delicious pickled treasures!
Now that you have a wealth of pickling knowledge, you’re ready to embark on your own pickling adventures. Happy pickling and enjoy your flavorful homemade pickles!
Conclusion
Congratulations! You have reached the end of this comprehensive guide on how to store homemade pickles. By following the steps outlined in this article, you are well-equipped to store your pickles properly and ensure their freshness, flavor, and safety.
From choosing the right container and sterilizing it to preparing the pickles, making the brine solution, and packaging the pickles, you have learned the essential steps for successful pickle storage. You now understand the importance of properly sealing the jars, labeling and dating them, and placing them in the refrigerator to maintain their quality.
Remember that regularly checking on your pickles and following proper storage practices are key to ensuring their freshness. Be mindful of any signs of spoilage, and discard any pickles that appear questionable, even if they were properly stored.
Additionally, we shared some valuable tips and tricks to enhance your pickle-making journey. Experiment with different flavors, use fresh produce, and feel free to get creative with your pickling adventures. The joy of homemade pickles lies in the ability to tailor them to your taste preferences and explore new flavor combinations.
Whether you’re making dill pickles, bread and butter pickles, or spicy jalapenos, the process of pickling allows you to preserve the flavors of the season and enjoy them year-round. Homemade pickles make a delightful addition to sandwiches, salads, cheese boards, and more, enhancing the taste of any dish with their tangy and crisp goodness.
So, go ahead and dive into the world of homemade pickles. Enjoy the rewards of your pickling endeavors and share your delicious creations with friends and family. Pickling is not only a way to preserve food; it’s also a way to connect with the age-old tradition of preserving flavors in jars.
Now that you have all the knowledge and guidance you need, it’s time for you to grab those fresh cucumbers, jalapenos, or any other veggies and fruits you desire and embark on your own homemade pickling adventure. Happy pickling and enjoy the satisfaction of savoring your own flavorful jars of homemade pickles!
Frequently Asked Questions about How To Store Homemade Pickles
Was this page helpful?
At Storables.com, we guarantee accurate and reliable information. Our content, validated by Expert Board Contributors, is crafted following stringent Editorial Policies. We're committed to providing you with well-researched, expert-backed insights for all your informational needs.


0 thoughts on “How To Store Homemade Pickles”