
Articles
How To Store Homemade Pita Bread
Modified: January 5, 2024
Learn the best techniques and tips for storing your homemade pita bread to keep it fresh and delicious. Read our informative articles for step-by-step instructions.
(Many of the links in this article redirect to a specific reviewed product. Your purchase of these products through affiliate links helps to generate commission for Storables.com, at no extra cost. Learn more)
Introduction
Welcome to the wonderful world of homemade pita bread! If you’re a bread enthusiast, there’s nothing quite like the satisfaction of baking your own pita bread from scratch. Not only does it allow you to enjoy the warm and fluffy goodness of freshly baked bread, but it also gives you the freedom to customize the flavors and experiment with different ingredients.
Homemade pita bread offers a plethora of benefits that make it worth the effort. First and foremost, you have complete control over the quality of the ingredients used. Instead of relying on store-bought options loaded with preservatives, you can choose wholesome and organic ingredients to create a healthier version of this Middle Eastern staple.
Another advantage of making pita bread at home is the ability to customize it to suit your culinary preferences. You can incorporate various flavors such as herbs, spices, or even cheese into the dough, giving your pita bread a unique and personal touch. Plus, you can adjust the thickness and size of the bread to your liking.
Not only is homemade pita bread delicious, but it is also incredibly versatile. You can use it as a vessel for your favorite sandwich fillings, slice it for appetizers or dip it into flavorful sauces. Its soft texture and pocket-like shape make it a perfect companion for various dishes.
Now that you’re aware of the benefits and versatility of homemade pita bread, let’s dive into the process of creating and storing it. In the following sections, we’ll explore the key steps involved in making your own pita bread and then delve into the proper storage methods to ensure it stays fresh and delectable for longer periods.
Key Takeaways:
- Homemade pita bread offers control over ingredients, endless customization, and unmatched freshness. Experiment with flavors, enjoy the satisfaction of baking from scratch, and savor the warm, fluffy goodness straight from your kitchen.
- Proper storage is essential for maintaining the freshness of homemade pita bread. Use airtight containers, avoid stacking, and consider freezing for longer shelf life. Enjoy the delightful experience of homemade pita bread at any time.
Read more: How To Store Pita Bread
Why Homemade Pita Bread?
While store-bought pita bread is convenient, there are several compelling reasons why you should consider making your own at home. Here are a few of the top reasons to embark on the homemade pita bread journey:
- Freshness and Taste: Homemade pita bread delivers unmatched freshness and flavor. The aroma of freshly baked bread wafting through your kitchen is unbeatable. The taste of warm, soft pita bread straight out of the oven is a culinary delight that surpasses any store-bought version.
- Control over Ingredients: By making your own pita bread, you have full control over the ingredients. You can choose high-quality flour, organic and unprocessed ingredients, and avoid any artificial additives or preservatives commonly found in store-bought bread. This allows you to create a healthier and more wholesome version.
- Customization: Homemade pita bread offers endless possibilities for customization. You can experiment with different flavors by adding herbs, spices, or even grated cheese to the dough. This allows you to tailor the taste of the bread to your liking, creating a unique and personalized experience with every batch.
- Economical: Making your own pita bread can be cost-effective in the long run. While the initial investment in ingredients and equipment may seem higher, the ability to produce multiple batches of pita bread at a fraction of the cost of store-bought alternatives can save you money over time.
- Creative Expression: Baking homemade pita bread is an opportunity for creative expression in the kitchen. From experimenting with different shapes and sizes to incorporating various fillings or toppings, you can let your culinary imagination run wild. It’s a chance to infuse your own personality and style into each loaf.
- Satisfaction and Pride: There’s immense satisfaction and pride that comes from creating something from scratch. Baking your own pita bread allows you to develop new baking skills, and the sense of accomplishment when you take out a batch of perfectly puffed bread is truly rewarding.
These are just a few reasons why homemade pita bread is an excellent choice. Whether you’re a bread lover, an adventurous home cook, or simply looking to elevate your culinary skills, making pita bread at home is a fulfilling and enjoyable experience that is sure to impress both yourself and those lucky enough to taste your creations.
Ingredients
Before we dive into the process of making homemade pita bread, let’s gather the necessary ingredients. Here’s what you’ll need:
- 2 ½ cups all-purpose flour: This forms the base of the pita bread dough. Opt for a high-quality all-purpose flour for the best texture and flavor.
- 1 teaspoon salt: Salt enhances the taste of the bread and helps in gluten development.
- 1 teaspoon sugar: Sugar aids in creating a favorable environment for yeast activation, leading to better dough rise.
- 2 teaspoons instant yeast: This is the leavening agent that helps the dough rise. Instant yeast is preferable because it doesn’t require proofing before use.
- 1 cup warm water: Warm water activates the yeast and helps to create a soft and pliable dough.
- 1 tablespoon olive oil: Olive oil adds moisture and a subtle flavor to the pita bread. It also helps in keeping the bread soft and tender.
These are the basic ingredients for making classic homemade pita bread. However, feel free to get creative and add your own twist by incorporating additional ingredients like herbs, spices, or even whole grains to enhance the flavor and nutrition profile of your bread.
Now that we’ve gathered all the necessary ingredients, it’s time to roll up our sleeves and start making the delicious homemade pita bread!
Step 1: Preparing the Dough
The first step in making homemade pita bread is preparing the dough. Follow these instructions to create a soft and elastic dough:
- In a large mixing bowl, combine the all-purpose flour, salt, and sugar. Mix well to evenly distribute the dry ingredients.
- In a separate small bowl, dissolve the instant yeast in warm water. Stir gently and let it sit for a few minutes until it becomes frothy. This indicates that the yeast is activated.
- Make a well in the center of the dry ingredients and pour in the activated yeast mixture. Add the olive oil as well.
- Using a wooden spoon or your hands, mix the ingredients until they come together to form a shaggy dough.
- Transfer the dough to a clean, floured surface and knead for about 8-10 minutes until the dough becomes smooth and elastic. This process helps to develop the gluten, which gives the pita bread its characteristic structure and texture.
- If the dough feels too sticky, gradually add a little more flour. Conversely, if it feels too dry, add a small amount of warm water. The consistency should be soft and slightly tacky, but not overly sticky.
- Once the dough is well-kneaded, shape it into a ball and place it back into the mixing bowl. Cover the bowl with a clean kitchen towel or plastic wrap and let the dough rest and rise for about 1-2 hours, or until it doubles in size.
During the rising stage, the yeast ferments the dough, causing it to expand and become airy. This is an essential step in creating light and fluffy pita bread.
Now that the dough is prepared and has undergone the rising process, it’s time to move on to the next step: proofing the dough.
Step 2: Proofing the Dough
After the dough has doubled in size during the rising stage, it needs to undergo a process called proofing. This step allows the flavors to develop further and enhances the texture of the pita bread. Here’s how to properly proof the dough:
- Gently punch down the risen dough to deflate it and release any trapped air bubbles. This helps the dough to become more manageable and evenly rise during proofing.
- Transfer the dough to a lightly floured surface and divide it into smaller portions. The size of the portions will depend on the desired size of your pita bread. Aim for portions that are approximately the size of a tennis ball.
- Shape each portion into a smooth ball by tucking the edges underneath and rolling it between your palms. This creates tension on the surface of the dough, ensuring a better rise during proofing.
- Place the dough balls on a baking sheet or tray lined with parchment paper. Make sure to leave enough space between each ball to allow for expansion.
- Cover the dough balls with a clean kitchen towel and let them rest for about 20-30 minutes. This period of rest allows the gluten to relax, making it easier to shape the pita bread later.
- During the proofing stage, the dough will undergo a second rise. It may not double in size like during the initial rise, but it should visibly puff up and become softer and more elastic.
- While the dough is proofing, preheat your oven to a high temperature, typically around 500°F (260°C). The high heat is essential to achieve the characteristic puffing of the pita bread.
Once the dough has undergone proofing and the oven is preheated, it’s time to move on to the exciting part: shaping and baking the pita bread. Stay tuned for the next steps!
Store homemade pita bread in an airtight container or resealable plastic bag at room temperature for up to 3 days. For longer storage, freeze the pita bread in a freezer-safe bag for up to 3 months.
Read more: How To Store Fresh Pita Bread
Step 3: Shaping the Pita Bread
Now that the dough has undergone proofing, it’s time to shape it into the classic pita bread round shape. Follow these steps to achieve perfectly shaped pita bread:
- Take one of the proofed dough balls and gently flatten it into a round disc shape using your hands. Be careful not to deflate the dough too much; it should still be soft and slightly puffy.
- On a floured surface, use a rolling pin to roll out the dough into a thin circle. Aim for a thickness of about ¼ inch (0.6 cm). The thinness of the dough is what allows the pita bread to puff up when baked.
- To prevent the dough from sticking, lightly dust both sides with flour as needed during the rolling process.
- Once the dough is rolled out, gently transfer it to a baking sheet lined with parchment paper. You can also use a pizza stone if you have one, as it helps to create a crispy bottom.
- Repeat the shaping process with the remaining dough balls, placing each rolled-out circle on the baking sheet or pizza stone.
- It’s important to work quickly during the shaping process to prevent the rolled-out dough from drying out too much. If needed, cover the shaped pita bread with a damp cloth as you continue shaping the rest to keep them moist.
Now that the dough has been shaped into thin circles, it’s time to move on to the final step: baking the pita bread. The anticipation is building! Stay tuned for the next step and the delicious aroma that will soon fill your kitchen.
Step 4: Baking the Pita Bread
Now comes the exciting part – baking the pita bread! Follow these steps to achieve perfectly baked pita bread with that iconic pocket:
- Preheat your oven to a high temperature, usually around 500°F (260°C). The high heat is necessary to create the rapid steam formation that puffs up the bread.
- If you have a baking stone, place it in the oven during preheating to ensure it gets hot. If not, a baking sheet will work just fine.
- Once the oven is preheated, carefully transfer a few of the shaped pita bread circles onto the hot baking stone or baking sheet. Be cautious when handling the hot surfaces.
- Bake the pita bread for about 3-4 minutes. Keep a close eye on them as they bake, as the cooking time can vary depending on the thickness of the dough and the temperature of your oven.
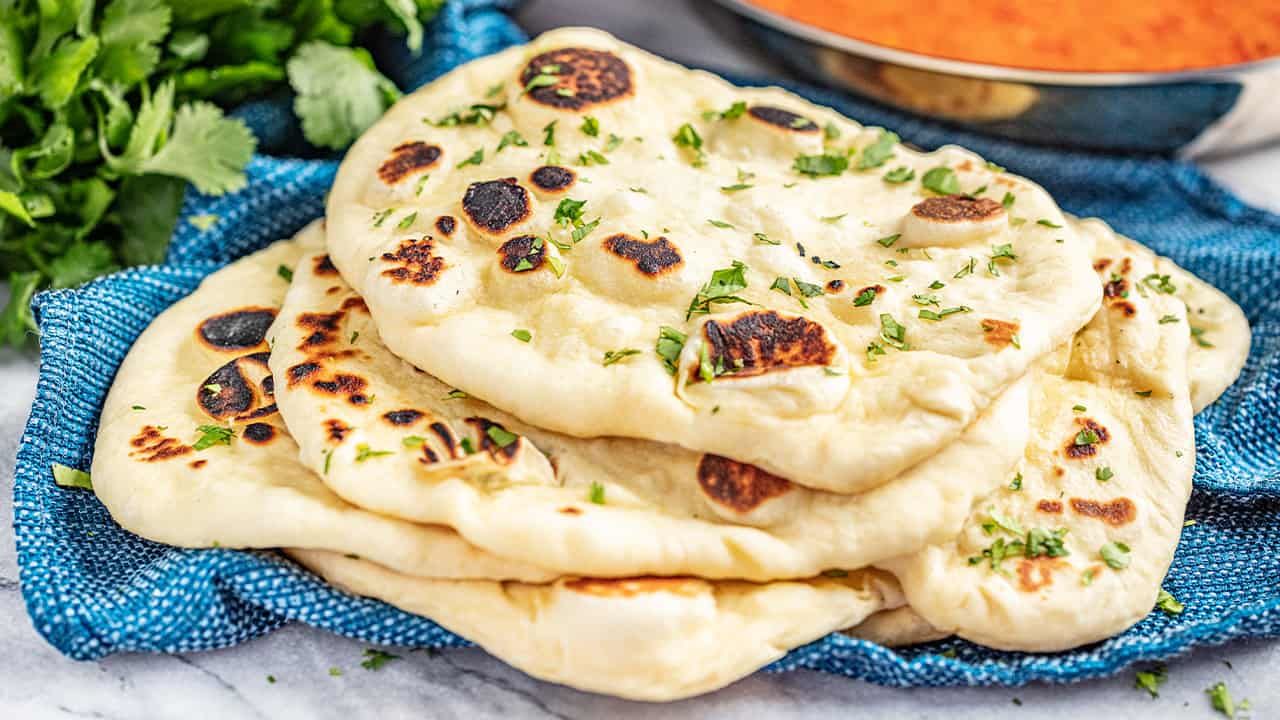
- You’ll know the pita bread is done when it has puffed up fully and turned a golden brown color. This indicates that the steam has formed and cooked the bread from the inside, resulting in a soft and airy texture.
- Remove the baked pita bread from the oven and transfer them to a wire rack to cool slightly. This allows them to firm up a bit and become easier to handle.
- Repeat the baking process with the remaining shaped dough circles until all the pita bread is baked to perfection.
Voila! You have successfully baked your homemade pita bread. Now comes the final step: cooling and storing the pita bread to maintain its freshness and quality. Keep reading to learn how to properly store your delicious creations.
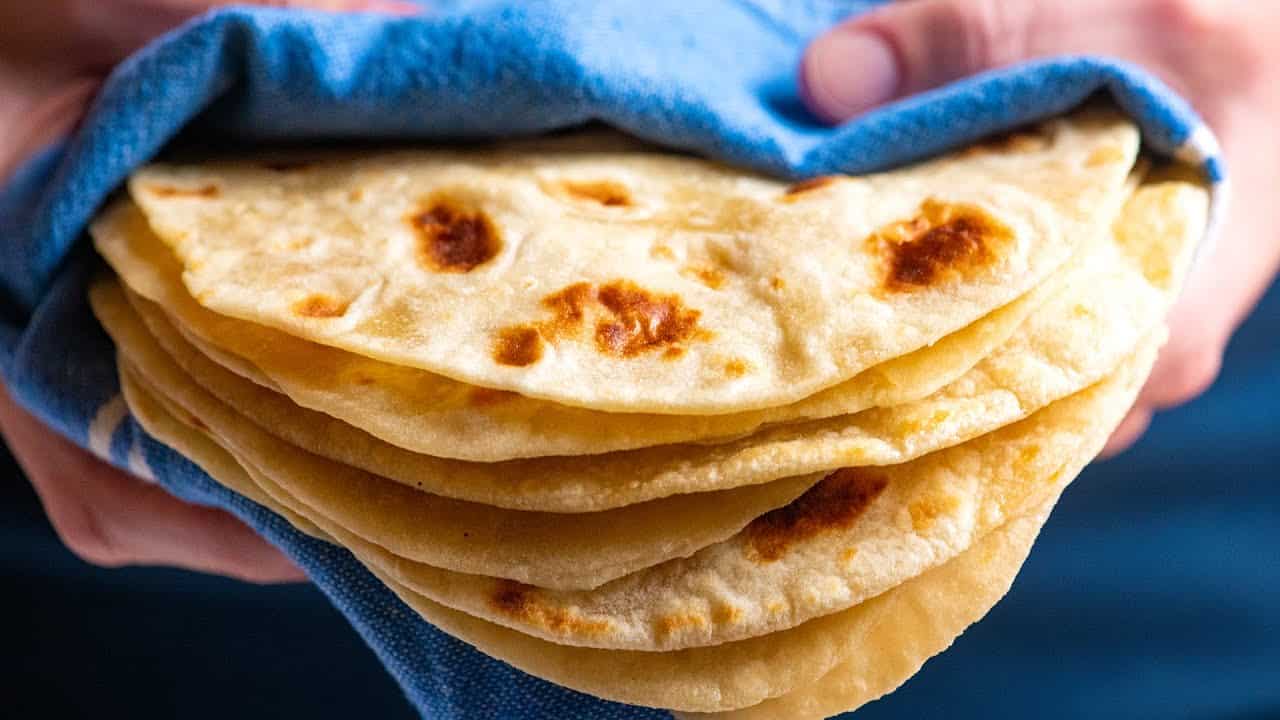
Step 5: Cooling and Storing the Pita Bread
After baking your fresh homemade pita bread, it’s essential to properly cool and store it to maintain its freshness for longer periods. Follow these steps to ensure your pita bread stays delicious:
- Allow the baked pita bread to cool completely on a wire rack. This helps to prevent the condensation of moisture, which can make the bread soggy.
- Once the pita bread has cooled, you can enjoy it immediately if desired. Simply tear it open to reveal the pocket-like interior and fill it with your favorite sandwich ingredients or use it as a dipper for savory dips or spreads.
- If you have leftover pita bread that you’d like to store, make sure it has cooled down completely before proceeding.
- Place the cooled pita bread in an airtight container or resealable plastic bag. This helps to maintain its moisture and prevent it from drying out.
- You can store the pita bread at room temperature for 2-3 days. However, to prolong its freshness, it’s best to store it in the refrigerator, where it can stay fresh for up to a week.
- If you wish to store the pita bread for longer periods, it is recommended to freeze it. Wrap the individual pita breads tightly in plastic wrap or aluminum foil, then place them in a freezer-safe bag. Frozen pita bread can last for up to 3 months.
- To thaw frozen pita bread, simply take it out of the freezer and let it come to room temperature. You can also heat it briefly in the oven or microwave to warm it up before serving, if desired.
- Whether you’re storing the pita bread in the refrigerator or freezer, it’s important to label and date the packages to keep track of their freshness.
Remember, while the pita bread can be stored, it is always best enjoyed fresh. So, if you have the opportunity, savor the warm, freshly baked pita bread as soon as possible!
Now that you’ve mastered the art of storing homemade pita bread, you can enjoy its deliciousness at any time. Whether it’s for a quick sandwich or a flavorful dip, your homemade pita bread will surely elevate your culinary experience.
Congratulations on successfully making and storing your own pita bread! Happy baking and enjoy every bite of your delectable creations!
Tips for Proper Storage
To ensure that your homemade pita bread stays fresh and delicious for as long as possible, consider the following tips for proper storage:
- Use airtight containers: When storing pita bread, opt for airtight containers or resealable plastic bags to prevent air and moisture from reaching the bread. This helps to maintain its softness and freshness.
- Avoid stacking: If you’re storing multiple pieces of pita bread, avoid stacking them on top of each other. The weight of the bread could cause it to become flattened or lose its shape. Instead, separate each piece with a sheet of parchment paper or wax paper to keep them separate.
- Reheat with care: If you need to reheat stored pita bread, do so with caution to prevent it from becoming dry. Wrap the bread in a damp paper towel and heat it in the microwave for a few seconds, or warm it in the oven for a few minutes at a low temperature.
- Freeze in individual portions: If you plan on freezing pita bread, consider separating them into individual portions before freezing. This way, you can easily thaw only the amount you need without having to defrost the whole batch.
- Label and date: When storing pita bread in the refrigerator or freezer, label and date the packages. This helps you keep track of their freshness and ensures you use the oldest bread first.
- Store separately from moist foods: To prevent the pita bread from becoming damp or soggy, store it separately from moist foods or fillings. If you’re planning to use the bread for sandwiches, consider assembling them just before eating to maintain the bread’s texture.
- Keep away from direct sunlight: Store pita bread in a cool, dry place away from direct sunlight or sources of heat. Exposure to excessive heat or sunlight can cause the bread to dry out.
- Check for mold or spoilage: Before using stored pita bread, check for any signs of mold, unusual smells, or texture changes. If you notice any of these signs, discard the bread as it may be spoiled.
By following these tips, you can maximize the shelf life of your homemade pita bread and enjoy it at its best. Whether you’re storing it for a few days or longer periods, proper storage ensures that your pita bread remains fresh, soft, and delicious.
Now that you’re armed with the knowledge of proper pita bread storage, go ahead and savor the satisfaction of homemade bread whenever you desire. Enjoy your tasty creations!
Disclaimer: The HTML encoding may not be valid. Please validate it to ensure proper encoding.
Read more: How To Store Homemade Dough
Conclusion
Congratulations! You have embarked on a delightful journey of making and storing your own homemade pita bread. By following the steps outlined in this guide, you have learned how to create soft, fluffy pita bread from scratch and how to properly store it for later use. The benefits of homemade pita bread are plentiful, from the control over ingredients to the satisfaction of creativity in the kitchen.
Homemade pita bread offers a delicious and versatile option for sandwiches, dips, and a variety of culinary creations. With complete control over the ingredients used, you can ensure that your pita bread is healthy, wholesome, and free from any unwanted additives commonly found in store-bought options.
Remember to experiment with flavors and customize your pita bread by adding herbs, spices, or even whole grains to the dough. This allows for an endless array of tastes and textures that cater to your personal preferences.
Proper storage is crucial for maintaining the freshness and quality of your homemade pita bread. Follow the tips provided to keep your bread soft, moist, and flavorful – whether you store it at room temperature, in the refrigerator, or in the freezer.
So go ahead, indulge in the pleasure of warm, freshly baked pita bread that you can enjoy at any time. With the knowledge and techniques you’ve acquired, you can confidently bake, store, and savor the delightful experience of homemade pita bread. Embrace the joy of creating something delicious from scratch and impress yourself and your loved ones with your newfound culinary skills.
Thank you for joining us on this pita bread adventure. Happy baking and may your homemade pita bread always be a delicious success!
Frequently Asked Questions about How To Store Homemade Pita Bread
Was this page helpful?
At Storables.com, we guarantee accurate and reliable information. Our content, validated by Expert Board Contributors, is crafted following stringent Editorial Policies. We're committed to providing you with well-researched, expert-backed insights for all your informational needs.


0 thoughts on “How To Store Homemade Pita Bread”