
Articles
How To Store Homemade Slime
Modified: November 2, 2024
Learn the best practices for storing homemade slime in this informative article. Keep your slime fresh and ready for playtime with these helpful tips and tricks.
(Many of the links in this article redirect to a specific reviewed product. Your purchase of these products through affiliate links helps to generate commission for Storables.com, at no extra cost. Learn more)
Introduction
Slime, the gooey and stretchy substance that has captured the hearts of children and adults alike, is a fun and satisfying DIY project. Whether you’ve made slime for a science experiment, a sensory play activity, or just for the sheer enjoyment of it, you’ll want to know how to store it properly to keep it fresh and ready for future use.
Properly storing homemade slime is essential to maintain its texture and prevent it from drying out or becoming mouldy. With a few simple techniques and the right materials, you can ensure that your slime stays in perfect condition for weeks or even months.
In this article, we’ll guide you through various methods of storing homemade slime, from using airtight containers to individual containers, ziplock bags to mason jars, and even squeeze bottles. We’ll also discuss specific considerations when storing slime made with different ingredients, such as glitter, foam beads, or food coloring.
So, if you’re ready to learn how to keep your homemade slime fresh, manageable, and ready to play with whenever the mood strikes, let’s dive into the exciting world of slime storage!
Key Takeaways:
- Keep your homemade slime fresh and ready for play by storing it in airtight containers, ziplock bags, individual containers, mason jars, or squeeze bottles. Consider safety precautions and unique ingredient considerations for optimal storage.
- Transform your slime storage into an aesthetic showcase with mason jars, or opt for convenience and precision with squeeze bottles. Prioritize safety, organization, and creativity to ensure a fun and safe slime experience for all.
Read more: How To Store Homemade Boba
Safety Precautions
Before we delve into the various methods of storing homemade slime, it’s important to go over some safety precautions. While making and playing with slime can be a fun and engaging activity, it’s essential to prioritize safety, especially when it comes to storing the slime.
Here are some safety precautions to keep in mind:
- Adult Supervision: Slime making and storage should always be done under the supervision of an adult. Some ingredients, such as borax or contact lens solution, can be harmful if not handled properly.
- Non-Toxic Ingredients: Ensure that the ingredients used in your homemade slime are non-toxic, especially if children will be playing with it. Check the labels of products like glue, food coloring, and any additives to ensure they are explicitly marked as non-toxic.
- Proper Ventilation: When handling ingredients such as glue, contact lens solution, or other chemicals, make sure you are in a well-ventilated area. Avoid inhaling fumes and always follow the safety instructions on the packaging.
- Allergies and Sensitivities: Be mindful of any allergies or sensitivities that you or your children may have to specific ingredients. If allergic reactions or skin irritations occur, discontinue use and seek medical advice.
- Storage Location: Store your slime in a safe and secure place, away from pets, small children, and direct sunlight. Make sure it is out of reach to prevent accidental ingestion or damage.
- Cleanup: After playing with slime, always wash your hands thoroughly with soap and water. Clean any surfaces or utensils used in the process to prevent cross-contamination.
By adhering to these safety precautions, you can ensure that slime making and storage remains a safe and enjoyable experience for everyone involved.
Materials Needed
Before we proceed with the various methods of storing homemade slime, let’s gather the materials you will need for slime storage:
- Airtight Containers: These can be plastic or glass containers with lids that create a tight seal. Choose containers that are the appropriate size to hold your slime without any excess air space.
- Ziplock Bags: These are convenient for storing smaller batches of slime or for on-the-go slime storage. Look for sturdy bags with strong seals to prevent leakage.
- Individual Containers: These can be small plastic containers with lids, like those used for food storage. They are handy for storing individual portions or different colors of slime separately.
- Mason Jars: Mason jars with screw-top lids provide a charming and functional storage option for slime. They are available in various sizes and are great for showcasing different layers or textures of slime.
- Squeeze Bottles: These are ideal for storing slimy liquids or slime with a more liquid consistency. Look for squeeze bottles with flip-top or screw-on caps for easy dispensing and sealing.
In addition to the containers, consider having labels or markers on hand to help you identify the contents and date of storage. You may also want to keep a measuring cup or other tools for portioning your slime into the appropriate storage containers.
Now that we have all the necessary materials, let’s dive into the various methods of storing homemade slime!
Method 1: Storing Homemade Slime in an Airtight Container
One of the simplest and most effective methods of storing homemade slime is using an airtight container. This method helps to preserve the moisture and texture of the slime, preventing it from drying out or becoming sticky.
Here’s how to store homemade slime in an airtight container:
- Ensure that your homemade slime is at room temperature before storing it. If the slime is too warm, it may become runny, and if it’s too cold, it may harden.
- Carefully transfer the slime into a clean and dry airtight container. Choose a container that is large enough to hold the slime without squishing or compacting it.
- Seal the container tightly to create an airtight seal. This will prevent air from entering the container and maintain the moisture level of the slime.
- Label the container with the date of storage, especially if you have multiple batches of slime or plan to keep it for an extended period.
- Store the airtight container in a cool, dry place away from direct sunlight, heat sources, or extreme temperature fluctuations. This will help to preserve the consistency and longevity of the slime.
When you’re ready to play with the slime again, simply open the container, remove the slime, and give it a good knead to restore its stretchiness and pliability.
Storing homemade slime in an airtight container is a reliable and convenient method, ensuring that your slime remains fresh and ready for endless hours of fun!
Method 2: Storing Homemade Slime in a Ziplock Bag
If you’re looking for a more compact and portable option for storing homemade slime, using a ziplock bag is a fantastic choice. Ziplock bags provide a secure seal, preventing the slime from drying out and allowing for easy storage and transportation.
Here’s how to store homemade slime in a ziplock bag:
- Ensure that your homemade slime is at room temperature before transferring it into a ziplock bag.
- Squeeze out any excess air from the ziplock bag before placing the slime inside. This minimizes air exposure, maintaining the moisture of the slime.
- Seal the ziplock bag tightly, ensuring that there are no gaps or openings where air can enter.
- If desired, label the ziplock bag with the date and any additional notes, such as the type of slime or any special ingredients used.
- Store the ziplock bag in a cool, dry place away from direct sunlight or extreme temperatures. Avoid placing heavy objects on top of the bag to prevent squishing or deforming the slime.
When it’s time to play with the slime, simply open the ziplock bag, remove the slime, and give it a gentle knead to restore its original texture.
Using a ziplock bag for slime storage is not only convenient but also allows you to easily transport the slime for on-the-go sensory play or sharing with friends. Just remember to securely seal the bag to prevent any leaks or spills!
Store homemade slime in an airtight container to prevent it from drying out. Keep it in a cool, dry place away from direct sunlight to maintain its consistency.
Read more: How To Store Homemade Pies
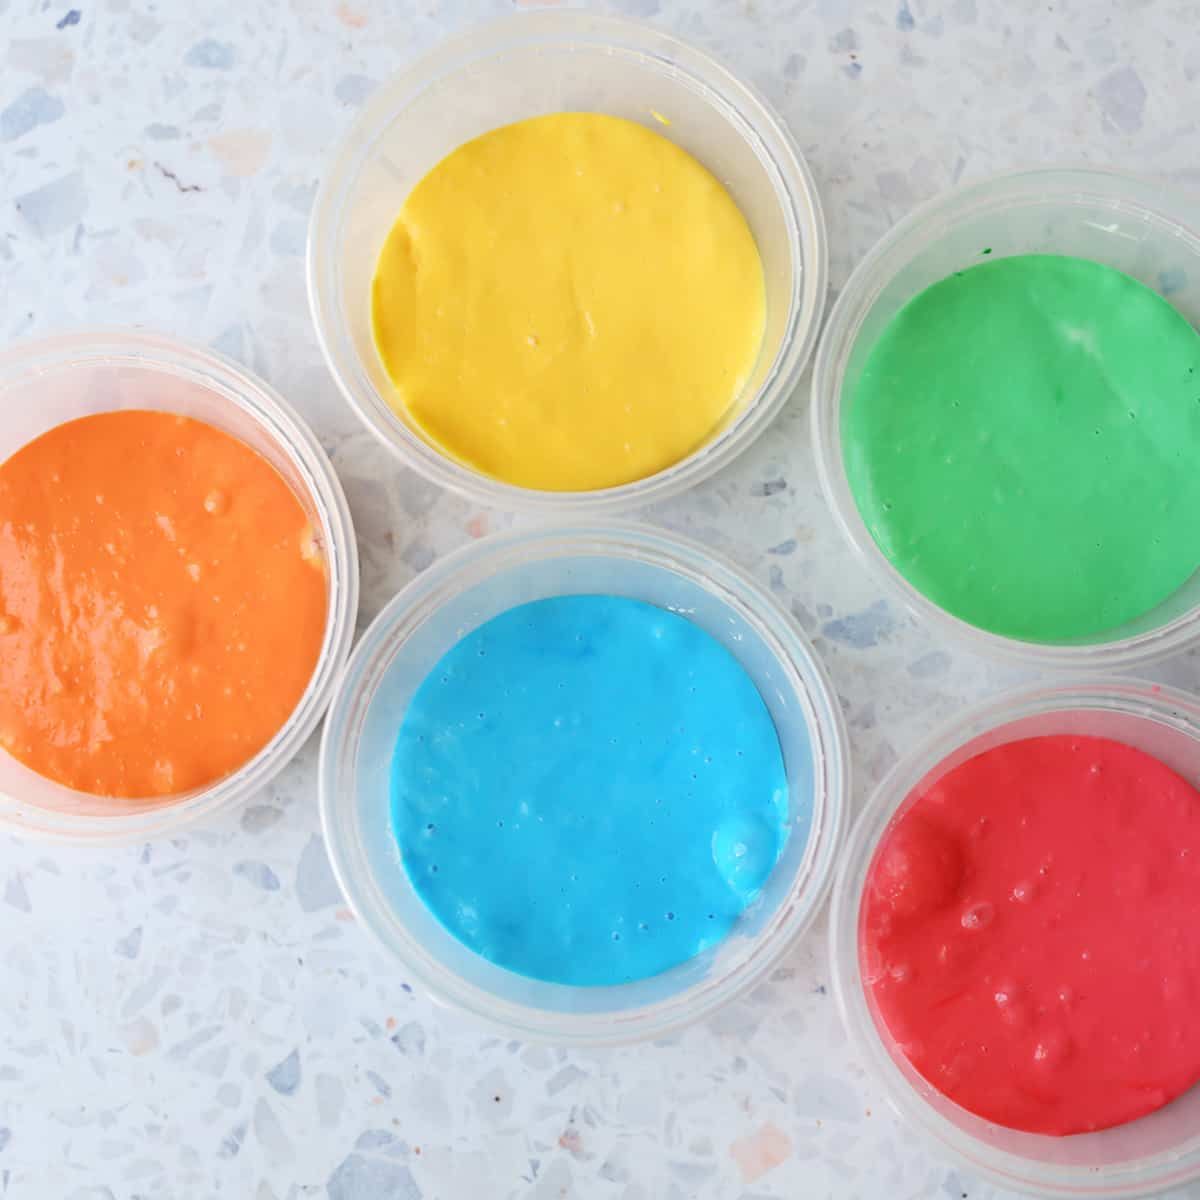
Method 3: Storing Homemade Slime in Individual Containers
If you want to keep your different types or colors of slime separate, or if you want to portion out individual servings of slime, storing homemade slime in individual containers is the perfect solution. This method provides convenience and organization for your slime collection.
Here’s how to store homemade slime in individual containers:
- Prepare your homemade slime and ensure that it’s at room temperature.
- Divide the slime into portions, depending on the size of the containers you have available. Use a measuring cup or your judgment to ensure consistent portions.
- Place each portion of slime into an individual container and secure the lids tightly.
- If desired, label each container with the type or color of slime and the date of storage.
- Store the individual containers in a cool, dry place away from direct sunlight.
This method not only keeps your different slimes neatly organized but also prevents them from mixing together and losing their distinct qualities. It’s also convenient if you want to share or gift individual portions of slime to friends or family.
When you’re ready to play with a particular slime, simply open the corresponding container, take out the slime, and enjoy its unique texture and color.
Storing homemade slime in individual containers ensures that each slime remains separate and fresh, allowing for easy access and hassle-free playtime.
Method 4: Storing Homemade Slime in a Mason Jar
If you’re looking for a visually appealing way to store your homemade slime, using a mason jar is an excellent choice. Mason jars provide a charming and functional storage option, allowing you to showcase your slime while keeping it fresh and ready for play.
Here’s how to store homemade slime in a mason jar:
- Prepare your homemade slime and ensure that it’s at room temperature.
- Choose a mason jar that is the appropriate size to hold your slime without squishing or compressing it.
- If desired, layer different colors or textures of slime in the jar to create an attractive visual effect.
- Securely screw on the lid of the mason jar to create an airtight seal.
- You may want to decorate the outside of the jar with labels, ribbons, or other embellishments to make it even more eye-catching.
- Store the mason jar in a cool, dry place away from direct sunlight or extreme temperatures.
When you’re ready to play with the slime, simply open the jar, remove the slime, and give it a good knead to restore its stretchiness and pliability.
Storing homemade slime in a mason jar not only keeps it fresh but also adds a decorative element to your collection. It can be a fun and creative way to display your slime, making it a visual delight for kids and adults alike.
So, grab your mason jars and transform your slime storage into an aesthetic showcase!
Method 5: Storing Homemade Slime in a Squeeze Bottle
If your homemade slime has a more liquid consistency or you want a convenient way to dispense the slime, storing it in a squeeze bottle is a great option. Squeeze bottles provide precise and controlled dispensing, making it easier to use and play with your slime.
Here’s how to store homemade slime in a squeeze bottle:
- Prepare your homemade slime and ensure that it’s at room temperature.
- Select a squeeze bottle with a flip-top or screw-on cap, depending on your preference.
When you’re ready to use the slime, simply squeeze the bottle to dispense the desired amount. This method provides easy access to your slime and allows for controlled application, making it ideal for creating slime art, designs, or even slime-filled sensory activities.
Remember to clean the tip of the squeeze bottle after each use to prevent any residue from clogging the opening.
Storing homemade slime in a squeeze bottle offers convenience, precision, and minimal mess, making it a popular choice for slime enthusiasts.
Storing Homemade Slime with Different Ingredients
Homemade slime can be customized with various ingredients such as glitter, foam beads, or food coloring to add texture, sparkle, or vibrant colors. While storing slime with these additions is similar to the methods mentioned earlier, there are a few additional considerations to keep in mind.
Here’s how to store homemade slime with different ingredients:
- Glitter Slime: If your slime is made with glitter, be mindful that the glitter may settle at the bottom over time. Before playing with the slime, give it a gentle mix or knead to redistribute the glitter evenly.
- Foam Bead Slime: Slime with foam beads provides a unique sensory experience. When storing this type of slime, make sure to seal the container tightly to prevent the beads from falling out. Avoid storing foam bead slime in ziplock bags, as the beads may get crushed or squished in the bag.
- Colorful Slime: Slime with vibrant colors made from food coloring or other coloring agents may transfer some color if stored together. To prevent colors from mixing, consider storing each color separately in individual containers. If you choose to layer different colored slimes in one container, place a piece of plastic wrap between the layers to keep them from blending.
Regardless of the specific ingredients used, it’s essential to follow the appropriate storage method discussed earlier, such as using airtight containers, ziplock bags, individual containers, mason jars, or squeeze bottles. Properly sealing the storage container and keeping it in a cool, dry place will help maintain the quality of your slime.
Remember to check the condition of your slime periodically. If you notice any changes in smell, appearance, or texture, it may be a sign that the slime needs to be discarded.
By considering the unique characteristics of your homemade slime and taking the necessary precautions, you can store and enjoy your slime creations for an extended period.
Read more: How To Store Homemade Soup
Conclusion
Properly storing homemade slime is crucial to maintain its texture, freshness, and longevity. By following the methods outlined in this article, you can ensure that your slime remains stretchy, gooey, and ready for play whenever the mood strikes.
From storing slime in airtight containers to using ziplock bags, individual containers, mason jars, or squeeze bottles, there are various options to fit your preferences and needs. Each method offers its own advantages, whether it’s convenience, organization, or visual appeal.
When storing slime, it’s essential to consider any additional ingredients, such as glitter, foam beads, or food coloring. Keep in mind that certain additives may require extra attention, such as redistributing glitter or preventing color transfer.
Lastly, always prioritize safety when making and storing slime. Ensure adult supervision, use non-toxic ingredients, maintain proper ventilation, and clean up any spills or messes promptly. Following these safety precautions will ensure a fun and safe slime experience for everyone involved.
So, whether you’re storing slime for future play, gifting it to friends, or just keeping your collection organized, these methods will help keep your slime fresh, enjoyable, and ready to delight both children and adults alike.
Now it’s time to gather your materials, choose your preferred storage method, and preserve the squishy goodness of your homemade slime!
Frequently Asked Questions about How To Store Homemade Slime
Was this page helpful?
At Storables.com, we guarantee accurate and reliable information. Our content, validated by Expert Board Contributors, is crafted following stringent Editorial Policies. We're committed to providing you with well-researched, expert-backed insights for all your informational needs.









0 thoughts on “How To Store Homemade Slime”