Articles
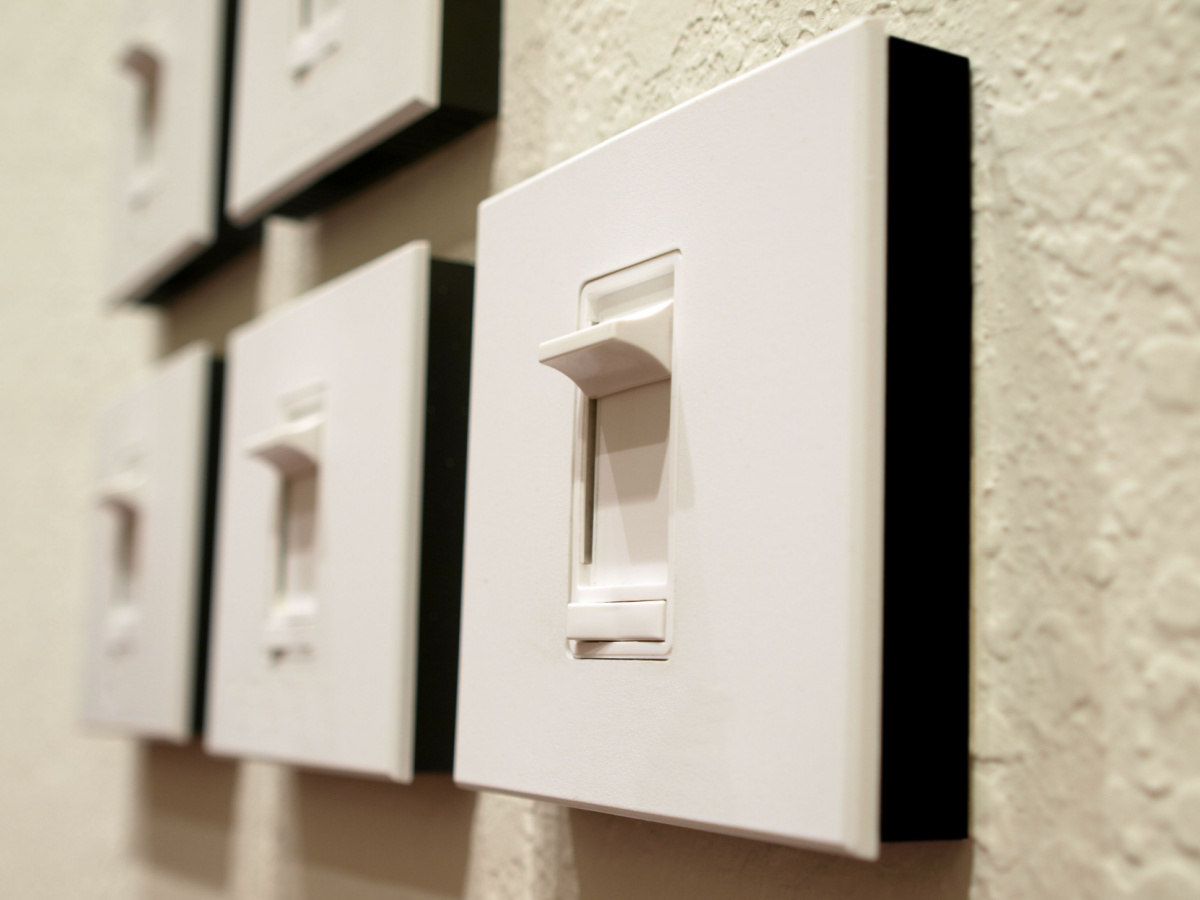
How To Tell If A Dimmer Switch Is Bad
Modified: August 28, 2024
Learn how to determine if your dimmer switch is faulty with our informative articles on troubleshooting and fixing common dimmer switch problems.
(Many of the links in this article redirect to a specific reviewed product. Your purchase of these products through affiliate links helps to generate commission for Storables.com, at no extra cost. Learn more)
Introduction
Welcome to our guide on how to tell if a dimmer switch is bad. Dimmer switches are a popular choice for homeowners looking to create the perfect ambiance in their living spaces. From setting the mood in the dining room to creating a relaxing atmosphere in the bedroom, dimmer switches allow you to adjust the brightness of your lights to suit your preferences.
However, like any electronic device, dimmer switches can experience issues over time, leading to malfunctions that affect their performance. It’s important to be able to identify if a dimmer switch is faulty so that you can address the problem promptly and ensure the safe and efficient operation of your lighting system.
In this article, we will explore the common symptoms of a bad dimmer switch and provide step-by-step instructions on how to determine if your dimmer switch is indeed the culprit. By following these guidelines, you can save time and money by diagnosing the issue correctly and carrying out the necessary repairs or replacements.
So whether you’re a homeowner or a DIY enthusiast, let’s dive into the world of dimmer switches and learn how to spot a bad one.
Key Takeaways:
- Don’t ignore flickering lights or excessive heat from your dimmer switch. These are signs of a potential problem that should be addressed promptly to ensure safety and optimal performance.
- By following the step-by-step process to diagnose and replace a faulty dimmer switch, you can take control of your lighting system and create the perfect ambiance in your living spaces.
Read more: How To Tell If Insulation Is Bad
Symptoms of a Bad Dimmer Switch
Dimmer switches are designed to provide smooth and precise control over the brightness of your lights. However, when they begin to malfunction, certain telltale signs start to appear. Here are some common symptoms of a bad dimmer switch:
- Dimmed Lights Flickering: If you notice that your dimmed lights are flickering intermittently or have an inconsistent, strobe-like effect, it could indicate a problem with your dimmer switch. This flickering could occur at any dimming level and is a clear sign of a malfunctioning switch.
- Dimmer Switch Getting Hot: Dimmer switches can generate some heat during operation, but if you feel that the switch is excessively hot to the touch, it may indicate a problem. Overheating can be a result of electrical arcing or poor design, and it’s a serious safety concern that should be addressed promptly.
- Inconsistent Dimming Levels: When you adjust the dimmer switch, you expect a smooth and gradual change in brightness. However, if you notice that the dimming level is erratic or doesn’t respond as intended, it’s a sign of a faulty switch. The lights may not dim or brighten evenly, making it difficult to achieve the desired lighting effect.
- Lights Not Turning Off Completely: When you turn off the lights using the dimmer switch, they should go completely dark. If you notice a faint glow or residual light, it indicates that the switch isn’t fully cutting off the power supply. This can be due to a faulty switch or a wiring issue.
- Buzzing or Humming Sounds: Dimmer switches rely on electronic components to regulate the flow of electricity, and sometimes these components can produce audible noises. If you hear a buzzing or humming sound coming from the dimmer switch, it’s a sign of a problem. This could be caused by loose wiring, a damaged component, or an incompatible bulb.
It’s important to note that these symptoms can also be indicative of other issues, such as faulty wiring or incompatible bulbs. However, if you experience multiple symptoms listed above, there’s a high likelihood that your dimmer switch is the root cause of the problem.
Now that we’ve identified the symptoms, let’s move on to the steps you can take to determine if your dimmer switch is indeed bad.
Key Takeaways:
- Don’t ignore flickering lights or excessive heat from your dimmer switch. These are signs of a potential problem that should be addressed promptly to ensure safety and optimal performance.
- By following the step-by-step process to diagnose and replace a faulty dimmer switch, you can take control of your lighting system and create the perfect ambiance in your living spaces.
Read more: How To Tell If Insulation Is Bad
Symptoms of a Bad Dimmer Switch
-
Dimmed Lights Flickering
One of the most common signs of a bad dimmer switch is when the lights that are connected to it start to flicker. When you dim the lights using the switch, they should maintain a steady level of brightness. However, if you notice that the lights are flickering intermittently or have a strobe-like effect, it’s a clear indication that something is wrong with the dimmer switch.
Flickering lights can occur at any dimming level, and it can be quite disruptive to the ambiance you’re trying to create. This issue often arises when the dimmer switch is not able to properly regulate the flow of electricity to the lights. It could be caused by a loose connection within the switch itself or by a problem with the electrical wiring.
It’s important to address the flickering lights issue because it not only compromises the desired lighting effect but can also be a safety hazard. Flickering lights can lead to eye strain and headaches, and in some cases, they may even indicate an underlying electrical problem that needs to be resolved to prevent further damage.
If you notice that your dimmed lights are flickering, the first step is to ensure that the bulbs are properly seated and secure. Loose bulbs can cause flickering, so make sure to tighten them if necessary. If the problem persists, it’s likely that the dimmer switch itself is the culprit.
To verify if the dimmer switch is indeed causing the flickering lights, you can try bypassing the dimmer switch temporarily. Start by turning off the power to the switch at the circuit breaker or fuse box. Then, remove the dimmer switch and connect the light fixture directly to the electrical wiring. If the lights no longer flicker when connected directly, it confirms that the dimmer switch is the source of the problem.
In such cases, it’s advisable to replace the faulty dimmer switch to ensure smooth and consistent dimming control over your lights. Consult an electrician or refer to the manufacturer’s instructions for the specific steps on how to safely remove and install a new dimmer switch.
Now that we’ve discussed the first symptom, let’s move on to the next one: Dimmer Switch Getting Hot.
Key Takeaways:
- Don’t ignore flickering lights or excessive heat from your dimmer switch. These are signs of a potential problem that should be addressed promptly to ensure safety and optimal performance.
- By following the step-by-step process to diagnose and replace a faulty dimmer switch, you can take control of your lighting system and create the perfect ambiance in your living spaces.
Read more: How To Tell If Insulation Is Bad
Symptoms of a Bad Dimmer Switch
-
Read more: What Is A Dimmer Switch
Dimmer Switch Getting Hot
The next symptom of a bad dimmer switch is when the switch itself becomes hot to the touch during operation. While it’s normal for dimmer switches to generate some heat, excessive heat can be a sign of a problem.
If you notice that the dimmer switch feels unusually hot after extended use, it’s important to investigate the issue further. Overheating can be caused by several factors, including electrical arcing, poor design, or overloading of the switch. It’s crucial to address this symptom promptly, as excessive heat can lead to damage to the switch and potentially pose a fire risk.
To determine if the dimmer switch is indeed getting too hot, follow these steps:
- Turn off the power to the dimmer switch at the circuit breaker or fuse box.
- Using your hand, gently touch the surface of the dimmer switch. If it feels excessively hot, proceed with caution and avoid further contact.
- Inspect the dimmer switch for any visible signs of discoloration or damage, such as melted plastic or burnt marks. These indicators are strong indications of an underlying issue.
- Check if the wattage of the bulbs connected to the dimmer switch exceeds the switch’s recommended load capacity. Overloading the switch can cause it to overheat.
- If the dimmer switch is getting hot and you cannot identify any external factors that may be causing the issue, consult a qualified electrician. They will have the expertise to assess the situation and determine if the switch needs to be replaced.
Remember, if you ever encounter a dimmer switch that feels excessively hot, it’s important to take it seriously and address the issue immediately to prevent any potential safety hazards.
Now that we’ve covered dimmer switches getting hot, let’s move on to the next symptom: Inconsistent Dimming Levels.
Key Takeaways:
- Don’t ignore flickering lights or excessive heat from your dimmer switch. These are signs of a potential problem that should be addressed promptly to ensure safety and optimal performance.
- By following the step-by-step process to diagnose and replace a faulty dimmer switch, you can take control of your lighting system and create the perfect ambiance in your living spaces.
Read more: How To Tell If Insulation Is Bad
Symptoms of a Bad Dimmer Switch
-
Inconsistent Dimming Levels
Another common symptom of a bad dimmer switch is when you experience inconsistent dimming levels. When you adjust the dimmer switch, you expect a smooth and gradual change in the brightness of the lights. However, if you notice that the dimming levels are erratic or don’t respond as intended, it’s a clear indication that the dimmer switch is not functioning properly.
Inconsistent dimming levels can manifest in various ways, such as:
- Lights not responding consistently to adjustments, resulting in sudden jumps in brightness or staying at the same intensity.
- Lights dimming unevenly, with some bulbs appearing brighter than others even when set to the same level.
- Dimming levels fluctuating randomly, making it difficult to achieve and maintain the desired lighting ambiance.
This inconsistency in dimming levels can be frustrating and hinder your ability to create the desired atmosphere in a room. It can also be a sign that the dimmer switch is unable to properly regulate the electrical current flowing to the lights.
To diagnose if your dimmer switch is the cause of the inconsistent dimming levels, you can try the following steps:
- Turn off the power to the dimmer switch at the circuit breaker or fuse box.
- Remove the faceplate of the dimmer switch to access the wiring connections.
- Inspect the wiring connections to ensure they are secure and tightly connected.
- If any wiring appears loose or damaged, consider consulting a licensed electrician to address the issue.
- If the wiring appears intact, reassemble the switch and restore power.
- Test the dimming function by adjusting the switch and observing the behavior of the lights.
- If the dimming levels are still inconsistent, it may be necessary to replace the dimmer switch.
It’s essential to choose a dimmer switch that is compatible with the type of lights you have installed. Some dimmer switches have compatibility requirements for specific types of bulbs, such as incandescent, LED, or CFL. Using an incompatible dimmer switch can result in inconsistent or unpredictable dimming performance.
If you’ve followed these steps and the dimming levels remain inconsistent, it’s recommended to consult a professional electrician for further assistance. They can accurately diagnose the issue and provide guidance on the best course of action, which may involve replacing the dimmer switch.
Now that we’ve discussed inconsistent dimming levels, let’s move on to the next symptom: Lights Not Turning Off Completely.
Key Takeaways:
- Don’t ignore flickering lights or excessive heat from your dimmer switch. These are signs of a potential problem that should be addressed promptly to ensure safety and optimal performance.
- By following the step-by-step process to diagnose and replace a faulty dimmer switch, you can take control of your lighting system and create the perfect ambiance in your living spaces.
Read more: How To Tell If Insulation Is Bad
Symptoms of a Bad Dimmer Switch
-
Lights Not Turning Off Completely
If you find that your lights connected to a dimmer switch are not turning off completely when the switch is set to its lowest position, it’s a clear sign of a problem with the dimmer switch. When you turn off the lights using the dimmer switch, you expect them to go completely dark, with no residual glow or light emission.
When the lights do not turn off completely, there are a few possible explanations:
- Improper wiring: Incorrectly wired dimmer switches can prevent the power from being fully cut off, resulting in residual light. It’s essential to ensure that the dimmer switch is wired correctly according to the manufacturer’s instructions.
- Compatibility issues: Certain types of light bulbs, such as LEDs or CFLs, may not be fully compatible with some dimmer switches. This can cause the lights to remain partially illuminated even when the switch is turned off. Checking the compatibility between the dimmer switch and the bulbs can help resolve the issue.
- Faulty switch: If the wiring appears to be correct and the bulbs are compatible, a malfunctioning dimmer switch may be to blame. Over time, components within the switch can wear out or become damaged, leading to improper functioning.
To determine if the dimmer switch is the cause of the lights not turning off completely, you can follow these steps:
- Ensure the power to the dimmer switch is turned off at the circuit breaker or fuse box.
- Remove the faceplate of the dimmer switch to access the wiring connections.
- Double-check the wiring connections to ensure they are properly connected and secure.
- If everything appears to be correct, try replacing the dimmer switch with a known working switch to test if the problem persists.
- If the lights still do not turn off completely with a different switch, the issue may lie elsewhere, such as faulty wiring or incompatible bulbs.
- Consider contacting a licensed electrician to inspect the wiring and troubleshoot the problem further.
Addressing the issue of lights not turning off completely is crucial for both functionality and energy efficiency. Leaving lights on, even partially, can lead to unnecessary energy consumption and increased utility costs.
By properly diagnosing and rectifying the problem, you can ensure that your dimmer switch functions as intended, allowing you to fully control the lighting in your space.
Now that we’ve covered the issue of lights not turning off completely, let’s move on to the final symptom: Buzzing or Humming Sounds.
Key Takeaways:
- Don’t ignore flickering lights or excessive heat from your dimmer switch. These are signs of a potential problem that should be addressed promptly to ensure safety and optimal performance.
- By following the step-by-step process to diagnose and replace a faulty dimmer switch, you can take control of your lighting system and create the perfect ambiance in your living spaces.
Read more: How To Tell If Insulation Is Bad
Symptoms of a Bad Dimmer Switch
-
Buzzing or Humming Sounds
If you hear buzzing or humming sounds coming from your dimmer switch, it is a clear indication of a problem. Dimmer switches rely on electronic components to regulate the flow of electricity, and when these components malfunction or become damaged, they can produce audible noises.
Buzzing or humming sounds can be caused by several factors, including:
- Loose wiring: If the wiring connections inside the dimmer switch are not secure, it can create an uneven flow of electricity, resulting in vibrations and audible buzzing or humming sounds.
- Damaged component: Over time, the internal components of the dimmer switch can wear out or become damaged. A damaged component can lead to irregular electrical currents, which can manifest as buzzing or humming noises.
- Incompatible bulbs: Some dimmer switches are not compatible with certain types of bulbs, such as LED or CFL. Incompatible bulbs can cause electrical fluctuations, resulting in buzzing or humming sounds.
To address the issue of buzzing or humming sounds coming from your dimmer switch, you can follow these steps:
- Turn off the power to the dimmer switch at the circuit breaker or fuse box.
- Remove the faceplate of the dimmer switch to access the wiring connections.
- Inspect the wiring connections to ensure they are tightly connected and not causing any vibrations or loose connections.
- If the wiring appears to be secure, check the compatibility of the bulbs with the dimmer switch. Replace the bulbs with ones that are recommended for use with dimmer switches if necessary.
- If the buzzing or humming sounds persist, it may indicate a problem with a component within the dimmer switch. Consider replacing the switch with a new one to resolve the issue.
- If you are unsure or uncomfortable performing these steps, it is best to consult a licensed electrician to diagnose and address the problem effectively.
It’s crucial to address buzzing or humming sounds coming from your dimmer switch because they not only indicate a malfunction but can also be associated with electrical hazards or potential damage to the switch itself. By resolving the issue promptly, you can ensure the smooth and safe operation of your lighting system.
Now that we’ve covered the symptoms of a bad dimmer switch, let’s recap the steps to determine if a dimmer switch is indeed the culprit.
Steps to Determine if a Dimmer Switch is Bad
Now that you are familiar with the common symptoms of a bad dimmer switch, it’s time to go through the steps to determine if your dimmer switch is indeed the culprit. Follow these steps to diagnose the problem:
-
Read more: How To Tell If A Spackle Is Bad
Step 1: Turn Off Power to the Dimmer Switch
Before inspecting the dimmer switch, ensure that the power to the switch is turned off at the circuit breaker or fuse box. This step is crucial for your safety and prevents any electrical accidents while working on the switch.
-
Step 2: Inspect the Switch for Physical Damage
Take a close look at the dimmer switch for any visible signs of physical damage, such as cracks, melted plastic, or burn marks. These are clear indications of a faulty switch that should be replaced.
-
Step 3: Test the Dimmer Switch with a Multimeter
If there are no visible signs of physical damage, you can use a multimeter to test the functionality of the dimmer switch. Set the multimeter to the resistance (ohms) setting and place the probes on the switch terminals. If the multimeter reading shows continuity when the switch is turned on and no continuity when the switch is turned off, it means the switch is functioning correctly.
-
Step 4: Check the Wiring Connections
Inspect the wiring connections at the back of the dimmer switch to ensure they are secure and properly connected. Loose or damaged wires can lead to issues with the switch’s operation. If any wiring appears loose or damaged, it’s advisable to consult a licensed electrician to rectify the problem.
-
Read more: How To Disable A Dimmer Switch
Step 5: Replace the Dimmer Switch if Necessary
If you have gone through the above steps and determined that the dimmer switch is indeed faulty, it’s time to replace it. Purchase a new dimmer switch that is compatible with your lighting system and follow the manufacturer’s instructions to install it correctly. If you are unsure or uncomfortable with the installation process, it’s best to consult a professional electrician.
By following these steps, you can effectively determine if your dimmer switch is the source of the problem and take the necessary steps to address it. Remember to always prioritize safety and consult a professional if you are unsure or uncomfortable with any electrical work.
Now that you have the knowledge to determine if a dimmer switch is bad, you can take control of your lighting system and ensure its optimal performance.
Steps to Determine if a Dimmer Switch is Bad
-
Read more: How To Tell If A Spackle Is Bad
Step 1: Turn Off Power to the Dimmer Switch
The first step in determining if a dimmer switch is bad is to turn off the power to the switch. This is essential for your safety and to avoid any risk of electrical shock while working on the switch.
To turn off the power to the dimmer switch, locate your electrical panel, also known as the circuit breaker or fuse box. Open the panel and locate the circuit breaker corresponding to the room or area where the dimmer switch is installed. Flip the switch on the circuit breaker to the “off” position to cut off the power to that specific circuit.
Turning off the power ensures that there is no electricity flowing to the dimmer switch, reducing the risk of accidental contact with live electrical wires. Always verify that the power is indeed off by attempting to turn on the light or using a non-contact voltage tester before proceeding with any work on the switch.
It’s important to note that if your electrical panel is labeled, it should indicate which circuit breaker controls the power to the specific area or room where the dimmer switch is located. If your panel is not labeled, it may require some trial and error to identify the correct breaker. In such cases, it’s recommended to seek assistance from a licensed electrician.
Remember, safety always comes first. Taking the time to turn off the power at the circuit breaker ensures that you can work on the dimmer switch without any risk of electrical injury.
Now that you have turned off the power to the dimmer switch, we can move on to the next step in determining if the switch is bad.
-
Step 2: Inspect the Switch for Physical Damage
Once you have ensured that the power to the dimmer switch is turned off, you can proceed to inspect the switch for any physical damage. Damaged or worn-out components can be a sign of a faulty dimmer switch.
Start by removing the faceplate of the dimmer switch. Most faceplates can be easily removed by unscrewing the screws that hold them in place. Once the faceplate is removed, you will have access to the switch itself.
Take a close look at the switch for any visible signs of physical damage, such as cracks, melted plastic, or burn marks. These signs are indications that the switch has experienced excessive heat or electrical arcing, which can compromise its functionality.
If you notice any physical damage, it is a clear indication that the dimmer switch is bad and needs to be replaced. Damaged switches can not only affect the performance of your lighting system but also pose a safety risk.
However, even if you do not observe any physical damage, it does not guarantee that the dimmer switch is in perfect condition. There could still be internal issues that require further investigation.
Now that you have completed the second step, we can proceed to the next step in determining if the dimmer switch is bad.
-
Step 3: Test the Dimmer Switch with a Multimeter
A multimeter is a useful tool for testing the functionality of electrical components, including a dimmer switch. By using a multimeter, you can determine if the dimmer switch is functioning properly or if it needs to be replaced.
Here’s how you can test the dimmer switch with a multimeter:
- Set your multimeter to the resistance (ohms) setting. Make sure the multimeter is calibrated and functioning correctly.
- Touch the multimeter’s probes to the terminals of the dimmer switch. Ensure that each probe makes contact with a separate terminal.
- With the dimmer switch turned off, the multimeter should display an “infinite” reading or open circuit, indicating no continuity.
- When you turn the dimmer switch on, the multimeter should display a low resistance or continuity, indicating that the switch is allowing the flow of electricity.
- If you get the expected readings on the multimeter, it indicates that the dimmer switch is functioning properly. If there is no continuity when the switch is on or if there is continuity when the switch is off, it suggests a problem with the switch.
Keep in mind that different models of dimmer switches may have slightly different configurations, so refer to the manufacturer’s instructions for specific guidelines on using a multimeter to test your dimmer switch.
If the multimeter test reveals that the dimmer switch is indeed faulty, it’s time to replace the switch with a new one.
Now that you have completed the third step, we can move on to the next step in determining if the dimmer switch is bad.
-
Step 4: Check the Wiring Connections
After inspecting the physical condition of the dimmer switch, the next step is to check the wiring connections. Loose or faulty wiring can cause issues with the switch’s functionality.
Start by removing the dimmer switch from the electrical box. Depending on the type of switch, this may involve unscrewing screws or releasing clips that hold it in place. Carefully pull the switch out to expose the wiring connections.
Inspect the wiring connections to ensure they are secure and tightly connected. Look for any loose or frayed wires that may need to be trimmed or reconnected. If you notice any damaged or corroded wires, it’s advisable to consult a licensed electrician for proper repairs.
Additionally, check for any signs of burning or discoloration around the wiring connections. This could indicate overheating and may require further investigation or professional assistance to resolve.
If the wiring connections appear to be in good condition and properly connected, you can proceed to re-install the dimmer switch.
It’s important to note that working with electrical wiring can be dangerous, and if you’re unsure or uncomfortable with this step, it’s best to consult a professional electrician to ensure proper and safe wiring connections.
Now that you have completed the fourth step, we can proceed to the final step in determining if the dimmer switch is bad.
Steps to Determine if a Dimmer Switch is Bad
-
Read more: How To Tell If A Spackle Is Bad
Step 1: Turn Off Power to the Dimmer Switch
The first step in determining if a dimmer switch is bad is to turn off the power to the switch. This is essential for your safety and to avoid any risk of electrical shock while working on the switch.
To turn off the power to the dimmer switch, locate your electrical panel, also known as the circuit breaker or fuse box. Open the panel and locate the circuit breaker corresponding to the room or area where the dimmer switch is installed. Flip the switch on the circuit breaker to the “off” position to cut off the power to that specific circuit.
Turning off the power ensures that there is no electricity flowing to the dimmer switch, reducing the risk of accidental contact with live electrical wires. Always verify that the power is indeed off by attempting to turn on the light or using a non-contact voltage tester before proceeding with any work on the switch.
It’s important to note that if your electrical panel is labeled, it should indicate which circuit breaker controls the power to the specific area or room where the dimmer switch is located. If your panel is not labeled, it may require some trial and error to identify the correct breaker. In such cases, it’s recommended to seek assistance from a licensed electrician.
Remember, safety always comes first. Taking the time to turn off the power at the circuit breaker ensures that you can work on the dimmer switch without any risk of electrical injury.
-
Step 2: Inspect the Switch for Physical Damage
Once you have ensured that the power to the dimmer switch is turned off, you can proceed to inspect the switch for any physical damage. Damaged or worn-out components can be a sign of a faulty dimmer switch.
Start by removing the faceplate of the dimmer switch. Most faceplates can be easily removed by unscrewing the screws that hold them in place. Once the faceplate is removed, you will have access to the switch itself.
Take a close look at the switch for any visible signs of physical damage, such as cracks, melted plastic, or burn marks. These signs are indications that the switch has experienced excessive heat or electrical arcing, which can compromise its functionality.
If you notice any physical damage, it is a clear indication that the dimmer switch is bad and needs to be replaced. Damaged switches can not only affect the performance of your lighting system but also pose a safety risk.
However, even if you do not observe any physical damage, it does not guarantee that the dimmer switch is in perfect condition. There could still be internal issues that require further investigation.
-
Step 3: Test the Dimmer Switch with a Multimeter
A multimeter is a useful tool for testing the functionality of electrical components, including a dimmer switch. By using a multimeter, you can determine if the dimmer switch is functioning properly or if it needs to be replaced.
Here’s how you can test the dimmer switch with a multimeter:
- Set your multimeter to the resistance (ohms) setting. Make sure the multimeter is calibrated and functioning correctly.
- Touch the multimeter’s probes to the terminals of the dimmer switch. Ensure that each probe makes contact with a separate terminal.
- With the dimmer switch turned off, the multimeter should display an “infinite” reading or open circuit, indicating no continuity.
- When you turn the dimmer switch on, the multimeter should display a low resistance or continuity, indicating that the switch is allowing the flow of electricity.
- If you get the expected readings on the multimeter, it indicates that the dimmer switch is functioning properly. If there is no continuity when the switch is on or if there is continuity when the switch is off, it suggests a problem with the switch.
Keep in mind that different models of dimmer switches may have slightly different configurations, so refer to the manufacturer’s instructions for specific guidelines on using a multimeter to test your dimmer switch.
If the multimeter test reveals that the dimmer switch is indeed faulty, it’s time to replace the switch with a new one.
-
Step 4: Check the Wiring Connections
After inspecting the physical condition of the dimmer switch, the next step is to check the wiring connections. Loose or faulty wiring can cause issues with the switch’s functionality.
Start by removing the dimmer switch from the electrical box. Depending on the type of switch, this may involve unscrewing screws or releasing clips that hold it in place. Carefully pull the switch out to expose the wiring connections.
Inspect the wiring connections to ensure they are secure and tightly connected. Look for any loose or frayed wires that may need to be trimmed or reconnected. If you notice any damaged or corroded wires, it’s advisable to consult a licensed electrician for proper repairs.
Additionally, check for any signs of burning or discoloration around the wiring connections. This could indicate overheating and may require further investigation or professional assistance to resolve.
If the wiring connections appear to be in good condition and properly connected, you can proceed to re-install the dimmer switch.
It’s important to note that working with electrical wiring can be dangerous, and if you’re unsure or uncomfortable with this step, it’s best to consult a professional electrician to ensure proper and safe wiring connections.
-
Read more: How To Disable A Dimmer Switch
Step 5: Replace the Dimmer Switch if Necessary
If, after going through the previous steps, you have determined that the dimmer switch is indeed faulty, it’s time to replace it with a new one.
First, ensure that you have a compatible replacement dimmer switch. Consult the manufacturer’s instructions or guidelines to ensure that the new switch supports the appropriate voltage and wattage for your lighting system.
Following the manufacturer’s instructions, connect the new dimmer switch’s wiring to the corresponding wires in the electrical box. Make sure the connections are secure and tightly fastened.
Once the connections are complete, carefully place the new dimmer switch into the electrical box and secure it in place using the mounting screws or clips provided.
Finally, reattach the faceplate to cover the dimmer switch and restore power to the circuit by flipping the corresponding circuit breaker to the “on” position.
Remember, if you are unsure or uncomfortable with any step of replacing the dimmer switch, it’s best to seek the assistance of a professional electrician.
By following these steps, you can effectively determine if your dimmer switch is the source of the problem and take the necessary steps to address it. Remember to always prioritize safety and consult a professional if you are unsure or uncomfortable with any electrical work.
Now that you have the knowledge to determine if a dimmer switch is bad, you can take control of your lighting system and ensure its optimal performance.
Conclusion
In conclusion, being able to identify if a dimmer switch is bad is crucial for maintaining the functionality and safety of your lighting system. By understanding the common symptoms of a faulty dimmer switch and following the steps outlined in this guide, you can effectively determine if your dimmer switch is the cause of the problem and take the necessary actions to address it.
From dimmed lights flickering and the dimmer switch getting hot to inconsistent dimming levels, lights not turning off completely, and buzzing or humming sounds, each symptom provides valuable clues to the condition of your dimmer switch.
By following the step-by-step process of turning off the power, inspecting the switch for physical damage, testing it with a multimeter, checking the wiring connections, and replacing the switch if necessary, you can diagnose and resolve issues related to a bad dimmer switch.
It’s important to emphasize the significance of prioritizing safety throughout the process. Always remember to turn off the power before working on the switch, and if you are unsure or uncomfortable with any step, it is best to consult a professional electrician who has the knowledge and expertise to handle electrical installations and repairs.
By addressing a faulty dimmer switch promptly, you can ensure the smooth and efficient operation of your lighting system, enhance the ambiance of your living spaces, and minimize the risk of electrical hazards.
We hope that this guide has provided you with the necessary information and guidance to determine if a dimmer switch is bad. Remember to prioritize safety and follow the appropriate steps to address any issues you may encounter. Now, go forth and enjoy the optimal lighting control that a functional dimmer switch provides!
Frequently Asked Questions about How To Tell If A Dimmer Switch Is Bad
Was this page helpful?
At Storables.com, we guarantee accurate and reliable information. Our content, validated by Expert Board Contributors, is crafted following stringent Editorial Policies. We're committed to providing you with well-researched, expert-backed insights for all your informational needs.

0 thoughts on “How To Tell If A Dimmer Switch Is Bad”