Home>Renovation & DIY>Tools & Equipment>How To Tell If A Spackle Is Bad

Tools & Equipment
How To Tell If A Spackle Is Bad
Modified: May 6, 2024
Learn how to identify if your spackle has gone bad with our expert tips and advice. Ensure your tools and equipment are in top condition for your next project.
(Many of the links in this article redirect to a specific reviewed product. Your purchase of these products through affiliate links helps to generate commission for Storables.com, at no extra cost. Learn more)
Introduction
Welcome to the world of home improvement, where the satisfaction of repairing and renovating your living space can be incredibly rewarding. However, as with any DIY project, it’s crucial to ensure that the materials you’re working with are in top condition. When it comes to patching up walls and achieving a smooth, flawless finish, spackle is a go-to product for both professionals and hobbyists. But how do you know if the spackle you have on hand is still good to use?
In this guide, we’ll delve into the realm of spackle and explore the telltale signs that indicate it may have gone bad. Whether you’re a seasoned DIY enthusiast or a newcomer to the world of home repairs, understanding how to assess the quality of your spackle is essential for achieving impeccable results. Let’s embark on this journey to uncover the secrets of identifying bad spackle and learn how to test it effectively.
Key Takeaways:
- Check your spackle for bad signs like unusual odor, change in consistency, discoloration, separation, or expiration date. Test it visually, by smell, consistency, application, and expiry date to ensure quality.
- By recognizing bad spackle signs and conducting simple tests, you can ensure professional and enduring repairs. Prioritize quality materials and expiration dates for flawless home improvement results.
Read more: How To Tell If Insulation Is Bad
What is Spackle?
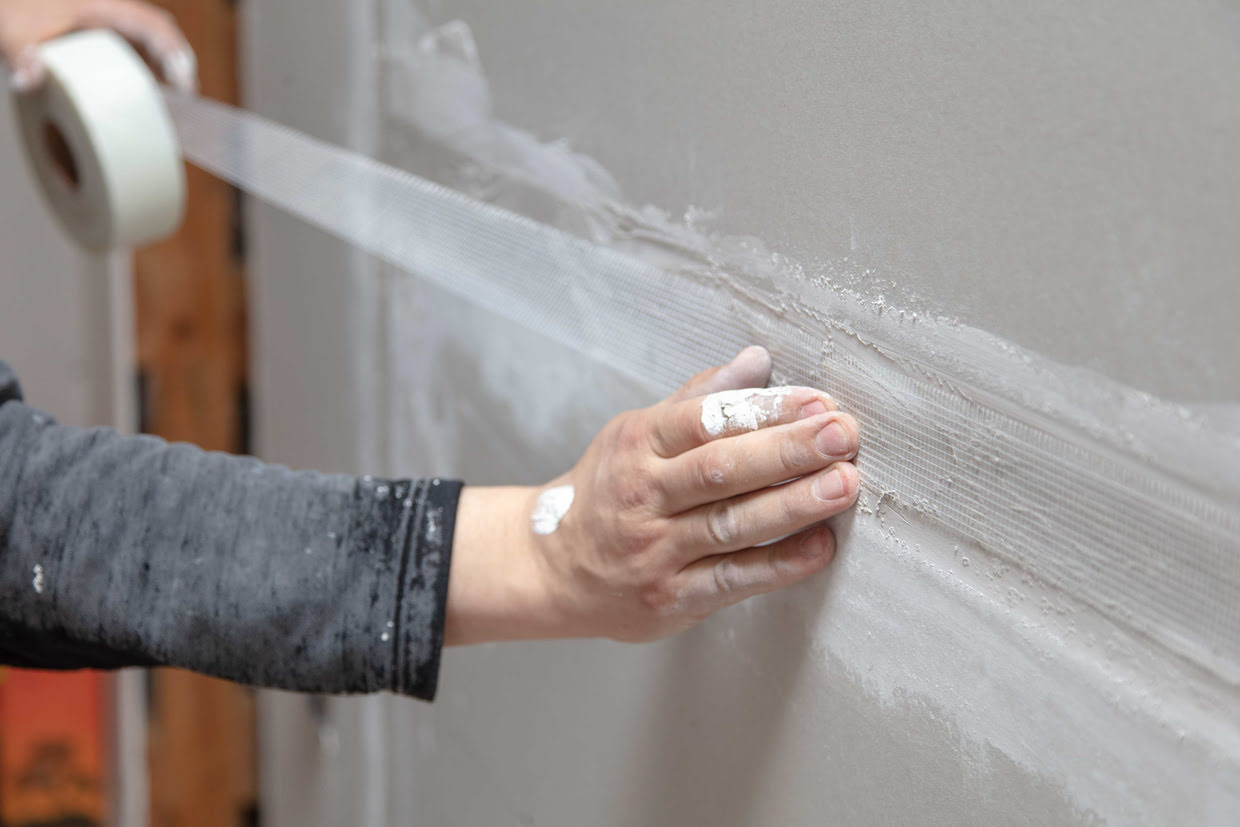
Spackle, often referred to as “spackling compound,” is a versatile and indispensable material used in the realm of home repair and renovation. This paste-like substance is primarily employed for patching holes, dents, and imperfections in walls, ceilings, and other surfaces prior to painting or wallpapering. Its composition typically consists of gypsum, binders, and water, resulting in a smooth and pliable consistency that adheres well to a variety of surfaces.
One of the key advantages of spackle is its quick-drying nature, which allows for efficient and convenient repairs. It can be easily applied with a putty knife or a similar tool, and once dried, it can be sanded down to achieve a seamless and uniform surface. Spackle is available in different formulations, including lightweight versions that are ideal for filling small cracks and holes, as well as heavyweight options designed to tackle more substantial repairs.
Whether you’re addressing minor blemishes or preparing a wall for a fresh coat of paint, spackle plays a pivotal role in achieving a professional and polished finish. Its ability to effectively fill and conceal imperfections makes it a staple in the toolkit of DIY enthusiasts, professional painters, and contractors alike.
Now that we have a better understanding of what spackle is and its fundamental role in home improvement projects, let’s explore the indicators that may suggest your spackle is no longer fit for use.
Signs of Bad Spackle
While spackle is a reliable ally in the quest for flawless walls and surfaces, it is not immune to deterioration. Understanding the signs of bad spackle is essential for maintaining the quality of your repairs and achieving professional results. Here are some indicators that may suggest your spackle has gone bad:
- Unusual Odor: Fresh spackle typically has a mild, neutral odor. If you detect a foul or musty smell emanating from the container, it may indicate that the spackle has gone bad. This could be a result of microbial growth or contamination, rendering the product unsuitable for use.
- Change in Consistency: Spackle should have a smooth, creamy consistency that is easy to spread and work with. If you notice that the texture has become lumpy, excessively dry, or unusually thick, it may be a sign that the product has degraded and is no longer viable for effective repairs.
- Discoloration: Fresh spackle typically exhibits a uniform color, depending on its formulation. Any signs of discoloration, such as dark spots, mold growth, or an uneven appearance, may indicate that the spackle has been compromised and should not be used.
- Separation or Settling: Over time, spackle may undergo separation or settling, leading to the accumulation of excess liquid at the top or a hardened layer at the bottom of the container. These changes in the product’s composition can impact its performance and render it ineffective for achieving seamless repairs.
- Expired Shelf Life: Like many construction and repair materials, spackle has a limited shelf life. If the product has exceeded its recommended storage duration, it may have deteriorated in quality, making it unsuitable for achieving optimal results.
Recognizing these signs is crucial for ensuring that your spackle performs as intended and delivers the desired outcomes. Now that we’ve identified the potential indicators of bad spackle, let’s explore how to test spackle effectively to determine its usability.
Check the expiration date on the spackle container. If it has passed, or if the spackle has dried out, developed a foul odor, or has mold growth, it is no longer good to use.
How to Test Spackle
Testing spackle for its viability and quality is a straightforward yet essential process that can save you time and frustration during your repair endeavors. By conducting a few simple assessments, you can determine whether the spackle is fit for use. Here’s how to test spackle effectively:
- Visual Inspection: Begin by visually examining the spackle. Check for any signs of discoloration, unusual texture, or the presence of liquid separation or hardened layers. If the spackle appears to have any of these characteristics, it may be an indication that it has gone bad.
- Olfactory Assessment: Take a moment to smell the spackle. Fresh spackle should have a neutral odor. If you detect any unpleasant or musty smells, it’s a strong indication that the spackle has deteriorated and should not be used.
- Consistency Test: Dip a putty knife or similar tool into the spackle and assess its consistency. The spackle should have a smooth and pliable texture that is easy to work with. If it feels excessively dry, lumpy, or unusually thick, it may have degraded and is likely unsuitable for effective repairs.
- Application and Drying: Apply a small amount of the spackle to a test surface, such as a spare piece of drywall or wood. Spread it evenly and allow it to dry according to the manufacturer’s recommended timeframe. Once dry, assess the finish for any irregularities, cracking, or poor adhesion. A degraded spackle may result in an unsatisfactory finish.
- Expiry Date Verification: Check the container for the expiration date or the recommended shelf life of the spackle. If the product has surpassed this timeframe, it may have lost its effectiveness and should be replaced with a fresh supply.
By conducting these simple tests, you can gain valuable insights into the condition of your spackle and make informed decisions regarding its usability. It’s important to prioritize the quality of your materials to achieve professional and durable repairs.
Now that we’ve explored the effective methods for testing spackle, it’s time to conclude our journey through the realm of spackle assessment and equip ourselves with the knowledge needed to ensure impeccable results in our home improvement endeavors.
Conclusion
Congratulations! You’ve now gained valuable insights into the world of spackle assessment, equipping yourself with the knowledge needed to discern the quality and usability of this essential repair material. By understanding the signs of bad spackle and learning how to effectively test it, you are empowered to achieve professional and enduring results in your home improvement projects.
As you embark on your repair and renovation endeavors, remember to prioritize the quality of your materials. A meticulous approach to assessing and testing spackle ensures that your repairs are not only visually appealing but also durable and long-lasting. By conducting visual inspections, olfactory assessments, and consistency tests, you can confidently determine whether your spackle is fit for use.
Additionally, always be mindful of the expiration date or recommended shelf life of your spackle. Like any construction material, spackle has a limited lifespan, and using it beyond its prime may compromise the integrity of your repairs.
Armed with the knowledge gained from this guide, you can approach your next home improvement project with confidence, knowing that your repairs will be carried out with the utmost attention to quality and detail. Whether you’re patching up a small hole or preparing an entire wall for a fresh coat of paint, the reliability of your spackle is paramount in achieving flawless results.
By staying attuned to the signs of bad spackle and conducting thorough tests, you are well-prepared to ensure that your repairs are executed with precision and excellence. Your commitment to quality craftsmanship will undoubtedly shine through in the finished results, leaving your living space with a touch of professional finesse and enduring beauty.
Now, armed with the knowledge of spackle assessment, go forth and conquer your home repair projects with confidence, knowing that you have the expertise to discern the quality of this indispensable repair material. Here’s to flawless repairs and the transformative power of a well-maintained living space!
Now that you've mastered spotting bad spackle, why not dive deeper into your home improvement knowledge? Our next read offers invaluable renovation tips for tackling one of the most challenging projects: roof remodeling. Discover strategies that ensure smooth project progression, from planning to execution. Whether you're a seasoned renovator or new to home upgrades, these insights will make all the difference.
Frequently Asked Questions about How To Tell If A Spackle Is Bad
Was this page helpful?
At Storables.com, we guarantee accurate and reliable information. Our content, validated by Expert Board Contributors, is crafted following stringent Editorial Policies. We're committed to providing you with well-researched, expert-backed insights for all your informational needs.


0 thoughts on “How To Tell If A Spackle Is Bad”