Articles
How To Tell If Insulation Is Bad
Modified: October 20, 2024
Learn how to determine if your insulation is in poor condition with these informative articles on insulation inspection and maintenance.
(Many of the links in this article redirect to a specific reviewed product. Your purchase of these products through affiliate links helps to generate commission for Storables.com, at no extra cost. Learn more)
Introduction
Insulation is an essential component of any home or building, serving as a barrier to keep the indoor temperature regulated and comfortable. Over time, however, insulation can deteriorate or become damaged, leading to a decrease in its effectiveness. If your insulation is bad, it can result in uneven temperature distribution, higher heating or cooling bills, drafts or air leaks, moisture or water damage, mold or mildew growth, pest infestation, and a lack of energy efficiency.
In this article, we will explore the common signs of bad insulation and discuss various methods to determine if your insulation needs attention. We will cover both do-it-yourself (DIY) techniques that you can try on your own and professional methods that can be performed by insulation contractors. By understanding these indicators and assessment techniques, you can take the necessary steps to address any insulation issues and improve the overall comfort and energy efficiency of your home.
Key Takeaways:
- Regularly assessing and maintaining insulation is crucial for a comfortable, energy-efficient home. DIY methods and professional contractors offer valuable insights and solutions for addressing insulation issues.
- Hiring a professional insulation contractor provides expertise, comprehensive assessments, and quality installation or repair services, ensuring improved energy efficiency and comfort in your home.
Read more: How To Tell If A Spackle Is Bad
Common Signs of Bad Insulation
Identifying the signs of bad insulation is crucial to ensure that your home remains energy-efficient and comfortable. Here are some common indicators that your insulation may be in need of attention:
- Uneven Temperature Distribution: If you notice significant temperature variations between different parts of your home, it could be a sign of poorly insulated areas. Certain rooms may feel colder or hotter than others, indicating that the insulation is not adequately regulating the temperature.
- High Heating or Cooling Bills: Insulation plays a vital role in maintaining a consistent indoor temperature. If your heating or cooling bills have been steadily increasing, it could be a result of insulation that is no longer able to effectively trap and retain heat or cold air.
- Drafts or Air Leaks: Feeling drafts or experiencing air leaks in your home is a clear indication of insulation problems. These leaks can occur around windows, doors, electrical outlets, or any other areas that are not properly sealed or insulated.
- Moisture or Water Damage: Poor insulation can lead to moisture or water infiltration in your home. If you notice damp spots on walls or ceilings, water stains, or the presence of mold or mildew, it could be a sign that moisture is seeping through the insulation and causing damage.
- Mold or Mildew Growth: Mold or mildew thrive in damp and poorly ventilated areas. If you notice the growth of mold or mildew on walls, ceilings, or in the corners of rooms, it may indicate that there are areas of your insulation that are retaining moisture and promoting the growth of these harmful fungi.
- Pest Infestation: Holes or gaps in your insulation can provide easy access for pests such as rodents or insects. If you discover signs of pests or hear scratching noises within your walls, it could be a sign that your insulation has been compromised and needs attention.
- Lack of Energy Efficiency: If you find yourself relying heavily on your heating or cooling system to maintain a comfortable indoor temperature, it could be a sign that your insulation is not performing optimally. Insulation that is worn out or damaged can lead to energy loss, resulting in decreased energy efficiency and increased energy bills.
If you notice any of these signs in your home, it may be time to investigate and address your insulation situation. This will help you ensure that your living space remains comfortable and energy-efficient, while also preventing potential damage and health hazards associated with insulation issues.
Uneven Temperature Distribution
One of the common signs of bad insulation is uneven temperature distribution within your home. This means that certain rooms or areas may feel significantly colder or hotter than others, even when your heating or cooling system is running. Understanding the causes of uneven temperature distribution can help you identify if insulation is the underlying issue.
Insulation acts as a barrier that helps to regulate the flow of heat or cold air between the interior and exterior of a building. When insulation is in good condition, it effectively traps heat during the cold winter months and keeps cool air inside during the hot summer months. However, when insulation becomes damaged or deteriorates over time, it can create gaps or areas where heat or cold air can escape.
Uneven temperature distribution can occur for a variety of reasons:
- Lack of insulation: Newer homes usually have proper insulation installed during construction. However, older homes or buildings may have insufficient or outdated insulation, leading to temperature variations throughout the space.
- Insulation gaps: Over time, insulation can develop gaps or cracks due to settling or shifting of the building. These gaps allow the transfer of heat or cold air, resulting in uneven temperature distribution.
- Poorly insulated areas: Certain areas of a building, such as attics, crawlspaces, or basements, are more prone to temperature variations if they are not adequately insulated. These areas may experience extreme temperatures, which can affect the overall temperature regulation of the entire building.
- Insulation damage: Any physical damage to insulation, such as tears, compression, or moisture issues, can compromise its effectiveness. Damaged insulation is less likely to provide proper temperature control, leading to uneven temperature distribution.
- Improper installation: If insulation is improperly installed, it may not cover all areas sufficiently, leaving gaps or areas without insulation. This can result in temperature variations throughout the building.
If you suspect uneven temperature distribution in your home, there are a few steps you can take to confirm if insulation is the culprit:
- Check for visible signs of insulation gaps: Inspect the insulation in your attic, crawlspaces, and walls for any visible gaps, cracks, or damage. These areas are common trouble spots where insulation issues often occur.
- Feel for temperature differences: Walk through different areas of your home and note any noticeable temperature changes. Use a thermometer to measure the temperature in each room and compare the readings to identify areas with significant variations.
- Consult with an insulation professional: If you are unsure of the condition of your insulation or need expert advice, it is recommended to consult with a professional insulation contractor. They can perform a thorough inspection and provide recommendations based on their findings.
Addressing uneven temperature distribution caused by bad insulation is crucial for maintaining a comfortable living environment. By identifying and resolving insulation issues, you can achieve better temperature control and optimize the energy efficiency of your home.
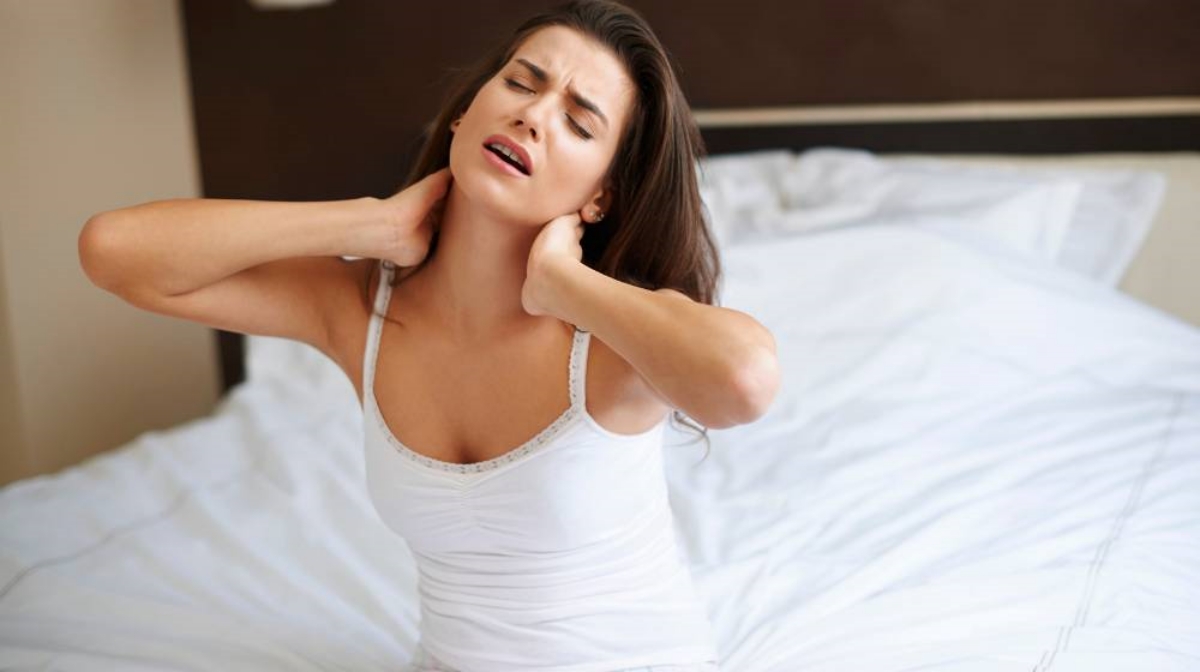
High Heating or Cooling Bills
If you’ve noticed a steady increase in your heating or cooling bills, it could be an indication of bad insulation. Insulation plays a crucial role in maintaining the temperature of your home and reducing the workload on your heating and cooling systems. When insulation becomes ineffective, it allows heat to escape during the winter and cold air to seep in during the summer, leading to increased energy consumption and higher utility bills.
Here are a few reasons why bad insulation can result in high heating or cooling bills:
- Heat loss: In cold weather, heat naturally tries to escape to the colder outside environment. Effective insulation acts as a barrier, preventing heat loss and keeping the indoor temperature stable. However, if your insulation is old, damaged, or improperly installed, it can allow heat to escape, causing your heating system to work harder and consume more energy to maintain the desired temperature.
- Cold air infiltration: During the hot summer months, bad insulation can allow warm air from outside to seep into your home. This forces your cooling system to work harder and longer to keep the indoor temperature cool, resulting in increased energy usage and higher cooling bills.
- Insufficient R-value: The R-value of insulation measures its ability to resist heat flow. If your insulation has a low R-value or is not properly installed, it may not provide adequate thermal resistance. This can lead to more energy loss and higher heating or cooling bills.
- Energy inefficient air leaks: Bad insulation is often associated with gaps, cracks, or poorly sealed areas where air can leak in or out. These air leaks create drafts and make it difficult to maintain a consistent indoor temperature. As a result, your heating or cooling system has to work harder to compensate, resulting in increased energy consumption and higher bills.
To determine if bad insulation is the cause of your high heating or cooling bills, you can take the following steps:
- Inspect your insulation: Check your insulation for signs of damage, compression, or gaps. Look for areas where insulation may be missing or improperly installed, such as around windows, doors, and in the attic or basement.
- Perform an energy audit: Consider conducting a professional energy audit of your home. A certified energy auditor can assess your insulation, identify areas of improvement, and provide recommendations to reduce energy consumption and lower your utility bills.
- Monitor temperature variations: Take note of any significant temperature differences between various areas of your home. Uneven temperature distribution can be a sign of insulation problems that are causing your heating or cooling system to work harder and consume more energy.
Addressing bad insulation can help improve the energy efficiency of your home and reduce your heating or cooling bills. By investing in better insulation or repairing and upgrading existing insulation, you can create a more comfortable living environment while saving on energy costs in the long run.
Drafts or Air Leaks
Feeling drafts or noticing air leaks in your home is a clear sign of bad insulation. Drafts occur when there is a flow of air entering or exiting the interior space, and they can significantly impact the comfort and energy efficiency of your home. Identifying and addressing these air leaks is essential to maintain a well-insulated living environment.
Here are some common causes of drafts or air leaks:
- Gaps around windows and doors: Improperly sealed windows and doors are a common source of drafts. Over time, gaps can develop due to weathering or settling of the structure, allowing air to enter or escape. This can lead to discomfort and an increase in your energy bills.
- Cracks or gaps in the walls: Insufficiently sealed or poorly installed insulation can result in cracks or gaps in the walls, which allow cold or warm air to enter the interior space. These air leaks can cause discomfort and place a higher load on your heating or cooling system.
- Inadequate insulation in attic or crawlspaces: Neglected or poorly insulated areas such as the attic or crawlspaces can develop air leaks. These spaces are often prone to temperature variations, and if insulation is not properly installed or is missing, it can result in drafts that affect the overall comfort of your home.
- Electrical outlets, fixtures, and switches: Electrical outlets, light fixtures, and switches on exterior walls can create small gaps and openings where air can infiltrate or escape. Insufficient insulation around these areas can lead to drafts and energy loss.
- Pipes, vents, and chimneys: Any openings or gaps around pipes, vents, or chimneys can create pathways for air infiltration. These areas should be properly sealed and insulated to prevent draft issues.
If you suspect drafts or air leaks in your home, here are some steps you can take to address the problem:
- Inspect windows and doors: Check for any gaps or cracks around windows and doors. Seal these areas with weatherstripping or caulking to prevent air leaks.
- Seal wall cracks and gaps: Identify and seal any cracks or gaps in the walls. Use caulk or expanding foam to seal these areas and prevent drafts.
- Insulate attic and crawlspaces: Ensure proper insulation is installed in your attic and crawlspaces. This will help prevent drafts and maintain a consistent temperature throughout your home.
- Install insulation around electrical fixtures: Use foam gaskets or insulating pads to reduce air leaks around electrical outlets, fixtures, and switches.
- Seal openings around pipes, vents, and chimneys: Use caulk or expanding foam to seal any gaps or openings around pipes, vents, and chimneys to prevent air infiltration or escape.
If you’re unsure about identifying and fixing drafts or air leaks, it is advisable to consult a professional insulation contractor. They can conduct a comprehensive assessment of your home’s insulation and provide recommendations to mitigate air leaks and improve energy efficiency.
By addressing drafts and air leaks, you can improve the comfort and energy efficiency of your home while reducing heating and cooling costs.
Read more: How To Tell If Electric Motor Is Bad
Moisture or Water Damage
Moisture or water damage in your home can be a clear sign of bad insulation. Insulation not only helps to regulate temperature but also serves as a barrier against moisture infiltration. When insulation becomes compromised, it can allow moisture to seep into the interior of your home, leading to various issues such as water damage, mold growth, and reduced indoor air quality.
Here are some common indications of moisture or water damage associated with bad insulation:
- Damp spots on walls or ceilings: Moisture can penetrate the walls or ceilings due to leaks or condensation. If you notice any damp or discolored areas, it may be a sign that water is seeping through your insulation, compromising its effectiveness.
- Water stains: Visible water stains on walls, ceilings, or floors can indicate a moisture problem. These stains may develop over time and can be a result of water infiltrating through the insulation.
- Musty or unpleasant odor: Moisture issues often lead to the growth of mold or mildew. These fungi can release a distinct musty odor that is noticeable in affected areas. If you detect a persistent unpleasant smell, it could be a sign of mold growth caused by moisture infiltration.
- Peeling paint or bubbled wallpaper: Excessive moisture can cause paint to peel or wallpaper to bubble. When water seeps through the insulation, it can damage the underlying materials, leading to these visible signs of moisture-related issues.
If you suspect that your insulation has resulted in moisture or water damage, it is essential to address the issue promptly to prevent further damage and potential health risks. Here are a few steps you can take:
- Identify the source of moisture: Inspect the affected area to determine the source of moisture. It could be a leaking pipe, a damaged roof, or condensation buildup due to inadequate insulation.
- Repair leaks and plumbing issues: If the moisture is originating from a plumbing issue, such as a leaking pipe, it is crucial to repair the problem promptly. Fixing the source of the water will prevent further damage to your insulation and the surrounding areas.
- Remove and replace damaged insulation: If your insulation has sustained significant water damage, it should be removed and replaced to prevent mold growth and restore the integrity of your insulation system.
- Address mold or mildew growth: If you discover mold or mildew growth, it is important to address this issue promptly. Hire a professional mold remediation specialist to safely remove and remediate any affected areas.
- Improve drainage and ventilation: Enhancing drainage systems, ensuring proper ventilation, and using moisture-resistant materials can help to prevent future moisture and water damage issues in your home.
Dealing with moisture or water damage caused by bad insulation is crucial for both the structural integrity of your home and the health of its occupants. By identifying and addressing these issues, you can maintain a dry and healthy living environment.
Mold or Mildew Growth
Mold or mildew growth in your home is a clear sign of bad insulation. Mold and mildew thrive in damp environments, and when insulation becomes compromised, it can allow moisture to seep into the interior of your home, creating the perfect conditions for mold to grow. Mold not only damages the structure of your home but can also have serious health implications, so it’s important to address mold or mildew growth promptly.
Here are some common indications of mold or mildew growth associated with bad insulation:
- Visible mold or mildew: Mold or mildew can appear as black, green, or brown patches on walls, ceilings, or other surfaces. If you notice these growths in your home, it is likely that moisture from compromised insulation is promoting their development.
- Musty odor: Mold and mildew release a musty smell that is distinct and unpleasant. If you detect a persistent musty odor in certain areas of your home, it could be an indication of mold growth resulting from moisture infiltration through the insulation.
- Allergic reactions or respiratory issues: Mold spores can trigger allergic reactions or respiratory symptoms in some individuals. If you or your family members experience unexplained allergies or respiratory issues, it is worth investigating for the presence of mold in your home, especially in areas with compromised insulation.
- Discoloration or peeling of paint or wallpaper: Mold growth behind walls can cause paint or wallpaper to discolor or peel. If you notice these signs, it may indicate the presence of mold due to moisture issues associated with bad insulation.
If you suspect mold or mildew growth caused by bad insulation, it is important to address the issue promptly to prevent further damage and potential health risks. Here are steps you can take:
- Identify and repair the source of moisture: Inspect your home to identify the source of moisture that is promoting mold growth. It could be a leak, condensation buildup, or inadequate insulation allowing moisture infiltration.
- Remove and remediate affected areas: If you discover mold or mildew, it is important to remove and remediate the affected areas. Hire a professional mold remediation specialist who can safely remove the mold and implement proper remediation techniques.
- Replace damaged insulation: Insulation affected by mold growth should be removed and replaced to ensure a clean and healthy living environment. It is essential to address the underlying cause of mold growth and install proper insulation to prevent future mold issues.
- Improve ventilation and reduce moisture: Enhance ventilation systems, use dehumidifiers in areas prone to moisture, and address any moisture-related issues to prevent the recurrence of mold or mildew growth.
Dealing with mold or mildew growth caused by bad insulation is crucial for both the structural integrity of your home and the well-being of its occupants. By identifying and remedying these issues, you can create a safe and healthy living environment.
Pest Infestation
Pest infestation in your home can often be associated with bad insulation. Insulation is not only meant to regulate temperature but also acts as a barrier to keep pests, such as rodents and insects, out of your living space. When insulation becomes compromised or contains gaps, it can provide easy entry points for pests, leading to infestations and potential damage to your home.
Here are some common indicators of pest infestation resulting from bad insulation:
- Visible signs of pests: If you notice actual pests or signs of their presence, such as droppings, scratching noises, or gnaw marks, it is likely that your insulation has been breached, allowing pests to enter your home.
- Damage to insulation: Rodents, in particular, can cause damage to insulation by tearing it apart or using it to build nests. Look for any signs of insulation damage or unusual openings.
- Gaps or openings: Insulation gaps or poorly sealed areas provide easy access for pests. If you notice gaps around windows, doors, or utility openings, it is important to address the issue to prevent pests from entering your home.
- Increased pest activity in certain areas: If you see a higher concentration of pests in specific areas of your home, such as the attic or crawlspaces, it may indicate that these areas have compromised insulation that is attracting pests.
If you suspect a pest infestation due to bad insulation, it is important to take steps to address the issue promptly. Here are some recommended actions:
- Inspect for entry points: Conduct a thorough inspection of your home to identify any gaps, cracks, or openings where pests may be entering. Seal these openings with caulk, weatherstripping, or other appropriate materials.
- Repair damaged insulation: If you discover insulation that has been damaged by pests, it should be replaced. Remove the compromised insulation and install new insulation to prevent further pest activity.
- Consider pest control services: If the infestation persists or appears to be beyond your control, it may be necessary to enlist the help of professional pest control services. They can assess the extent of the infestation and implement appropriate measures to eliminate the pests.
- Maintain regular pest prevention measures: To prevent future pest infestations, it is important to maintain proper insulation and regularly inspect your home for any signs of pests or potential entry points.
By addressing pest infestations caused by bad insulation, you can protect your home from damage and create a more comfortable and hygienic living environment.
Lack of Energy EfficiencyA lack of energy efficiency is a common consequence of bad insulation. Insulation plays a vital role in preventing heat transfer, meaning it helps to keep the indoor temperature stable while reducing the workload on your heating and cooling systems. When insulation becomes ineffective, it leads to energy loss, resulting in a lack of energy efficiency in your home.
Here are some reasons why bad insulation can lead to a lack of energy efficiency:
- Heat loss in winter: Inadequate insulation allows heat to escape from your home during the winter months. This means your heating system needs to work harder and consume more energy to maintain a comfortable temperature, resulting in increased energy usage and higher heating bills.
- Heat gain in summer: Bad insulation allows unwanted heat from outside to enter your home during the summer. This, in turn, causes your cooling system to work harder and consume more energy to keep the indoor temperature cool, leading to higher cooling bills.
- Inefficient temperature regulation: Insulation gaps or lack of insulation in certain areas can create inconsistent temperature distribution throughout your home. This leads to the uneven heating or cooling of different rooms, causing your heating or cooling systems to run longer and consume more energy.
- Air leaks and drafts: Gaps, cracks, or poorly sealed areas in your insulation can result in air leaks and drafts. These air leaks allow conditioned air to escape and outside air to enter, forcing your HVAC system to work harder and use more energy to maintain the desired temperature.
- Inadequate R-value: The R-value measures the thermal resistance of insulation. If your insulation has a low R-value or is not properly installed, it may not provide sufficient resistance to heat transfer, leading to energy loss and decreased energy efficiency.
- Insufficient insulation levels: Insufficient insulation thickness or coverage can result in energy inefficiency. If your home does not meet the recommended insulation levels for your region, it can lead to increased energy consumption and higher utility bills.
If you suspect that bad insulation is causing a lack of energy efficiency in your home, there are steps you can take to address the issue:
- Assess your insulation: Inspect your insulation for any signs of damage, gaps, or inadequate coverage. Identify areas that need attention and determine the overall condition and effectiveness of your insulation.
- Seal air leaks: Identify and seal any air leaks or drafts in your home. Use weatherstripping, caulking, or other appropriate materials to seal gaps around windows, doors, electrical outlets, and any other areas where air may be leaking.
- Upgrade insulation: Consider upgrading your insulation to improve its thermal performance. This may involve adding additional insulation, replacing old insulation with newer, more efficient insulation materials, or installing insulation in areas that are currently un-insulated.
- Consult with a professional: If you are unsure about the best course of action or need expert advice, consult with a professional insulation contractor. They can assess your current insulation, recommend improvements, and ensure that you achieve optimal energy efficiency.
By addressing the lack of energy efficiency caused by bad insulation, you can create a more comfortable living environment, reduce your energy consumption, and ultimately lower your utility bills.
Read more: How To Tell If A Dimmer Switch Is Bad
DIY Methods to Check Insulation
If you suspect that your insulation may be compromised, there are several do-it-yourself (DIY) methods you can use to check its condition. These methods can help you assess the effectiveness of your insulation and identify areas that may require attention or improvement. Here are some DIY methods to check insulation:
- Visual inspection for damage or gaps: Conduct a visual inspection of your insulation. Look for any signs of damage, such as tears, compression, or moisture issues. Inspect the insulation for gaps or areas where it may be missing or improperly installed. Common trouble spots include attics, crawlspaces, and exterior walls.
- Checking for air leaks: Air leaks can significantly impact the efficiency of your insulation. Close all windows and doors tightly and turn off any fans or ventilation systems. Light a candle or incense stick and pass it along common areas known for air leaks, such as windows, doors, outlets, and baseboards. If you notice a flickering flame or smoke being drawn in or blown out, it indicates the presence of air leaks that should be sealed.
- Conducting a thermal imaging test: Thermal imaging cameras can detect temperature variations and identify potential insulation issues. On a colder day, use a thermal imaging camera to scan the interior walls, ceilings, and floors of your home. Look for areas where there are noticeable temperature differences, indicating potential insulation problems.
While these DIY methods can provide some insight into the condition of your insulation, it is important to note that they may not provide a comprehensive analysis. For a more accurate assessment, consider consulting with a professional insulation contractor who can utilize specialized equipment and techniques.
Additionally, if you detect any significant issues during your DIY inspections, it is advisable to seek professional assistance to address and resolve the problems effectively. Insulation contractors have the expertise and knowledge to conduct detailed assessments, identify specific areas of concern, and recommend the most suitable insulation solutions for your home.
By utilizing these DIY methods to check the condition of your insulation, you can gain a better understanding of its effectiveness and take the necessary steps to improve your home’s insulation and energy efficiency.
Check for signs of moisture, mold, or mildew in the insulation, as these can indicate a problem. Also, if your energy bills are higher than usual, it could be a sign of poor insulation.
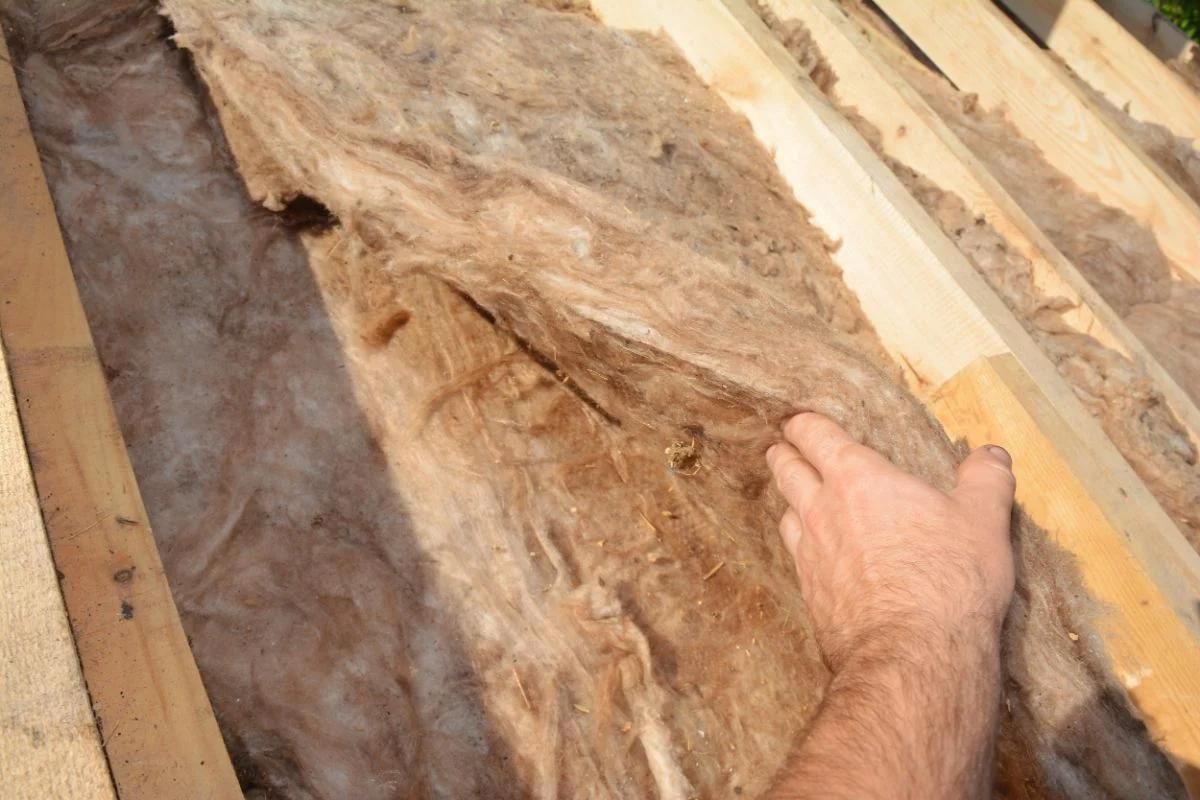
Visual Inspection for Damage or Gaps
A visual inspection is a simple yet effective DIY method to check the condition of your insulation. By visually examining your insulation, you can identify any signs of damage, gaps, or areas that may require attention. Here are some steps to conduct a visual inspection for damage or gaps in your insulation:
- Choose a suitable time and location: Conduct the visual inspection during daylight hours when natural light can help you identify any issues more easily. Start with the areas where insulation is commonly installed, such as attics, crawlspaces, basements, and walls adjacent to the exterior.
- Wear protective gear: Before you begin the inspection, put on safety goggles, gloves, and a dust mask to protect yourself from any potential allergens, dust, or debris that may be present in the area you are inspecting.
- Inspect for signs of damage: Examine the insulation for any visible signs of damage, such as tears, compression, or moisture-related issues. Look for areas where the insulation may have become dislodged or flattened over time. Pay close attention to the condition of the insulation around plumbing pipes, electrical fixtures, and ventilation ducts.
- Check for gaps or areas of missing insulation: Look for gaps or areas where insulation may be missing or improperly installed. Insulation should cover the entire surface without gaps or exposed areas. Pay particular attention to corners, edges, and junctions between different materials, as these are common trouble spots for gaps or insufficient coverage.
- Inspect around windows and doors: Check the insulation around windows and doors for any gaps or damaged seals. Look for signs of air leaks, such as drafts or visual indications of air movement. Properly sealed insulation around windows and doors is crucial for energy efficiency and maintaining a comfortable indoor environment.
- Take note of any issues: As you conduct the visual inspection, make a note of any areas that require attention or repair. This will help you prioritize and address the necessary improvements to your insulation.
Keep in mind that visual inspection provides a basic assessment and may not reveal all potential issues with your insulation. If you encounter significant damage or suspect insulation problems beyond what you can visually identify, it is advisable to consult with a professional insulation contractor. They can perform a more detailed inspection using specialized tools and techniques to provide a comprehensive evaluation.
By conducting a visual inspection for damage or gaps in your insulation, you can identify potential problem areas, take appropriate actions for repair or improvement, and ensure that your home remains properly insulated and energy-efficient.
Checking for Air Leaks
Checking for air leaks is an important DIY method to assess the integrity of your insulation. Air leaks can significantly impact the efficiency of your insulation, leading to energy loss and increased heating or cooling costs. With a few simple steps, you can identify and address air leaks in your home. Here’s how to check for air leaks:
- Select a suitable time: Choose a calm day, without excessive wind, to conduct the air leak check. It’s best to do this when there is a noticeable temperature difference between the inside and outside of your home.
- Create a pressure difference: Close all windows, exterior doors, and fireplace dampers, and turn off exhaust fans. This creates a pressurized environment inside your home, making it easier to detect air leaks.
- Feel for drafts: Walk throughout your home, particularly near windows, doors, electrical outlets, and baseboards. Use the back of your hand or a lit candle and slowly move it around these areas. If you feel a draft or notice the flame flickering, it indicates the presence of an air leak that needs to be sealed.
- Check door and window seals: Inspect the seals around windows and doors for any gaps or cracks. Replace worn-out weatherstripping around doors and seal any gaps with caulking or weatherproofing tape.
- Examine electrical outlets and switches: Inspect electrical outlets, switches, and wiring on exterior walls. If you feel coolness or notice any drafts around these areas, it may indicate an air leak. Install foam gaskets or use draft stoppers to seal these outlets and switches.
- Inspect the attic and crawlspaces: Check the insulation in your attic and crawlspaces for any visible gaps or areas where insulation is missing. Seal these gaps with expanding foam or install additional insulation to prevent air leakage.
- Seal gaps and cracks: Once you’ve identified air leaks, use caulking or weatherstripping to seal gaps and cracks around windows, doors, pipes, and electrical penetrations. Pay attention to areas where different building materials meet, as they are common sources of air leaks.
- Consider a blower door test: If you want a more comprehensive assessment of air leaks in your home, you may opt for a professional blower door test. This test uses a specialized fan to pressurize or depressurize your home, allowing for a precise measurement of air leakage rates.
By checking for air leaks and addressing them promptly, you can improve the energy efficiency of your home and reduce heating and cooling costs. Sealing air leaks not only helps your insulation perform better, but it also enhances the overall comfort of your living space by preventing drafts and temperature fluctuations.
Conducting Thermal Imaging Test
A thermal imaging test is a valuable DIY method to assess the effectiveness of your insulation and identify any areas of concern. This test utilizes a thermal imaging camera to detect temperature variations and potential insulation issues in your home. By conducting a thermal imaging test, you can visually identify areas of heat or energy loss, allowing you to take appropriate steps to improve your insulation. Here’s how to conduct a thermal imaging test:
- Choose a suitable time: Conduct the thermal imaging test on a colder day when there is a noticeable temperature difference between the inside and outside of your home. This temperature contrast will make it easier to detect variations using the thermal imaging camera.
- Set up the thermal imaging camera: Follow the manufacturer’s instructions to set up and familiarize yourself with the thermal imaging camera. Ensure that the camera is properly calibrated before starting the test.
- Scan the interior walls, ceilings, and floors: Start by scanning the interior walls, ceilings, and floors of your home, one room at a time. Pay close attention to areas where there may be insulation, such as exterior walls, attics, and crawlspaces. Look for temperature variations, indicated by color differences on the thermal imaging display.
- Identify areas of concern: Take note of any areas that show significant temperature differences. Hot spots may indicate areas of heat loss, while cold spots may suggest insulation gaps or areas that are retaining cool air. Common trouble spots include windows, doors, electrical outlets, and areas where different materials meet.
- Inspect the exterior of your home: Continue the thermal imaging test outside to assess the insulation and identify any potential issues. Scan the exterior walls and roof to check for any anomalies or temperature variations that could indicate insulation problems or air leakage.
- Address the identified issues: Once you have completed the thermal imaging test and identified areas of concern, take appropriate steps to address the issues. This may include adding or replacing insulation, sealing air leaks, or improving the insulation in specific trouble areas.
While a thermal imaging test can provide valuable insight into the effectiveness of your insulation, it is important to note that it may not capture all potential issues. It is advisable to consult with a professional insulation contractor if you suspect significant insulation problems or require a more thorough evaluation.
By conducting a thermal imaging test, you can gain a visual understanding of your insulation’s performance, identify areas in need of improvement, and take proactive measures to enhance the energy efficiency and comfort of your home.
Read more: How To Tell If Radiator Fan Is Bad
Professional Methods to Assess Insulation
While DIY methods can provide some insight into the condition of your insulation, professional methods offer a more comprehensive and accurate assessment. If you want a detailed evaluation of your insulation, it is advisable to consult with a professional insulation contractor who can utilize specialized tools and techniques. Here are some common professional methods to assess insulation:
- Blower Door Test: A blower door test is a widely used method to measure a home’s airtightness and identify air leakage points. During the test, a powerful fan is mounted on an exterior door, creating a pressure difference that allows the contractor to measure the rate of air infiltration or exfiltration. This test can determine the overall effectiveness of your insulation and help locate areas that require sealing or further insulation improvements.
- Infrared Thermography: Infrared thermography uses specialized cameras to detect temperature variations and thermal patterns on surfaces. Professional contractors can use this method to scan your home and identify insulation issues, air leakage points, or areas of heat loss. Thermal imaging can provide a visual representation of the insulation’s performance and pinpoint problem areas that require attention.
- Thermal Conductivity Testing: Thermal conductivity testing measures the ability of materials to transfer heat. Professional contractors can assess your insulation’s thermal conductivity using specialized equipment. This test helps determine the insulating efficiency of your insulation and whether it meets the recommended standards for your region.
- Visual Inspection and Moisture Testing: Professional contractors will conduct a thorough visual inspection of your insulation. They will check for signs of damage, gaps, or areas where insulation may be missing or improperly installed. Additionally, they may use moisture-detection tools to identify areas of excess moisture or water damage that can compromise the effectiveness of your insulation.
- Assessment of Insulation Levels: Professional contractors can measure the thickness and coverage of your insulation to determine if it meets the recommended levels for your region. They will assess the R-value (the measure of thermal resistance) to ensure that your insulation provides sufficient insulation against heat transfer.
Professional methods provide a comprehensive evaluation of your insulation system, allowing for a more accurate assessment of its performance. By relying on the expertise and specialized tools of professional contractors, you can gain valuable insights into the effectiveness of your insulation and receive recommendations for necessary improvements.
Consulting with professional insulation contractors can help you make informed decisions regarding repairs, upgrades, or replacements that will ultimately improve the energy efficiency and comfort of your home.
Blower Door Test
A blower door test is a commonly used professional method to assess the airtightness and overall energy efficiency of a home. This test helps identify air leakage points and provides valuable information about the performance of your insulation and the effectiveness of your home’s thermal envelope. By conducting a blower door test, professional contractors can determine the rate of air infiltration or exfiltration and locate areas that require sealing or additional insulation improvements.
Here’s an overview of how a blower door test is conducted:
- Preparation: The blower door test begins with the installation of a powerful fan, typically mounted on an exterior door. This fan is connected to a computerized system that measures air pressure differentials and airflow.
- Calibration: The fan is calibrated to create negative pressure inside the house, effectively depressurizing the interior. This allows for the detection of air leaks and infiltration points.
- Pressurization: Once the house is depressurized, the fan is operated to pressurize the interior. This creates a higher pressure inside compared to the outside, allowing for the detection of air exfiltration points.
- Airflow Measurement: During the test, the computerized system measures the airflow created by the blower door fan. By analyzing this data, professionals can determine the air leakage rate, represented by the air changes per hour (ACH) metric. A higher ACH indicates greater air leakage and potential energy efficiency issues.
- Identification of Air Leakage Points: As the blower door test is conducted, professionals use diagnostic tools, such as smoke pencils or infrared cameras, to identify specific air leakage points. These tools help identify areas where air is infiltrating or exfiltrating, including gaps around windows and doors, poorly sealed penetrations, electrical outlets, and ductwork connections.
- Recommendations for Improvements: Based on the results of the blower door test, professional contractors provide recommendations for improving the airtightness and energy efficiency of your home. These recommendations may include sealing air leaks, adding insulation or weatherstripping, improving ventilation systems, or installing energy-efficient windows and doors.
A blower door test is a valuable tool for assessing the performance of your insulation and identifying areas for improvement. It provides objective data about the airtightness of your home and helps prioritize necessary repairs or upgrades. By addressing air leakage points and improving the insulation, you can enhance energy efficiency, reduce utility bills, and create a more comfortable and sustainable living environment.
Infrared Thermography
Infrared thermography is a professional method that utilizes specialized cameras to detect temperature variations and thermal patterns on surfaces. This technique helps assess the performance of insulation in your home and identify potential issues related to heat loss or air infiltration. By conducting an infrared thermography assessment, professional contractors can visually identify areas of concern and provide valuable insights into the effectiveness of your insulation.
Here’s an overview of how infrared thermography is used to assess insulation:
- Preparation: Professional contractors use infrared cameras that detect and capture the infrared radiation emitted by objects. Before the assessment, the camera is calibrated to ensure accurate temperature readings.
- Scanning the interior: The contractor scans the interior of your home, focusing on areas where insulation is commonly installed, such as exterior walls, ceilings, and floors. The camera captures the surface temperatures of these areas and creates a visual representation of the thermal patterns.
- Identifying temperature variations: By analyzing the thermal images, professionals can detect temperature variations that may indicate insulation issues. Hot spots or areas of higher temperature can suggest heat loss, while cold spots may indicate insulation gaps or areas of air infiltration.
- Locating problem areas: Infrared thermography helps pinpoint specific problem areas in your insulation, such as gaps, missing insulation, or poorly performing sections. Common areas of concern include around windows and doors, electrical outlets, plumbing penetrations, and areas where different building materials meet.
One of the benefits of infrared thermography is its ability to provide a visual representation and clear indication of insulation problems. The thermal images allow professionals to quickly identify areas that require attention and prioritize improvements.
Based on the results of the infrared thermography assessment, professional contractors can provide recommendations for addressing the identified issues. This may involve adding insulation, sealing gaps or air leaks, or upgrading insulation in specific trouble areas. These recommendations help improve the energy efficiency, comfort, and overall performance of your insulation system.
It’s important to note that infrared thermography is a specialized technique that requires the expertise of trained professionals. By relying on their knowledge and using advanced tools, you can gain valuable insights into the condition of your insulation and make informed decisions about necessary repairs or upgrades.
Thermal Conductivity Testing
Thermal conductivity testing is a professional method used to assess the thermal performance and efficiency of insulation materials. This test measures the ability of a material to conduct heat and provides valuable information about its insulating properties. By conducting thermal conductivity testing, professional contractors can determine the effectiveness of your insulation and ensure that it meets the recommended standards for energy efficiency.
Here’s an overview of how thermal conductivity testing is conducted:
- Selection of testing equipment: Professional contractors use specialized equipment, such as a hot plate or heat flow meter, to measure the thermal conductivity of insulation materials. This equipment creates controlled heat flow through the material, allowing for accurate measurements.
- Preparation of the sample: A representative sample of the insulation material is prepared according to the testing standards. The sample is typically cut to a specific size and thickness to ensure consistent and reliable results.
- Heat flow measurement: The prepared sample is placed between two plates, and a temperature difference is applied across the plates. The equipment measures the heat flow and temperature changes to calculate the thermal conductivity of the insulation material.
- Analysis of results: The obtained thermal conductivity value is compared to the recommended standards for insulation materials. This analysis helps determine if the tested insulation meets the required thermal performance and if any improvements or adjustments are necessary.
- Recommendations for improvements: Based on the results of the thermal conductivity testing, professional contractors can provide recommendations for improving the insulation performance. This may include upgrading insulation materials, increasing insulation thickness, or addressing any identified insulation deficiencies.
Thermal conductivity testing provides valuable information about the heat transfer properties of insulation materials. It helps identify the insulating efficiency and performance of the insulation installed in your home.
It’s important to note that thermal conductivity testing requires specialized equipment and expertise. Professional contractors have the necessary knowledge to conduct the testing accurately and interpret the results effectively. By relying on their expertise, you can ensure that your insulation meets the recommended standards and contributes to energy efficiency and optimal thermal comfort in your home.
Read more: How To Tell If Home Thermostat Is Bad
Hiring a Professional Insulation Contractor
When it comes to assessing and improving your insulation, hiring a professional insulation contractor is highly recommended. These experts have the knowledge, experience, and specialized tools to accurately evaluate your insulation system and provide the necessary solutions for enhanced energy efficiency and comfort in your home. Here are some reasons why hiring a professional insulation contractor is beneficial:
- Expertise and Experience: Professional insulation contractors have extensive expertise in insulation installation, repair, and improvement. They understand the intricacies of different insulation materials, building codes, and energy efficiency requirements. With their experience, they can identify insulation issues effectively and recommend the most suitable solutions for your specific needs.
- Comprehensive Assessment: Professional contractors can conduct a comprehensive assessment of your insulation system. They will perform various tests, such as blower door tests, thermal imaging, and visual inspections, to evaluate the insulation’s performance, airtightness, and potential areas of improvement. This thorough evaluation helps identify insulation gaps, air leaks, and insulation deficiencies that may be affecting your home’s energy efficiency and comfort.
- Specialized Tools and Techniques: Professional insulation contractors have access to advanced tools and technologies that allow for accurate measurements and analysis. These tools include blower door fans, thermal imaging cameras, infrared thermometers, and moisture meters. By utilizing these specialized tools, contractors can detect hidden issues, such as air leaks, moisture problems, or thermal irregularities, that may not be visible to the naked eye.
- Quality Installation and Repair: Professional contractors ensure proper installation or repair of insulation materials according to industry standards. They have the necessary skills and techniques to complete the work efficiently and effectively, ensuring that your insulation performs optimally and meets the recommended thermal resistance levels for your region.
- Guidance and Recommendations: Professional contractors can offer guidance and recommendations based on their expertise. Whether you need to add or replace insulation, seal air leaks, or improve ventilation systems, they can provide personalized recommendations specific to your home’s insulation needs. They can guide you through the decision-making process, providing insights into the benefits, costs, and potential returns on investment for different insulation options.
- Code Compliance and Safety: Professional contractors are well-versed in building codes and regulations related to insulation. They ensure that the insulation work is performed in compliance with these codes, ensuring your safety and protecting your investment. They also prioritize safety measures during installation or repair, minimizing risks associated with insulation materials and processes.
When hiring a professional insulation contractor, it’s important to do your research, check their credentials, and review their previous work. Look for contractors who are licensed, insured, and have a good reputation in the industry. Get multiple quotes and ask for references to ensure you hire a contractor who can meet your specific insulation needs.
By hiring a professional insulation contractor, you can have confidence in the assessment, installation, or repair of your insulation system. Their expertise and quality craftsmanship will help improve the energy efficiency, comfort, and overall performance of your home.
Conclusion
Ensuring that your insulation is in good condition is essential for maintaining a comfortable, energy-efficient, and sustainable home. Bad insulation can lead to issues such as uneven temperature distribution, high heating or cooling bills, drafts or air leaks, moisture or water damage, mold or mildew growth, pest infestation, and a lack of energy efficiency.
By being aware of the common signs of bad insulation and conducting regular assessments, you can identify and address any insulation issues in a timely manner. DIY methods such as visual inspection for damage or gaps, checking for air leaks, and conducting a thermal imaging test can provide valuable insights into the condition of your insulation. However, for a more comprehensive evaluation, it is advisable to hire a professional insulation contractor who can perform specialized tests such as blower door tests, infrared thermography, thermal conductivity testing, and visual inspections with their expertise and specialized tools.
Working with a professional insulation contractor offers numerous benefits, including their expertise, experience, comprehensive assessments, and access to specialized tools and techniques. They can provide guidance, recommendations, and quality installation or repair services to improve the energy efficiency and comfort of your home. By addressing insulation deficiencies, sealing gaps, repairing air leaks, and ensuring proper insulation thickness and coverage, you can save on energy costs, enhance indoor comfort, and contribute to a more sustainable living space.
Investing in the maintenance, repair, or upgrade of your insulation is a worthwhile endeavor that can have long-lasting benefits. It not only improves your quality of life but also reduces your environmental footprint by reducing energy consumption and greenhouse gas emissions.
In conclusion, being proactive in assessing and maintaining your insulation is crucial for a well-insulated home. Whether you opt for DIY methods or hire a professional insulation contractor, taking the necessary steps to ensure effective insulation will provide a range of advantages and create a more comfortable and energy-efficient living environment for years to come.
Frequently Asked Questions about How To Tell If Insulation Is Bad
Was this page helpful?
At Storables.com, we guarantee accurate and reliable information. Our content, validated by Expert Board Contributors, is crafted following stringent Editorial Policies. We're committed to providing you with well-researched, expert-backed insights for all your informational needs.

0 thoughts on “How To Tell If Insulation Is Bad”