
Articles
12 Amazing Kegerator Tap For 2025
Modified: June 9, 2025
Discover the top 12 kegerator taps for 2025 and enhance your beer-drinking experience. Choose from a range of amazing options to suit your preferences.
(Many of the links in this article redirect to a specific reviewed product. Your purchase of these products through affiliate links helps to generate commission for Storables.com, at no extra cost. Learn more)
Introducing the 12 Amazing Kegerator Tap For 2025 — your ultimate guide to finding the perfect kegerator tap for an exceptional beer-drinking experience. Whether you're a beer enthusiast or a casual drinker, having a reliable and efficient kegerator tap is crucial for enjoying your favorite brews straight from the keg. In this comprehensive guide, we'll explore the top 12 kegerator taps available in the market, considering factors such as durability, functionality, and design. Get ready to take your beer enjoyment to the next level with these must-have kegerator taps for 2025.

Overall Score: 9.5/10
The FERRODAY Stainless Steel Core Draft Beer Faucet is a durable and corrosion-resistant faucet designed for keg tap towers and kegerators. It features a solid construction with a brass body and stainless steel core, ensuring longevity and preventing foaming. The faucet has a smooth flow with no leaks, thanks to its strong rubber seal. With a polished interior, it's also easy to clean. This American standard faucet is suitable for attaching beer and wine lines through walls, refrigerator doors, and cabinets. The FERRODAY faucet comes with a lifetime warranty and offers exceptional customer service. Overall, it provides a great value with high-quality performance.
Key Features
- Standard American beer faucet
- Durable and corrosion resistant
- Smooth flow with no leaks
- Wide application for various setups
- Lifetime technical support
Specifications
- Color: Silver
Pros
- Long-lasting and corrosion-resistant
- Easy to operate and clean
- Versatile for different setups
- Lifetime technical support
Cons
- May require frequent cleaning
- Some issues with sticking after a few weeks of use
The FERRODAY Stainless Steel Core Draft Beer Faucet is a reliable and affordable option for beer enthusiasts. Its solid construction and smooth flow ensure a great pouring experience, while the versatile application allows you to use it in various settings. With a lifetime warranty and exceptional customer service, FERRODAY stands behind the quality of their product. Although some users reported issues with sticking after a few weeks, regular cleaning can help mitigate this problem. Overall, the FERRODAY faucet is a smart choice for anyone looking to upgrade their beer dispensing setup.

Overall Score: 8.5/10
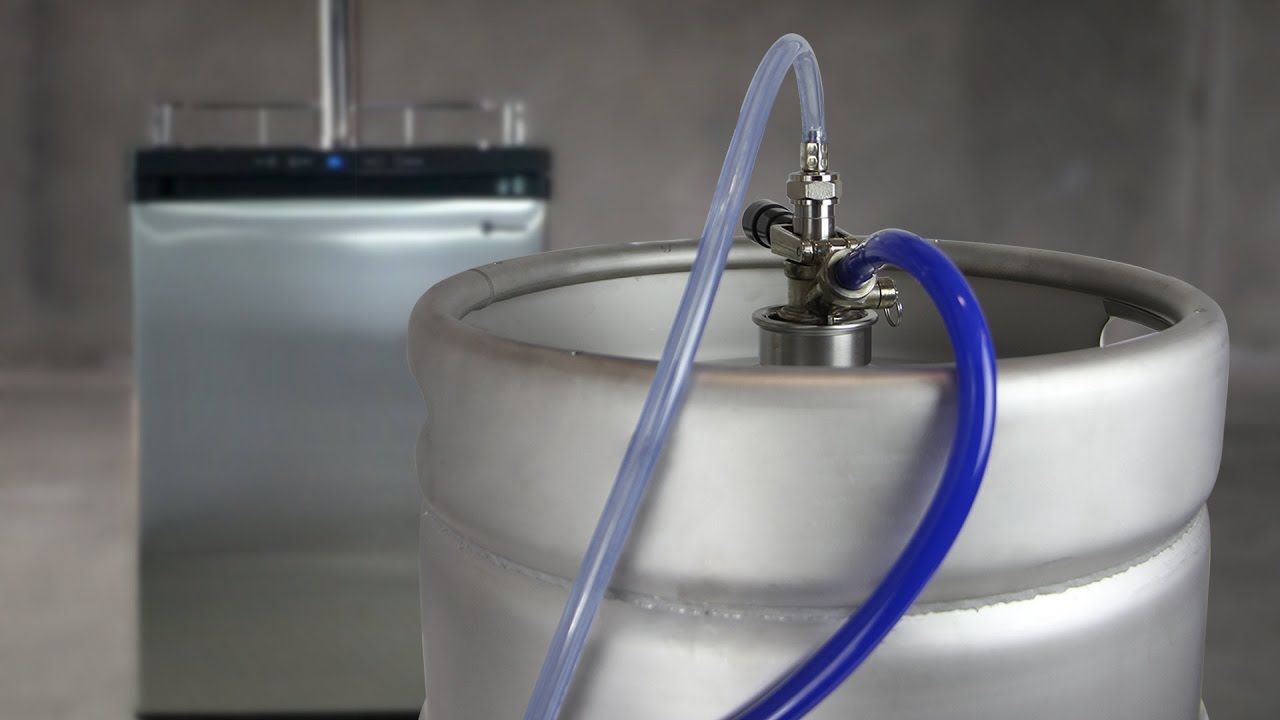
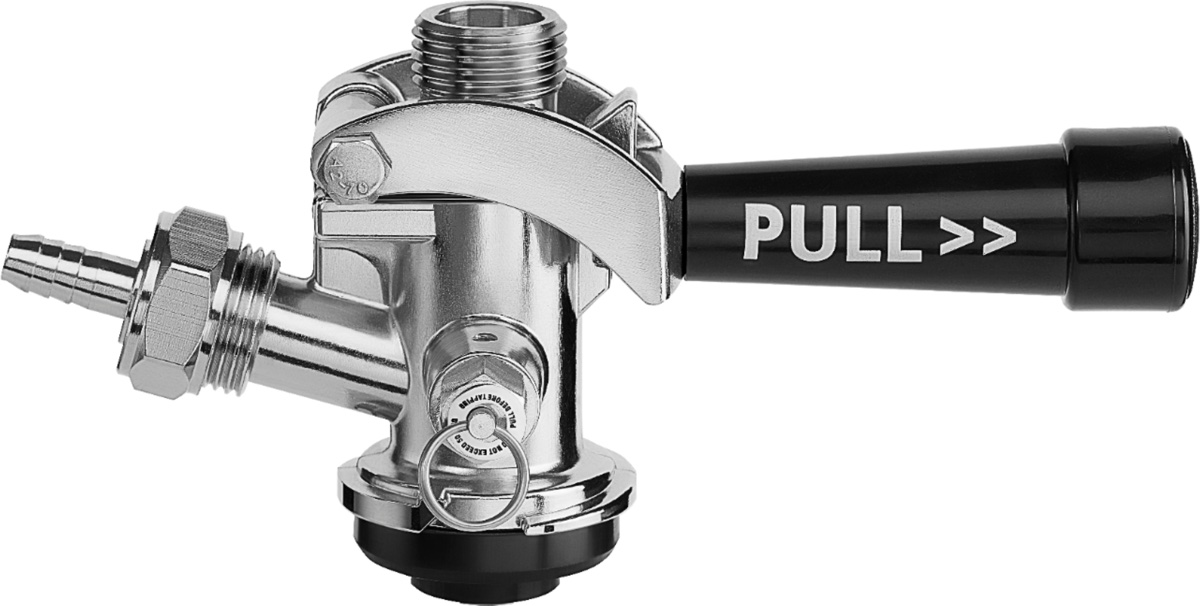
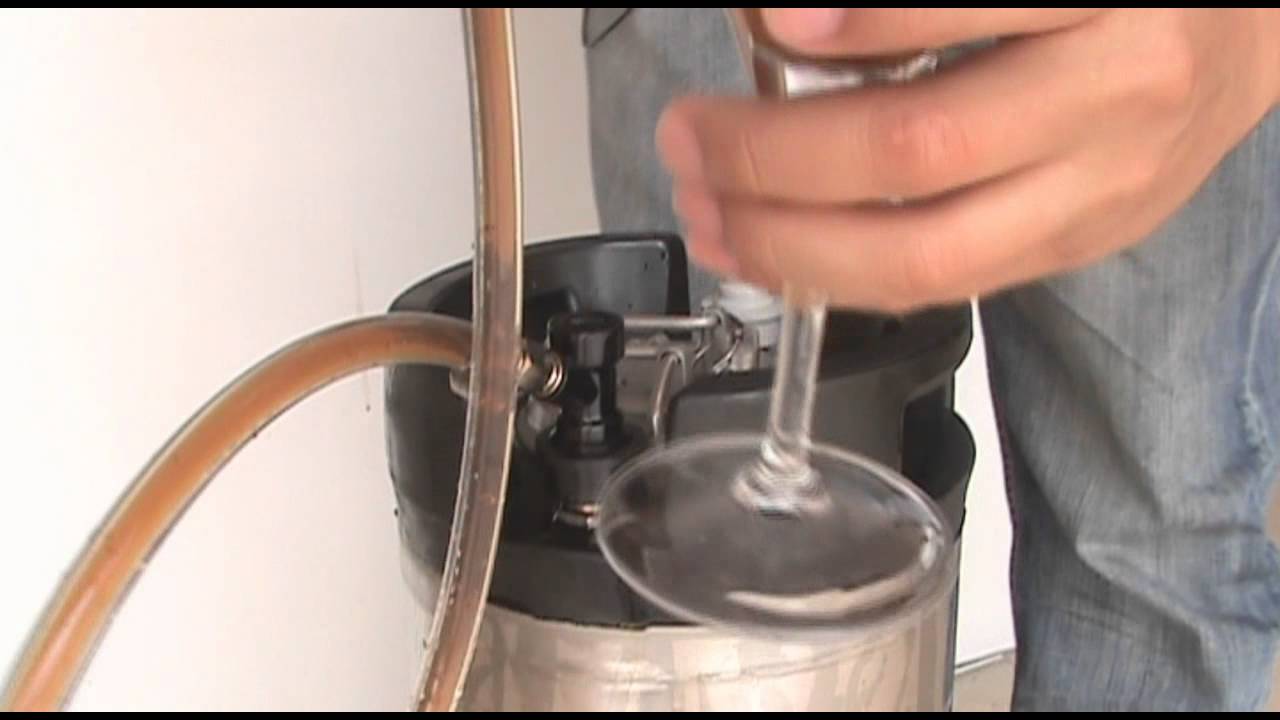
The Jansamn Keg Coupler is a high-quality and durable coupler that is perfect for serving beer, wine, soda, and other carbonated drinks. It is made with a chrome-plated brass body and a stainless steel probe, ensuring that it retains the flavor of the beer even after long-term use. The coupler has a safety pressure relief valve that prevents gas leaks and comes with silicone check valves and beer line washers for a secure seal. It is easy to install and lock, making it convenient for both professional and home use. The Jansamn Keg Coupler is compatible with all American 'D' System Sankey Kegs. Its great performance and compatibility make it a reliable and essential tool for bars, restaurants, breweries, and even home kegerators.
Key Features
- Stainless Steel Probe
- Safety Pressure Relief Valve
- Easy to Install & Lock
- Professional Keg Coupler Kit
- Great Compatibility
Specifications
- Color: Black
- Dimension: 4.90Lx4.90Wx2.90H
- Size: D Style
Pros
- Durable and retains beer flavor
- Prevents gas leaks with pressure relief valve
- Easy to install and lock
- Comes with tailpiece set and hose clamp
- Fits all American 'D' System Sankey Kegs
Cons
- Occasional small leaks
- Interior plastic piece may be damaged
The Jansamn Keg Coupler is a reliable and essential tool for anyone in the business of serving beer or other carbonated drinks. Its durable construction and stainless steel probe ensure that it retains the flavor of the beer, while the safety pressure relief valve prevents any gas leaks. The coupler is easy to install and lock, making it convenient for both professionals and home users. It is compatible with all American ‘D’ System Sankey Kegs, making it a versatile choice. Although there may be occasional small leaks reported by some customers, the overall performance and functionality of this keg coupler make it a great investment for bars, restaurants, breweries, and home kegerators.

Overall Score: 8.5/10
Introducing the FERRODAY Beer Faucet Stainless Steel Faucet, a top-of-the-line professional beer faucet designed for longer service life. Made from stainless steel with a distinctive style, this faucet is both visually appealing and durable. With food-grade rubber seals, it eliminates worries about leakage and provides a smooth flow with less foaming. The stainless steel construction ensures that it won't tarnish or pit, preserving the flavor of your beers. It is also compatible with other beverages such as wine, soda, and kombucha. Easy to assemble and clean, this faucet is ideal for both home and commercial use.
Key Features
- Solid stainless steel craft beer faucet exuding strength
- Longer service life than most competition
- Food-grade rubber seals to prevent leakage
- Overall stainless steel construction, corrosion-resistant
- Easy to assemble and fits North American shanks and towers
Specifications
- Color: Silver
Pros
- Visually appealing with a distinctive style
- Durable and long-lasting stainless steel construction
- Smooth flow with less foaming
- Compatible with various beverages
- Easy to assemble and clean
Cons
- Lacks self-closing feature
The FERRODAY Beer Faucet Stainless Steel Faucet is a reliable and stylish choice for beer enthusiasts. With its solid stainless steel construction, it offers durability and a longer service life compared to its competitors. The food-grade rubber seals ensure a leak-free experience, while the smooth flow prevents excessive foaming. The faucet’s compatibility with other beverages makes it versatile for various drink options. While it lacks a self-closing feature, this faucet is easy to assemble and clean. Overall, it is an excellent investment for both home and commercial use, providing a pleasurable pouring experience for your favorite beverages.

Overall Score: 9/10
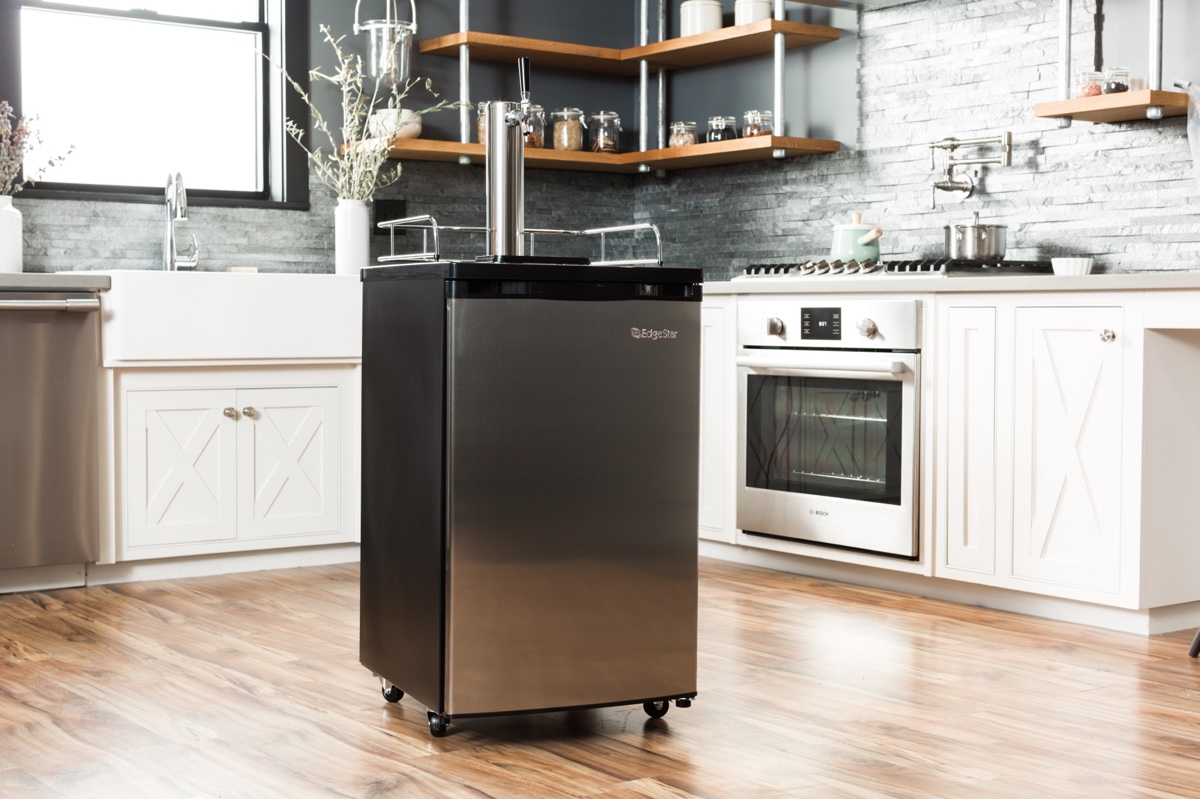
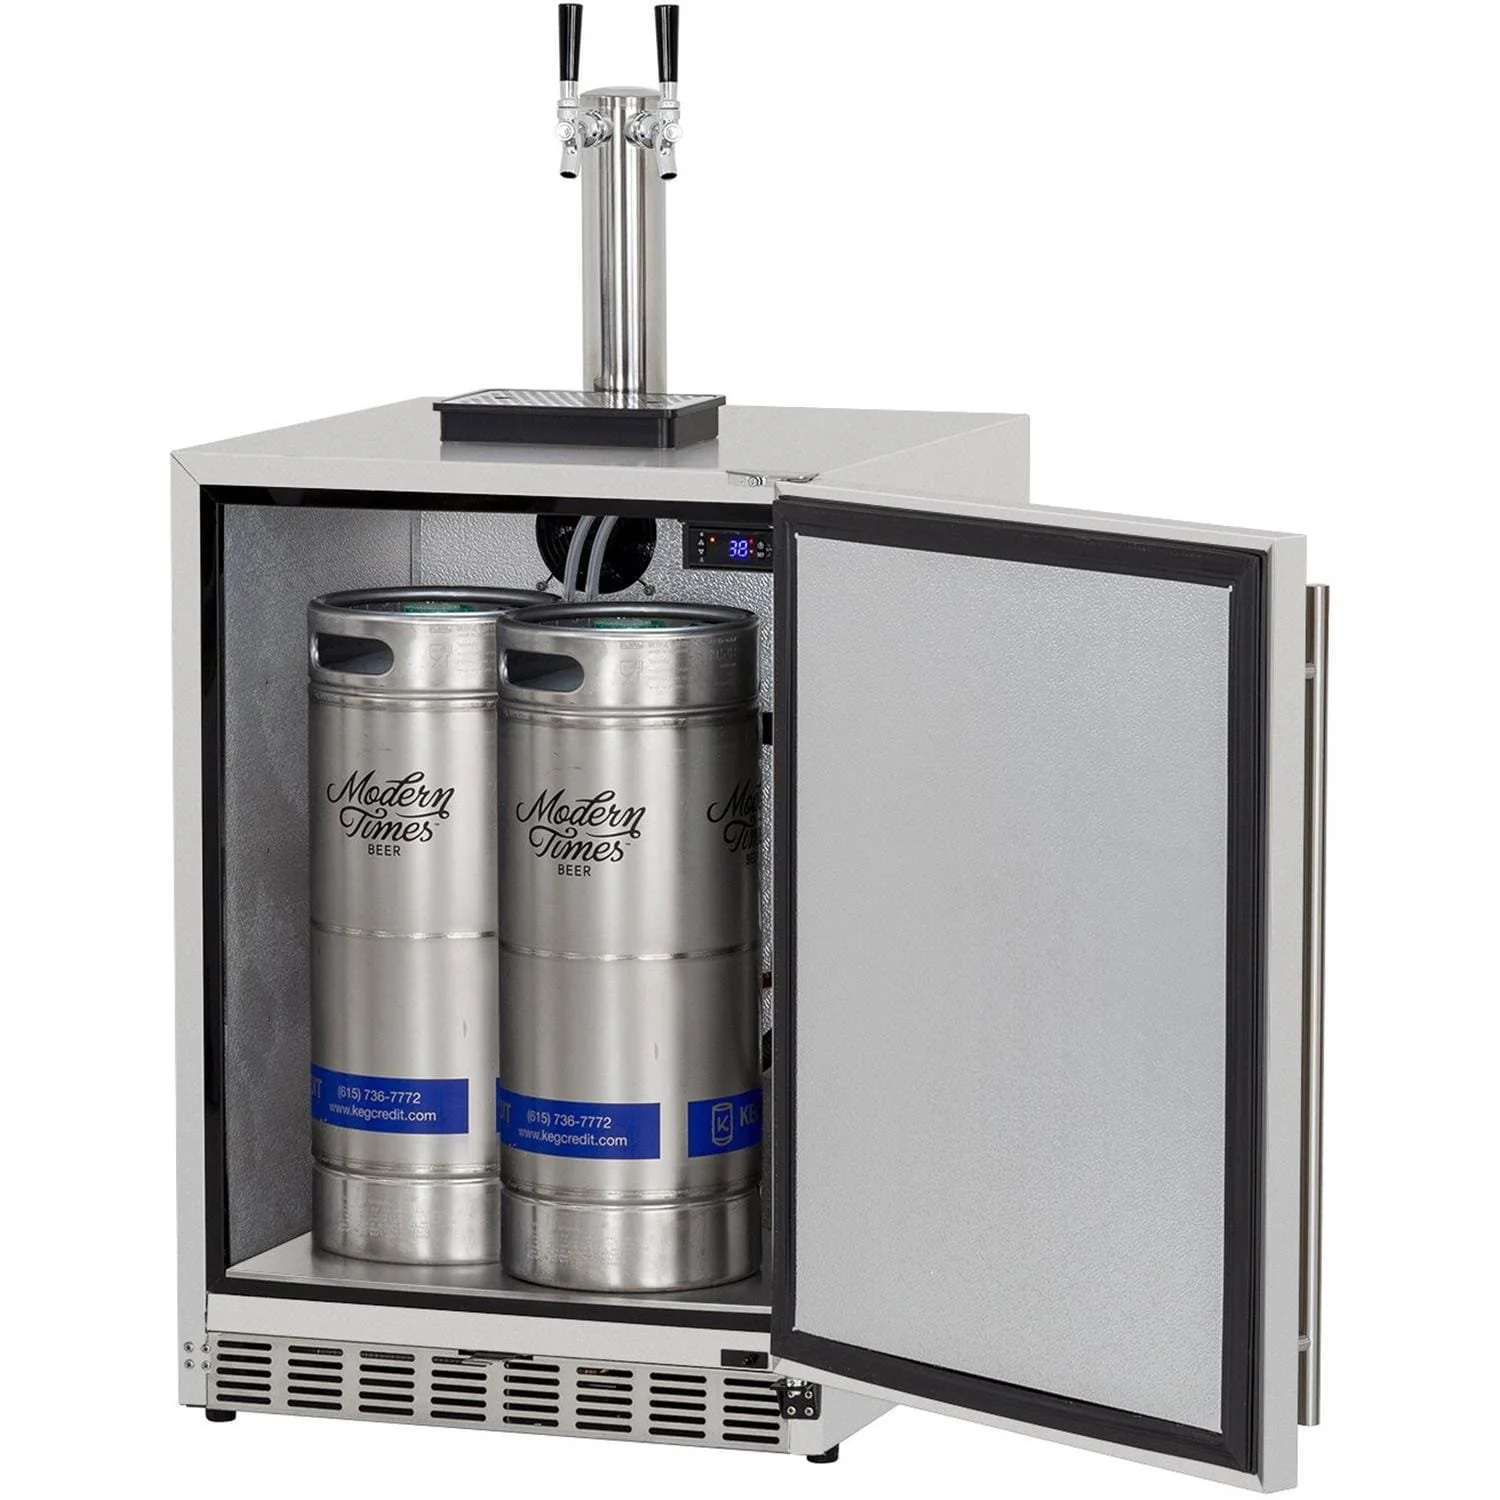
The EdgeStar KC2000 Full Size Kegerator and Keg Beer Cooler is a versatile and convenient appliance that allows you to enjoy your favorite draft beer at home. It has a temperature range from the low 30's to mid 40's, making sure your beer is always perfectly chilled. The kegerator can hold US standard 1/4 and 1/2 kegs, and it comes with a 5 lbs CO2 cylinder (empty) for easy dispensing. The unit also has the option to convert into a refrigerator for added versatility. With casters included, it is easy to move around, and the drip tray catches spills for easy cleaning. It comes with a 90-day labor warranty and 1-year parts warranty. Overall, the EdgeStar KC2000 provides a reliable and convenient solution for enjoying draft beer at home.
Key Features
- Holds US Standard 1/4 and 1/2 Kegs
- Temp Range: Low 30's to Mid 40's
- Easy conversion to a refrigerator
- 5 lbs CO2 cylinder included
- For freestanding use only
- Casters included for easy mobility
- Drip tray catches spills
- Available in stainless steel and dual tap models
Specifications
- Color: Black
- Dimension: 25.69Lx20.19Wx35.06H
Pros
- Versatile and convenient for enjoying draft beer at home
- Wide temperature range ensures perfectly chilled beer
- Can hold US standard kegs
- Includes a 5 lbs CO2 cylinder for easy dispensing
- Option to convert into a refrigerator
- Easy to move around with casters
- Drip tray catches spills for easy cleaning
- Available in different models for personal preference
Cons
- Does not support use of certain oversized kegs
- Some users experienced temperature fluctuations
- External CO2 tank mount may take up additional space
The EdgeStar KC2000 Full Size Kegerator and Keg Beer Cooler is an excellent choice for beer enthusiasts who want to enjoy draft beer at home. With its wide temperature range, versatile design, and convenient features like casters and drip tray, it offers a reliable and enjoyable experience. While it may have some limitations with oversized kegs and temperature consistency, these issues are outweighed by its overall performance. Whether you’re hosting a party or simply want to enjoy a cold pint of beer, the EdgeStar KC2000 is a reliable and convenient solution. Cheers to great beer!

Overall Score: 9/10
The MRbrew All 304 Stainless Steel Keg Coupler is a heavy-duty commercial keg tap dispenser made from high-quality 304 stainless steel. It features a 55-PSI safety pressure release valve and a gas check valve to prevent leaks and backflow. The keg coupler is designed with a quick and convenient lever locking handle for easy connection to the keg, and it is compatible with CO2 keg regulators. With its all-stainless construction, this keg coupler is perfect for commercial environments like pubs, bars, and restaurants, as well as for home brewing setups. Tap your kegs with ease and enjoy your favorite beverages without worrying about rust or unhealthy substances. Cheers to this durable and reliable keg coupler!
Key Features
- All stainless construction
- 55-PSI safety pressure release valve
- Gas check valve and sealing washer
- Beer gas line fitting standard G 5/8 thread
- Quick and convenient lever locking handle
- Works with CO2 keg regulator
Specifications
- Color: Black
- Size: Stainless Steel
Pros
- Heavy-duty stainless steel construction
- No leaking or backflow
- Convenient lever locking handle
- Works with CO2 keg regulator
- Suitable for commercial and home use
Cons
- One unit leaked CO2
- Twist lock may not work with all kegs
The MRbrew All 304 Stainless Steel Keg Coupler is a reliable and durable option for keg tapping. Its all-stainless construction ensures a healthier and rust-free experience, making it suitable for both commercial and home brewing setups. The convenient lever locking handle and compatibility with CO2 keg regulators make it easy to use. Although there were a few reports of leakage and compatibility issues with certain kegs, overall, customers are satisfied with the quality and performance of this keg coupler. If you’re looking for a dependable and high-quality keg tap dispenser, the MRbrew All 304 Stainless Steel Keg Coupler is worth considering.

Overall Score: 8/10
The MRbrew Upgraded Beer Faucet is a top-quality, commercial-grade stainless steel draft beer keg tap. Its solid stainless steel construction ensures durability and prevents unwanted flavors. With a sleek and elegant design, this beer faucet is perfect for high-traffic restaurants or homebrew setups. It features a healthy composition with silicone gaskets that do not impart odors or metallic taste to the beverage. The faucet is easy to clean and comes with sealing o-rings to prevent leaks, foaming, and dripping. Its flexible lever provides smooth pouring and prevents accidental spills. This beer tap is suitable for various homebrewing activities and can be used with kegerators, jockey boxes, and more. Overall, the MRbrew Upgraded Beer Faucet is a reliable and affordable choice for beer enthusiasts.
Key Features
- All SS 304 Construction
- Healthy Compositions of Beer Tap and Silicone Gasket
- Easily Clean, Thoughtful Beer Tap Sealing O-rings and No Leaks No Foaming No Drip
- Flexible Beer Faucet Top Lever and Will Not Stick
- Perfect for Various Homebrewing Activities
Specifications
- Color: Silver
- Size: 1 Count (Pack of 1)
Pros
- Solid stainless steel construction for durability
- Healthy composition with silicone gaskets
- Easy to clean and maintain
- Flexible lever for smooth pouring
- Suitable for various homebrewing activities
Cons
- Some users experienced air leaks around the lever post
- Washers may not fit properly on some units
- Requires an additional piece for certain installations
The MRbrew Upgraded Beer Faucet offers great value for its price. It provides a durable and stylish solution for beer dispensing, whether for commercial or homebrewing purposes. The stainless steel construction ensures longevity and prevents unwanted flavors. The faucet’s easy-to-clean design and thoughtful sealing o-rings make maintenance hassle-free. Despite a few minor flaws reported by some users, such as air leaks and sizing issues with washers, this beer tap performs well overall. It is a reliable choice for those looking for a basic, no-frills stainless steel faucet that won’t break the bank. If you’re seeking a cost-effective and efficient solution for your beer dispensing needs, the MRbrew Upgraded Beer Faucet is worth considering.

Overall Score: 8/10
The Hilangsan Draft Beer Faucet Beer Line Shank Kit is a must-have for anyone looking to build a kegerator dispenser or replace a beer faucet on an old system. This kit includes all the necessary parts, such as a self-closing beer faucet, a beer shank with elbow, 5ft clear PVC kegerator lines, beer line barb connector, gasket washer, a faucet wrench, brush, cover, and clamps. The stainless steel spring mechanism in the faucet ensures it self-closes in time, while the SS304 core guarantees no rust and corrosion resistance. The 5ft long beer line tubing and coupler fitting are perfect for most draft beer dispensing systems. With tight connections and no leaks, this kit provides a sleek and coordinated look when mounted to a beer tower. Plus, it includes a practical cleaning brush and dust cover to keep your system clean. Overall, the Hilangsan Draft Beer Faucet Beer Line Shank Kit is a reliable and practical choice for beer enthusiasts.
Key Features
- Build A Kegerator Dispenser
- SS304 Core Self-Closing Beer Tap Faucet
- 5ft Long Beer Line Tubing & G5/8 Hex Nut Coupler Fitting
- Tight Connection & No Leak No Loose
- Practical Cleaning Brush + Dust Cover
Specifications
- N/A
Pros
- Complete kit for kegerator dispenser or faucet replacement
- Stainless steel spring mechanism for self-closing faucet
- No rust and corrosion-resistant SS304 core
- 5ft long beer line tubing with coupler fitting
- Tight connections and no leaks
- Includes cleaning brush and dust cover
Cons
- May be challenging to connect the lines for some
- No specifications provided
The Hilangsan Draft Beer Faucet Beer Line Shank Kit is a reliable and practical solution for anyone looking to build or upgrade their kegerator system. With its complete set of high-quality components and thoughtful features like a self-closing faucet and included cleaning tools, this kit offers great value for its price. While the installation process may be a bit tricky for some, the overall functionality and performance of the kit are highly satisfactory. Whether you are a beer enthusiast or a business owner in the hospitality industry, this kit provides the necessary equipment to ensure a fresh and delicious draft beer experience. Cheers!

Overall Score: 8/10
The BACOENG Standard Tower Kegerator No Tank Beer Conversion Kit is a high-quality conversion kit that allows you to turn your refrigerator into a draft beer dispenser. It features a pro series dual gauge regulator, lever handle keg coupler, single faucet draft beer tower, standard metal beer faucet wrench, and includes detailed instructions for easy setup. The kit comes with everything you need and is designed to ensure a perfect pour every time. With its stylish design and premium features, this conversion kit is a great choice for beer enthusiasts.
Key Features
- Pro series dual gauge regulator
- Lever handle keg coupler
- Single faucet draft beer tower
- Standard metal beer faucet wrench
- Includes detailed instructions
Specifications
- Color: Silver
Pros
- High-quality components
- Easy to set up
- Stylish design
- Perfect pour
Cons
- Beer line diameter may need replacement
- Instruction manual could be improved
- CO2 tank pressure gauge may have issues
The BACOENG Standard Tower Kegerator No Tank Beer Conversion Kit is a reliable and convenient option for turning your refrigerator into a draft beer dispenser. It has a sleek design and comes with all the necessary components for an easy setup. While there may be some issues with the beer line diameter and the instruction manual, overall, this conversion kit offers good value for its price. With proper modifications and adjustments, users can achieve a perfect pour and enjoy their favorite draft beer at home. If you’re looking for an affordable and stylish kegerator conversion kit, this product is worth considering.

Overall Score: 8/10
The MRbrew Draft Beer Line Shank Faucet Kit is a complete kegerator replacement parts set that includes everything you need to replace old dispensing parts on your beer tower. With high-quality components and thoughtful features, this kit is perfect for homebrew enthusiasts. The self-closing beer faucet spring prevents beverage waste by closing the faucet in case of accidental contact. The beer tap wrench ensures tight connections to prevent leaks, while the tap brush cover keeps your faucet clean. The kit also comes with 5 feet of high-quality beer line that is resistant to kinks and maintains beverage taste. Easy to install and compatible with various setups, this kit is a great addition to any brewer's equipment.
Key Features
- Complete Kegerator Replacement Parts
- Self-Closing Beer Faucet Spring
- Beer Tap Wrench Prevents Leaking
- Replace Your Old leaking Brewing Hose
- Pretty Simple to Install
Specifications
- Color: Clear
- Size: 5 Feet
Pros
- Comes with all necessary parts
- Self-closing faucet spring reduces beverage waste
- Tap wrench prevents leaks
- High-quality beer line prevents kinks and maintains taste
- Easy to install on various setups
Cons
- Some customers reported missing items in shipment
- Wrench tool may slip during use
The MRbrew Draft Beer Line Shank Faucet Kit is a reliable and comprehensive solution for replacing old dispensing parts in your kegerator setup. It offers high-quality components, such as the self-closing faucet spring and the tight-sealing tap wrench. The included beer line is durable and ensures a smooth and leak-free beverage transfer. While there have been some reports of missing items in shipments, the overall customer satisfaction is high. With easy installation and compatibility with different setups, this kit is a great choice for homebrew enthusiasts looking to improve their dispensing system.

Overall Score: 8/10
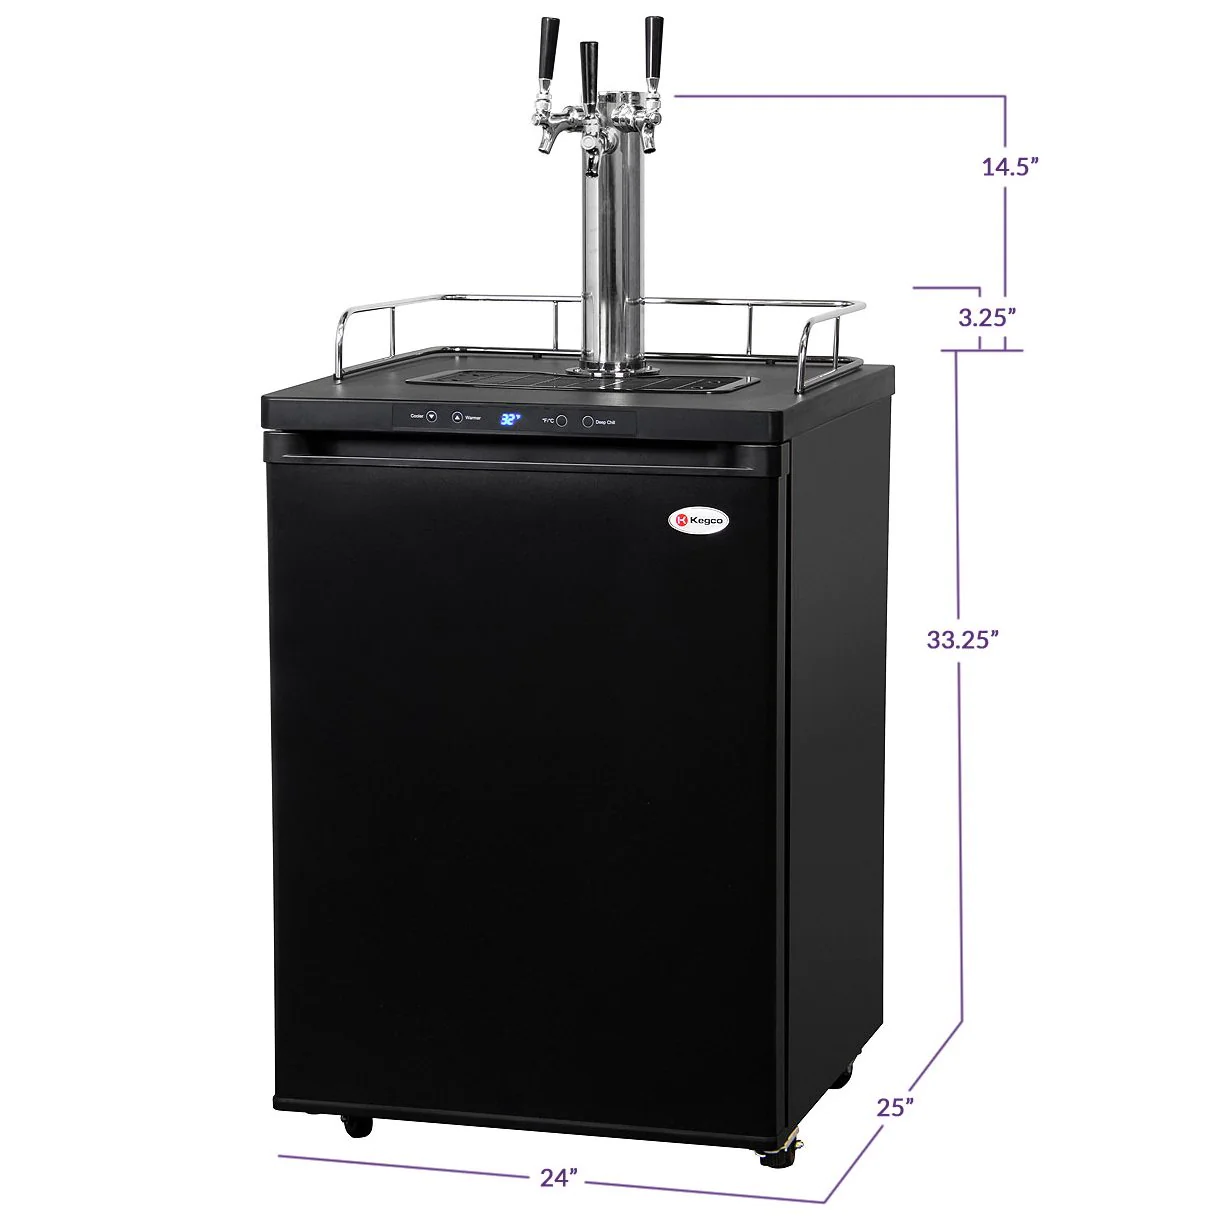
The EdgeStar KC2000SSTWIN is a full-size stainless steel dual tap kegerator and draft beer dispenser. It can store a full-sized half shell Sankey standard keg or two sixth kegs. The temperatures range from low 30s to mid 40s degrees, and it comes with rolling casters for easy mobility. The unit is for freestanding indoor use only and includes a 5 lb. CO2 cylinder (empty) with external or internal mounting capabilities. The dimensions are 50-7/16" H x 20-3/16" W x 20-1/16" D. The kegerator has a 90-day labor warranty and a 1-year parts warranty. Overall, it has received positive reviews for its performance and customer service. However, some users have reported issues with cheap parts and a small drip tray. Despite these drawbacks, it offers a convenient and stylish option for enjoying draft beer at home.
Key Features
- Stores up to a full-sized half shell Sankey standard keg or two sixth kegs
- Temperatures: Low 30s to mid 40s degrees
- Rolling casters included for easy mobility
- For freestanding indoor use only
- 5 lb. CO2 cylinder (supplied empty) included with external or internal mounting capabilities
Specifications
- Color: Silver
- Dimension: 25.69Lx20.18Wx35.06H
Pros
- Spacious interior for kegs
- Easy mobility with rolling casters
- Includes 5 lb. CO2 cylinder
- Stylish stainless steel design
Cons
- Cheap parts like CO2 regulator and beer taps
- Small and low-quality drip tray
- Some users reported issues with the thermostat
The EdgeStar KC2000SSTWIN Kegerator & Draft Beer Dispenser offers a convenient and stylish solution for enjoying draft beer at home. It has a spacious interior that can accommodate a full-sized keg or two smaller kegs. The rolling casters make it easy to move around, and the stainless steel design adds a touch of elegance to any space. While there are some drawbacks, such as cheap parts and a small drip tray, overall the kegerator performs well and has received positive reviews. If you’re looking to enhance your home bar or entertainment area with draft beer on tap, the EdgeStar KC2000SSTWIN is worth considering.

Overall Score: 8/10
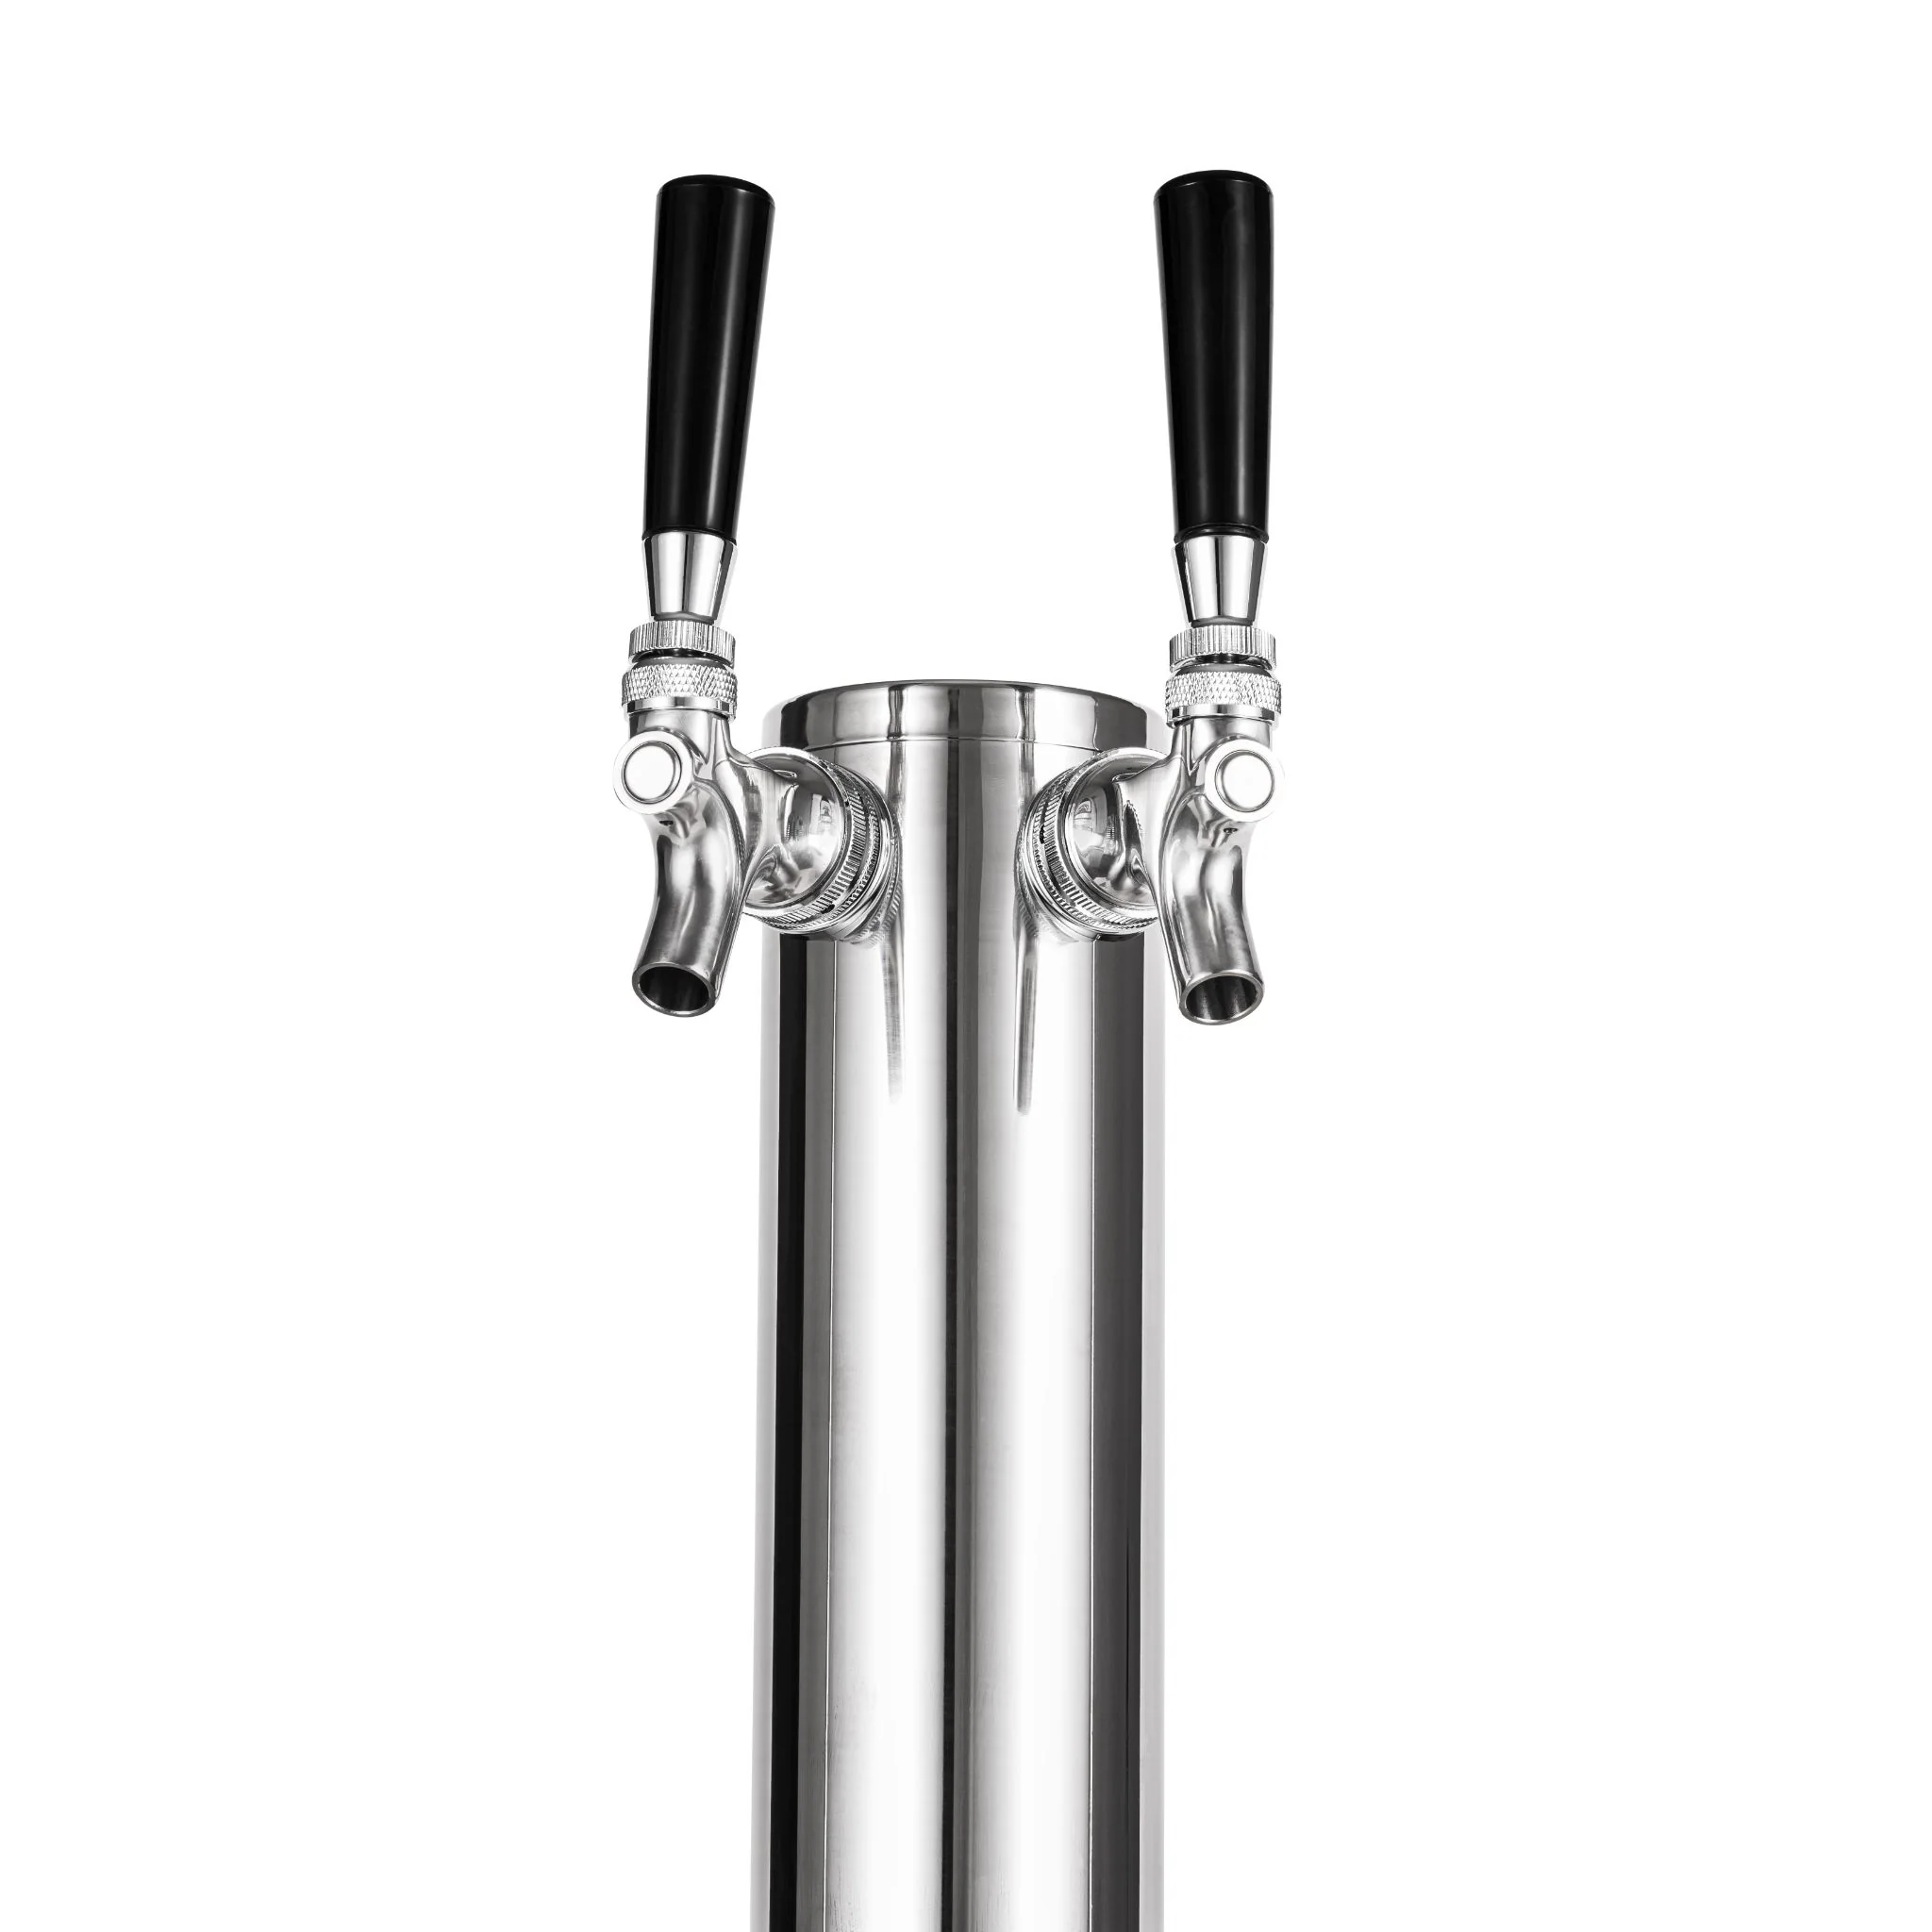
The Kegco 3PSTCK2-NT Kegerator Kit is an impressive product for anyone looking to enjoy draft beer at home. This kit includes a two-product dual gauge regulator, allowing you to pressurize two kegs simultaneously. The Kegco KT85D-L 'D' system keg couplers are designed to easily tap all North American D System store-bought kegs. With a 3-inch diameter air-cooled draft beer tower, your beer will stay cold throughout the dispense process. The high-quality metal beer faucet wrench ensures that you can loosen or tighten shank collars without scratching your faucets. Assembly is made easy with the included detailed instruction guide. Upgrade your kegerator experience with the Kegco 3PSTCK2-NT Kegerator Kit!
Key Features
- Kegco two product dual gauge regulator with shut off valves
- Metal lever handle Kegco KT85D-L 'D' system keg couplers
- 3' diameter air-cooled draft beer tower
- High-quality metal beer faucet wrench
- Easy-to-follow detailed instruction guide
Specifications
- Color: Chrome
- Dimension: 18.00Lx10.00Wx10.00H
- Size: 2-Tap
Pros
- Allows pressurizing two kegs simultaneously
- Fits all North American D System store-bought kegs
- Ensures beer stays cold during the dispense process
- Doesn't scratch faucets while loosening or tightening shank collars
- Comes with easy-to-follow assembly instructions
Cons
- Wrong regulator and damaged washers reported in a few cases
The Kegco 3PSTCK2-NT Kegerator Kit is a solid choice for beer enthusiasts who want to enjoy draft beer at home. With its dual keg capability, easy-to-use couplers, and air-cooled draft beer tower, this kit provides a convenient and efficient way to dispense cold beer. The included instruction guide makes assembly a breeze, ensuring a hassle-free experience. While there have been a few reports of wrong regulators and damaged washers, the overall customer satisfaction is high. If you’re looking for a reliable kegerator kit that delivers on performance and quality, the Kegco 3PSTCK2-NT is worth considering.

Overall Score: 8.5/10
The FERRODAY 4-1/8 inch Shank Stainless Steel Core Beer Faucet is a high-quality beer tap designed for homebrewing. Made with stainless steel 304 core and a forged brass body, this faucet is durable, corrosion-resistant, and will not taint the flavor of your beers. The faucet features a 4-1/8 inch shank with a built-in 1/4 inch barbed fitting, making it easy to install on a wall, refrigerator, or cabinet. It also has food-safe rubber seals to ensure no leaks and no sticking. The faucet has a simple construction for a smooth flow with less foaming. With its sleek chrome polished finish, it adds a touch of elegance to your kitchen. The FERRODAY 4-1/8 inch Shank Stainless Steel Core Beer Faucet comes with lifetime technical support for your peace of mind.
Key Features
- Material & Construction: Stainless steel 304 core, forged brass body, and premium 5-layer chrome polished
- 4-1/8 Shank Easy to Install: Built-in 1/4” barbed fitting and 4-1/8” Shank
- Sure No Leak & No Stick: Food-safe rubber seals to eliminate your worries about leakage
- Smooth Flow Less Foaming: Simple construction, LESS agitation, a smooth interior for smooth flow LESS foaming
- Life Time Service: We are committed to offering you high-quality products as well as superior service
Specifications
- Color: Black
- Size: L
Pros
- Durable and corrosion resistant
- Easy to assemble and clean
- Smooth flow with less foaming
- Lifetime technical support
Cons
- Tap clogs easily
- No parts diagram or installation instructions provided
- Tap may lock if not used daily
The FERRODAY 4-1/8 inch Shank Stainless Steel Core Beer Faucet is a reliable and stylish option for homebrewers. Its durable construction and no-leak design make it a great choice for long-term use. The smooth flow and less foaming feature ensure a pleasurable beer-drinking experience. However, it is important to note that the tap may clog easily and a parts diagram or installation instructions are not provided. Overall, this faucet offers good value for money and is backed by lifetime technical support. Upgrade your homebrew setup with the FERRODAY 4-1/8 inch Shank Stainless Steel Core Beer Faucet.
Buyer's Guide: Kegerator Tap
*So, you've decided to take your love for beer to the next level by investing in a kegerator tap. Congratulations!* 🍻Buying the perfect kegerator tap can be an exciting, yet overwhelming journey. With numerous options available in the market, it's important to consider various factors to ensure you make an informed decision. To simplify things for you, we've put together this comprehensive buyer's guide.
Things to Consider When Buying a Kegerator Tap:
- Compatibility: Ensure that the kegerator tap you choose is compatible with your existing kegerator system. Different taps have different connecting mechanisms, so be sure to check the compatibility before making a purchase.
- Number of Taps: Determine the number of taps you want for your kegerator. If you're a beer enthusiast who enjoys a variety of brews, multiple taps would allow you to serve different types of beer simultaneously.
- Material and Build Quality: Look for a kegerator tap that is made from durable and corrosion-resistant materials like stainless steel or brass. A well-built tap will not only stand the test of time but also enhance the overall beer dispensing experience.
- Style and Design: Consider the aesthetic appeal of the tap. You want a tap that looks stylish and complements your kegerator setup. From classic to modern designs, there are options to suit every taste and décor.
- Ease of Installation: Opt for a kegerator tap that is easy to install and maintain. Look for taps that come with clear instructions and include all necessary mounting hardware. An easy-to-install tap will save you time and frustration.
- Flow Control: Some taps offer adjustable flow control, allowing you to pour your beer at the desired rate. This feature can be particularly useful if you're serving different beer styles that require varying levels of carbonation.
- Cleaning and Maintenance: Consider taps that are easy to clean and maintain. Look for removable components and ensure they are dishwasher-safe. Regular cleaning ensures the longevity of your tap and keeps your beer tasting fresh.
- Price and Budget: Set a budget for your kegerator tap and explore options within that range. While cost is an important factor, remember that investing in a quality tap can make all the difference in the long run.
- Brand Reputation: Research and opt for reputable brands known for their quality and customer satisfaction. Reading reviews and seeking recommendations can help you choose a reliable and trusted tap.
- Warranty: Check if the kegerator tap comes with a warranty. A warranty provides peace of mind and safeguards you against any manufacturing defects or malfunctions.
- Additional Features: Consider additional features like drip trays, LED lights, or handles with ergonomic designs. These extra features can enhance your pouring experience and add a touch of convenience.
Read also: 12 Best Kegerator Tap Handle For 2025
Frequently Asked Questions about 12 Amazing Kegerator Tap For 2025
Not all kegerator taps are compatible with all kegerator systems. Ensure to check compatibility before purchasing to avoid any connectivity issues.
Yes, most kegerator taps come with detailed instructions and all the necessary mounting hardware for easy installation. However, if you’re unsure, it’s always good to seek professional assistance.
It’s recommended to clean your kegerator tap after each keg or at least once a month, depending on usage. Regular cleaning prevents beer residue build-up and maintains the quality of your brews.
Yes, kegerator taps are versatile and can dispense various types of beer, including ales, lagers, stouts, and more. Just make sure you have the appropriate kegs and CO2 setup for each beer type.
Most kegerator taps come with a warranty, but the length and coverage may vary. Be sure to check the warranty terms and conditions before making a purchase.
Was this page helpful?
Trust Storables.com for unbiased and honest product reviews. Our reviews are rigorously assessed by our Expert Board Contributors and adhere to strict Editorial Standards. We ensure that each review is transparent and trustworthy, helping you make informed purchasing decisions.


0 thoughts on “12 Amazing Kegerator Tap For 2025”