Articles
How To Set Up True Commercial Kegerator
Modified: August 30, 2024
Learn how to set up a commercial kegerator in this informative article. Step-by-step instructions and helpful tips for beginners and experts.
(Many of the links in this article redirect to a specific reviewed product. Your purchase of these products through affiliate links helps to generate commission for Storables.com, at no extra cost. Learn more)
Introduction
Are you a beer enthusiast who wants to enjoy your favorite brew on tap at home or in your commercial establishment? Look no further than a true commercial kegerator—the ultimate solution for keeping your beer fresh, cold, and perfectly carbonated.
Setting up a true commercial kegerator may seem daunting at first, but with a little guidance and know-how, you’ll have it up and running in no time. In this article, we will walk you through the step-by-step process of setting up a true commercial kegerator, ensuring that you can enjoy a cold and refreshing draft beer whenever you desire.
Before we dive into the setup process, it’s essential to understand what makes a true commercial kegerator different from its residential counterparts. True commercial kegerators are specifically designed for high-volume usage in bars, restaurants, and other hospitality establishments. They are built to withstand continuous operation, maintain consistent temperature and pressure, and accommodate multiple kegs.
Now that we have a clear understanding of what a true commercial kegerator is, let’s get started on the setup process.
Key Takeaways:
- Setting up a true commercial kegerator involves choosing the right location, assembling the unit, and connecting the CO2 tank and beer lines. Proper maintenance and troubleshooting are essential for optimal performance and longevity.
- Enjoy the rewarding experience of pouring cold, refreshing draft beer by following the step-by-step process for setting up and maintaining a true commercial kegerator. Pay attention to detail, prioritize regular maintenance, and troubleshoot any issues promptly for a continuous supply of high-quality draft beer.
Read also: 9 Incredible True Kegerator For 2025
Step 1: Choosing the Right Location
Choosing the right location for your true commercial kegerator is crucial for its proper functioning and convenience. Here are a few factors to consider when selecting the ideal spot:
- Accessibility: Ensure that the location you choose allows easy access to the kegerator. This will make it easier for maintenance, cleaning, and changing out kegs.
- Ventilation: True commercial kegerators generate heat as they cool the beer. It is important to place the kegerator in a well-ventilated area to prevent overheating. Avoid placing it in a confined space or against a wall.
- Level Surface: The kegerator should be placed on a level surface to prevent any stability issues or potential damage to the unit. Use a leveling tool to ensure that the kegerator is perfectly balanced.
- Proximity to Power Outlet: Make sure that the location you choose has a nearby power outlet to plug in the kegerator. This will prevent the need for long extension cords or other wiring complications.
- No Direct Sunlight: Sunlight can heat up the kegerator and affect its cooling capabilities. Choose a location away from direct sunlight to maintain optimal temperature control.
Once you have considered these factors, you can confidently choose the right location for your true commercial kegerator. Remember, a well-placed kegerator will enhance the overall experience and make serving and enjoying draft beer a breeze.
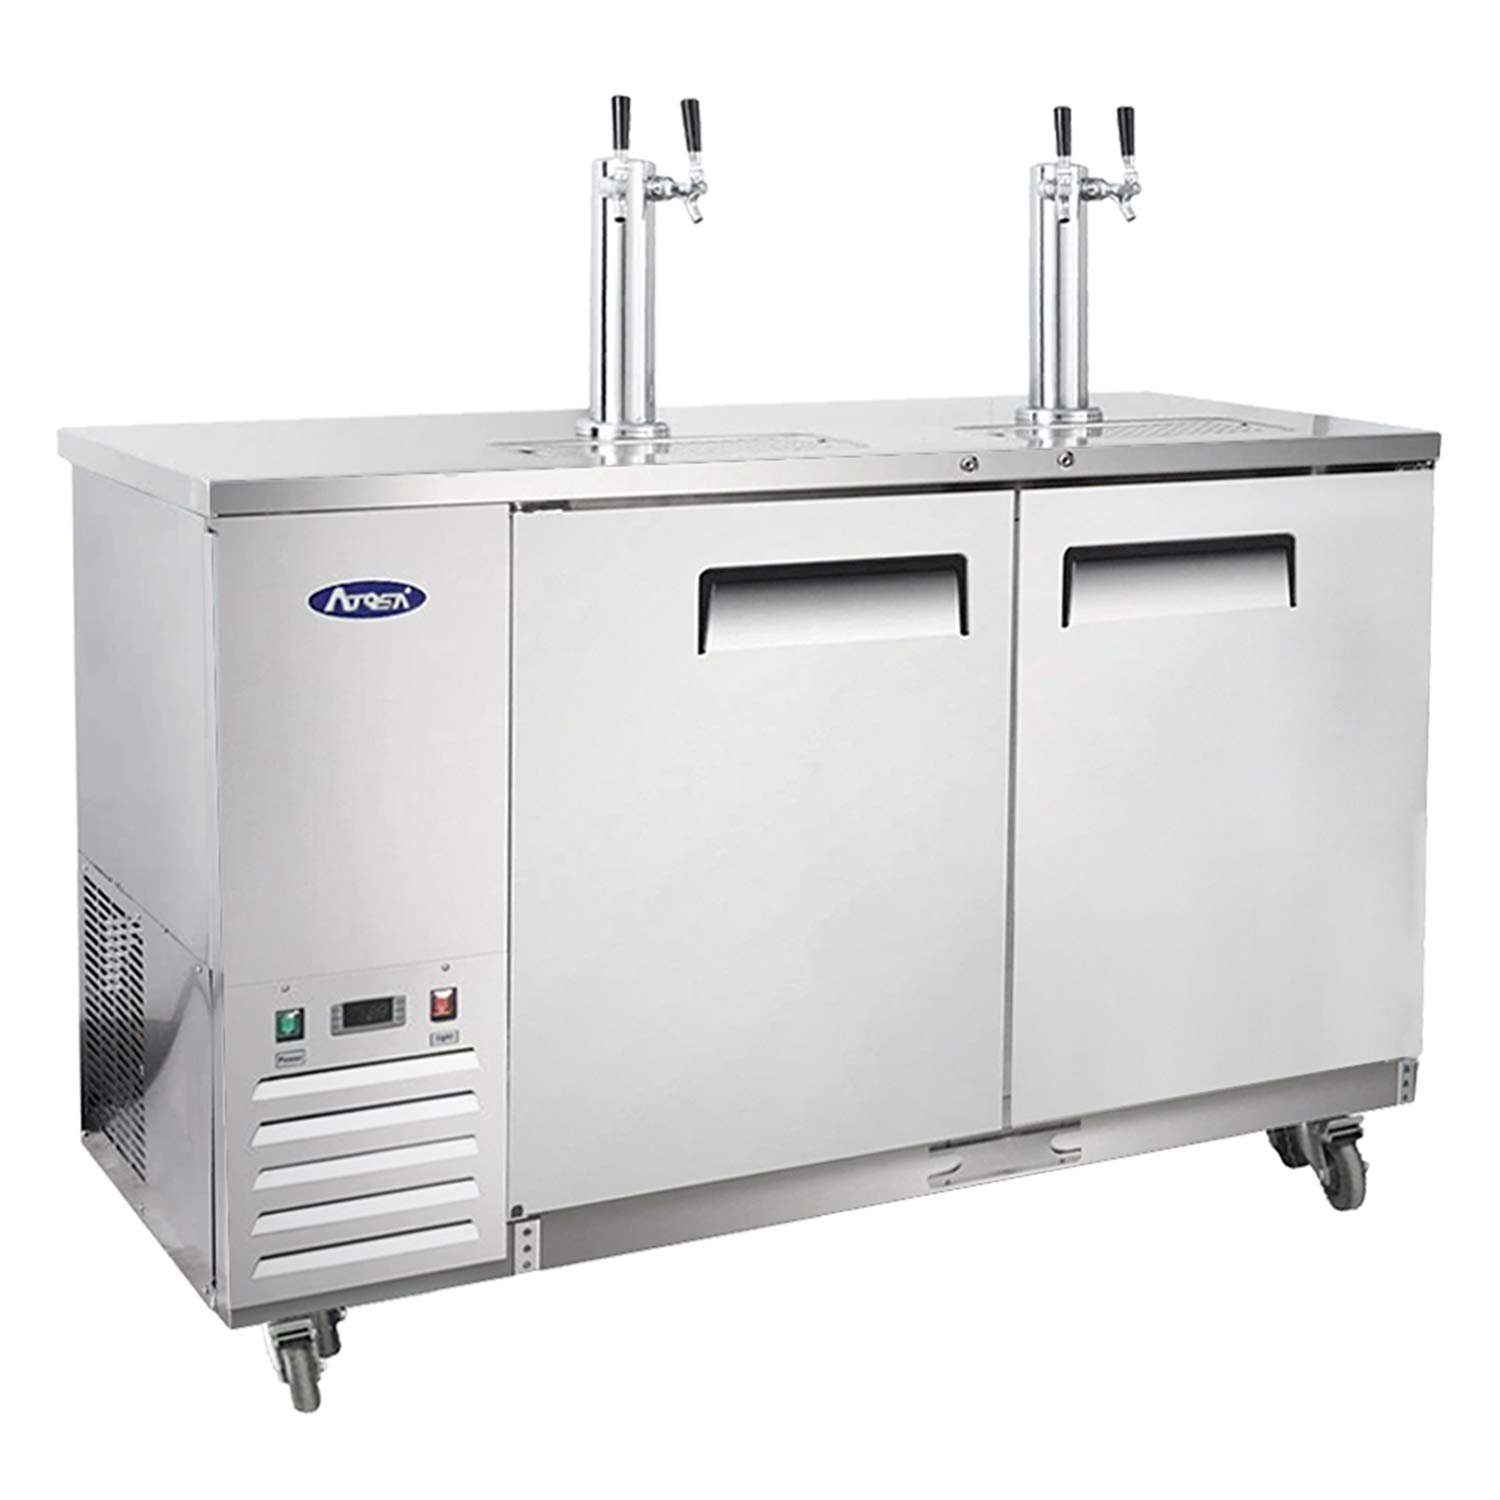
Step 2: Assembling the Kegerator
Assembling your true commercial kegerator is the next crucial step in the setup process. Follow these steps to ensure an efficient and successful assembly:
- Unboxing and Inspection: Carefully unbox the kegerator and inspect all the components. Check for any signs of damage or missing parts. Contact the manufacturer if anything seems amiss.
- Read the Manual: Take the time to read the instruction manual provided by the manufacturer. Familiarize yourself with the different parts and their functions. This will make the assembly process easier.
- Assemble the Tower: If your kegerator has a tower, assemble it according to the manufacturer’s instructions. This typically involves attaching the faucet and beer line to the tower and securing it in place.
- Attach the Drip Tray: Some kegerators come with a drip tray that collects any excess liquid. Attach the drip tray to the front of the kegerator using the provided hardware.
- Install the Caster Wheels: If your kegerator has caster wheels, install them on the bottom of the unit. This will enable you to move the kegerator around easily if needed.
- Adjust the Shelves: If your kegerator has adjustable shelves, adjust them to accommodate your kegs or other accessories. Ensure that they are securely in place.
- Clean the Interior: Before moving forward, clean the interior of the kegerator thoroughly. Use warm water and mild detergent to remove any dust or debris.
By following these steps, you will have your true commercial kegerator fully assembled and ready for the next stages of setup. Take your time during this process to ensure everything is secure and in place.
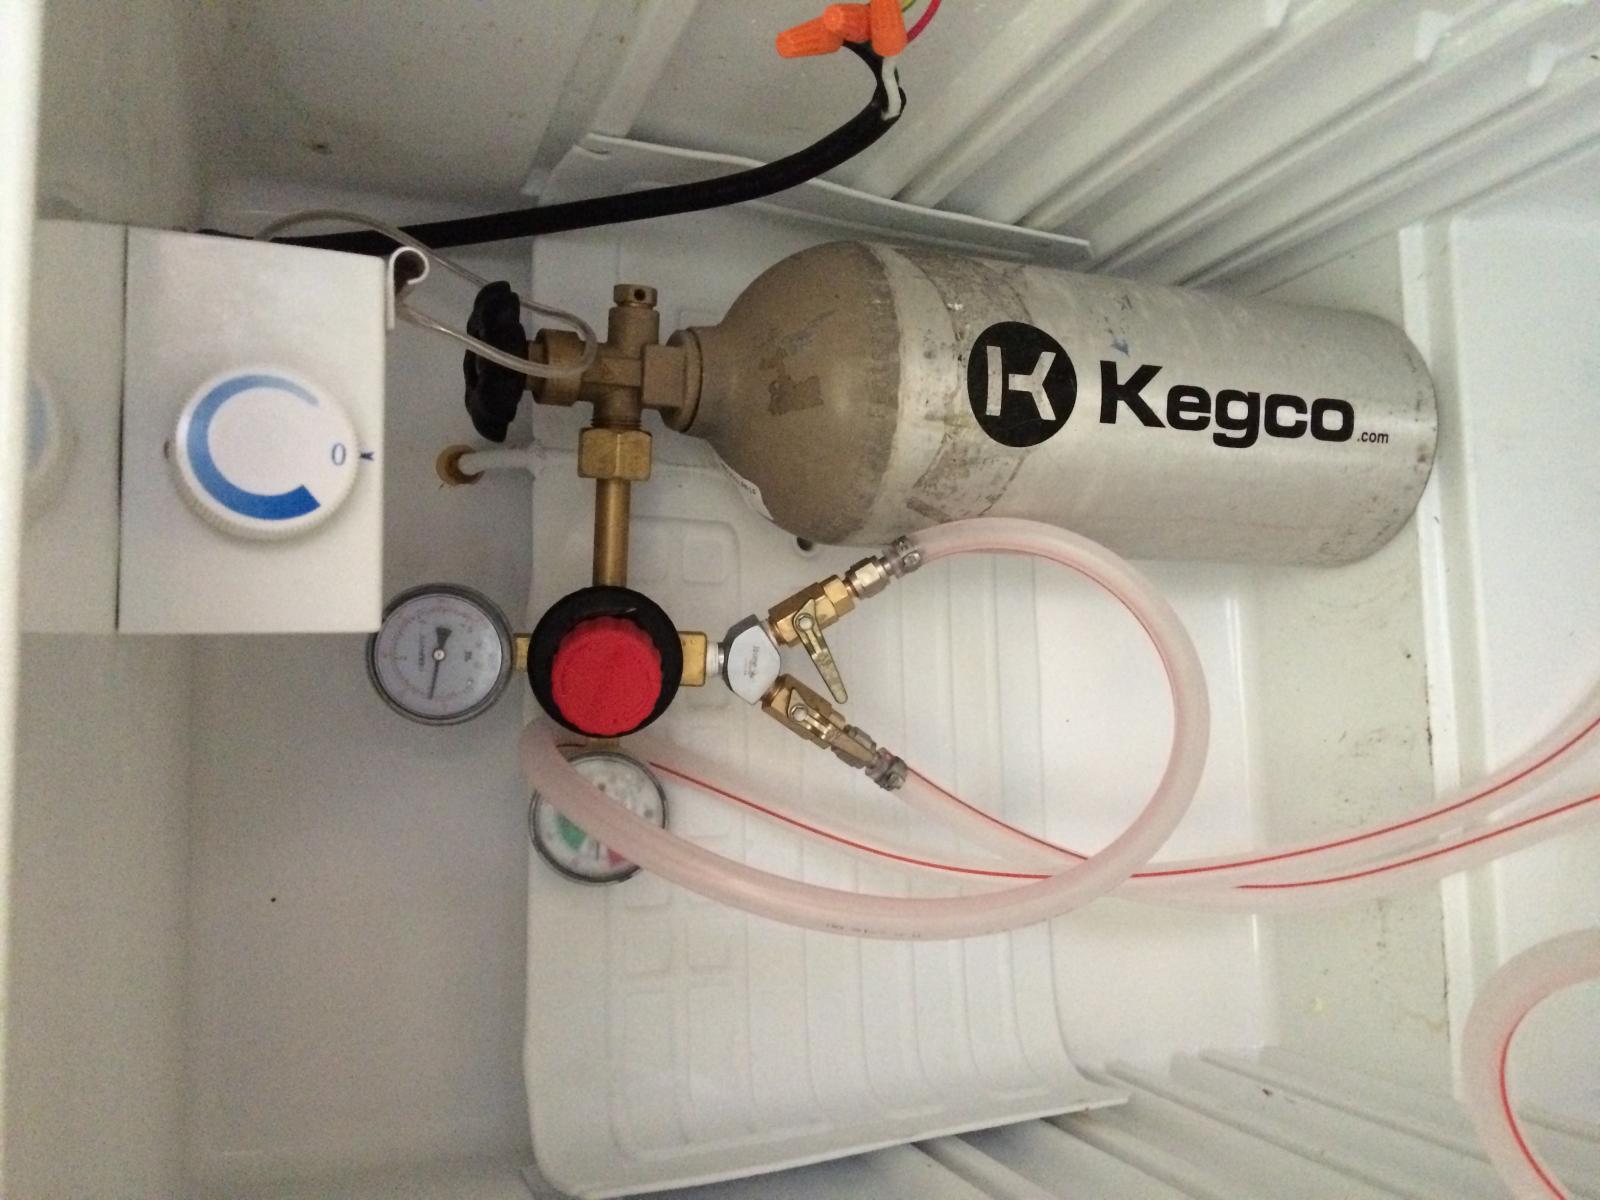
Step 3: Connecting the CO2 Tank
Connecting the CO2 tank to your true commercial kegerator is a crucial step in ensuring the perfect carbonation of your draft beer. Follow these steps to connect the CO2 tank:
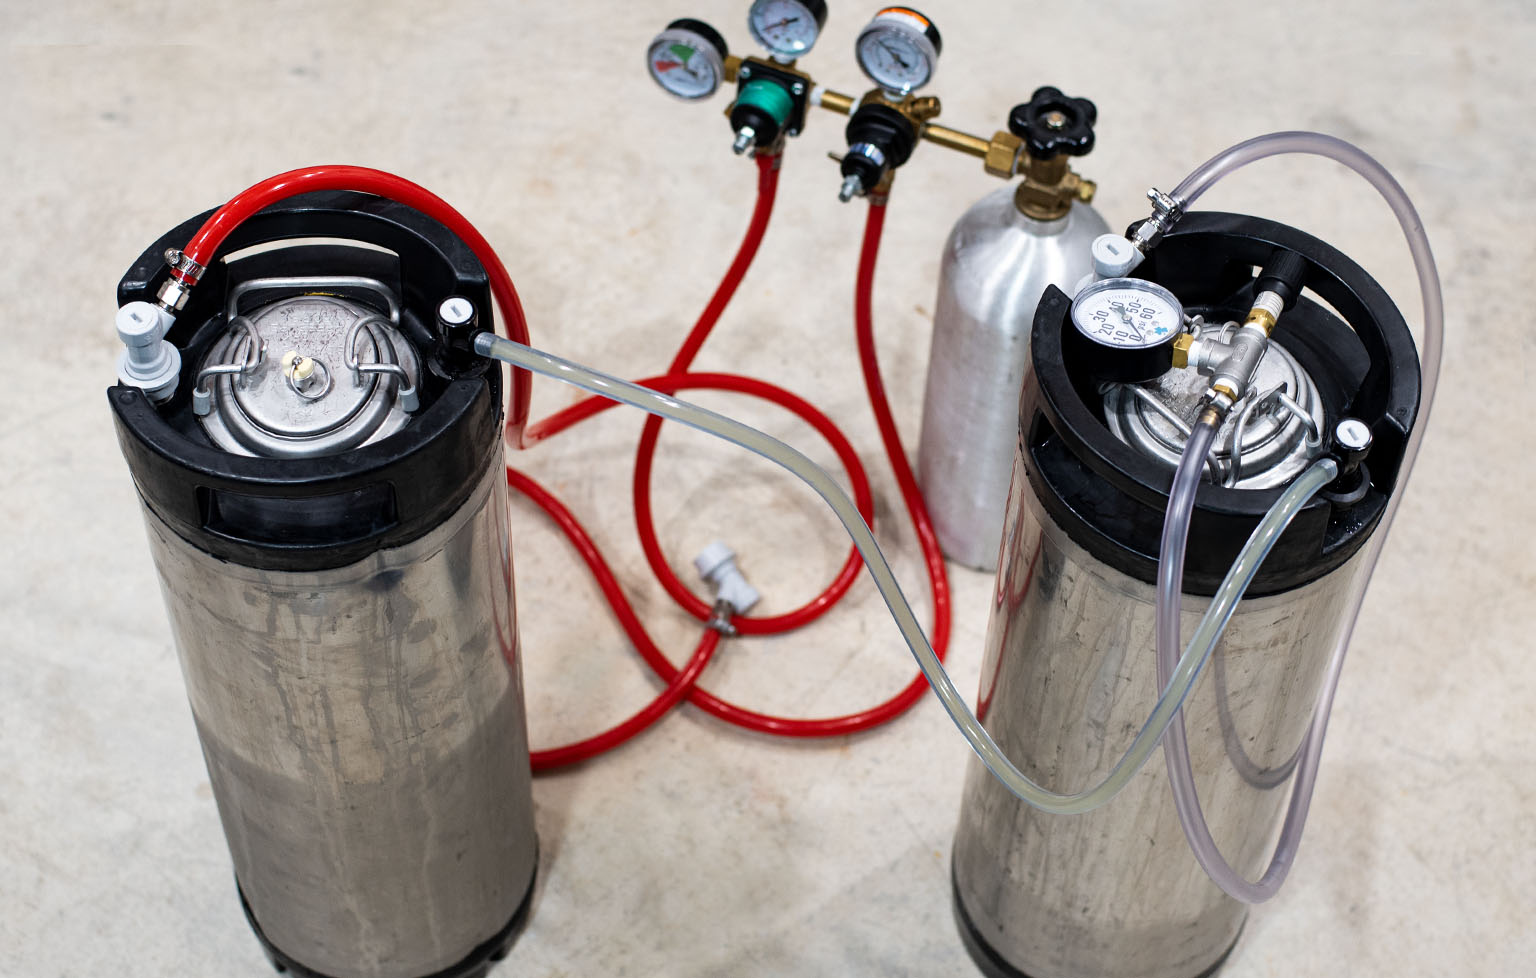
- Locate the CO2 Regulator: The CO2 regulator is typically located inside the kegerator. Locate it and ensure that it is properly attached and secured.
- Check the CO2 Tank: Inspect the CO2 tank to ensure that it is in good condition and properly filled. Make sure the tank’s valve is tightly closed before attaching it.
- Attach the CO2 Regulator: Connect the regulator to the CO2 tank by aligning the regulator’s outlet valve with the tank’s inlet valve. Tighten the connection to create a secure seal.
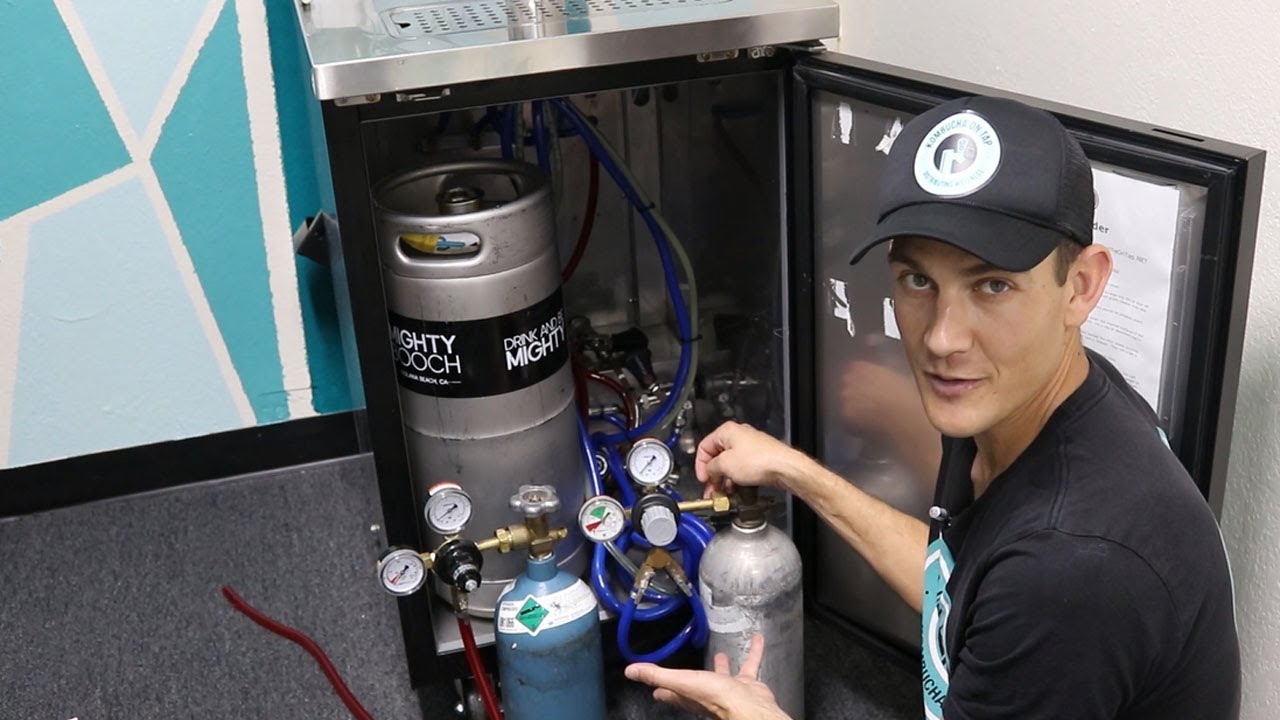
- Adjust the Regulator Pressure: Use the adjustment knob on the regulator to set the desired pressure for carbonation. Refer to the manufacturer’s instructions for the recommended pressure for your specific kegerator model and beer type.
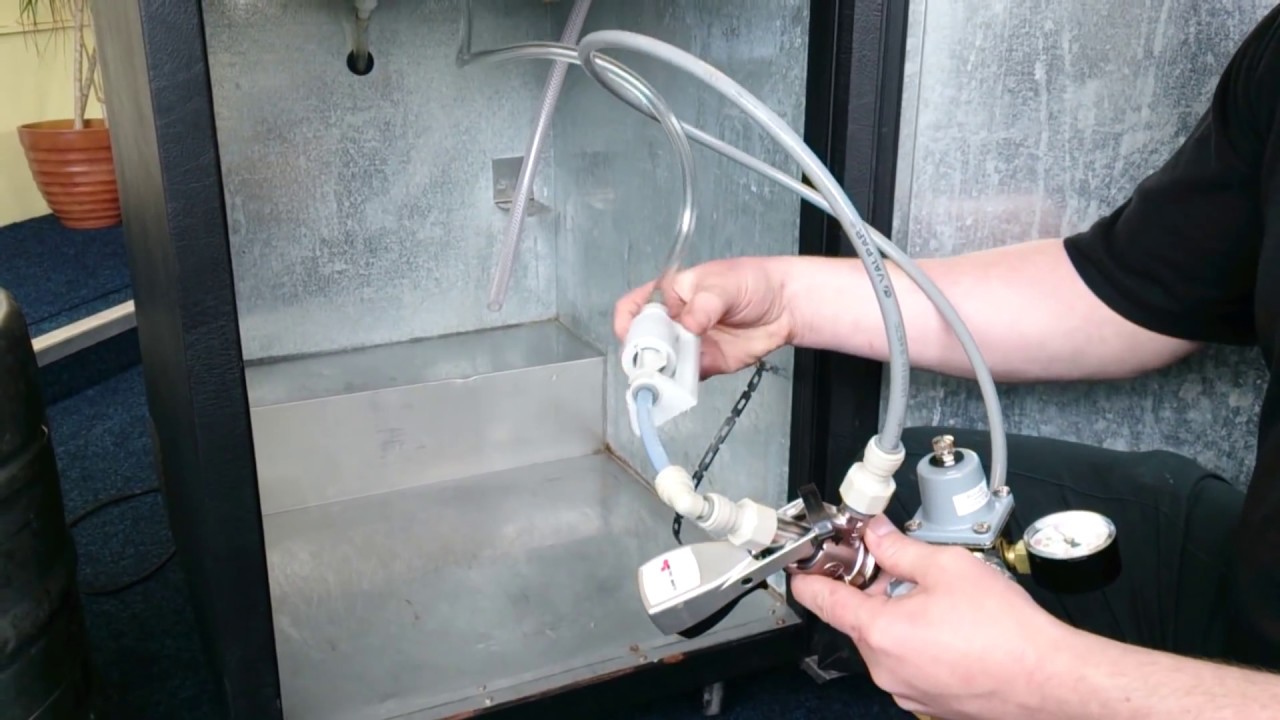
- Connect the Gas Line: Attach one end of the gas line to the CO2 regulator’s gas outlet valve and the other end to the keg’s gas-in port. Ensure that the connections are secure and tight.
- Check for Leaks: Apply a mixture of water and soap to the connections to check for any gas leaks. Bubbles will form if there is a leak. If you notice any leaks, tighten the connections and retest until there are no bubbles.
- Turn on the CO2: Slowly open the CO2 tank’s valve to allow the gas to flow into the kegerator. Monitor the pressure on the regulator gauge to ensure it reaches the desired setting.
By following these steps, you will have successfully connected the CO2 tank to your true commercial kegerator. This will ensure proper carbonation and a consistent flow of beer from your taps.
Step 4: Installing the Beer Lines
Installing the beer lines is a critical step in the setup process of your true commercial kegerator. Proper installation of the beer lines ensures a smooth flow and maintains the quality of your draft beer. Follow these steps to install the beer lines:
- Gather Your Equipment: Collect all the necessary equipment, including the beer lines, faucet, shank, and connectors. Ensure that everything is clean and ready for installation.
- Measure and Cut the Beer Lines: Measure the distance from the keg to the faucet, taking into account any bends or obstacles along the route. Cut the beer lines to the appropriate length, leaving some extra length for flexibility.
- Connect the Beer Lines to the Faucet and Shank: Attach one end of the beer line to the back end of the faucet and the other end to the shank. Ensure that the connections are secure, using appropriate connectors if necessary.
- Attach the Shank to the Tower or Wall Mount: If your kegerator has a tower, attach the shank to the tower using the provided hardware. If it is a wall-mounted setup, attach the shank to the wall mount securely.
- Connect the Other End of the Beer Lines: Attach the other end of the beer lines to the keg couplers, ensuring a tight seal. Use appropriate connectors for compatibility between the beer lines and the keg couplers.
- Purge the Beer Lines: Before turning on the kegerator, it is essential to purge the beer lines of any air. Open the faucet and allow the beer lines to fill with beer or sanitizer solution, ensuring there are no air bubbles.
- Clean and Sanitize: Clean the faucet and shank thoroughly to remove any residue or debris. Then, sanitize the entire beer line system using a sanitizing solution to maintain hygiene and prevent contamination.
By following these steps, you will successfully install the beer lines, ensuring a proper flow and serving of your draft beer. Take your time during this process to ensure all connections are secure and the lines are properly installed.
When setting up a true commercial kegerator, make sure to properly level the unit to ensure efficient and consistent beer dispensing. Use a level to check the kegerator’s position and adjust as needed.
Read more: Why Does True Kegerator Shut Off
Step 5: Setting the Temperature and Pressure
Setting the right temperature and pressure in your true commercial kegerator is crucial for maintaining the quality and freshness of your draft beer. Follow these steps to accurately set the temperature and pressure:
- Read the Manual: Refer to the kegerator’s instruction manual to determine the recommended temperature range and pressure settings for the specific beer you are serving.
- Access the Temperature Controls: Locate the temperature controls on your kegerator. These are often found inside or at the back of the unit. Consult the manual if you’re unsure of their exact location.
- Adjust the Temperature: Use the temperature controls to set the desired temperature for your beer. Typically, a temperature range of 36°F to 40°F (2°C to 4°C) is recommended for most draft beers.
- Monitor and Stabilize: Allow the kegerator some time to stabilize at the set temperature. Use a thermometer to regularly monitor the internal temperature and make minor adjustments if needed.
- Access the Pressure Regulator: Locate the pressure regulator on your kegerator. This is usually found next to the CO2 tank or on the front of the unit. Consult the manual for exact placement.
- Adjust the Pressure: Use the pressure regulator to set the appropriate pressure for the beer you are serving. This will vary depending on the style of beer and the desired carbonation level. Refer to the manual or beer manufacturer’s guidelines for recommended pressures.
- Monitor and Fine-Tune: Allow the kegerator some time to stabilize at the set pressure. Use a pressure gauge to monitor the pressure regularly and make adjustments if necessary.
Setting the temperature and pressure correctly will ensure that your beer is served at its best, with the right carbonation and flavor profile. Keep in mind that different beers may require slightly different settings, so it’s important to refer to the specific recommendations for each beer you serve.
Step 6: Testing the Kegerator
Now that your true commercial kegerator is set up and the temperature and pressure are properly adjusted, it’s time to test it to ensure everything is working as it should. Follow these steps to test your kegerator:
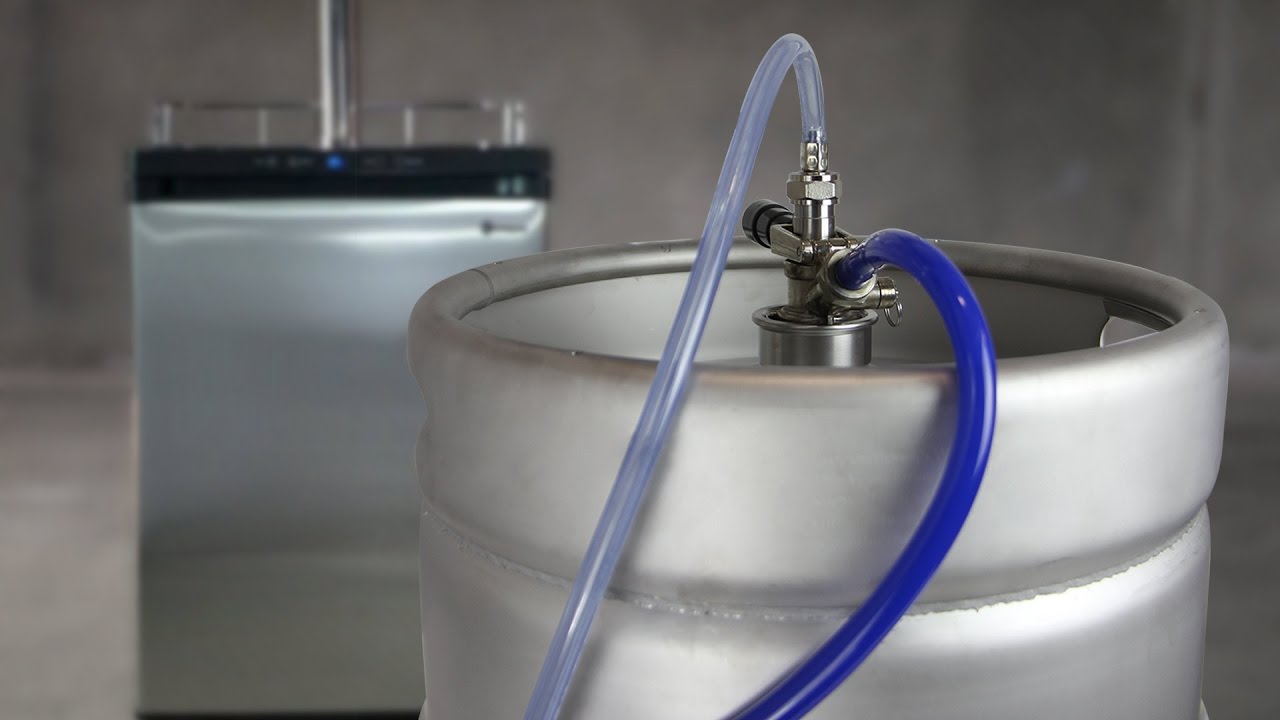
- Prepare the Keg: Make sure your keg is properly connected and secured within the kegerator. Ensure that the keg is chilled to the recommended temperature before testing.
- Sanitize the Faucet: Open the faucet and let a small amount of beer flow through. This will help to sanitize the faucet and remove any initial debris or air from the lines.
- Pour a Test Sample: Position a glass underneath the faucet and open it slowly to pour a small sample of beer. Observe the pour for any irregularities, such as excessive foam or slow flow.
- Taste and Assess: Take a sip of the test sample and assess the taste, carbonation, and temperature. Ensure that the beer is pouring smoothly with the desired level of carbonation and at the desired temperature.
- Adjust if Necessary: If the beer is not pouring correctly or has any issues, make adjustments to the temperature, pressure, or dispensing system as needed. Refer to the previous steps for guidance on troubleshooting common kegerator issues.
- Repeat the Test: Once you have made the necessary adjustments, repeat the test pour and tasting process to ensure that the issues have been resolved and that the beer is pouring correctly.
By testing your kegerator, you can ensure that all components are working properly and that your beer is being dispensed as intended. Adjustments may be required initially to achieve the optimal pour, but with a bit of experimentation, you’ll soon have your true commercial kegerator serving perfect pints of draft beer.
Step 7: Troubleshooting and Maintenance
As a true commercial kegerator owner, it’s important to familiarize yourself with troubleshooting and maintenance procedures to ensure the longevity and optimal performance of your unit. Here are some key steps to follow:
- Regular Cleaning: Clean your kegerator on a regular basis to prevent the buildup of bacteria, yeast, and mold. Follow the manufacturer’s guidelines for cleaning, which typically involve using a sanitizing solution and thoroughly rinsing all components.
- Check for Leaks: Periodically inspect the connections, fittings, and hoses for any leaks. If you notice any leaks, tighten the connections or replace faulty parts promptly to prevent wastage and maintain consistent carbonation levels.
- Monitor Temperature and Pressure: Keep an eye on the temperature and pressure gauges regularly to ensure they remain within the recommended range. Adjust as necessary to maintain the desired conditions for serving your beer.
- Replace Seals and Gaskets: Over time, seals and gaskets can degrade or become worn, leading to leaks or inefficient cooling. Check these components periodically and replace them when necessary to maintain a proper seal and temperature control.
- Clean the Faucet and Lines: Clean the faucet and beer lines regularly to prevent the buildup of residue or bacteria. Disassemble the faucet and soak it in a sanitizing solution, and run a cleaning solution through the beer lines to keep them clear and fresh.
- Inspect and Clean the CO2 Regulator: Check the CO2 regulator for any signs of damage or malfunction. Clean it periodically and ensure that it is calibrated properly to maintain accurate pressure control.
- Monitor Gas Levels: Keep an eye on the gas levels in your CO2 tank. If the pressure drops significantly, it may be a sign of a leak or an empty tank. Replace or refill the tank as needed to maintain a consistent flow of carbonation.
- Follow Manufacturer’s Guidelines: Always follow the specific maintenance and troubleshooting instructions provided by the manufacturer. These guidelines are tailored to your specific kegerator model and will help ensure proper functioning and longevity.
By following these maintenance and troubleshooting steps, you can keep your true commercial kegerator in excellent condition and enjoy uninterrupted, high-quality draft beer. Regular maintenance and prompt troubleshooting will help prolong the life of your kegerator and provide a great beer-drinking experience for you and your customers.
Conclusion
Setting up and maintaining a true commercial kegerator may initially seem like a daunting task, but with the right guidance and knowledge, it can be a rewarding and enjoyable experience. By following the step-by-step process outlined in this article, you can successfully set up your kegerator and start pouring cold, refreshing draft beer.
Choosing the right location, assembling the kegerator, connecting the CO2 tank, installing the beer lines, and setting the temperature and pressure are all crucial steps in the setup process. By paying attention to detail and following the manufacturer’s guidelines, you can ensure that your kegerator is functioning optimally and delivering the best-tasting draft beer.
In addition to the setup process, it’s important to prioritize regular maintenance and troubleshooting to keep your kegerator in top shape. Cleaning the unit, checking for leaks, monitoring temperature and pressure, and replacing worn parts are all essential for the longevity and consistent performance of your kegerator.
Remember to always refer to the manufacturer’s instructions, as every kegerator model may have specific requirements and guidelines. By following these instructions and taking the time to properly care for your kegerator, you can enjoy a continuous supply of high-quality, perfectly carbonated draft beer.
So, whether you are an avid homebrewer or a business owner in the hospitality industry, setting up and maintaining a true commercial kegerator is well worth the effort. Take the time to familiarize yourself with the process, troubleshoot any issues that arise, and enjoy the unmatched experience of pouring fresh, cold draft beer at your convenience.
Frequently Asked Questions about How To Set Up True Commercial Kegerator
Was this page helpful?
At Storables.com, we guarantee accurate and reliable information. Our content, validated by Expert Board Contributors, is crafted following stringent Editorial Policies. We're committed to providing you with well-researched, expert-backed insights for all your informational needs.


0 thoughts on “How To Set Up True Commercial Kegerator”