Articles
How To Use A Bella Flip Waffle Iron
Modified: August 26, 2024
Learn how to make delicious waffles with the Bella Flip Waffle Iron through our informative articles. Discover tips, recipes, and more!
(Many of the links in this article redirect to a specific reviewed product. Your purchase of these products through affiliate links helps to generate commission for Storables.com, at no extra cost. Learn more)
Introduction
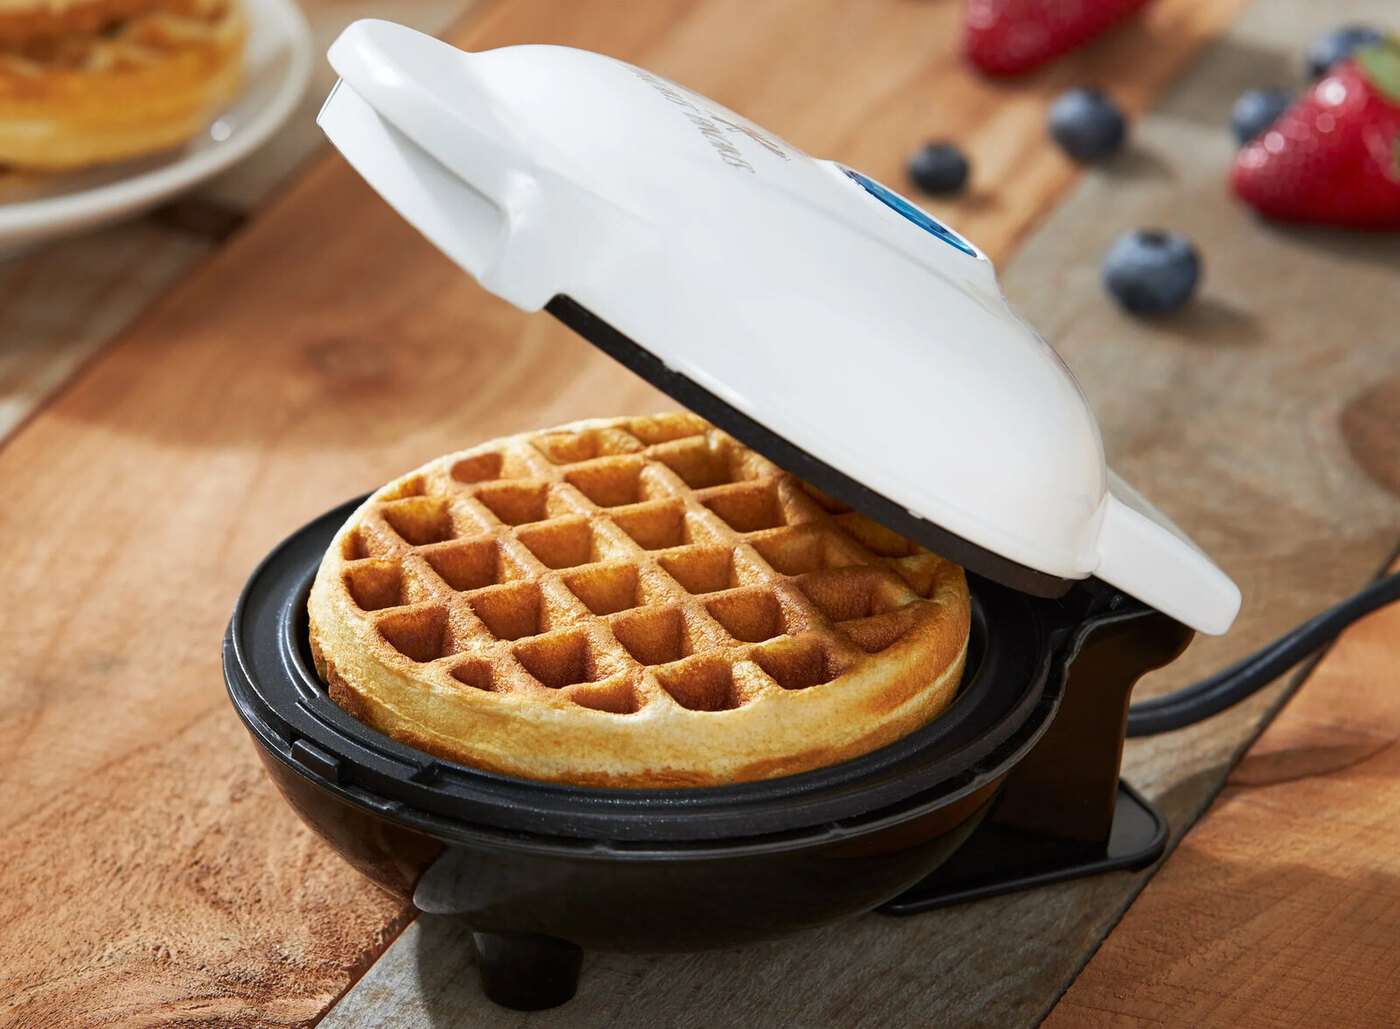
Waffles are a beloved breakfast staple, loved by people of all ages. Their crisp exterior and fluffy interior make them the perfect canvas for a variety of toppings. If you’re a waffle enthusiast looking to bring the joy of homemade waffles to your own kitchen, the Bella Flip Waffle Iron is an excellent choice.
In this article, we will guide you through the process of using the Bella Flip Waffle Iron. From unboxing to cleaning, we’ll cover every step to ensure you can make delicious waffles with ease. So, grab your ingredients and get ready to embark on a waffle-making adventure!
Before we begin, it’s important to note that while using a waffle iron can be fun and rewarding, it’s crucial to prioritize safety. Always read and follow the manufacturer’s instructions and exercise caution when handling hot surfaces.
Now, let’s dive into the exciting world of waffle making with the Bella Flip Waffle Iron!
Key Takeaways:
- Safety first! Prioritize safety by following the manufacturer’s instructions, handling hot surfaces with care, and keeping children away from the Bella Flip Waffle Iron to ensure a safe and enjoyable waffle-making experience.
- Master the art of waffle making with the Bella Flip Waffle Iron by assembling, preheating, pouring batter, flipping, and monitoring cooking progress. Embrace creativity and enjoy the process of creating delicious homemade waffles.
Read more: How To Use A Flip Waffle Iron
Safety Precautions
Prioritizing safety is essential when using any kitchen appliance, and the Bella Flip Waffle Iron is no exception. Here are some important safety precautions to keep in mind:
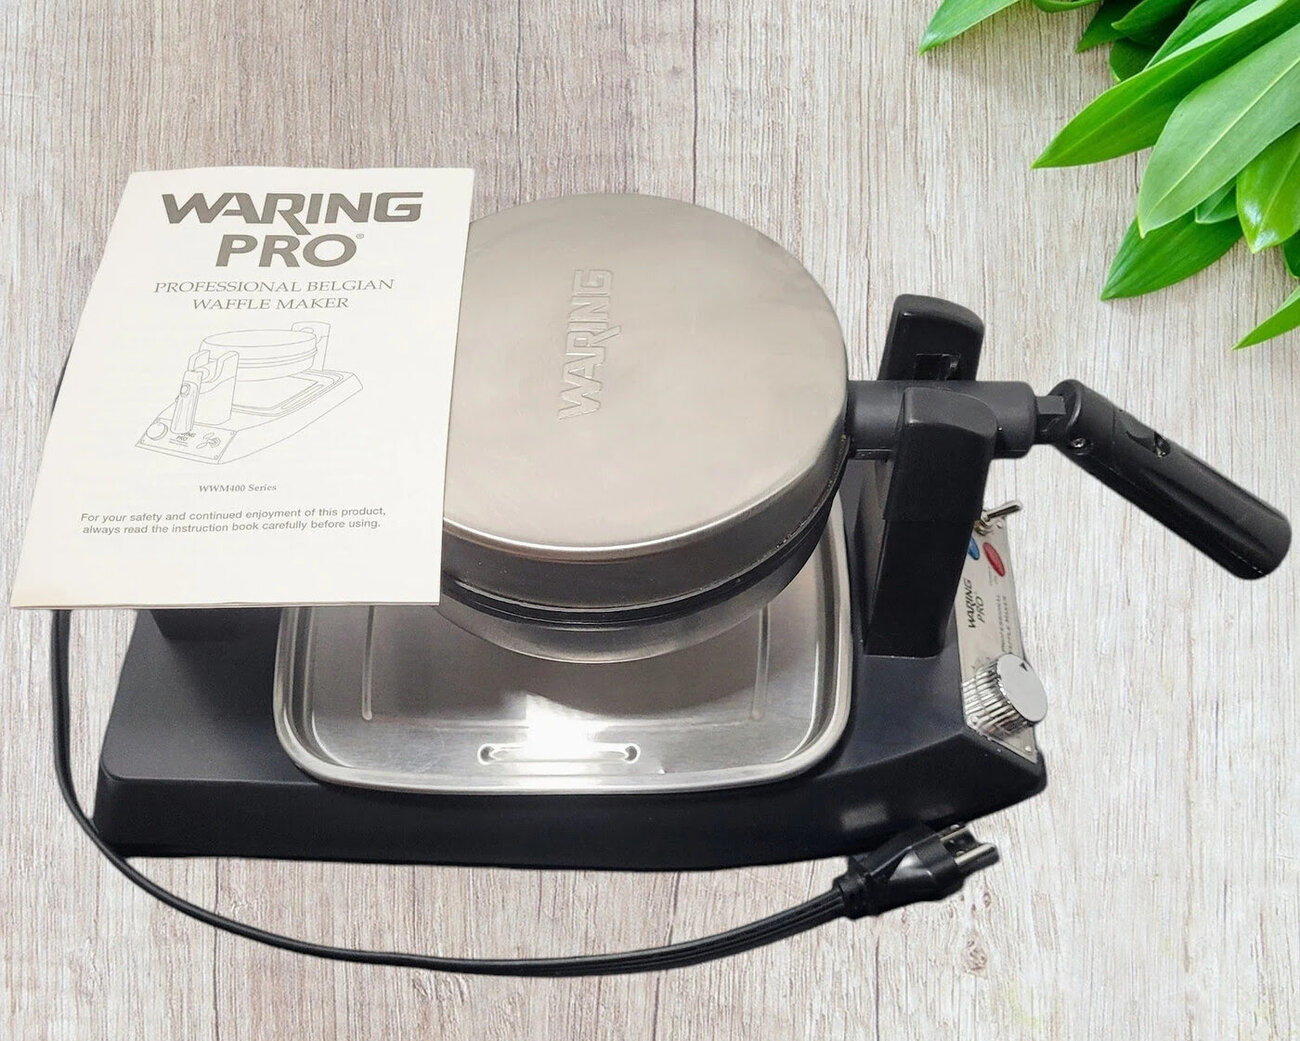
- Read the manual: Before using the Bella Flip Waffle Iron, thoroughly read the instruction manual provided by the manufacturer. Familiarize yourself with the appliance’s features, functions, and safety guidelines.
- Handle with care: The waffle iron surfaces can become extremely hot during operation. Always use oven mitts or heat-resistant gloves when opening, closing, or handling the appliance.
- Keep children away: Waffle irons can pose a burn hazard to children. Make sure to keep children at a safe distance from the appliance when it’s in use and avoid leaving the iron unattended.
- Choose a stable surface: Place the Bella Flip Waffle Iron on a sturdy, heat-resistant surface. Avoid using it near flammable materials or on an unstable surface that could cause the appliance to tip over.
- Avoid contact with water: Never immerse the waffle iron or its power cord in water or any other liquids. This can cause electric shock or damage to the appliance.
- Allow for proper ventilation: Ensure that there is sufficient space around the waffle iron for proper airflow and ventilation. Avoid using it near walls or other kitchen appliances that may block the airflow and cause overheating.
- Carefully clean the waffle iron: Always wait for the appliance to cool down completely before cleaning. Use a soft, damp cloth to wipe the exterior, and follow the manufacturer’s instructions for cleaning the cooking plates.
- Unplug after use: Once you’re finished making waffles, unplug the Bella Flip Waffle Iron and allow it to cool down before storing it away. This helps to prevent accidental burns or electrical hazards.
By following these safety precautions, you can ensure a safe and enjoyable experience while using the Bella Flip Waffle Iron. Now that we’ve covered the safety aspects, let’s move on to the exciting part: unboxing the appliance!
Unboxing the Bella Flip Waffle Iron
Unboxing a new kitchen appliance is always an exciting moment, especially when it’s something as versatile and delicious as the Bella Flip Waffle Iron. Here are the steps to follow when unboxing this fabulous waffle maker:
- Find a suitable location: Choose a clean and spacious area in your kitchen where you plan to use and store the Bella Flip Waffle Iron. Ensure that there is enough space to maneuver and plug in the appliance.
- Open the package: Carefully remove the packaging material from the box. Check for any accompanying accessories, such as a user manual or a warranty card, ensuring that nothing is left behind.
- Inspect the waffle iron: Take a close look at the Bella Flip Waffle Iron to ensure there are no visible damages or defects. If you notice any issues, contact the manufacturer or retailer for assistance.
- Remove protective coverings: If there are any protective coverings or stickers on the waffle iron or cooking plates, carefully peel them off. This step will ensure that your waffles are not affected by any residue or adhesive.
- Arrange the components: Lay out all the components of the Bella Flip Waffle Iron in an organized manner on your countertop. This will give you a clear view of all the parts and make the assembly process easier.
- Review the user manual: Before proceeding with the assembly and usage of the waffle iron, take the time to read the user manual thoroughly. Familiarize yourself with the different parts, their functions, and any specific instructions provided by the manufacturer.
- Keep the packaging for future use: It’s always a good idea to hold onto the packaging materials, especially if you may need to transport or store the waffle iron in the future. Proper packaging will help protect the appliance from any potential damage.
Unboxing the Bella Flip Waffle Iron is a straightforward process that sets the stage for the delicious waffles you’ll soon be making. With the appliance out of the box and ready to go, it’s time to move on to assembling the waffle iron.
Assembling the Bella Flip Waffle Iron
Now that you have unboxed the Bella Flip Waffle Iron, it’s time to assemble the various components. Follow these simple steps to ensure a smooth assembly process:
- Position the base: Place the base of the Bella Flip Waffle Iron on a flat and stable surface, such as a countertop or kitchen table. Ensure that it is positioned in an area near an electrical outlet.
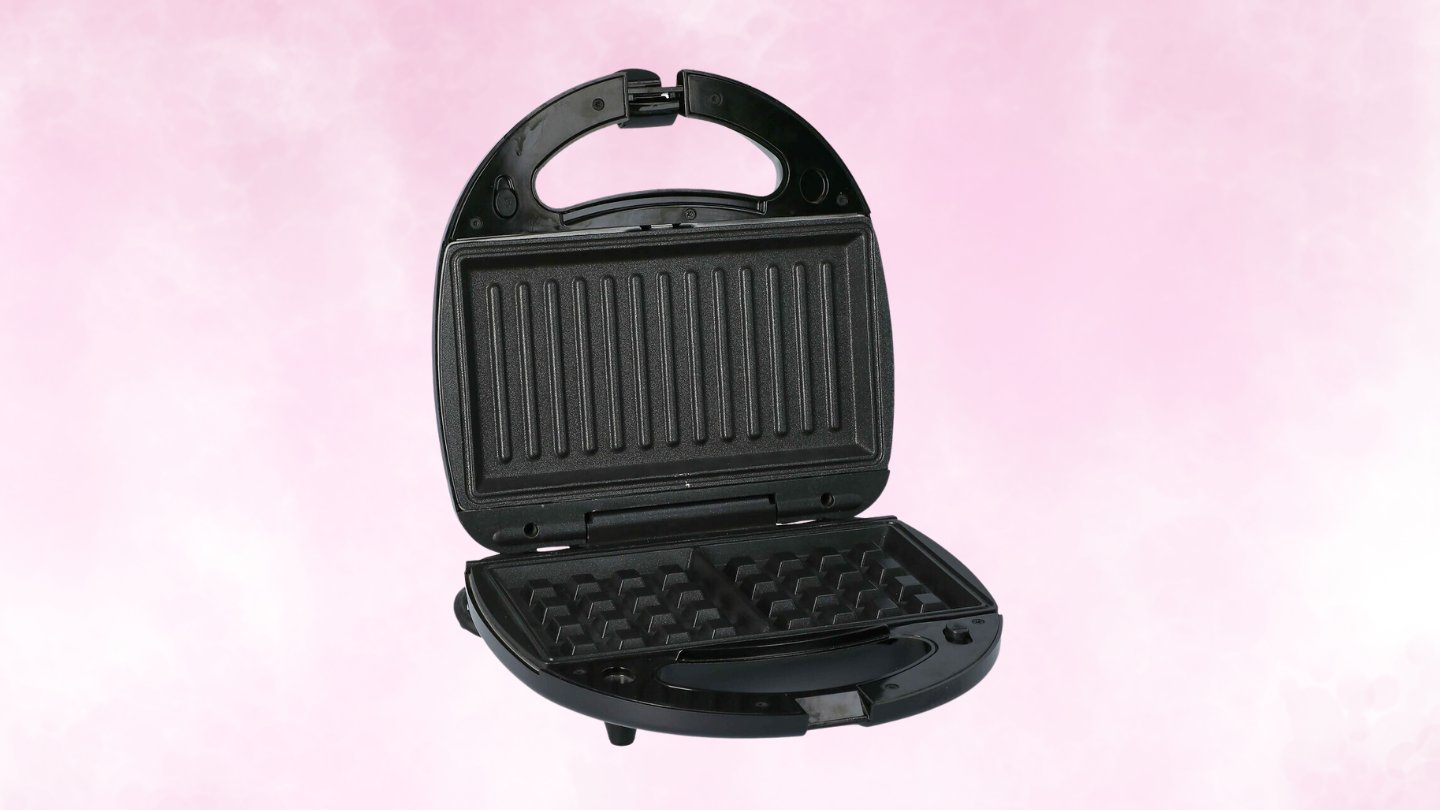
- Attach the cooking plates: Take the cooking plates that were included in the packaging and align them with the base of the waffle iron. The plates should fit snugly and securely into the designated slots.
- Secure the latch: Once the cooking plates are in place, locate the latch on the side of the waffle iron. Gently push the latch down to secure the plates. This will prevent the plates from shifting during the cooking process.
- Plug in the power cord: Locate the power cord that came with the Bella Flip Waffle Iron and connect it to the appropriate outlet on the base. Ensure that the cord is securely plugged in to avoid any power interruptions.
- Confirm power indicator: Check if the appliance has a power indicator. The indicator light will let you know when the waffle iron is powered on and ready for use. Refer to the user manual for specific information about the indicator light.
- Allow for preheating: Before using the Bella Flip Waffle Iron for the first time, it’s important to let it preheat for a few minutes. This will ensure that the cooking plates are properly heated and ready for the batter.
With the Bella Flip Waffle Iron fully assembled, you’re now ready to move on to the next step: preparing the waffle batter. Make sure to follow the manufacturer’s instructions and any specific guidelines provided in the user manual for the best results.
Preparing the Waffle Batter
One of the key elements to delicious waffles is the batter. With the Bella Flip Waffle Iron assembled and preheated, it’s time to prepare the waffle batter. Follow these steps to create a delectable batter for your waffles:
- Gather the ingredients: Check the recipe or instructions provided by the waffle mix or recipe you are using. Collect all the necessary ingredients, such as flour, sugar, baking powder, salt, eggs, milk, butter (or oil), and any additional flavorings or mix-ins.
- Measure and mix the dry ingredients: In a large mixing bowl, measure the appropriate amount of flour, sugar, baking powder, and salt. Whisk these dry ingredients together until they are evenly combined.
- Beat the eggs: In a separate bowl, crack the eggs and beat them until they are well whisked. This will help incorporate air into the batter and result in lighter, fluffier waffles.
- Add liquids and fats: To the beaten eggs, add the milk and melted butter (or oil). Mix these wet ingredients together until they are well incorporated.
- Combine wet and dry ingredients: Pour the wet ingredient mixture into the bowl with the dry ingredients. Use a spatula or whisk to gently stir them together until just combined. Be careful not to overmix, as this can make the waffles tough.
- Allow the batter to rest: Let the waffle batter rest for a few minutes. This resting time allows the ingredients to hydrate and results in a more tender waffle.
Once your waffle batter is prepared, it’s time to move on to the next step: applying cooking spray to the waffle iron. Properly greasing the cooking plates will prevent the waffles from sticking and ensure easy removal. Keep reading to learn more!
Read also: 10 Superior Flip Waffle Iron For 2025
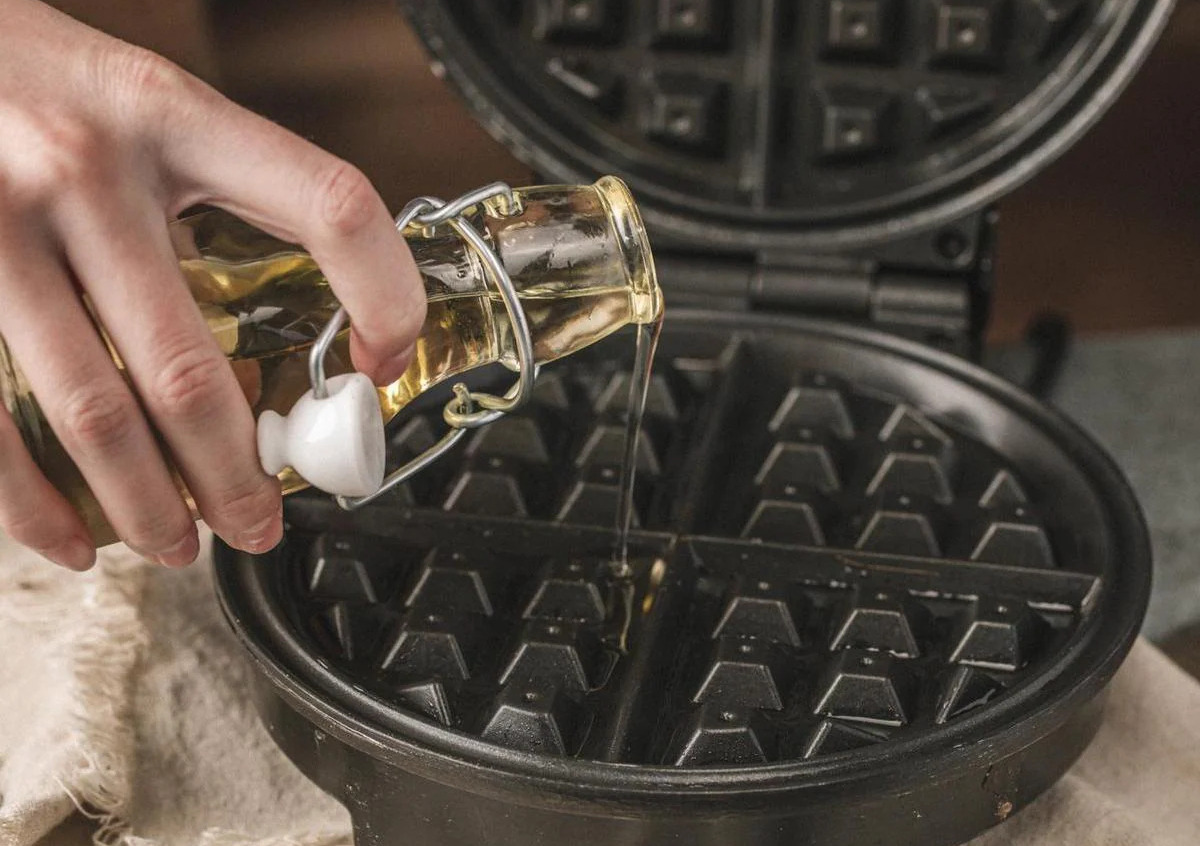
Applying Cooking Spray
Properly greasing the cooking plates of the Bella Flip Waffle Iron is crucial to prevent the waffle batter from sticking and ensure easy removal. Follow these steps to apply cooking spray to the waffle iron:
- Make sure the waffle iron is clean: Before applying cooking spray, ensure that the cooking plates are clean and free from any residue or debris from previous uses. Use a soft cloth or paper towel to wipe away any excess oil or crumbs.
- Select a suitable cooking spray: Choose a cooking spray that is specifically designed for high-heat cooking, such as one labeled for use on griddles or waffle irons. These sprays are formulated to withstand the heat and provide effective non-stick properties.
- Apply an even coat of cooking spray: Hold the cooking spray canister approximately 6-8 inches away from the waffle iron and spray a light and even coat of the cooking spray onto the cooking plates. Be sure to cover the entire surface area.
- Spread the spray evenly: Use a brush or a clean, lint-free cloth to spread the cooking spray evenly across the cooking plates. This will help ensure full coverage and prevent any potential hot spots that could cause uneven cooking.
- Avoid over-spraying: It’s important not to apply too much cooking spray, as excessive oil can cause the batter to spread too thin and lead to uneven browning. A light and even coating are sufficient to prevent sticking.
- Wipe away excess oil: If you accidentally apply too much cooking spray, use a paper towel or cloth to gently blot away any excess oil. This will help prevent drips and excess oil from pooling in the waffle iron.
Now that you have properly greased the cooking plates of the Bella Flip Waffle Iron, it’s time to move on to the next important step: heating the waffle iron. Keep reading to learn how to achieve the perfect temperature for delicious waffles!
Heating the Bella Flip Waffle Iron
Properly heating the Bella Flip Waffle Iron is crucial to achieving perfectly cooked waffles. Follow these steps to ensure the waffle iron reaches the appropriate temperature:
- Plug in the waffle iron: After applying cooking spray to the cooking plates, plug the Bella Flip Waffle Iron into a suitable electrical outlet. Ensure that the power cord is securely connected to the base of the appliance.
- Turn on the waffle iron: Look for the power switch on the Bella Flip Waffle Iron and turn it on. This will activate the heating elements and start the preheating process.
- Preheat indicator: Some waffle irons have a preheat indicator light that will turn on while the appliance is heating up. Refer to the user manual or check the control panel of your specific model to see if it has this feature.
- Allow for preheating time: It’s important to allow the waffle iron sufficient time to preheat. Follow the manufacturer’s instructions for the recommended preheating time, as it may vary depending on the specific model of the Bella Flip Waffle Iron.
- Wait for temperature readiness: Once the preheating time is up, the waffle iron should reach the desired temperature. This is typically indicated by an audible beep or a light indicator on the appliance. Refer to the user manual for specific information on temperature readiness.
- Check for even heat distribution: Prior to pouring the batter, it’s a good idea to check if the heat is evenly distributed across the cooking plates. Gently touch the surface of the plates with a heat-resistant utensil or your fingertips. The plates should feel evenly warm throughout.
By properly preheating the Bella Flip Waffle Iron, you will ensure that the waffles cook evenly and achieve that desirable golden brown color. Now that the waffle iron is heated and ready, it’s time to move on to the exciting task of pouring the batter into the iron!
Before using a Bella Flip Waffle Iron, make sure to preheat it for at least 5 minutes to ensure even cooking and crispy waffles. Also, lightly grease the plates to prevent sticking.
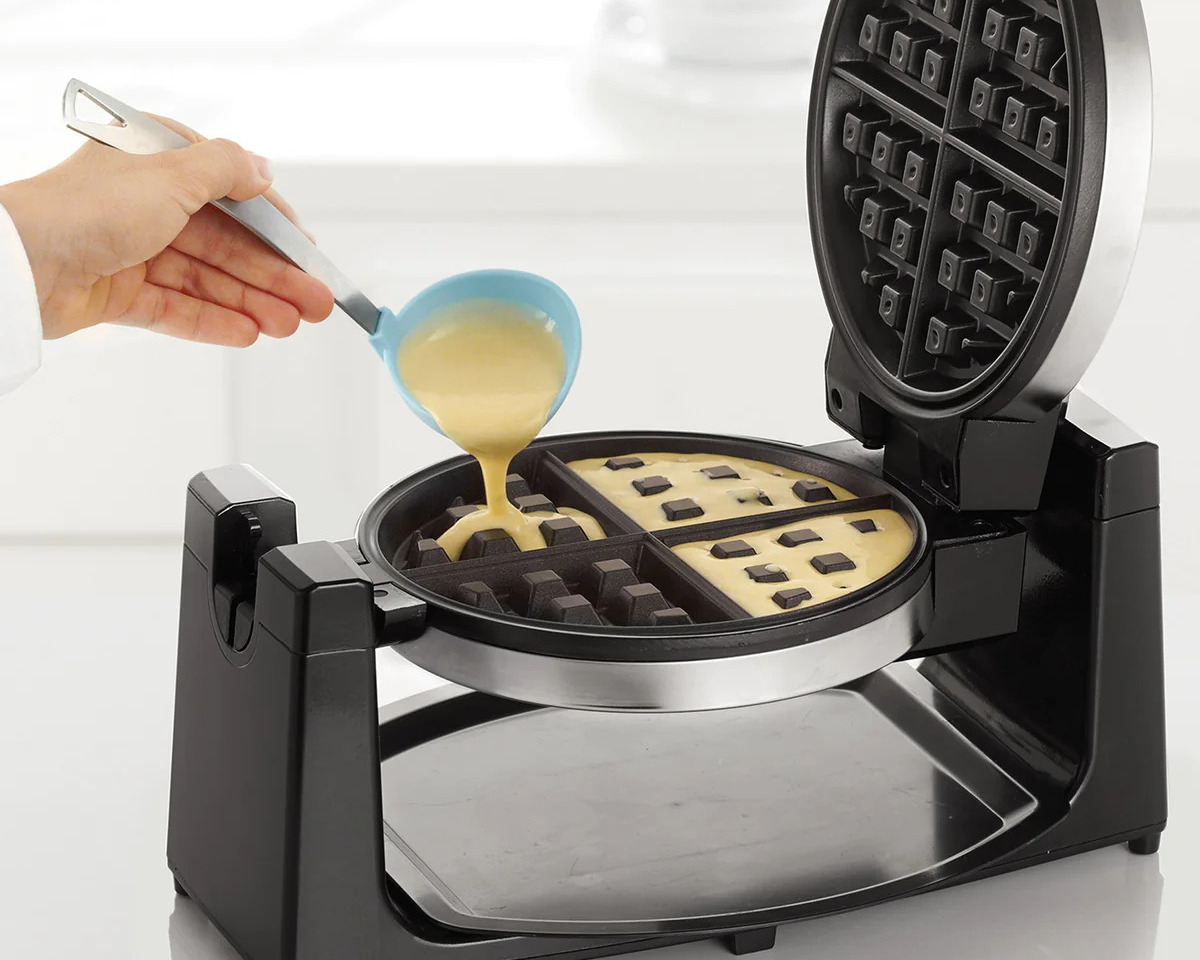
Pouring the Batter into the Iron
With the Bella Flip Waffle Iron preheated and ready, it’s time to pour the waffle batter into the cooking plates. Follow these steps for perfectly poured waffle batter:
- Stir the batter: Before pouring the batter, give it a gentle stir to ensure that all the ingredients are well incorporated. This will help you achieve consistent and evenly cooked waffles.
- Measure the waffle batter: Use a ladle or a measuring cup to scoop the desired amount of batter for each waffle. Refer to the recipe or the manufacturer’s instructions for the recommended amount of batter per waffle.
- Prevent overflow: It’s important not to overfill the cooking plates with batter, as it might overflow and create a mess. Leave some space around the edges to allow the batter to spread without spilling over.
- Pour the batter onto the center of the lower cooking plate: Hold the ladle or measuring cup above the center of the lower cooking plate and gently pour the batter onto it. Allow it to spread naturally towards the edges.
- Close the lid: Once the batter is poured, close the lid of the Bella Flip Waffle Iron. The weight of the lid will help evenly distribute the batter and ensure that it cooks uniformly.
- Avoid excessive pressure: Be careful not to press down too hard on the waffle iron lid. Excessive pressure can cause the batter to become compacted, resulting in dense waffles rather than light and fluffy ones.
- Do not open the waffle iron too soon: Resist the temptation to peek at the waffle before it’s fully cooked. Opening the waffle iron prematurely can cause the batter to stick to the cooking plates and result in a messy waffle.
With the batter poured into the Bella Flip Waffle Iron, it’s time to let the magic happen. Read on to discover how to flip the waffle iron for even cooking and achieve that coveted crisp exterior and fluffy interior.
Flipping the Waffle Iron
Flipping the Bella Flip Waffle Iron is a unique feature that allows for even cooking and ensures that both sides of the waffle are perfectly golden and crispy. Follow these steps to flip the waffle iron:
- Wait for the appropriate cooking time: Each waffle recipe or mix will have a recommended cooking time. Follow those guidelines and allow the batter to cook for the suggested duration before attempting to flip the waffle iron.
- Check for cooking progress: It’s essential to monitor the cooking progress to ensure that the waffle is cooked to perfection. Keep an eye on the steam escaping from the waffle iron and listen for any sizzling sounds. This indicates that the waffle is cooking inside.
- Determine if it’s time to flip: When the initial cooking time is almost complete, check the instructions provided by the waffle mix or recipe. Some recipes will specify when it’s time to flip the waffle iron, while others rely on visual cues.
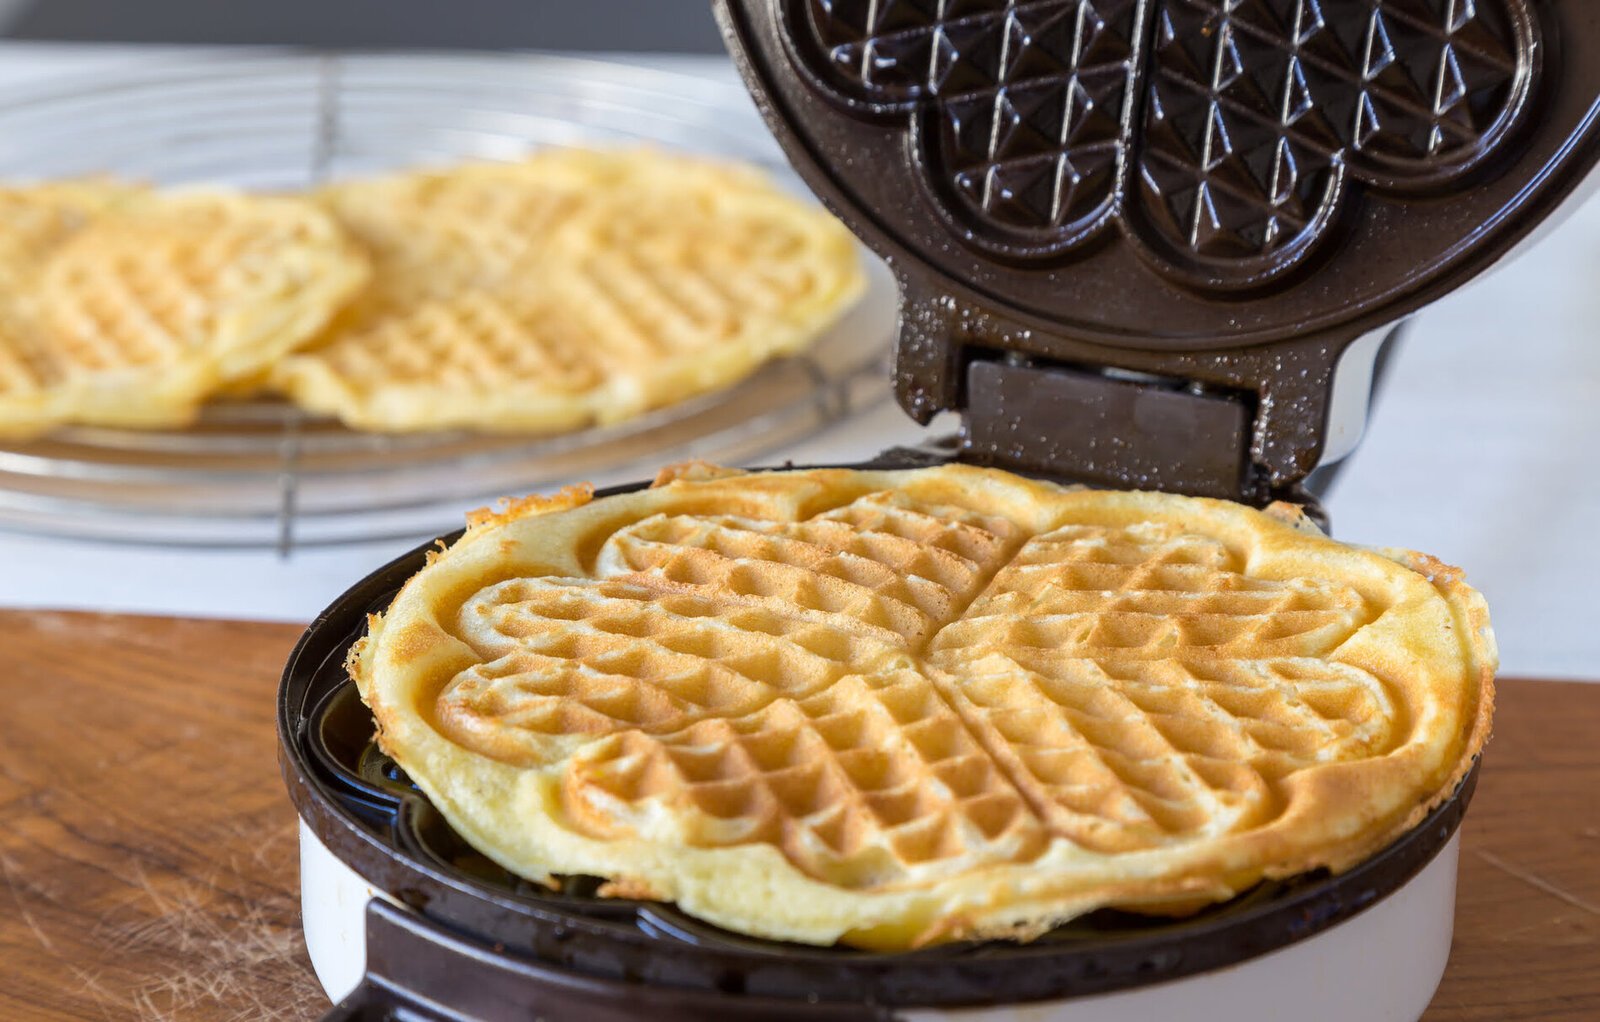
- Visually assess the edges: Carefully lift the corner of the waffle iron using a heat-resistant utensil. If the edges of the waffle are lightly browned and slightly crisp, it’s likely time to flip the waffle iron.
- Rotate 180 degrees: Holding the handle of the Bella Flip Waffle Iron, gently rotate it 180 degrees. This action will flip the position of the cooking plates, ensuring that both sides of the waffle are evenly cooked.
- Close the lid and continue cooking: Once the waffle iron is flipped, close the lid and continue cooking according to the recommended cooking time for the specific recipe or mix you are using.
- Avoid opening the waffle iron too soon: Just as with the initial cooking time, it’s important to refrain from opening the waffle iron too soon after flipping. Doing so may disrupt the cooking process and lead to an unevenly cooked waffle.
By mastering the technique of flipping the Bella Flip Waffle Iron at the right time, you’ll achieve a waffle with a beautiful, golden brown exterior and a fluffy interior. Patience is key during this step to ensure a perfect result. Now, let’s move on to the next step: monitoring the cooking progress.
Read more: Why Do You Need To Use A Flip Waffle Iron
Monitoring the Cooking Progress
Monitoring the cooking progress of your waffles is essential to ensure that they are cooked to perfection. Follow these steps to effectively monitor the waffle’s cooking progress using the Bella Flip Waffle Iron:
- Refer to the cooking time: Before monitoring the cooking progress, refer to the recommended cooking time provided by the waffle mix or recipe. This will serve as a general guideline for how long the waffle should cook.
- Listen for sizzling sounds: As the waffle cooks, you may hear sizzling sounds coming from the waffle iron. This indicates that the batter is being cooked and the waffle is progressing towards completion.
- Observe the steam: Keep an eye on the steam escaping from the waffle iron. Initially, the steam will be more visible and intense. As the waffle cooks, the steam will begin to diminish, indicating that the waffle is nearing completion.
- Check the browning: Peek at the edges of the waffle to assess the level of browning. The edges should be golden brown and slightly crispy when the waffle is ready. If it appears pale and undercooked, continue cooking for a bit longer.
- Use the manufacturer’s indicator: Some waffle irons, including the Bella Flip Waffle Iron, have built-in indicators that will alert you when the waffle is done. These indicators may be in the form of an audible beep or a light that turns on when the waffle is cooked.
- Avoid opening too frequently: It’s important to avoid opening the waffle iron too frequently during the cooking process. Opening the waffle iron too soon or too often can lead to temperature fluctuations and uneven cooking.
- Keep note of your preferences: As you gain experience with your Bella Flip Waffle Iron, take note of your preferred level of crispness and cooking time. This will help you achieve consistent results and perfect your waffle-making technique.
By closely monitoring the cooking progress, you can ensure that your waffles are cooked just the way you like them. Now that the waffle is cooked, it’s time to remove it from the waffle iron and savor your delicious creation. Keep reading to learn how to remove the waffle without any hassle.
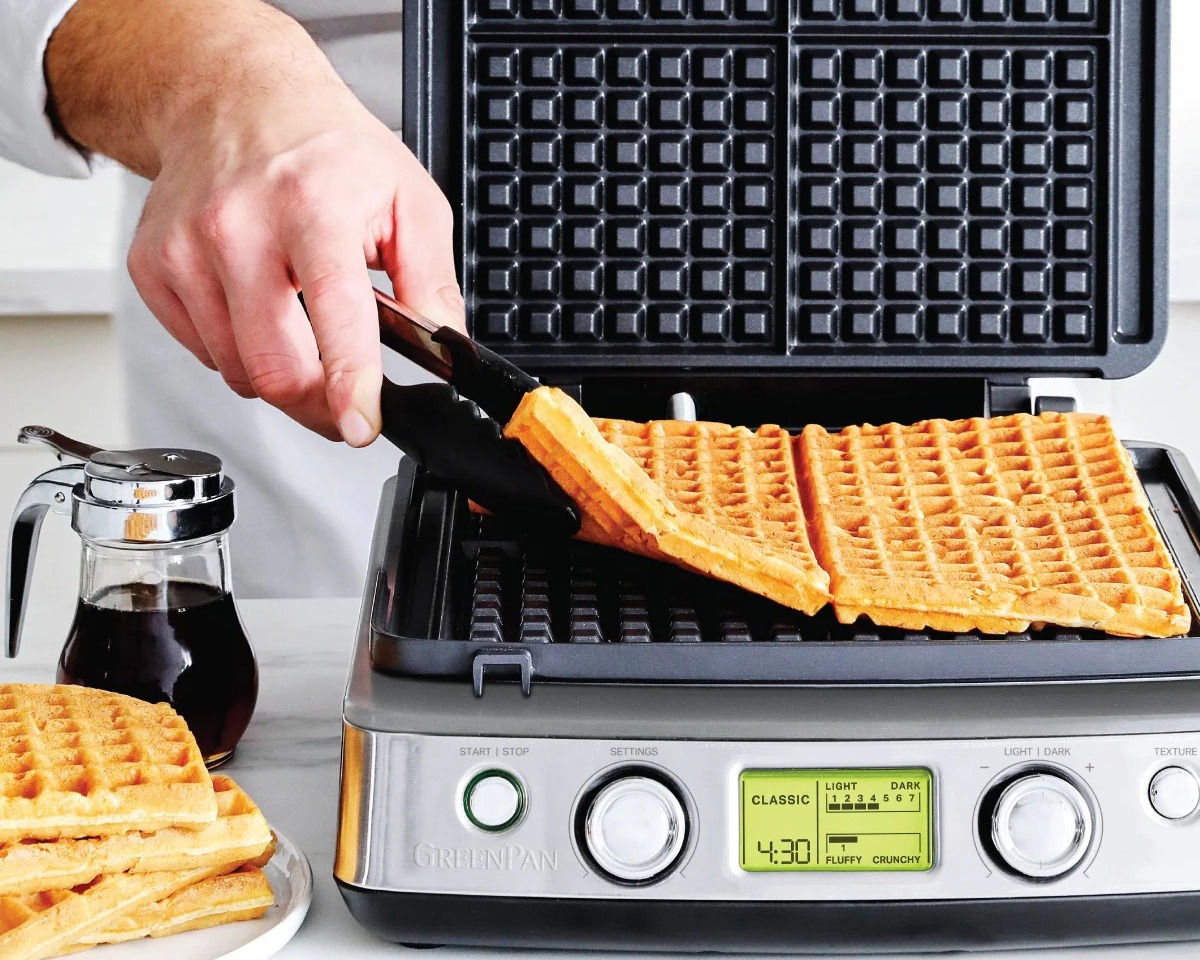
Removing the Waffle from the Iron
Removing the finished waffle from the Bella Flip Waffle Iron without any sticking or breakage is a satisfying moment. Follow these steps to ensure a smooth removal process:
- Check for doneness: Before removing the waffle, ensure that it is fully cooked to your desired level of crispness. The edges should be golden brown and slightly crispy, and the center should be cooked through.
- Open the waffle iron: Use the handle of the Bella Flip Waffle Iron to open the appliance. The hinge mechanism allows easy access to the cooked waffle without having to pry it loose.
- Lift the waffle gently: Using a heat-resistant spatula or tongs, gently lift the edges of the waffle to loosen it from the cooking plates. Work your way around the waffle until it is completely released.
- Be cautious of steam: As you remove the waffle, be mindful of any escaping steam. Steam can cause burns, so exercise caution and avoid placing your hands or face too close to the opening of the waffle iron.
- Place the waffle on a wire rack: Once the waffle is completely removed from the waffle iron, transfer it to a wire rack or a plate. Placing the waffle on a wire rack helps maintain its crispness by allowing any excess moisture to evaporate.
- Repeat the process: If you are making multiple waffles, carefully repeat the cooking and removal process for each one. Ensure that you apply cooking spray to the cooking plates before pouring more batter.
- Serve and enjoy: Once you’ve removed the waffle from the iron, it’s time to garnish it with your favorite toppings and serve it hot. Whether it’s maple syrup, fresh fruit, or whipped cream, let your creativity shine and enjoy the delicious results!
With the waffle successfully removed from the Bella Flip Waffle Iron, you can now admire your culinary creation and savor the delightful combination of crispy exterior and fluffy interior. Now, let’s move on to some tips for cleaning and maintaining your waffle iron for future use.
Cleaning and Maintenance Tips
Proper cleaning and maintenance of the Bella Flip Waffle Iron will ensure its longevity and consistent performance. Follow these tips to keep your waffle iron in excellent condition:
- Allow the waffle iron to cool down: Before cleaning, always unplug the waffle iron and allow it to cool down completely. The cooking plates will be hot during use, so exercise caution to prevent any burns.
- Wipe the exterior: Use a soft, damp cloth to wipe the exterior of the Bella Flip Waffle Iron. This will remove any residue or grease that may have accumulated during the cooking process. Avoid using harsh chemicals or abrasive cleaners that can damage the surface.
- Clean the cooking plates: When the waffle iron has cooled down, carefully remove the cooking plates according to the manufacturer’s instructions. Wash them in warm soapy water, using a non-abrasive sponge or cloth to remove any batter or food particles.
- Avoid submerging the waffle iron: Never immerse the entire waffle iron, including the base, in water or any other liquid. This can cause damage to the electrical components and pose a safety risk. Clean only the removable cooking plates as directed.
- Dry thoroughly: After cleaning, dry the cooking plates and any other removable parts thoroughly before reassembling the Bella Flip Waffle Iron. This will prevent any moisture from causing corrosion or damage to the appliance.
- Store properly: When not in use, store the Bella Flip Waffle Iron in a clean and dry location. Keep the appliance out of reach from children and away from any potential hazards such as water or heat sources.
- Regular maintenance checks: Periodically inspect the power cord and plug for any signs of damage or wear. If you notice any fraying, exposed wires, or other issues, discontinue use and contact the manufacturer for assistance.
- Follow the manufacturer’s guidelines: Always refer to the user manual provided by the manufacturer for specific cleaning and maintenance instructions. Each waffle iron may have unique care requirements, so it’s important to follow the guidelines recommended by the manufacturer.
By following these cleaning and maintenance tips, you can ensure that your Bella Flip Waffle Iron remains in top condition, ready to whip up delicious waffles for years to come. Now, let’s address some common issues you may encounter and provide troubleshooting solutions.
Troubleshooting Common Issues
While using the Bella Flip Waffle Iron, you may encounter some common issues. Here are troubleshooting tips to help you address and overcome these problems:
- Waffles sticking to the cooking plates: If the waffles are sticking to the cooking plates, ensure that you have adequately greased the plates with cooking spray. Additionally, make sure that the waffle iron is fully preheated before pouring the batter.
- Inconsistent browning: Inconsistent browning can occur due to uneven heat distribution. To resolve this issue, make sure that the batter is evenly spread, and the cooking plates are clean and properly assembled. You can also try rotating the waffle iron during cooking for more even heat distribution.
- Waffles not crispy enough: If your waffles are not as crispy as desired, try extending the cooking time slightly. This will allow the waffles to cook for a longer period, resulting in a crisper texture. You can also adjust the temperature setting if your waffle iron allows it.
- Batter overflowing: Overfilling the cooking plates with batter can lead to overflow. Be mindful of the recommended amount of batter per waffle and leave some space around the edges of the plates. If overflow still occurs, reduce the amount of batter or adjust your pouring technique.
- Unevenly cooked waffles: Uneven cooking can be caused by various factors, including uneven heat distribution or uneven pouring of batter. Ensure that the cooking plates are assembled correctly and that the batter is poured evenly. Flipping the waffle iron during cooking can also help achieve more uniform results.
- Waffle iron not heating up: If your waffle iron does not heat up, check that it is properly plugged into an electrical outlet and that the power switch is turned on. If the appliance is plugged in and switched on but still not heating up, contact the manufacturer for further assistance.
- Excessive smoke or burning smell: Excessive smoke or a burning smell can indicate that the waffle iron is overheating or that the batter is dripping onto the heating element. Ensure that you are using the recommended amount of batter and that the waffle iron is clean and free from any spills. If the issue persists, discontinue use and contact the manufacturer.
If you continue to experience issues with your Bella Flip Waffle Iron that are not addressed by these troubleshooting tips, consult the manufacturer’s user manual or contact their customer support for further assistance.
Now that we’ve covered common troubleshooting tips, it’s time to wrap up our comprehensive guide to using the Bella Flip Waffle Iron. With proper precautions, maintenance, and a touch of creativity, you’ll be able to create delectable waffles that will delight your taste buds. Happy waffle making!
Read more: How To Use A Cast Iron Waffle Iron
Conclusion
Congratulations! You have now completed our comprehensive guide on how to use the Bella Flip Waffle Iron. With the knowledge and tips shared in this article, you are well-equipped to embark on your waffle-making adventures and impress your family and friends with delicious homemade waffles.
We started by emphasizing the importance of prioritizing safety when using any kitchen appliance and encouraged you to carefully follow the manufacturer’s instructions. Safety should always be the top priority to ensure a pleasant and accident-free cooking experience.
You learned the step-by-step process of unboxing and assembling the Bella Flip Waffle Iron, preparing the waffle batter, applying cooking spray to the cooking plates, and heating the waffle iron to achieve the perfect cooking temperature. We also covered how to pour the batter onto the cooking plates, flip the waffle iron for even cooking, monitor the cooking progress, and safely remove the finished waffle.
We provided you with essential cleaning and maintenance tips to ensure the longevity of your waffle iron and troubleshooted common issues that may arise during the waffle-making process. By following these troubleshooting tips and practicing proper maintenance, you’ll be able to overcome any challenges that may come your way.
Remember, making waffles is not only about following a recipe; it’s about enjoying the process and embracing your creativity. Feel free to experiment with different batters, flavors, and toppings to personalize your waffle-making experience. Let your taste buds be your guide!
As you continue to use your Bella Flip Waffle Iron, you will gain confidence and master the art of making mouthwatering waffles. So, gather your ingredients, preheat your waffle iron, and let the aroma of freshly cooked waffles fill your kitchen.
Now go forth, and may your Bella Flip Waffle Iron bring joy and deliciousness to your breakfast table for many mornings to come. Happy waffle making!
Now that you've got the hang of using your Bella Flip Waffle Iron, why not perfect your technique further? Learning when your device has cooked waffles to golden perfection isn't just handy, it's a game changer. Head over to our detailed guide on recognizing the right moment to lift that lid for impeccably cooked waffles every time. With these savvy insights, you'll never have undercooked or burnt offerings at your breakfast table!
Frequently Asked Questions about How To Use A Bella Flip Waffle Iron
Was this page helpful?
At Storables.com, we guarantee accurate and reliable information. Our content, validated by Expert Board Contributors, is crafted following stringent Editorial Policies. We're committed to providing you with well-researched, expert-backed insights for all your informational needs.

0 thoughts on “How To Use A Bella Flip Waffle Iron”