Articles
How To Use A Carpet Seam Tape
Modified: October 20, 2024
Learn how to properly use a carpet seam tape with these insightful articles. Discover the best techniques and tips for seamless carpet installation.
(Many of the links in this article redirect to a specific reviewed product. Your purchase of these products through affiliate links helps to generate commission for Storables.com, at no extra cost. Learn more)
Introduction
Welcome to this comprehensive guide on using carpet seam tape! If you’re looking to achieve a professional finish when installing or repairing carpet, using carpet seam tape is a crucial step. Carpet seam tape is a double-sided adhesive tape specifically designed to join carpet seams together seamlessly, ensuring a tight and durable bond.
In this article, we will explore how carpet seam tape works and the various benefits it offers. We will also provide a step-by-step guide on how to use carpet seam tape effectively, as well as the necessary tools and materials you’ll need for the job.
Whether you’re a seasoned DIY enthusiast or a professional carpet installer, mastering the use of carpet seam tape will allow you to achieve flawless carpet installations and repairs. So let’s delve into the world of carpet seam tape and discover how it can elevate the quality and longevity of your carpeting projects.
Key Takeaways:
- Using carpet seam tape offers numerous benefits, including creating a seamless appearance, providing a strong and durable bond, enhancing comfort and safety, resisting moisture and mold, and saving time and costs on professional installation.
- Proper preparation, precise application, and meticulous finishing are essential for achieving flawless carpet seams using carpet seam tape. Attention to detail and regular maintenance contribute to the longevity and professional appearance of the carpeted areas.
Read more: How To Join Carpet Seams
What is Carpet Seam Tape?
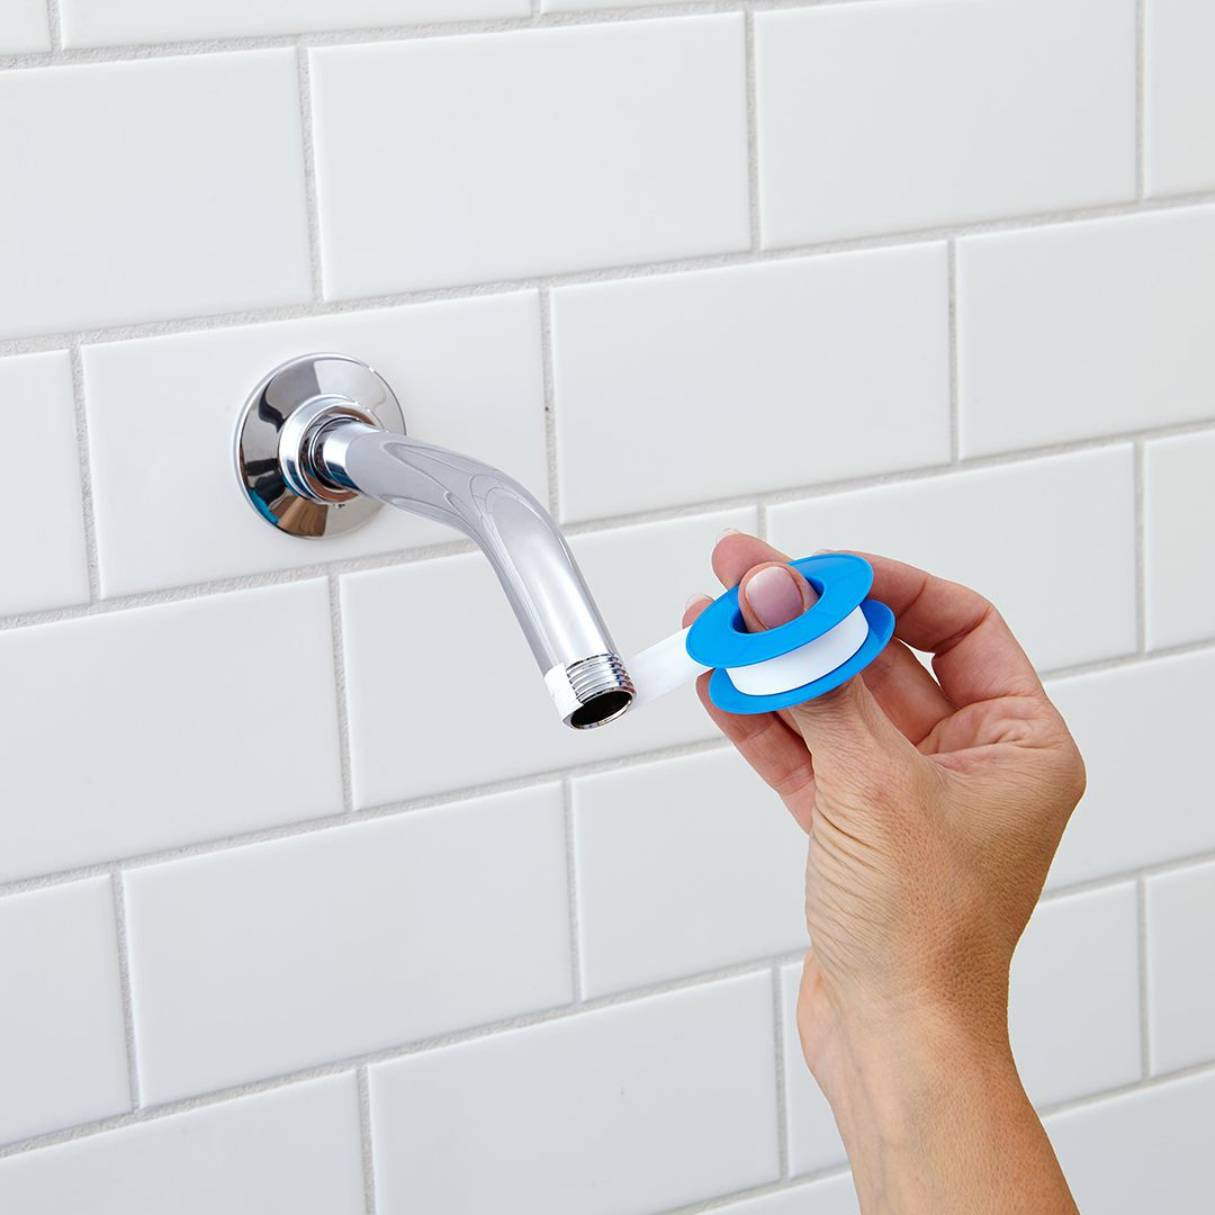
Carpet seam tape is a specialized adhesive tape designed to join two pieces of carpet together seamlessly. It is typically made of a strong, durable material with a double-sided adhesive surface that securely holds the carpet edges in place.
When installing or repairing carpet, it’s common to encounter areas where two pieces of carpet need to be joined together to create a cohesive and continuous flooring surface. These areas are called carpet seams. Seam tape is used to bond these seams, ensuring they are secure and virtually invisible to the eye.
Carpet seam tape comes in various widths, typically ranging from 2 to 6 inches, to accommodate different carpet thicknesses and seam widths. It is available in both standard and heavy-duty options, allowing for varying levels of strength and durability depending on the application.
The adhesive on the carpet seam tape is designed to provide a strong bond that withstands daily foot traffic and resists moisture and shifting over time. This ensures that the carpet seams remain intact and do not come apart or become noticeable.
In addition to the adhesive properties, carpet seam tape often features a reinforced middle section, known as the carrier or scrim. This adds strength and stability to the tape, preventing it from stretching or tearing during installation or use.
Overall, carpet seam tape plays a vital role in achieving a professional and seamless carpet installation. It provides a reliable method to join carpet pieces, ensuring that the seams are secure, durable, and virtually undetectable.
Benefits of Using Carpet Seam Tape
Carpet seam tape offers several advantages when it comes to carpet installation and repair. Here are some of the key benefits:
- Seamless Appearance: One of the primary benefits of using carpet seam tape is the seamless appearance it creates. When properly applied, the tape helps to join the carpet seams together tightly, resulting in a smooth and uniform carpet surface. This eliminates any visible gaps or unevenness that can be a common issue with poorly joined carpet seams.
- Strong and Durable Bond: Carpet seam tape is specifically designed to provide a strong and long-lasting bond between carpet pieces. The adhesive on the tape ensures that the seams stay securely in place, even with regular foot traffic and use. This helps to prevent the carpet from pulling apart or shifting, extending the lifespan of the carpet installation.
- Enhanced Comfort and Safety: Properly bonded carpet seams not only improve the aesthetic appeal but also enhance the comfort and safety of the carpeted area. With carpet seam tape, you won’t have to worry about the unevenness caused by loose seams, reducing the risk of trips and falls, especially in high-traffic areas.
- Moisture and Mold Resistance: Many carpet seam tapes are designed to be moisture-resistant, preventing water from seeping through the seams and causing damage to the underlying floor. This helps to safeguard against issues such as mold growth and water damage, ensuring the longevity of both the carpet and the subfloor beneath.
- Time and Cost Savings: By using carpet seam tape, you can save time and money on professional installation or repair services. With the right tools and materials, you can easily join the carpet seams yourself, eliminating the need for a professional and reducing labor costs. Additionally, the durability of the tape means fewer repairs in the long run, saving you further expenses down the line.
Overall, carpet seam tape is an essential tool for achieving a flawless and long-lasting carpet installation. It offers numerous benefits, including a seamless appearance, strong bonding, enhanced comfort and safety, moisture resistance, and cost savings. With its reliability and durability, carpet seam tape is a valuable asset for anyone undertaking a carpeting project.
Tools and Materials Needed
Before you start using carpet seam tape, you will need to gather the necessary tools and materials to ensure a smooth and successful installation or repair. Here’s a list of what you’ll need:
- Carpet Seam Tape: This is the main component of the process, and it’s important to choose a high-quality tape specifically designed for carpet seams. Look for a tape that is moisture-resistant and offers a strong adhesive bond.
- Utility Knife: A sharp utility knife will be needed to cut the carpet seam tape to the required length and width. Make sure to use a new blade for clean and precise cuts.
- Straight Edge or Metal Ruler: This tool is helpful for cutting straight lines and ensuring a precise and clean seam. A straight edge or metal ruler will help you achieve accurate measurements and guide your utility knife along the desired cutting line.
- Measuring Tape: Accurate measurements are crucial when working with carpet seam tape. A measuring tape will help you determine the length of tape needed for each seam and ensure a proper fit.
- Carpet Seam Roller: A carpet seam roller is used to apply pressure to the tape once it is applied to the carpet seams. This helps to ensure a strong and secure bond between the carpet pieces and eliminates any air bubbles or wrinkles.
- Carpet Trimmer: A carpet trimmer, also known as a carpet cutter or a carpet edge trimmer, is used to trim excess carpet along the seams. This tool creates a clean and professional finish by cutting the carpet flush with the seam line.
- Adhesive Remover (Optional): If you’re working on a carpet repair project and need to remove old adhesive residue, an adhesive remover can be helpful. Look for a product specifically designed for carpet to avoid damaging the fibers.
- Protective Gloves: It’s a good idea to wear protective gloves to keep your hands safe during the installation process. This will protect your hands from any potential cuts or injuries while handling sharp tools.
Make sure to gather all the necessary tools and materials before you begin using carpet seam tape. Having everything prepared in advance will make the installation or repair process more efficient and help you achieve professional results.
Step-by-Step Guide on Using Carpet Seam Tape
Now that you have gathered all the necessary tools and materials, let’s dive into the step-by-step process of using carpet seam tape. Follow these instructions carefully to ensure a successful installation or repair:
- Prepare the Carpet: Start by cleaning the area around the carpet seams. Remove any dirt, debris, or old adhesive residue using a vacuum cleaner or adhesive remover if necessary. Ensure that the carpet edges are clean and free from any obstructions.
- Cut the Seam Tape: Measure the length of each seam and cut the carpet seam tape to match those measurements. Use a utility knife and a straight edge to make precise cuts. It’s important to cut the tape slightly longer to allow for overlapping and trimming later on.
- Apply the Tape: Peel off the backing from the carpet seam tape to expose the adhesive side. Starting at one end of the seam, align the tape along the carpet edge, applying firm pressure to ensure good contact. Continue unrolling the tape along the entire length of the seam, making sure to keep it aligned and centered.
- Secure the Seams: Once the tape is applied to both sides of the seam, use a carpet seam roller to apply even pressure. Roll the seam roller back and forth along the seam, ensuring that the tape adheres firmly to the carpet and eliminates any air bubbles or wrinkles.
- Trim Excess Carpet: Use a carpet trimmer to carefully trim any excess carpet along the seam line. Hold the trimmer at an angle and run it along the seam, cutting the carpet flush with the tape. Be cautious not to cut into the tape or the carpet fibers beyond the seam.
- Recheck and Repeat: Once you have trimmed the excess carpet, verify that the seam is securely bonded and the carpet edges are aligned correctly. If necessary, repeat the process for any remaining carpet seams, ensuring consistent application and trimming.
- Final Finishing: Inspect the carpet seams to ensure they are smooth and undetectable. If needed, use a carpet seam roller once again to ensure a secure bond. Vacuum the carpeted area to remove any loose fibers or debris, completing the final finishing touch.
Following these step-by-step instructions will help you achieve professional-looking carpet seams using carpet seam tape. Remember to work carefully and pay attention to detail to ensure a seamless and durable carpet installation or repair.
Read more: What Is A Carpet Tape
Preparing the Carpet for Seam Taping
Before applying carpet seam tape, it is important to properly prepare the carpet and the area around the seams. This preparation ensures a clean and secure bond between the carpet pieces. Follow these steps to prepare the carpet for seam taping:
- Clean the Carpet: Use a vacuum cleaner to thoroughly clean the carpet, paying special attention to the area around the seams. Remove any dirt, dust, or debris that could interfere with the adhesive bond of the tape.
- Inspect the Seams: Carefully inspect the carpet seams to identify any loose or frayed edges. If there are any, trim them carefully using sharp scissors or a carpet knife. Ensure that the carpet edges are clean-cut and even.
- Remove Old Adhesive: If you are working on a carpet repair project and there is old adhesive residue on the carpet edges, use an adhesive remover specifically designed for carpet. Apply the remover according to the manufacturer’s instructions and remove any remaining residue using a cloth or scraper. Allow the carpet to dry before proceeding.
- Straighten the Seams: To ensure a seamless appearance, it is important to straighten the carpet seams before applying the tape. Gently pull the carpet edges to align them properly, making sure there are no gaps or overlaps along the seam line.
- Measure and Mark: Use a measuring tape to determine the length of each seam that needs to be taped. Mark the measurements lightly using a pencil or masking tape to guide your cutting and application process.
- Trim Excess Carpet: If necessary, trim any excess carpet along the edges to create a neat and even seam. Use sharp scissors or a carpet knife to make clean cuts, ensuring that the carpet edges align properly and there are no loose fibers.
- Ensure a Dry Surface: It is essential to work with a dry carpet surface when applying the carpet seam tape. If the carpet has been cleaned or exposed to moisture, allow it to dry completely before proceeding. Moisture can interfere with the adhesive bond and compromise the effectiveness of the tape.
By preparing the carpet properly, you ensure a smooth and secure installation or repair process. Taking the time to clean, straighten, and trim the carpet edges will result in a seamless and professional-looking carpet seam when using the carpet seam tape.
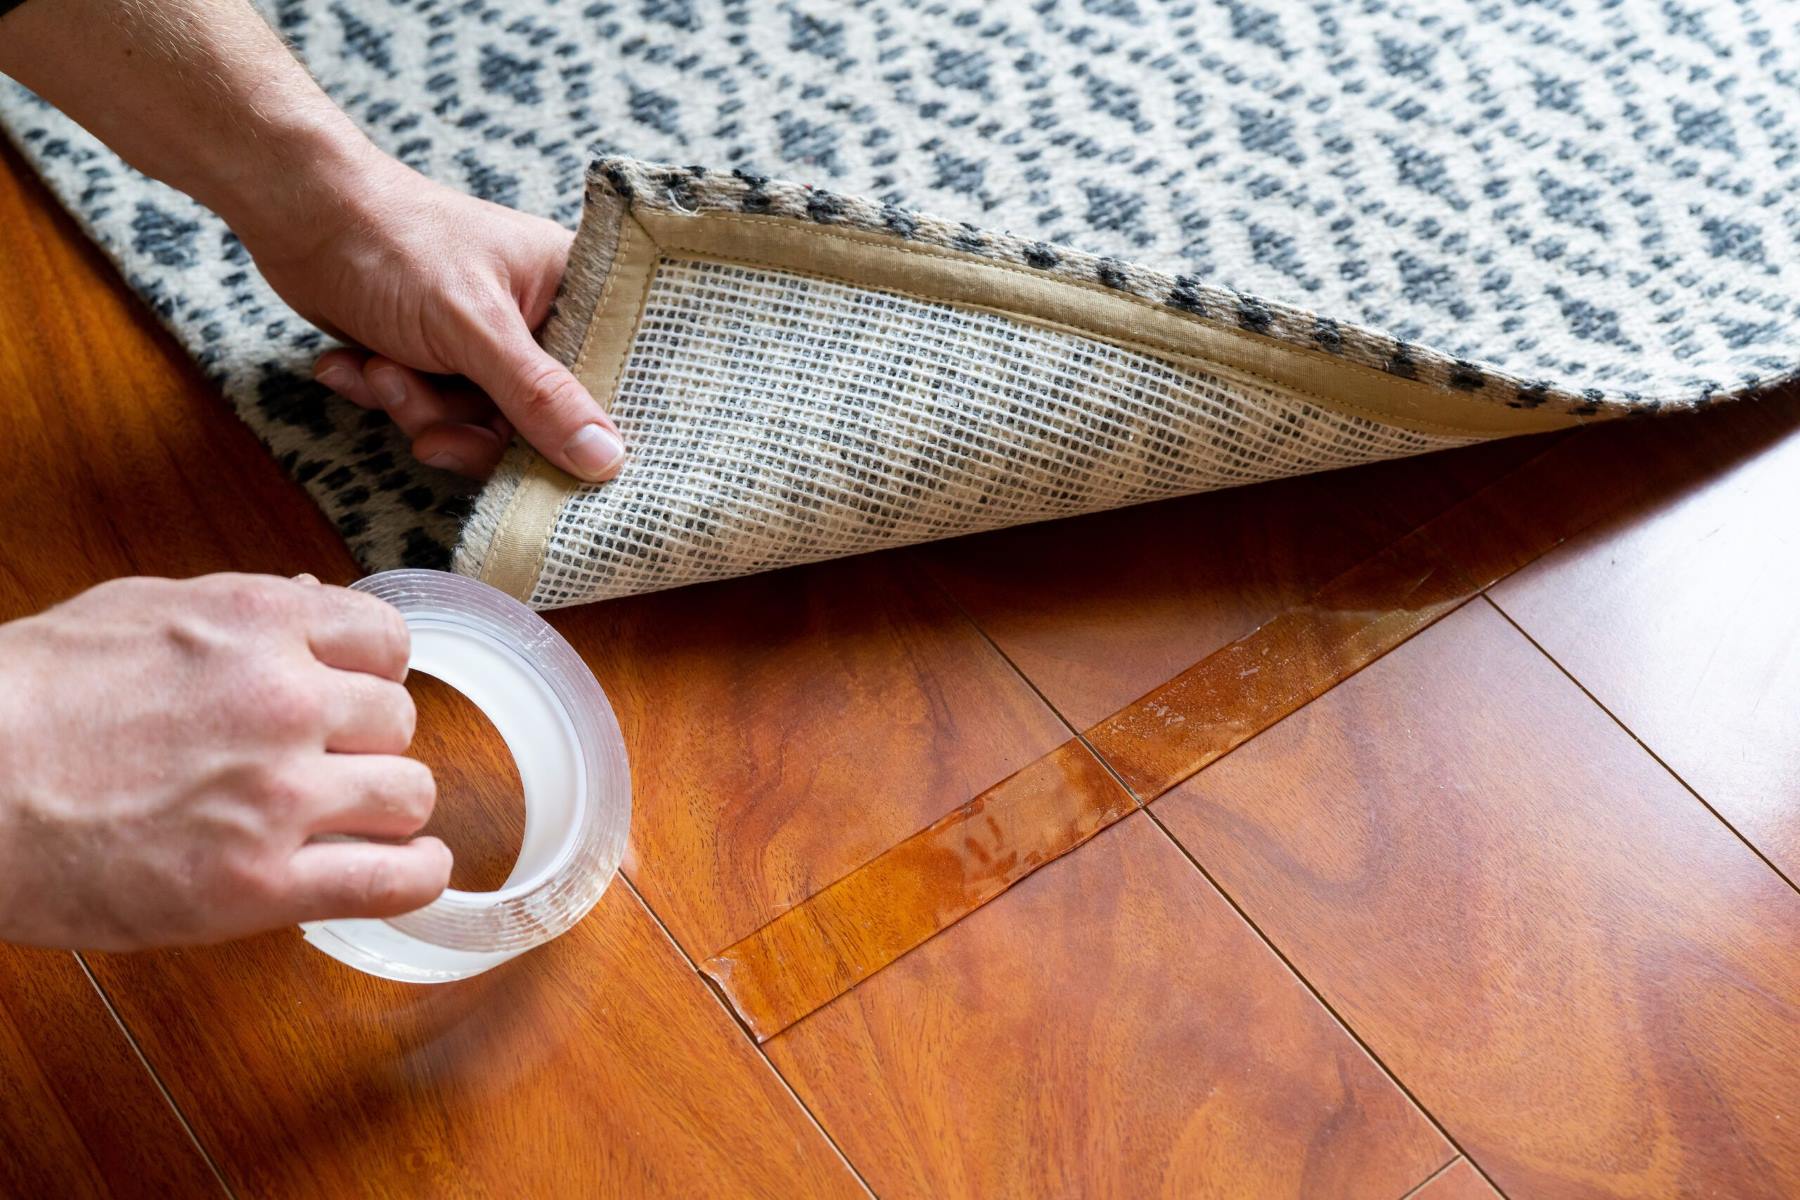
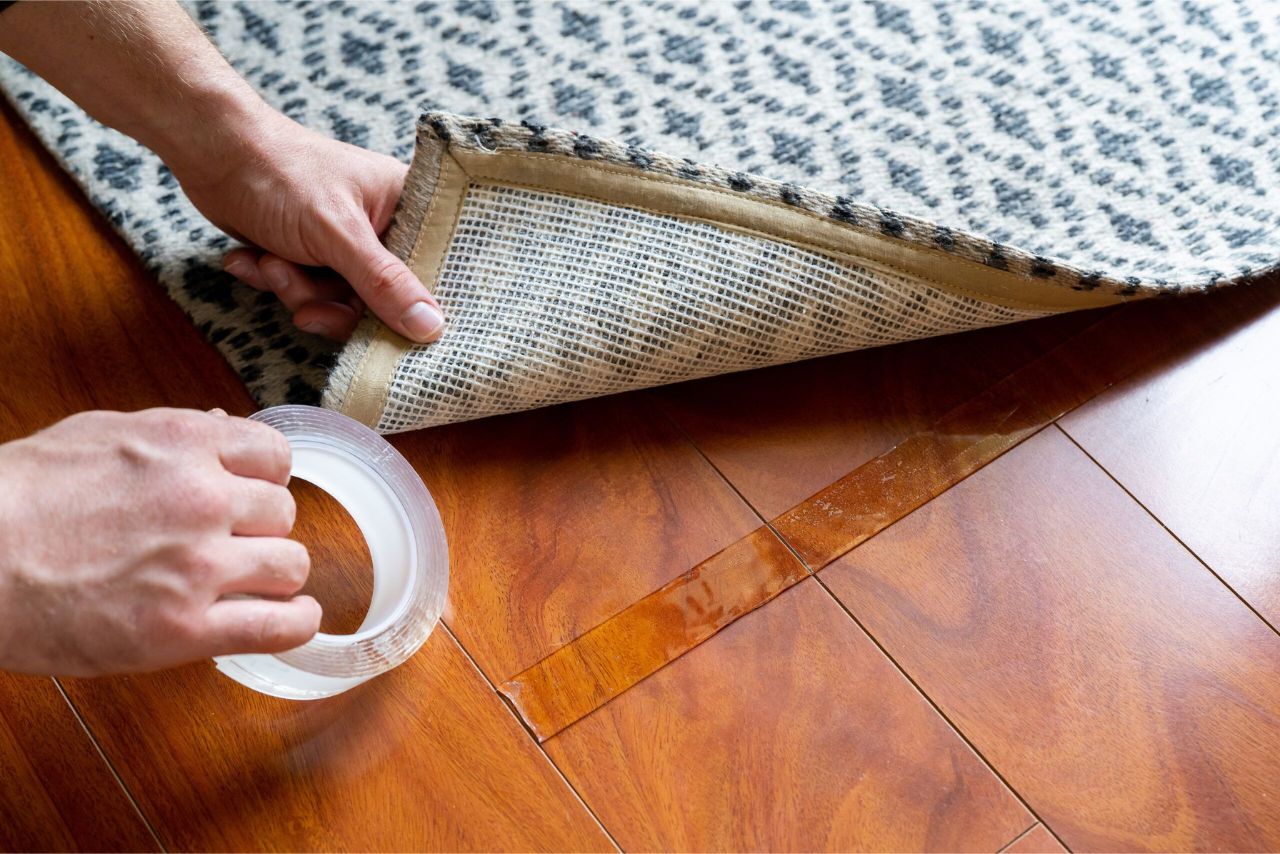
When using a carpet seam tape, make sure to clean and dry the area thoroughly before applying the tape. Press firmly to ensure a strong bond between the carpet edges.
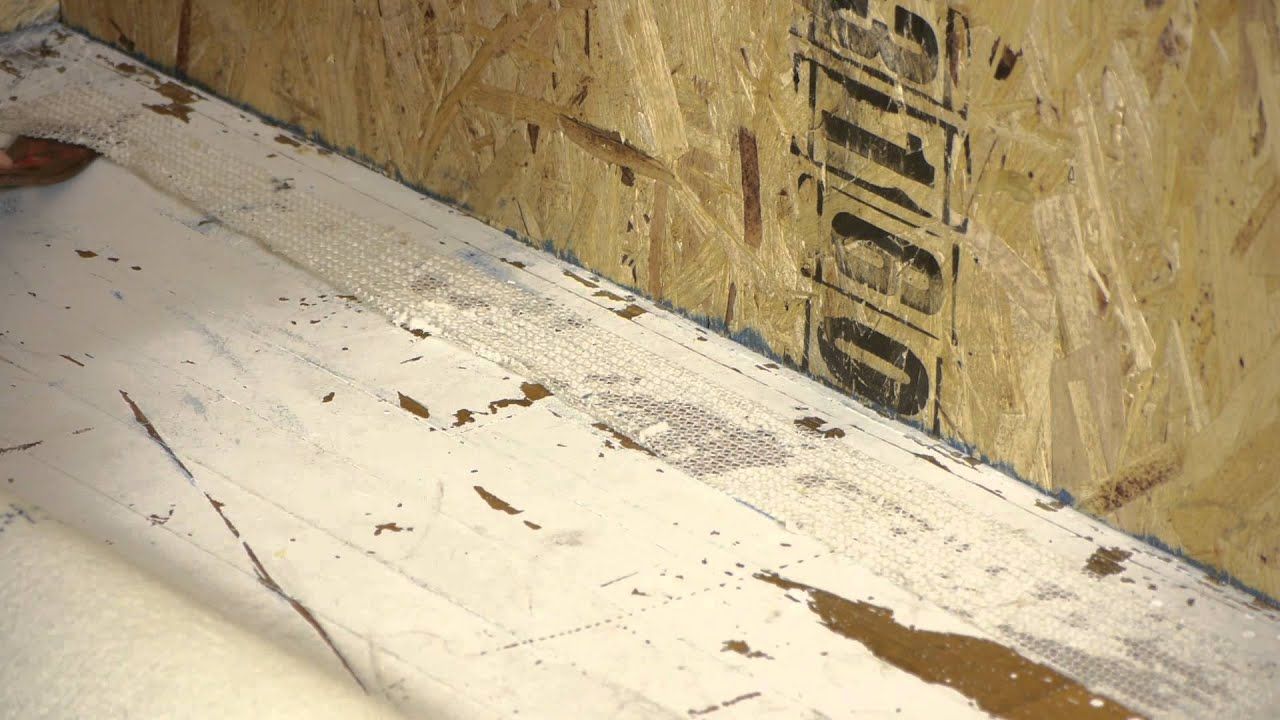
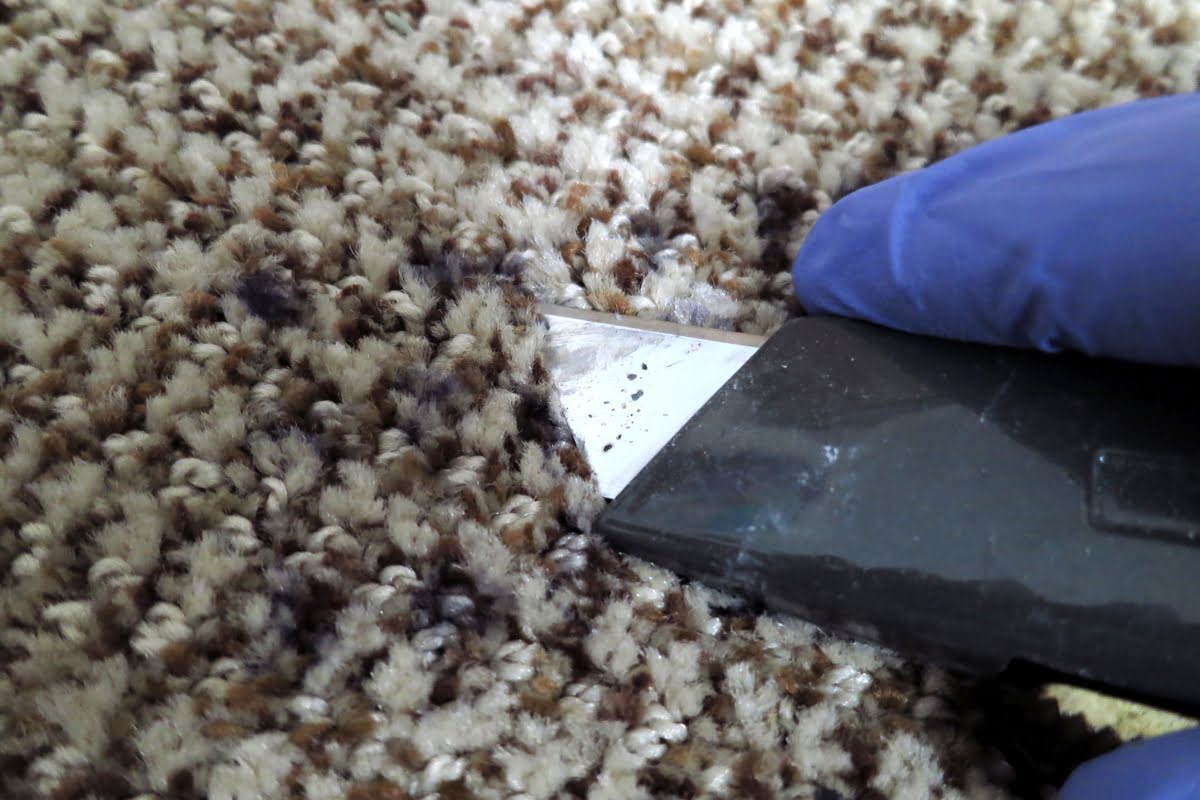
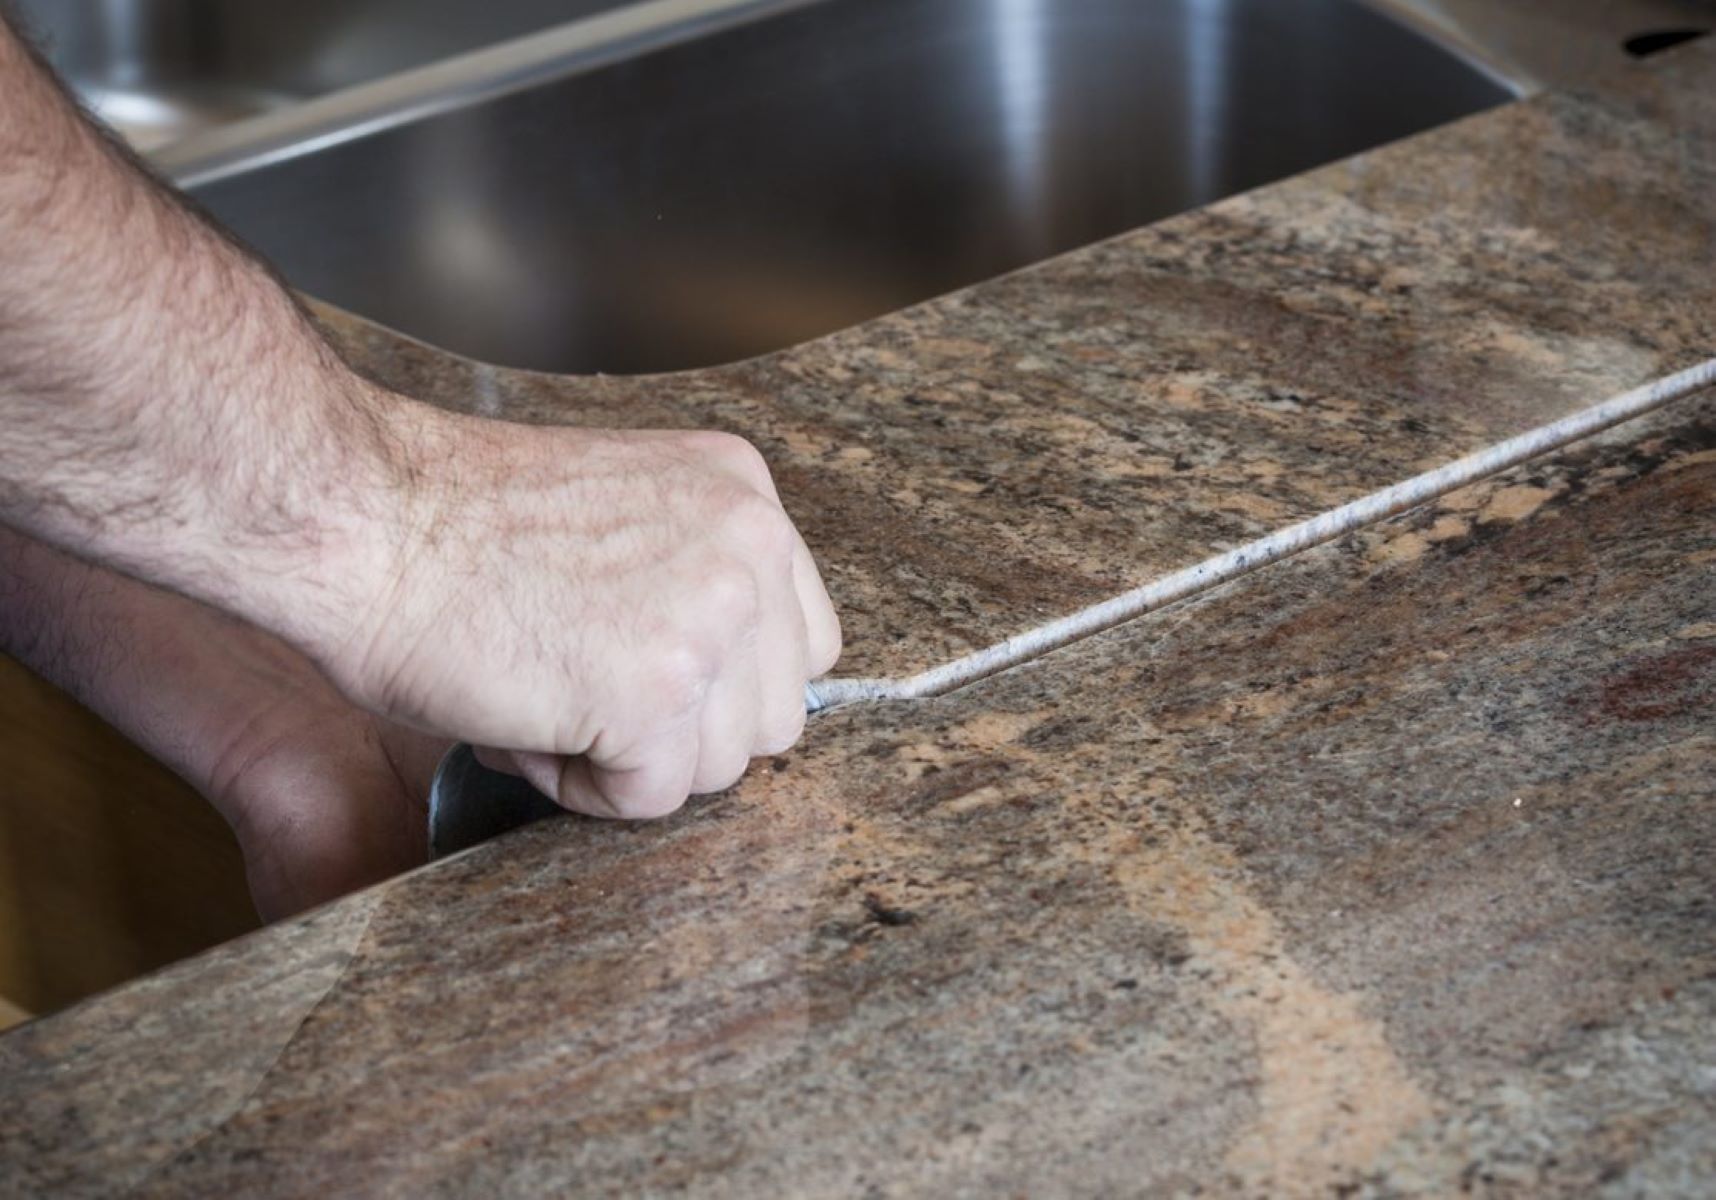
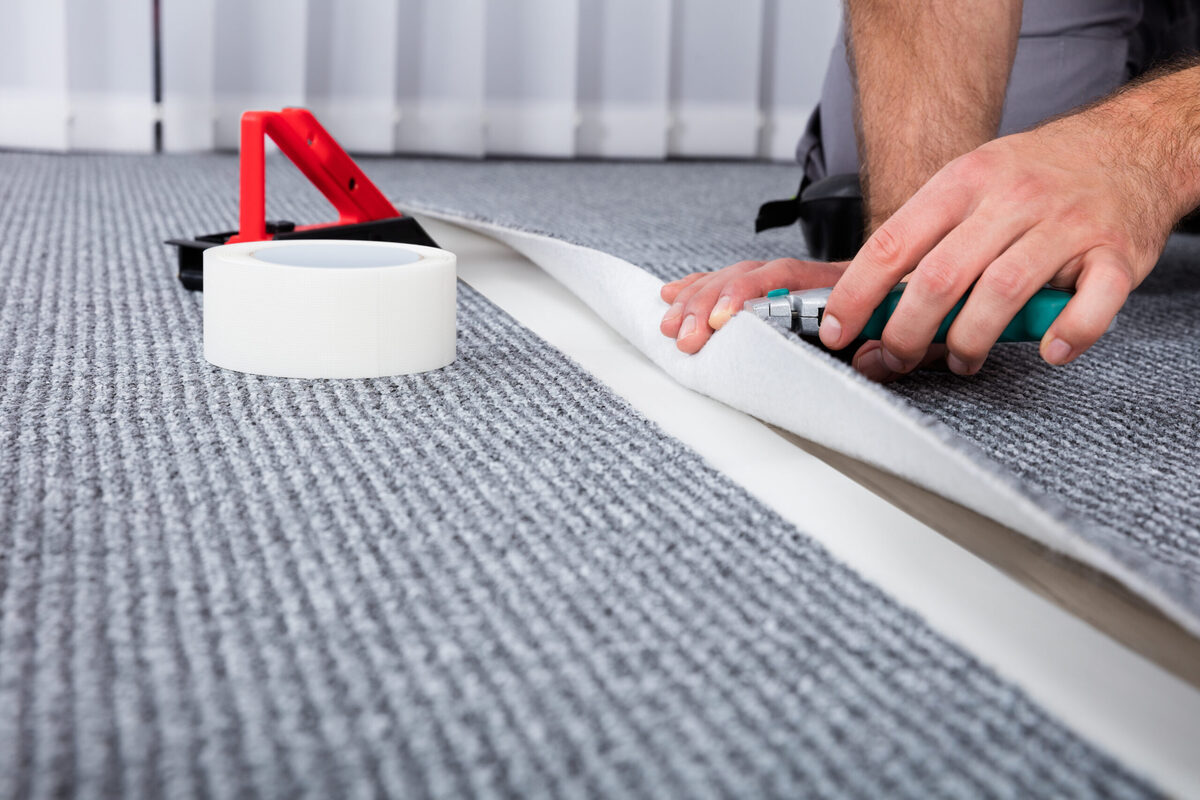
Applying the Carpet Seam Tape
Once the carpet is prepared, it’s time to apply the carpet seam tape to create a strong and invisible bond between the carpet edges. Follow these steps to ensure a successful application:
- Unroll the Tape: Start by unrolling the carpet seam tape, adhesive side up, along the length of the seam. Use a utility knife or scissors to cut the tape to the required length, allowing for a slight overlap at each end.
- Position the Tape: Carefully position the carpet seam tape along the center of the seam, ensuring it is aligned with the carpet edges. Press down firmly to secure the tape to the carpet, beginning at one end and working your way to the other.
- Remove the Backing: Slowly peel off the backing from the carpet seam tape, exposing the adhesive side. Maintain the alignment of the tape with the carpet edges as you remove the backing, ensuring a smooth and even application.
- Press Firmly: Once the backing is removed, press down firmly along the entire length of the tape. Apply even pressure to ensure a strong bond between the carpet and the tape. Use a carpet seam roller to go over the tape, ensuring it adheres well to the carpet.
- Secure the Overlapping Ends: If the tape has an overlapping end, carefully remove the backing from the overlapping section and press it down firmly onto the tape beneath it. Ensure there are no gaps or bubbles between the overlapping ends.
- Smooth Out any Wrinkles: If you notice any wrinkles or air bubbles while applying the tape, use a carpet seam roller or your hands to smooth them out. This helps to ensure a flat and seamless appearance along the carpet seam.
Remember, precision and attention to detail are essential during the application process. Take your time to align the tape properly and apply firm pressure to ensure a strong bond. By following these steps, you’ll achieve a secure and professional-looking carpet seam using the carpet seam tape.
Securing the Seams
After applying the carpet seam tape, it’s time to secure the seams to ensure a strong and long-lasting bond between the carpet pieces. Follow these steps to effectively secure the seams:
- Apply Pressure: Using a carpet seam roller, apply firm pressure along the entire length of the seam. Roll the seam roller back and forth several times to ensure the tape adheres firmly to the carpet. This helps to eliminate any air bubbles or wrinkles and ensures a tight bond.
- Roll from the Center Outward: Start in the middle of the seam and roll towards each end. This helps to distribute the pressure evenly and ensures that the tape is securely pressed against the carpet edges. Repeat this motion several times to thoroughly secure the seams.
- Check for Proper Alignment: While applying pressure, keep an eye on the alignment of the carpet edges. If they start to shift or misalign, gently reposition them and continue rolling. It’s important to maintain a straight and seamless appearance along the seam.
- Smooth Out any Wrinkles: If you notice any wrinkles or bubbles along the seam, use the carpet seam roller or your hands to smooth them out. Apply additional pressure as needed to ensure the tape adheres tightly to the carpet fibers.
- Allow Time for Bonding: After securing the seams, give the adhesive on the carpet seam tape sufficient time to bond. Check the manufacturer’s instructions for the recommended curing time. Avoid placing heavy objects or walking on the seams until the adhesive has fully cured.
Securing the seams is a critical step in the carpet seam tape application process. Applying firm pressure with a carpet seam roller ensures a tight bond and eliminates any imperfections along the seam. By following these steps, you’ll ensure that the carpet seams stay securely in place for years to come.
Trim and Finishing Touches
After securing the carpet seams with the seam tape, it’s time to trim any excess carpet and add the finishing touches to achieve a polished and professional appearance. Follow these steps for a clean and seamless finish:
- Trim Excess Carpet: Use a carpet trimmer, also known as a carpet cutter or carpet edge trimmer, to carefully trim any excess carpet along the seam line. Hold the trimmer at an angle and run it along the seam, cutting the carpet flush with the tape. Be cautious not to cut into the tape or the surrounding carpet fibers.
- Check the Seam: Inspect the trimmed seam to ensure it is clean and even. Verify that there are no loose fibers or frayed edges. If needed, use scissors to carefully trim any stray fibers to create a neat and tidy appearance.
- Smooth and Blend the Edges: Use your hands or a carpet seam roller to gently press down on the trimmed edges of the carpet. This helps to blend them seamlessly with the surrounding carpet fibers and create a smooth transition at the seam.
- Vacuum the Area: Once you have finished trimming and smoothing the carpet seams, vacuum the entire carpeted area to remove any loose fibers, dust, or debris. This will provide a clean and tidy finish to your carpet installation or repair.
- Inspect and Touch Up: Take a close look at the finished seams and the overall appearance of the carpet. Make any necessary adjustments or touch-ups to ensure a flawless and professional result. Pay attention to details like color matching and transition areas between different sections of carpet.
- Maintain the Carpet: Going forward, maintain the carpet properly to preserve the integrity of the seams. Regularly vacuum the carpet to remove dirt and debris, and promptly address any spills or stains to prevent them from seeping into the seams.
Trimming the carpet and adding the finishing touches ensures a clean and seamless appearance for your carpet seams. Taking the time to carefully trim, smooth, and blend the edges will result in a professional-looking finish that enhances the overall aesthetics of the carpeted area.
Read more: How To Sew A Pillowcase Using French Seams
Frequently Asked Questions (FAQs)
Here are some commonly asked questions about using carpet seam tape:
- 1. Can I use carpet seam tape on any type of carpet?
- 2. How long does carpet seam tape last?
- 3. Can I reuse carpet seam tape?
- 4. Is it possible to remove carpet seam tape?
- 5. Can I overlap the carpet seam tape?
Yes, carpet seam tape is suitable for use on most types of carpet, including synthetic carpets, wool carpets, and blends. However, it’s always a good idea to check the manufacturer’s recommendations or consult with a professional if you have any concerns about compatibility.
Carpet seam tape is designed to provide a long-lasting bond, typically lasting for several years. The durability can vary depending on factors such as the quality of the tape, the carpet type, and the amount of foot traffic. Proper installation and regular maintenance can help maximize the lifespan of the carpet seam tape.
In general, carpet seam tape is not designed to be reusable. Once the adhesive has bonded to the carpet and set, it becomes difficult to remove without damaging the tape or the carpet fibers. It is recommended to use new tape for each installation or repair project.
While it is technically possible to remove carpet seam tape, it can be challenging and may result in damage to the carpet. Attempting to remove the tape may leave adhesive residue or cause the carpet fibers to come loose. If you need to remove the tape, consult a professional or follow the manufacturer’s instructions for the best approach.
Yes, overlapping the carpet seam tape is a common practice to ensure a secure bond. When applying the tape, allow a slight overlap at each end to provide extra strength and stability. This helps to prevent the seams from coming apart and ensures a more seamless and durable result.
If you have any additional questions or concerns about using carpet seam tape, it’s always best to consult with a professional carpet installer or refer to the manufacturer’s instructions for specific guidance.
Conclusion
Using carpet seam tape is a crucial step in achieving a professional and seamless carpet installation or repair. This specialized adhesive tape provides a strong and durable bond, ensuring that carpet seams remain secure and virtually invisible. By following the steps outlined in this guide, you can effectively use carpet seam tape to create flawless carpet seams and enhance the overall appearance and longevity of your carpeted areas.
From preparing the carpet and applying the tape to securing the seams and adding the finishing touches, each step plays a crucial role in achieving a successful carpet seam. Taking the time to properly prepare the carpet, align the seams accurately, apply sufficient pressure, and trim any excess carpet will result in a polished and professional-looking finish.
By using carpet seam tape, you benefit from a range of advantages, including a seamless appearance, a strong and durable bond, enhanced comfort and safety, moisture and mold resistance, time and cost savings, and the ability to achieve professional results without the need for a professional installer.
Remember to carefully choose a high-quality carpet seam tape and gather the necessary tools and materials before starting your project. Additionally, keep in mind that regular maintenance and prompt attention to spills or stains are essential for preserving the integrity of the seams and ensuring the long-term durability of your carpeted areas.
Now that you have a comprehensive understanding of how to use carpet seam tape, you can confidently tackle your next carpet installation or repair project with ease. By following the guidelines provided in this article, you’ll be able to create reliable and visually appealing carpet seams that will withstand the test of time.
Frequently Asked Questions about How To Use A Carpet Seam Tape
Was this page helpful?
At Storables.com, we guarantee accurate and reliable information. Our content, validated by Expert Board Contributors, is crafted following stringent Editorial Policies. We're committed to providing you with well-researched, expert-backed insights for all your informational needs.