Articles
How To Join Carpet Seams
Modified: August 20, 2024
Learn how to join carpet seams with these helpful articles. Find step-by-step guides and tips for seamless carpet installation.
(Many of the links in this article redirect to a specific reviewed product. Your purchase of these products through affiliate links helps to generate commission for Storables.com, at no extra cost. Learn more)
Introduction
Carpeting is a common choice for flooring due to its softness, insulation properties, and aesthetic appeal. However, when installing carpet, one challenge that often arises is joining carpet seams. Seam joining is necessary to ensure a seamless and professional-looking installation. Whether you are a homeowner looking to install new carpeting or a professional carpet installer, understanding how to join carpet seams is a valuable skill.
In this article, we will walk you through the process of joining carpet seams step by step. We will cover the tools and materials needed, as well as the techniques required to achieve a seamless and durable result. By following these instructions and using the right techniques, you can ensure that your carpet seams are not only well-joined but also withstand the test of time.
Before we dive into the specific steps, it’s important to note that joining carpet seams requires a certain level of skill and precision. If you are not confident in your abilities, it is always recommended to seek professional help. Additionally, make sure to read through and understand the manufacturer’s instructions that come with your carpeting as each type of carpet may have specific recommendations for seam joining.
Now, let’s get started on the process of joining carpet seams!
Key Takeaways:
- Master the art of joining carpet seams with precision cutting, proper alignment, and seam reinforcement for a seamless and durable installation. Enjoy the comfort and aesthetic appeal of a well-joined carpet in your space.
- From understanding carpet seam types to applying final finishing touches, learn how to achieve professional-looking carpet seams that withstand the test of time. Elevate your space with a seamlessly installed carpet that enhances both beauty and functionality.
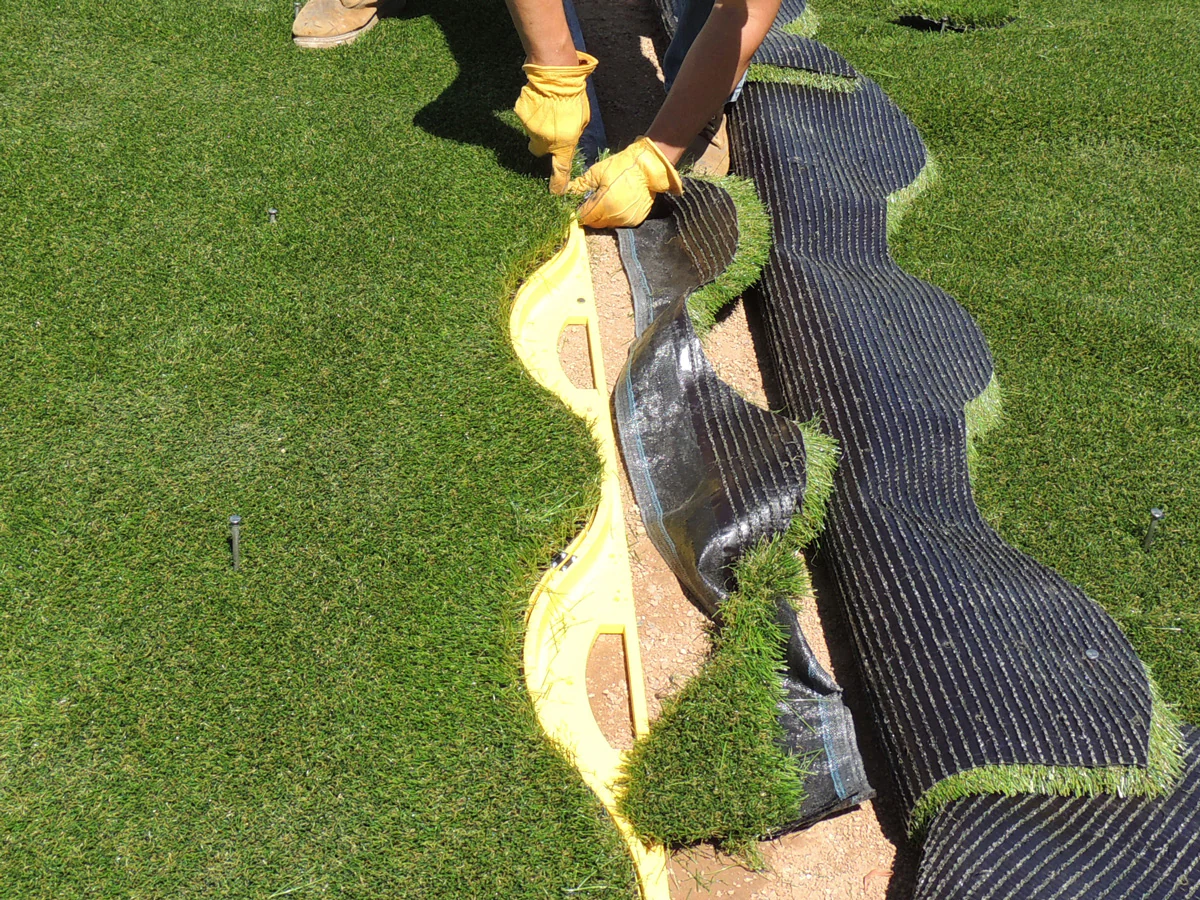
Read more: How To Join Astro Turf Seams
Understanding Carpet Seams
Carpet seams refer to the areas where two pieces of carpet are joined together to create a continuous surface. These seams are necessary in rooms that are wider than the available roll width of the carpet. Understanding the different types of carpet seams will help you determine the most appropriate method for joining your carpet.
The most common types of carpet seams are:
- Butt Seam: In a butt seam, the edges of the carpet pieces are cut straight and joined together to form a seam. This seam type requires precise cutting and alignment to achieve a seamless look.
- Pattern Match Seam: Pattern match seams are used when the carpet has a design or pattern that needs to be matched at the seams. The pieces are cut to match the pattern and then joined together.
- Overlapping Seam: In an overlapping seam, one edge of the carpet is folded back and placed over the other edge. This creates a double thickness at the seam, which may be visible in certain lighting conditions.
- Cushion-Backed Seam: Cushion-backed carpet requires a different kind of seam joining technique. The edges of the carpet are typically serged or bound before being fused together using a hot melt adhesive.
Understanding the type of carpet seam you have will determine the specific techniques and tools you will need for joining the seams. It’s essential to select the appropriate method for your carpet type to ensure a seamless and secure bond.
Now that we have a basic understanding of carpet seams, let’s move on to the tools and materials needed for joining carpet seams.
Tools and Materials Needed
Before you begin joining carpet seams, it is important to gather all the necessary tools and materials. Having everything ready will make the process smoother and more efficient. Here are the key tools and materials you will need:
- Carpet Knife: A sharp carpet knife is essential for cutting the carpet pieces to size and shape. Look for a knife with a replaceable blade for ease of use.
- Straight Edge: A straight edge, such as a ruler or a piece of sturdy board, is necessary for ensuring clean and accurate cuts.
- Seam Tape: Seam tape is used to reinforce the carpet seams and ensure a strong bond. There are different types of seam tape available, so make sure to choose one that is suitable for your carpet type and installation method.
- Carpet Seaming Iron: A carpet seaming iron is used to activate the adhesive on the seam tape, creating a strong and durable bond. Look for a seaming iron with adjustable temperature settings for different types of carpet.
- Carpet Roller: A carpet roller or a carpet weight is used to apply pressure to the seams, helping them adhere firmly and evenly.
- Heat Gun: A heat gun is useful for warming up the carpet and making it more pliable during the seaming process. It can also help to activate the adhesive on the seam tape.
- Seam Adhesive: Seam adhesive is used to reinforce the seams, especially in high-traffic areas. Make sure to choose an adhesive that is compatible with your carpet type.
- Carpet Stretcher (optional): If you are working with a thicker or more rigid carpet, a carpet stretcher can help to ensure a tight and smooth installation.
In addition to these tools, you will also need some basic supplies such as a measuring tape, marker or chalk for marking the carpet cuts, and a utility knife for any trimming or adjustments needed during the installation process.
Now that you have gathered all the necessary tools and materials, let’s move on to the step-by-step process of joining carpet seams.
Step 1: Preparing the Carpet Pieces
Before you can join the carpet seams, it’s important to prepare the carpet pieces that will be joined together. Follow these steps to ensure the carpet pieces are properly prepared:
- Measure and Cut: Measure the area where the carpet will be installed and then measure each carpet piece accordingly, adding a few inches of extra length to allow for trimming and adjustments. Use a straight edge and a carpet knife to make precise cuts along the measured marks. Ensure that the cuts are straight and clean.
- Clean and Vacuum: Thoroughly clean the area where the carpet will be installed to remove any dirt, dust, or debris. Vacuum the carpet pieces as well to ensure they are clean and free from loose fibers that could affect the seam joining process.
- Align the Nap Direction: Pay attention to the direction of the carpet’s nap, which is the way the fibers lie. Make sure that the nap direction of each carpet piece is consistent so that the seams blend in seamlessly.
It’s worth noting that patterned carpets require additional care when cutting and aligning the seams. Take the time to match the patterns as closely as possible to create a continuous design across the seams.
Once you have prepared the carpet pieces, you are ready to move on to the next step: cutting and aligning the seams.
Step 2: Cutting and Aligning the Seams
Once you have prepared the carpet pieces, the next step is to cut and align the seams. Properly aligning the seams is crucial for achieving a seamless and professional-looking installation. Follow these steps to cut and align the seams:
- Place the Carpet Pieces: Lay out the carpet pieces in the desired position, making sure they are aligned correctly. If you are working with a patterned carpet, take extra care to match the patterns at the seams for a cohesive look.
- Overlap the Edges: Taking one carpet piece at a time, overlap the edges that will be joined together. The amount of overlap will depend on the type of seam you are creating. For a butt seam, the edges should be butted tightly against each other without overlapping. For other types of seams, such as an overlapping seam, the edges should be overlapped by a specific amount as recommended by the manufacturer.
- Mark the Seams: Using a marker or chalk, mark the seam lines on the carpet pieces. These lines will serve as a guide for cutting and aligning the seams accurately.
- Cut the Seams: Carefully cut along the marked seam lines using a sharp carpet knife and a straight edge. Ensure that the cuts are straight and clean to achieve a seamless result. Take your time and be precise in your cutting to avoid any mistakes.
- Check the Alignment: Once the seams are cut, double-check the alignment to ensure that the edges match up perfectly. This is especially important for patterned carpets to maintain a consistent design across the seams.
By following these steps, you will be able to cut and align the carpet seams accurately and achieve a seamless look. It’s essential to take your time during this step to ensure the best possible outcome.
Next, we will move on to step 3, which involves applying seam tape to reinforce the carpet seams.
Read more: How To Join Two Pieces Of Carpet
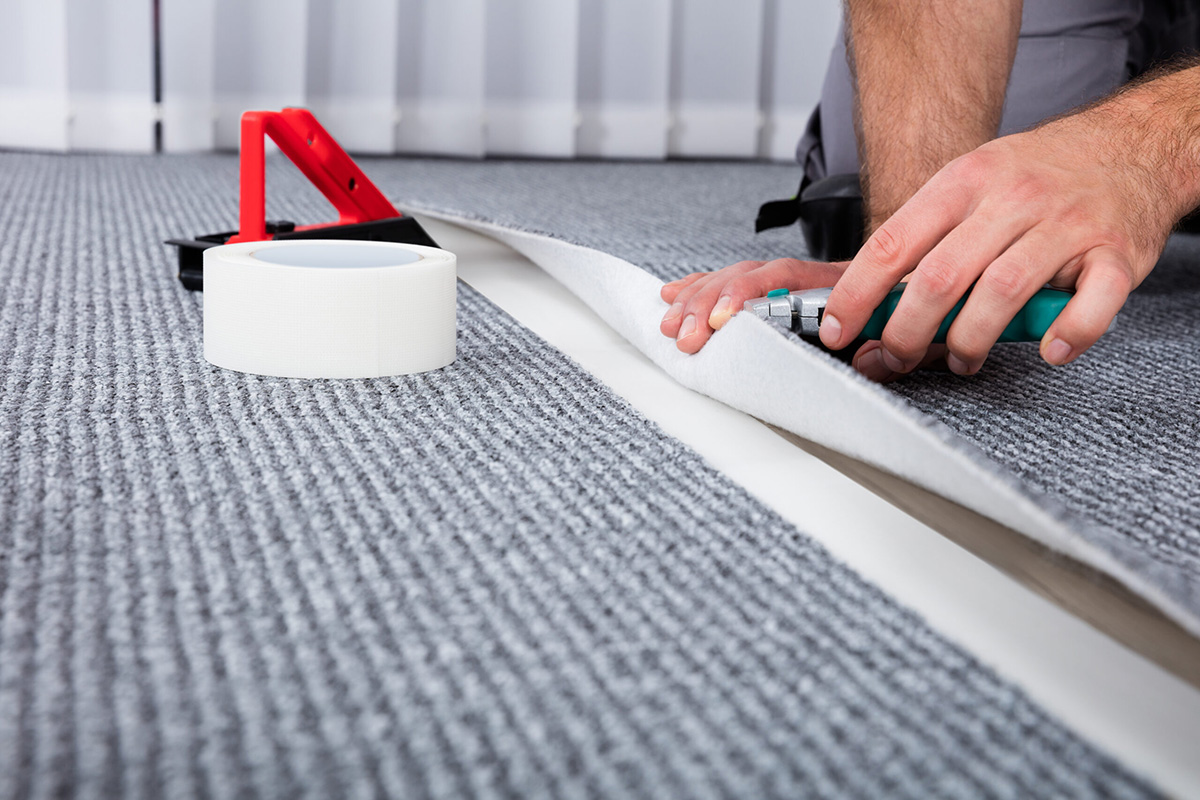
Step 3: Applying Seam Tape
Once you have cut and aligned the carpet seams, the next step is to apply seam tape. Seam tape reinforces the seam and helps create a strong and durable bond between the carpet pieces. Follow these steps to apply seam tape:
- Clean the Seams: Ensure that the seam area is clean and free from any dust or debris. Wipe the seams with a clean, dry cloth to remove any loose particles.
- Prepare the Seam Tape: Unroll the seam tape and cut it to the length of the seam. Make sure to use a seam tape that is specifically designed for your carpet type and installation method. Some seam tapes require a specific adhesive, so consult the manufacturer’s instructions.
- Position the Seam Tape: Place the seam tape beneath the seam, ensuring that it is centered and covers the full width of the seam. The adhesive side of the seam tape should face up towards the carpet.
- Secure the Seam Tape: Use a carpet knife to cut slits along the edges of the seam tape. This will help to anchor the tape to the carpet, preventing it from shifting during the seaming process.
- Activate the Adhesive: Using a carpet seaming iron set to the appropriate temperature for your carpet type, go over the seam tape. The heat from the iron will activate the adhesive, bonding the carpet pieces together. Move the seaming iron slowly and evenly over the seam tape, making sure to apply steady pressure.
- Smooth Out the Seams: Once the adhesive has been activated, use a carpet roller or a carpet weight to press down on the seam and ensure a secure bond. Start from the center of the seam and work your way outwards, smoothing out any wrinkles or irregularities.
Applying seam tape is a crucial step in joining carpet seams. It reinforces the seams, ensuring they are strong and durable. Take your time during this step to ensure that the seam tape is positioned correctly and securely.
Next, we will move on to step 4 which involves using a carpet seaming iron to further strengthen the seams.
When joining carpet seams, make sure to use a sharp carpet knife to create clean, straight edges. This will ensure a seamless and professional-looking result.
Step 4: Using a Carpet Seaming Iron
Using a carpet seaming iron is an important step in the carpet seaming process. It helps to activate the adhesive on the seam tape, ensuring a strong and secure bond between the carpet pieces. Follow these steps to use a carpet seaming iron:
- Prepare the Seaming Iron: Make sure the seaming iron is clean and in good working condition. Check the temperature settings and adjust them according to the manufacturer’s recommendations for your specific carpet type.
- Plug in the Seaming Iron: Plug in the seaming iron and give it some time to heat up to the desired temperature. It’s important to use the appropriate temperature for your carpet type to avoid damaging the carpet fibers or the adhesive on the seam tape.
- Start at One End: Position the seaming iron at one end of the seam. Hold it at a slight angle, allowing the heat plate to make contact with the carpet and seam tape.
- Move Slowly and Evenly: Slowly move the seaming iron along the length of the seam, applying even pressure. The heat from the iron will activate the adhesive on the seam tape, ensuring a secure bond between the carpet pieces.
- Avoid Excessive Heat: Be careful not to apply excessive heat or linger in one spot for too long, as this can damage the carpet or the seam tape. Keep the movement smooth and continuous to evenly distribute the heat.
- Repeat if Necessary: Depending on the type of adhesive and the manufacturer’s instructions, you may need to go over the seam multiple times to ensure a strong bond. Follow the recommended guidelines to achieve the best results.
Using a carpet seaming iron requires precision and caution. Take your time and pay attention to the temperature and movement to avoid any mishaps. It’s always a good idea to practice on a scrap piece of carpet before working on the actual seams.
Now that the seams have been reinforced with the seaming iron, we can move on to step 5, which involves pressing the seams to ensure a secure bond.
Step 5: Pressing the Seams
Pressing the seams is an important step in the carpet seaming process. It helps to ensure a secure bond between the carpet pieces and improves the overall appearance of the seams. Follow these steps to properly press the seams:
- Allow the Seams to Cool: After using the seaming iron, allow the seams and the adhesive to cool down. This will help the adhesive to fully set and create a strong bond.
- Inspect the Seams: Take a close look at the seams to ensure they are aligned properly and there are no visible gaps or wrinkles. If any issues are detected, you may need to reposition the carpet pieces or reapply heat with the seaming iron.
- Apply Pressure: Use a carpet roller or a carpet weight to press down on the seams. Start from the center of the seam and work your way towards the edges. Apply firm and even pressure to ensure that the seams are fully bonded and there are no air pockets or loose areas.
- Roll in Different Directions: To achieve a strong and seamless bond, roll the carpet roller in different directions. This will help to evenly distribute the pressure and ensure that the seams are well pressed down.
- Repeat if Necessary: If there are any areas that seem uneven or do not appear well-pressed, go over them again with the carpet roller. This will help to further secure the seams and achieve a professional finish.
By properly pressing the seams, you ensure that they are securely bonded and will withstand regular foot traffic. This step is crucial for the long-term durability and appearance of your carpet installation.
Now that we have pressed the seams, it’s time to move on to step 6, which involves checking for proper seaming.
Step 6: Checking for Proper Seaming
After joining the carpet seams, it’s important to check for proper seaming to ensure a seamless and professional-looking installation. Follow these steps to thoroughly inspect the seams:
- Inspect the Seam Alignment: Carefully examine the seam to ensure that the edges of the carpet pieces are aligned properly. There should be no visible gaps or unevenness along the seam line.
- Check for Smoothness: Run your hand over the seam to check for any bumps, ridges, or irregularities. The seam should be smooth and flush with the surrounding carpet.
- Look for Fraying or Loose Fibers: Inspect the seams for any fraying or loose fibers. Trim any stray fibers with a sharp pair of scissors to achieve a clean and seamless finish.
- Test the Strength of the Seams: Gently pull on the edges of the carpet pieces near the seam to check the strength of the bond. The carpet should not separate or come apart at the seam.
- Observe the Appearance: Step back and take a look at the overall appearance of the carpet installation. The seams should be inconspicuous, blending in seamlessly with the rest of the carpet.
If you notice any issues during the inspection, such as gaps, unevenness, or fraying, you may need to make adjustments or rework the seams. It’s important to address any problems promptly to ensure a high-quality and long-lasting carpet installation.
Once you have confirmed that the seams are properly joined and meet your satisfaction, you can proceed to the next step, which involves trimming any excess carpet.
Read more: How To Use A Carpet Seam Tape
Step 7: Trimming Excess Carpet
After joining and inspecting the carpet seams, the next step is to trim any excess carpet that may be extending beyond the desired area. Trimming the excess carpet will help create a clean and polished finish. Follow these steps to properly trim the excess carpet:
- Mark the Trimming Line: Use a straight edge and a marker or chalk to mark the desired trimming line. Make sure the line is straight and aligned with the rest of the carpet edges.
- Score the Carpet: Along the marked line, carefully score the carpet using a carpet knife and a straight edge. Apply gentle pressure and make multiple passes if needed to achieve a clean cut.
- Trim the Carpet: With the carpet scored, bend it back slightly to expose the scored line. Use the carpet knife to cut along the scored line, ensuring a straight and precise cut.
- Remove the Excess Carpet: After the trimming is complete, carefully remove the excess carpet. Make sure to dispose of it properly.
- Check for Clean Edges: Inspect the trimmed edges to ensure they are clean and even. If needed, use a carpet trimmer or a sharp pair of scissors to fine-tune the edges and achieve a seamless and professional finish.
Trimming the excess carpet is an important final step to achieve a polished and well-finished carpet installation. Take your time and pay attention to detail to ensure that the trimmed edges blend seamlessly with the rest of the carpet.
With the excess carpet trimmed, we can now move on to the final finishing steps to complete the carpet seaming process.
Step 8: Final Finishing Steps
After joining, inspecting, and trimming the carpet seams, you are almost finished with the carpet seaming process. However, there are a few final finishing steps to complete the installation and ensure a professional and long-lasting result. Follow these final steps:
- Clean the Carpet: Vacuum the entire carpeted area to remove any loose fibers, dirt, or debris. This will leave your newly installed carpet looking clean and fresh.
- Secure Loose Edges: If you notice any loose edges or corners, apply a carpet adhesive or double-sided carpet tape underneath to secure them. This will prevent tripping hazards and ensure that the edges stay in place.
- Replace Furniture and Accessories: If you had to move any furniture or accessories during the carpet installation, now is the time to carefully place them back in their original positions. Take caution to avoid dragging or sliding heavy furniture, as this can damage the carpet fibers.
- Apply Carpet Protector (Optional): Consider applying a carpet protector, such as a spray or a clear film, to protect the carpet from stains, spills, and wear. Follow the manufacturer’s instructions for proper application.
- Regular Maintenance: Maintain your newly installed carpet by practicing regular cleaning and maintenance. Vacuum regularly, spot clean any stains promptly, and schedule professional carpet cleaning periodically to keep your carpet looking its best.
By completing these final finishing steps, you can ensure that your carpet seaming project is successfully finalized and that your carpet is properly installed and ready for use.
Congratulations! You have successfully learned how to join carpet seams, from preparing the carpet pieces to the final finishing steps. Remember, a well-joined carpet with seamless seams not only enhances the overall appearance of your space but also provides long-lasting durability.
Now you can enjoy your beautifully installed carpet and revel in the comfort and aesthetic appeal it brings to your home or office.
Should you ever need to join carpet seams again in the future, refer back to this guide as a helpful reference.
Happy carpeting!
Conclusion
Joining carpet seams is a crucial step in the carpet installation process. By following the steps outlined in this guide, you can achieve seamless and professional-looking carpet seams. From preparing the carpet pieces to the final finishing touches, each step is essential for a successful and durable result.
Understanding the different types of carpet seams, gathering the necessary tools and materials, and taking the time to cut and align the seams properly are all important aspects of the process. Applying seam tape, using a carpet seaming iron, and pressing the seams ensure a strong bond that will withstand regular foot traffic and maintain the integrity of the carpet installation.
Remember to inspect the seams for alignment, smoothness, and cleanliness. Trim any excess carpet and complete the final finishing steps to give your carpet installation a polished and professional appearance. Regular maintenance, such as vacuuming and spot cleaning, will help keep your carpet looking its best for years to come.
Whether you are a homeowner tackling a DIY project or a professional carpet installer, mastering the art of joining carpet seams is an invaluable skill. With attention to detail and the right techniques, you can achieve seamless carpet seams that enhance the overall beauty and functionality of your space.
So go ahead, confidently embark on your carpet seaming journey and enjoy the satisfaction of a perfectly joined carpet!
Frequently Asked Questions about How To Join Carpet Seams
Was this page helpful?
At Storables.com, we guarantee accurate and reliable information. Our content, validated by Expert Board Contributors, is crafted following stringent Editorial Policies. We're committed to providing you with well-researched, expert-backed insights for all your informational needs.