Articles
How To Build A Co2 Kegerator
Modified: October 19, 2024
Learn how to build a CO2 kegerator with our articles. Discover step-by-step instructions and pro tips for a perfect pour every time.
(Many of the links in this article redirect to a specific reviewed product. Your purchase of these products through affiliate links helps to generate commission for Storables.com, at no extra cost. Learn more)
Introduction
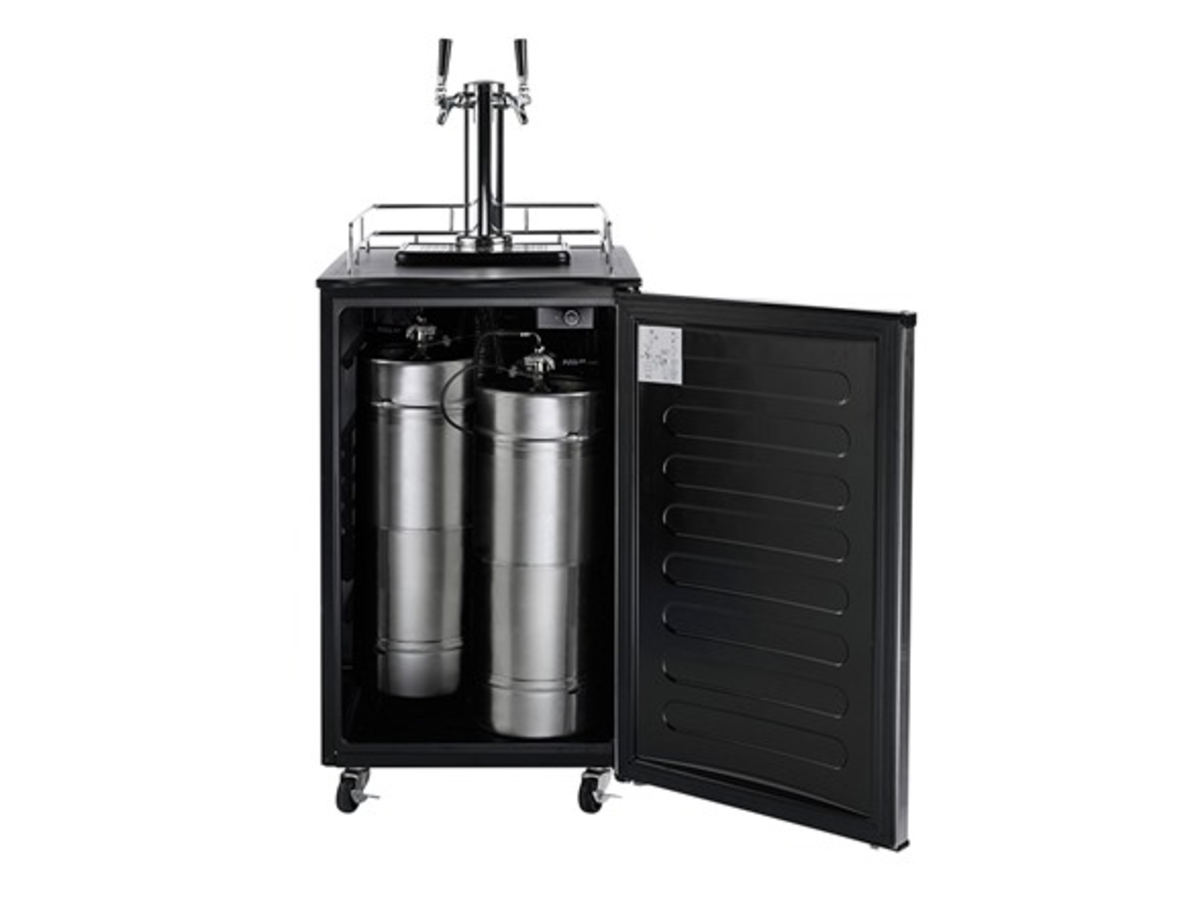
Welcome to the world of homebrewing! If you’re a beer enthusiast, you’ve probably thought about how great it would be to have your own kegerator to dispense fresh draft beer at home. A kegerator is essentially a refrigerator that’s been modified to hold a keg of beer and dispense it using a CO2 system. It’s a fantastic addition to any beer lover’s entertainment space, and building one can be a fun and rewarding project.
In this article, we will guide you through the process of building your own CO2 kegerator. We’ll cover everything from choosing the right refrigerator to assembling the CO2 system and installing the tap system. By the end of this guide, you’ll have all the knowledge and confidence to create a kegerator that will impress your friends and provide you with an endless supply of fresh, cold beer.
Before we dive into the nitty-gritty details, let’s first take a look at the materials you’ll need to gather before getting started.
Key Takeaways:
- Building a CO2 kegerator involves choosing the right refrigerator, assembling the CO2 system, and setting up the tap system. Regular maintenance and troubleshooting are essential for a smooth and enjoyable homebrewing experience.
- Enjoy the satisfaction of pouring perfectly chilled and carbonated beer from your CO2 kegerator. Share the joy of homebrewed beer with friends and loved ones, and continue to explore and refine your brewing skills.
Read more: How Adjust Co2 Kegerator
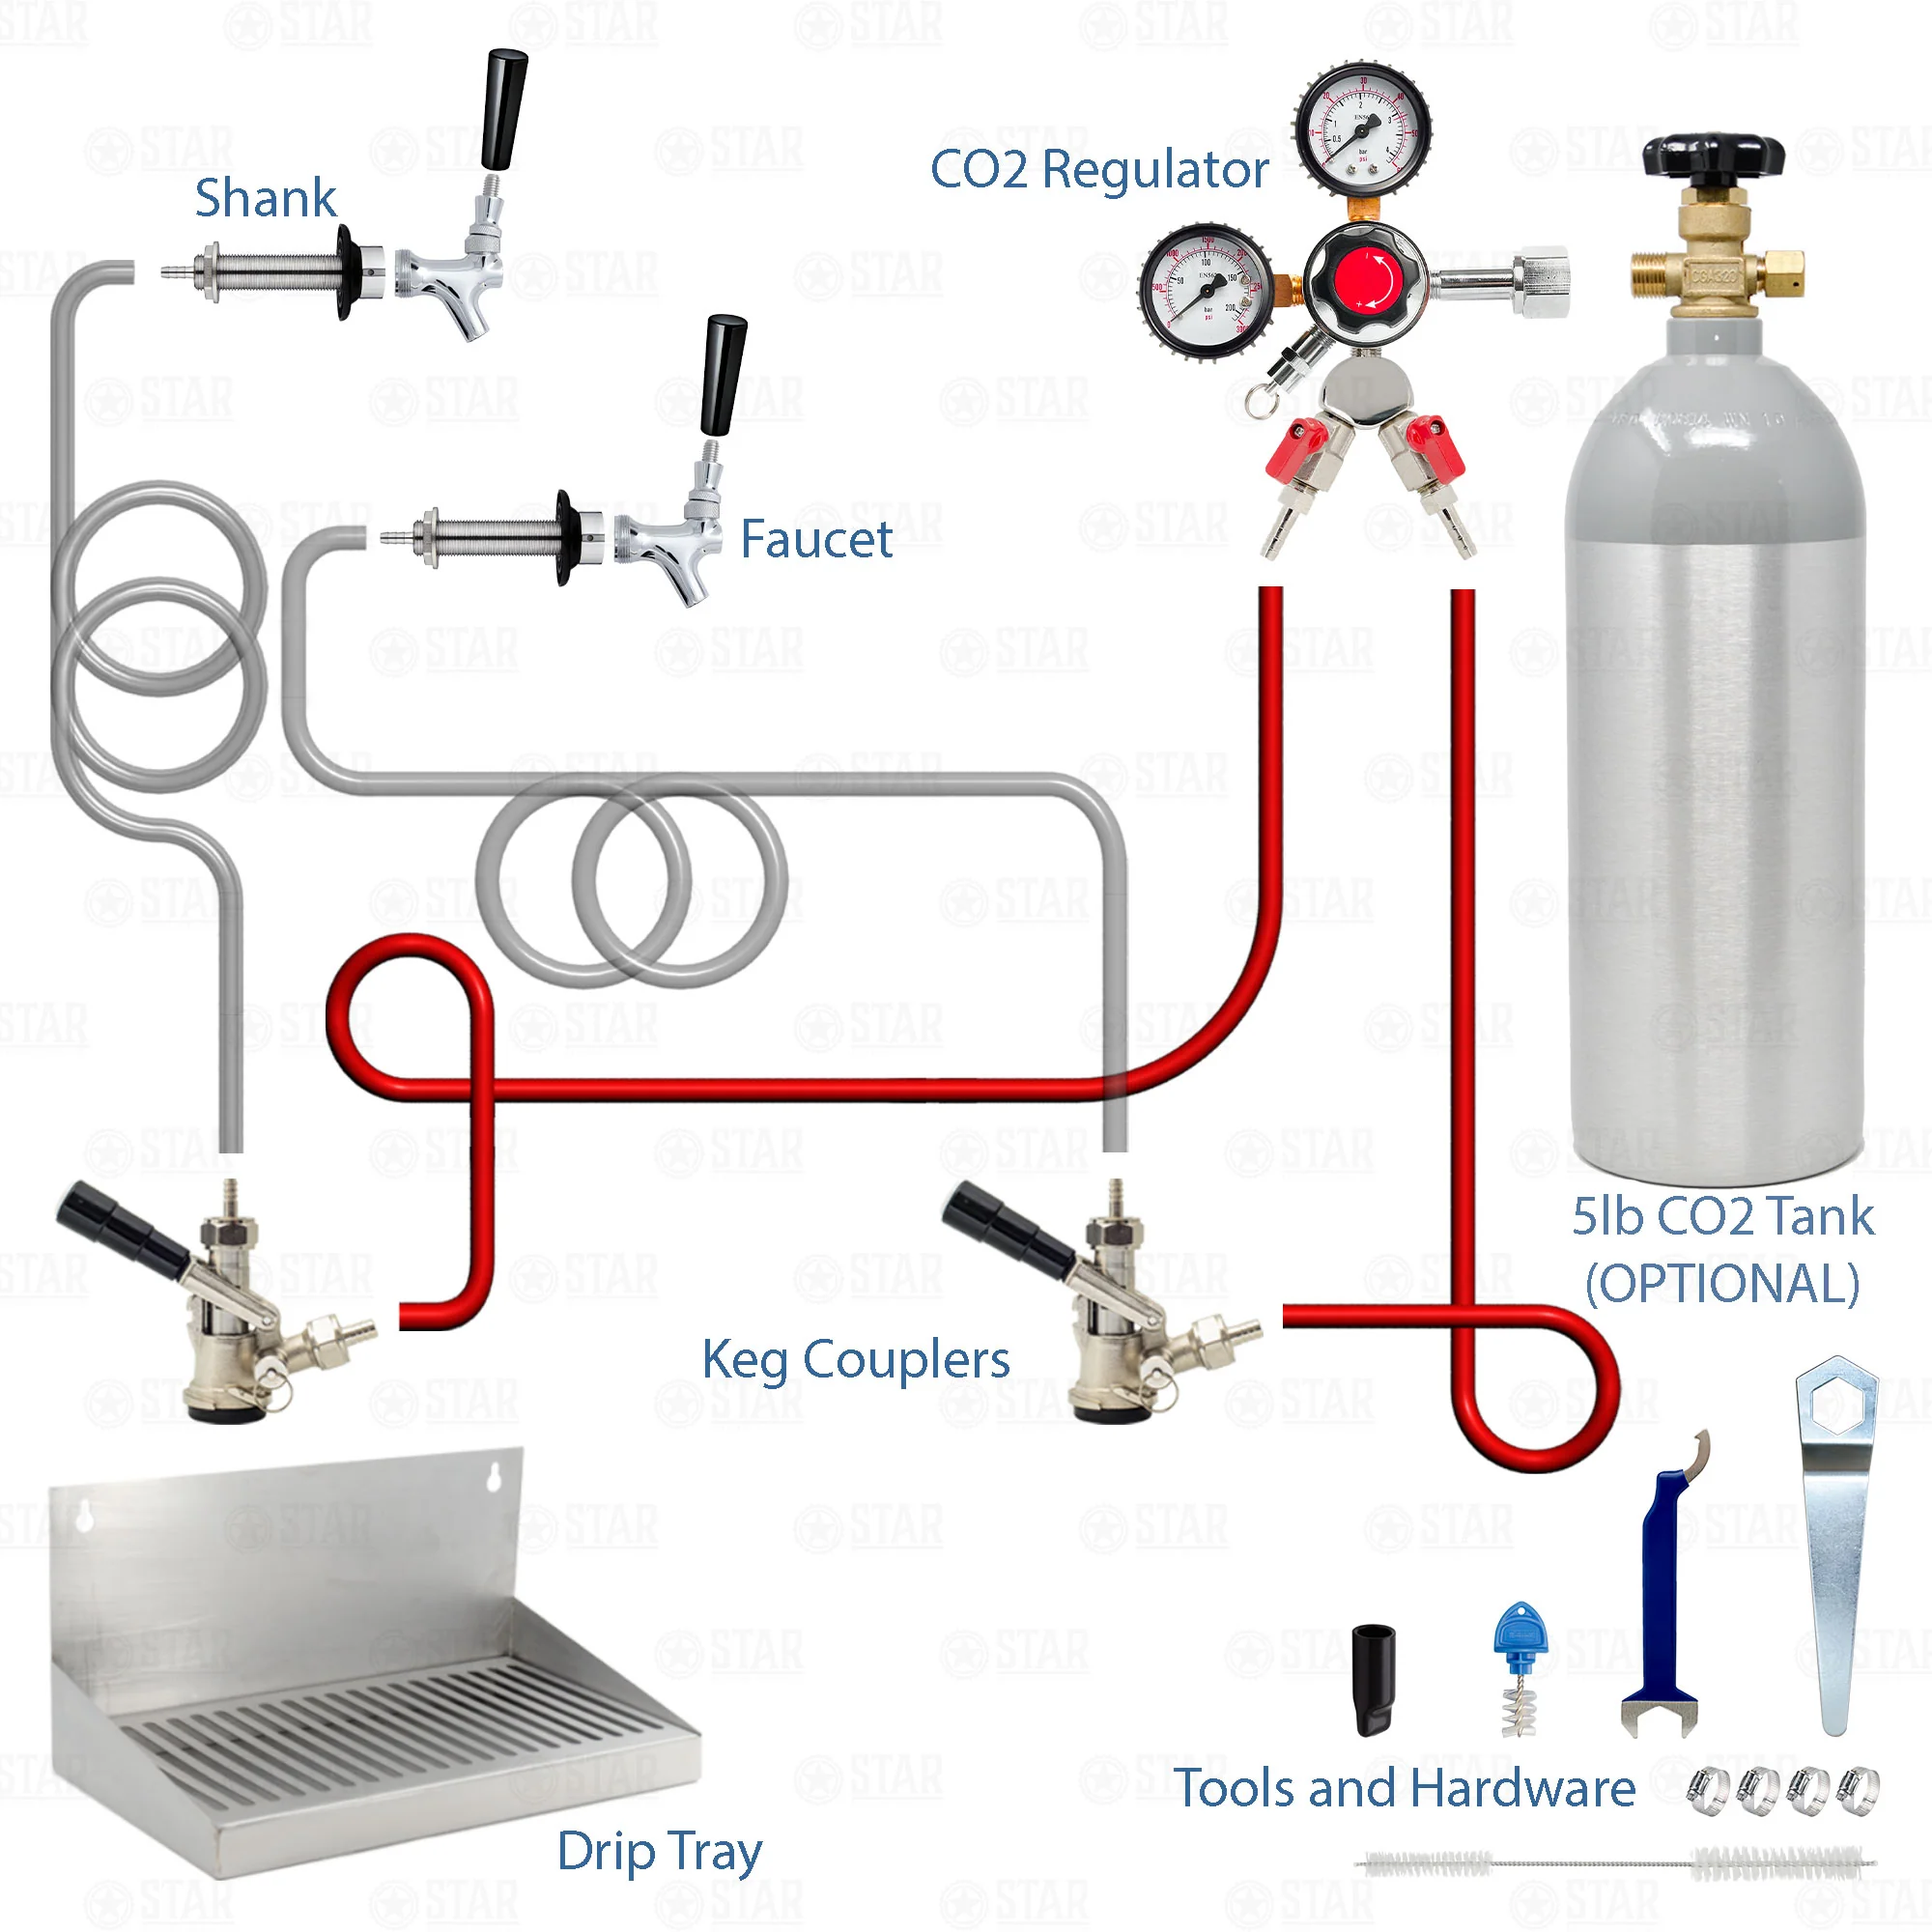
Materials Needed
Building a CO2 kegerator requires some specific materials and equipment. Here is a list of items you’ll need to gather before embarking on this project:
- A refrigerator: Look for a refrigerator that has enough space to accommodate the keg(s) you plan to use. Make sure it has a temperature control feature.
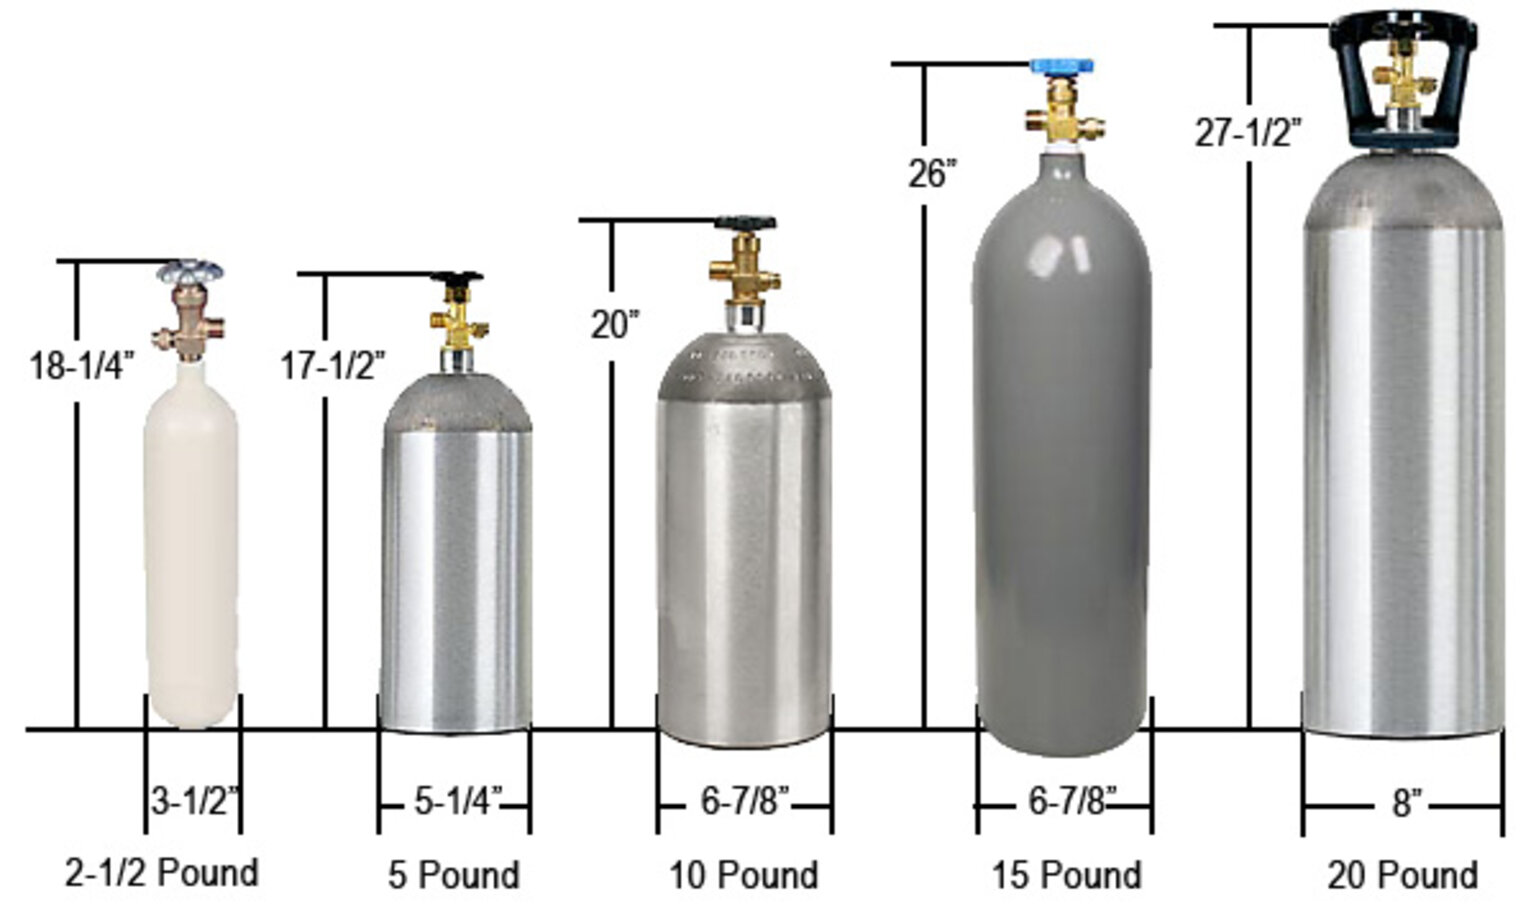
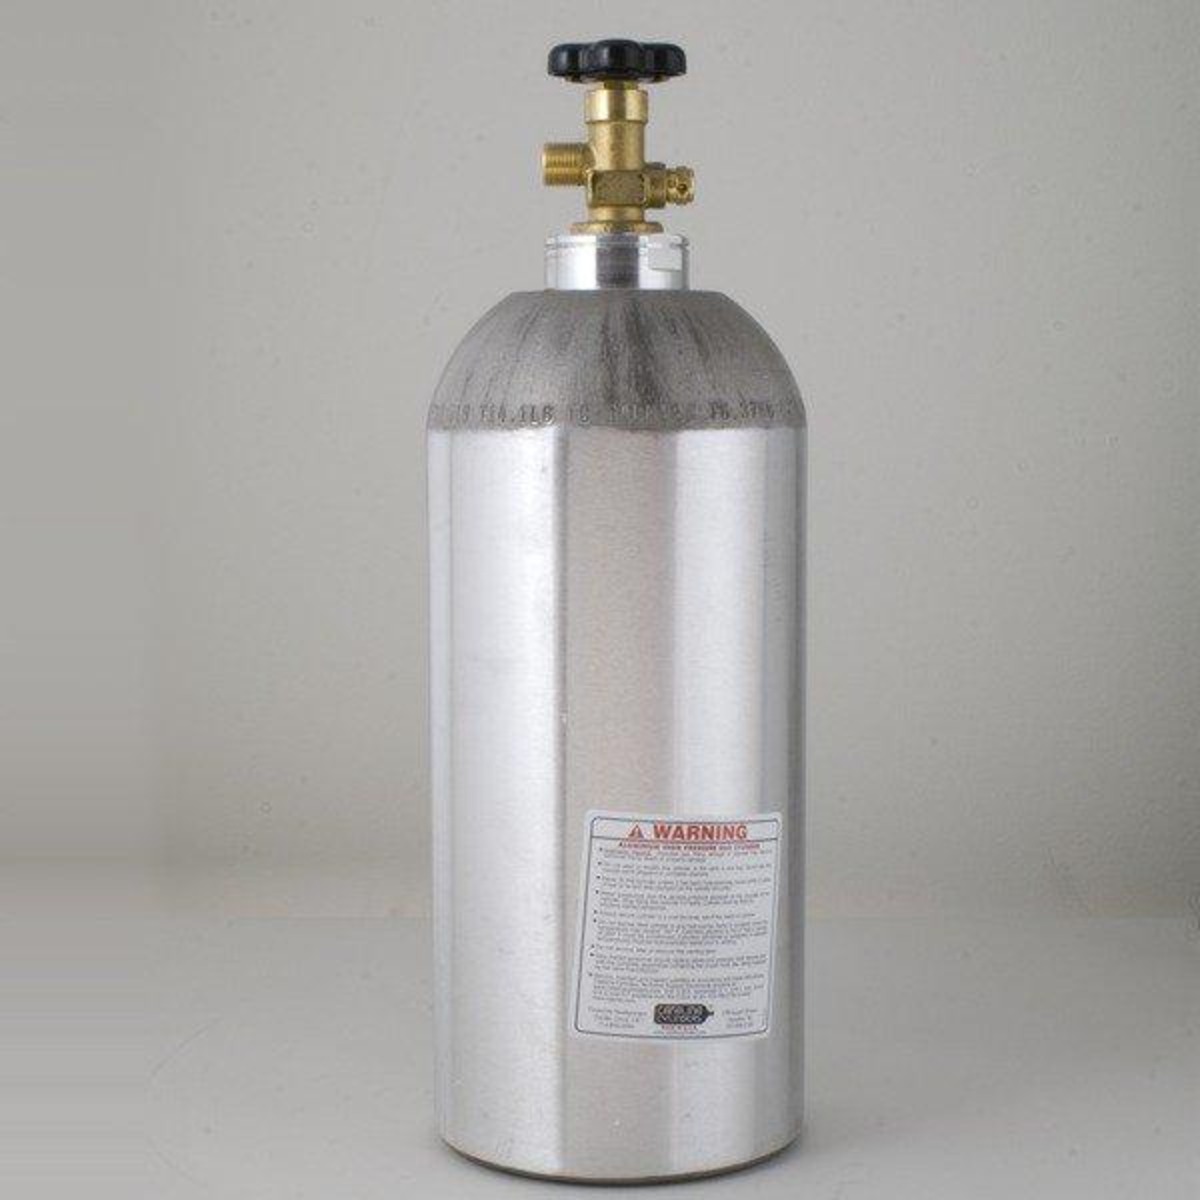
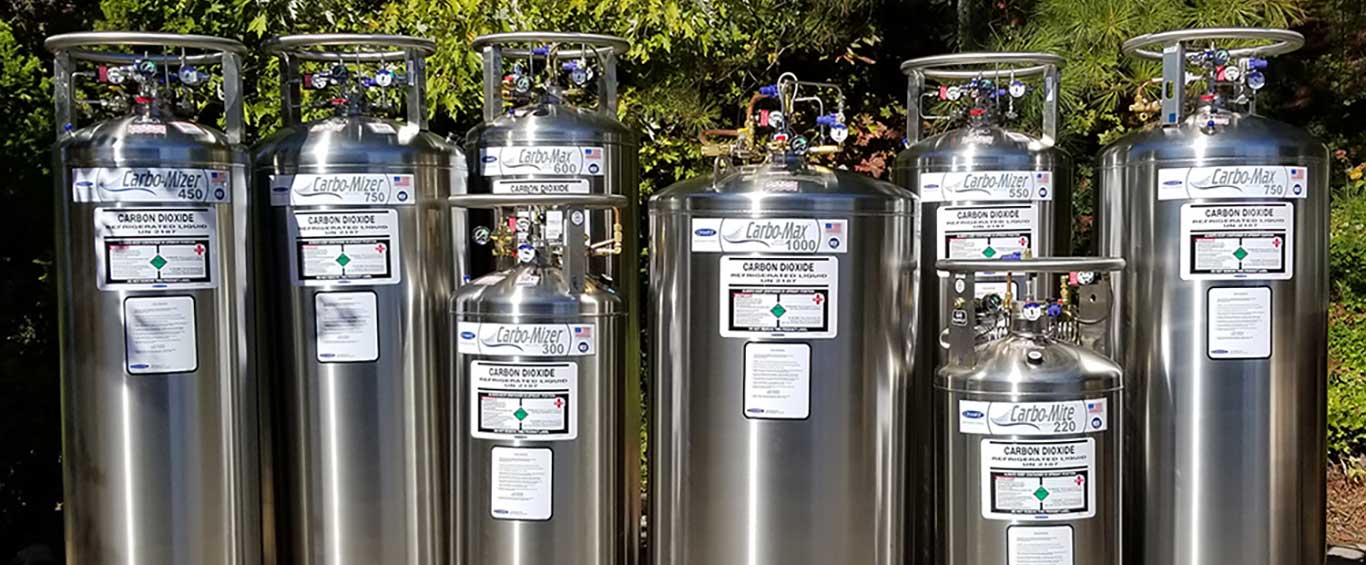
- CO2 tank: The CO2 tank is an essential component of the kegerator. It supplies the carbon dioxide needed to carbonate and dispense the beer. You can find CO2 tanks at local homebrew stores or online.
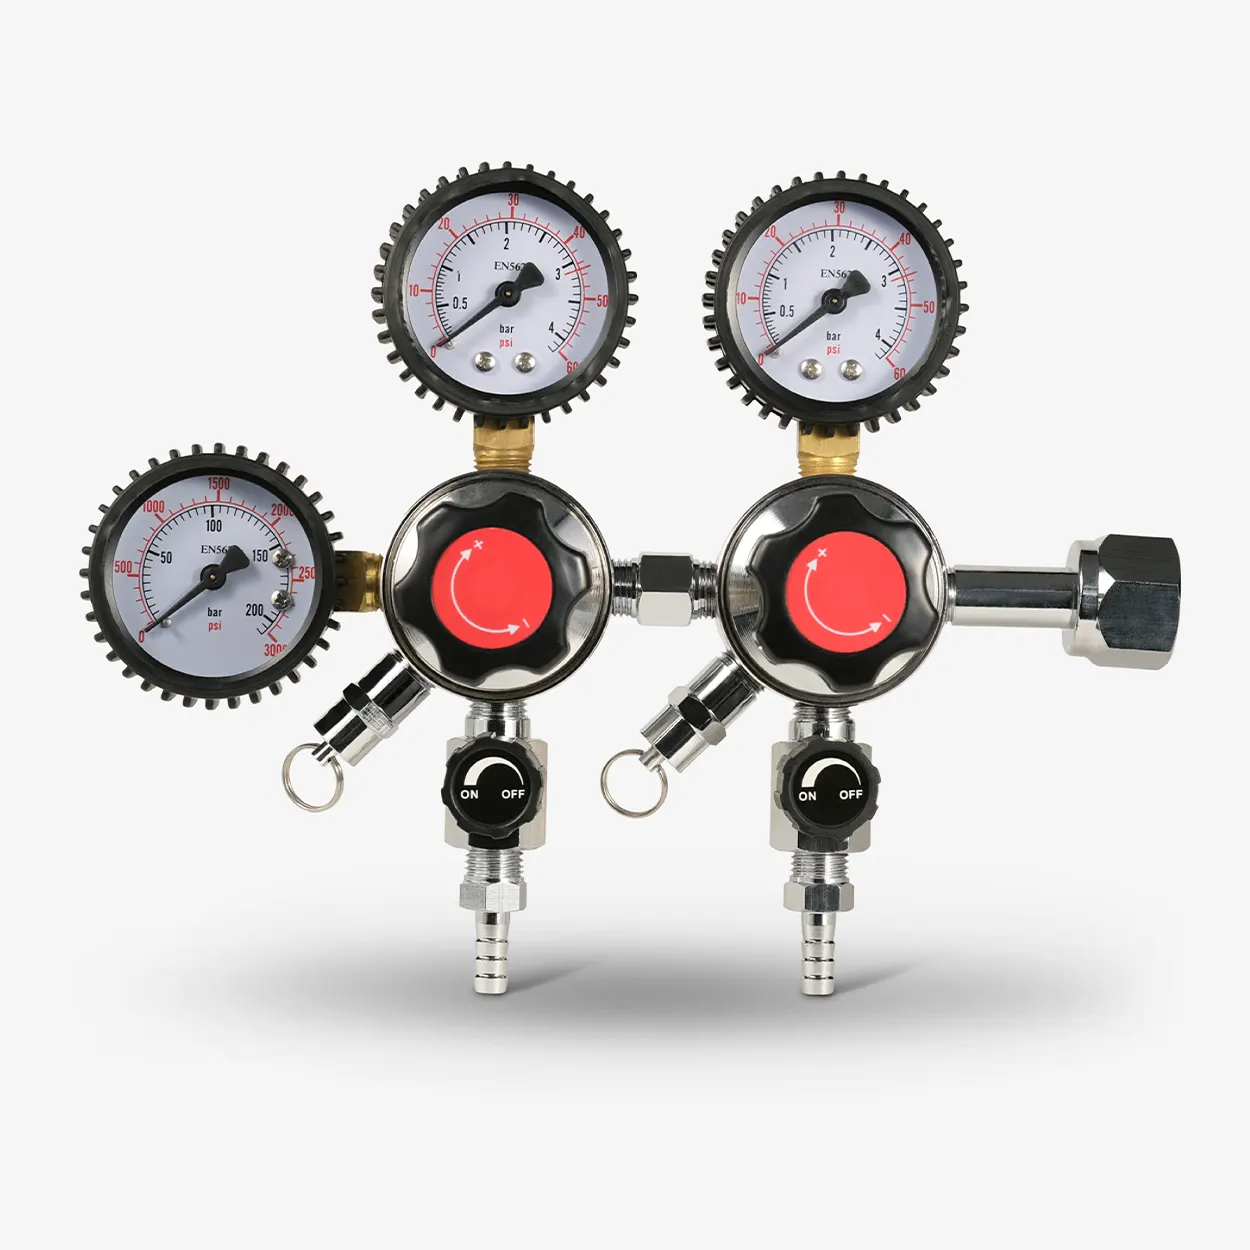
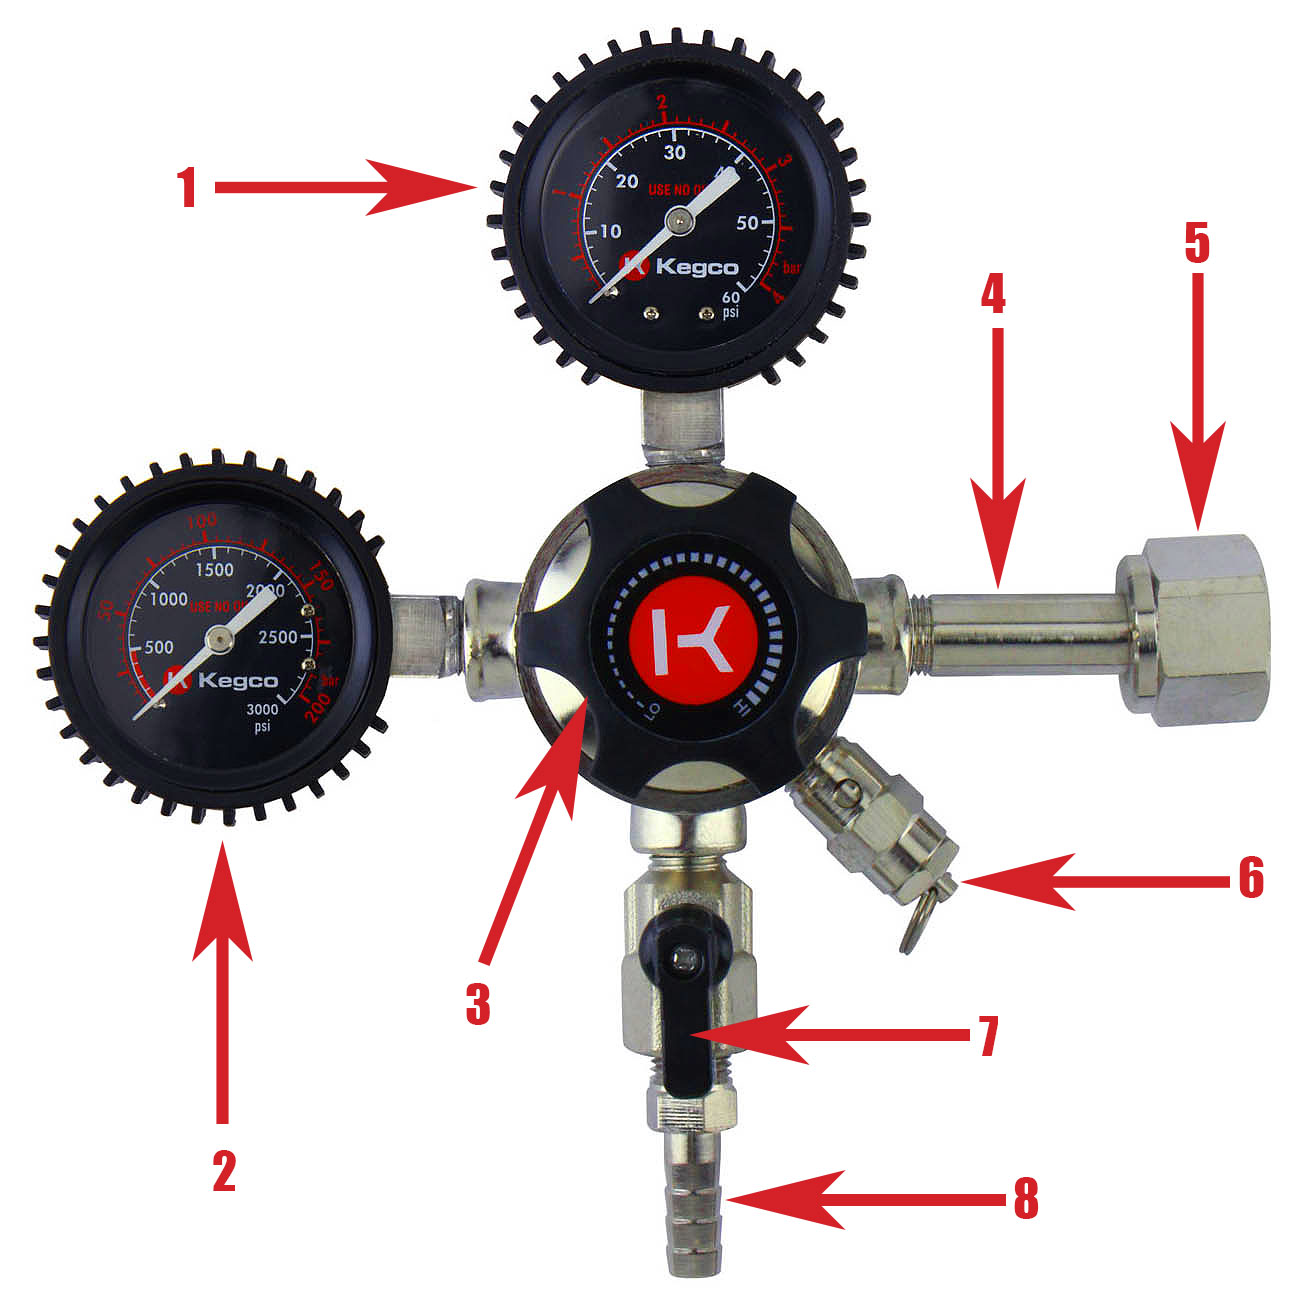
- CO2 regulator: The regulator controls the flow of CO2 from the tank to the keg. Ensure that it is compatible with the size of your CO2 tank and has gauges to monitor the pressure levels.
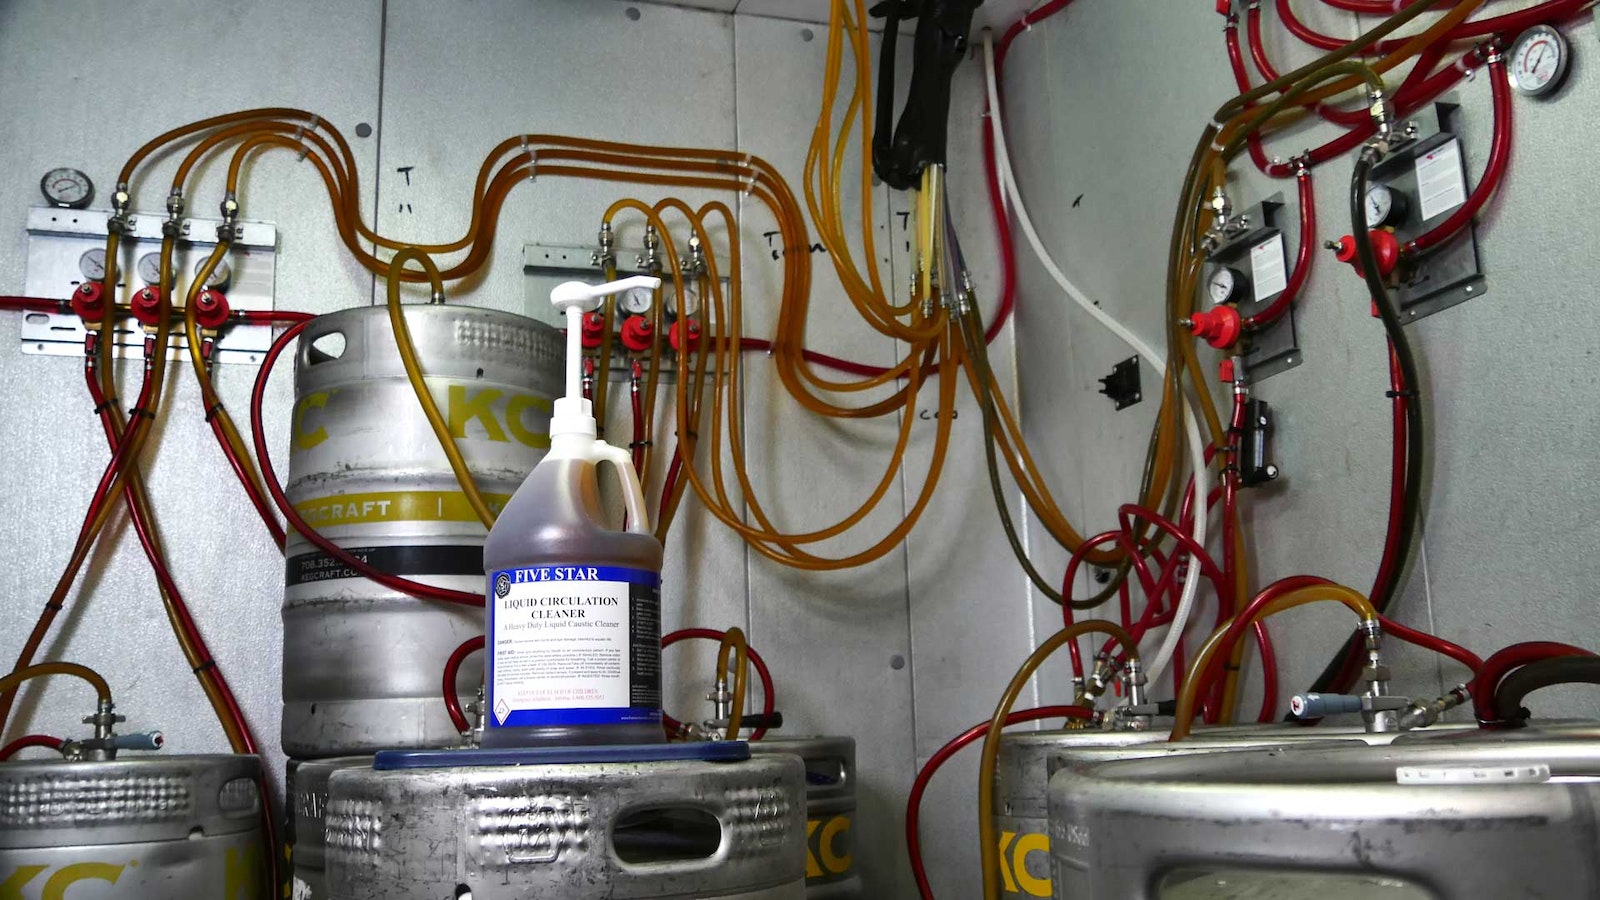
- Gas and beer lines: These are the tubes that connect the CO2 tank to the keg and from the keg to the tap. It’s important to choose food-grade lines that are resistant to flavor and odor absorption.
- Disconnects: These are the fittings that connect the gas and beer lines to the keg. Choose the appropriate type of disconnects based on the style of keg you’ll be using (ball lock or pin lock).
- Faucet/shank assembly: This includes the faucet, shank, and beer line coupling that connects to the keg. Invest in a high-quality, stainless steel faucet for better durability and hygiene.
- Drip tray: A drip tray is placed under the faucet to catch any spilled beer. It helps maintain cleanliness and prevents messes.
- Sanitizing solution: It’s crucial to keep all the equipment clean and sanitized to avoid contamination. Purchase a food-safe sanitizing solution to clean your keg and other components.
- Wrenches and screwdrivers: These tools will be necessary for assembling and mounting various parts of the kegerator.
Make sure you have all these materials ready before you begin building your kegerator. With everything in hand, let’s move on to the first step: choosing the right refrigerator.
Step 1: Choosing the Right Refrigerator
Choosing the right refrigerator is a crucial step in building a CO2 kegerator. Here are some important factors to consider:
Size and Capacity: Make sure the refrigerator you choose has enough space to fit the keg(s) you plan to use. Consider the dimensions and internal capacity of the refrigerator to ensure a proper fit. It’s also important to check if the shelves and compartments can be adjusted or removed to accommodate the kegs.
Temperature Control: Look for a refrigerator that has a temperature control feature. This is essential for maintaining the ideal temperature for storing and serving beer. The refrigerator should be able to maintain a temperature range of 38-40 degrees Fahrenheit (3-4 degrees Celsius).
Energy Efficiency: Opt for a refrigerator that is energy-efficient to minimize energy consumption and reduce your utility bills. Look for models with an Energy Star certification, as they meet the highest energy efficiency standards.
Door Configuration: Consider the door configuration of the refrigerator. A single-door refrigerator is typically more convenient for installing the CO2 system, while a double-door refrigerator provides easier access to the kegs. Choose the configuration that suits your preferences and available space.
Used or New: You can choose to buy a brand new refrigerator or opt for a used one. Used refrigerators can be more cost-effective, but make sure to thoroughly inspect them for any potential issues or malfunctions.
Price Range: Set a budget for your kegerator project and choose a refrigerator within that price range. Consider the features and specifications that are most important to you while staying within your budget.
Research and Reviews: Before making a purchase, read reviews and do some research on the refrigerator models you’re considering. Look for feedback on their performance, reliability, and durability.
Once you’ve selected the right refrigerator, ensure that it is clean and in good working condition before proceeding to the next steps. Remove any unwanted shelves or compartments to create space for the keg and CO2 system.
In the next step, we’ll gather the equipment needed for the CO2 system. Let’s move on!
Step 2: Gathering the Equipment
Now that you’ve chosen the right refrigerator for your kegerator project, it’s time to gather the equipment needed for the CO2 system. Here’s a list of the essential components you’ll need:
- CO2 Tank: The CO2 tank is a critical component of the kegerator. It supplies the carbon dioxide needed to carbonate and dispense the beer. Determine the appropriate size of the CO2 tank based on your usage and the number of kegs you plan to have on tap.
- CO2 Regulator: The regulator controls the flow of CO2 from the tank to the keg. Select a high-quality regulator that is compatible with the size of your CO2 tank. It should also have gauges to monitor the pressure levels.
- Gas and Beer Lines: These flexible tubes transport the CO2 gas from the tank to the keg and the beer from the keg to the tap. Make sure to choose food-grade lines that are resistant to flavor and odor absorption. The length of the lines will depend on the distance between the kegerator and the faucet location.
- Disconnects: These fittings connect the gas and beer lines to the keg. Make sure to get the appropriate type of disconnects for your kegs – ball lock or pin lock – depending on their style. You will need one gas disconnect and one beer disconnect for each keg.
- Faucet/Shank Assembly: This includes the faucet, shank, and beer line coupling that connects to the keg. Invest in a high-quality, stainless steel faucet for better durability and hygiene. The shank and coupling should be compatible with your faucet and beer lines.
- Drip Tray: A drip tray is placed under the faucet to catch any spilled beer and prevent messes. Choose a drip tray that fits the size of your kegerator and is easy to clean.
- Sanitizing Solution: It’s crucial to keep all the equipment clean and sanitized to prevent contamination. Get a food-safe sanitizing solution to clean your kegs, lines, disconnects, and faucet.
- Wrenches and Screwdrivers: These tools will be necessary for assembling and mounting various parts of the CO2 system. Make sure you have the appropriate wrenches and screwdrivers for the job.
Once you have gathered all the necessary equipment, you’re ready to move on to the next step: assembling the CO2 system. We’ll guide you through the process in the following step, so let’s get started!
Step 3: Assembling the CO2 System
With all the necessary equipment in hand, it’s time to assemble the CO2 system for your kegerator. Follow these steps to ensure a successful and operational setup:
- Clean and Sanitize: Before you begin assembling the CO2 system, make sure to clean and sanitize all the components to avoid any contamination. Use the sanitizing solution as directed, and rinse everything thoroughly with clean water.
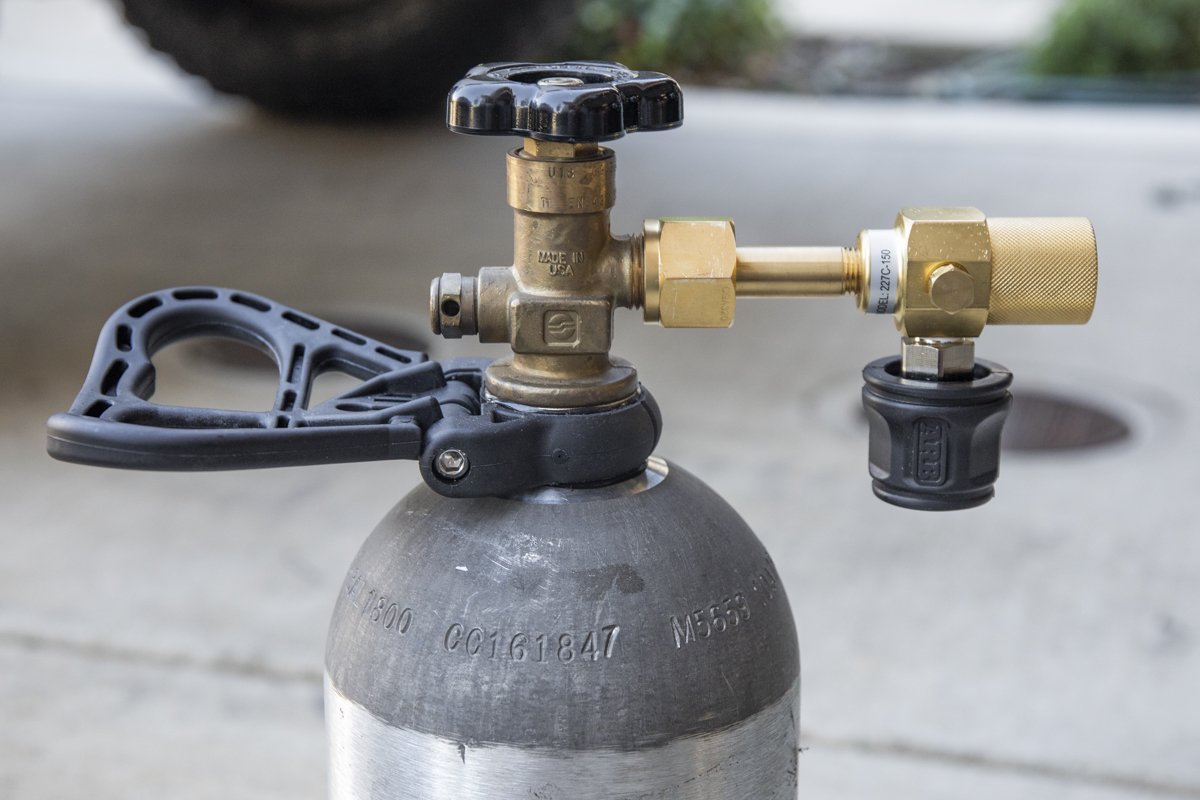
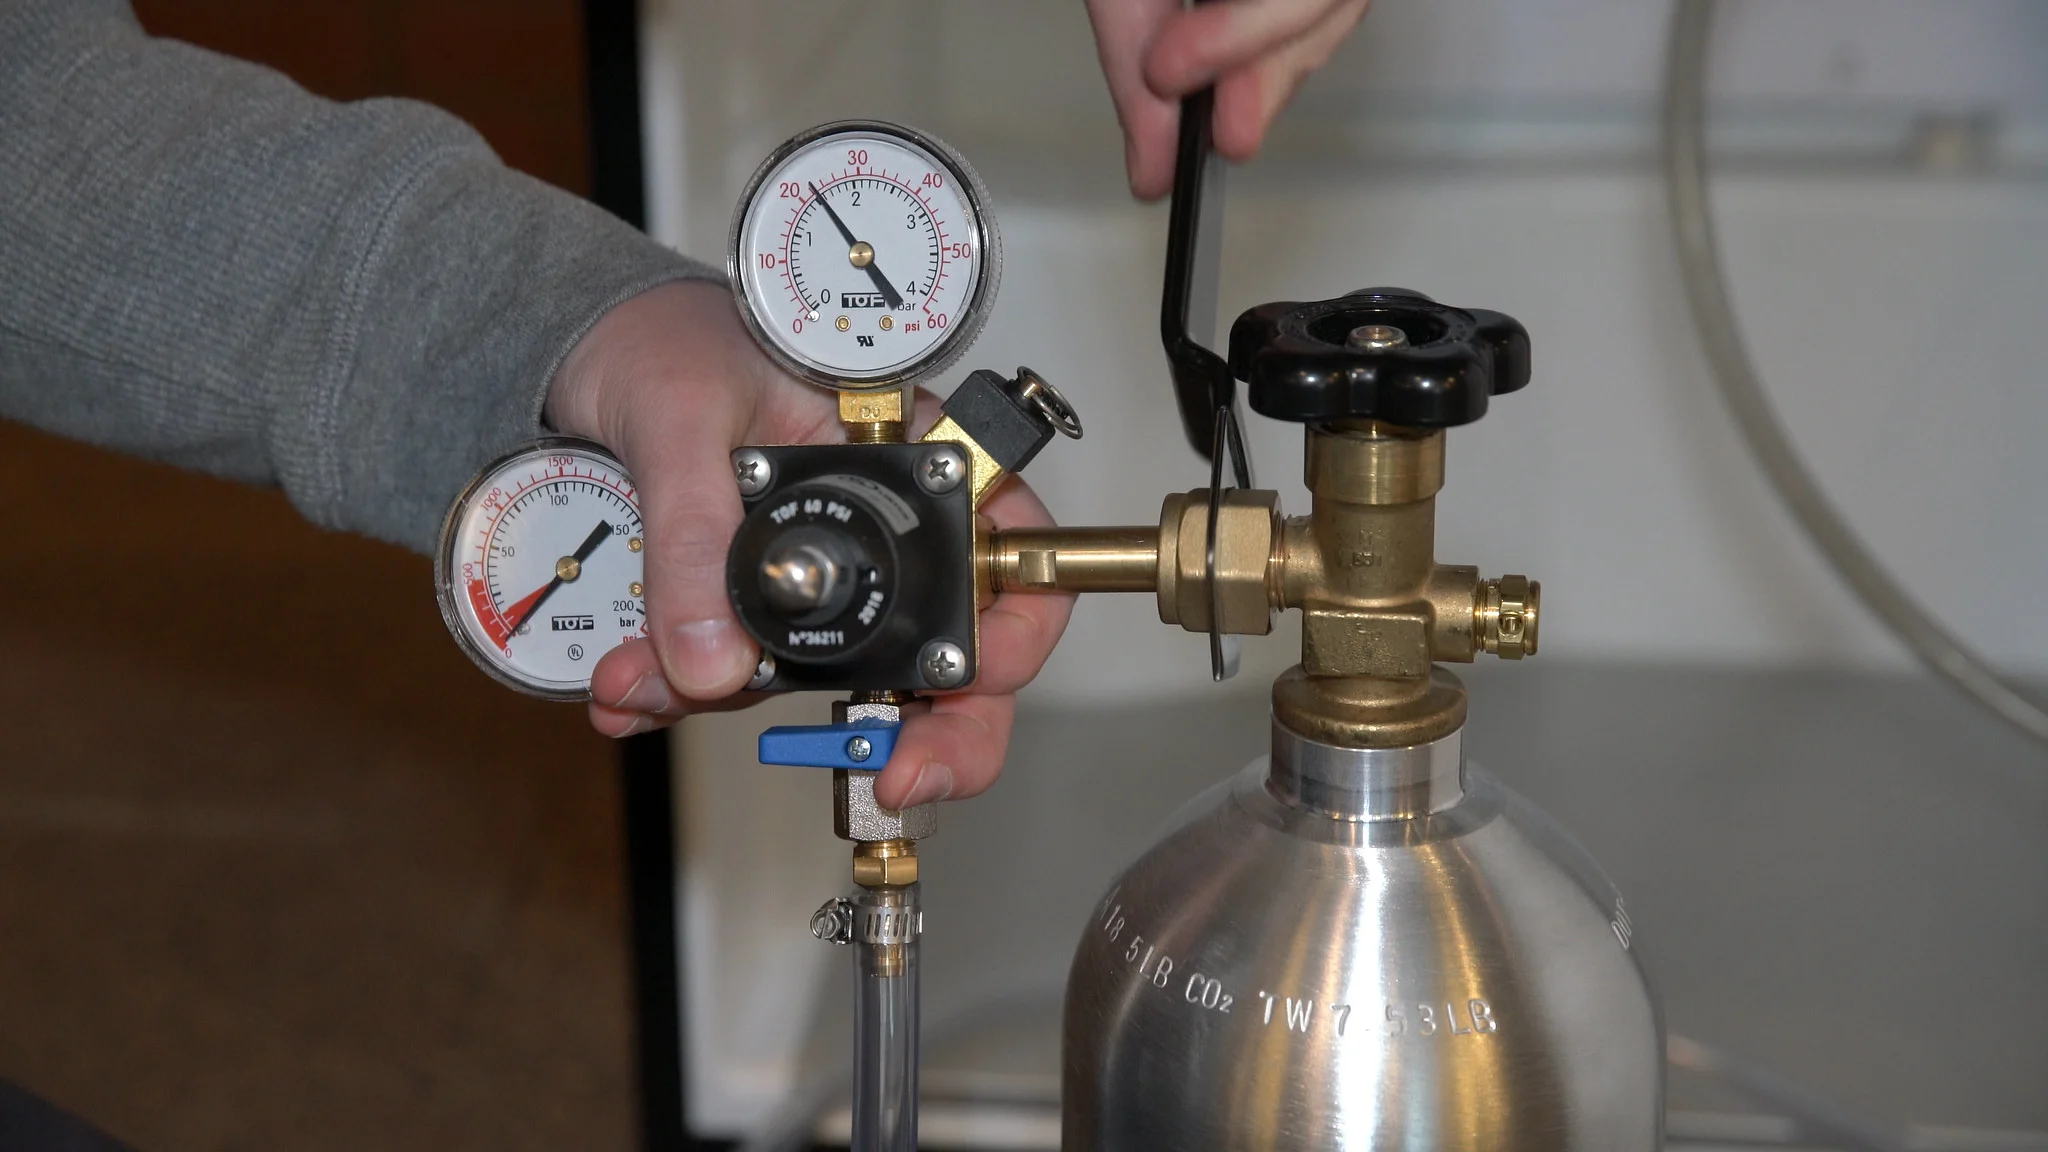
- Attach the Regulator: Start by attaching the CO2 regulator to the CO2 tank. Ensure that the regulator valve is closed before making any connections. Slowly and firmly screw the regulator onto the CO2 tank valve using a wrench to ensure a tight seal. Be careful not to over-tighten, as this can damage the threads.
- Connect the Gas Line: Take the gas line and connect one end to the barbed fitting on the regulator. Secure it with a hose clamp to ensure a snug fit. The other end of the gas line will be connected to the gas disconnect on the keg, but we’ll cover that in a later step.
- Check for Leaks: Once you have connected the gas line, it’s important to check for any leaks. Apply a mixture of water and dish soap to all the connections and look for bubbles. If you see bubbles forming, it means there is a leak. Tighten the connections or replace any faulty components as needed.
By following these steps, you will have successfully assembled the basic components of your CO2 system. In the next step, we will guide you on how to mount the CO2 tank properly. Stay tuned!
Read more: Where To Get Co2 For A Kegerator
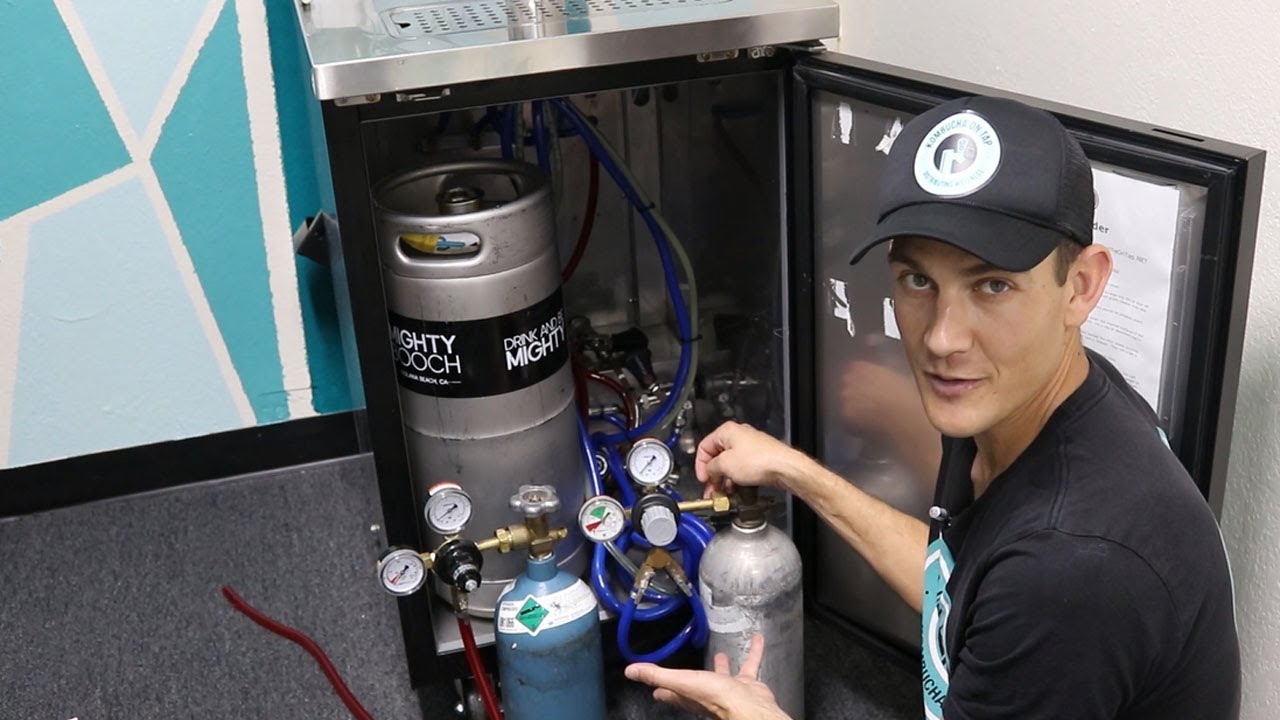
Step 4: Mounting the CO2 Tank
Mounting the CO2 tank securely is an essential step in building a CO2 kegerator. By properly securing the tank, you’ll ensure the safety and stability of your setup. Here’s how you can mount the CO2 tank:
- Choose a Mounting Location: Select a suitable location inside the kegerator where you can mount the CO2 tank. It should be easily accessible and have enough space to accommodate the tank. Consider factors like the size of your kegerator and the length of the gas line to determine the best position.
- Install the Tank Bracket: Most kegerators come with a detachable bracket or strap that can be used to secure the CO2 tank. Attach the bracket to the chosen location using screws or bolts. Make sure the bracket is securely fastened to avoid any movement or shifting during operation.
- Secure the CO2 Tank: Place the CO2 tank into the bracket and align it properly. Ensure that the tank is in an upright position to prevent any leaks. Use the provided straps or clamps to secure the tank tightly to the bracket. Double-check the attachment to ensure that the tank is firmly in place.
- Check for Clearance: Verify that the CO2 tank is not obstructing any other components or the keg itself. Ensure that there is enough clearance between the tank and other parts of the kegerator to allow for proper installation and operation.
Once you have mounted the CO2 tank securely, take a step back and inspect the setup to ensure that everything is in order. Make any necessary adjustments or tightening as needed. With the CO2 tank in place, it’s time to move on to the next step: installing the regulator and gauges.
Stay tuned for the detailed instructions on how to complete this step!
When building a CO2 kegerator, make sure to properly insulate the inside of the fridge to maintain a consistent temperature and reduce energy consumption.
Step 5: Installing the Regulator and Gauges
Installing the regulator and gauges is a crucial step in setting up your CO2 kegerator. The regulator controls the flow of CO2 from the tank to the keg, while the gauges help monitor the pressure levels. Here’s a step-by-step guide on how to install them:
- Unscrew the CO2 Tank Valve: Before installing the regulator, ensure that the CO2 tank valve is closed. Slowly and firmly unscrew the valve to release any remaining pressure. Take caution not to remove the valve completely to prevent any sudden releases of gas.
- Attach the Regulator to the CO2 Tank: Take the CO2 regulator and screw it onto the CO2 tank valve. Use a wrench to securely fasten the regulator onto the tank. Make sure it is tightened enough to prevent any leaks, but don’t over-tighten to avoid damaging the threads.
- Connect the Gas Line: Take the gas line connected to the regulator and attach the other end to the gas disconnect on the keg. Ensure a tight and secure connection, and use a hose clamp if necessary. This will allow the flow of CO2 from the tank to the keg.
- Check for Leaks: Once the regulator and gas line are connected, it’s crucial to check for any gas leaks. Apply a mixture of water and dish soap to all the connections, including the regulator and disconnects. Look for any bubbles forming, which indicates a leak. If there are any leaks, tighten the connections or replace faulty components.
- Attach the Gauges to the Regulator: The regulator should have gauges that indicate the pressure levels of the CO2 tank and the keg. Attach the gauges to the regulator by screwing them into the designated ports. Ensure that they are securely fastened and easily readable.
- Adjust the Pressure: The regulator will have a control knob or dial that allows you to adjust the pressure. Refer to the manufacturer’s instructions or guidelines to set the appropriate pressure for your specific beer style or personal preference.
Once you have installed the regulator and gauges and ensured that there are no leaks, take a moment to double-check the setup. Confirm that the gas line is securely attached and the gauges are functioning correctly. With the regulator and gauges in place, you’re now ready to move on to the next step: connecting the CO2 tank to the keg.
Stay tuned for detailed instructions on how to complete this important step!
Step 6: Connecting the CO2 Tank to the Keg
Connecting the CO2 tank to the keg is a critical step in the process of building your CO2 kegerator. This step ensures that your keg will be properly pressurized, allowing for the carbonation and dispensing of your beer. Here’s how to connect the CO2 tank to the keg:
- Ensure Proper Pressure Setting: Before connecting the CO2 tank to the keg, make sure you have properly set the pressure on the regulator. Refer to the specific beer style guidelines or manufacturer’s instructions to determine the appropriate pressure.
- Sanitize keg fittings: It’s crucial to keep all the keg fittings clean to prevent any contamination. Thoroughly sanitize the gas disconnect and beer disconnect on the keg, using a food-safe sanitizing solution.
- Connect the Gas Line: Take the gas line that is connected to the regulator and attach it to the gas disconnect on the keg. Make sure the connection is firm and secure. You may need to push down or twist the gas disconnect to properly engage it with the keg.
- Check for Gas Leaks: Once the gas line is connected, check for any gas leaks. Apply a mixture of water and dish soap to the connections and look for bubbles. If you notice any bubbles forming, it indicates a leak. Tighten the connections or replace faulty components as needed.
- Purge the Keg: To ensure the best quality beer, it’s important to purge the keg of any oxygen. This can be done by briefly opening the relief valve or pulling up on the pressure release on the gas disconnect. This will allow any oxygen inside the keg to be displaced by CO2.
- Connect the Beer Line: Take the beer line connected to the faucet and attach the other end to the beer disconnect on the keg. Again, ensure a tight and secure connection. You may need to push down or twist the beer disconnect to properly engage it with the keg.
- Check for Beer Leaks: Once the beer line is connected, check for any beer leaks. Look for any visible drips or leaks around the beer disconnect and connections. Tighten any loose fittings or replace any faulty components.
After connecting the CO2 tank to the keg, double-check all the connections to ensure they are secure and leak-free. Once you’re confident in the setup, you’re ready to move on to the next step: setting up the tap system.
Stay tuned for detailed instructions on how to complete this step and start pouring your own draft beer!
Step 7: Setting Up the Tap System
The tap system is the final piece of the puzzle for your CO2 kegerator. Setting up the tap system involves installing the faucet, shank, and beer line, allowing you to dispense your delicious homebrewed beer. Follow these steps to set up the tap system:
- Prepare the Faucet and Shank: Start by attaching the faucet to the shank. Ensure that all the components are clean and sanitized before assembly. Tighten the faucet onto the shank using the provided wrench, ensuring it is securely fastened.
- Measure and Cut the Beer Line: Measure the distance between the shank and the beer disconnect on the keg. Cut the beer line to the appropriate length, leaving a bit of extra length to work with. Use a clean, sharp blade to make a clean cut.
- Attach the Beer Line: Take the cut end of the beer line and attach a beer line coupling. Slide the coupling onto the shank until it is snug and secure. Ensure a tight connection, using a hose clamp if necessary.
- Connect the Faucet to the Shank: Slide the shank through the pre-drilled hole in your kegerator door or drip tray. Secure it from the inside using the provided hardware. Ensure that the faucet is positioned properly and tightened adequately.
- Connect the Beer Line to the Keg: Take the other end of the beer line and attach it to the beer disconnect on the keg. Ensure a secure connection, pushing down or twisting the disconnect as needed.
- Purge the Faucet and Line: Before pouring your beer, it’s crucial to purge any air from the faucet and beer line. Release a small amount of beer by briefly opening the faucet. This will remove any air and ensure that you’ll get pure beer when you start pouring.
- Test the Tap System: Give the tap system a test run to ensure everything is working as expected. Open the faucet and let some beer flow through. Check for any leaks, and make adjustments or tighten connections as needed. Take note of how the beer pours and adjust the pressure if necessary.
Once you’ve successfully set up the tap system and tested it, you’re ready to enjoy your homebrewed beer on tap! Keep in mind that proper cleaning and maintenance of the tap system are essential to ensure the longevity of your kegerator and the quality of your beer.
Congratulations on completing the setup of your CO2 kegerator! In the final step, we’ll cover some testing and troubleshooting tips to make sure everything is running smoothly.
Read more: How To Use A Kegerator Co2 Regulator
Step 8: Testing and Troubleshooting
Before you can sit back and enjoy your freshly poured draft beer, it’s important to test and troubleshoot your CO2 kegerator to ensure everything is running smoothly. Follow these steps to test and troubleshoot your kegerator:
- Check for Leaks: Conduct a thorough inspection of all connections and fittings to ensure there are no leaks. Look for any signs of dripping or bubbles forming when applying a mixture of water and dish soap to the connections. Tighten any loose fittings or replace faulty components.
- Monitor the Pressure: Keep an eye on the pressure gauges of your CO2 tank and regulator. The pressure should be set according to the specific beer style or your preference. Make adjustments to the regulator as needed, ensuring proper carbonation and dispensing pressure.
- Test the Pour: Pour a glass of beer and assess the flow and carbonation. Check for any issues like excessive foam, slow pouring, or a lack of carbonation. Adjust the pressure and temperature if necessary, and check for obstructions or kinks in the lines.
- Practice Proper Cleaning and Maintenance: Regularly clean and sanitize all the components of your kegerator to prevent bacterial growth and maintain the quality of your beer. Follow manufacturer guidelines for cleaning solutions and procedures, and ensure that all parts are thoroughly rinsed and dried before reassembly.
- Troubleshoot Common Issues: If you encounter any issues with your kegerator, such as inconsistent pouring, off-flavors, or unusual noises, consult troubleshooting guides or reach out to fellow homebrewers for assistance. Common issues can often be resolved with simple adjustments or part replacements.
- Keep a Maintenance Schedule: Create a maintenance schedule to stay on top of cleaning, sanitizing, and inspecting your kegerator. Regularly check for any wear and tear on components, replace worn-out seals or gaskets, and ensure proper functioning of all parts.
Remember, troubleshooting and maintenance are ongoing practices. Don’t hesitate to seek help from experienced homebrewers or consult resources online for detailed troubleshooting guides. With proper testing, maintenance, and troubleshooting, you’ll be able to enjoy your homebrewed beer on tap with minimal issues.
Congratulations on successfully completing your CO2 kegerator! Now, sit back, relax, and indulge in the joy of pouring and savoring your delicious homebrewed beer.
Pro tip: Document your setup and troubleshooting experiences to help others in the homebrewing community and to ensure you have a reference for future projects or upgrades.
Happy homebrewing and cheers to many refreshing pints from your CO2 kegerator!
Conclusion
Congratulations! You have now successfully built your own CO2 kegerator, bringing the joy of draft beer into your home. By following the steps outlined in this guide, you have learned how to choose the right refrigerator, gather the necessary equipment, assemble the CO2 system, mount the CO2 tank, install the regulator and gauges, connect the CO2 tank to the keg, set up the tap system, and test and troubleshoot your kegerator.
Having your own kegerator not only enhances your beer-drinking experience but also allows you to showcase and share your homebrewed creations with friends, family, and fellow beer enthusiasts. With proper maintenance and care, your kegerator will provide you with countless hours of enjoyment as you continue to explore and refine your brewing skills.
Remember to clean and sanitize your kegerator regularly to maintain the quality and taste of your beer. Keep an eye on pressure levels, carbonation, and temperature to ensure optimal pouring and serving conditions. Troubleshoot any issues that may arise promptly, and don’t hesitate to seek guidance and support from the homebrewing community.
Enjoy the satisfaction of pouring a perfectly chilled and carbonated beer, and revel in the convenience of having draft beer at your fingertips whenever you desire. Share the joy of your kegerator with friends and loved ones, and watch as it becomes a centerpiece of gatherings and celebrations.
Now that you have completed this project, feel free to experiment, innovate, and further personalize your kegerator with additional features or upgrades. Keep exploring the world of homebrewing, expand your beer knowledge, and continue to refine your craft.
Thank you for embarking on this journey with us, and we wish you many delightful moments of pouring, tasting, and celebrating your own homebrewed beer with your CO2 kegerator. Cheers!
Frequently Asked Questions about How To Build A Co2 Kegerator
Was this page helpful?
At Storables.com, we guarantee accurate and reliable information. Our content, validated by Expert Board Contributors, is crafted following stringent Editorial Policies. We're committed to providing you with well-researched, expert-backed insights for all your informational needs.


0 thoughts on “How To Build A Co2 Kegerator”