Articles
How To Use Kegerator For Home Brew
Modified: October 21, 2024
Learn how to use a kegerator for home brew with our informative articles. Discover the best tips and techniques to elevate your brewing experience.
(Many of the links in this article redirect to a specific reviewed product. Your purchase of these products through affiliate links helps to generate commission for Storables.com, at no extra cost. Learn more)
Introduction
Welcome to the world of home brewing! If you’re passionate about brewing your own beer, then you know how important it is to have the right equipment to create the perfect pint. One essential piece of equipment every home brewer should consider is a kegerator.
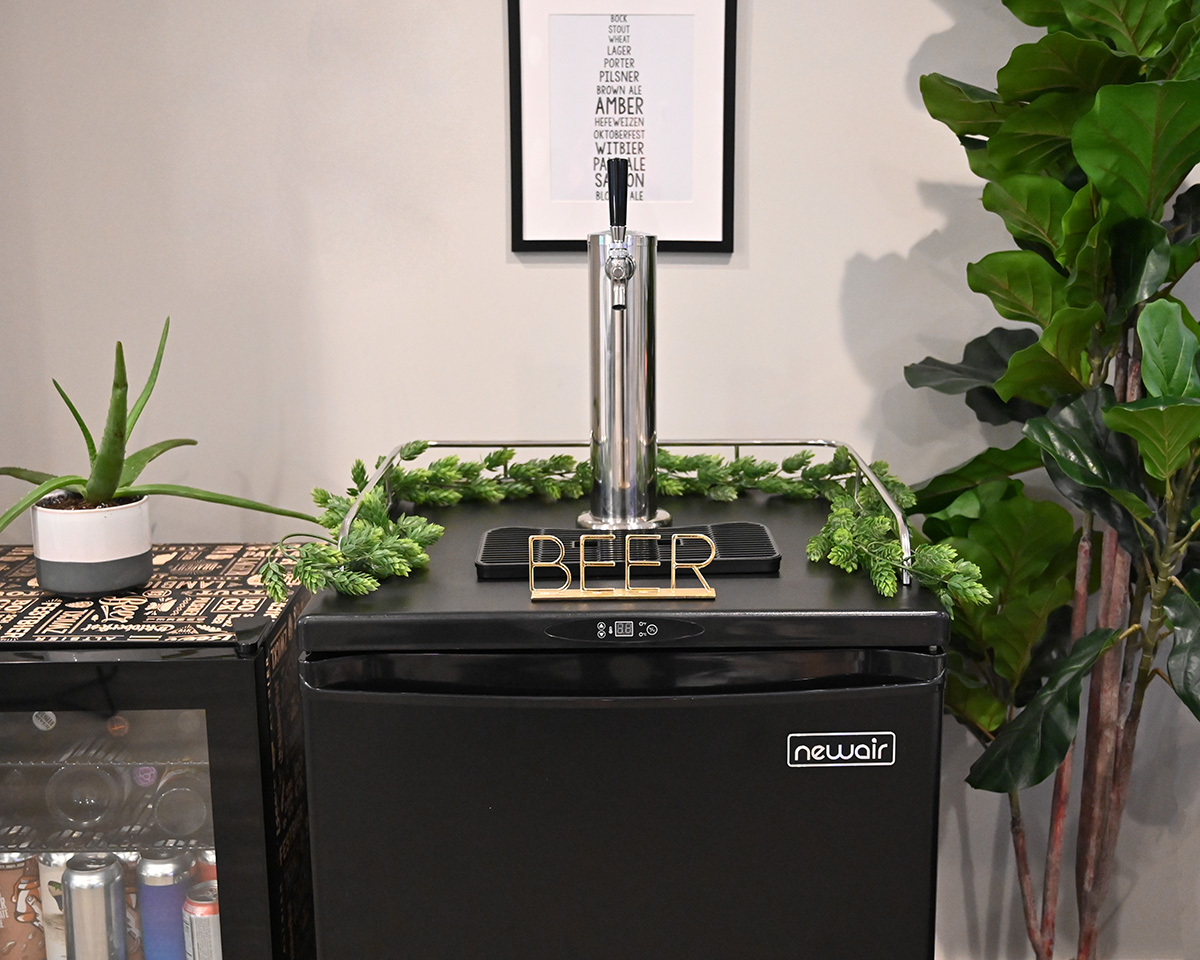
A kegerator is a specialized refrigerator that is designed to store and dispense beer kegs. It provides you with the ability to have draft beer at home, just like the ones you would find at your favorite pub. With a kegerator, you can enjoy your freshly brewed beer in its optimal condition, with carbonation and temperature control.
In this article, we will guide you on how to use a kegerator for your home brew. We will cover everything from choosing the right kegerator to setting it up, cleaning and maintaining it, connecting and carbonating your beer, and dispensing it properly. Whether you’re a seasoned home brewer or just starting out, this guide will help you make the most of your kegerator.
Before we delve into the specifics, it’s essential to understand the key components of a kegerator. This will help you grasp the concepts discussed throughout the article and get a clearer picture of how everything works together.
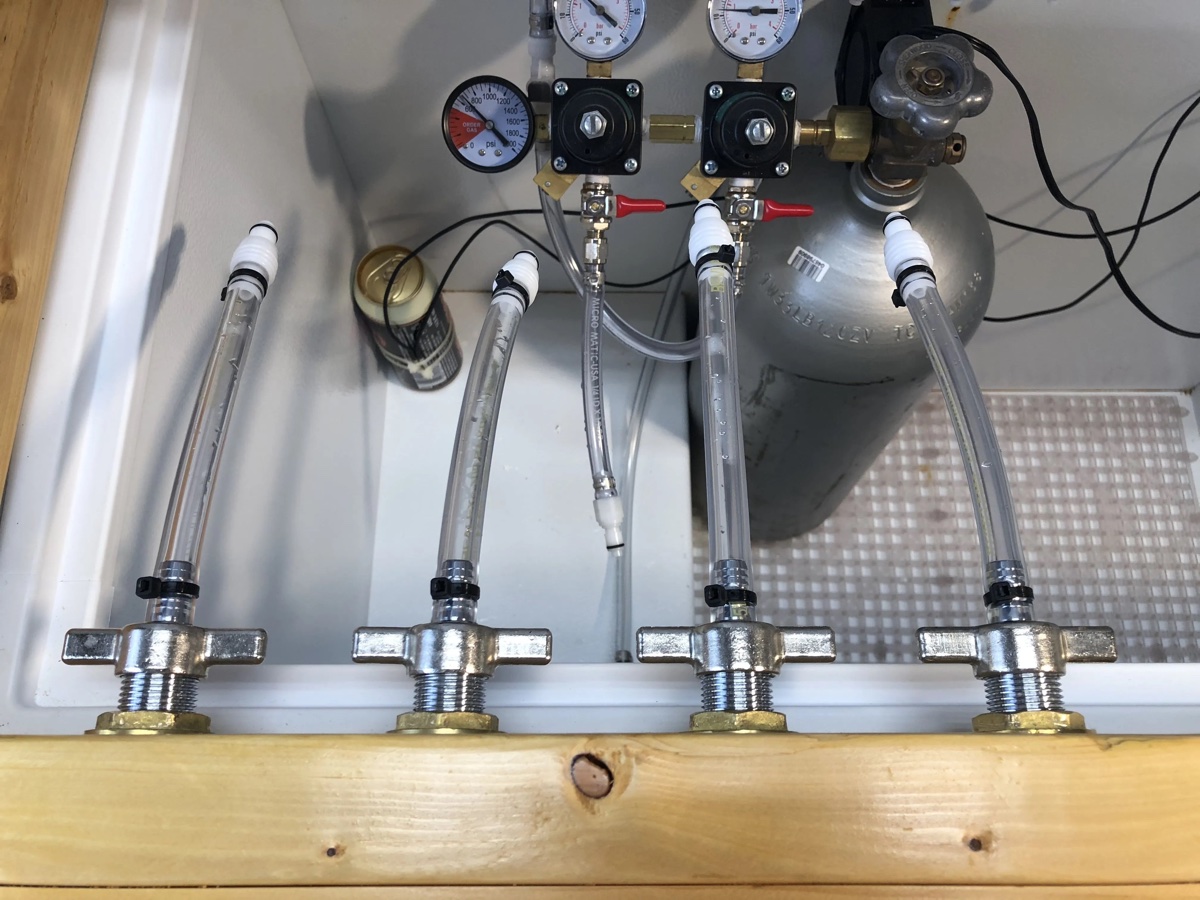
A typical kegerator consists of a refrigerated compartment, a draft tower, a CO2 tank, regulators, beer lines, and faucets. The refrigerated compartment is where you store your beer kegs, while the draft tower houses the faucets and beer lines. The CO2 tank and regulators are responsible for carbonating and pressurizing the beer, ensuring that it flows from the keg to the faucets smoothly.
Now that we have a basic understanding of what a kegerator is and its components, let’s move on to choosing the right kegerator for your home brew.
Key Takeaways:
- Elevate your home brewing experience with a kegerator, ensuring optimal carbonation, temperature control, and draft beer authenticity for enjoying your handcrafted brews.
- Master the art of kegerator use, from setup to troubleshooting, and enhance your home brewing journey with cleanliness, experimentation, and continuous improvement.
Read more: How To Use A Freezer As A Kegerator
Understanding Kegerators
Before you dive into using a kegerator for your home brew, it’s important to have a solid understanding of how these appliances work and what makes them different from regular refrigerators.
At its core, a kegerator is a refrigerator that is specifically designed to store and dispense beer kegs. Unlike regular refrigerators, kegerators are equipped with components that allow for temperature control, carbonation, and dispensing of draft beer.
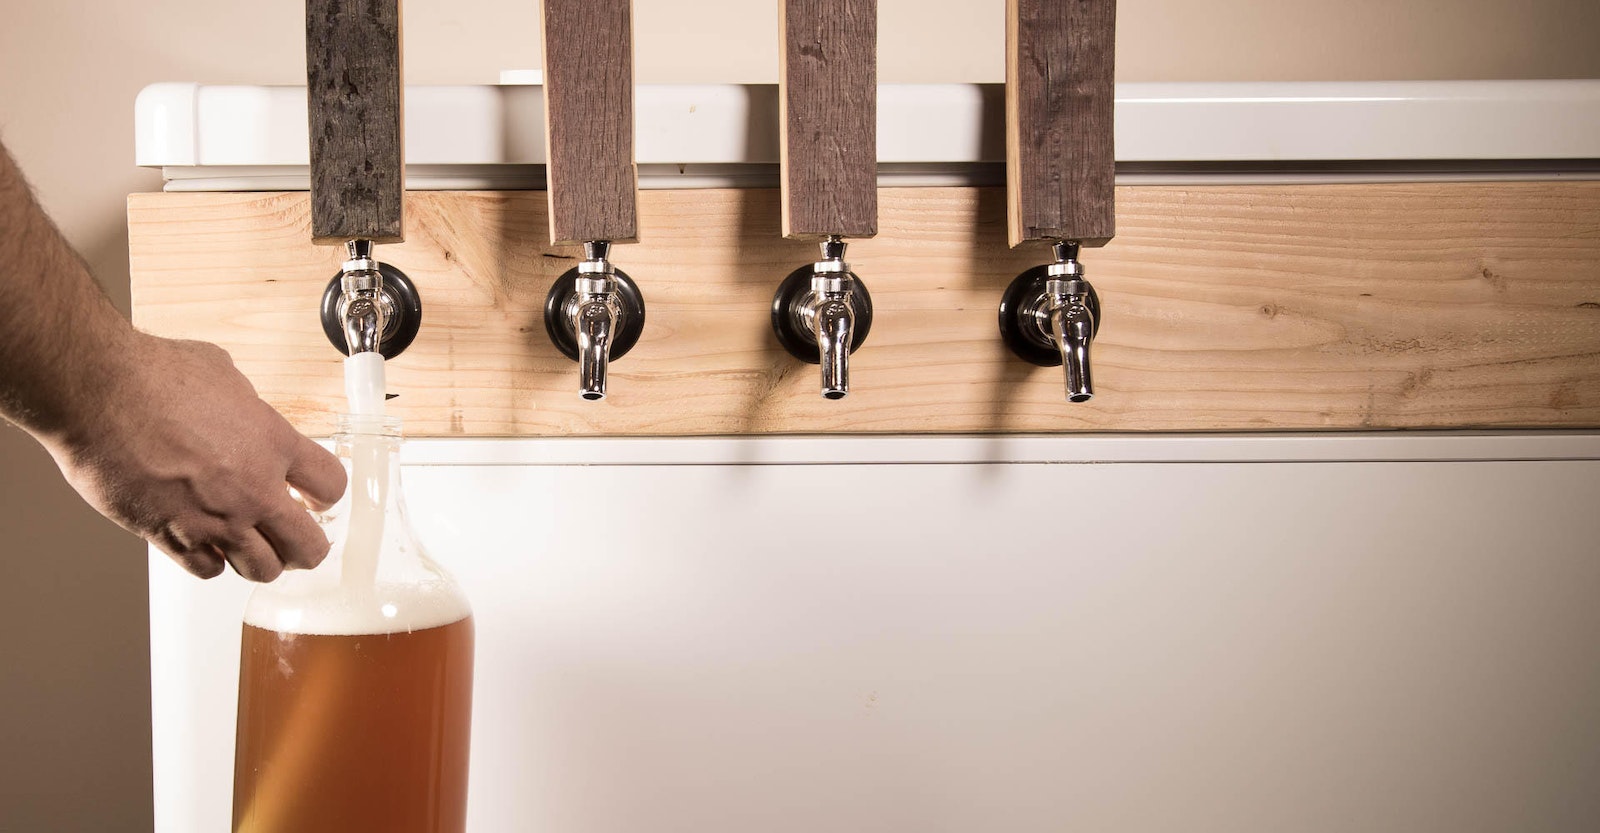
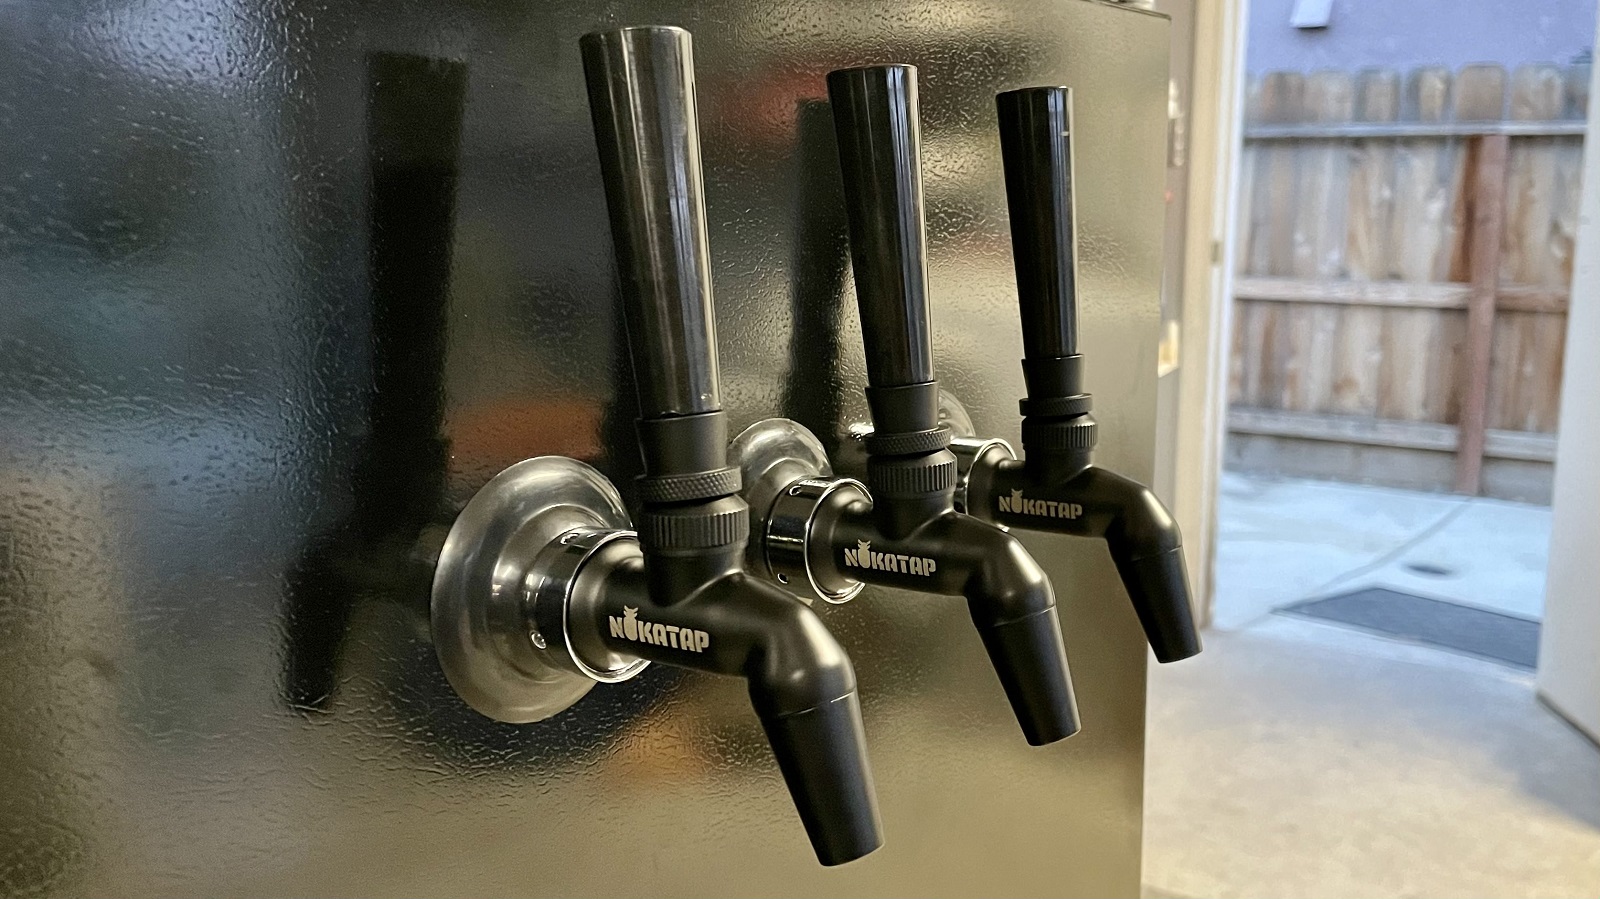
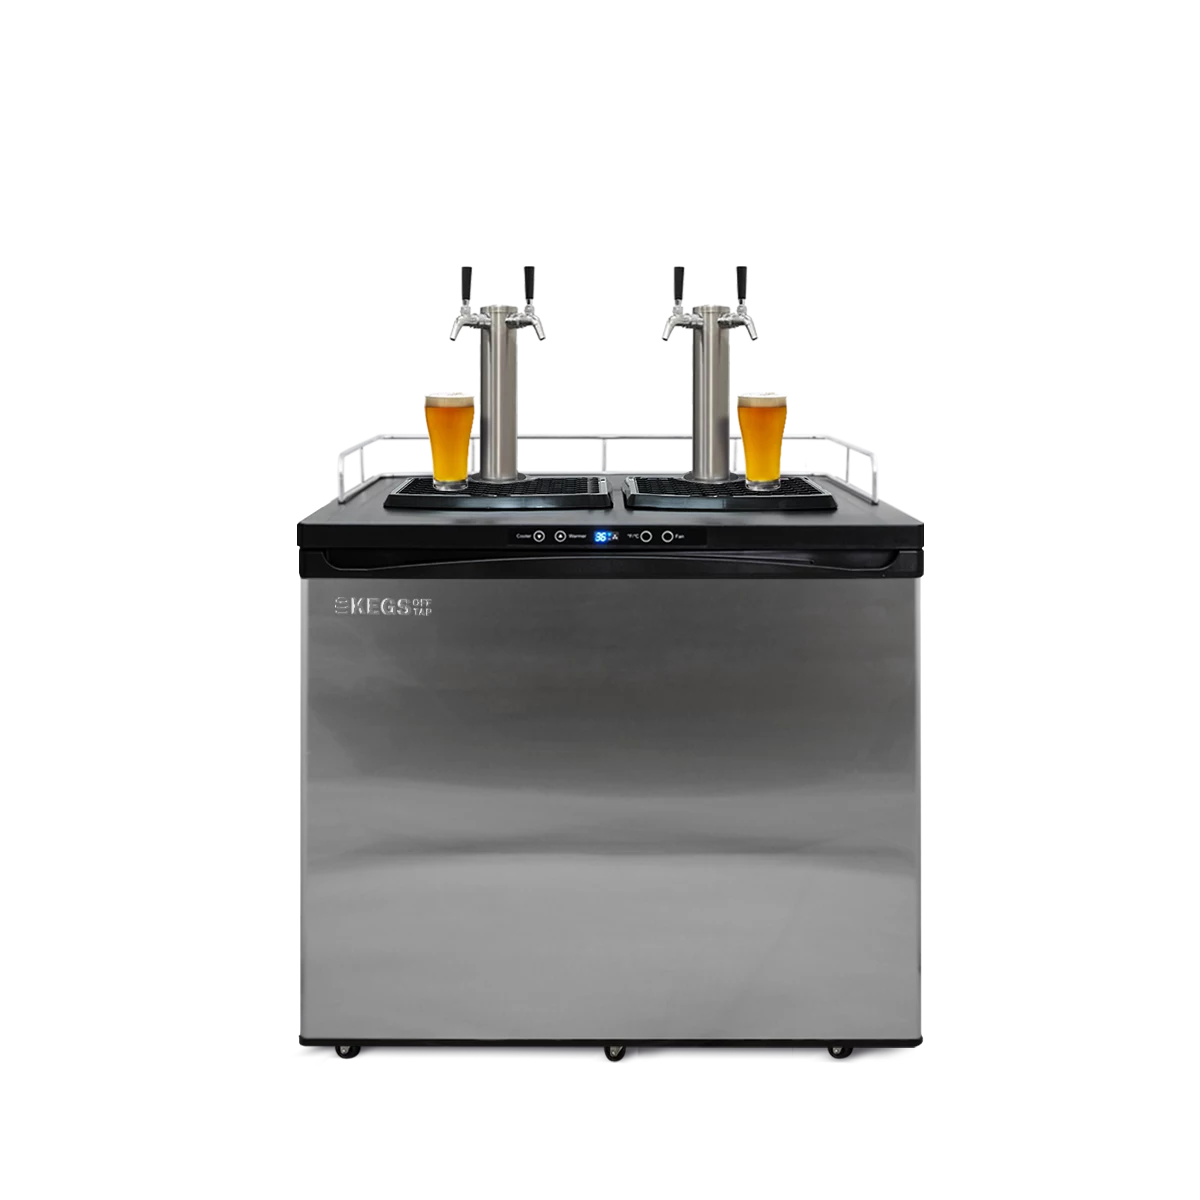
One of the key components of a kegerator is the draft tower. This is where the faucets and beer lines are located. The draft tower extends vertically from the top of the kegerator and allows you to pour beer directly from the keg. The number of faucets on the draft tower will depend on the model of the kegerator you choose.
Another essential component is the CO2 system. This includes a CO2 tank, regulators, and hoses. The CO2 tank is filled with carbon dioxide, which is used to carbonate and pressurize the beer. The regulators allow you to control the pressure and carbonation level, ensuring that your beer is dispensed properly.
Beer lines are responsible for transporting the beer from the keg to the faucet. They are made from food-grade tubing that is resistant to temperature and pressure. The length and diameter of the beer lines can affect the flow and quality of your beer, so it’s important to ensure they are properly sized for your setup.
Temperature control is crucial in preserving the flavor and quality of your home brew. Kegerators are equipped with a thermostat that allows you to adjust the temperature inside the refrigerator compartment. The ideal temperature for storing beer is typically between 36-40 degrees Fahrenheit, but this can vary depending on the style of beer you’re brewing.
Now that you have a better understanding of the basic components and functions of a kegerator, let’s move on to choosing the right kegerator for your home brew.
Choosing the Right Kegerator for Home Brew
When it comes to choosing a kegerator for your homebrew setup, there are a few important factors to consider. The right kegerator will not only fit your brewing needs but also provide efficient and reliable service. Here are some key points to keep in mind:
- Size: Determine how many kegs you plan to store and dispense at a time. Kegerators come in various sizes, ranging from small countertop models that can hold a single keg to larger units that can accommodate multiple kegs.
- Temperature Control: Ensure that the kegerator has a reliable temperature control system. This will allow you to adjust and maintain the optimal temperature for storing and serving your beer.
- CO2 System: Look for a kegerator that comes with a high-quality CO2 system. The CO2 tank should have a decent capacity to avoid frequent refills, and the regulators should be accurate and easy to adjust.
- Faucets and Draft Tower: Consider the number of faucets you will need for your setup. If you plan to serve multiple beers simultaneously, opt for a kegerator with multiple faucets. Make sure the draft tower is sturdy and well-built to prevent any leaks or issues during use.
- Quality and Durability: Invest in a kegerator that is made from high-quality materials and has a solid construction. This ensures durability and reliability, giving you peace of mind in the long run.
- Brand and Reviews: Research different brands and read reviews from other homebrewers to gauge the reputation and performance of the kegerator models you are considering. This can provide valuable insights and help you make an informed decision.
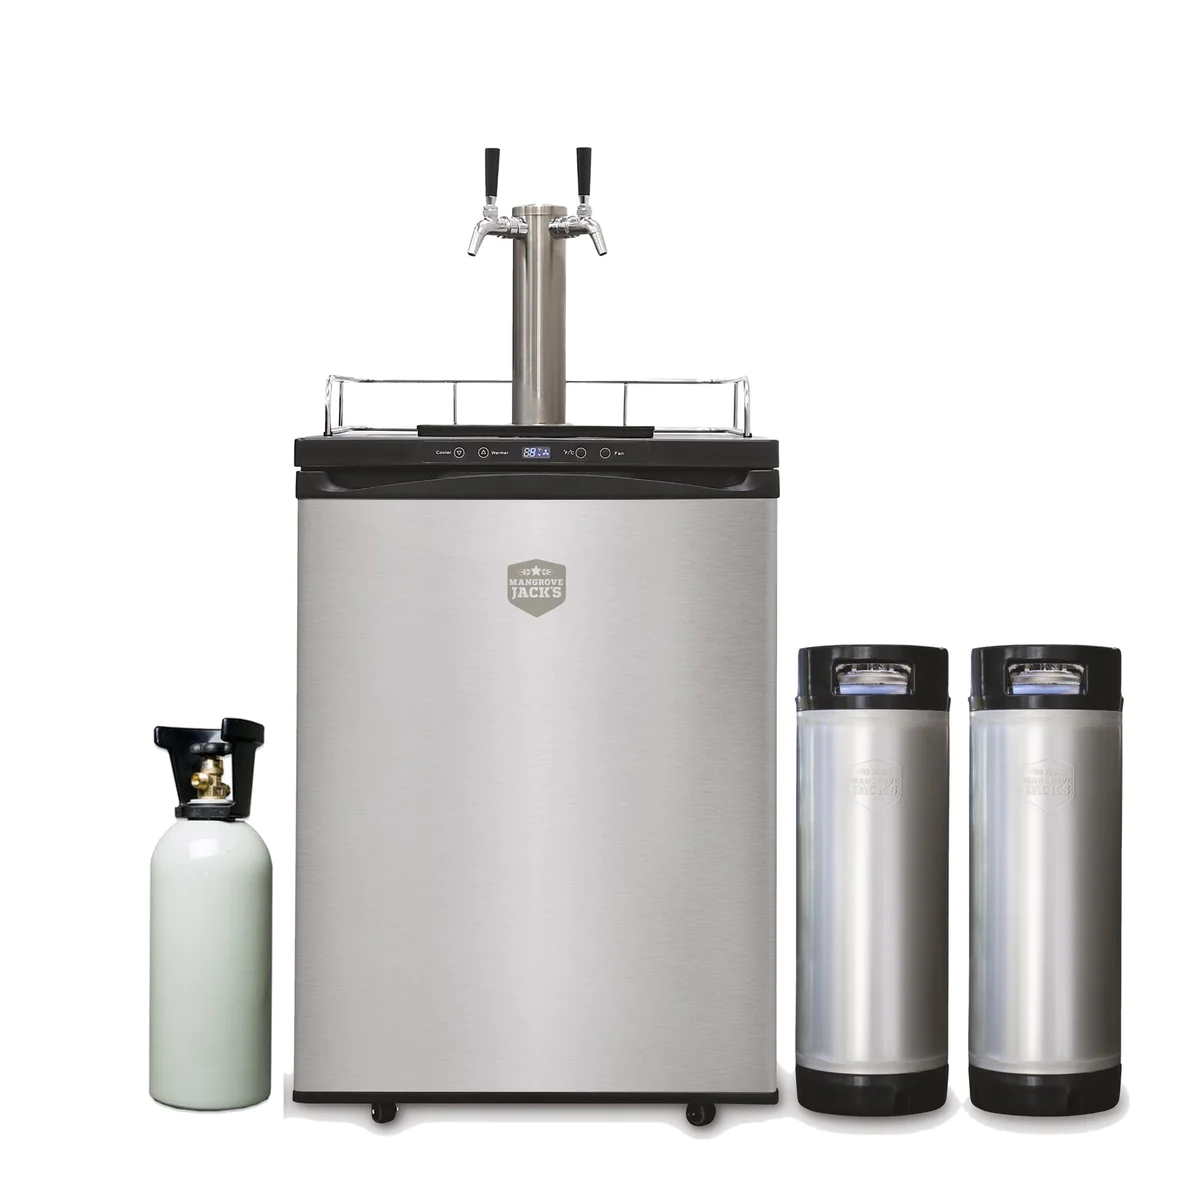
It’s also worth mentioning that some kegerators come as complete packages, including all the necessary components like CO2 tanks, regulators, hoses, and faucets. These packages can be convenient for beginners or those looking for a hassle-free setup.
Lastly, consider your budget when choosing a kegerator. Remember that it is an investment in your home brewing setup, and you want to ensure you get a kegerator that meets your needs without breaking the bank.
By carefully considering these factors, you will be able to select a kegerator that is perfect for your homebrewing adventures and provides you with years of enjoyment.
Setting Up Your Kegerator
Once you have chosen the right kegerator for your home brew, it’s time to set it up and get everything ready for serving your delicious beer. Follow these steps to ensure a smooth and successful setup:
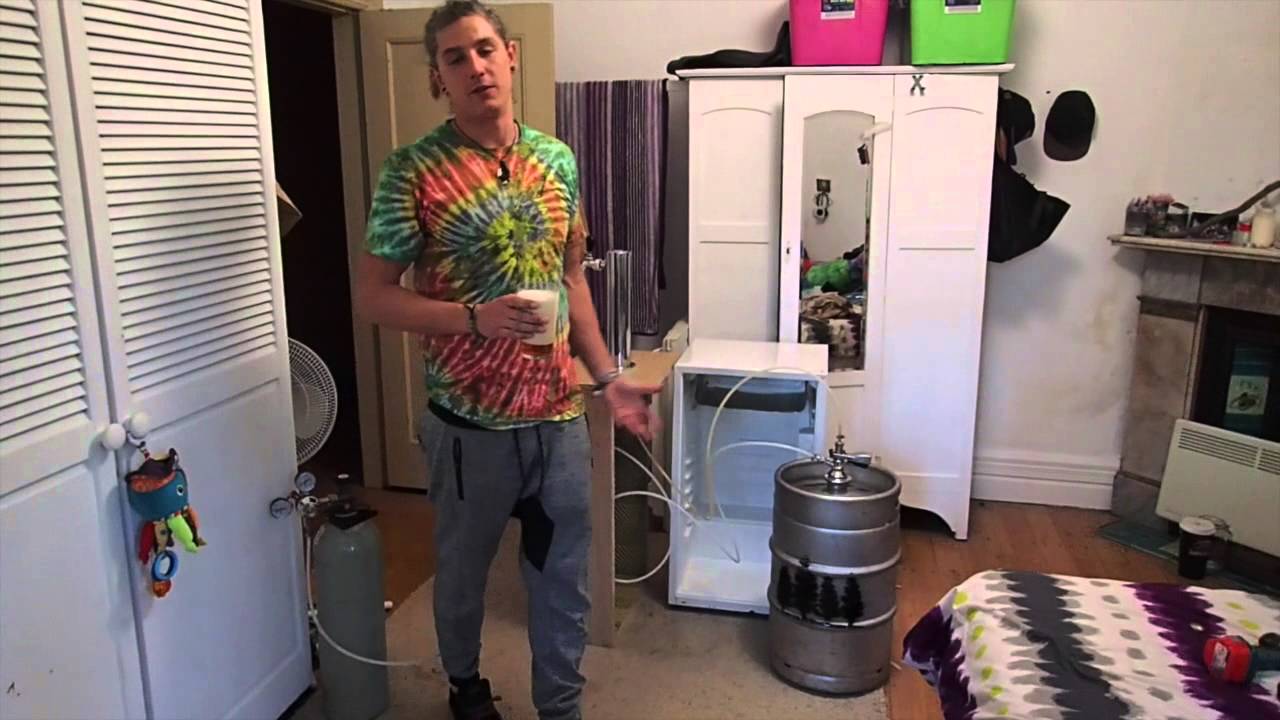
- Find the Perfect Location: Choose a suitable location for your kegerator. It should be a well-ventilated area with enough space for the kegerator to operate properly. Avoid placing it near a heat source or in direct sunlight, as this can affect the temperature control.
- Clean the Kegerator: Before setting up, clean the inside of the kegerator to remove any dirt or debris. Use a mild detergent and warm water, rinsing thoroughly to ensure a clean and sanitary environment for your beer.
- Install the Draft Tower: Attach the draft tower to the top of the kegerator following the manufacturer’s instructions. Make sure it is securely fastened to prevent any leaks.
- Connect the CO2 System: Attach the CO2 tank to the kegerator using the provided brackets or straps. Connect the CO2 regulator to the tank and adjust the pressure according to your beer’s carbonation requirements. Then, connect the gas line to the regulator and ensure a tight seal.
- Connect the Beer Lines: Attach one end of the beer line to the keg coupler and the other end to the faucet on the draft tower. Ensure that the connections are secure and leak-free.
- Check for Leaks: Once everything is connected, check for any leaks by spraying a mixture of water and dish soap on all the connections. If you see any bubbles forming, tighten the connections or fix any issues to eliminate the leaks.
- Turn on the Kegerator: Plug in the kegerator and turn it on. Set the desired temperature using the thermostat, generally between 36-40 degrees Fahrenheit for most beers. Allow it to reach the desired temperature before proceeding.
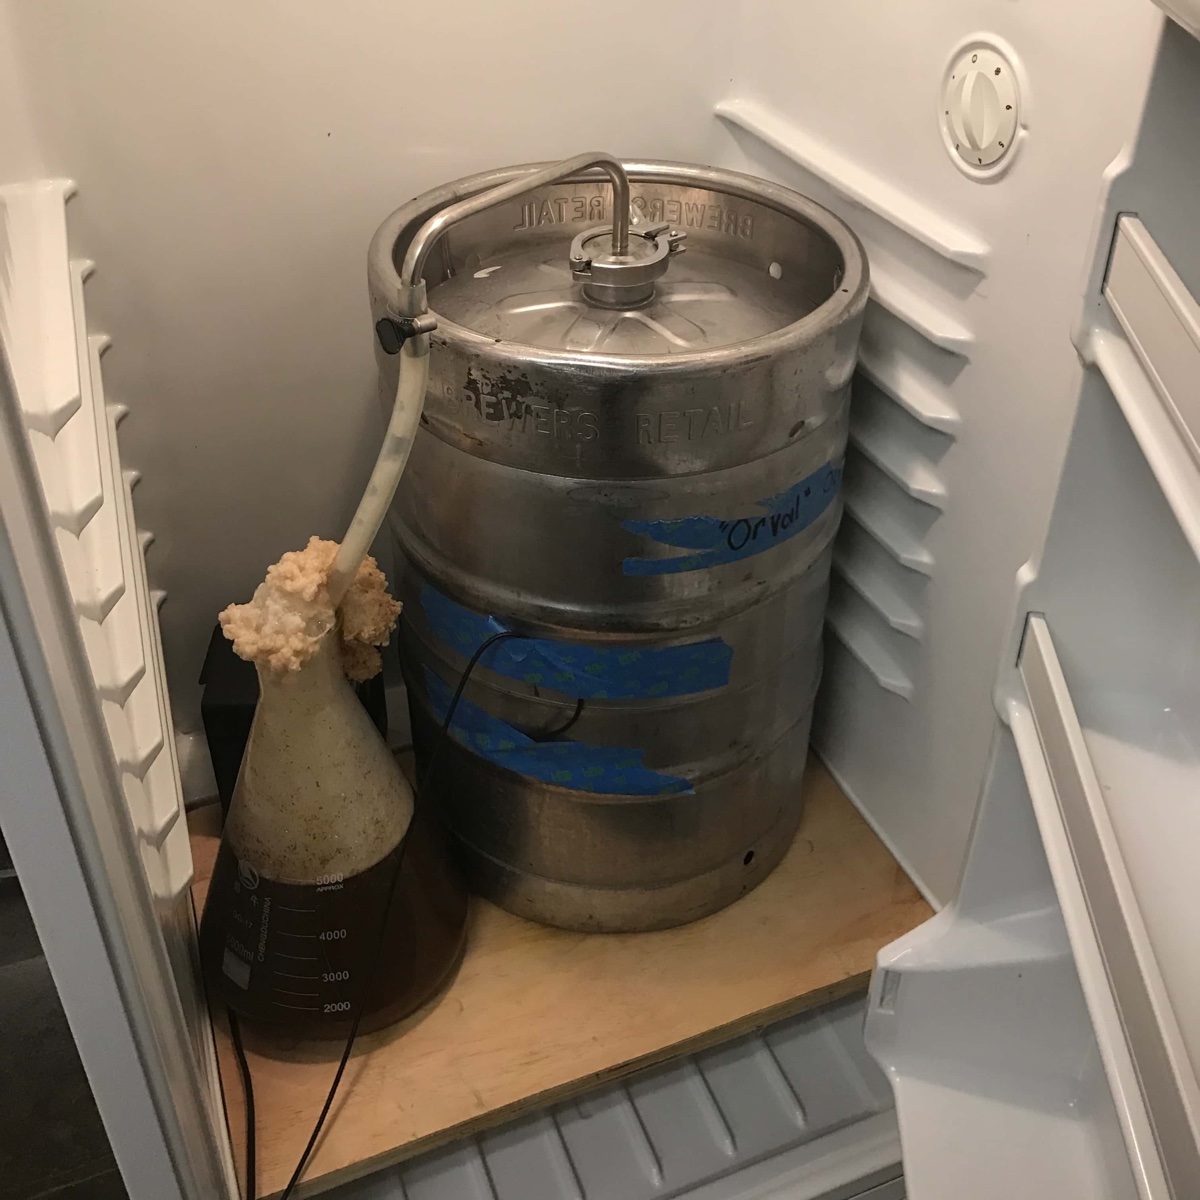
- Load and Carbonate the Keg: Load your keg into the kegerator, ensuring it is properly positioned and the coupler is securely attached. Begin carbonating the beer by adjusting the CO2 pressure to the recommended level for your specific beer style. Follow the recommended carbonation timeline provided by your recipe or the brewer’s guidelines.
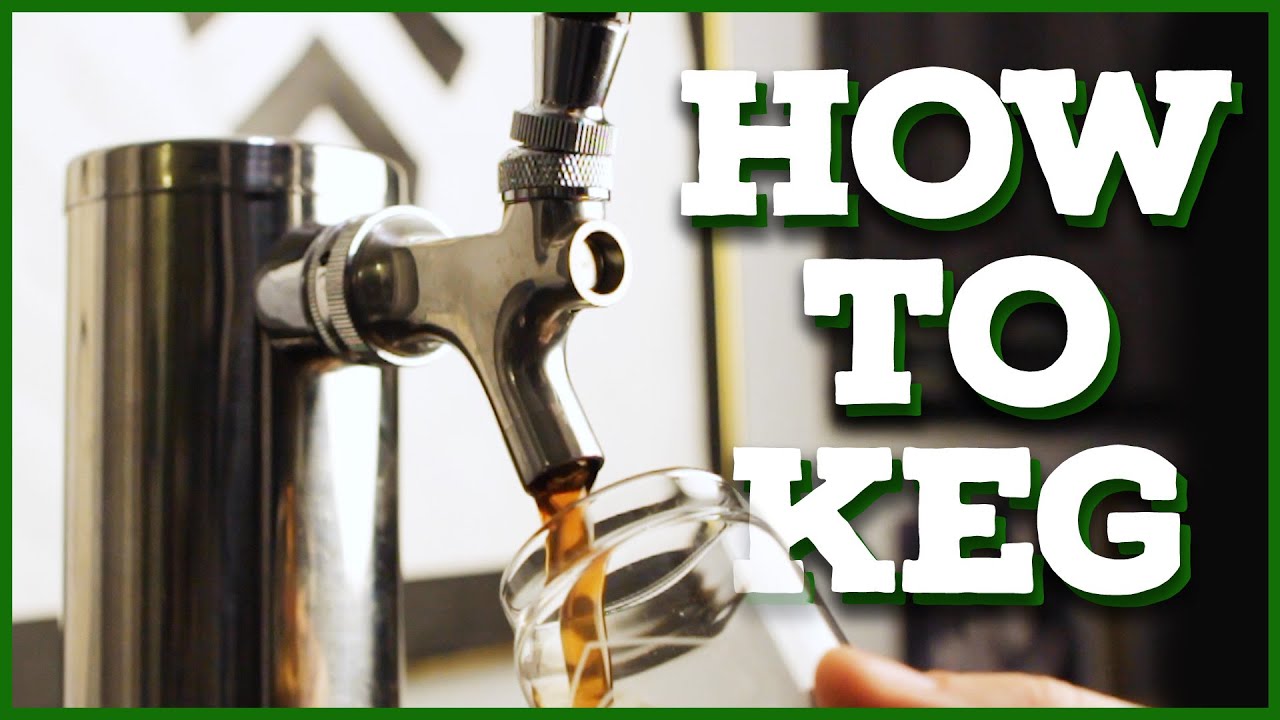
- Wait and Enjoy: Allow the beer to carbonate for the recommended time. Once carbonation is complete, your home brew is ready to be enjoyed straight from the kegerator. Pull the tap handle, tilt the glass, and let the beer flow!
Setting up your kegerator may require some trial and error, especially when it comes to dialing in the perfect carbonation level and temperature control. Don’t be afraid to make adjustments and fine-tune the settings until you achieve the desired results. It’s all part of the learning process!
Remember to regularly check and maintain your kegerator to ensure optimal performance and enjoy fresh, perfectly poured beer every time.
Cleaning and Maintaining Your Kegerator
Proper cleaning and maintenance of your kegerator is crucial for preserving the quality and taste of your home brew. Regular cleaning not only ensures a sanitary environment but also prevents the buildup of residue and bacteria that can affect the flavor of your beer. Follow these steps to keep your kegerator clean and well-maintained:
- Regular Cleaning Schedule: Develop a cleaning routine and stick to it. Depending on how frequently you use your kegerator, aim to clean it every two to four weeks. This will prevent any mold, bacteria, or unwanted odors from developing inside the unit.
- Disconnect and Empty the System: Before starting the cleaning process, disconnect the keg coupler and empty any remaining beer and gas from the system. Dispose of any beer that has been in the lines for an extended period since it may have gone stale.
- Remove Faucets, Beer Lines, and Couplers: Remove the faucets, beer lines, and couplers from the kegerator. Soak them in a cleaning solution made from warm water and a mild detergent or dedicated beer line cleaning solution. Scrub the parts gently with a brush to remove any buildup or debris.
- Clean Inside the Kegerator: Wipe down the interior surfaces of the kegerator with a mixture of warm water and mild detergent. Pay special attention to the walls, shelves, and corners where yeast, spills, or condensation can accumulate. Rinse thoroughly to remove any soap residue.
- Clean and Sanitize Beer Lines: After soaking, thoroughly flush the beer lines with clean water to remove any remaining cleaning solution. Then, sanitize the lines with a dedicated beer line cleaner or a solution of warm water and sanitizer. Reattach the beer lines to the kegerator once they are clean and sanitized.
- Reassemble and Check for Leaks: Reassemble the faucets, beer lines, and couplers, ensuring all connections are secure and leak-free. Use the same bubble test method as during setup to check for any leaks. Tighten any connections if necessary to eliminate leaks.
- Keep the Kegerator Clean: Regularly wipe down the exterior of the kegerator with a damp cloth to remove any spills or fingerprints. Avoid using abrasive cleaners that can damage the finish. Keeping the exterior clean not only maintains the appearance but also prevents any dirt or debris from entering the unit.
- Check CO2 Levels: Monitor the CO2 tank levels regularly to ensure you have an adequate supply. Refill or replace the tank as needed to maintain consistent carbonation levels.
- Check Temperature Control: Monitor the temperature inside the kegerator regularly using a thermometer. Make adjustments to the thermostat if necessary to maintain the optimal temperature for your beer.
- Replace Parts as Needed: If you notice any worn or damaged parts, such as seals, gaskets, or faucets, replace them promptly to avoid any potential issues with the performance or sanitation of your kegerator.
By following these cleaning and maintenance practices, you can ensure that your kegerator remains clean, sanitary, and in optimal condition. This will help you maintain the quality of your home brew and continue enjoying fresh, well-poured beer for years to come.
When using a kegerator for home brew, make sure to clean and sanitize the keg thoroughly before filling it with your beer. This will help prevent any off-flavors or contamination.
Read more: How To Make A Kegerator For Cold Brew
Connecting and Carbonating Your Home Brew
Once you have set up and cleaned your kegerator, the next step is to connect and carbonate your home brew. Carbonation adds the desired level of fizziness to your beer, creating a refreshing and enjoyable drinking experience. Follow these steps to connect and carbonate your home brew in the kegerator:
- Prep your Keg: Ensure that your home brew is fully fermented and ready for carbonation. It’s important to have a sealed and sanitized keg with your beer inside.
- Clean and Sanitize: Before connecting your keg, make sure that all the components, including the keg coupler, are clean and sanitized to avoid any contamination. Use a cleaning solution and rinse thoroughly.
- Attach the Keg Coupler: Connect the keg coupler to the top of the keg by aligning the notches or tabs and twisting it clockwise to lock it in place. Make sure it is securely attached to prevent any leaks.
- Connect the Gas Line: Connect the gas line from the CO2 tank to the gas inlet on the keg coupler. Ensure a tight seal to prevent any gas leaks. You can use a wrench to tighten the connection if needed, but be cautious not to overtighten.
- Adjust the Pressure: Refer to the carbonation guidelines for your specific beer style to determine the appropriate carbonation level. Adjust the pressure on the CO2 regulator accordingly. It’s generally recommended to start with a lower pressure and gradually increase it until the desired carbonation level is reached.
- Wait for Carbonation: Allow the keg to carbonate for the recommended time. This can vary depending on the beer style, but typically ranges from a few days to a week. Keep the keg at a consistent temperature during this process for optimal carbonation.
- Burp the Keg: After the initial carbonation period, release any excess pressure by turning the pressure release valve on the keg coupler. This “burping” process eliminates any built-up gas and ensures a smoother flow when dispensing your beer.
- Test Carbonation: Pull a small sample of beer from the tap to test the carbonation level. Adjust the pressure if needed, keeping in mind that it may take some time for the adjustments to take effect. Repeat this process until you achieve the desired carbonation and flavor profile.
- Enjoy Your Home Brew: Once you are satisfied with the carbonation level, your home brew is ready to be enjoyed. Pull the tap handle, tilt your glass, and pour yourself a perfectly carbonated pint of your own delicious creation.
It’s important to note that carbonation is an ongoing process, and the carbonation level may continue to change over time. Regularly monitor and adjust the CO2 pressure as needed to maintain the desired level of carbonation in your keg.
Remember to keep track of the carbonation process for each batch of home brew, as different beer styles and recipes may require varying levels of carbonation. Experiment and fine-tune the process to create the perfect level of fizziness for your individual taste preferences.
With your home brew properly connected and carbonated, you’re now ready to savor the flavors of your own brew, straight from your kegerator!
Dispensing Beer from the Kegerator
Dispensing beer from your kegerator is the final and most rewarding step in the process. It’s the moment you get to enjoy the fruits of your labor and share your home brew with friends and family. Here’s a step-by-step guide on how to properly dispense beer from your kegerator:
- Chill Your Glassware: Before pouring, it’s essential to chill your glassware. Place your pint glasses or beer mugs in the refrigerator or freezer for a few minutes to ensure they are cold.
- Purge the Tap Line: Before pouring your first beer, it’s a good practice to purge the tap line by letting a small amount of beer flow through it. This helps remove any trapped air and ensures a clean pour.
- Position the Glass: Hold your glass at a 45-degree angle just below the faucet. This angle allows for proper beer flow and minimizes excessive foaming.
- Open the Faucet: Slowly open the faucet, allowing the beer to flow into the glass. Gradually raise the glass to an upright position as it fills, keeping the faucet near the surface of the beer to reduce foam.
- Achieve the Perfect Head: As the glass fills, you should aim to achieve a desirable head of foam on top of the beer. This head not only enhances the appearance of the beer but also traps aromas, contributing to the overall sensory experience.
- Let the Beer Settle: Once the glass is full, let the beer settle for a moment. This allows any excess foam to dissipate and prevents overflow when you lift the glass.
- Enjoy Your Beer: With your glass now filled and the foam settled, it’s time to enjoy your home brew. Raise your glass, savor the aroma, and take a sip of your handcrafted beer.
It’s important to note that dispensing beer from a kegerator may require some practice to achieve the perfect pour. Factors such as carbonation levels, temperature, and faucet control can influence the pour and the resulting head of foam. Adjusting the pressure, temperature, and tilt angle of the glass can help you fine-tune your pouring technique.
If you experience excessive foaming, it could be a sign of improper carbonation, high serving temperature, or dirty beer lines. Troubleshooting these issues, as discussed later in this article, can help you achieve a smoother and more enjoyable pour.
Remember, pouring beer from a kegerator is an art form, and with practice and experience, you will become adept at creating the perfect head and delivering a satisfying pint of your home brew for yourself and others to enjoy.
Troubleshooting Common Kegerator Issues
While kegerators provide an excellent way to enjoy your home brew, they can sometimes encounter issues that may affect the quality of the beer or the functionality of the system. Here are some common kegerator issues and troubleshooting tips to help you resolve them:
- Excessive Foam: If your beer is pouring with excessive foam, it could be due to several factors. First, ensure that your keg has been properly carbonated, as under-carbonated beer can lead to excessive foaming. Check the CO2 pressure and adjust it if necessary. Additionally, ensure that your beer lines are clean and free from obstructions. A dirty or partially blocked line can cause foaming issues. Lastly, consider the temperature of your kegerator. Beer poured at too warm of a temperature can result in excessive foam.
- Low Carbonation: If your beer lacks the desired level of carbonation, check the CO2 pressure. If the pressure is too low, increase it gradually until you achieve the desired carbonation level. Be patient and give the beer time to carbonate properly. If the carbonation issue persists, check for leaks in the system, as escaping CO2 can result in loss of carbonation.
- Strange Tastes or Odors: If your beer has off-flavors or unusual odors, it could be a sign of improper cleaning or maintenance. Make sure to regularly clean and sanitize all components of your kegerator, including the beer lines, faucets, and keg couplers. Pay attention to any residual cleaning agents or sanitizer that may have been left behind, as this can alter the taste of the beer. Also, ensure that your kegerator is stored in a clean and odor-free environment.
- Leaks: If you notice any leaks in your kegerator system, check all the connections. Tighten or replace any faulty seals, gaskets, or fittings. Use a mixture of water and dish soap to conduct a leak test. Apply this solution to the connections, and if you see bubbles forming, tighten the connection further or replace the faulty part. Leaks can affect the carbonation and dispensing process, so it’s vital to address them promptly.
- Serving Temperature Issues: If you find that your beer is too warm or too cold when dispensed, check the settings on your temperature control. Make sure the thermostat is set to the appropriate temperature range for your beer style. It’s also important to avoid placing the kegerator in direct sunlight or near heat sources, as this can affect temperature stability. Allow time for the kegerator to reach the desired temperature after making adjustments.
Remember, troubleshooting kegerator issues can sometimes be a process of trial and error. It’s essential to approach the problem methodically and address each possible cause systematically. If you’re still experiencing difficulties, consult the kegerator’s manual or reach out to the manufacturer’s customer support for further assistance.
By troubleshooting and resolving these common kegerator issues, you can ensure that your home brew is delivered at its best, giving you a satisfying and enjoyable tasting experience.
Tips and Tricks for Using a Kegerator with Home Brew
Using a kegerator to serve your home brew can be a rewarding and convenient experience. To make the most out of your kegerator, here are some tips and tricks that can enhance your home brewing journey:
- Properly Clean and Sanitize: Regularly clean and sanitize all components of your kegerator to maintain a hygienic environment for your beer. This includes the keg couplers, beer lines, faucets, and any other parts that come into contact with the beer.
- Monitor and Adjust Carbonation: Keep a close eye on the carbonation levels in your keg. Adjust the CO2 pressure as necessary to achieve the desired level of carbonation for your specific beer style. This will ensure that your beer is perfectly carbonated and tastes just right.
- Optimize Temperature Control: Maintain the ideal temperature for your beer by properly setting and monitoring the temperature control of your kegerator. Different beer styles have different temperature requirements, so be sure to research and adjust accordingly to maximize flavor and enjoyment.
- Store and Rotate Kegs: If you’re using multiple kegs, ensure you have enough space in your kegerator to store them properly. Consider implementing a rotation system to ensure that all your kegs are consumed within a reasonable time frame to maintain freshness.
- Experiment with Different Beer Styles: Don’t be afraid to explore and experiment with different beer styles in your kegerator. Use it as an opportunity to expand your brewing horizons and try new recipes. This can be a great way to showcase your creativity and impress your friends and family.
- Consider Adding a Tap Lock: If you have concerns about unauthorized access to your kegerator, consider investing in a tap lock. This can provide an extra layer of security and ensure that only you have access to your delicious home brew.
- Keep a Spare CO2 Tank: It’s always a good idea to have a spare CO2 tank on hand. This way, you won’t have to worry about running out of gas in the middle of a party or when you’re about to enjoy a fresh pint of beer.
- Share Your Home Brew: One of the joys of home brewing is sharing your creations with others. Invite friends and family over to enjoy your kegerator and taste your delicious home brew. It’s a great way to receive feedback and create memorable experiences.
- Document Your Recipes: As you experiment with different recipes and beer styles, keep a record of your brewing process. Document your ingredients, measurements, and observations. This will help you refine your recipes and replicate successful batches in the future.
- Continuously Learn and Improve: Home brewing is a continuous learning process. Stay curious, seek out resources, and learn from other experienced brewers. Join online communities or local homebrewing clubs to exchange tips, tricks, and experiences.
With these tips and tricks, you can elevate your kegerator experience and make the most out of serving your home brew. Remember to have fun, be creative, and enjoy the fruits of your brewing labor.
Read more: How Adjust Co2 Kegerator
Conclusion
Using a kegerator for your home brew brings a new level of convenience and enjoyment to the world of home brewing. It allows you to serve your beer just like the professionals, with optimal carbonation, temperature control, and an authentic draft experience. By following the steps outlined in this guide, you can confidently set up, clean, maintain, and enjoy your kegerator with your own handcrafted beer.
Choosing the right kegerator that suits your brewing needs is the first step. Consider the size, temperature control, CO2 system, and overall quality when making your selection. Once you have your kegerator, take the time to set it up correctly, connecting all the components and ensuring a tight and leak-free system. Regular cleaning and maintenance will help maintain the freshness and quality of your beer.
Carbonation plays a vital role in enhancing the taste and mouthfeel of your home brew. Adjusting the CO2 pressure and allowing sufficient time for carbonation will lead to optimal results. When it comes time to pour your beer, follow proper techniques for avoiding excessive foam and achieving the perfect head.
Throughout this journey, it’s important to troubleshoot common issues that may arise. From excessive foam to off-flavors, understanding the possible causes and implementing the necessary adjustments will help you overcome any challenges and ensure a smooth experience with your kegerator.
Finally, the tips and tricks provided in this guide serve as valuable insights and recommendations to enhance your kegerator experience even further. From maintaining proper cleanliness to experimenting with different beer styles, these tips will help you make the most of your kegerator and share your creations with others.
Remember, using a kegerator for your home brew is not only about enjoying your beer, but also about the joy of the brewing process itself. It’s a journey of creativity, experimentation, and continuous learning. So, have fun, be adventurous, and savor the satisfaction that comes with serving your delicious, freshly poured pints of home brew straight from your kegerator.
Frequently Asked Questions about How To Use Kegerator For Home Brew
Was this page helpful?
At Storables.com, we guarantee accurate and reliable information. Our content, validated by Expert Board Contributors, is crafted following stringent Editorial Policies. We're committed to providing you with well-researched, expert-backed insights for all your informational needs.


0 thoughts on “How To Use Kegerator For Home Brew”