Articles
How To Use Floor Buffer
Modified: October 21, 2024
Discover helpful articles on how to effectively use a floor buffer for superior cleaning results. Expert tips, techniques, and step-by-step guides await you.
(Many of the links in this article redirect to a specific reviewed product. Your purchase of these products through affiliate links helps to generate commission for Storables.com, at no extra cost. Learn more)
Introduction
Welcome to the world of floor buffing! In this comprehensive guide, we will walk you through everything you need to know about using a floor buffer. Whether you are a professional cleaner or a DIY enthusiast, understanding how to properly operate this powerful machine is essential for achieving that sparkling, polished finish on your floors.
Using a floor buffer can make the task of maintaining and restoring the beauty of your floors much easier and more efficient. Whether you have tile, hardwood, laminate, or any other type of hard surface flooring, a floor buffer can give it that extra shine and luster.
However, before diving into the process, it is important to prioritize safety. Floor buffers are heavy-duty machines that require careful handling and proper technique to prevent accidents. Therefore, we will start by discussing some important safety precautions you should keep in mind when using a floor buffer.
Key Takeaways:
- Prioritize safety, gather supplies, and prepare the floor before operating a floor buffer to achieve professional results and prevent accidents or damage.
- Implement buffing techniques, maintain the floor buffer, and troubleshoot common issues to ensure efficient and effective floor cleaning with a polished finish.
Read more: Where To Rent Floor Buffer
Safety Precautions
When using a floor buffer, it is crucial to prioritize safety to prevent accidents and injuries. Here are some important safety precautions to keep in mind:
- Read the manual: Before using a floor buffer, take the time to read and understand the manufacturer’s manual. Familiarize yourself with the specific instructions, warnings, and safety guidelines provided.
- Protective gear: Always wear appropriate protective gear, including safety goggles, earplugs, gloves, and non-slip footwear. Protecting your eyes, ears, hands, and feet is essential when operating a floor buffer.
- Clear the area: Before starting, remove all obstacles, furniture, and loose objects from the area you will be working on. This will prevent tripping hazards and minimize the risk of accidents.
- Secure power cord: Ensure that the power cord is properly secured and out of the way to avoid tripping or entanglement. Do not run the machine over the power cord.
- Inspect the machine: Before using the floor buffer, check for any damages or loose parts. Make sure all components are in good working condition and securely attached.
- Practice in a small area: If you are new to using a floor buffer, start in a small, inconspicuous area to familiarize yourself with the machine and its controls. This allows you to gain confidence and practice your technique.
- Keep a firm grip: Maintain a firm grip on the handles of the floor buffer at all times. This will give you better control over the machine and help prevent accidents.
- Switch off when not in use: When taking a break or moving to a different area, always switch off the floor buffer and unplug it from the power source. This prevents accidental starts and ensures safety during breaks.
- Avoid wet areas: Never use a floor buffer on wet or damp surfaces. Moisture can cause the machine to become unstable and increase the risk of slipping or losing control.
- Follow electrical safety: Ensure that the electrical outlets and extension cords you are using are in good condition. Do not overload the circuits and always use a Ground Fault Circuit Interrupter (GFCI) when working with electrical equipment near water sources.
- Keep children and pets away: To prevent accidents, keep children and pets at a safe distance from the area where you are using the floor buffer. It is best to work in a controlled environment to minimize potential hazards.
By following these safety precautions, you can ensure a safe and smooth floor buffing experience. Now that you are aware of the necessary safety measures, let’s move on to gathering the supplies you will need for the task.
Gathering Supplies
Before you begin operating a floor buffer, it is important to gather all the necessary supplies. Having everything prepared and within reach will help streamline the process and ensure a more efficient cleaning experience. Here are the supplies you will need:
- Floor buffer: Of course, the main supply you will need is a floor buffer. Choose a machine that is suitable for the type of flooring you have and the size of the area you will be working on. Ensure that the buffer is in good working condition and equipped with the necessary pads or brushes.
- Pads or brushes: Depending on the type of flooring you have, you will need the appropriate pads or brushes for your floor buffer. For hardwood floors, use soft polishing pads, while for tile or concrete, use scrubbing brushes or pads.
- Cleaning solution: Select a cleaning solution that is specifically formulated for your type of flooring. Read the label and follow the instructions for diluting the cleaning solution, if necessary. Avoid using harsh or abrasive chemicals that could damage your floors.
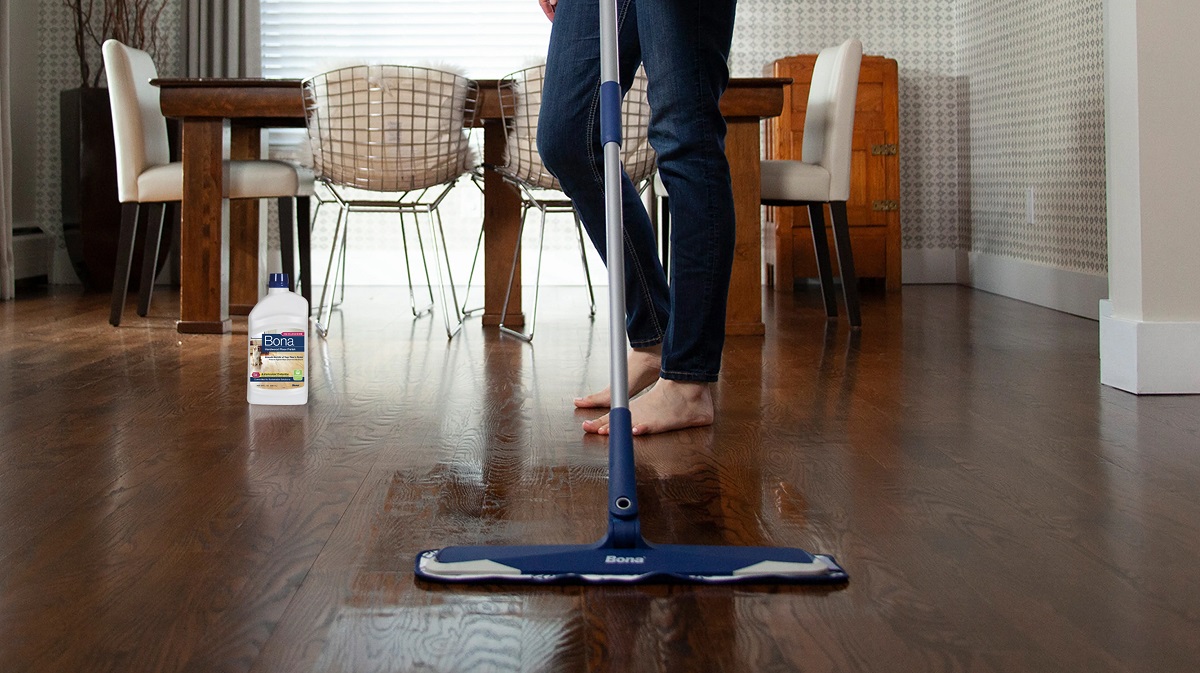
- Bucket and mop: You will need a bucket to mix and prepare the cleaning solution, as well as a mop for pre-cleaning the floor before using the buffer. Choose a mop that is suitable for your flooring type and consider using a microfiber mop for better results.
- Protective gear: As mentioned earlier, make sure to have the necessary protective gear, including safety goggles, earplugs, gloves, and non-slip footwear. Protecting yourself is essential for a safe and comfortable cleaning experience.
- Clean rags or towels: Have some clean rags or towels on hand for wiping any spills or excess cleaning solution. These can also be used to dry the floor after buffing, if needed.
- Extension cords: If your floor buffer requires an electrical power source, ensure that you have suitable and properly functioning extension cords. Make sure they are long enough to reach all the areas you plan to clean.
- Labels and markers: It is a good practice to label your cleaning solution containers and any other supplies you have. This helps ensure that you are using the correct products for each type of flooring and prevents any mix-ups.
- Furniture sliders or moving blankets: If you have heavy furniture that cannot be easily moved, consider using furniture sliders or moving blankets to protect them from the floor buffer and make shifting them easier during the cleaning process.
- Ventilation: If you are working in an enclosed area, make sure you have proper ventilation to avoid excessive exposure to the cleaning solution fumes. Open windows or use fans to circulate fresh air during the process.
By gathering these supplies in advance, you will be well-prepared to begin using the floor buffer and achieve professional-looking results. With your supplies ready, it’s time to move on to preparing the floor before buffing.
Preparing the Floor
Properly preparing the floor before using a floor buffer is crucial for achieving optimal results. Taking the time to clean and clear the area will ensure that the buffing process is efficient and effective. Here are the steps to follow for preparing the floor:
- Sweep or vacuum: Start by sweeping or vacuuming the floor to remove any loose dirt, debris, or dust. This will prevent scratches and ensure that the buffer can work effectively without pushing around small particles.
- Spot clean: Take a closer look at the floor and address any specific spots or stains. Use a suitable cleaning solution and a scrub brush or mop to spot clean those areas. Allow the solution to sit for a few minutes before scrubbing and rinsing off.
- Move furniture: If possible, move any furniture or obstructions out of the area you plan to buff. This will give you a clear working space and prevent any accidental damage to the furnishings.
- Protect baseboards: To protect the baseboards or wall edges from any potential damage, apply painter’s tape or use plastic sheets to cover them. This will provide a barrier and prevent the buffer from accidentally scratching or marring the walls.
- Check for loose tiles: If you have tile flooring, check for any loose or damaged tiles. If you find any, fix or replace them before buffing to avoid further damage during the process.
- Check for moisture: Before using the floor buffer, ensure that the floor is completely dry. Excess moisture can affect the performance of the buffer and lead to slippery conditions. If necessary, use a dry mop or towels to remove any remaining moisture.
- Test in a small area: If you are using a new cleaning solution or have recently refinished your floors, it is recommended to test the product in a small, inconspicuous area. This will help you ensure that the solution is suitable for your floor type and doesn’t cause any adverse effects.
- Secure pets and children: Before starting the buffing process, make sure to keep children and pets in a safe area away from the work zone. This will prevent any accidents and allow you to focus on the task at hand.
- Double-check the supplies: Before proceeding, double-check that you have all the necessary supplies within reach. This includes the floor buffer, pads or brushes, cleaning solution, bucket, mop, and any other items you may require during the process.
By following these steps and adequately preparing the floor, you can ensure that the buffing process goes smoothly and delivers the desired results. With the floor prepared, it’s time to move on to assembling the floor buffer.
Assembling the Floor Buffer
Before you can start using a floor buffer, you need to properly assemble the machine. While the exact assembly process may vary depending on the model you are using, here are the general steps to follow:
- Read the manual: Start by reading the manufacturer’s manual for specific instructions on assembling your floor buffer. This will provide you with model-specific guidance and ensure that you follow the correct steps.
- Inspect the parts: Before assembling, inspect all the parts and components of the floor buffer to ensure they are in good condition and free from any damages. Check for loose screws or any missing pieces that may affect the performance of the machine.
- Attach the handle: Most floor buffers have detachable handles that need to be attached. Align the holes in the handle with the corresponding holes on the machine’s body. Insert the screws and tighten them securely using the provided tools or wrench.
- Attach the pad driver: Depending on the type of flooring you have and the tasks you need to perform, you will need to attach the appropriate pad driver to the floor buffer. This could be a pad holder or a brush holder. Follow the manufacturer’s instructions on how to attach it securely.
- Secure the pads or brushes: Place the pads or brushes on the pad driver according to the manufacturer’s recommendations. Make sure they are aligned properly and securely attached. Some floor buffers may require additional fasteners or clips to hold the pads or brushes in place.
- Plug in the power cord: If your floor buffer requires electrical power, ensure that the power cord is securely plugged into the machine. Make sure there are no frayed wires or exposed connections that may pose a safety hazard. Avoid running the power cord over the area you will be working on to prevent tripping.
- Position the floor buffer: Once assembled, position the floor buffer at the starting point of your cleaning area. Make sure there is enough clearance and space to maneuver the machine without bumping into walls, furniture, or other obstacles.
- Double-check the assembly: Before turning the floor buffer on, double-check all the connections and attachments to ensure everything is properly secured. This will prevent any accidents or malfunctions while operating the machine.
By following these steps, you can successfully assemble your floor buffer and get ready for the buffing process. Make sure to always refer to the manufacturer’s instructions for your specific model to ensure the proper assembly and safe operation of the machine. With the floor buffer assembled, it’s time to move on to the next step: operating the floor buffer.
When using a floor buffer, start by reading the manufacturer’s instructions carefully. Always wear appropriate safety gear, and make sure the area is clear of obstacles before starting. Keep a firm grip on the machine and move in a smooth, overlapping pattern for even results.
Read more: How To Use Floor Jack
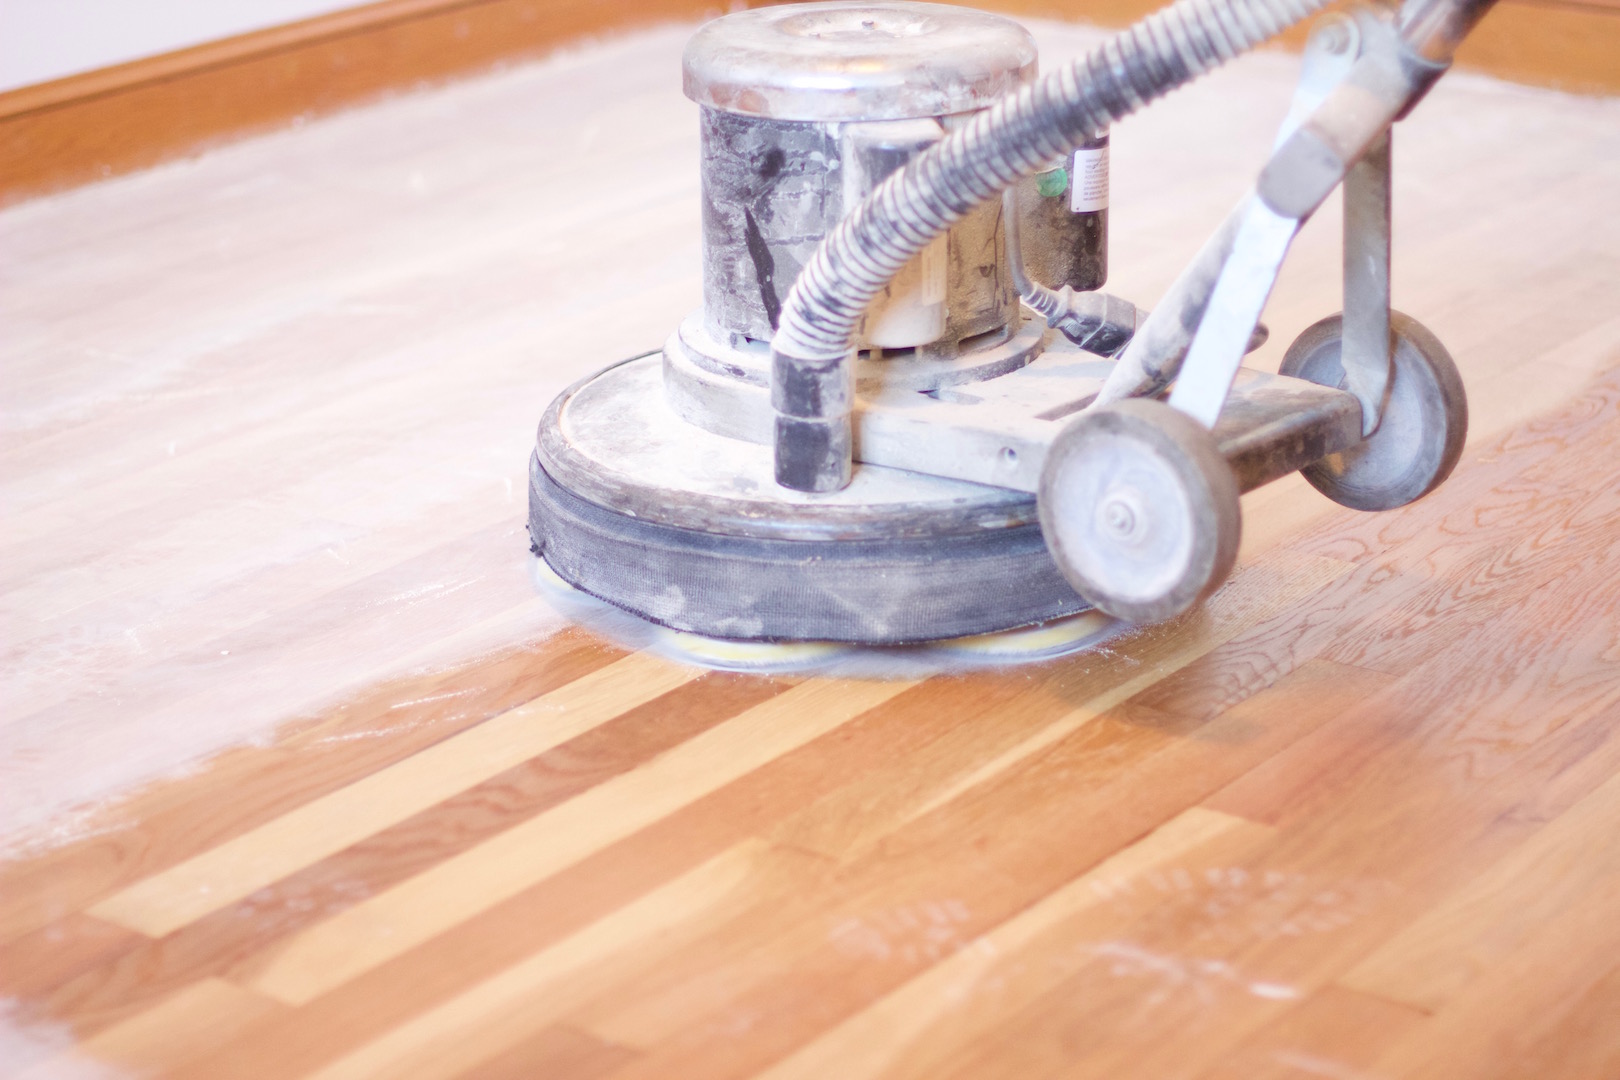
Operating the Floor Buffer
Operating a floor buffer requires skill and proper technique to achieve the best results. Here is a step-by-step guide to help you navigate the process:
- Position yourself: Stand behind the floor buffer, gripping the handles firmly with both hands. Keep your knees slightly bent and maintain a stable stance. Make sure to distribute your weight evenly to maintain balance while operating the machine.
- Power on the machine: Turn on the floor buffer using the power switch, following the instructions provided by the manufacturer. It is important to note that some models may have a separate switch to engage the pads or brushes.
- Start at a low speed: Begin at a low speed setting to get familiar with the machine’s operation. Gradually increase the speed as you gain more control and confidence. Keep in mind that different floor surfaces may require different speeds, so adjust accordingly.
- Start in a corner: Start buffing in a corner or along the wall, working your way towards the exit of the room. This allows for easier maneuvering and prevents you from stepping on the already buffed areas.
- Move the machine smoothly: When operating the floor buffer, move it in slow, overlapping passes. Use gentle, fluid motions to cover the entire area evenly. Avoid jerky or sudden movements that could cause you to lose control of the machine.
- Work in small sections: It is best to work in small, manageable sections. This ensures that you give proper attention to each area and prevents the cleaning solution from drying before you can buff it properly.
- Avoid excess pressure: Let the floor buffer’s weight do the work for you. Do not exert excessive pressure on the machine as it can lead to uneven buffing or damage to the flooring surface. Maintain a light, even pressure to achieve optimal results.
- Overlap each pass: Make sure to overlap each pass by about one-third to ensure even coverage. This helps avoid streaks or missed spots, allowing for a consistent shine across the entire floor.
- Change direction occasionally: To ensure thorough buffing, change the direction of your passes occasionally. This helps to remove any visible swirl marks and provides a more uniform finish.
- Inspect periodically: Pause periodically to inspect your work. Check for any missed spots, streaks, or areas that require additional attention. Take the time to address these areas before moving on to the next section.
- Work your way out: As you continue buffing, gradually work your way towards the exit of the room. Be mindful of your positioning and minimize stepping on the freshly buffed areas to avoid footprints or accidental damage.
- Finish with a final pass: Once you have buffed the entire floor, make a final pass over the entire area to ensure a consistent shine. This helps blend any slight variations and leaves you with a professional-looking finish.
Remember to practice patience and maintain a steady pace while operating the floor buffer. Rushing can lead to uneven results or skipped areas. With proper technique and attention to detail, you can achieve a beautifully polished floor. After operating the floor buffer, it’s time to dive into buffing techniques to enhance your floor-cleaning prowess.
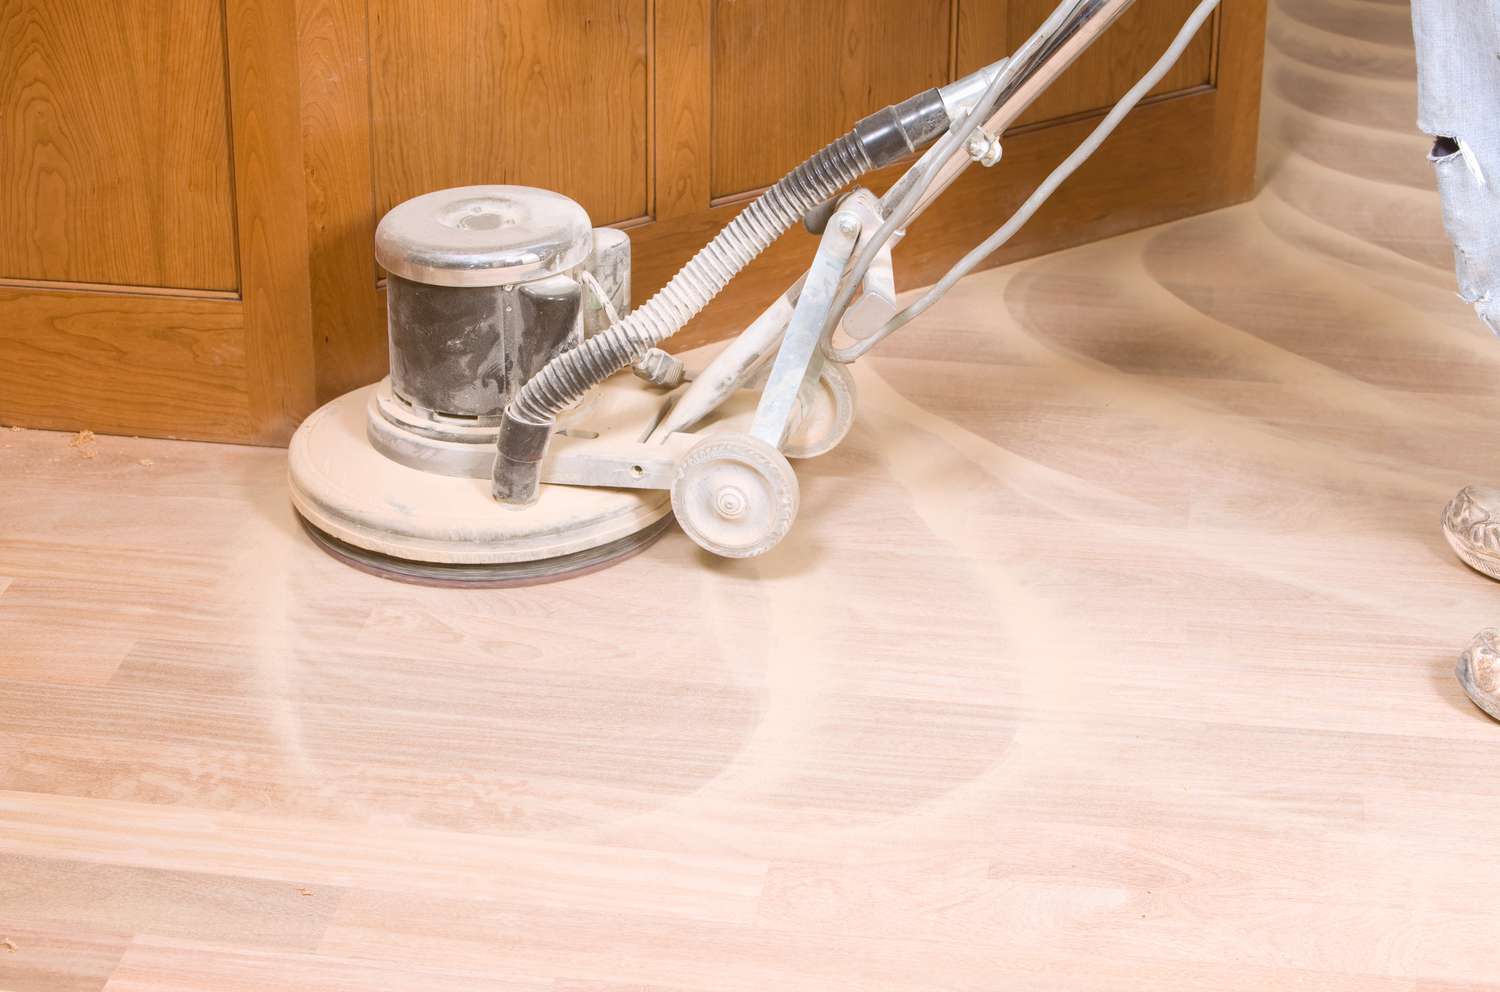
Buffing Techniques
Buffing is not just about operating the floor buffer; it’s also about applying effective techniques to achieve a flawless shine. Here are some buffing techniques that can help you take your floor cleaning to the next level:
- Overlap passes: When buffing, make sure to overlap each pass by about one-third. This ensures even coverage and prevents streaks or missed spots.
- Vary the direction: Change the direction of your passes periodically to avoid creating visible swirl marks. This helps achieve a more uniform and consistent finish.
- Use figure-eight motion: When buffing, try using a figure-eight motion with the floor buffer. This technique helps distribute the cleaning solution more evenly and ensures all areas are properly buffed.
- Control the speed: Adjust the speed of the floor buffer based on the type of flooring and the result you want to achieve. Higher speeds are usually suitable for polishing, while lower speeds work well for scrubbing or removing stubborn stains.
- Focus on high-traffic areas: Spend extra time and attention buffing high-traffic areas, such as hallways or entryways. These areas usually require more cleaning and buffing to remove dirt buildup and restore the shine.
- Address stubborn stains: For stubborn stains or marks that are not easily removed with buffing alone, consider spot-cleaning with a suitable cleaning solution and a scrub brush or pad. This targeted approach can help lift and remove deep-seated stains.
- Apply even pressure: Maintain a light, even pressure on the floor buffer to avoid causing damage to the flooring surface. Let the machine’s weight do the work for you, and avoid exerting excessive force.
- Clean the pads or brushes: Periodically clean or change the pads or brushes on the floor buffer to prevent buildup of dirt or residue. This ensures that the machine continues to work effectively and delivers optimal results.
- Buff in small sections: Work in small, manageable sections to ensure that you give proper attention to each area and achieve consistent buffing results. This prevents the cleaning solution from drying before you can buff it properly.
- Stay organized: Keep your supplies organized and within reach. This includes extra pads or brushes, cleaning solution, towels, and any other items you may need during the buffing process. Being organized will streamline the process and save you time.
- Practice regularly: Like any skill, buffing technique improves with practice. The more you buff, the better you will become at achieving a smooth, uniform shine. Take the time to practice and refine your technique to achieve professional-grade results.
By implementing these buffing techniques, you can enhance the efficiency and effectiveness of your floor cleaning routine. Experiment with different approaches and find the ones that work best for your specific floor type and condition. With consistent practice, you’ll develop the skills needed to achieve a beautiful, glossy finish every time.
Now that you’ve learned about the various buffing techniques, it’s important to understand the importance of cleaning and maintaining the floor buffer itself. Let’s explore cleaning and maintenance tips in the next section.
Cleaning and Maintenance
Cleaning and maintaining your floor buffer properly is essential to ensure its longevity and optimal performance. Neglecting regular cleaning and maintenance can lead to decreased efficiency and potential damage to the machine. Here are some key cleaning and maintenance tips to keep your floor buffer in top shape:
- Clean after each use: After each use, clean the floor buffer thoroughly to remove any dirt, debris, or residue. Wipe down the machine with a damp cloth and ensure that all the attachments, such as pads or brushes, are free from any particles.
- Empty and clean the solution tank: If your floor buffer has a solution tank, empty it after each use and rinse it thoroughly to remove any residual cleaning solution. Allow it to air dry completely before storing or using it again.
- Inspect for damages: Regularly inspect the floor buffer for any damages or wear and tear. Check the power cord, handles, switches, and other components. If you notice any issues, such as frayed wires or loose screws, address them promptly before using the machine.
- Replace worn pads or brushes: Over time, the pads or brushes on your floor buffer will wear out and become less effective. Replace them when necessary to ensure optimal results. Follow the manufacturer’s recommendations regarding the lifespan and replacement schedule for these attachments.
- Lubricate moving parts: Lubricate any moving parts of the floor buffer as recommended by the manufacturer. This prevents excessive friction and ensures smooth operation of the machine. Use the appropriate lubricant, and be mindful not to over-lubricate.
- Store in a clean, dry area: When not in use, store the floor buffer in a clean, dry area to protect it from dust, moisture, and other potential damages. Choose a location away from direct sunlight and extreme temperatures.
- Follow maintenance schedule: Refer to the manufacturer’s maintenance schedule and follow it diligently. This may include regular inspections, lubrication, and other maintenance tasks. Adhering to the recommended schedule will ensure the longevity and peak performance of your floor buffer.
- Use proper cleaning solutions: Only use cleaning solutions that are recommended for your specific type of flooring. Avoid using harsh chemicals or abrasive cleaners that can damage the floor or the machine. Read the labels and follow the instructions for dilution, if applicable.
- Keep the machine dry: After cleaning or maintenance tasks, make sure the floor buffer is completely dry before using or storing it. Moisture can cause electrical issues and promote the growth of mold or mildew.
- Regularly clean the power cord: Inspect and clean the power cord of the floor buffer regularly. Remove any dust or debris that may have accumulated to prevent potential electrical hazards.
By following these cleaning and maintenance tips, you can keep your floor buffer operating smoothly and prolong its lifespan. Regular care and attention will ensure that you get the best performance out of your machine, making your floor cleaning tasks more efficient and effective.
Now that you’re aware of the importance of cleaning and maintaining your floor buffer, let’s move on to the next section, which covers troubleshooting common issues that may arise during the buffing process.
Troubleshooting Common Issues
While operating a floor buffer, you may encounter some common issues that can impact the efficiency and effectiveness of the buffing process. Here are a few troubleshooting tips to help you overcome these challenges:
- Uneven buffing: If you notice that the buffing results are inconsistent or uneven, double-check your technique. Ensure that you are overlapping your passes and applying even pressure to the floor buffer. Adjusting the speed or changing the direction of your passes can also help achieve a more uniform shine.
- Streaks or smudges: Streaks or smudges on the floor can occur due to various reasons, such as excess cleaning solution or improperly maintained pads/brushes. Make sure to use the appropriate amount of cleaning solution, and regularly clean or replace the pads/brushes to prevent residue buildup. Also, ensure that the floor is completely dry before buffing to avoid streaks.
- Excessive noise or vibration: If your floor buffer is producing excessive noise or vibration during operation, it could indicate a problem with its components. Check for loose screws, damaged pads/brushes, or worn-out parts that may need to be replaced. If the issue persists, consult the manufacturer or seek professional help for repair.
- Lack of power: If your floor buffer seems to lack power or is not performing as expected, first check the power source and ensure that the machine is properly plugged in. Make sure the circuit breaker or fuse has not tripped. If the issue persists, it may be due to a mechanical problem within the machine that requires professional attention.
- Excessive heat: If you notice that your floor buffer is generating excessive heat during operation, it could be a sign of overworking the machine. Take breaks in between buffing sessions to allow the motor to cool down. If the problem persists, it may be a result of a malfunctioning motor or other internal issues that need to be addressed by a professional.
- Burn marks on the floor: Burn marks can occur if the floor buffer is held in one spot for too long or if excessive pressure is applied. To avoid this, always keep the machine moving and distribute your pressure evenly. Buffing in smaller sections and using suitable pads/brushes can help prevent burn marks.
- Electrical issues: If you experience any electrical issues, such as power fluctuations or intermittent operation, immediately turn off the floor buffer and unplug it from the power source. Inspect the power cord for any damages or loose connections. If the problem persists, consult a professional electrician or contact the manufacturer for assistance.
- Excessive product consumption: If you find that you are using a large amount of cleaning solution during the buffing process, reassess your dilution ratios. A higher concentration of cleaning solution may not necessarily yield better results. Follow the product instructions for the recommended dilution and adjust accordingly to avoid wastage.
- Excessive splashing: Excessive splashing of the cleaning solution can occur if the floor buffer is being operated at a high speed or if too much solution is being dispensed. Adjust the speed settings and the amount of solution dispensed to minimize splashing. Also, make sure to position the solution tank properly to prevent leakage.
- Loss of control: If you feel like you are losing control of the floor buffer or struggling to maneuver it effectively, first check your stance and grip. Ensure that you have a proper grip on the handles and are standing in a stable position. If the problem persists, seek additional training or consult a professional for guidance.
Remember, if you encounter any persistent issues with your floor buffer that you are unable to resolve, it is advisable to consult the manufacturer’s manual, seek professional assistance, or contact customer support for further guidance. Troubleshooting common issues will help you overcome challenges, ensuring a smooth and efficient buffing process.
With these troubleshooting tips, you are now equipped to handle any obstacles that may arise during floor buffing. In the next section, we will conclude our guide with a summary and some final thoughts.
Read more: How To Use A Floor Scrubber
Conclusion
Congratulations! You have reached the end of our comprehensive guide on how to use a floor buffer. We hope that this article has equipped you with the knowledge and skills needed to achieve professional results in your floor cleaning endeavors.
We began by emphasizing the importance of safety precautions when using a floor buffer. Understanding and following safety guidelines is crucial to protect yourself and prevent accidents during operation.
We then discussed the supplies needed to effectively operate a floor buffer. From the machine itself to the appropriate pads or brushes and cleaning solutions, having the right supplies readily available ensures a smooth and efficient cleaning process.
Preparing the floor before buffing is a vital step to achieve optimal results. This includes sweeping or vacuuming, spot cleaning, moving furniture, and protecting baseboards. Properly preparing the floor sets the foundation for a successful buffing session.
Next, we covered the assembly process of the floor buffer. By following the manufacturer’s instructions, you can correctly assemble the machine, attach the handles, pad driver, and ensure everything is securely in place.
To operate the floor buffer effectively, we shared a step-by-step guide and highlighted important techniques such as overlapping passes, using a figure-eight motion, and adjusting speed and direction. Following these techniques will help you achieve a polished and uniform shine.
In addition, we emphasized the importance of cleaning and maintaining the floor buffer itself. Regularly cleaning the machine, inspecting for damages, replacing worn parts, and following the manufacturer’s maintenance schedule will ensure its longevity and peak performance.
We also provided troubleshooting tips to overcome common issues such as uneven buffing, streaks, excessive noise, lack of power, and more. By addressing these challenges, you can overcome obstacles and achieve desired results.
Finally, we concluded with a reminder to always prioritize safety, practice proper techniques, and seek professional assistance when needed.
We hope that this guide has empowered you to confidently operate a floor buffer and achieve exceptional results in your floor cleaning endeavors. By following the steps, guidelines, and techniques outlined in this article, you will be well on your way to maintaining beautiful, polished floors that make a lasting impression.
Frequently Asked Questions about How To Use Floor Buffer
Was this page helpful?
At Storables.com, we guarantee accurate and reliable information. Our content, validated by Expert Board Contributors, is crafted following stringent Editorial Policies. We're committed to providing you with well-researched, expert-backed insights for all your informational needs.


0 thoughts on “How To Use Floor Buffer”