Articles
How To Use A Laser Level To Check A Floor
Modified: August 31, 2024
Learn how to use a laser level to accurately check the levelness of any floor surface with our informative articles.
(Many of the links in this article redirect to a specific reviewed product. Your purchase of these products through affiliate links helps to generate commission for Storables.com, at no extra cost. Learn more)
Introduction
Welcome to our guide on how to use a laser level to check a floor. Whether you are a homeowner looking to assess the levelness of your floors or a professional contractor working on a construction project, a laser level can be an invaluable tool. It provides accurate measurements and helps you identify any unevenness or slopes that may affect the stability and aesthetics of the floor.
In this article, we will walk you through the process of using a laser level to inspect your floors. We will cover everything from understanding laser levels to troubleshooting common issues that may arise during the inspection. So, let’s get started!
Key Takeaways:
- Ensure safety, calibrate, and position your laser level properly for accurate floor inspections. Prioritize safety, follow manufacturer’s instructions, and troubleshoot common issues to achieve reliable results.
- Choose the right laser level for the task, prioritize safety, and follow proper calibration and setup procedures. By doing so, you can accurately assess floor levelness and identify potential issues.
Read more: How To Check Accuracy Of Laser Level
Understanding Laser Levels
Before we dive into the specifics of using a laser level to check a floor, let’s first familiarize ourselves with what a laser level is and the different types available:
- Rotary Laser Levels: These are the most versatile laser levels and are commonly used for large-scale construction projects. They emit a rotating laser beam that provides a 360-degree coverage, making them ideal for leveling floors, walls, and ceilings.
- Line Laser Levels: These laser levels emit a straight laser beam that can be projected horizontally or vertically. They are often used for smaller-scale projects, such as installing shelves or aligning tiles.
- Dot Laser Levels: These laser levels emit multiple laser dots in various directions, which are useful for aligning objects or creating reference points.
Each type of laser level has its own advantages and is suited to different tasks. For the purpose of checking a floor, a rotary laser level is recommended due to its ability to project a 360-degree laser beam and cover a larger area.
…
…
Key Takeaways:
- Ensure safety, calibrate, and position your laser level properly for accurate floor inspections. Prioritize safety, follow manufacturer’s instructions, and troubleshoot common issues to achieve reliable results.
- Choose the right laser level for the task, prioritize safety, and follow proper calibration and setup procedures. By doing so, you can accurately assess floor levelness and identify potential issues.
Read more: How To Check Accuracy Of Laser Level
Understanding Laser Levels
Before we dive into the specifics of using a laser level to check a floor, let’s first familiarize ourselves with what a laser level is and the different types available:
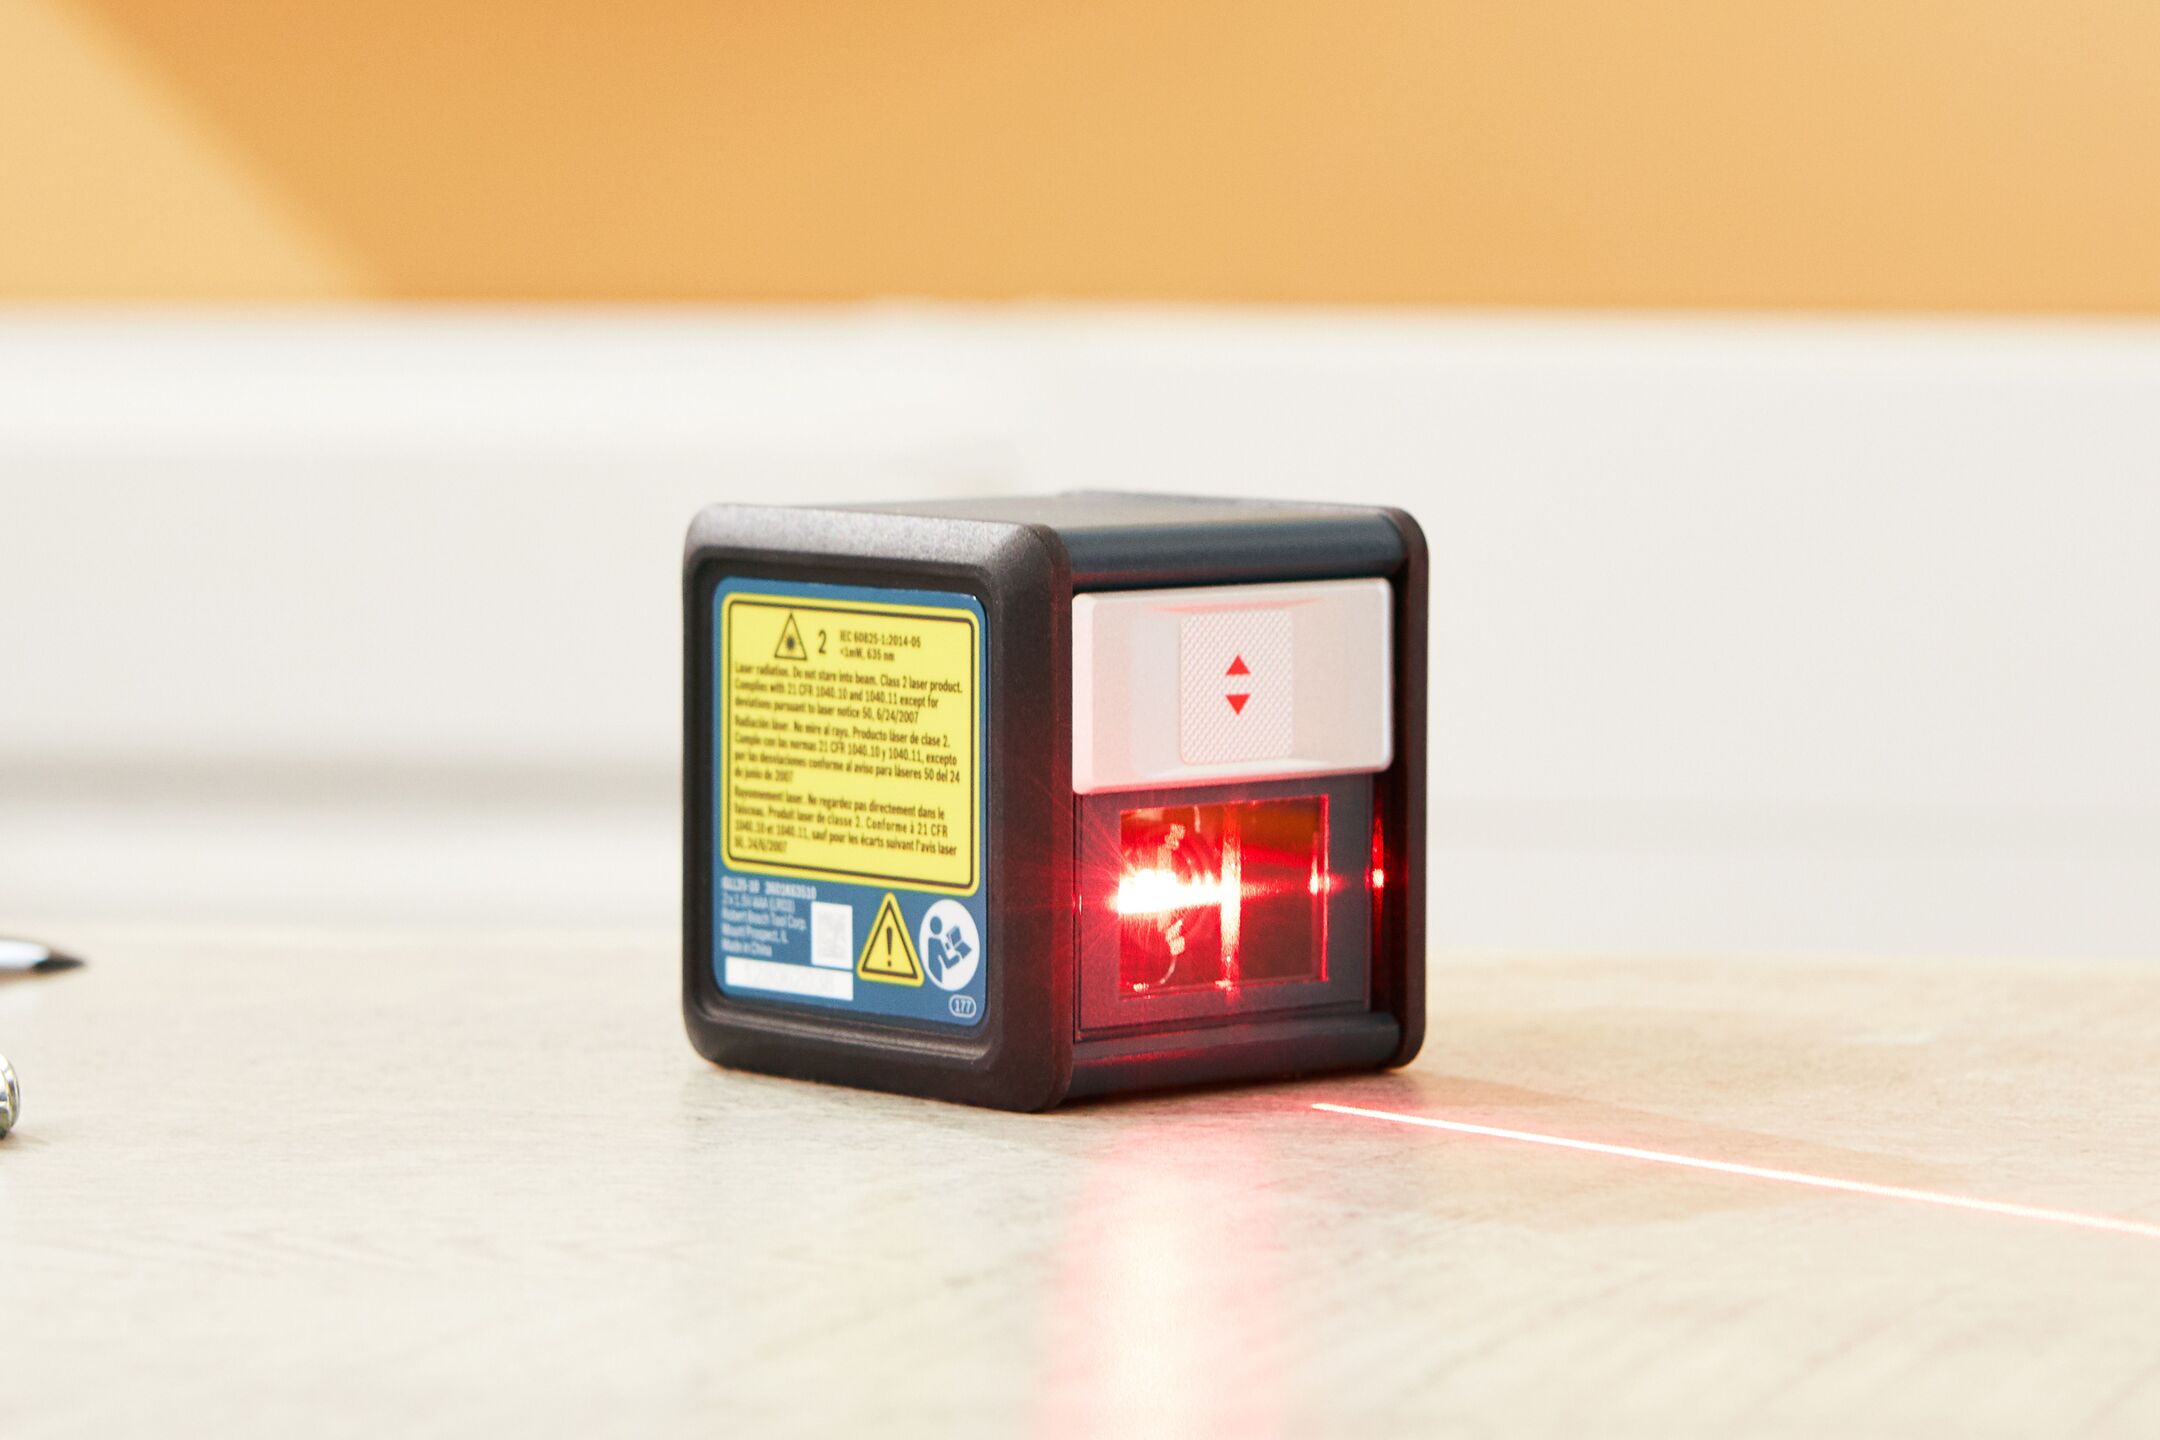
What is a laser level?
A laser level is a precision tool that uses laser technology to project a straight and level reference line or point. It provides a highly accurate measurement of levelness and is commonly used in construction, surveying, and interior design tasks. Laser levels eliminate the need for traditional leveling methods such as bubble levels, making the process faster and more precise.
Types of laser levels
There are several types of laser levels available, each designed for specific tasks. Here are the most common types:
- Rotary Laser Levels: These are the most versatile laser levels and are commonly used for large-scale construction projects. They emit a rotating laser beam that provides a 360-degree coverage, making them ideal for leveling floors, walls, and ceilings. Rotary laser levels can be self-leveling or manual-leveling, with self-leveling models automatically adjusting the beam to ensure accuracy.
- Line Laser Levels: Line laser levels emit a straight laser beam that can be projected horizontally or vertically. They are often used for smaller-scale projects, such as installing shelves, aligning tiles, or hanging pictures. Line laser levels are compact, easy to use, and provide a clear and visible reference line.
- Dot Laser Levels: Dot laser levels emit multiple laser dots in various directions, which are useful for aligning objects or creating reference points. They are commonly used for tasks such as aligning windows and doors, installing electrical fixtures, or hanging artwork. Dot laser levels offer versatility and precision in a compact design.
- Cross-Line Laser Levels: Cross-line laser levels project two intersecting laser lines, forming a cross shape on surfaces. They are beneficial for tasks that require aligning objects, such as installing cabinets, aligning tiles, or framing walls. Cross-line laser levels provide accurate and highly visible reference lines.
Each type of laser level has its own advantages and is suited to different tasks. For the purpose of checking a floor, a rotary laser level is recommended due to its ability to project a 360-degree laser beam and cover a larger area. However, depending on the size and complexity of the project, other types of laser levels may also be suitable.
Now that we understand the basics of laser levels, let’s move on to the next steps in preparing for a floor inspection.
Read more: How To Use A Laser Level
Preparing for Floor Inspection
Before you begin using a laser level to check the levelness of a floor, it’s essential to take some necessary precautions and ensure that the laser level is properly adjusted and calibrated. Here are the key steps to follow:
Safety precautions
When working with a laser level, it’s important to prioritize safety. Ensure that you have the following safety measures in place:
- Wear appropriate personal protective equipment (PPE), including safety glasses to protect your eyes from the laser beam.
- Keep the laser level and its accessories away from children and unauthorized individuals.
- Avoid pointing the laser beam directly towards people or reflective surfaces.
- Place warning signs or barricades around the work area to prevent accidental exposure to the laser beam.
Adjusting the laser level
Prior to using the laser level, make sure it is properly adjusted to ensure accurate readings. Follow these steps:
- Check the battery level or power source of the laser level and ensure it is sufficiently charged or connected.
- Inspect the laser level for any visible damage or misalignment. If any issues are detected, contact the manufacturer or consult the user manual for guidance on repairs or adjustments.
- Ensure the laser level is on a stable surface or mounted securely on a tripod, depending on the type of laser level being used.
- If your laser level has a leveling mechanism, activate the self-leveling feature or manually adjust the level until the bubble or indicator shows that the laser level is perfectly level. This step is crucial to ensure the accuracy of the laser beam.
Calibrating the laser level
Calibrating the laser level is an important step to ensure its accuracy. Here’s how to calibrate the laser level:
- Refer to the user manual provided by the manufacturer for specific calibration instructions, as different laser levels may have varying calibration processes.
- Place the laser level on a stable surface or mount it securely on a tripod.
- Identify a known level reference point or surface nearby, such as a professionally leveled object or a dedicated leveling reference point.
- Aim the laser level at the reference point or surface and adjust the laser level’s settings or positioning until the laser beam aligns with the reference point.
- Repeat the calibration process at multiple points to ensure consistent accuracy throughout the inspection.
By taking the necessary safety precautions and properly adjusting and calibrating the laser level, you can ensure accurate and reliable floor inspection results. Now that the laser level is ready, it’s time to proceed with setting it up for the floor inspection.
Read more: How To Use A Self Leveling Laser Level
Setting up the Laser Level
Once you have prepared your laser level by adjusting it and calibrating it, it’s time to set it up for the floor inspection. Follow these steps to ensure proper setup:
Choosing the appropriate location
Before you mount the laser level, carefully choose the location where you want to perform the floor inspection:
- Ensure that the area is clear of any obstructions such as furniture, debris, or equipment that may interfere with the laser level’s beam.
- Select a location that provides a clear line of sight for the laser beam to project across the floor.
- If possible, choose a location that is in the center of the room or area you are inspecting to achieve a balanced and accurate measurement.
Mounting the laser level
The method of mounting the laser level will depend on the type of laser level you are using:
- For rotary laser levels: Place the laser level on a stable surface or mount it securely on a tripod. Adjust the height and position of the tripod to align the laser level with the desired location and ensure stability.
- For line or dot laser levels: These types of laser levels typically come with mounting brackets that can be attached to walls or surfaces. Use screws or adhesive to securely attach the bracket, ensuring that it is level and aligned with the desired location.
Leveling the laser horizontally
Regardless of the type of laser level you are using, it’s crucial to ensure that the laser beam is projected horizontally for an accurate floor inspection:
- Use the built-in leveling mechanism or an external level to ensure that the laser level is perfectly horizontal. Adjust the leveling knobs or bubble indicators until the laser level is leveled.
- Check the bubble or digital indicator to confirm that the laser level is accurately leveled.
- Securely lock the laser level in place or activate the self-leveling mechanism, depending on the instructions provided by the manufacturer.
By carefully selecting the location, securely mounting the laser level, and ensuring it is perfectly leveled horizontally, you can guarantee accurate and reliable floor inspection results. Now that the laser level is set up, let’s move on to conducting the floor inspection.
Read more: How To Laser Level A Floor With GLL 2
Conducting the Floor Inspection
With the laser level set up and ready, it’s time to conduct the floor inspection. Follow these steps to ensure a thorough and accurate inspection:
Positioning the laser level
Position the laser level in the chosen location to cover the area you want to inspect:
- Ensure that the laser beam is projected across the entire floor or the section you are inspecting.
- Avoid positioning the laser level too close to walls or obstacles that may block the laser beam.
- Consider placing the laser level at different locations within the room or area to cover a larger section and identify any variations in the floor level.
Starting the floor inspection
Once the laser level is positioned, it’s time to start the inspection:
- Activate the laser level and ensure that the laser beam is clearly visible on the floor.
- Slowly move around the room or area, observing the laser level’s beam as it projects across the floor surface.
- Take note of any deviations or variations in the laser level’s beam, indicating an uneven or sloping floor.
Interpreting the laser level readings
As you conduct the floor inspection, it’s important to interpret the laser level readings accurately:
- If the laser beam remains perfectly straight and level, it indicates a flat and even floor surface.
- If the laser beam deviates or slopes, it indicates areas of unevenness or slope in the floor.
- Take measurements or record the points where the laser level beam deviates to quantify the extent of the unevenness.
- Use a measuring tape or other measuring tools to confirm the difference in height or the degree of slope.
By positioning the laser level appropriately, starting the inspection, and interpreting the laser level readings accurately, you can identify any areas of concern and determine the levelness of the floor. However, it’s essential to keep in mind that laser levels are precise tools, and any slight variations in the floor may require further assessment or professional guidance.
Read more: How To Use A Laser Level For Framing
Troubleshooting Common Issues
During the floor inspection process with a laser level, you may encounter some common issues that can affect the accuracy of the readings. Here are some troubleshooting tips to overcome these issues:
Uneven floor surfaces
If you notice that the laser level beam is not parallel to the floor or if there are significant deviations in the readings, it may be due to an uneven floor surface. Here’s what you can do to troubleshoot this issue:
- Inspect the floor surface for any visible irregularities, such as bumps, depressions, or cracks.
- Use a leveling compound or self-leveling mortar to fill in any low spots or uneven areas on the floor.
- Allow the leveling compound or self-leveling mortar to dry and cure according to the manufacturer’s instructions before repositioning and recalibrating the laser level.
Obstructions and interferences
If there are obstructions in the path of the laser beam or if interferences are affecting the readings, you may need to address these issues to obtain accurate measurements. Follow these troubleshooting steps:
- Remove any objects or obstacles that are blocking the laser beam’s path.
- Ensure that there are no reflective surfaces, such as mirrors or shiny materials, that might redirect or distort the laser beam.
- Adjust the positioning of the laser level to avoid any interferences, such as overhead fixtures or structures that may cast shadows or disrupt the laser beam.
Adjusting the laser level settings
If you are encountering inconsistencies or inaccuracies in the laser level readings, consider adjusting the settings of the laser level. Here’s what you can do:
- Consult the user manual for specific instructions on adjusting the settings of your laser level.
- Check the accuracy and sensitivity settings to ensure they are set appropriately for the floor inspection task.
- Consider modifying the rotation speed or intensity of the laser beam to improve the visibility and precision of the readings.
By troubleshooting these common issues, you can overcome any challenges that may arise during the floor inspection process. Remember to always refer to the manufacturer’s instructions and seek professional assistance if needed for complex or extensive floor leveling projects.
Read more: How To Use Topcon Laser Level
Key Points to Remember
As you use a laser level to check a floor, it is essential to keep the following key points in mind to ensure safety and accurate results:
Safety first
Prioritize safety throughout the entire floor inspection process:
- Wear appropriate personal protective equipment (PPE), such as safety glasses, to protect your eyes from the laser beam.
- Keep the laser level and its accessories out of the reach of children and unauthorized individuals.
- Avoid pointing the laser beam directly at people or reflective surfaces.
- Use warning signs or barricades to prevent accidental exposure to the laser beam.
Calibrating the laser level before use
Always calibrate the laser level before using it for floor inspection:
- Follow the manufacturer’s instructions for calibrating your specific laser level model.
- Ensure that the laser level is perfectly level and aligned with a known reference point or surface.
- Repeat the calibration process at multiple points to ensure consistent accuracy throughout the inspection.
Proper positioning and leveling important for accurate results
The positioning and leveling of the laser level greatly impact the accuracy of the floor inspection:
- Choose the appropriate location for the laser level, ensuring a clear line of sight and coverage of the floor area.
- Mount the laser level securely using a tripod or mounting bracket, depending on the type of laser level.
- Ensure that the laser level is perfectly leveled horizontally for accurate measurements.
- Regularly check and adjust the position and levelness of the laser level throughout the inspection to maintain accuracy.
By prioritizing safety, calibrating the laser level, and ensuring proper positioning and leveling, you can achieve accurate and reliable results during the floor inspection process. If you encounter any difficulties or have extensive floor leveling needs, consider consulting a professional for guidance and assistance.
Read more: How To Use A Transit Laser Level
Conclusion
Using a laser level to check a floor is a practical and efficient method that provides accurate measurements and helps identify any unevenness or slopes that may affect the stability and aesthetics of the floor. By following the steps outlined in this guide, you can ensure a successful floor inspection and obtain reliable results.
Throughout the process, it is crucial to prioritize safety by wearing appropriate protective equipment and taking necessary precautions to prevent accidents or exposure to the laser beam. Additionally, calibrating the laser level before use and properly positioning and leveling it are key factors in obtaining accurate readings.
Remember, different types of laser levels serve varying purposes, so choose the appropriate level for the specific task at hand. Rotary laser levels are recommended for floor inspections due to their ability to project a 360-degree laser beam and cover a larger area. However, line laser levels and dot laser levels may also be suitable for smaller-scale projects or specific tasks.
If you encounter any issues during the floor inspection, such as uneven floor surfaces, obstructions, or inaccuracies, troubleshoot the problems by addressing the specific challenges and adjusting the laser level settings as needed. Always consult the manufacturer’s instructions for proper troubleshooting methods.
In conclusion, using a laser level to check a floor provides accuracy, efficiency, and convenience. By following the steps outlined in this guide and keeping the key points in mind, you can ensure a thorough and successful floor inspection. Remember that laser levels are precision tools, and any significant variations or complex floor leveling projects may require professional assessment and guidance.
Now, armed with the knowledge and understanding of how to use a laser level effectively, you can confidently assess the levelness of floors in various settings, including homes, offices, or construction sites. Enjoy the benefits of precise measurements and level floors for improved stability and overall quality.
Frequently Asked Questions about How To Use A Laser Level To Check A Floor
Was this page helpful?
At Storables.com, we guarantee accurate and reliable information. Our content, validated by Expert Board Contributors, is crafted following stringent Editorial Policies. We're committed to providing you with well-researched, expert-backed insights for all your informational needs.


0 thoughts on “How To Use A Laser Level To Check A Floor”