Home>Articles>How To Use Johnson Self Leveling Rotary Laser Level
Articles
How To Use Johnson Self Leveling Rotary Laser Level
Modified: August 21, 2024
Learn how to effectively use Johnson Self Leveling Rotary Laser Level with our informative articles. Get expert tips and tricks for accurate leveling.
(Many of the links in this article redirect to a specific reviewed product. Your purchase of these products through affiliate links helps to generate commission for Storables.com, at no extra cost. Learn more)
Introduction
Welcome to the world of construction and surveying, where accuracy and precision are paramount. In any construction project, the need for a level surface is crucial, whether it’s for installing flooring, aligning walls, or setting up outdoor structures. Johnson Self Leveling Rotary Laser Level is a powerful tool that can make the task of leveling surfaces effortless and efficient.
Whether you are a professional contractor or a DIY enthusiast, understanding how to use the Johnson Self Leveling Rotary Laser Level can greatly enhance your projects’ quality and speed. This article will guide you through the features, set up, calibration, operation, and maintenance of this versatile tool.
The Johnson Self Leveling Rotary Laser Level is renowned for its accuracy and reliability. It is designed to emit a laser beam that rotates 360 degrees, providing a level reference point in all directions. This innovative tool eliminates the need for tedious manual leveling using traditional surveying tools, saving you time and effort.
By using the Johnson Self Leveling Rotary Laser Level, you can ensure that your surfaces are perfectly level, eliminating any potential errors in your construction or renovation projects. With its simple operation and intuitive features, even beginners can easily achieve professional-level results.
In the following sections, we will explore the various components and accessories of the Johnson Self Leveling Rotary Laser Level, as well as provide a step-by-step guide on how to set it up, calibrate it, and operate it effectively. Additionally, we will discuss some tips and tricks to optimize your usage and troubleshoot common issues that may arise.
So, let’s dive into the world of the Johnson Self Leveling Rotary Laser Level and discover how this tool can revolutionize your construction and surveying projects.
Key Takeaways:
- The Johnson Self Leveling Rotary Laser Level simplifies leveling and alignment tasks in construction and surveying projects. Its self-leveling capability, visible laser beam, and versatile features ensure accurate and efficient results for professionals and DIY enthusiasts.
- Understanding the components, setup, calibration, and operation of the rotary laser level is crucial for achieving precise measurements and optimal performance. Regular maintenance, care, and adherence to safety guidelines are essential for extending the tool’s lifespan and ensuring reliable results.
Read more: Who Uses Rotary Laser Level
Understanding the Johnson Self Leveling Rotary Laser Level
The Johnson Self Leveling Rotary Laser Level is a versatile tool that combines precision, speed, and convenience for all your leveling needs. It uses advanced technology to emit a rotating laser beam, creating a reference line or plane that indicates the levelness of a surface.
One of the key features of the Johnson Self Leveling Rotary Laser Level is its self-leveling capability. This means that it automatically adjusts its position to maintain a level reference line. This feature is particularly useful when working on uneven surfaces or when there are small changes in elevation.
The laser beam emitted by the Johnson Self Leveling Rotary Laser Level is highly visible, making it easy to align objects and surfaces accurately. It can be seen over long distances, both indoors and outdoors, making it suitable for a wide range of applications.
The Johnson Self Leveling Rotary Laser Level consists of several components that work together seamlessly to provide accurate and reliable measurements. These components include the laser diode, a rotating head, a leveling mechanism, and a base unit.
The laser diode is responsible for emitting the laser beam. It is a highly precise and durable component that ensures the accuracy of the measurements taken by the rotary laser level. The rotating head allows the laser beam to rotate 360 degrees, providing a full reference line or plane around the working area. The leveling mechanism is responsible for adjusting the position of the rotating head to maintain a level reference line. Finally, the base unit houses the controls and power source for the rotary laser level.
In addition to its core components, the Johnson Self Leveling Rotary Laser Level also offers various accessories that enhance its functionality. These accessories include a tripod, a receiver, a remote control, and a target card. The tripod allows you to securely mount the rotary laser level at different heights and angles. The receiver helps to extend the working range of the laser beam, making it easier to detect the laser even in bright or outdoor environments. The remote control allows you to operate the rotary laser level from a distance, providing convenience and flexibility. The target card is used to mark specific points or areas of reference when working with the rotary laser level.
Overall, understanding the components and features of the Johnson Self Leveling Rotary Laser Level is essential for optimal usage. By familiarizing yourself with how it works, you can make the most of its capabilities and achieve precise and accurate results in your construction and surveying projects.
Components and Accessories
The Johnson Self Leveling Rotary Laser Level comes with a range of components and accessories that enhance its functionality and make it a versatile tool for various applications. Understanding these components and accessories is essential to ensure optimal usage and accuracy.
Let’s take a closer look at the key components and accessories of the Johnson Self Leveling Rotary Laser Level:
Components:
- Laser Diode: The laser diode is the heart of the rotary laser level. It emits a highly visible and precise laser beam that rotates 360 degrees. The laser diode ensures the accuracy of the measurements taken by the rotary laser level.
- Rotating Head: The rotating head allows the laser beam to rotate in a full circle, projecting a reference line or plane around the working area. It provides a comprehensive and accurate level indication.
- Leveling Mechanism: The leveling mechanism is responsible for automatically adjusting the position of the rotating head to maintain a level reference line or plane. This self-leveling feature ensures precise measurements even on uneven surfaces.
- Base Unit: The base unit houses the controls and power source for the rotary laser level. It allows you to operate and control the rotary laser level, adjusting settings and switching between different modes.
Accessories:
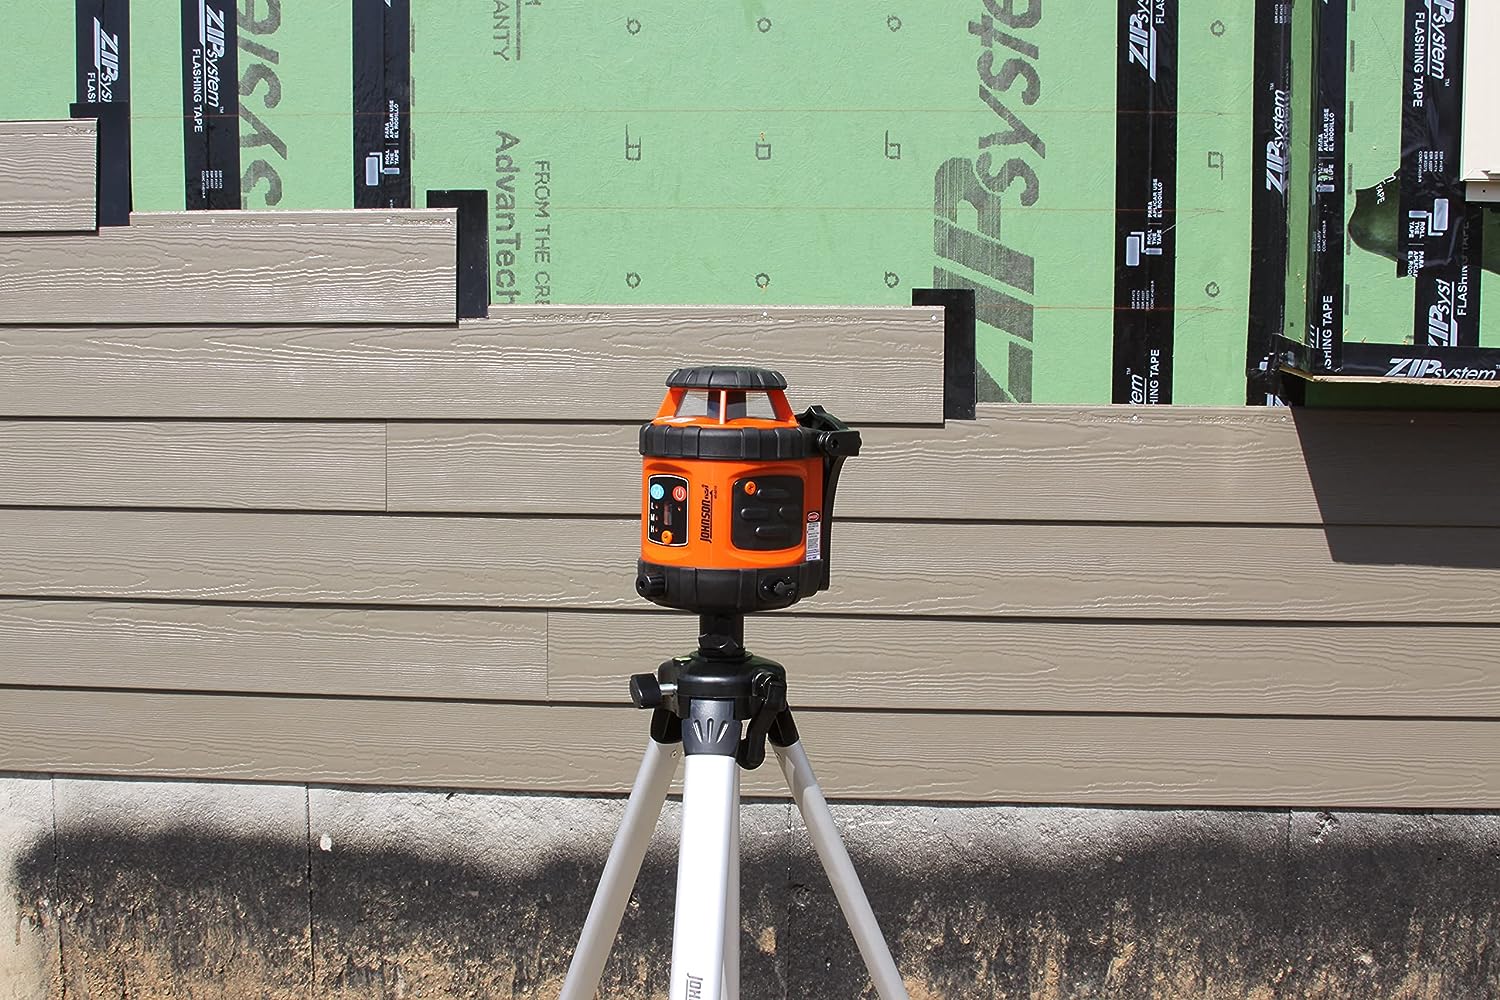
- Tripod: The tripod is a crucial accessory for the rotary laser level. It provides a stable and adjustable platform to mount the rotary laser level at different heights and angles. The tripod allows you to position the rotary laser level at the desired location for accurate measurements.
- Receiver: The receiver is an accessory that extends the working range of the laser beam. It is particularly useful in bright or outdoor environments where the laser beam may be harder to detect. The receiver helps you accurately locate the laser beam and align objects or surfaces accordingly.
- Remote Control: The remote control is a convenient accessory that allows you to operate the rotary laser level from a distance. It gives you flexibility and ease of use, especially when you need to make adjustments or switch between different settings while not directly next to the unit.
- Target Card: The target card is a small card or target that is used to mark specific points or areas of reference during measurements. It helps you achieve precise alignment and positioning of objects or surfaces based on the laser beam’s projection.
These components and accessories work together to provide accurate and reliable measurements with the Johnson Self Leveling Rotary Laser Level. By understanding their functionalities and proper usage, you can maximize the efficiency and effectiveness of this tool in your construction and surveying projects.
Setting Up the Rotary Laser Level
Setting up the Johnson Self Leveling Rotary Laser Level correctly is crucial to ensure accurate measurements and optimal performance. Here is a step-by-step guide to help you set up the rotary laser level with ease:
Step 1: Choose a Suitable Location
Select a stable and level surface to place the rotary laser level. Ensure that the surface is free from any obstructions or debris that could interfere with the laser beam’s projection.
Step 2: Attach the Rotary Laser Level to the Tripod
Securely attach the rotary laser level to the tripod by aligning the mounting bracket with the tripod’s screw. Tighten the screw to hold the rotary laser level in place.
Step 3: Adjust the Tripod Height
Adjust the tripod legs to the desired height, making sure the rotary laser level is at a suitable level for your specific project.
Step 4: Power On the Rotary Laser Level
Turn on the rotary laser level by pressing the power button. Wait for the self-leveling mechanism to activate, which may take a few seconds. The level indicator lights will indicate when the unit has successfully leveled itself.
Step 5: Fine-Tune the Leveling
If necessary, use the fine-adjustment knobs or controls on the rotary laser level to further fine-tune the leveling. This step ensures the laser beam’s projection is perfectly level and aligned with your desired reference point.
Step 6: Check the Laser Beam Projection
Verify that the laser beam is projecting a clear and visible line or plane. Adjust the rotation speed and beam brightness, if applicable, to match your visibility preferences and working environment.
Step 7: Secure the Rotary Laser Level
Once you are satisfied with the laser beam projection and leveling, secure the tripod legs in place to prevent any accidental movement during operation.
By following these steps, you can quickly and effectively set up the Johnson Self Leveling Rotary Laser Level for your construction or surveying project. Remember to refer to the user manual for specific instructions and safety guidelines provided by the manufacturer.
Read also: 12 Amazing Johnson Laser Level for 2025
Calibrating the Rotary Laser Level
Calibrating the Johnson Self Leveling Rotary Laser Level is essential to ensure accurate measurements and reliable performance. Calibration is the process of aligning the laser beam’s projection with a known reference point or benchmark. Here’s a step-by-step guide to help you calibrate your rotary laser level:
Step 1: Find a Known Reference Point
Identify a known reference point or benchmark in your working area. This can be a leveling mark on a wall, a benchmark on the floor, or any other clearly defined point that represents a level surface.
Step 2: Position the Rotary Laser Level
Place the rotary laser level at a suitable distance from the known reference point. Ensure that the laser beam can effectively project onto the reference point without obstruction.
Step 3: Activate the Manual Leveling Mode (If Applicable)
If your rotary laser level has a manual leveling mode, activate it to disable the self-leveling mechanism temporarily. This allows you to manually adjust the leveling of the laser beam.
Read more: How Many Ft. Will Rotary Laser Level Go
Step 4: Align the Laser Beam with the Reference Point
Using the fine-adjustment knobs or controls on the rotary laser level, carefully align the laser beam with the known reference point. Take your time to make precise adjustments until the laser beam perfectly aligns with the reference point.
Step 5: Lock the Manual Leveling Adjustment (If Applicable)
If your rotary laser level has a manual leveling mode, lock the manual leveling adjustment once the laser beam is aligned with the reference point. This ensures that the laser beam remains fixed at the desired level position.
Step 6: Verify Calibration
Confirm the calibration by checking the laser beam’s projection on other surfaces or objects in the working area. Ensure that the laser beam consistently projects an accurately leveled line or plane.
Step 7: Reset to Self-Leveling Mode (If Applicable)
If you disabled the self-leveling mode during calibration, reset the rotary laser level back to the self-leveling mode. This allows the laser level to automatically adjust and maintain a level reference line or plane for future measurements.
Calibrating your rotary laser level is a crucial step that ensures precise and reliable measurements. It is recommended to perform regular calibration checks to maintain accuracy throughout your construction or surveying projects. Refer to the user manual provided by the manufacturer for specific calibration instructions and guidelines tailored to your rotary laser level model.
Operating the Rotary Laser Level
Operating the Johnson Self Leveling Rotary Laser Level is straightforward and intuitive. It offers various features and functionalities to make your leveling tasks efficient and accurate. Here’s a step-by-step guide to help you navigate the operation of the rotary laser level:
Step 1: Power On the Rotary Laser Level
Press the power button to turn on the rotary laser level. Allow a few seconds for the self-leveling mechanism to activate and the level indicators to indicate when the unit has leveled itself.
Step 2: Select the Operating Mode
Choose the appropriate operating mode based on your specific needs. Most rotary laser levels offer options such as horizontal, vertical, or single-axis leveling modes. Select the desired mode using the controls on the unit.
Step 3: Adjust the Rotation Speed
If your rotary laser level allows you to adjust the rotation speed, set it according to your preference and the requirements of your project. Higher rotation speeds may be necessary for increased visibility or larger working areas.
Read also: 14 Best Laser Level Rotary for 2025
Step 4: Align the Laser Beam
Using the fine-adjustment knobs or controls on the rotary laser level, align the laser beam with your desired reference point or benchmark. Take care to make precise adjustments to ensure accurate leveling.
Step 5: Start the Laser Beam Projection
Once the laser beam is aligned, commence the projection by activating the rotation. The laser beam will now rotate 360 degrees, creating a visible reference line or plane around the working area.
Step 6: Make Measurements or Align Surfaces
Utilize the laser beam’s projection to take measurements or align surfaces accurately. The laser beam’s visibility allows you to easily align walls, set up fixtures or installations, or verify the levelness of a surface.
Step 7: Adjust Settings as Needed
Throughout the operation, you can adjust various settings such as rotation speed, beam brightness, or activating additional features like a pulse mode or scanning function. Refer to the user manual for specific instructions on adjusting these settings.
Read also: 11 Best Green Rotary Laser Level for 2025
Step 8: Power Off the Rotary Laser Level
Once you have completed your leveling tasks, press the power button to turn off the rotary laser level. This helps conserve battery life and ensures safe storage until your next use.
Operating the Johnson Self Leveling Rotary Laser Level is a straightforward process. Familiarize yourself with the controls and features of your specific model to make the most of its capabilities. Practice proper safety measures when working with laser beams, such as wearing appropriate eye protection and ensuring a clear working environment.
Understanding Self-Leveling and Manual Leveling Options
The Johnson Self Leveling Rotary Laser Level offers both self-leveling and manual leveling options to accommodate a wide range of leveling tasks and working conditions. Understanding the difference between these two modes is important for optimal usage of the rotary laser level.
Self-Leveling Mode
In self-leveling mode, the rotary laser level utilizes an internal mechanism to automatically adjust its position to maintain a level reference line or plane. This mode is ideal when working on uneven surfaces or when there are small changes in elevation. The self-leveling mechanism ensures that the laser beam remains perfectly level, providing accurate measurements and eliminating the need for manual adjustments.
Self-leveling mode offers convenience and ease of use, particularly for tasks that require a continuous and precise level reference. It simplifies the leveling process, allowing users to focus on other aspects of their project without constantly monitoring and adjusting the rotary laser level.
Manual Leveling Mode
In manual leveling mode, the self-leveling mechanism of the rotary laser level is temporarily disabled. Users can manually adjust the laser beam’s position to create a sloped or angled reference line or plane. Manual leveling mode is useful for projects that require non-standard or custom leveling angles, such as creating a gradient for drainage systems or aligning objects at specific angles.
When operating in manual leveling mode, it is crucial to ensure the accuracy of the manually adjusted level. Careful and precise adjustments are needed to maintain the desired slope or angle. Users should be vigilant in monitoring the laser beam’s position and making necessary adjustments as needed.
Switching between self-leveling and manual leveling modes typically requires selecting the appropriate mode using the controls on the rotary laser level. Refer to the user manual provided by the manufacturer for specific instructions on how to activate each mode.
Understanding the self-leveling and manual leveling options of the Johnson Self Leveling Rotary Laser Level gives you the flexibility to tackle a variety of leveling tasks with precision and ease. Consider the requirements of your project and choose the appropriate mode to achieve the best results.
Read more: How To Use A Laser Level
Tips and Tricks for Effective Use
Using the Johnson Self Leveling Rotary Laser Level effectively not only ensures accurate measurements but also allows you to work efficiently. Here are some helpful tips and tricks to maximize your usage of the rotary laser level:
1. Understand the Specifications:
Familiarize yourself with the specifications of your specific model, including its working range, accuracy, and battery life. This knowledge will help you plan your projects and make informed decisions regarding its usage.
2. Use a Receiver in Bright Environments:
In bright or outdoor environments where the laser beam may be harder to detect, use a receiver (if available) to extend the working range and enhance visibility. The receiver will enable you to accurately locate the laser beam and align your surfaces accordingly.
3. Secure the Tripod Firmly:
When setting up the rotary laser level on a tripod, ensure that the tripod is securely tightened and stable. This will minimize any movement or vibrations, which can affect the accuracy of the level measurements.
Read more: How To Use A Self Leveling Laser Level
4. Take Safety Precautions:
When working with laser beams, remember to wear appropriate eye protection to protect your eyes from potential hazards. Additionally, be mindful of others in the vicinity of the laser beam and avoid pointing it towards people or reflective surfaces.
5. Confirm Calibration Regularly:
To maintain accuracy, periodically check and confirm the calibration of your rotary laser level. This helps ensure that the laser beam remains aligned with a known reference point or benchmark.
6. Mark and Measure:
Use target cards or other marking tools to clearly identify reference points and specific areas during measurements. This will make it easier to align objects or surfaces accurately based on the laser beam’s projection.
7. Experiment with Different Modes and Features:
Explore the various modes and features available on your rotary laser level, such as pulse mode or scanning function. Experimenting with these options can enhance your capabilities and allow you to tackle a broader range of projects.
Read more: How To Use Laser Level Outside
8. Keep the Unit Clean and Protected:
Regularly clean the rotary laser level and its components to remove any dirt or debris that may affect its performance. Also, store the unit in a protective case or bag when not in use to prevent damage.
By implementing these tips and tricks, you can improve your efficiency and accuracy when using the Johnson Self Leveling Rotary Laser Level. Remember to consult the user manual provided by the manufacturer for detailed instructions and safety guidelines specific to your model.
Troubleshooting Common Issues
While the Johnson Self Leveling Rotary Laser Level is designed to work smoothly and accurately, occasionally, you may encounter some common issues. Here are some troubleshooting tips to help you overcome these challenges:
1. Laser Beam not Visible:
If the laser beam is not visible, check the following:
- Ensure that the laser diode is powered on and functioning properly.
- Verify that the laser beam’s brightness setting is adjusted correctly for the working environment.
- In bright conditions, use a receiver to detect and locate the laser beam.
- Check if there are any obstructions, dirt, or debris hindering the laser beam’s projection.
2. Inaccurate Leveling:
If the rotary laser level is not accurately leveling, consider the following troubleshooting steps:
- Check if the unit is properly leveled. Ensure that the leveling mechanism is functioning correctly and not hindered by any external factors.
- Verify that the tripod is stable and firmly secured, minimizing any vibrations or movement that may affect the level measurements.
- Confirm that the rotary laser level is calibrated correctly to a known reference point or benchmark.
- Check for any damage or misalignment of the laser diode that may impact the accuracy of the leveling.
Read more: How To Use A Laser Level For Backsplash
3. Battery Life and Power Issues:
If you are experiencing battery life or power-related issues, try the following troubleshooting steps:
- Ensure that the batteries are fully charged or replace them if needed.
- Confirm that the power source, such as power outlets or rechargeable batteries, is providing adequate power to the rotary laser level.
- Check for any loose connections or faulty wiring that may be affecting the power supply.
- Clean the battery compartment and contacts to ensure proper connection and maximize battery efficiency.
4. Interference or Reading Errors:
If you are encountering interference or reading errors, consider the following troubleshooting tips:
- Ensure that there are no reflective surfaces or obstacles that may cause interference with the laser beam or affect the accuracy of the readings.
- Check for any electromagnetic interference from nearby electrical equipment or power lines. Move away from potential sources of interference if possible.
- Ensure that the receiver, if used, is properly aligned and calibrated with the rotary laser level.
- Verify that the receiver’s display settings and settings on the rotary laser level are compatible for accurate readings.
If the troubleshooting steps do not resolve the issues, consult the user manual or contact the manufacturer’s support for further assistance. They can provide specific guidance tailored to your model and address any other potential issues you may encounter.
Maintenance and Care of the Rotary Laser Level
To ensure the longevity and reliable performance of your Johnson Self Leveling Rotary Laser Level, regular maintenance and proper care are essential. Here are some tips to help you maintain and care for your rotary laser level:
1. Clean the Laser Level:
Regularly clean the laser level and its components to remove any dirt, dust, or debris that may accumulate. Use a soft, lint-free cloth or brush to wipe down the exterior surfaces and carefully clean the laser diode, leveling mechanism, and lenses. Avoid using harsh chemicals or abrasive materials that could damage the unit.
Read more: How To Use A Laser Level For Landscaping
2. Store Properly:
When not in use, store the rotary laser level in a cool, dry place, protected from extreme temperatures, moisture, and direct sunlight. Utilize the provided carrying case or a protective bag to prevent dust accumulation and protect the unit from potential damage.
3. Handle with Care:
Handle the rotary laser level with care, avoiding any rough or excessive force that could cause damage. Be mindful of the fragile components, such as the laser diode and rotating head, and avoid dropping or bumping the unit.
4. Check Battery Life:
Regularly check the battery life and replace the batteries as needed to prevent any interruptions during use. It’s best to use high-quality batteries recommended by the manufacturer to ensure optimal performance.
5. Calibrate Regularly:
Perform regular calibration checks to ensure the accuracy of the rotary laser level. Confirm that the laser beam aligns with a known reference point or benchmark. Follow the manufacturer’s instructions for calibration and adjustment procedures specific to your model.
Read more: How To Use Skil Laser Level
6. Avoid Exposure to Harsh Conditions:
Avoid exposing the rotary laser level to harsh or extreme conditions such as excessive heat, cold, humidity, or moisture. These conditions can affect the performance and lifespan of the unit, potentially causing damage or malfunctioning.
7. Follow Safety Guidelines:
Always prioritize safety when using the rotary laser level. Wear appropriate eye protection to shield your eyes from potential laser beam hazards. Adhere to safety guidelines provided by the manufacturer and exercise caution when operating the unit.
8. Regularly Inspect and Test:
Periodically inspect the rotary laser level for any signs of damage or wear. Test the unit to ensure all functions and controls are working properly. If you notice any issues, contact the manufacturer’s support or an authorized service center for assistance.
By following these maintenance and care tips, you can extend the lifespan and maintain optimal performance of your Johnson Self Leveling Rotary Laser Level. Investing time and effort into proper maintenance will ensure accurate and reliable measurements throughout your construction and surveying projects.
Conclusion
The Johnson Self Leveling Rotary Laser Level is a powerful tool that simplifies the process of leveling and aligning surfaces in construction and surveying projects. With its self-leveling capability, highly visible laser beam, and ease of use, this tool provides accurate and efficient results for professionals and DIY enthusiasts alike.
In this comprehensive guide, we have explored the different aspects of using the Johnson Self Leveling Rotary Laser Level. We started by introducing the tool and emphasizing its importance in achieving level surfaces for various applications. We then discussed its components and accessories, highlighting their roles in enhancing functionality and versatility.
We provided step-by-step instructions for setting up the rotary laser level, calibrating it for accurate measurements, and operating it effectively. Understanding the self-leveling and manual leveling options ensures that you can tackle different types of leveling tasks with precision and flexibility.
We also shared valuable tips and tricks to optimize your usage of the rotary laser level, allowing you to work more efficiently and achieve professional-level results. Additionally, we provided troubleshooting tips for common issues that may arise during operation, along with guidance on maintenance and care to ensure the longevity of your rotary laser level.
By following the guidance and recommendations outlined in this guide, you can confidently use the Johnson Self Leveling Rotary Laser Level to consistently achieve accurate measurements, align surfaces with precision, and enhance the quality of your construction or surveying projects.
Remember to consult the user manual provided by the manufacturer for specific instructions and safety guidelines tailored to your rotary laser level model. With practice and experience, you will become proficient in utilizing this powerful tool to its fullest potential.
So, take advantage of the Johnson Self Leveling Rotary Laser Level and make your leveling tasks a breeze. Get ready to experience increased efficiency, improved accuracy, and professional-level results in your construction and surveying projects!
Frequently Asked Questions about How To Use Johnson Self Leveling Rotary Laser Level
Was this page helpful?
At Storables.com, we guarantee accurate and reliable information. Our content, validated by Expert Board Contributors, is crafted following stringent Editorial Policies. We're committed to providing you with well-researched, expert-backed insights for all your informational needs.


0 thoughts on “How To Use Johnson Self Leveling Rotary Laser Level”