Articles
How To Use Johnson Laser Level
Modified: January 19, 2024
Learn how to effectively use the Johnson Laser Level with our comprehensive articles. Discover tips and tricks for precise measurements and leveling in any project.
(Many of the links in this article redirect to a specific reviewed product. Your purchase of these products through affiliate links helps to generate commission for Storables.com, at no extra cost. Learn more)
Introduction
Welcome to our comprehensive guide on how to use the Johnson Laser Level. Whether you are a professional contractor or a DIY enthusiast, having a reliable laser level can greatly improve the accuracy and efficiency of your projects. Johnson Laser Levels are known for their precision and user-friendly features, making them a popular choice among professionals in various industries.
In this article, we will provide you with a step-by-step guide on how to use a Johnson Laser Level effectively. From unboxing and assembly to adjusting the level and utilizing its various functions, we will cover everything you need to know to get started. We will also share some troubleshooting tips and safety guidelines to ensure a smooth and successful user experience.
Before we dive into the details, let’s start with a brief overview of Johnson Laser Levels to familiarize ourselves with their key features and benefits.
Key Takeaways:
- Johnson Laser Levels offer precision, durability, and versatility, making them essential for professionals and DIY enthusiasts. Their self-leveling capability, variety of laser beams, and additional features enhance performance and usability.
- Prioritize safety when using a Johnson Laser Level by wearing protective gear, securely mounting the laser level, and preventing direct exposure to the laser beam. Following the user manual and contacting customer support for assistance can ensure a smooth and successful user experience.
Overview of Johnson Laser Level
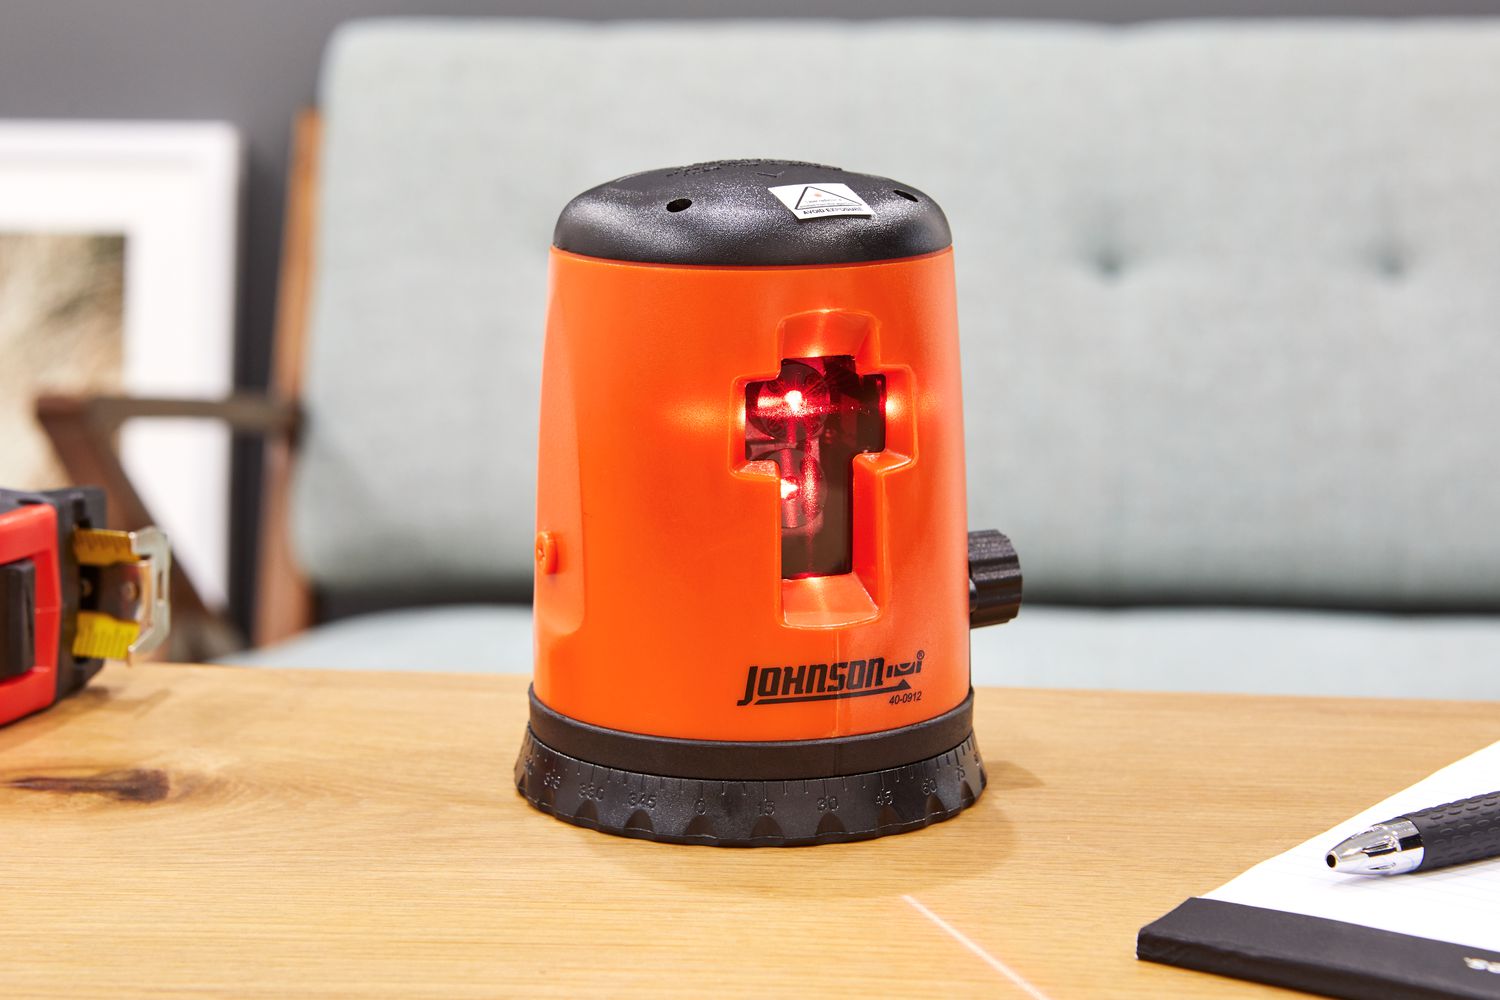
Johnson Laser Levels are renowned for their accuracy, durability, and versatility. They are designed to provide precise measurements and alignment in a wide range of applications, such as construction, carpentry, plumbing, and landscaping. Whether you need to level floors, align walls, or install ceiling fixtures, a Johnson Laser Level will be a valuable tool in your arsenal.
One of the standout features of Johnson Laser Levels is their self-leveling capability. This means that the laser automatically adjusts to maintain a level position, even on uneven surfaces. This saves you time and effort by eliminating the need for manual adjustments.
Johnson Laser Levels also offer a variety of laser beams, including horizontal, vertical, and cross-line projections. This allows you to tackle different tasks with ease and precision. Some models even come with additional features like pulse mode for outdoor use, remote control functionality, and even compatibility with laser detectors for extended range.
Now that you have an overview of the Johnson Laser Level, let’s proceed to the next section to learn how to unbox and assemble it.
Key Takeaways:
- Johnson Laser Levels offer precision, durability, and versatility, making them essential for professionals and DIY enthusiasts. Their self-leveling capability, variety of laser beams, and additional features enhance performance and usability.
- Prioritize safety when using a Johnson Laser Level by wearing protective gear, securely mounting the laser level, and preventing direct exposure to the laser beam. Following the user manual and contacting customer support for assistance can ensure a smooth and successful user experience.
Overview of Johnson Laser Level
Johnson Laser Levels are renowned for their accuracy, durability, and versatility. They are designed to provide precise measurements and alignment in a wide range of applications, such as construction, carpentry, plumbing, and landscaping. Whether you need to level floors, align walls, or install ceiling fixtures, a Johnson Laser Level will be a valuable tool in your arsenal.
One of the standout features of Johnson Laser Levels is their self-leveling capability. This means that the laser automatically adjusts to maintain a level position, even on uneven surfaces. This saves you time and effort by eliminating the need for manual adjustments.
Johnson Laser Levels also offer a variety of laser beams, including horizontal, vertical, and cross-line projections. This allows you to tackle different tasks with ease and precision. Whether you need to create straight lines for tiling or align shelves, the laser beams provide clear and visible references.
Another advantage of Johnson Laser Levels is their durability. They are built to withstand tough job site conditions, ensuring reliable performance even in rugged environments. The sturdy construction and shock-resistant features make them suitable for both indoor and outdoor use.
In terms of versatility, Johnson Laser Levels come with various mounting options. They can be attached to tripods, wall brackets, or magnetic bases, depending on your specific needs. This makes it easy to position the laser at the desired height and angle, allowing for flexible usage in different situations.
Additionally, Johnson Laser Levels often come with user-friendly interfaces, making them accessible for both professionals and beginners. The controls are intuitive and straightforward, enabling quick setup and operation. Many models also feature clear LCD displays and audible indicators to provide real-time feedback and ensure accurate results.
It’s worth mentioning that Johnson Laser Levels are available in different models and price ranges, allowing you to choose the one that best suits your requirements and budget. Whether you opt for a basic entry-level laser level or a more advanced model with advanced features and extended range, you can expect quality and reliability from Johnson Laser Levels.
With their precision, durability, versatility, and user-friendly features, it’s no wonder that Johnson Laser Levels have earned a reputation as trusted tools among professionals in various industries. In the next sections of this guide, we will delve into the practical aspects of using a Johnson Laser Level, starting with unboxing and assembly.
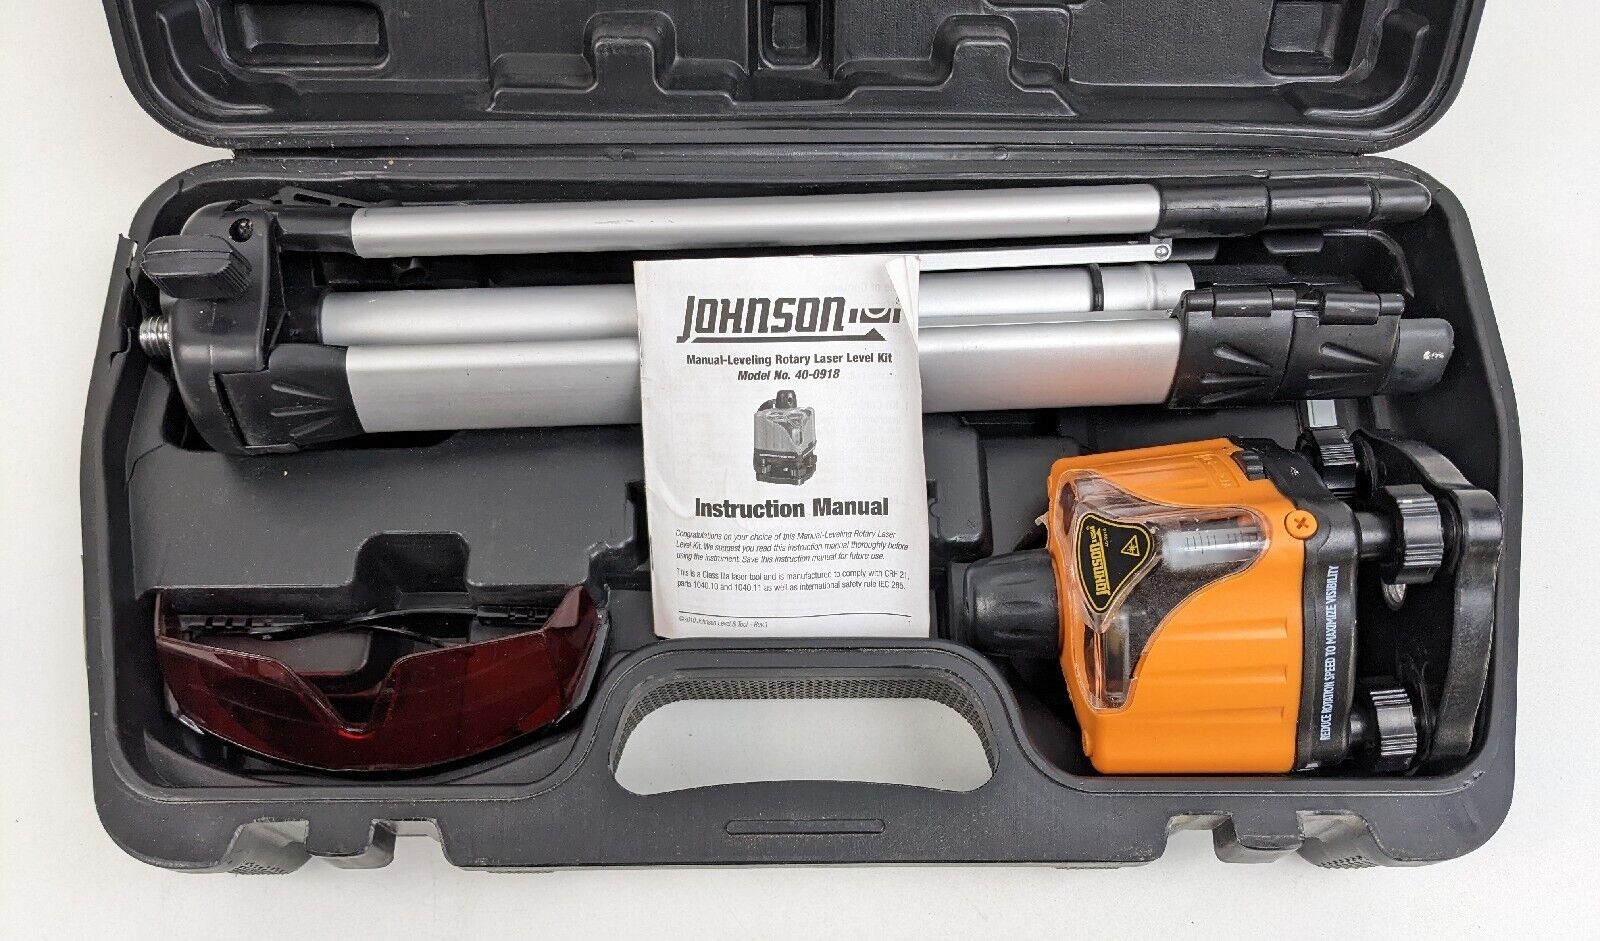
Unboxing and Assembly
When you first receive your Johnson Laser Level, it’s important to unbox it carefully and ensure that all the necessary components are included. The contents may vary depending on the specific model you have purchased, but here are some common items you can expect to find:
- Laser level unit
- Magnetic mounting base or tripod
- Laser target card
- Batteries or charger
- User manual and warranty information
Once you have verified that all the components are present, the next step is to assemble the laser level. Follow these steps to set up your Johnson Laser Level:
- Attach the laser level to the magnetic mounting base or tripod using the provided screws or clamps. Make sure it is securely fastened to prevent any movement during operation.
- If your laser level is battery-powered, insert the batteries into the designated compartment. Ensure that you follow the correct polarity indicated on the unit or in the user manual. If it is rechargeable, connect the charger to a power source and plug it into the laser level to charge the batteries fully before use.
- Turn on the laser level by pressing the power button or switch. You may need to hold it down for a few seconds to initiate the power-up sequence. Refer to the user manual for specific instructions on powering up your particular model.
- Some laser levels come with additional accessories, such as laser glasses or detectors. Familiarize yourself with these accessories and how to properly use them for enhanced visibility or extended range, if applicable.
Once you have completed the assembly and powered up the laser level, you are ready to move on to the next steps of setting up and using the laser level. In the following sections, we will guide you through the process of powering the laser level and adjusting the level for accurate measurements.
Before proceeding, it’s important to note that each Johnson Laser Level model may have specific instructions and features. Always refer to your user manual for detailed information and guidelines specific to your laser level.
Powering the Laser Level
Powering the Johnson Laser Level is an essential step before you can start using it. The power source for your laser level will depend on the specific model you have. Here are the common power options:
- Battery-powered: If your laser level is battery-powered, it will typically require standard AA or AAA batteries. Make sure to insert the batteries following the correct polarity indicated on the unit or in the user manual. It is recommended to use high-quality, long-lasting batteries for optimal performance. Some laser levels may have a battery compartment that slides open, while others require removing a cover using a small tool or screwdriver. Always refer to the user manual for specific instructions.
- Rechargeable: Some Johnson Laser Level models come with a rechargeable battery pack. To power up your laser level, insert the fully charged battery pack into the designated compartment. Ensure that you align the terminals properly to establish a secure connection. Connect the charger to a power source, and plug it into the laser level to recharge the batteries when they are running low. Follow the recommended charging time mentioned in the user manual to avoid overcharging.
- AC power: Certain Johnson Laser Level models offer the option to be powered directly from an AC outlet. These models typically come with an AC adapter that you can connect to the laser level. Locate the DC power input port on the unit and plug the AC adapter into it. Then, plug the other end of the adapter into a nearby electrical outlet. This power option is convenient when you need extended operation without relying on batteries or recharging.
Regardless of the power source, always ensure that the laser level is turned off before connecting or disconnecting any power supply. This helps prevent any electrical mishaps or damage to the laser level.
It’s important to note that the battery life of your Johnson Laser Level will vary depending on factors such as the model, usage frequency, and the quality of the batteries. To ensure optimal battery performance, it’s recommended to remove the batteries from the unit if you anticipate not using it for an extended period.
Now that you have powered up your laser level, let’s move on to the next step of setting up the level for accurate measurements.
Read also: 12 Amazing Johnson Laser Level for 2024
Setting Up the Laser Level
Setting up your Johnson Laser Level properly is crucial to ensure accurate measurements and alignment for your projects. Follow these steps to set up the laser level effectively:
- Select a suitable location: Choose a stable and flat surface where you will place the laser level. This can be a table, countertop, or any secure area. Ensure that the surface is free from dust or debris that could affect the stability of the laser level.
- Position the laser level: Place the laser level on the selected surface, ensuring that it is level and stable. You can use a bubble level or the laser level’s built-in leveling indicator to check if it is perfectly horizontal. Adjust the position as needed until the bubble is centered or the leveling indicator shows that the unit is level.
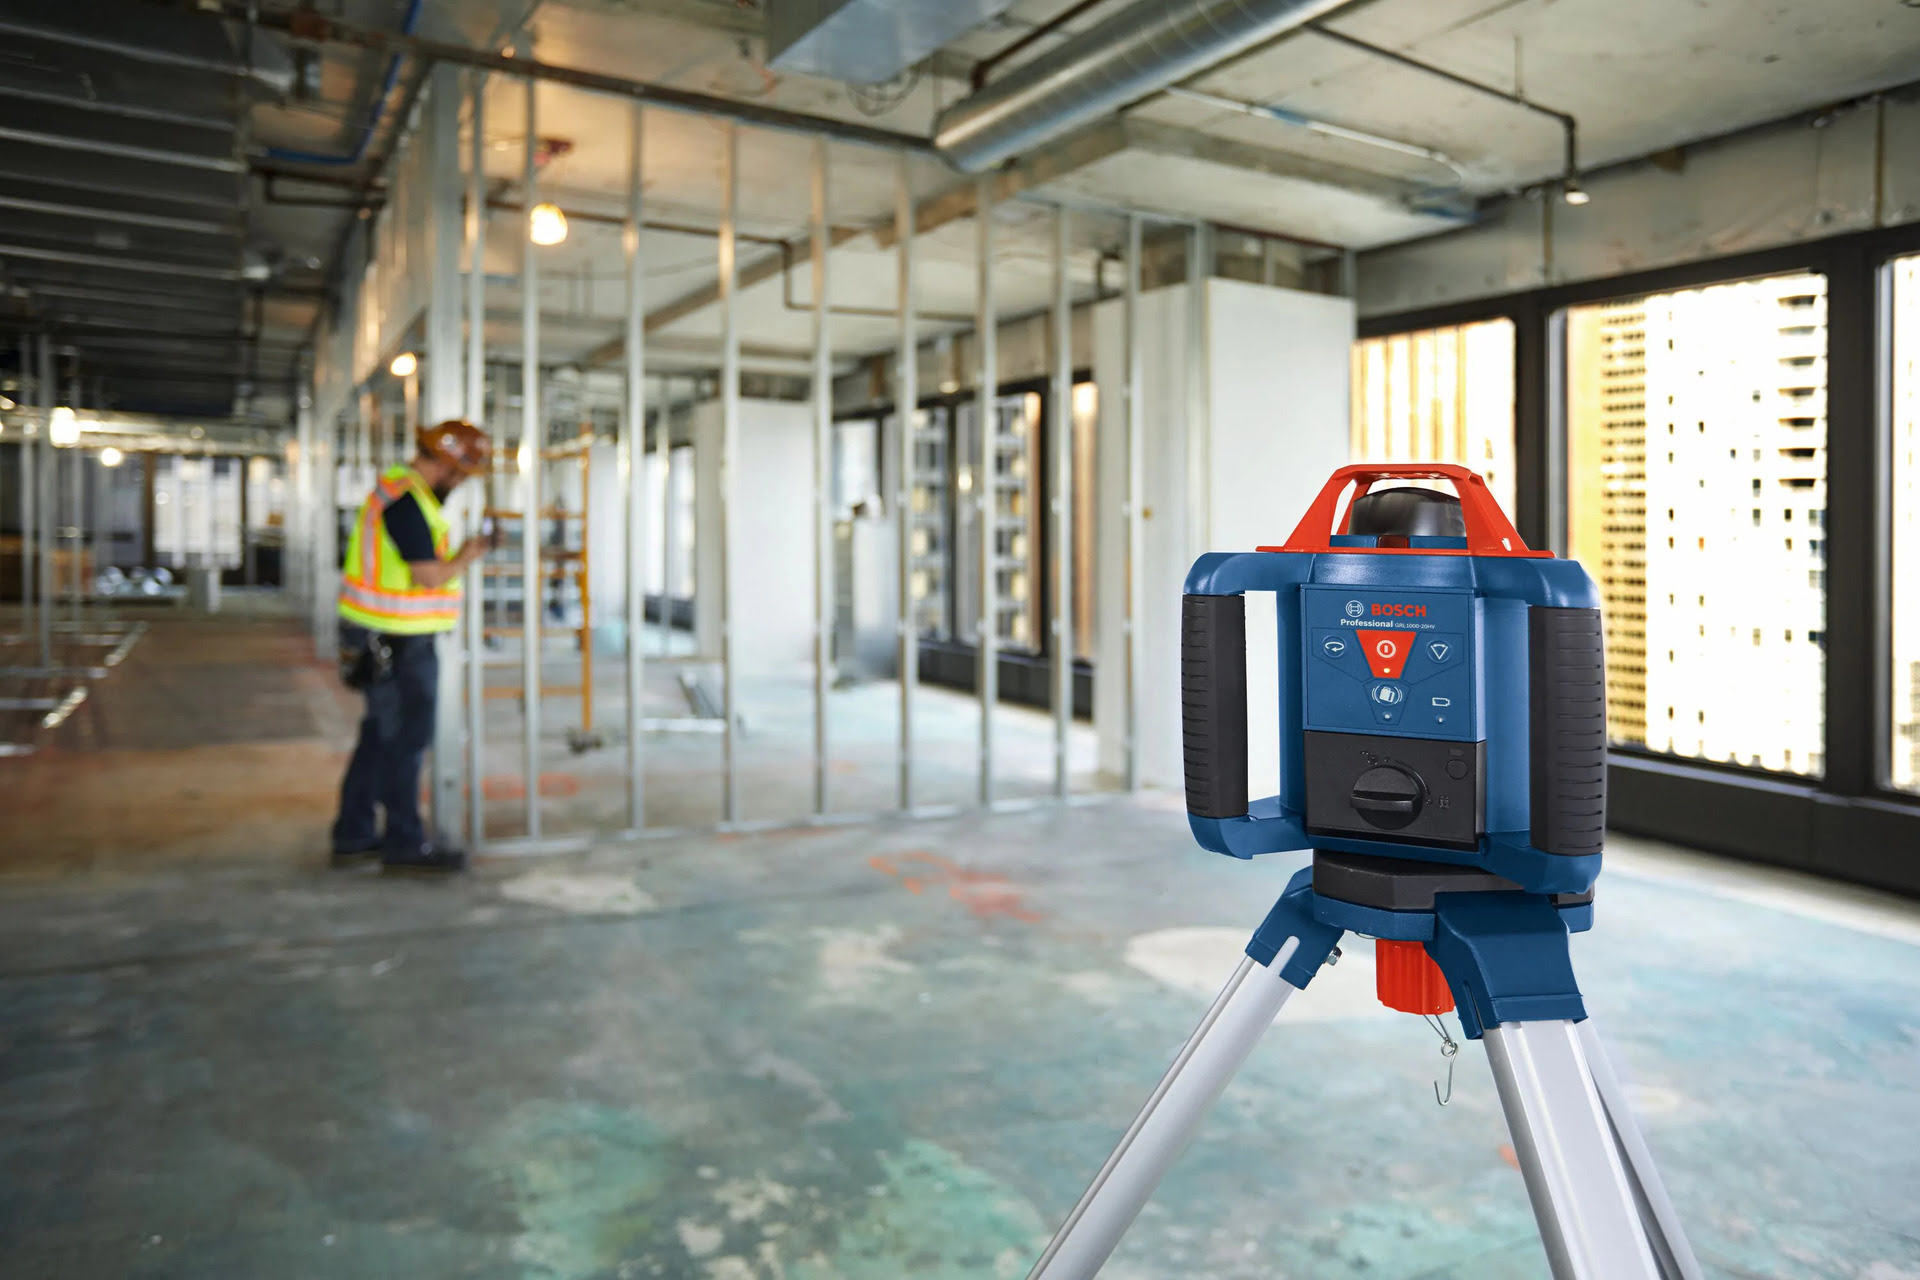
- Utilize the mounting options: Depending on your specific model, you may have different mounting options available. If your laser level has a magnetic base, you can attach it securely to metal surfaces such as steel studs or pipes. If it comes with a tripod, extend the legs and adjust the height to your desired position. Mount the laser level onto the tripod using the provided mounting bracket or adapter. Ensure that the laser level is secure and level on the tripod.
- Aim the laser: Once the laser level is set up, adjust the laser beam so that it aligns with your desired reference point or target area. Some laser levels have a fine-tuning feature that allows you to precisely direct the laser beam. Use the adjustment knobs or buttons to move the laser horizontally or vertically as needed. Aim the laser at the target point, ensuring that it is visible and aligned.
- Lock or secure the laser level: To prevent any unintentional movement or disturbance to the laser level, you can lock it in place. Some models have a locking mechanism or clamp that you can tighten to secure the laser level on a tripod or mounting bracket. This ensures that the laser level maintains its position and alignment throughout your project.
- Test the laser level: Before proceeding with your project, it is recommended to perform a quick test to verify the accuracy of the laser level. Use a laser target card or a reflective surface to check if the laser beam aligns with the desired reference point. Adjust the laser level if necessary to achieve precise alignment.
Once you have completed these steps, your Johnson Laser Level is set up and ready for use. In the next sections, we will guide you through adjusting the level and utilizing the laser level for both horizontal and vertical alignment.
Remember, each model may have specific instructions and features, so always refer to your user manual for detailed information and guidelines specific to your laser level.
Adjusting the Level
To ensure accurate measurements and alignment, it is important to properly adjust the level of your Johnson Laser Level. Here are the steps to follow:
- Activate the self-leveling mode: Most Johnson Laser Levels come with a self-leveling feature, which automatically adjusts the laser to maintain a level position. Make sure the self-leveling mode is activated on your laser level. This may be a switch or button specifically labeled for self-leveling.
- Allow the laser level to self-level: Once the self-leveling mode is activated, place the laser level on a stable surface or mount it onto a tripod. The laser will begin self-leveling and will indicate when it is ready for use. Depending on the model, there may be a visual or audible indicator to confirm that the laser is in the level position.
- Double-check the level: Even with self-leveling capabilities, it’s always a good practice to double-check the level of your laser. Use a bubble level or the laser level’s built-in leveling indicator to ensure that the unit is perfectly horizontal. Make any necessary adjustments to achieve a level position.
- Verify the accuracy: Once the laser level is self-leveled and confirmed to be horizontal, you can perform a quick test to verify its accuracy. Use a laser target card or a reflective surface and place it at a known distance from the laser. Check if the laser beam aligns with the target accurately. If the laser doesn’t align, adjust the level using the fine-tuning feature on your laser level until the alignment is achieved.
It is important to note that the self-leveling process may take a few moments, especially if the laser level has been moved or if the surface is not completely level. Allow the laser level to stabilize and self-level before performing any measurements or alignments.
If you are working on a surface that is severely uneven or if you need to angle the laser deliberately for specific tasks, your laser level may have a manual leveling feature. Consult the user manual for instructions on manual leveling and adjust the laser accordingly.
By accurately adjusting the level of your Johnson Laser Level, you can ensure precise measurements and alignment for your projects. In the next sections, we will explore how to use the laser level for horizontal and vertical alignment.
Remember to always follow the specific instructions provided in your user manual for your particular model.
When using a Johnson laser level, make sure to set it on a stable surface and adjust the level bubble to ensure accuracy. Always follow the manufacturer’s instructions for best results.
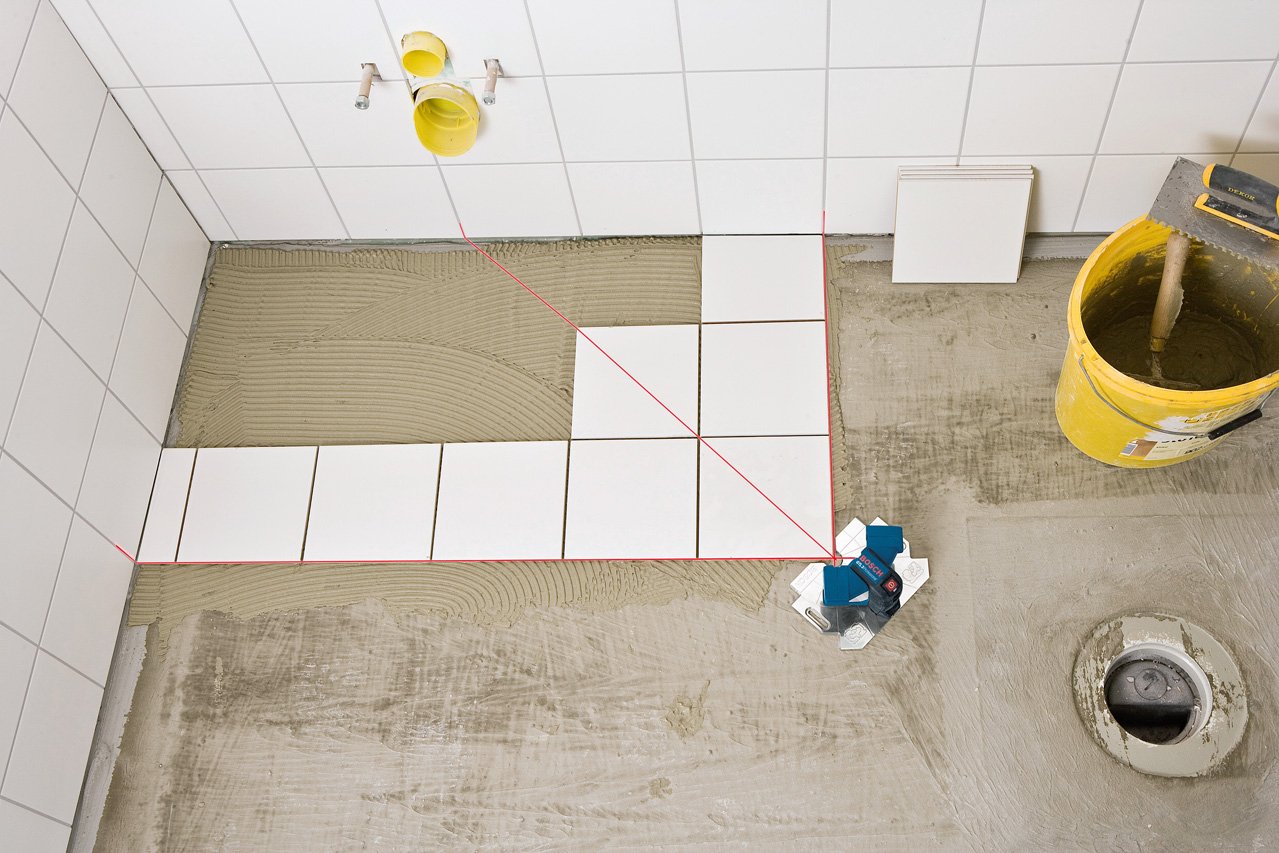
Using the Laser Level for Horizontal Alignment
The Johnson Laser Level is a versatile tool that can be used for various alignment tasks, including horizontal alignment. Whether you need to align shelves, install a chair rail, or level a countertop, here’s how you can use the laser level for horizontal alignment:
- Position the laser level: Set up the laser level in a suitable location, ensuring that it is level and stable. Use the previous instructions on setting up and adjusting the level to ensure accurate horizontal alignment.
- Select the target point: Identify the reference point or line where you want to achieve horizontal alignment. It could be a mark on the wall, a specific height on a shelf, or any other point of reference.
- Activate the laser beam: Turn on the laser level and activate the horizontal laser beam projection. Depending on your model, there may be a specific button or switch to activate the horizontal beam. Ensure that the laser beam is aligned with the target point.
- Adjust the alignment: If the laser beam does not align with the target point, you can adjust the horizontal alignment using the fine-tuning feature on your laser level. Use the adjustment knobs, buttons, or dials to move the laser beam horizontally until it aligns with the desired point.
- Verify the alignment: Once you have adjusted the horizontal alignment, double-check its accuracy. Use a measuring tape or a level to confirm that the laser beam aligns horizontally with the target point. Make any necessary adjustments until the alignment is achieved.
- Mark the alignment: Once you have achieved the desired horizontal alignment, mark the laser’s path or the reference point on the surface. This will serve as a guide for your project, ensuring that you maintain the level alignment throughout.
Using the Johnson Laser Level for horizontal alignment provides precise and consistent results, allowing you to complete your projects with accuracy and efficiency. Remember to always consult your user manual for specific instructions and features of your laser level.
In the next section, we will explore how to use the laser level for vertical alignment, which is useful for tasks such as hanging pictures, aligning cabinets, or installing light fixtures.
Using the Laser Level for Vertical Alignment
The Johnson Laser Level is a valuable tool for achieving accurate vertical alignment in a wide range of projects. Whether you need to hang pictures, install cabinets, or align light fixtures, here’s how you can use the laser level for vertical alignment:
- Set up the laser level: Position the laser level on a stable surface or mount it securely using a tripod or mounting bracket. Ensure that the laser level is level and stable, following the instructions provided earlier in this guide.
- Identify the vertical reference point: Determine the location or line where you want to achieve vertical alignment. This could be a mark on the wall, the edge of a cabinet, or any other point of reference for your project.
- Activate the laser beam: Turn on the laser level and activate the vertical laser beam projection. Depending on your model, there may be a specific button or switch to activate the vertical beam. Align the laser beam with the target vertical reference point.
- Adjust the vertical alignment: If the laser beam does not align with the target point, you can adjust the vertical alignment using the fine-tuning feature on your laser level. Use the adjustment knobs, buttons, or dials to move the laser beam vertically until it aligns with the desired point.
- Verify the alignment: Double-check the accuracy of the vertical alignment by using a level or plumb line. Confirm that the laser beam aligns vertically with the target point, ensuring that it is perfectly straight. Make any necessary adjustments until the alignment is achieved.
- Mark the alignment: Once you have achieved the desired vertical alignment, mark the laser’s path or the reference point on the surface. This will serve as a guide for your project, ensuring that you maintain the vertical alignment throughout.
Using the Johnson Laser Level for vertical alignment allows you to achieve precise and straight lines, making your projects look professional and visually appealing. Refer to your user manual for specific instructions and features of your particular laser level model.
Now that you have learned how to use the laser level for both horizontal and vertical alignment, let’s explore some additional features and functions that may be available on your Johnson Laser Level in the next section.
Additional Features and Functions
In addition to its fundamental leveling and alignment capabilities, the Johnson Laser Level may offer a range of additional features and functions to enhance your experience and make your projects even more efficient. Here are some common additional features you may find:
- Pulse mode: Some Johnson Laser Level models come with a pulse mode function. This feature increases the laser’s visibility and extends its range, making it ideal for outdoor use or in bright environments. Activate pulse mode when you need the laser to be more visible over longer distances or when using a laser detector.
- Remote control functionality: Certain laser level models may include remote control capabilities, allowing you to control the laser’s functions from a distance. This feature can be particularly useful when you are working alone or when you need to adjust the laser’s position without physically reaching it.
- Laser detectors compatibility: If your Johnson Laser Level supports laser detectors, you can extend its range and usability. Laser detectors detect the laser beam when it is not directly visible, enabling you to work at greater distances or in adverse lighting conditions. Follow the instructions provided with your laser level and laser detector for proper setup and operation.
- Dual-axis leveling: Some advanced models of Johnson Laser Levels offer dual-axis leveling capabilities. This feature allows you to simultaneously level the laser horizontally and vertically, making it easier to achieve precise 90-degree angles and alignments.
- Rotating laser beam: Certain laser level models have the ability to project a rotating laser beam instead of a fixed line. This is particularly useful for tasks such as setting up partitions, creating circular layouts, or aligning multiple points simultaneously.
- Memory saving: Some laser level models have a memory function that allows you to save specific laser settings or alignments for future reference. This feature can be convenient for recurring projects or when you need to match previous measurements.
These additional features and functions can greatly enhance the versatility and efficiency of your Johnson Laser Level, allowing you to tackle a wider range of projects with ease and accuracy. It’s important to consult your user manual to understand the specific features and instructions related to your model.
Now that you are familiar with the additional features and functions, let’s move on to the next section, where we will discuss some common troubleshooting tips and solutions for common issues you may encounter when using your Johnson Laser Level.
Troubleshooting Common Issues
While Johnson Laser Levels are known for their reliability and accuracy, you may encounter some common issues during your usage. Here are some troubleshooting tips and solutions to help resolve these issues:
- Laser not leveling: If your laser level is not self-leveling or the leveling indicator does not show a level position, ensure that the surface is stable and level. Make sure the self-leveling mode is activated, and give the laser level enough time to stabilize. If the problem persists, check if there is any debris or obstruction interfering with the internal leveling mechanism. Clean the leveling vials or contact customer support for further assistance.
- Weak or dim laser beam: If the laser beam appears weak or dim, check the battery charge or power source. Ensure that the batteries are installed correctly or, if rechargeable, fully charged. If using an AC power adapter, verify that it is properly connected. Clean the laser lens with a soft, lint-free cloth and verify if the laser beam becomes stronger. If the issue persists, replace the batteries or contact customer support for further assistance.
- Inaccurate measurements or alignment: If the measurements or alignments are consistently inaccurate, check the position of the laser level. Make sure it is securely mounted or placed on a stable surface. Verify that there are no vibrations or movement that could affect the laser’s position. Double-check the calibration and adjustments, ensuring that the laser beam is aligned with the reference points accurately. Consult the user manual for specific calibration instructions or seek customer support for further assistance if the problem persists.
- Difficulty seeing the laser beam: If you are having trouble seeing the laser beam, especially in bright or outdoor environments, activate the pulse mode on your laser level. This will enhance the visibility of the laser beam. Consider using laser glasses or goggles designed to enhance the laser’s visibility. If necessary, use a laser detector compatible with your laser level to detect the beam when it is not directly visible.
- Interference or obstruction: If the laser beam is being obstructed or interrupted, check for any objects or surfaces blocking the beam’s path. Remove any debris, dust, or obstructions that may be blocking the laser’s projection. Ensure that the surroundings are clear and free from any obstructions that may affect the accuracy of the measurements or alignment.
If you encounter any other issues or if the troubleshooting tips mentioned above do not resolve the problem, it is recommended to consult the user manual for specific troubleshooting instructions provided by Johnson or contact their customer support for further assistance.
By addressing common issues and applying the appropriate troubleshooting techniques, you can ensure optimal performance and accurate results from your Johnson Laser Level.
Now, let’s move on to the final section where we will discuss some essential safety guidelines to follow when using your Johnson Laser Level.
Safety Guidelines
While using your Johnson Laser Level, it is essential to prioritize safety to prevent accidents and ensure a smooth and secure working environment. Here are some important safety guidelines to follow:
- Read the user manual: Before using your Johnson Laser Level, thoroughly read and understand the instructions provided in the user manual. Familiarize yourself with the specific safety precautions and guidelines outlined by the manufacturer.
- Protective gear: Wear appropriate protective gear, such as safety glasses or goggles, to protect your eyes from direct exposure to the laser beam. This is especially important when working with high-powered laser levels or in situations where the laser beam may bounce off reflective surfaces.
- Battery safety: If your laser level is battery-powered, handle the batteries with care. Follow the manufacturer’s instructions for battery installation, replacement, and disposal. Avoid short-circuiting the batteries and prevent them from coming into contact with water or other liquids.
- Secure the laser level: Ensure that the laser level is securely mounted or placed on a stable surface. This prevents accidental movement or falls during operation. Use additional mounting accessories like tripods or magnetic bases for added stability, especially when working in elevated positions.
- Observe laser beam precautions: Avoid direct exposure to the laser beam, as it can cause harm to your eyes or skin. Do not point the laser beam toward people, animals, or reflective surfaces that may inadvertently redirect the beam towards others. Always treat the laser beam with caution and respect its power.
- Check for laser class information: Laser levels are classified based on their power output. Be aware of the laser class of your Johnson Laser Level and adhere to the safety guidelines associated with that class. Higher-class lasers may require additional precautions and considerations.
- Avoid electrical hazards: If your laser level requires an AC power source, ensure that the power cord is in good condition and free from damage. When plugging or unplugging the laser level, ensure your hands are dry to prevent electrical accidents. Keep the power cord away from water or other liquids.
- Store and transport safely: When not in use, store your Johnson Laser Level in a safe and secure location, away from moisture, extreme temperatures, or potential damage. Use the supplied carrying case or protective cover to safeguard the laser level during transportation or storage.
By following these safety guidelines, you can minimize the risk of accidents and ensure a secure working environment when using your Johnson Laser Level. Remember, it is crucial to prioritize safety at all times.
With the proper safety measures in place, you can confidently and effectively use your Johnson Laser Level for a wide range of projects.
Now that you have a comprehensive understanding of how to use and optimize your Johnson Laser Level, you are well-equipped to tackle your next project with precision and confidence.
Good luck!
Conclusion
Congratulations! You have reached the end of our comprehensive guide on how to use the Johnson Laser Level effectively. We have covered the key aspects of unboxing and assembling the laser level, powering it up, adjusting the level, and utilizing it for horizontal and vertical alignment. We have also explored additional features, troubleshooting tips, and safety guidelines to ensure a smooth and successful user experience.
The Johnson Laser Level offers precision, durability, and versatility, making it an essential tool for professionals and DIY enthusiasts alike. Its self-leveling capability, variety of laser beams, and additional features such as pulse mode and remote control functionality enhance its performance and usability.
By following the step-by-step instructions provided in this guide and referring to your user manual, you can confidently and accurately use your Johnson Laser Level for various projects, including construction, carpentry, plumbing, and more. Remember to prioritize safety by wearing protective gear, securely mounting the laser level, and taking precautions to prevent direct exposure to the laser beam.
In case you encounter any issues or have questions specific to your model, always refer to the user manual or contact Johnson’s customer support for assistance.
We hope that this guide has equipped you with the knowledge and confidence to make the most out of your Johnson Laser Level. By using this powerful tool effectively, you can achieve precise measurements, accurate alignments, and excellent results in your projects.
So, go ahead and embark on your next project with confidence and precision. The Johnson Laser Level will be your trusted companion throughout the process, helping you achieve professional-level accuracy and efficiency.
Happy leveling and aligning!
Frequently Asked Questions about How To Use Johnson Laser Level
Was this page helpful?
At Storables.com, we guarantee accurate and reliable information. Our content, validated by Expert Board Contributors, is crafted following stringent Editorial Policies. We're committed to providing you with well-researched, expert-backed insights for all your informational needs.


0 thoughts on “How To Use Johnson Laser Level”