Articles
How To Use Ninja Auto Iq Blender
Modified: August 16, 2024
Learn how to make the perfect smoothies and soups with the Ninja Auto IQ Blender. Explore our articles for tips, tricks, and delicious recipes to elevate your blending game.
(Many of the links in this article redirect to a specific reviewed product. Your purchase of these products through affiliate links helps to generate commission for Storables.com, at no extra cost. Learn more)
Introduction
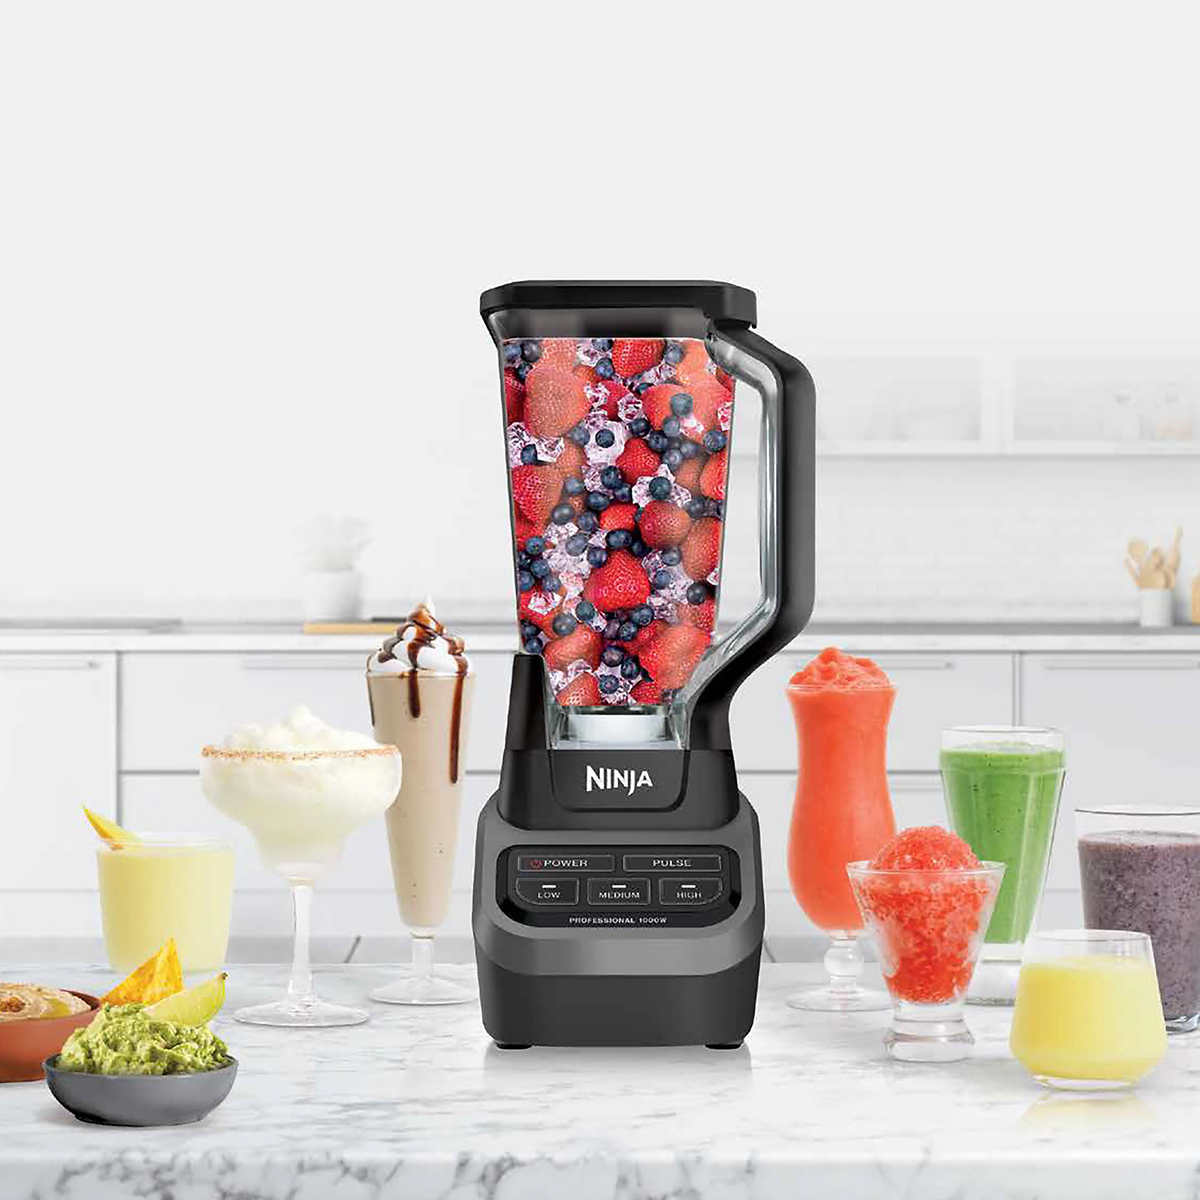
Welcome to the world of versatile blending and powerful performance with the Ninja Auto IQ Blender. If you’re looking to step up your culinary game and create delicious smoothies, soups, sauces, and more, this innovative blender is here to help. With its advanced technology and intelligent programming, the Ninja Auto IQ Blender takes the guesswork out of blending, ensuring consistent results every time.
Whether you’re a seasoned chef or a novice in the kitchen, the Ninja Auto IQ Blender offers a user-friendly experience that will elevate your blending capabilities. With its sleek design and intuitive controls, this blender is not only efficient but also a stylish addition to any kitchen countertop. So, let’s dive in and discover how to make the most of your Ninja Auto IQ Blender.
In this article, we will cover everything from assembling the blender to selecting the right settings, operating the machine efficiently, and cleaning and maintaining it. Additionally, we will provide troubleshooting tips to help you overcome any challenges you might encounter along the way. So, without further ado, let’s embark on this blending journey with our Ninja Auto IQ Blender.
Key Takeaways:
- Elevate your blending game with the Ninja Auto IQ Blender, offering user-friendly experience, intelligent Auto IQ settings, and versatile blending capabilities for delicious recipes.
- Keep your Ninja Auto IQ Blender in top shape with proper assembly, ingredient preparation, and regular cleaning and maintenance, ensuring safe, hygienic, and long-lasting blending experiences.
Read also: 10 Amazing Ninja Iq Blender for 2025
Getting Started
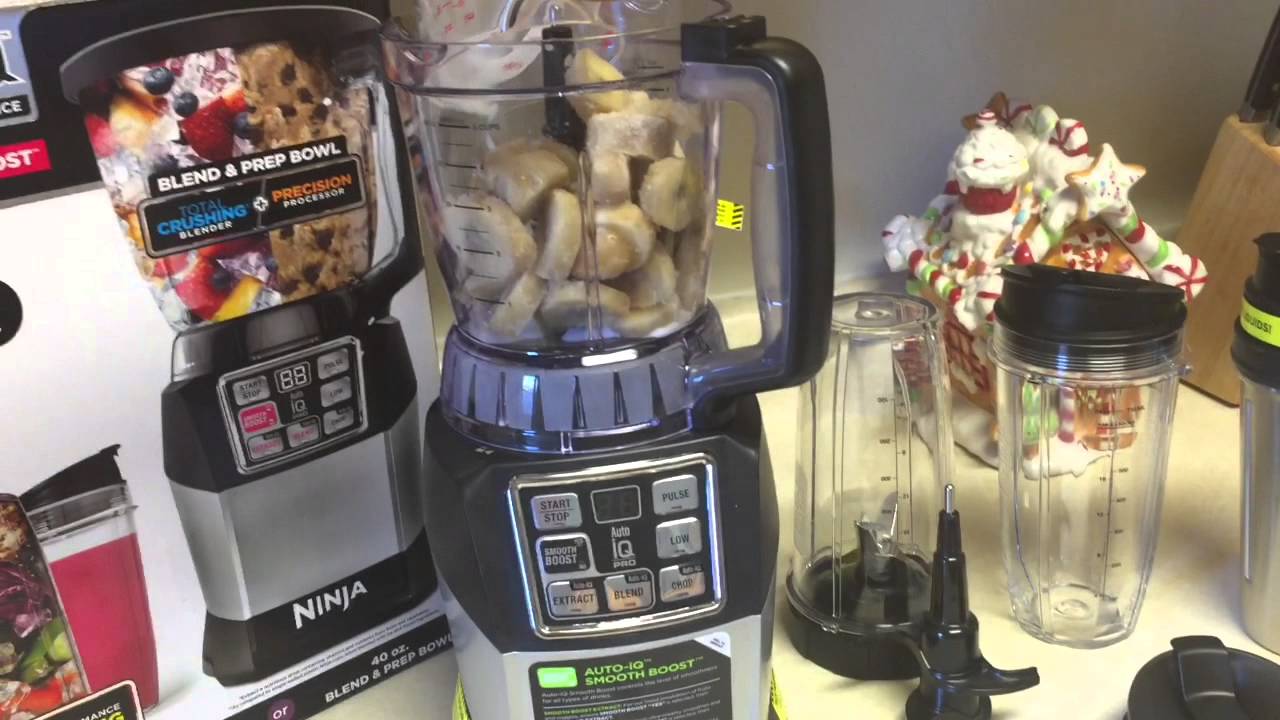
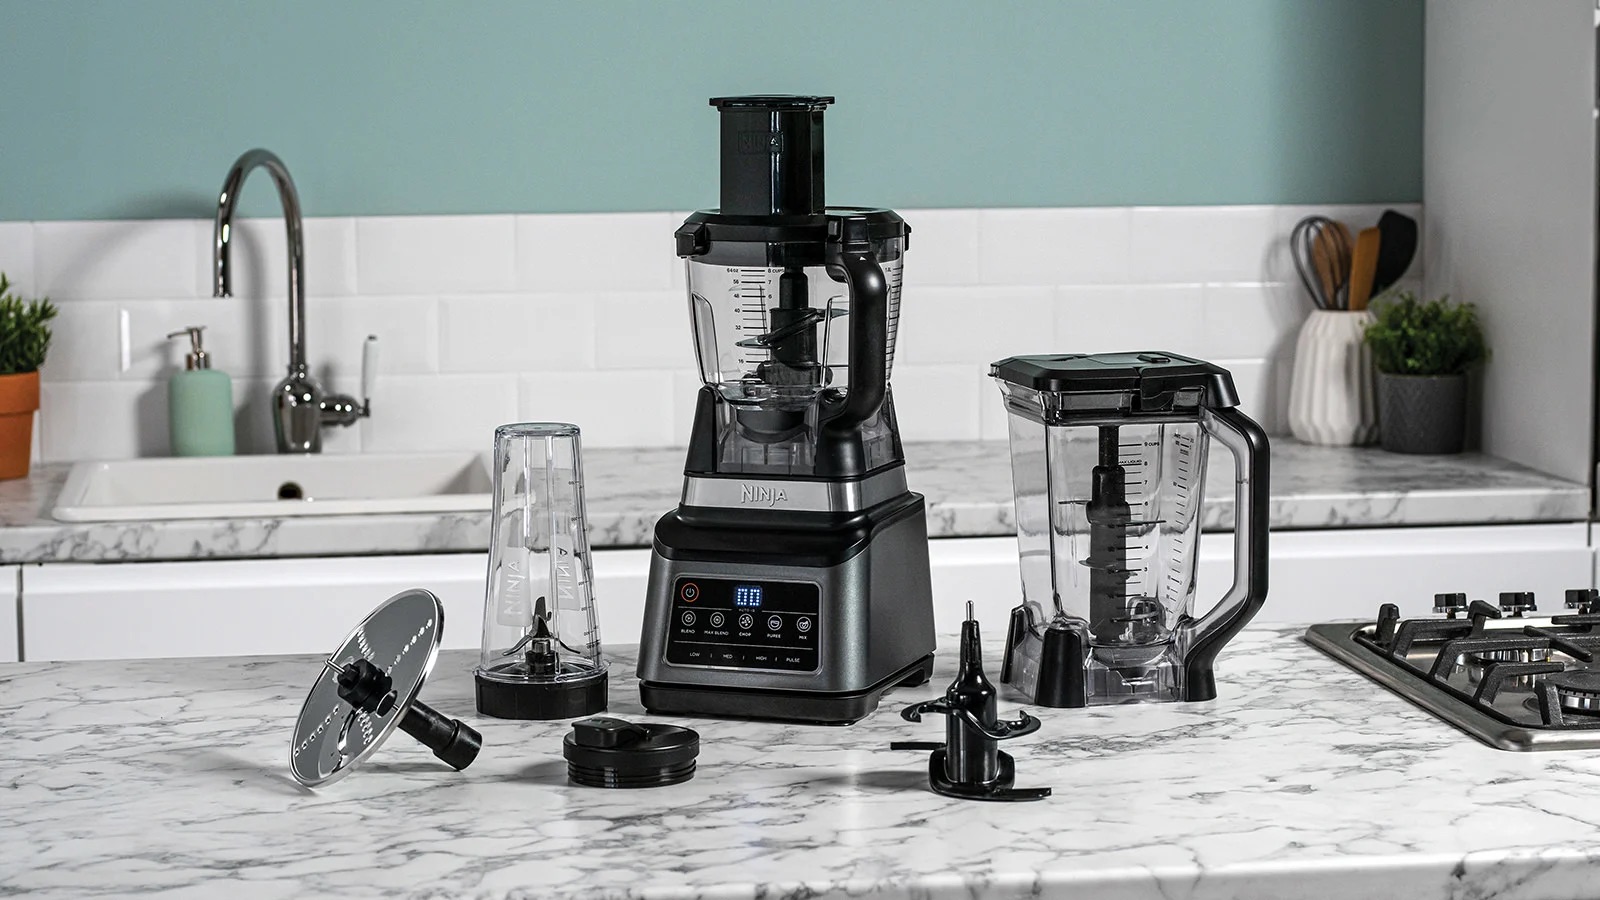
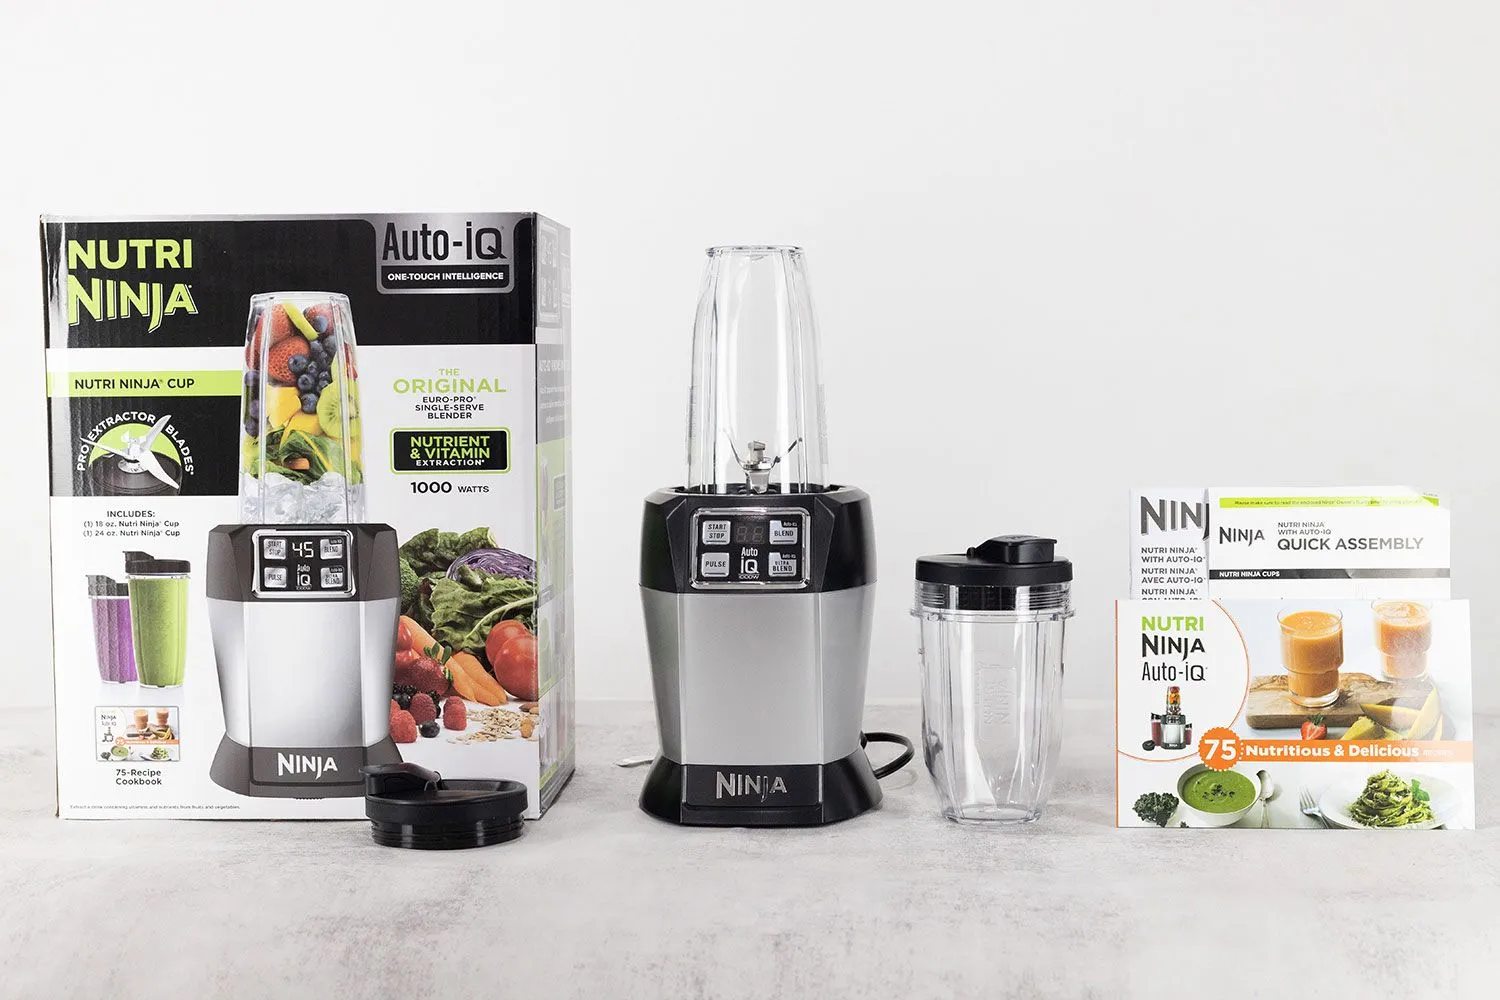
Before you begin using your Ninja Auto IQ Blender, it’s important to familiarize yourself with its components and features. The Ninja Auto IQ Blender comes with a base unit, a pitcher or cup, and various blades and attachments. Take a moment to unpack and inspect all the parts to ensure everything is in good condition.
Once you’ve ensured that your Ninja Auto IQ Blender is complete, find a clean, stable surface to set it up. Ensure that the base unit is on a flat and level surface, as this will prevent any vibrations or movement during operation. Additionally, make sure that the power cord is plugged into a grounded outlet to avoid any electrical mishaps.
Next, take a look at the user manual that came with your Ninja Auto IQ Blender. Familiarize yourself with the safety precautions, operating instructions, and recommended cleaning procedures outlined in the manual. This will ensure that you use the blender safely and effectively.
Now that you’re all set up, it’s time to assemble your Ninja Auto IQ Blender and get ready for blending magic. In the next section, we will guide you through the process of assembling the blender, step by step.
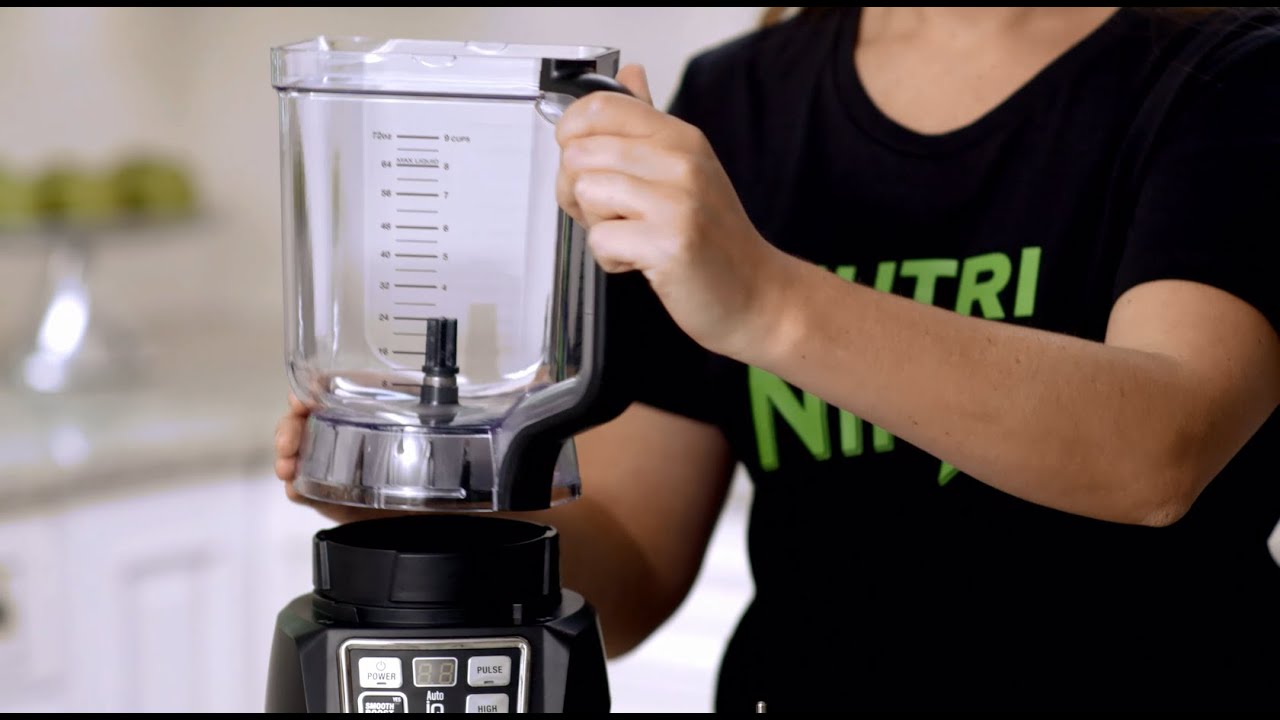
Assembling the Ninja Auto IQ Blender
The Ninja Auto IQ Blender is designed to be easy to assemble and disassemble, making it convenient for everyday use. Follow these simple steps to assemble your blender:
- Start by placing the base unit on a dry, flat surface. Make sure it is securely in place and stable.
- Take the pitcher or cup that came with your Ninja Auto IQ Blender and ensure it is clean and dry.
- Identify the blade or attachment you will need for your blending task. The Ninja Auto IQ Blender comes with different blades for various purposes, such as blending, chopping, or making dough.
- Attach the selected blade or attachment to the pitcher or cup by lining up the notches or arrows on the blade with the corresponding slots on the pitcher or cup.
- Once lined up, twist the blade or attachment clockwise until it locks into place.
- Ensure that the pitcher or cup is securely attached to the base unit by aligning the tabs on the pitcher or cup with the slots on the base unit. Push down gently until you hear a click, indicating that it is properly locked in place.
And that’s it! You have successfully assembled your Ninja Auto IQ Blender. It’s important to note that the specific assembly process may vary slightly depending on the model of your blender, so always refer to the user manual for detailed instructions.
Now that your blender is fully assembled, you’re ready to start preparing your ingredients. In the next section, we’ll explore the various types of ingredients you can use with the Ninja Auto IQ Blender and how to prepare them for blending.
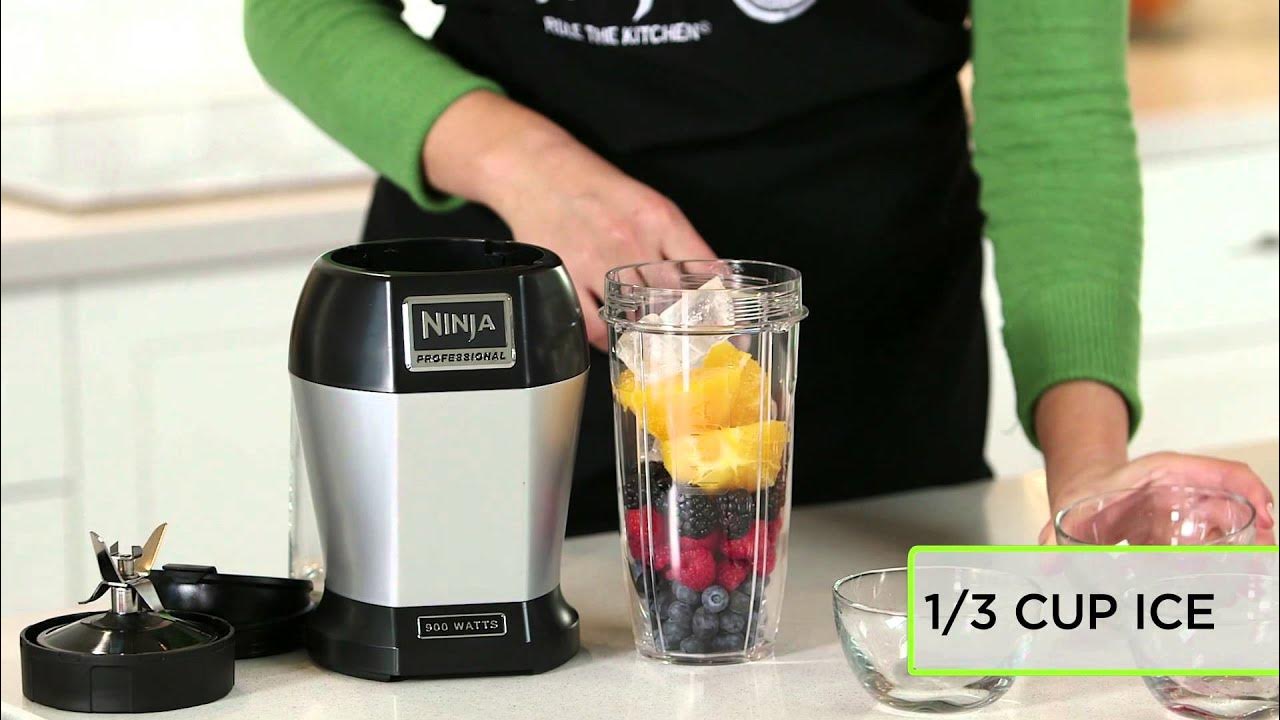
Preparing Ingredients
When it comes to using the Ninja Auto IQ Blender, the possibilities are endless. Whether you’re blending fruits for a refreshing smoothie, creating a creamy soup, or making your own nut butter, it’s important to properly prepare your ingredients to achieve the best results.
Here are a few tips to help you prepare your ingredients for blending:
- Wash and Clean: Before using any fruits or vegetables, make sure to wash them thoroughly to remove any dirt, pesticides, or residues. Additionally, ensure that any meat or seafood is cleaned and trimmed of any excess fat or bones.
- Cut into Small Pieces: To ensure even blending and to prevent strain on the blender’s motor, it’s recommended to cut larger ingredients into smaller, manageable pieces. For fruits and vegetables, dice them into chunks. For meats, cut them into smaller strips or cubes.
- Soak if Necessary: For certain ingredients, such as nuts or dried fruits, soaking them beforehand can help soften them and make them easier to blend. Simply soak the ingredients in water for a few hours or overnight, then drain before adding them to the blender.
- Remove Seeds or Pits: When using fruits or vegetables with large seeds or pits, such as peaches or avocados, make sure to remove them before blending to prevent any damage to the blender blades.
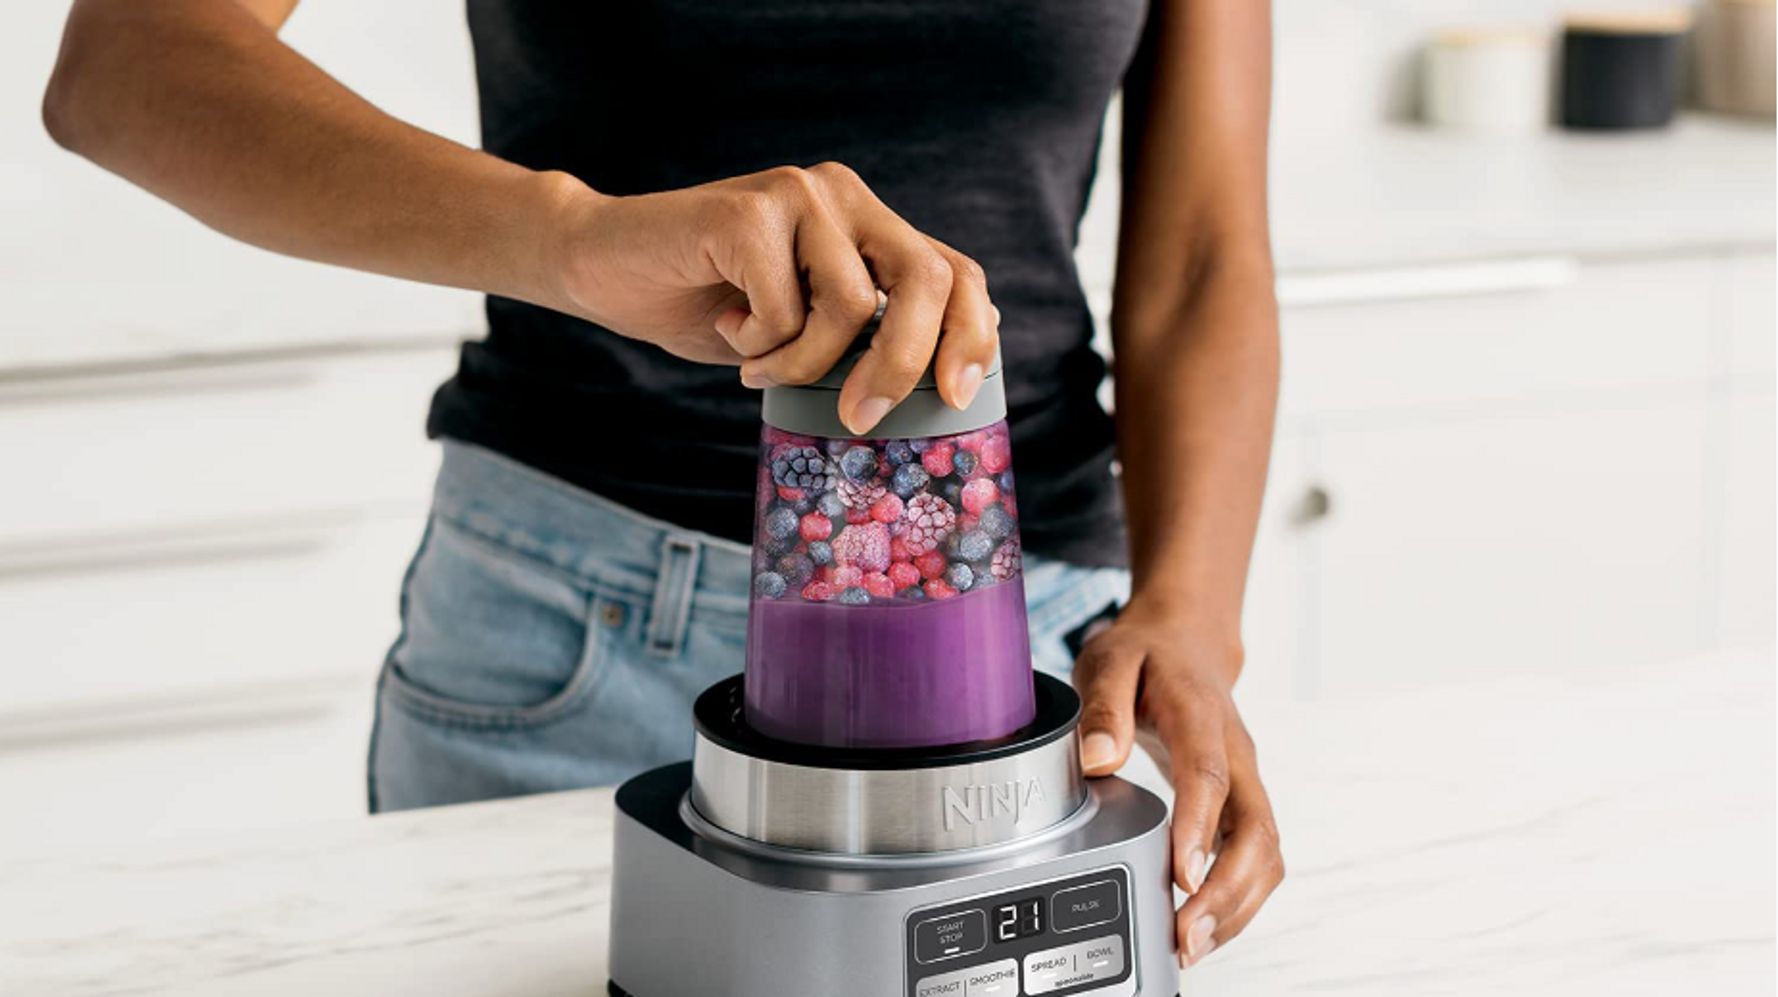
- Layer Ingredients: When blending multiple ingredients, it’s best to layer them in the blender in the order of hardness. Start with softer items like leafy greens or liquids, and layer on harder items like frozen fruits or ice. This helps ensure a smooth and consistent blend.
By following these simple preparation tips, you’ll set yourself up for success when using your Ninja Auto IQ Blender. Remember, experimentation is key, so don’t be afraid to get creative with your ingredient choices and combinations.
In the next section, we’ll dive into the different Auto IQ settings available on the Ninja Auto IQ Blender and how to select the right one for your blending needs.
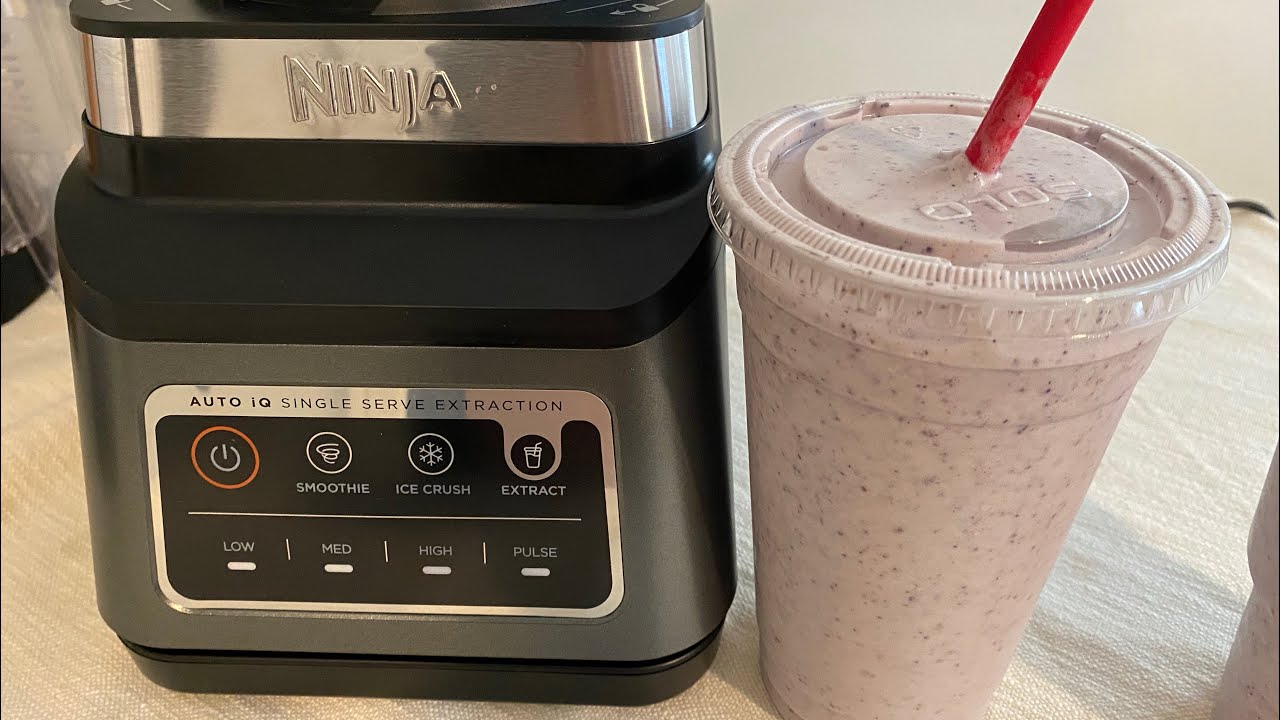
Selecting the Right Auto IQ Settings
The Ninja Auto IQ Blender comes equipped with a range of intelligent Auto IQ settings, making it easier than ever to achieve precise blending results. These pre-programmed settings take the guesswork out of blending and ensure consistent and optimal performance. Here’s how to select the right Auto IQ setting for your blending needs:
- Refer to the Recipe Guide: The Ninja Auto IQ Blender usually comes with a recipe guide that provides recommendations for which Auto IQ setting to use for specific recipes. Take a look at the guide for inspiration and guidance on which setting to select.
- Consider the Ingredients: Different ingredients require different blending techniques. For example, leafy greens might benefit from a gentle blending setting, while harder ingredients like ice or nuts might require a more powerful setting. Take into account the texture and hardness of the ingredients you’re working with.
- Experiment with Manual Mode: In addition to the Auto IQ settings, the Ninja Auto IQ Blender often comes with a manual mode, allowing you to have more control over the blending process. This can be helpful if you prefer to customize the blending speed and duration based on your preferences.
- Start with the Default Setting: If you’re unsure which Auto IQ setting to use, it’s often a safe bet to start with the default setting. This setting is designed to provide a balanced blending experience for most recipes and ingredients.
- Observe and Adjust: As you begin blending, closely observe the progress and consistency of the ingredients. If you find that the blend is too thick or too thin, you can pause the blender and make adjustments. Add more liquid if the blend is too thick, or add more ingredients if it’s too thin. Then, resume blending until you reach the desired consistency.
Remember, the Auto IQ settings on your Ninja Auto IQ Blender are there to assist you and simplify the blending process. However, don’t hesitate to experiment and adjust the settings according to your preferences and the specific recipe you’re working with.
Next, we’ll explore how to effectively operate the Ninja Auto IQ Blender and unleash its blending power.
When using the Ninja Auto iQ Blender, make sure to follow the recommended blending times for different ingredients to achieve the desired consistency. Over-blending can result in a less desirable texture.
Read more: How To Use Ninja Professional Blender
Operating the Ninja Auto IQ Blender
Operating the Ninja Auto IQ Blender is a breeze once you’ve assembled it and selected the right settings. Here’s a step-by-step guide on how to effectively operate your blender:
- Ensure that the pitcher or cup is securely attached to the base unit.
- Add your prepared ingredients into the pitcher or cup. Remember to follow the layering technique we discussed earlier, starting with softer ingredients and adding harder ones on top.
- If using the Auto IQ settings, press the corresponding button for the desired setting. The blender will automatically adjust the blending time and speed based on the selected program.
- If using the manual mode, start with a low speed and gradually increase it as needed. Refer to the user manual for specific speed settings and pulse options.
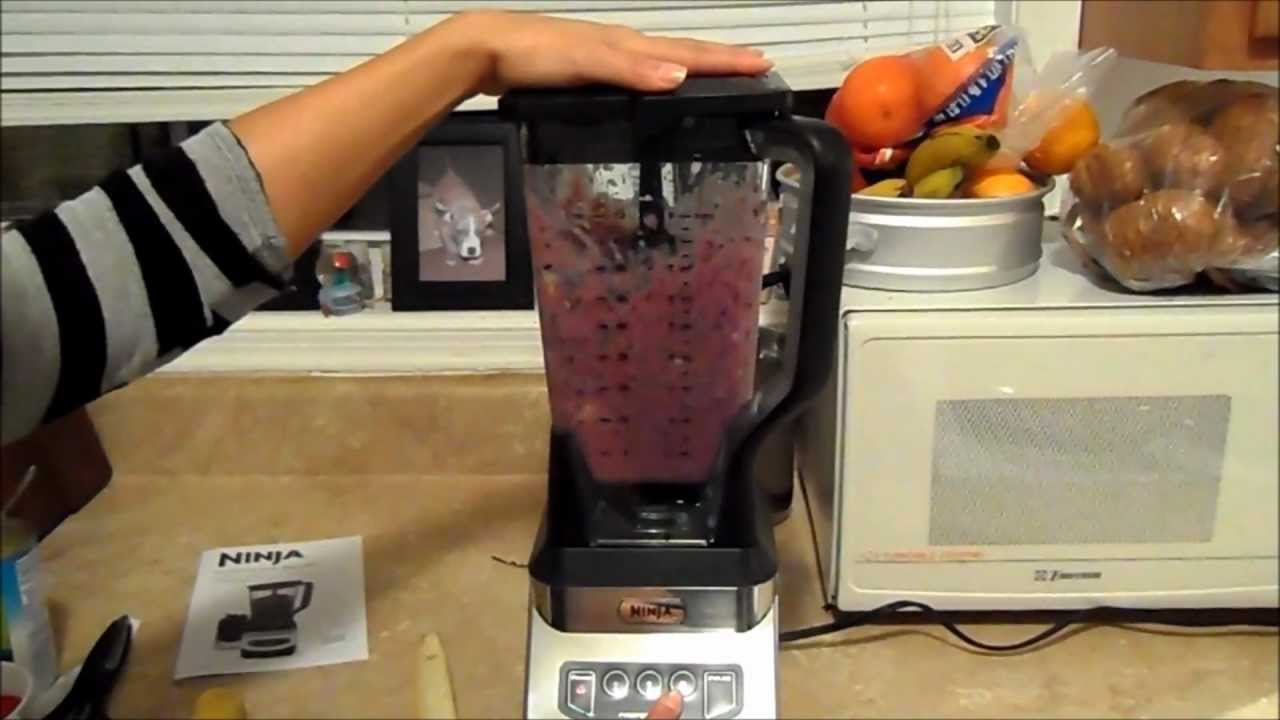
- Let the blender run until the ingredients are fully blended and reach the desired consistency. The Auto IQ settings will automatically stop the blender once the program is complete. In manual mode, you can stop the blender when you’re satisfied with the results.
- Once blending is complete, carefully remove the pitcher or cup from the base unit. Always exercise caution as the blades may still be sharp.
- Pour out the blended mixture into your desired containers and enjoy your delicious creation!
It’s important to note that different recipes may require different blending times and speeds. When blending, keep an eye on the progress and adjust as necessary. If you’re unsure, start with shorter blending times and increase as needed.
Remember to clean your blender thoroughly after each use to maintain its performance and longevity. We’ll explore cleaning and maintenance tips in the next section.
Cleaning and Maintenance
Proper cleaning and maintenance of your Ninja Auto IQ Blender will not only ensure its longevity but also guarantee hygienic and safe blending experiences. Follow these cleaning and maintenance tips to keep your blender in top shape:
- Unplug the blender: Before cleaning, make sure to unplug the blender from the power outlet to prevent any accidents.
- Disassemble the blender: Carefully remove the pitcher or cup from the base unit and detach any blades or attachments. Follow the instructions in the user manual for disassembling specific parts.
- Rinse immediately: Rinse the pitcher or cup and blades under warm water immediately after use to prevent food particles from drying and becoming harder to clean.
- Hand wash or use a dishwasher: Most parts of the Ninja Auto IQ Blender are dishwasher-safe. However, it’s always recommended to hand wash the blades and attachments to ensure a thorough cleaning. Use a mild detergent and a soft sponge or brush to gently clean all the parts.
- Dry completely: After cleaning, make sure to dry all the parts thoroughly before reassembling or storing them. Moisture can lead to mold or bacteria growth if left for an extended period.
- Wipe the base unit: Use a damp cloth to wipe the base unit to remove any spills or residues. Never submerge the base unit in water or any other liquid.
- Store properly: When not in use, store the Ninja Auto IQ Blender in a dry and clean area, preferably in its original packaging or a designated storage container. This will help protect it from dust and any potential damage.
Regular cleaning and maintenance will not only keep your Ninja Auto IQ Blender in optimal condition but also prevent any cross-contamination between different ingredients.
Now that you’ve learned about the cleaning and maintenance of your blender, let’s move on to troubleshooting tips in case you encounter any issues during use.
Troubleshooting Tips
While the Ninja Auto IQ Blender is designed to provide seamless blending experiences, occasionally you may encounter some challenges. Here are some troubleshooting tips to help you resolve common issues:
- Blender not turning on: If your blender is not turning on, ensure that it is securely plugged into a working power outlet. Check for any blown fuses or tripped circuit breakers. If the issue persists, contact the manufacturer for further assistance.
- Blades not rotating: If the blades are not rotating, it could be due to an obstruction. Make sure there are no large or hard pieces of ingredients blocking the blades. Additionally, check if the pitcher or cup is properly secured to the base unit. If the problem continues, reach out to customer support for guidance.
- Leaking pitcher or cup: If you notice any leakage from the pitcher or cup during blending, make sure that the lid is securely fastened and that all seals and gaskets are in place. Inspect for any cracks or damages on the pitcher or cup as well. If the issue persists, consider replacing the damaged parts.
- Blender overheating: If the blender overheats during use, it may be due to overloading or using the blender for an extended period. Allow the blender to cool down for at least 15 minutes before using it again. Make sure to follow the recommended maximum capacity guidelines for blending. If the problem persists, contact customer support.
- Unsatisfactory blending results: If the blending results are not as expected, try adjusting the blending time or speed. You can also experiment with different ingredients, quantities, or layering techniques to achieve the desired consistency. Refer to the user manual or recipe guide for specific recommendations.
If you encounter any other issues or difficulties with your Ninja Auto IQ Blender, it’s always recommended to consult the user manual or contact the manufacturer’s customer support. They will provide you with specific troubleshooting instructions or guide you through the necessary steps to resolve the problem.
Now that you’re equipped with these troubleshooting tips, you’ll be prepared to handle any challenges that may arise while using your Ninja Auto IQ Blender.
Conclusion
The Ninja Auto IQ Blender is a versatile and powerful kitchen appliance that can elevate your blending experience. With its intelligent Auto IQ settings, sleek design, and ease of use, this blender is a valuable addition to any kitchen. By following the assembly instructions, proper preparation of ingredients, selecting the right Auto IQ settings, and effectively operating the blender, you can create a wide range of delicious recipes with ease.
Remember to clean and maintain your Ninja Auto IQ Blender regularly to ensure its longevity and optimal performance. By following the cleaning and maintenance tips provided, you can enjoy hygienic and safe blending experiences for years to come.
If you encounter any issues or challenges while using your blender, refer to the troubleshooting tips mentioned in this article or reach out to the manufacturer’s customer support for further assistance.
Now that you have a comprehensive understanding of how to use the Ninja Auto IQ Blender, it’s time to unleash your creativity and explore the countless blending possibilities. Experiment with new ingredients, flavors, and textures and enjoy the convenience and precision offered by this remarkable kitchen appliance.
Happy blending!
Ready to shake things up in your kitchen? If you're curious about crafting delicious smoothies but lack a traditional blender, don't worry! Our next article offers clever hacks for smoothie making without needing specialized equipment. You'll find simple yet effective methods to enjoy your favorite blends using everyday kitchen tools.
Frequently Asked Questions about How To Use Ninja Auto Iq Blender
Was this page helpful?
At Storables.com, we guarantee accurate and reliable information. Our content, validated by Expert Board Contributors, is crafted following stringent Editorial Policies. We're committed to providing you with well-researched, expert-backed insights for all your informational needs.


0 thoughts on “How To Use Ninja Auto Iq Blender”