
Articles
How To Test An Ac Adapter
Modified: January 18, 2024
Discover how to properly test an AC adapter with our informative articles. Ensure your devices are receiving the correct power supply.
(Many of the links in this article redirect to a specific reviewed product. Your purchase of these products through affiliate links helps to generate commission for Storables.com, at no extra cost. Learn more)
Introduction
An AC adapter, also known as a power adapter or charger, is a device that converts alternating current (AC) from the electrical outlet into direct current (DC) for powering electronic devices. It plays a crucial role in ensuring the proper functioning of various devices such as laptops, mobile phones, and gaming consoles.
However, AC adapters can sometimes malfunction or fail, resulting in devices not being powered properly. In such cases, it becomes necessary to test the AC adapter to determine if it is working correctly before considering a replacement.
In this article, we will discuss step-by-step methods to test an AC adapter to ensure its functionality. By following these steps, you can save time and money by identifying any issues with the AC adapter and potentially avoid unnecessary purchases.
Key Takeaways:
- Ensure your AC adapter’s functionality by visually inspecting for damage, checking voltage output, and testing continuity. Use known working devices, load testers, and voltage regulators for a comprehensive evaluation.
- Safeguard your electronic devices by testing AC adapters with power supply testers. Identify potential issues and ensure reliable power delivery for optimal device performance and longevity.
Read more: How To Test An AC Compressor
Step 1: Visual Inspection
The first step in testing an AC adapter is to perform a visual inspection. This allows you to check for any obvious signs of damage or wear that may indicate a problem with the adapter.
Start by examining the AC adapter’s power cord for any fraying, cuts, or exposed wires. If you notice any damage, it is crucial to replace the power cord as it can pose a safety risk.
Next, inspect the connector that plugs into your device. Look for bent or broken pins, dirt or debris inside the connector, or any signs of corrosion. These issues can prevent the proper connection between the adapter and your device.
Additionally, check the AC adapter itself for any physical damage, such as cracks, dents, or signs of overheating. Overheating can be indicated by discoloration or a burnt smell. If you detect any of these signs, it may be an indication that the AC adapter is faulty and needs to be replaced.
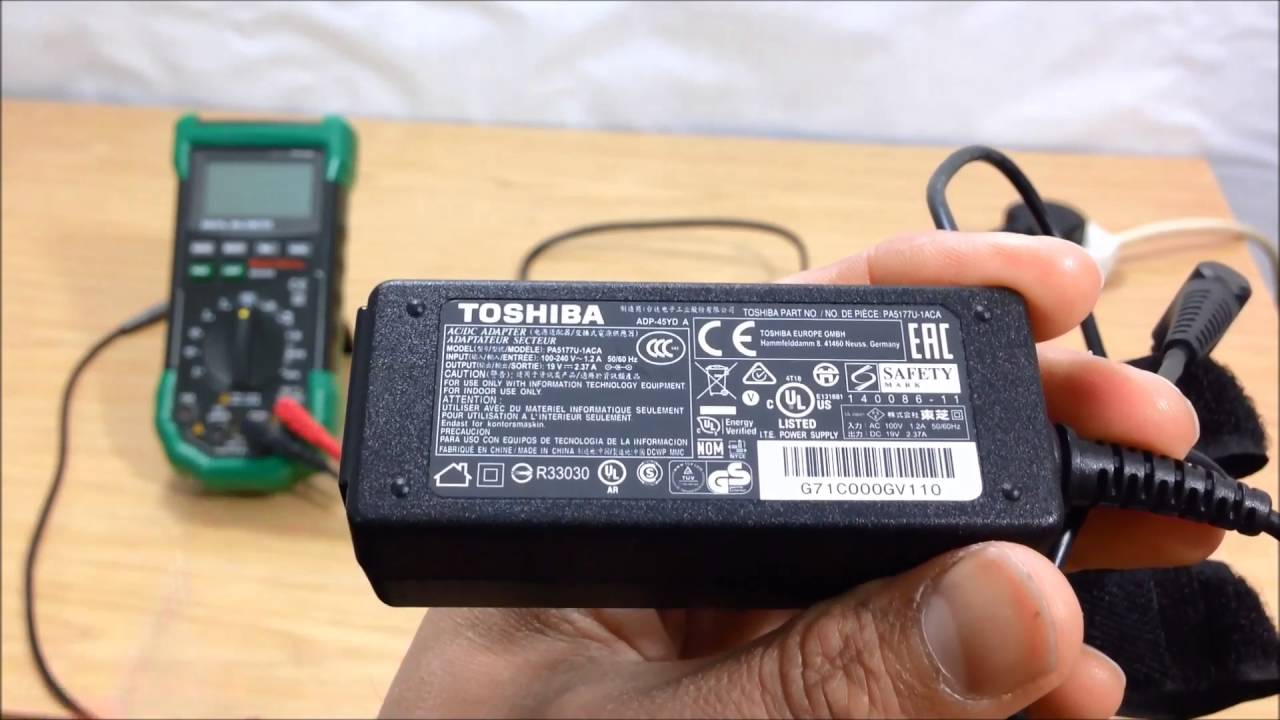
Remember to also check the labels on the AC adapter to ensure that the voltage and current ratings match the requirements of your device. Using an adapter with incorrect ratings can damage your device or cause it to malfunction.
By conducting a visual inspection, you can quickly identify any visible issues with the AC adapter and determine if further testing is necessary. If there are no visible signs of damage, you can proceed to the next step in the testing process.
Step 2: Check the Voltage Output
After performing a visual inspection, the next step is to check the voltage output of the AC adapter. This will help you determine if the adapter is providing the correct level of power to your device.
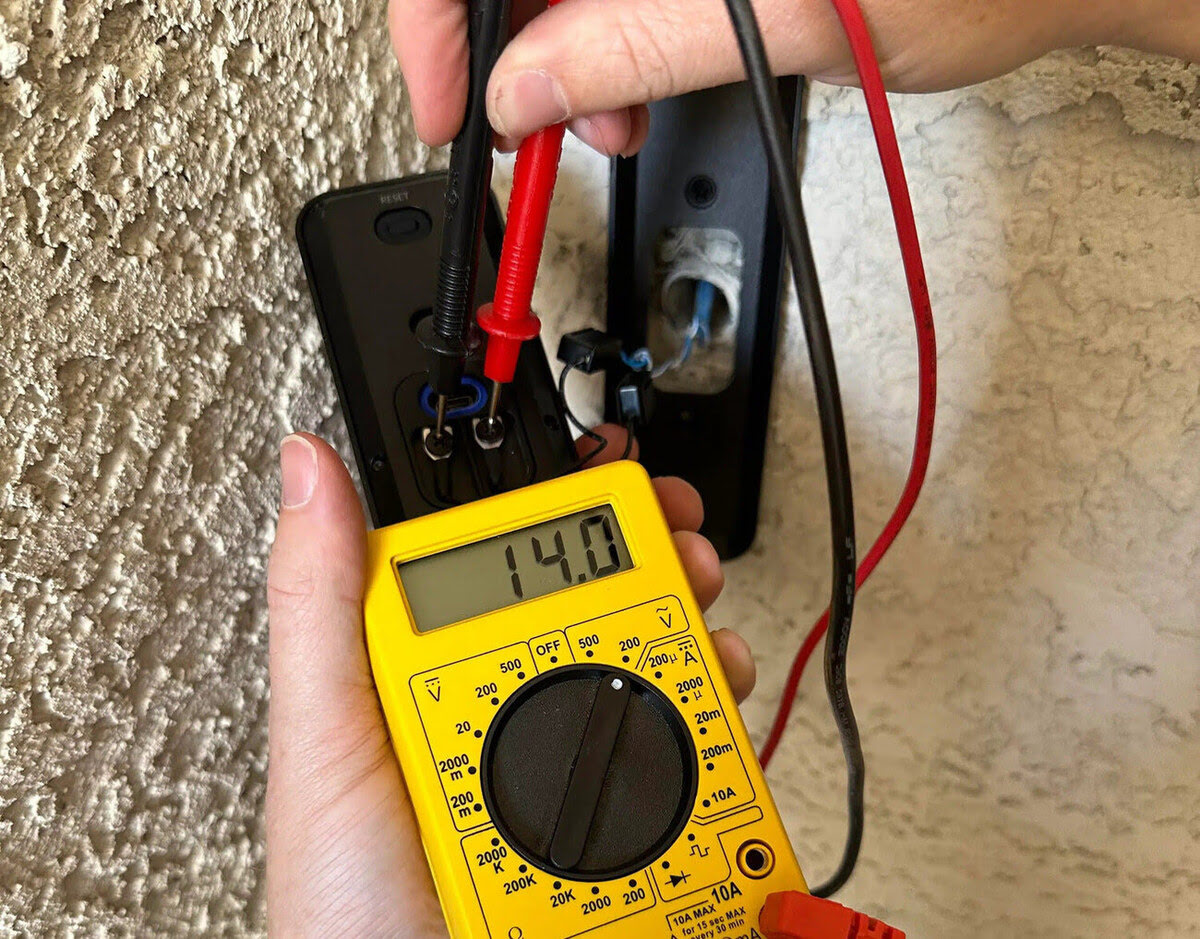
To check the voltage output, you will need a multimeter, which is a device that measures electrical properties such as voltage, current, and resistance. Set the multimeter to the DC voltage setting.
First, ensure that the AC adapter is unplugged from the power source and disconnected from your device. Then, insert the positive (red) probe of the multimeter into the center of the connector that plugs into your device. Insert the negative (black) probe into the outer metal section of the connector.
Once the probes are securely in place, plug in the AC adapter to a power source and turn it on. The multimeter will display the voltage output of the adapter.
Compare the voltage reading on the multimeter to the specified voltage requirements of your device. If the voltage output is within the acceptable range, the AC adapter is functioning correctly. However, if the voltage reading is significantly higher or lower than the specified requirements, it indicates that the AC adapter may be faulty and not providing the necessary power to your device.
If the voltage output is incorrect, it is recommended to try using a different AC adapter to see if the issue persists. This will help confirm whether the problem lies with the AC adapter or the device itself.
Checking the voltage output is a vital step in testing an AC adapter as it ensures that the adapter is delivering the correct power level to your device. If the voltage output is not within the acceptable range, further testing is needed to pinpoint the exact issue.
Step 3: Use a Multimeter to Test the Continuity
In addition to checking the voltage output, it is important to test the continuity of the AC adapter using a multimeter. Continuity testing helps determine if there is a functioning electrical path between different components of the adapter.
To perform the continuity test, set the multimeter to the continuity or resistance mode. This mode allows the multimeter to detect if there is a continuous electrical path between two points.
First, make sure that the AC adapter is unplugged from the power source and disconnected from your device. Then, touch the positive (red) probe of the multimeter to the center of the connector that plugs into your device and the negative (black) probe to the outer metal section of the connector.
If there is continuity, the multimeter will emit a beep or display a low resistance reading, indicating that there is a complete electrical path. This means that the internal components of the AC adapter are properly connected and functioning.
However, if there is no continuity, it suggests that there may be a break or a loose connection within the AC adapter. This can result in a loss of power transmission and the adapter not working correctly.
In such cases, it is advisable to consult a professional technician or replace the AC adapter to ensure the proper functioning of your device.
Testing the continuity of the AC adapter is an important step to identify any potential issues with the internal components that may affect its functionality. By conducting this test, you can confirm if the adapter is capable of providing a continuous electrical path.
Step 4: Test the AC Adapter with a Known Working Device
Another effective way to test the functionality of an AC adapter is by using it with a known working device. This step helps determine if the adapter can successfully power a device and if it is compatible with the specific device.
Choose a device that you know is functioning properly and uses the same type of power input as your target device. This can be a laptop, smartphone, or any other electronic device that requires an AC adapter.
First, ensure that the AC adapter is unplugged from the power source. Then, connect the AC adapter to the known working device and plug it into a power outlet. Turn on the device to see if it powers up successfully.
If the device powers on without any issues and functions normally, it indicates that the AC adapter is working correctly. This means that the AC adapter can supply the necessary power to the device and is compatible with it.
However, if the device does not power up or shows any signs of malfunctioning, it suggests that the AC adapter may be faulty. In such cases, try using a different AC adapter to see if the issue persists.
It is worth noting that some devices might have specific power requirements that are not met by the AC adapter. Therefore, it is recommended to refer to the device’s user manual or specifications to ensure that the AC adapter meets the necessary voltage, current, and connector requirements.
Testing the AC adapter with a known working device helps verify its compatibility and its ability to power electronic devices. If the adapter successfully powers a known working device, it can be assumed that the adapter is functioning correctly.
When testing an AC adapter, use a multimeter to check the output voltage. Set the multimeter to the appropriate voltage range and connect the probes to the adapter’s output terminals. The reading should match the adapter’s specified output voltage.
Read more: How To Test An Ac Adapter With A Multimeter
Step 5: Inspect the AC Adapter for Overheating or Burnt Smell
In addition to checking the physical condition of the AC adapter, it is important to inspect it for any signs of overheating or a burnt smell. These can indicate an internal issue or damage that may affect the adapter’s functionality.
Start by unplugging the AC adapter from the power source and allowing it to cool down for a few minutes. Then, carefully inspect the adapter for any signs of overheating, such as discoloration, scorch marks, or melted plastic. These signs may indicate that the adapter has been operating at an excessively high temperature.
Next, take a sniff and check if there is any burnt smell coming from the AC adapter. A burnt smell can indicate that the internal components of the adapter have been damaged or have suffered from excessive heat.
If you notice any signs of overheating or a burnt smell, it is highly recommended to discontinue the use of the AC adapter immediately. Continued use of a damaged or overheating adapter can pose a safety risk and may further damage your device.
In such cases, it is advisable to replace the AC adapter with a new one that is in proper working condition. This ensures the safe and reliable operation of your electronic devices.
By inspecting the AC adapter for overheating and a burnt smell, you can identify any internal issues or damage that may affect the adapter’s functionality. Taking proper care of the adapter helps prevent potential safety hazards and ensures the longevity of your electronic devices.
Step 6: Test the AC Adapter with a Load Tester
To further assess the performance of an AC adapter, you can use a load tester. A load tester simulates the power requirements of a device and measures the adapter’s ability to meet those demands.
Start by acquiring a load tester that is compatible with your AC adapter’s specifications and connector type. Connect the load tester to the AC adapter, ensuring a secure connection.
Once the load tester is connected, plug the AC adapter into a power source and turn it on. The load tester will draw power from the adapter, simulating the power consumption of a device.
Observe the performance of the AC adapter while the load tester is active. Pay attention to any fluctuations in voltage or unusual behavior, such as the adapter becoming excessively hot or shutting off unexpectedly.
If the AC adapter can handle the load without any issues, it indicates that it is capable of providing the necessary power to devices with similar power requirements. However, if the adapter struggles to maintain voltage stability or exhibits unusual behavior, it suggests that it may be faulty or unable to meet the power demands.
In such cases, it is advisable to replace the AC adapter with a new one that can handle the power requirements of your devices. A load tester provides a more thorough evaluation of the adapter’s performance by testing its capability under simulated load conditions.
Testing the AC adapter with a load tester helps ensure that the adapter can deliver the required power consistently and reliably. By performing this test, you can identify any potential issues or limitations with the adapter’s power output.
Step 7: Test the AC Adapter with a Voltage Regulator
To further evaluate the performance of an AC adapter, you can test it with a voltage regulator. A voltage regulator is a device that stabilizes the voltage output, ensuring a consistent and safe level of power is supplied to your electronic devices.
Obtain a voltage regulator that is compatible with your AC adapter’s specifications, including voltage requirements and connector type. Connect the AC adapter to the input port of the voltage regulator.
Next, plug the voltage regulator into a power outlet and turn it on. The voltage regulator will effectively regulate and stabilize the voltage output from the AC adapter.
Connect a device that requires the same voltage as your AC adapter to the output port of the voltage regulator. This device should be one that you know is functioning properly.
Observe the performance of the device while it is powered by the AC adapter through the voltage regulator. Pay attention to any fluctuations in voltage or any issues with the device’s operation. A stable voltage output indicates that the AC adapter is providing a consistent level of power.
If the device operates smoothly with no voltage fluctuations or malfunctions, it suggests that the AC adapter is functioning correctly. However, if the device experiences power-related issues, it may indicate a problem with the AC adapter or the voltage regulator.
Keep in mind that the voltage regulator may introduce a slight voltage drop due to its operation. Therefore, ensure that the voltage output from the regulator is still within the acceptable range for your device.
Testing the AC adapter with a voltage regulator provides an additional layer of assurance regarding its performance and voltage stability. It helps ensure that the adapter can reliably and accurately supply the necessary power to your electronic devices.
Step 8: Test the AC Adapter with a Power Supply Tester
One final method to comprehensively test the functionality of an AC adapter is to use a power supply tester. A power supply tester is a specialized device designed specifically for testing the performance of power adapters.
First, obtain a power supply tester that is compatible with your AC adapter’s specifications. Connect the AC adapter to the power supply tester using the appropriate connectors.
Once connected, plug the AC adapter into a power outlet and turn it on. The power supply tester will analyze various aspects of the adapter’s performance, including voltage levels, ripple, and efficiency.
Monitor the readings displayed on the power supply tester. Check if the voltage output is stable and within the specified range for your device. Ensure that the ripple, which refers to the level of fluctuation in the output voltage, is minimal.
The power supply tester may also provide additional information, such as the current draw and power efficiency of the adapter. Use these readings to evaluate the overall performance and efficiency of the AC adapter.
If the power supply tester shows that the AC adapter meets the necessary voltage requirements, exhibits minimal ripple, and operates efficiently, it indicates that the adapter is performing as expected. This suggests that it is capable of providing reliable and consistent power to your electronic devices.
However, if the power supply tester displays irregular voltage readings, excessive ripple, or low efficiency, it suggests that the AC adapter may be faulty or failing to meet the necessary performance standards.
In such cases, it is advisable to replace the AC adapter with a new one that meets the desired voltage and performance requirements. A power supply tester offers a comprehensive assessment of the adapter’s performance and helps to identify any potential issues.
By testing the AC adapter with a power supply tester, you can ensure that it is delivering the required power output and operating efficiently. This step provides a thorough evaluation of the adapter’s performance and helps determine its suitability for powering electronic devices.
Read more: How To Test AC Compressor In Car
Conclusion
Testing an AC adapter is essential to ensure its functionality and compatibility with your electronic devices. By following the step-by-step methods outlined in this article, you can effectively test an AC adapter and identify any potential issues.
Starting with a visual inspection, checking for physical damage or wear, and verifying the correct voltage output are crucial initial steps. Continuing with a multimeter test to determine continuity and using a known working device to check compatibility further assesses the adapter’s performance.
Inspecting for overheating or a burnt smell is vital, as these can indicate internal damage or potential safety hazards. Utilizing a load tester and a voltage regulator helps evaluate the adapter’s power capacity and stability.
Finally, using a power supply tester provides a comprehensive assessment of the adapter’s performance, including voltage levels, ripple, and efficiency.
If any issues or abnormalities are detected during the testing process, it is recommended to replace the AC adapter with a new and reliable one that meets the necessary voltage and performance requirements.
By diligently testing and ensuring the functionality of your AC adapter, you can safeguard your electronic devices from potential damage, ensure optimal performance, and promote a longer lifespan.
Remember, if you are unsure about any of the testing methods or encounter persistent issues, seeking assistance from a professional technician is always a wise decision.
By following these steps and taking necessary precautions, you can confidently determine the status of your AC adapter and make informed decisions regarding its use or replacement.
Frequently Asked Questions about How To Test An Ac Adapter
Was this page helpful?
At Storables.com, we guarantee accurate and reliable information. Our content, validated by Expert Board Contributors, is crafted following stringent Editorial Policies. We're committed to providing you with well-researched, expert-backed insights for all your informational needs.








0 thoughts on “How To Test An Ac Adapter”